Posted by: briellethefirst | March 7, 2011

Easter Basket Grass


M3361S-3034

Wednesday is Ash Wednesday. That means I get to go to church and get a smudge on my forehead…if I’m a good Catholic and remember what day it is, which isn’t guaranteed even though I know it’s only two days from now. The problem is that Fat Tuesday is between now and Wednesday, so I’ll probably just skip to Thursday before realizing Wednesday happened. Since I usually forget to drink or otherwise partake in any mind-altering substances on Fat Tuesday I only have general flakiness as an excuse.

My other excuse is grass. No, not THAT grass! Easter grass. I started doing this when I lived in Florida. I hated the fake ‘grass’ for Easter baskets and tried to think of other things to use but settled on just growing my own. It does take a bit of planning, but not much and with even as little as two weeks head start you can get enough grass up and green to work for the Easter Bunny but starting now will give you a nice basket lawn. While you’re out and about stop by your favourite store(s) and pick up basket(s), potting soil, grass seed (annual rye is fine but a packet or two of kitty grass is fine, too) and a 6-pack of flower starts for the garden. I’ve used alyssum, snap dragon, Dianthus, pansies, Johnny-jump-up and primrose but you can use whatever you like. It’s usually not hard to find packets of grass to grow inside for your kitty but it’s kind of thick-bladed so I usually go to a regular nursery and get a small bag of bulk rye grass or whatever they still have in stock. It doesn’t take much, but you will want to plant thickly for good coverage and you can always share the extra with friends, family and co-workers. I got talked about the first year I took a basket to work and shared baggies of grass (seed, really!) with other mommies. Everybody smiled as they went by my desk and ran their fingers through my grass. The chocolate kisses were nice, too. Oh, you will want to save the plastic shopping bags to make your real-grass baskets. So here’s how:

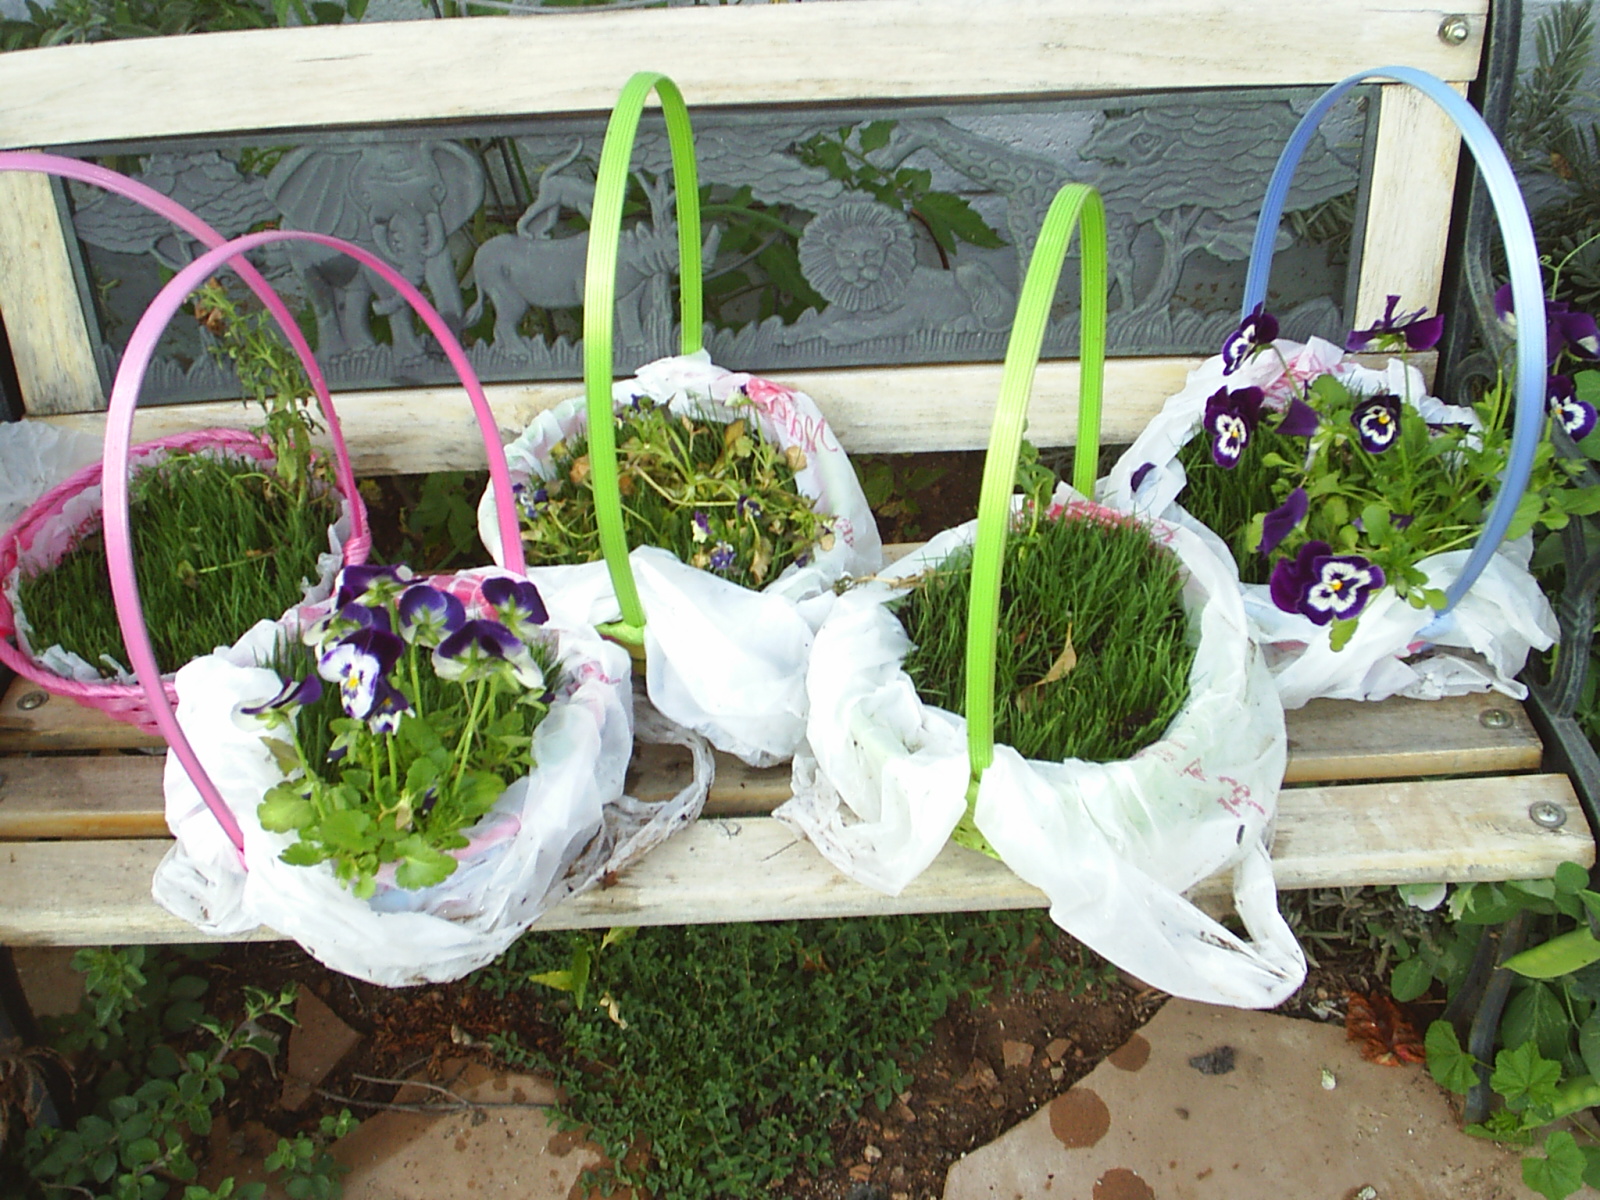
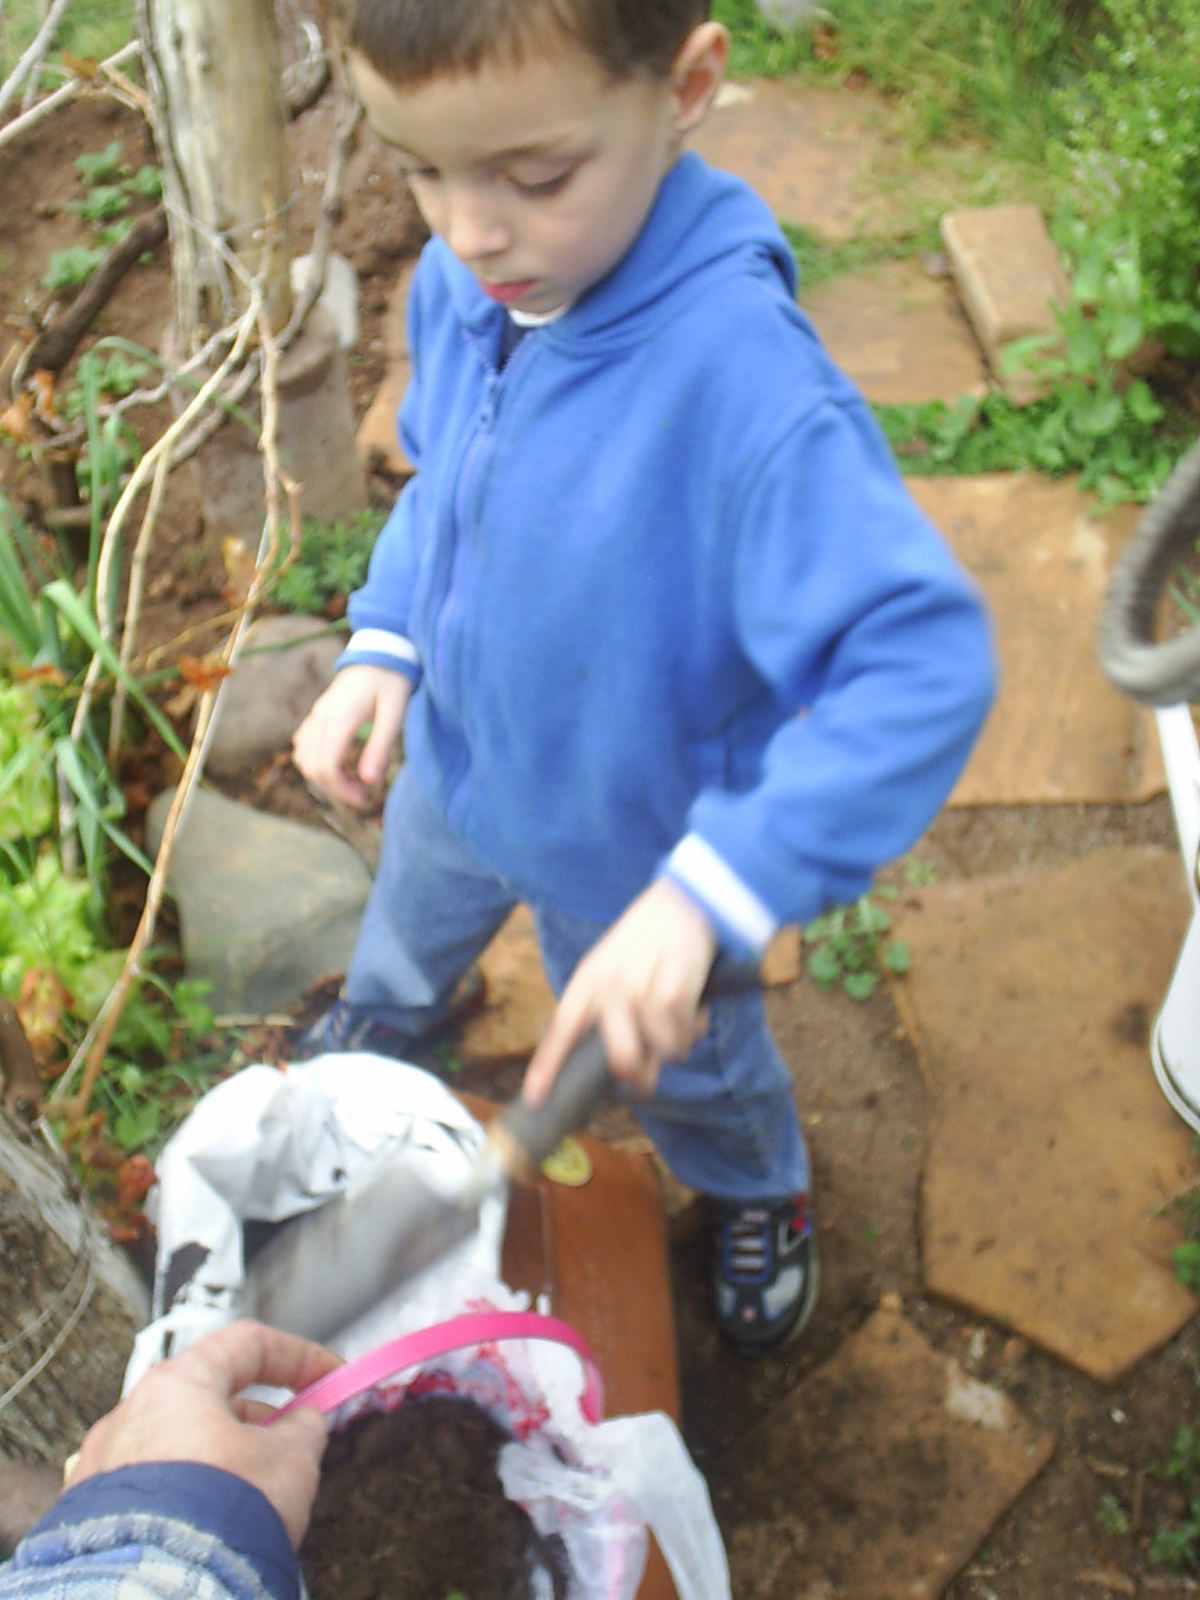
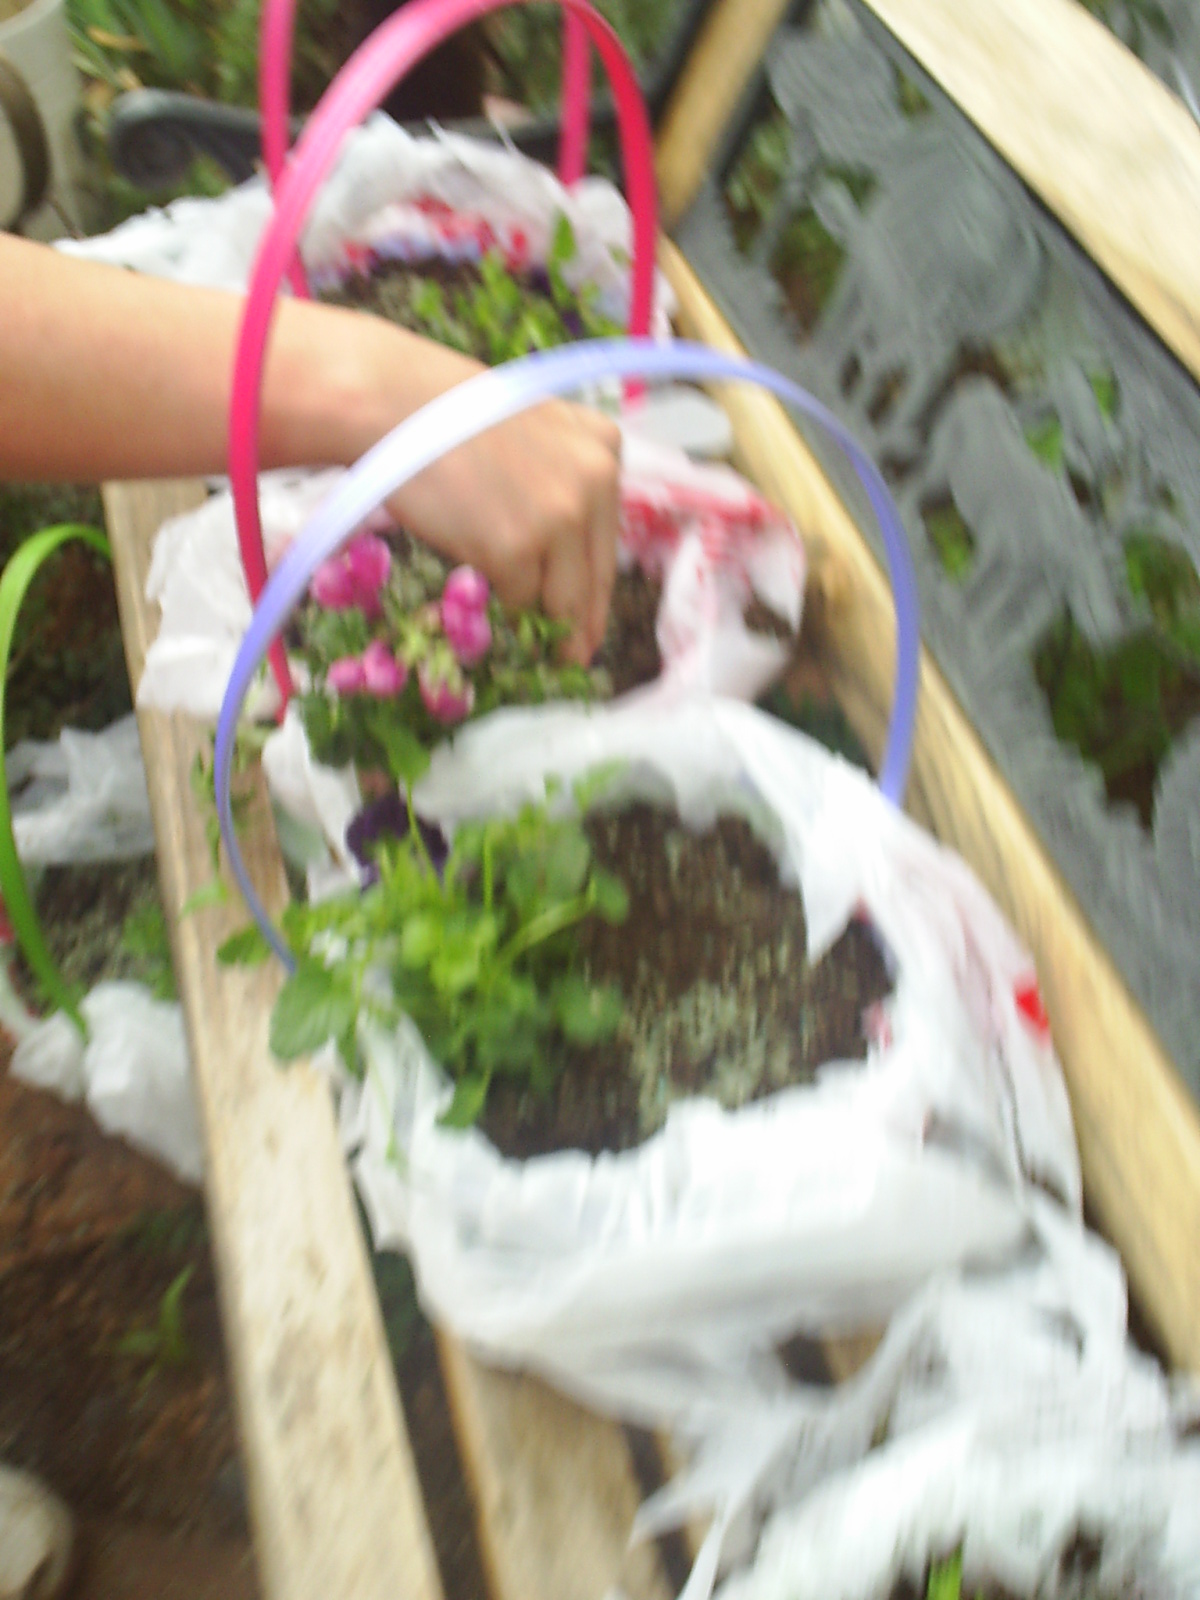
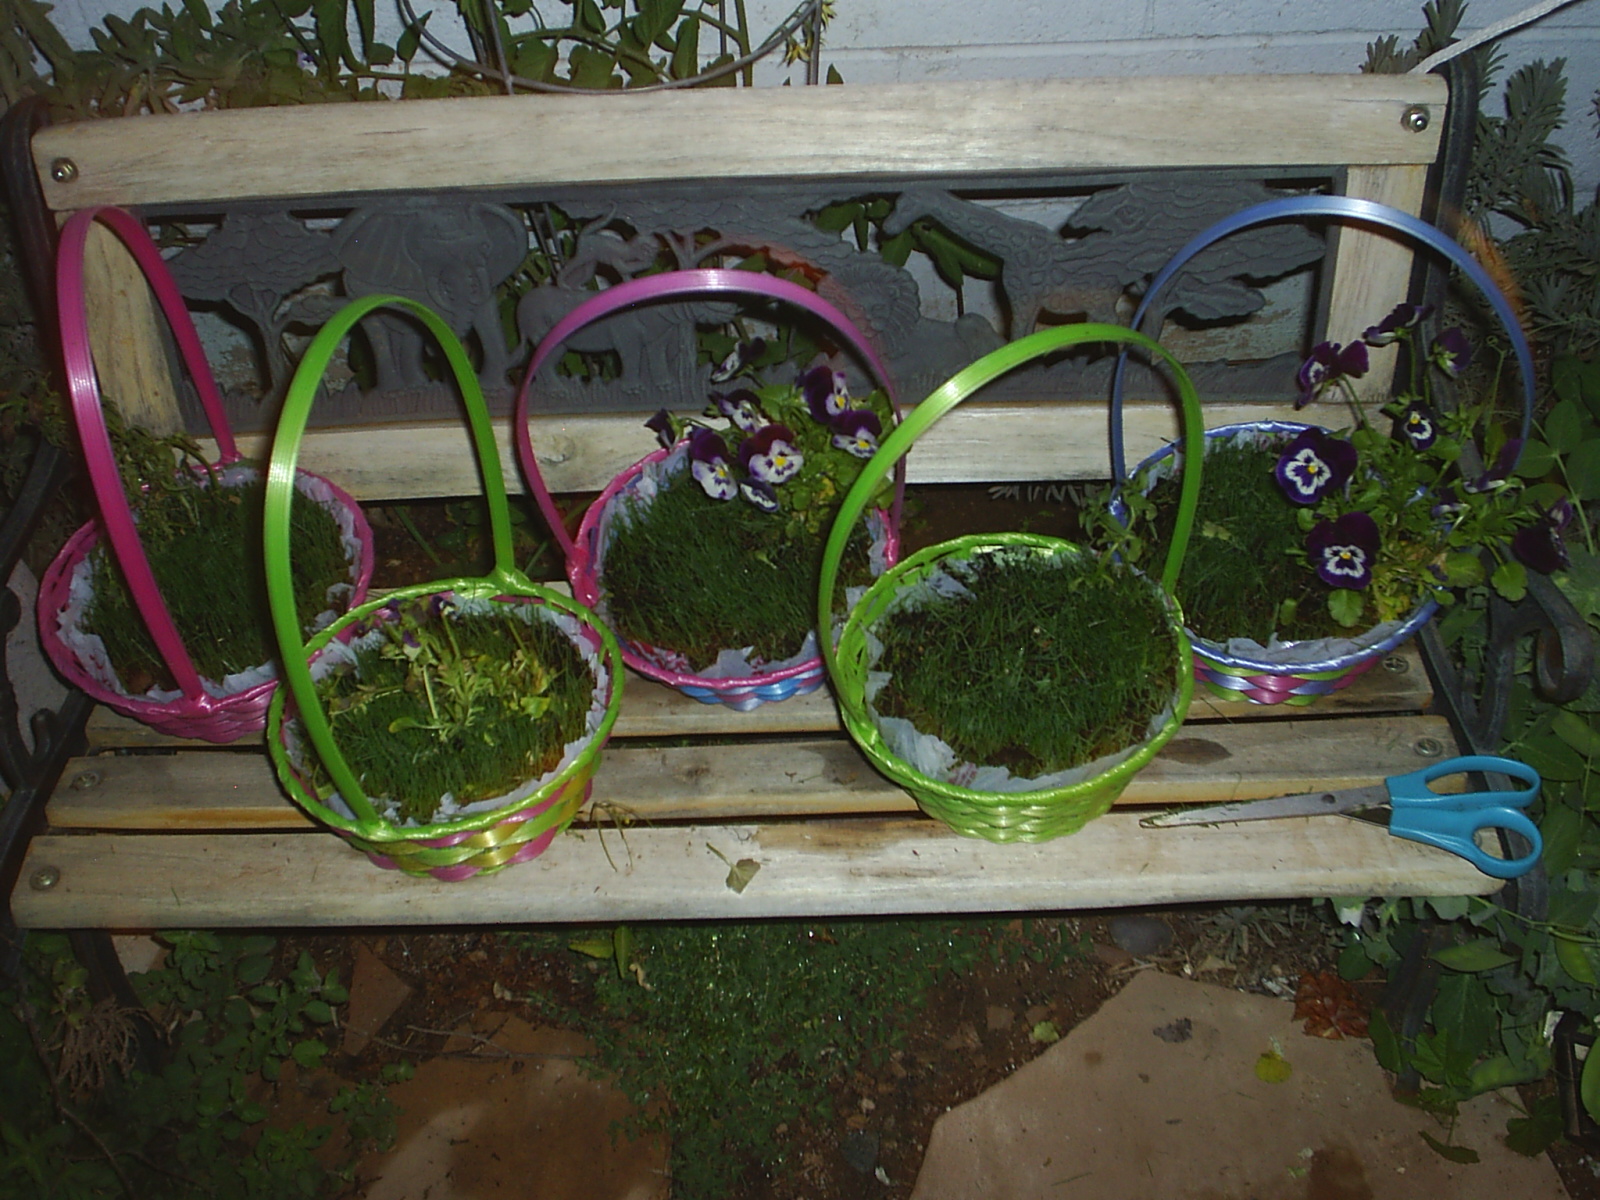
Figure out how many people you want to make baskets for. If you’re doing this on your own you can do it on the table, but if you do it with the kids you’ll probably want to do it outside. So, line each basket with a plastic grocery bag. Make sure it doesn’t have holes! Fold the edges over the sides as much as you can…if there’s a handle it can get in the way but just do what you can. Use a trowel or spoon to put potting soil in the basket. OK, if you’re like me and the kids you’ll probably just use your hands since you don’t need much, maybe only half way up. Plant a flower on one side of the basket, splitting the root-ball to spread it out if you have to make it not stand above the soil level. It’s amazing how much abuse plants can handle and there’s a lot of time for them to recover before Easter. Once you have the flower planted, smoothe the soil and sprinkle grass seed liberally over it. Sprinkle a light layer of soil over the seeds, press slightly and water gently. Now pull the rest of the grocery bag up loosely to form a temporary greenhouse and keep the birds out. Set it out where it can get sun and check it every day to make sure it doesn’t get dry. Watering liberally at first is OK, the seeds won’t mind and the plant should recover and can be replaced if it dies, but even so, you don’t want to over-water. When The grass gets tall enough you can cut the bag off even with the side of the basket and trim the grass every couple of days with scissors.

I re-use coloured plastic baskets every year but sometimes get a nice real basket for special occasions like birthdays, Mother’s day, showers or whatever. This doesn’t have to be just for Easter! You can substitute herbs or even veggies for the flowers.

Add dirt...
Add dirt…
Spread out the plant 'feet'
Spread out the plant ‘feet’
Sprinkle...
Sprinkle…
Mini-greenhouses!
Mini-greenhouses!
Ready for Easter
Ready for Easter

Last week Kenzie saw the baskets in the spare room and grabbed them, telling me it was time to make “bunny baskets”…I distracted her with truffle making and we’ll make bunny baskets later this week. Toys, coloured eggs and wrapped candy can go right on the grass but I put jelly beans or other unwrapped candy in plastic eggs or cupcake liners. I also schedule the watering so the baskets aren’t soggy on Easter morning. If I have extra seed I scatter it on thin spots in the lawn and after Easter the kids get to transplant the flowers into the garden and the grass gets plugged into parts of the lawn that are still skimpy. Over all, I think it’s a vast improvement over fake Easter grass. Have fun and happy basket gardening!

Additional comments added 3/29/17: Once again I’ve forgotten to make baskets on or near Ash Wednesday. If you have the same casual relationship with calendars and planning as I do, or if this is the first time seeing this, I had another idea, especially if it’s the last-minute before Easter. If you can find some turf grass at the big box hardware stores, especially if it’s torn off the big sheets they use for lawns, see if they’ll let you buy the scraps or take it off their hands. Or you can see if any local nurseries have moss (moss gardens were in vogue in recent years) or other low-growing small ground-cover plants that can substitute for grass.

Posted by: briellethefirst | March 6, 2011

Basil


The happy coincidence of a dead tree and a really bad lawn lead me to put an herb garden into the back yard of the house we rented in Florida. I immediately made wish lists of wonderful herbs, veggies and flowers we could grow. Firm reminders from my husband of space limitations and our lack of ownership somewhat curbed my kid-in-a-candyshop impulses and forced me to plan my space, companion plants and crop rotation carefully. While I did continue to plan carefully I was very good at finding new placed to tuck in another bed of herbs, strawberries or flowers. There were several disasters and successes but we’re still learning after all these years since that’s all part of gardening. I’m now living happily in Arizona in a house I own without the constraints (or assistance) of a husband, so my garden is growing as fast as the fiendishly hot, dry summers and my (tired) back and friends will allow.

Basil

Basil

Ocimum basilicum is my favourite herb, both in the kitchen and in the garden. Leaf miners devastated my first harvest of Basil all those years ago. The next time I planted it I was careful to pick and destroy any affected leaves and was rewarded with a decent harvest. They didn’t do as much damage to the Lemon Basil and hardly noticed the Clove Basil. The other scented varieties are similarly unattractive to the little vandals. Caterpillars like Basil, too, but not as much as other plants and a little Bt (Bacillus thuringiensis) makes them go away. Bees like Basil flowers and will fly on to pollinate other plants in the garden, making a bigger harvest. As long as it has full sun and enough water it grows well despite any abuse I’ve inflicted upon it. It did well in the sandy soil of Florida and has done very well in the clay under my grape arbour. It is a very vigorous annual that readily re-seeds itself.

I never thought I could have too much Basil but after the first season volunteers were everywhere! The ones in the yard were no problem, just roll over ’em as you mow the grass and enjoy the perfume. The became a weed in the garden in Florida but not so much here, maybe because the ground is harder? Be careful to clip the seed heads off before they’re fully ripe to keep the plants growing longer since the whole point of flowers is to make seeds that will turn into more baby Basil plants.

Basil in bloom

Basil in bloom

Besides, the chickens like the clippings and repay me with extra yummy eggs.

In the early ’90s I tried two scented varieties, Sacred Basil (Tulsi) and Lemon Basil. The first smells like cloves and has smaller leaves and lavender flowers and the lemon has white flowers. Later I tried Licorice ans Cinnamon Basils. They smelled nicely of their names and were wonderful to use but only the Tulsi was robust and in fact it acted like a tender perennial and grew to about 3x3x3 feet! One variety I grew and loved was Globe Basil. It grew into small, rounded mounds about 8 inches high that looked like they’d been pruned. A perfect little surprise accent for flower gardens and they can be used in the kitchen, too. There are even varieties with ruffled and purple and variegated and purple-ruffled leaves, so we probably won’t be getting bored with basil in the garden any time soon.

Out of the garden and in the house there are lots of uses for Basil: dry and moist potpourris, sachets, perfumes, incense, herb beads, teas and cooking. I use it fresh or dried in almost everything: soups, stews, breads, sauces dredging flour for roasts…just toss it in, especially if tomatoes are part of the recipe. Because it’s on the sweet side a little is a surprisingly nice addition to breads, teas and deserts-especially the flavoured varieties. Experiment and you’ll be well rewarded for your efforts.

Posted by: briellethefirst | March 5, 2011

Herb-A-Week Club


So you’re a good cook but a little bored. You don’t cook but think you should learn. Don’t care about cooking but want to be able to tweak the take-out or stuff that comes out of the microwave? Want to ignore cooking compleatly and make cool crafts? How ’bout starting yourself on an herb-of-the-week club? Pick an herb, any herb, set it next to the salt and pepper and use it in anything that seems even remotely like a good idea. This may or may not turn out well for every dish, but at least you’ll know. It’s an experiment, a culinary adventure, and what’s the worst that can happen? So what if you put cinnamon in the spaghetti sauce? It’s still edible, and may be funny. Yes, I have experience with this and no, you may not want to do this on purpose. You might just stumble on some amazing discoveries and open a whole new world of food for yourself. So grab an herb jar and start your week. If you want to watch for my posts for ideas I’ll try to keep up with a cool new herb post every week explaining how to use each herb and even how to grow them. Have fun crafting and good fooding, and if you decide to grow your own, happy gardening too.

Back Yard Herb Border.

Back Yard Herb Border

Herb and Spice Shelf

Herb and Spice Shelf

Posted by: briellethefirst | February 26, 2011

Bacon Alfredo Sauce


I had to use 2 leftover egg yolks and wanted to do something a little different and special with the noodles I just made, so I thawed a package of bacon and made this.

Cook 2 strips of bacon until enough fat is rendered to sauté onions. Slice, chop or mince an onion as finely as you like and sauté with the bacon. When the onions are as done as you like add about a cup of half and half or milk. Whisk 2 yolks, temper with a spoonful of hot milk sauce then add to the sauce, stirring it in before it can cook separately. Add Parmesan, pepper and salt to taste.

Serve immediately on pasta with a salad, garlic toast and a nice wine. Something light and fruity for desert would be nice.

Posted by: briellethefirst | February 25, 2011

Egg Pasta


The Kenz needed a baby-sit again so no writing on the book till later. We did get stuff made. I worked on the Celtic knot-work around the edge of my big leather chessboard while she played PBS games. The she wanted to make more chocolate candy like the last stuff. Yeah, genache is addictive & I’ve got another choco-fiend hooked! Then we made meringues  While the genache was firming up in the fridge.The recipe will be posted soon. Since meringue only uses egg whites I had to find something to use the yolks in. Decided on pasta for dinner. From scratch. It’s not as hard as you’d think.

Make a pile out of 1 1/4 c flour. Make it into a volcano. Into the crater add 2 large yolks, 1 Tbsp Olive oil and enough water to make it hold together, about 1/8 c, but add it bit by bit. Don’t worry about it sticking to the counter. By some magic it ends up wanting to stick more to itself than the counter.

Mix it with your hands. It won’t take long for you to develop a mixing technique. Usually it starts with gingerly teasing the flour into the volcano crater with the tips of your fingers while trying to get as little wet stuff on them as possible. Add the water in dribbles as needed. When it’s all together in a nice firm ball wrap it in plastic wrap and set it aside to rest for about 1/2 an hour while you do something productive.

Toss a little flour on the counter (you did clean it after the mixing?) and roll the dough out. Don’t forget to take off the plastic wrap. Roll from the center out and turn it 1/4 turn every few rolls. Dust it with flour if needed, brushing it off where it settles in thick spots so it doesn’t make dents in the dough. When it’s as thin as you can comfortably get it roll it up like a jelly roll with no filling. Cut the roll from the end into fettuccine as wide or narrow as you like it, unrolling each of the slices and piling onto a plate to dry. Toss with a little flour if it starts sticking together.

Boil like regular pasta, in salted water but it won’t take as long because it’s fresh. Top with butter or Olive oil and herbs, maybe a little Parmesan or your favourite pasta sauce.

Posted by: briellethefirst | February 24, 2011

Hot Herby Buttered Noodles


Cat and I had noodles and gravy for dinner tonight. I’ll write that recipe up in a different post so you’ll want to have leftover meatloaf or other meat leftovers ready for it. If I haven’t added a recipe for meatloaf I soon will…and noodles, too. The kids like it OK, but they wanted hot dogs, so more for us. I usually buy noodles in bulk but this time only had a single regular package, and as the last bits went into the boiling water…I realized that a whole 16 oz package is more than I usually use. Too late, it’s cooking now! So, creative me decides to set the extra aside and make something special, hot herby buttered noodles, hoping the kids would like them! So simple you can even do it with one hand:

Cook noodles in salted boiling water as per package instructions. Lots of water means less sticking. A dash of oil is optional to help prevent boil-over if you forget to turn down the heat after adding the noodles to the boiling water.

After about 10 minutes check to see if the noodles are done: spear one with a fork, hold under cold water briefly and bite in half. Is there a white layer in the middle? Cook it a little longer. Is it soft all the way through? It’s done. If it’s limp and mushy it’s overdone, better luck next time and pay better attention but they’ll be good enough this time. When they’re done dump into a colander. Make sure the colander is in the sink so you don’t have to do the “OMG there’s HOT WATER running off the counter onto my floor and feet” dance. Yes, it happens and no, it wasn’t me…but it was funny! And if you forgot to scour your sink first just put a bowl or pan in the sink and put the colander in the bowl before straining the noodles. Yes, some people have to be told. No, I know you aren’t one of them, but we won’t out the ones who are. Promise. *Evil grin*

Don’t have a colander? Put the lid on the pot a little off-kilter and very carefully try to pour off the boiling water while losing as few noodles as possible. This is not the preferred or recommended method and make sure there are no kids, cats or critters of any kind underfoot or between the stove and the sink. Try not to scald yourself too badly and be prepared to talk to your kids about not using all those colourful words you just used while you apply the aloe to the burns. DON’T USE BUTTER ON BURNS!!! IT MAKES THEM WORSE!!! I don’t care what your grandmother said, your other grandmother was right, use aloe!

Now, your new shopping quest will be to find a colander so this won’t happen again. And buy an aloe plant to put in the garden or on the windowsill. The big box stores carry perfectly functional simple plastic (not my fav), metal and maybe even enamel ones at reasonable prices (even cheaper at thrift stores) but if you get a chance to pop into a kitchen boutique you can find fancier up-scale ones in various fun designs. If you’re real lucky and wander into a nice craft show you can pick up a really nice ceramic one hand-made and signed by the artist. If you’re really really lucky and know a potter you just may be able to get one custom-made for you…if you can afford their price (not always monetary-*playful grin*). If you don’t find an aloe plant while you’re at that big-box store you can drop by a lovely little nursery on your way home. You may even find some herbs for the garden or a nice pot to put them in on the windowsill.

So, back to the noodles. Now that you’re doctored-up (with a glass of wine on the side?) and they’re strained, put them into a nice bowl. While you were wandering that Kitchen boutique or (even better) a craft fair or your favourite potter you’ll probably have picked up a couple of cool favourites. While the noodles are still hot drop on a few knobs of butter. Yes, knobs is a proper (albeit old-fashioned) term, but I use old-fashioned words, spellings and phrases occasionally so get used to it. If you don’t have butter margarine or olive oil is OK. This is a to-taste recipe so use as much or as little as you like. It’s easier to add more than remove some, so start with less and add more if you need to. Mix thoroughly by kind of folding the noodles from the sides through the middle to help the butter melt. Sprinkle with herbs of your choice. This, also, is subject to the add-a-little-at-a-time-since-you-can’t-take-it-out-once-it’s-in rule. Tonight I used pepper, garlic, paprika, parsley and basil. Kenzie loved it, ate it before her hot dog and asked for seconds. Andrew finished his after his hot dog. It was a hit.

If you don’t like an herb, don’t add it. If you like other herbs, add them. If you want to be real fancy and plan ahead you can sauté onions, mushrooms, bell peppers, tiny peas, bacon, tiny shrimp or fancy ham and stuff like that to add too. Except for the boiling/straining/potential use of bad words part this is a recipe the kids can help with, at least the mixing part. This can be a simple, fast, economical peasant recipe when you’re short on supplies or a fancy side dish to serve with a special dinner for in-laws, boss, potential client or any one else you want to impress. It all depends on the presentation. If you keep a few herbs growing on the window sill or in the garden you’ll always have fresh ingredients and a nice garnish too. And those serving dishes by your favourite potter won’t hurt the atmosphere either.

Posted by: briellethefirst | February 22, 2011

Genache And Truffles


Mmmm…chocolaty goodness! This is that yummy coating on petit fours, rich icing for cakes, decadent topping for ice cream  and the center of truffles. It’s really easy, and only 2 ingredients: chocolate and cream. So easy that when you do it with the kids the hardest part is waiting for it to melt. No, I won’t give you a low-fat/sugar-free/wimpy-ass alternative. If you want something nice make it right. The benefit will be that instead of putting it off, feeling deprived and suffering through cravings you can make something wonderful that you can look forward to, reward yourself with and savour, while you pamper yourself soaking in a tub of lovely scented bubbles or bath salts, candles, tea and a magazine, mystery or penny dreadful. Procrastination is your friend. I find that no amount of substitution will satisfy me, but if I allow myself to have the brownie/candy/ice cream or whatever I’m really hungry for I can enjoy just a reasonable amount (often at bedtime, dinner fills me up!) and be happy. Don’t cave in to the lesser stuff like cheap store-bought cookies, candy bars or other stuff that won’t fill that craving. Look forward to a lovely total sensory treat later. It’s sooo worth it!

1 c chocolate chips   1/2 c cream (whipping or heavy)

Put the chips in a bowl. Warm the cream to just boiling. Pour the cream over the chips and let sit a few minutes until the chips melt. Mix well then pour/spread over cakes/petit fours or ice cream or set it aside to set up. This will be faster in the fridge. When it is firm you can scoop bits out with a spoon, roll quickly into a ball (be very quick, it melts fast) and roll in cocoa, powdered sugar or cocoa drink mix and set aside for later. You could also just roll them and put them in the fridge or freezer to firm up so you can cover them in regular melted chocolate. When done I keep mine in a tin lined with waxed paper.

Experiment with different types of chocolate (if you use chocolate from chunks or blocks shave or break it first) to get different consistencies, flavours and effects. Using less chocolate or milk chocolate makes a softer genache that doesn’t firm, using more chocolate makes it firmer. You can even try white chocolate and colour it for decorations. You can also experiment with flavouring. Crush some mint and add to the milk before you heat it to make mint chocolate or just add a few drops of any extract you like.

On a cold night or morning or any time for that matter I’ve found that if you heat some milk and drop in one or two of the truffles you get a really nummy hot chocolate. Stir with a cinnamon stick, candy cane or old-fashioned stick candy. Enjoy in front of the fire, wood stove or that video of a fire. Or better yet, games with the family or a good book. A reward after real work or a treat with real fun: real food…mmm!

Posted by: briellethefirst | February 16, 2011

Shut Box


Shut Box probably originated around the islands in the English Channel somewhere between the 15th to 18th century, so it might be fun to incorporate into geography and history classes. When my kids were little I used this game to teach them how to take turns, count the pips on dice, basic strategy, number recognition and later Roman numerals and Chinese numbers. They used it in school for show and tell and math class. I’ve started games at parties in a corner with people coming and going all evening. It’s easy to learn, takes a little bit of skill to win and is just unpredictable enough to keep you on your toes and be fun.

Materials:

Pencil, Paper, 2 Six-sided dice, 9 markers (pennies or stones will do).

The board is a square made of 9 squares with the numbers 1-9 in them.

Players: any number

Rules:

The first player throws the dice and places a marker on either the sum of the two dice or each of the numbers thrown. For example, throw 2/3 and you can either put one marker on 5 or one marker on 2 and one marker on 3. The player continues to throw the dice until he can’t cover any numbers with the numbers thrown. So, if the only numbers thrown are 4, 7 and 8 and you throw a pair of 3’s, then you can’t cover anything, your turn is over and you add up the numbers showing, clear the board and pass the dice to the next player. Play continues in a round until everyone had thrown and added their leftover numbers. The player with the lowest number wins and a new round may start. The winner also wins the difference between their score and the loser’s scores, if you choose to enjoy the potential redistribution of wealth aspect of the game.

Shut Box and Posh Kitty

Shut Box set found in an antique shop

A simple flip-style board

A simple flip-style board

Simple Shut Box board

Simple Shut Box board

Posted by: briellethefirst | February 12, 2011

Merelles or 9 Man Morris


9 Man Morris

9 Man Morris

9MM, aka Merelles

9MM, aka Merelles

12 Man Morris

12 Man Morris

3 Man Morris

3 Man Morris

Andrew is good at puzzles, likes playing in invisible boxes (mime) and is trying to learn games. So far we’ve learned rock/paper/scissors, I spy with my little eye, shut box, checkers, dominoes and tic-tac-toe. He just turned 6 and his biggest problem has been a temper when he thinks he’s loosing. He’s starting to understand that a setback is a learning opportunity and loosing a move or two doesn’t mean you’re losing the game. No matter, tonight we discovered he’s a wiz at 9 Man Morris. Look out world!

What is 9 man morris? It’s an ancient form of tic-tac-toe, only more interesting. There are several versions. 9 holes, tic tac toe, 5 man morris, 9 man morris and 12 man morris. In tic tac toe you know the rules, 3 in a row etc… In the others you play on an expanded board with each player usually starting with the number of pieces in the title of the game. The markers/pieces can be stones, checkers, coins, whatever happens to be handy. Players take turns entering pieces on the  points on the board trying to make a mil (3 in  a row). Every time a player makes a mil they get to remove an opponent’s piece. A mil is 3 in a row. If there’s a choice of taking from an opponent’s mil or set of 2 or a single marker they must take from a non-mil first. Once all pieces are entered on the board players can start moving pieces along the lines to form more mils. Play continues until one player either gets down to 2 pieces or their pieces are blocked and can’t move, then that player has just lost. So…

IMG_20200401_170525
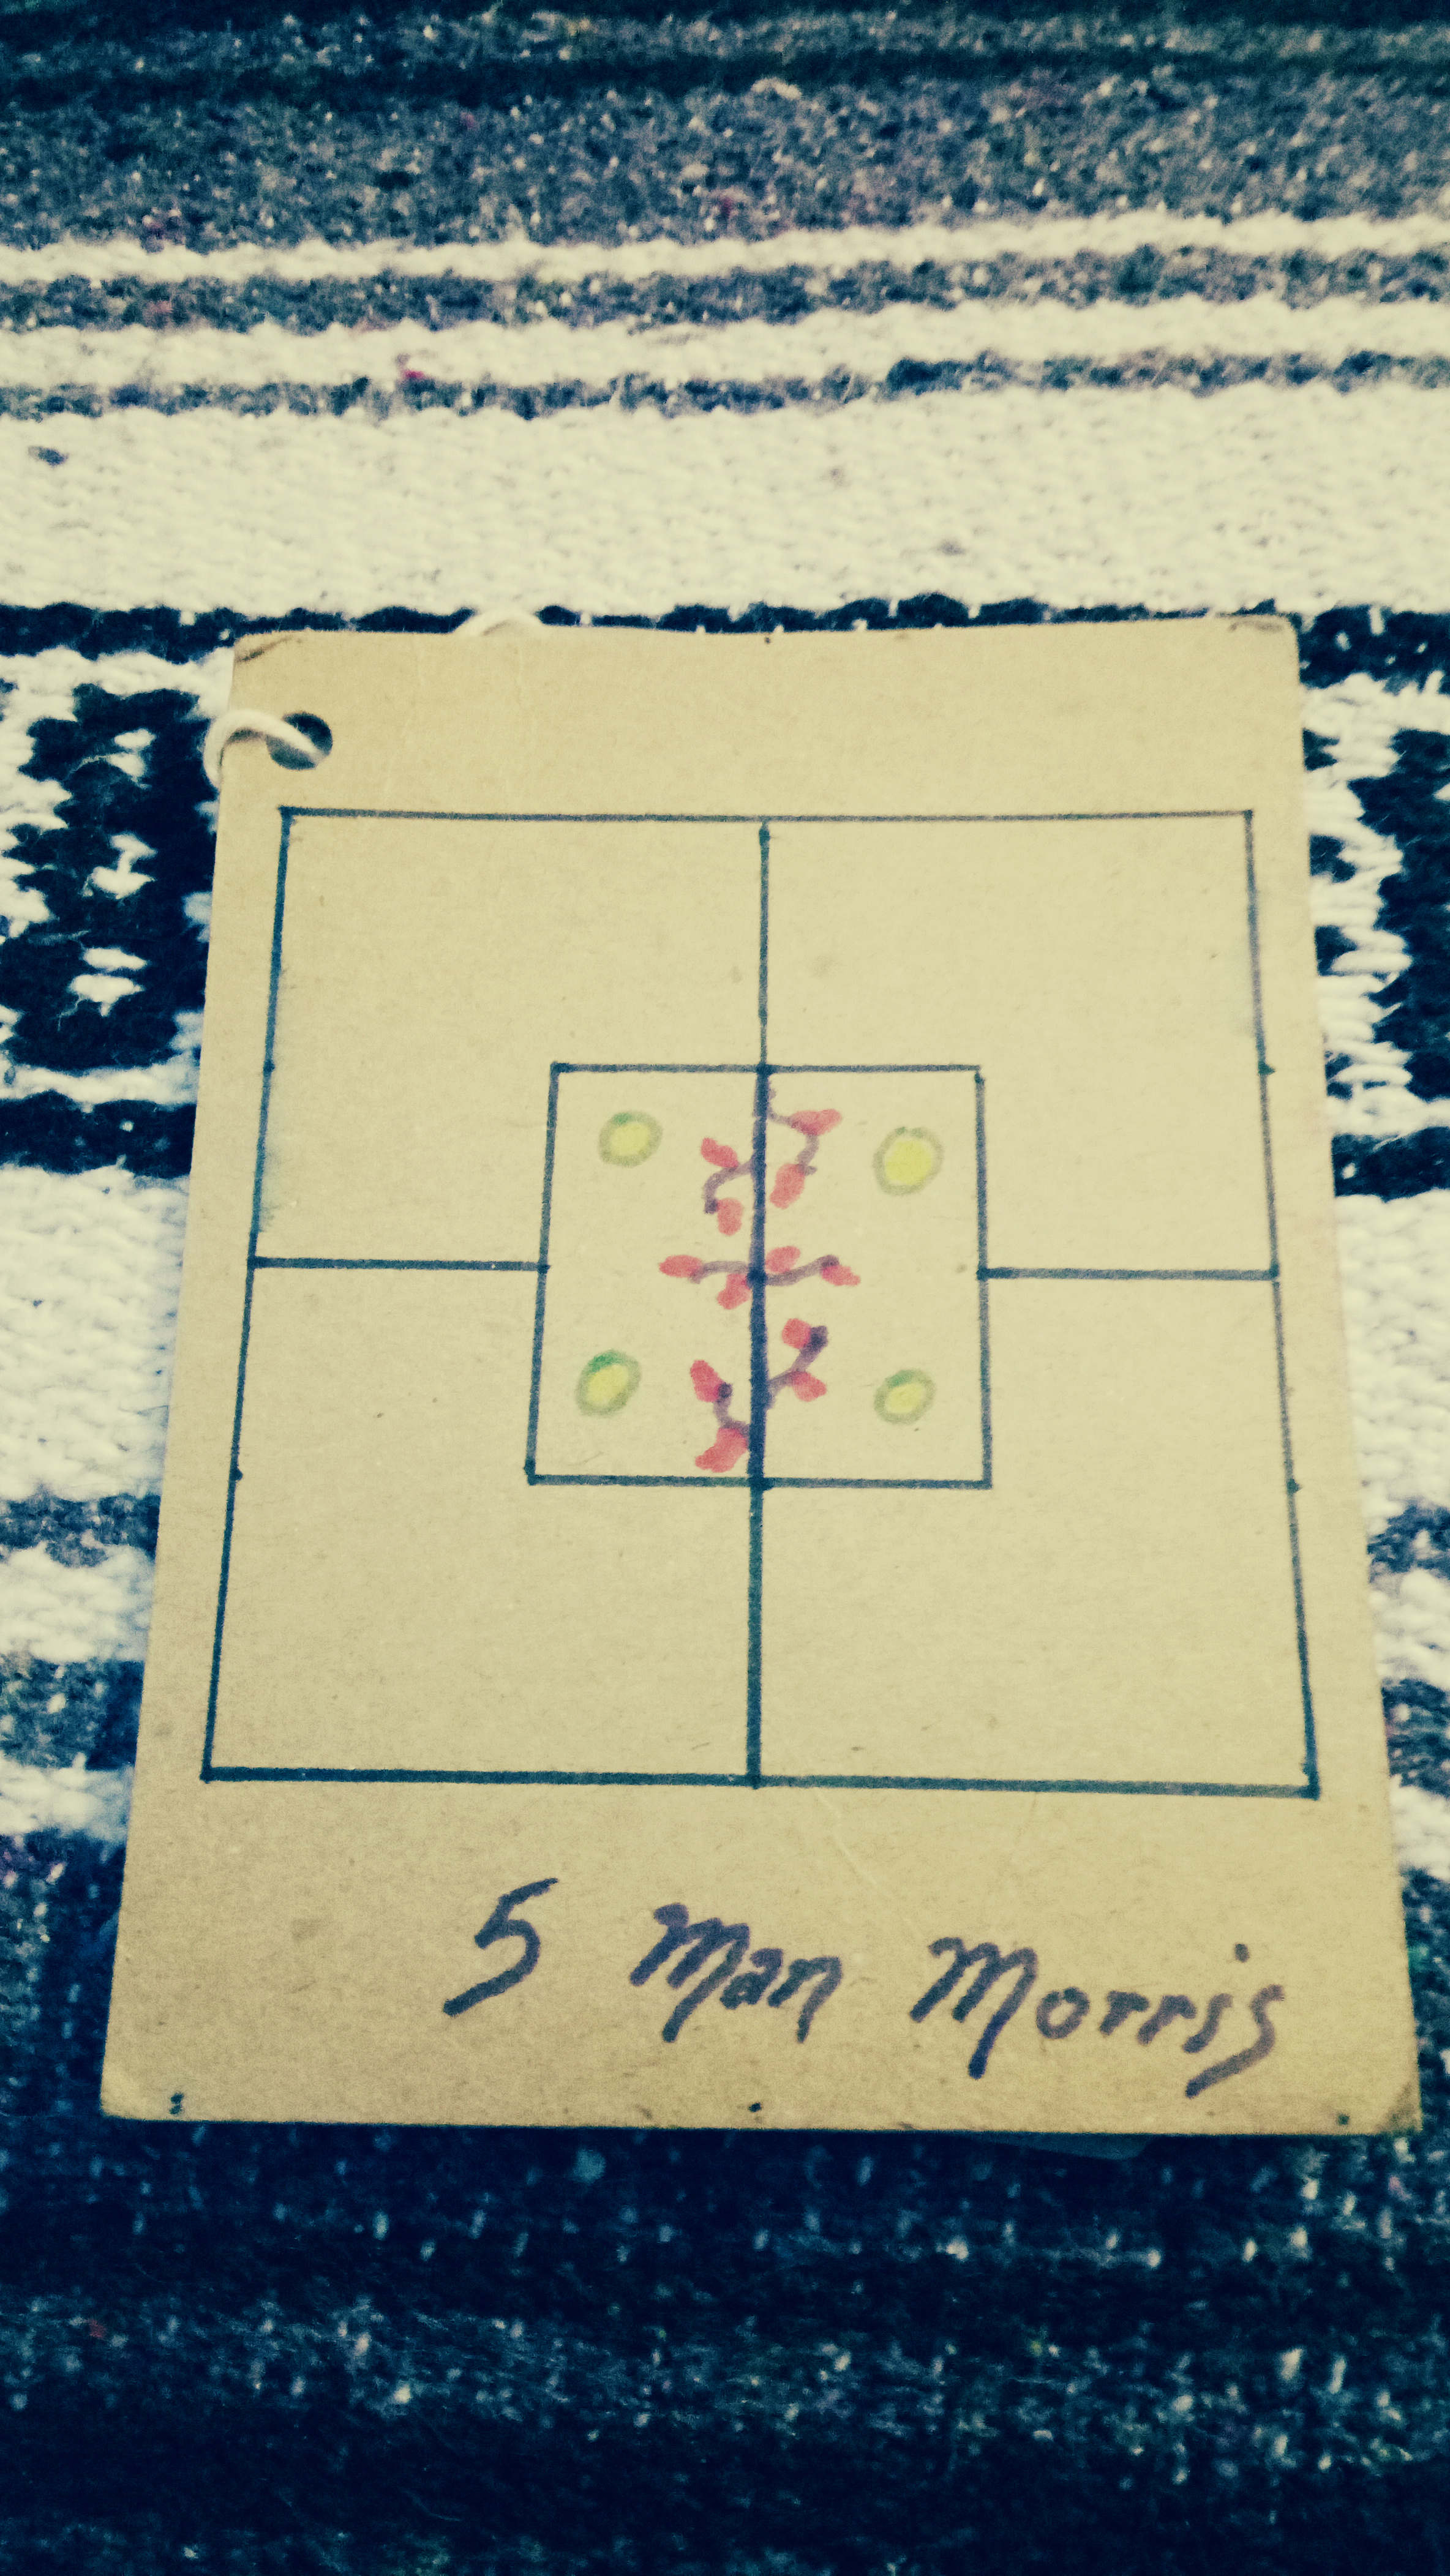
1 board, 2 players, 9 markers each. Take turns and play nice! I know I have a 9 holes, 5 man morris and a 12 man morris board around somewhere, I just can’t lay hand on them just now. 9 holes is just a square divided into 9 parts with a tic tac toe grid, or tic tac toe with a box drawn around it. The 5 man morris is just like the 9 man morris but without the 3rd outer square. The board isn’t supposed to have a line all the way through the middle, so I put a vine on this one so players can’t climb/move along it.

Morris games have been found scratched into stones making up ancient monuments in Egypt, Greece and Rome as well as beams in European castles and cathedrals built in the Middle Ages and Renaissance. Since it was known to the Romans it was certainly played in King Arthur’s time and possibly before the Romans got to Britain, which is why it’s included in my Arthur category. It seems it was an easy pass-time that was easily improvised during lunch or while waiting for someone to happen before your part of the building went up. It can be a fun way to get in touch with a part of history and it’s certainly more entertaining than regular old tic tac toe. Whether you make it yourself or find a commercial set to buy, have fun!

Posted by: briellethefirst | February 5, 2011

Chicken And Dumplings


Cat and the kids came over today. Deciding on dinner was interesting. The leftover meat in the fridge was chicken, so it didn’t really go with spaghetti. I was out of salsa so no Mexican food. We didn’t feel like waiting for a casserole. I did have left over broth. And leftover mashed potatoes. Hmm… potato dumplings. Chicken and dumplings. Whip out the can of cream of mushroom soup and go to it! Of course, if you don’t have leftover chicken or some other bird you’ll have to start by looking up my post on How To Roast A Bird and Making Broth so you can have leftovers to work with. Or you can buy a rotisserie bird from the deli and use canned broth, but what fun would that be? So…

Put the broth in a pan and warm to simmer. Pull out a casserole or cake pan, open the cream of mushroom soup and put it in the pan. Add 2 Tbsp sour cream and thin with 2/3 can milk, water or broth or a combination. Tonight I used a combination. Mix. Tear the chicken into little pieces and mix into the soup. Pop into the oven at 350 degrees to warm.

Pull out the leftover mashed potatoes and put about a cup or so in a mixing bowl and mix with an egg. Add 2/3 c flour, sprinkle with salt, pepper and nutmeg and mix. cut a slice of bread into croutons. Take a bit of dumpling batter on a spoon, press a crouton into it, cover it with a bit more dumpling and push off the spoon (with another spoon) into the simmering broth. By the time you’ve done about four the first one should be ready to take out. Use a slotted spoon and put it in a bowl. Repeat till you’re out of dumpling dough, about ten or twelve. Pull the chicken out, arrange the dumplings on top, sprinkle with cheese (optional) and put back in the oven till the cheese melts.

Serve with a salad. Broccoli, cauliflower and zucchini go well with this too, you could even add it with the chicken, especially if you need to stretch the chicken. White wine or milk is good to drink with this too, depending on your age. Brownies or cookies make a good desert, especially with more milk. Just for the record, that one chicken made this dinner for four; a batch of broth that made stuffing, the dumplings for this dinner and tomorrow will make more stuffing; one drumstick dinner for me and two sandwiches. Not bad for a $4.99 convenience deli bird. If you happen to have leftover turkey, duck, goose, ostrich or any feathered friend they can be used for this too.

« Newer Posts - Older Posts »

Categories