Posted by: briellethefirst | November 15, 2010

Friday Night Shank Steaks


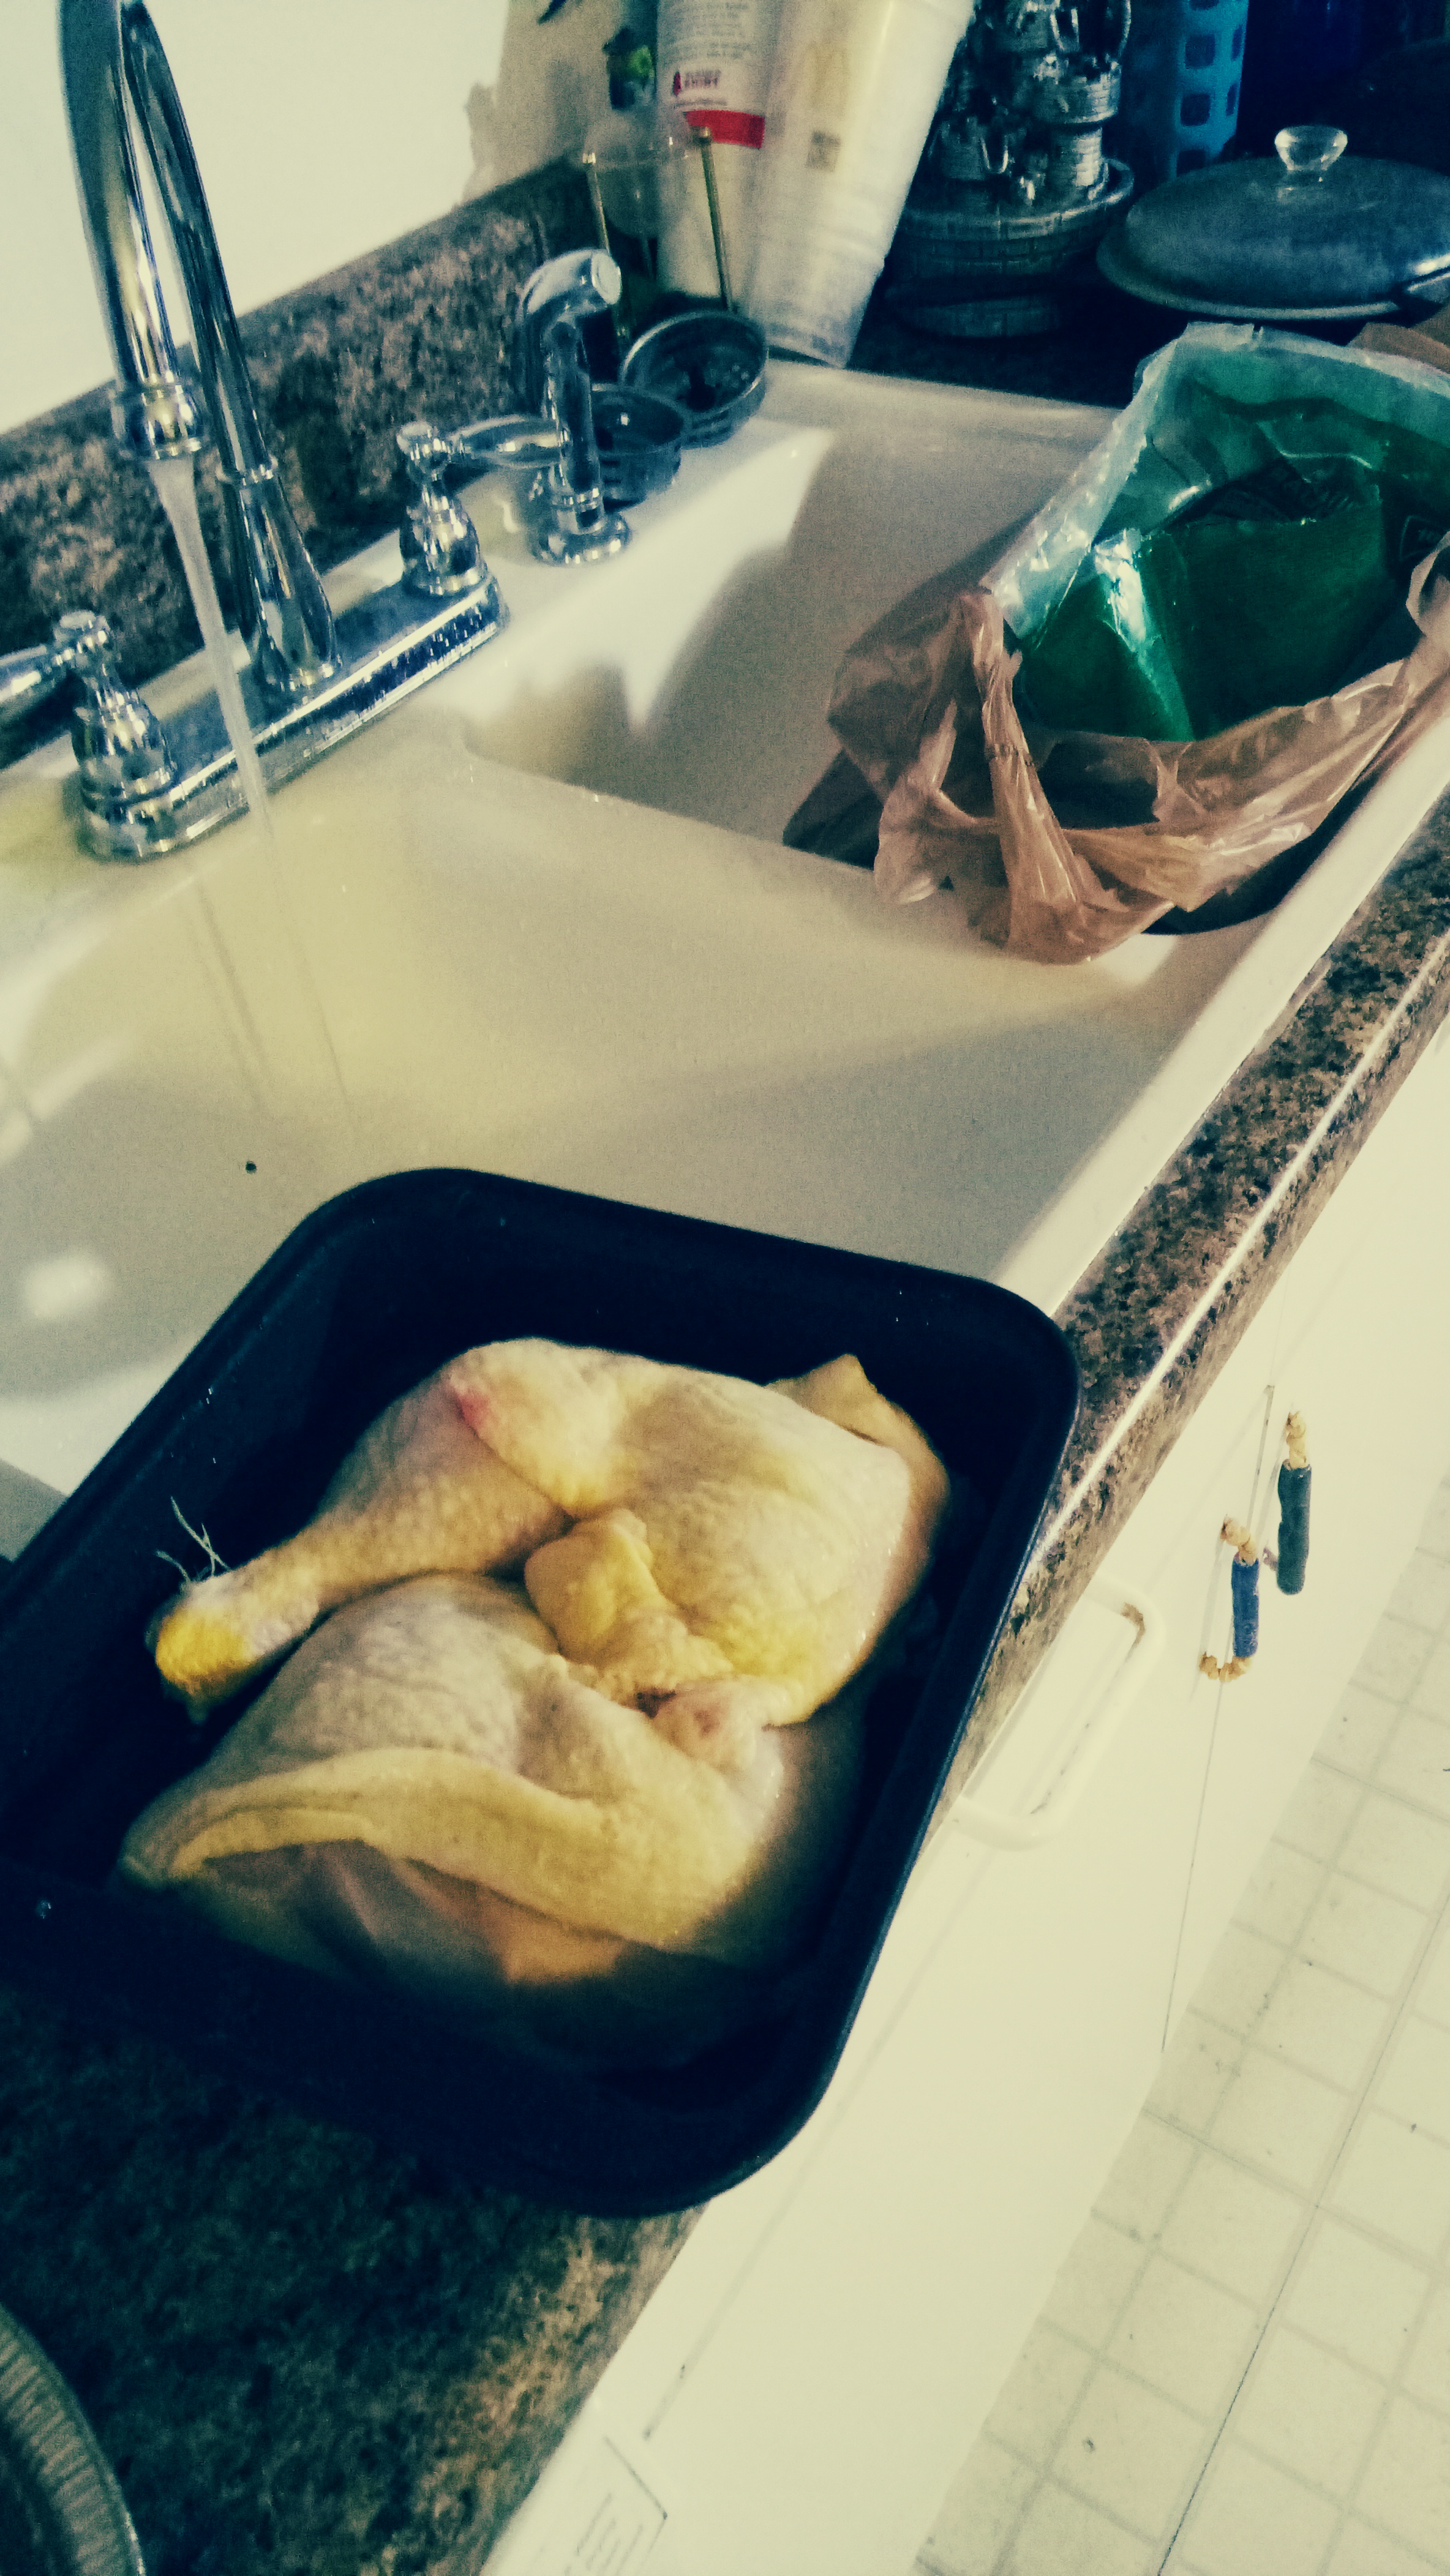
OK, it’s Friday, you’ve had a long week, you want something special for dinner but the last thing you want to do is cook! Believe me, it’s not that hard and it’ll be SO worth it! Besides, you don’t have anything pressing tomorrow morning, do you? So, on your way home stop by the grocery store and pick up a couple of shank steaks. OK, maybe you don’t have that cut in your store, or you like something more expensive that doesn’t have a line of gristle through it, but I like the flavour, don’t mind the gristle (I can cut around it and give it to the dogs later) and I use the bone for broth. Whatever cut you get, make sure it comes with a bone. Getting the most for your money is a good thing. So is controlling what you eat, self-sufficiency and even being able to impress the daylights out of your boss, in-laws or anyone else that you really shouldn’t have to worry about impressing but will anyway.

The whole point is to have something lovely now and something else lovely (French Onion Soup) later. Oh, don’t forget to grab something for salad and a nice bread from the bakery section. French, Italian, sourdough or any fresh rustic country bread will do. If you want to grab some fresh vegis that are in season, do, but I often find it easier to heat some frozen vegis in the microwave or on the stove. I can use only what I need and don’t have to worry about the rest going to waste that way. And maybe pick up a nice inexpensive red wine, unless you have a decent ale in mind. We will be cooking with it and yes, you will need to sample some of your ingredients as you use them.

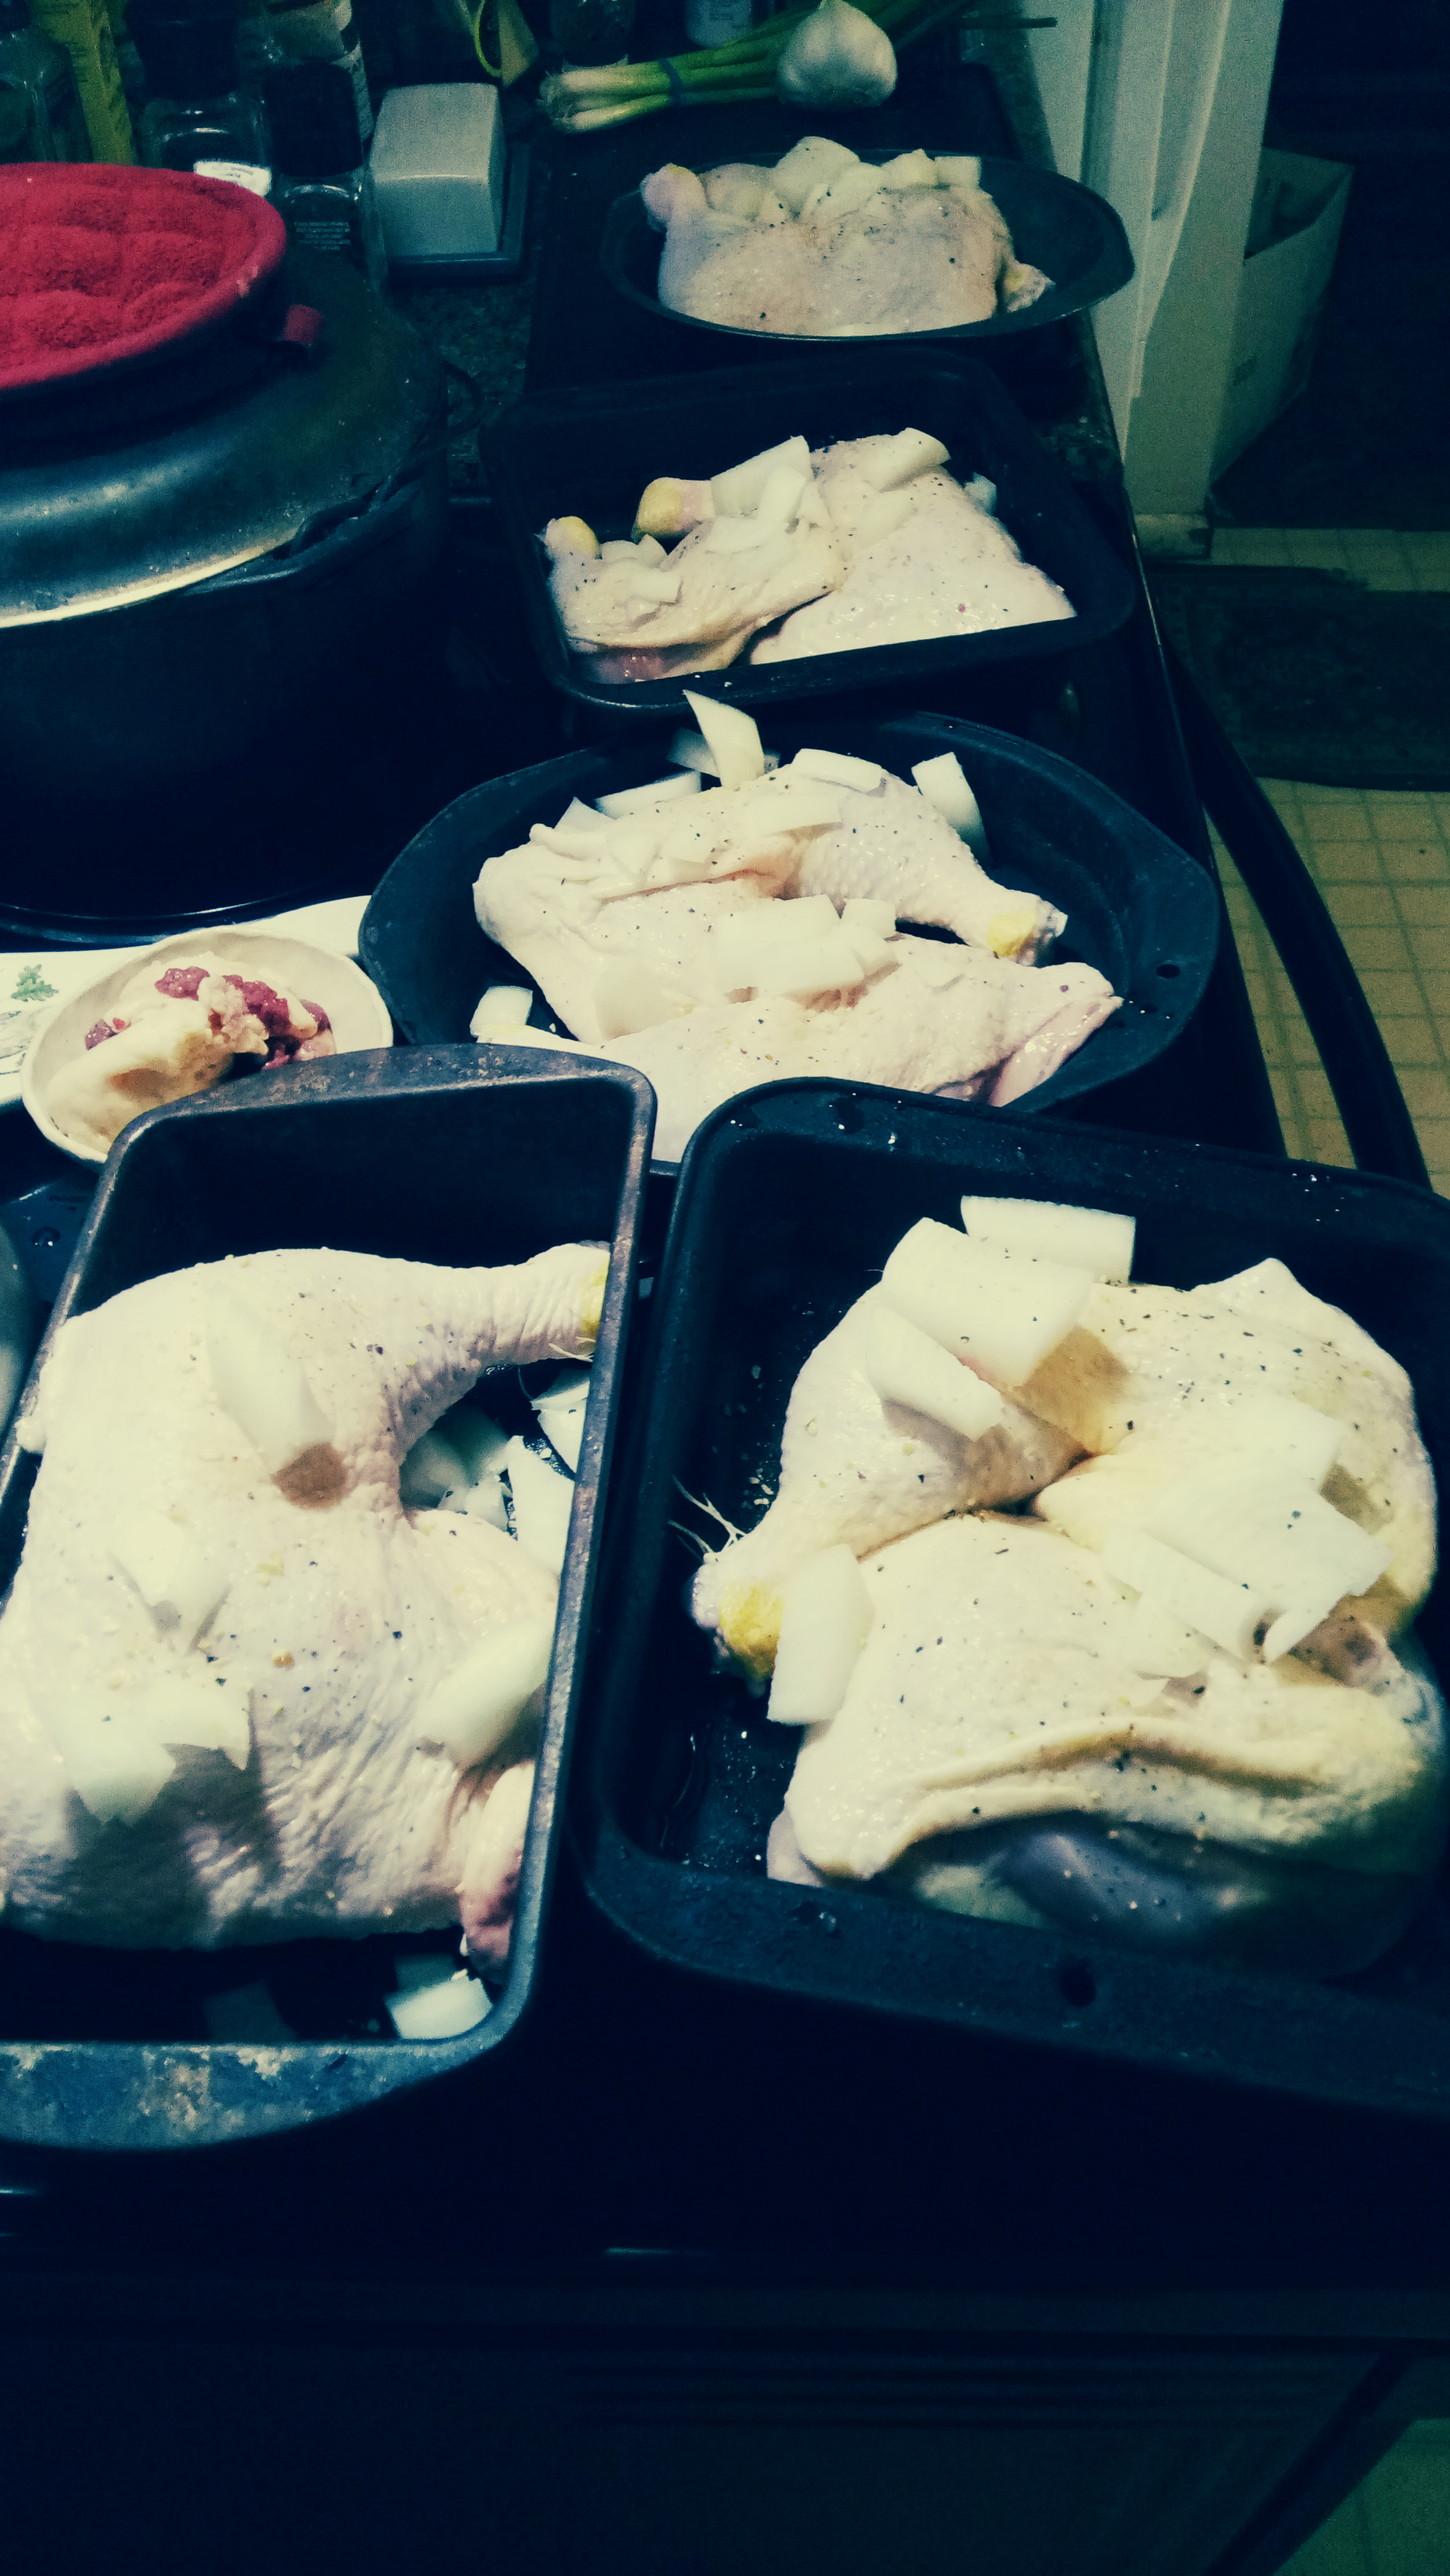
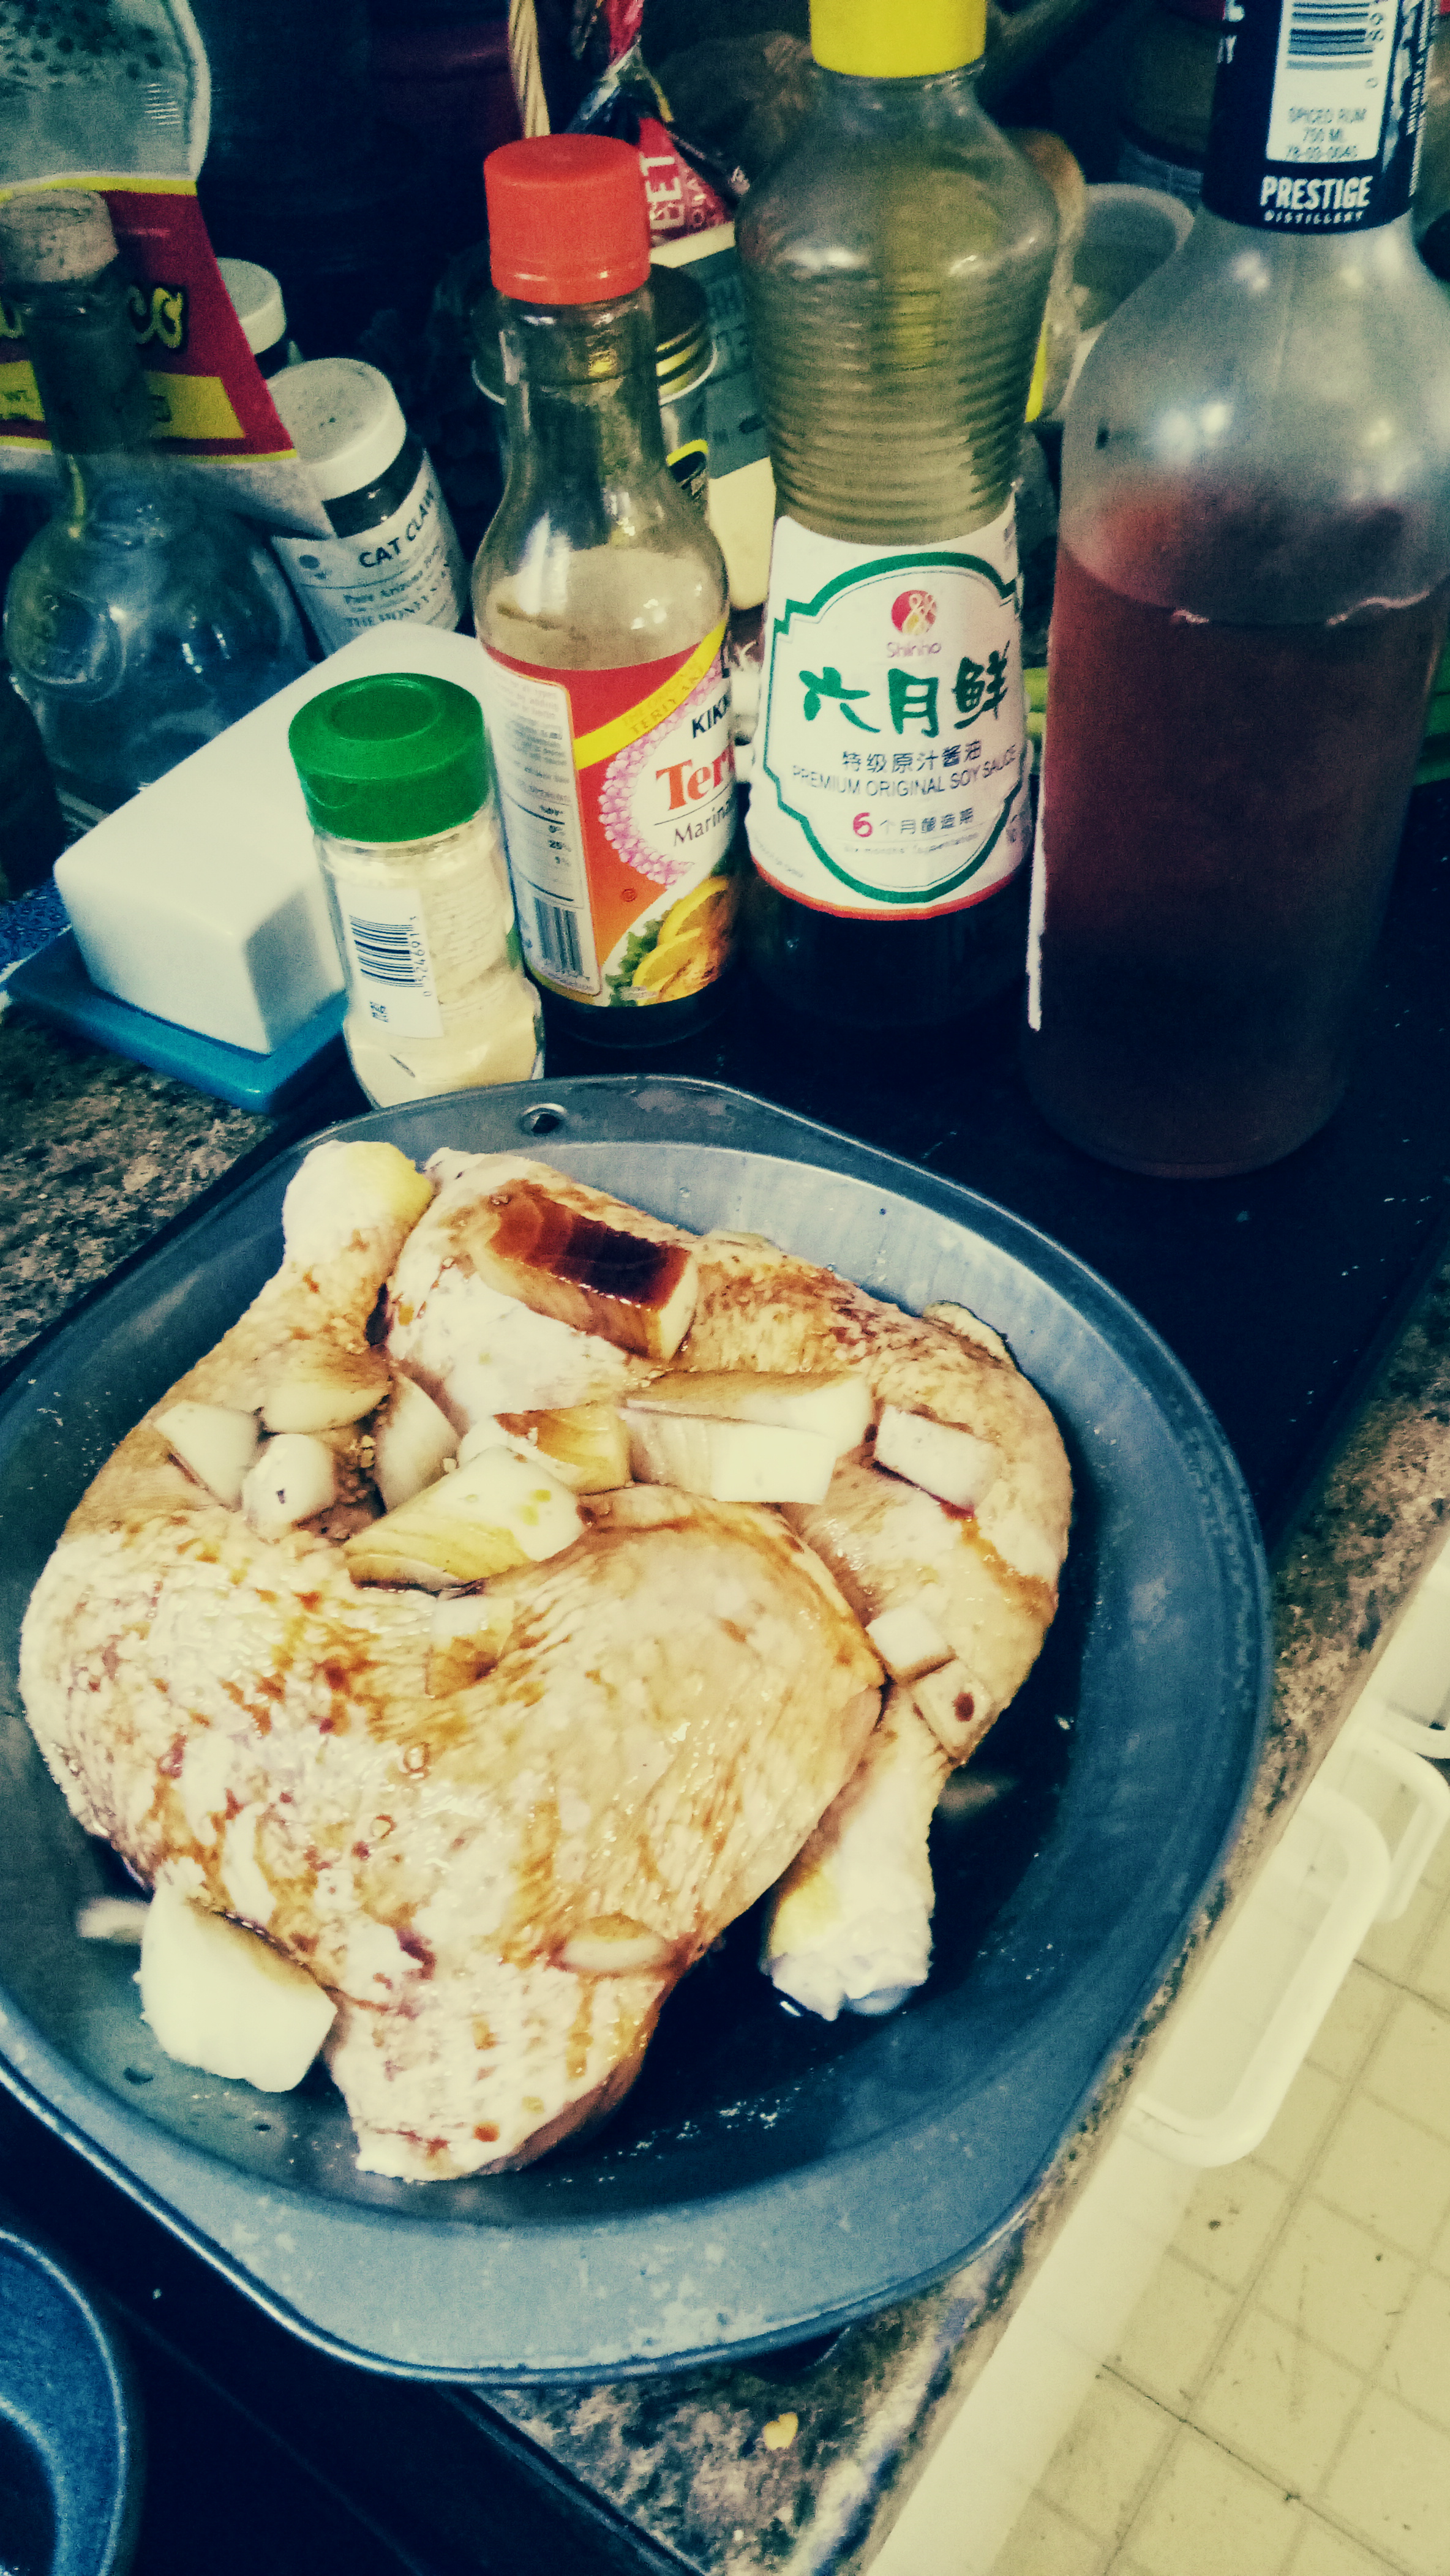
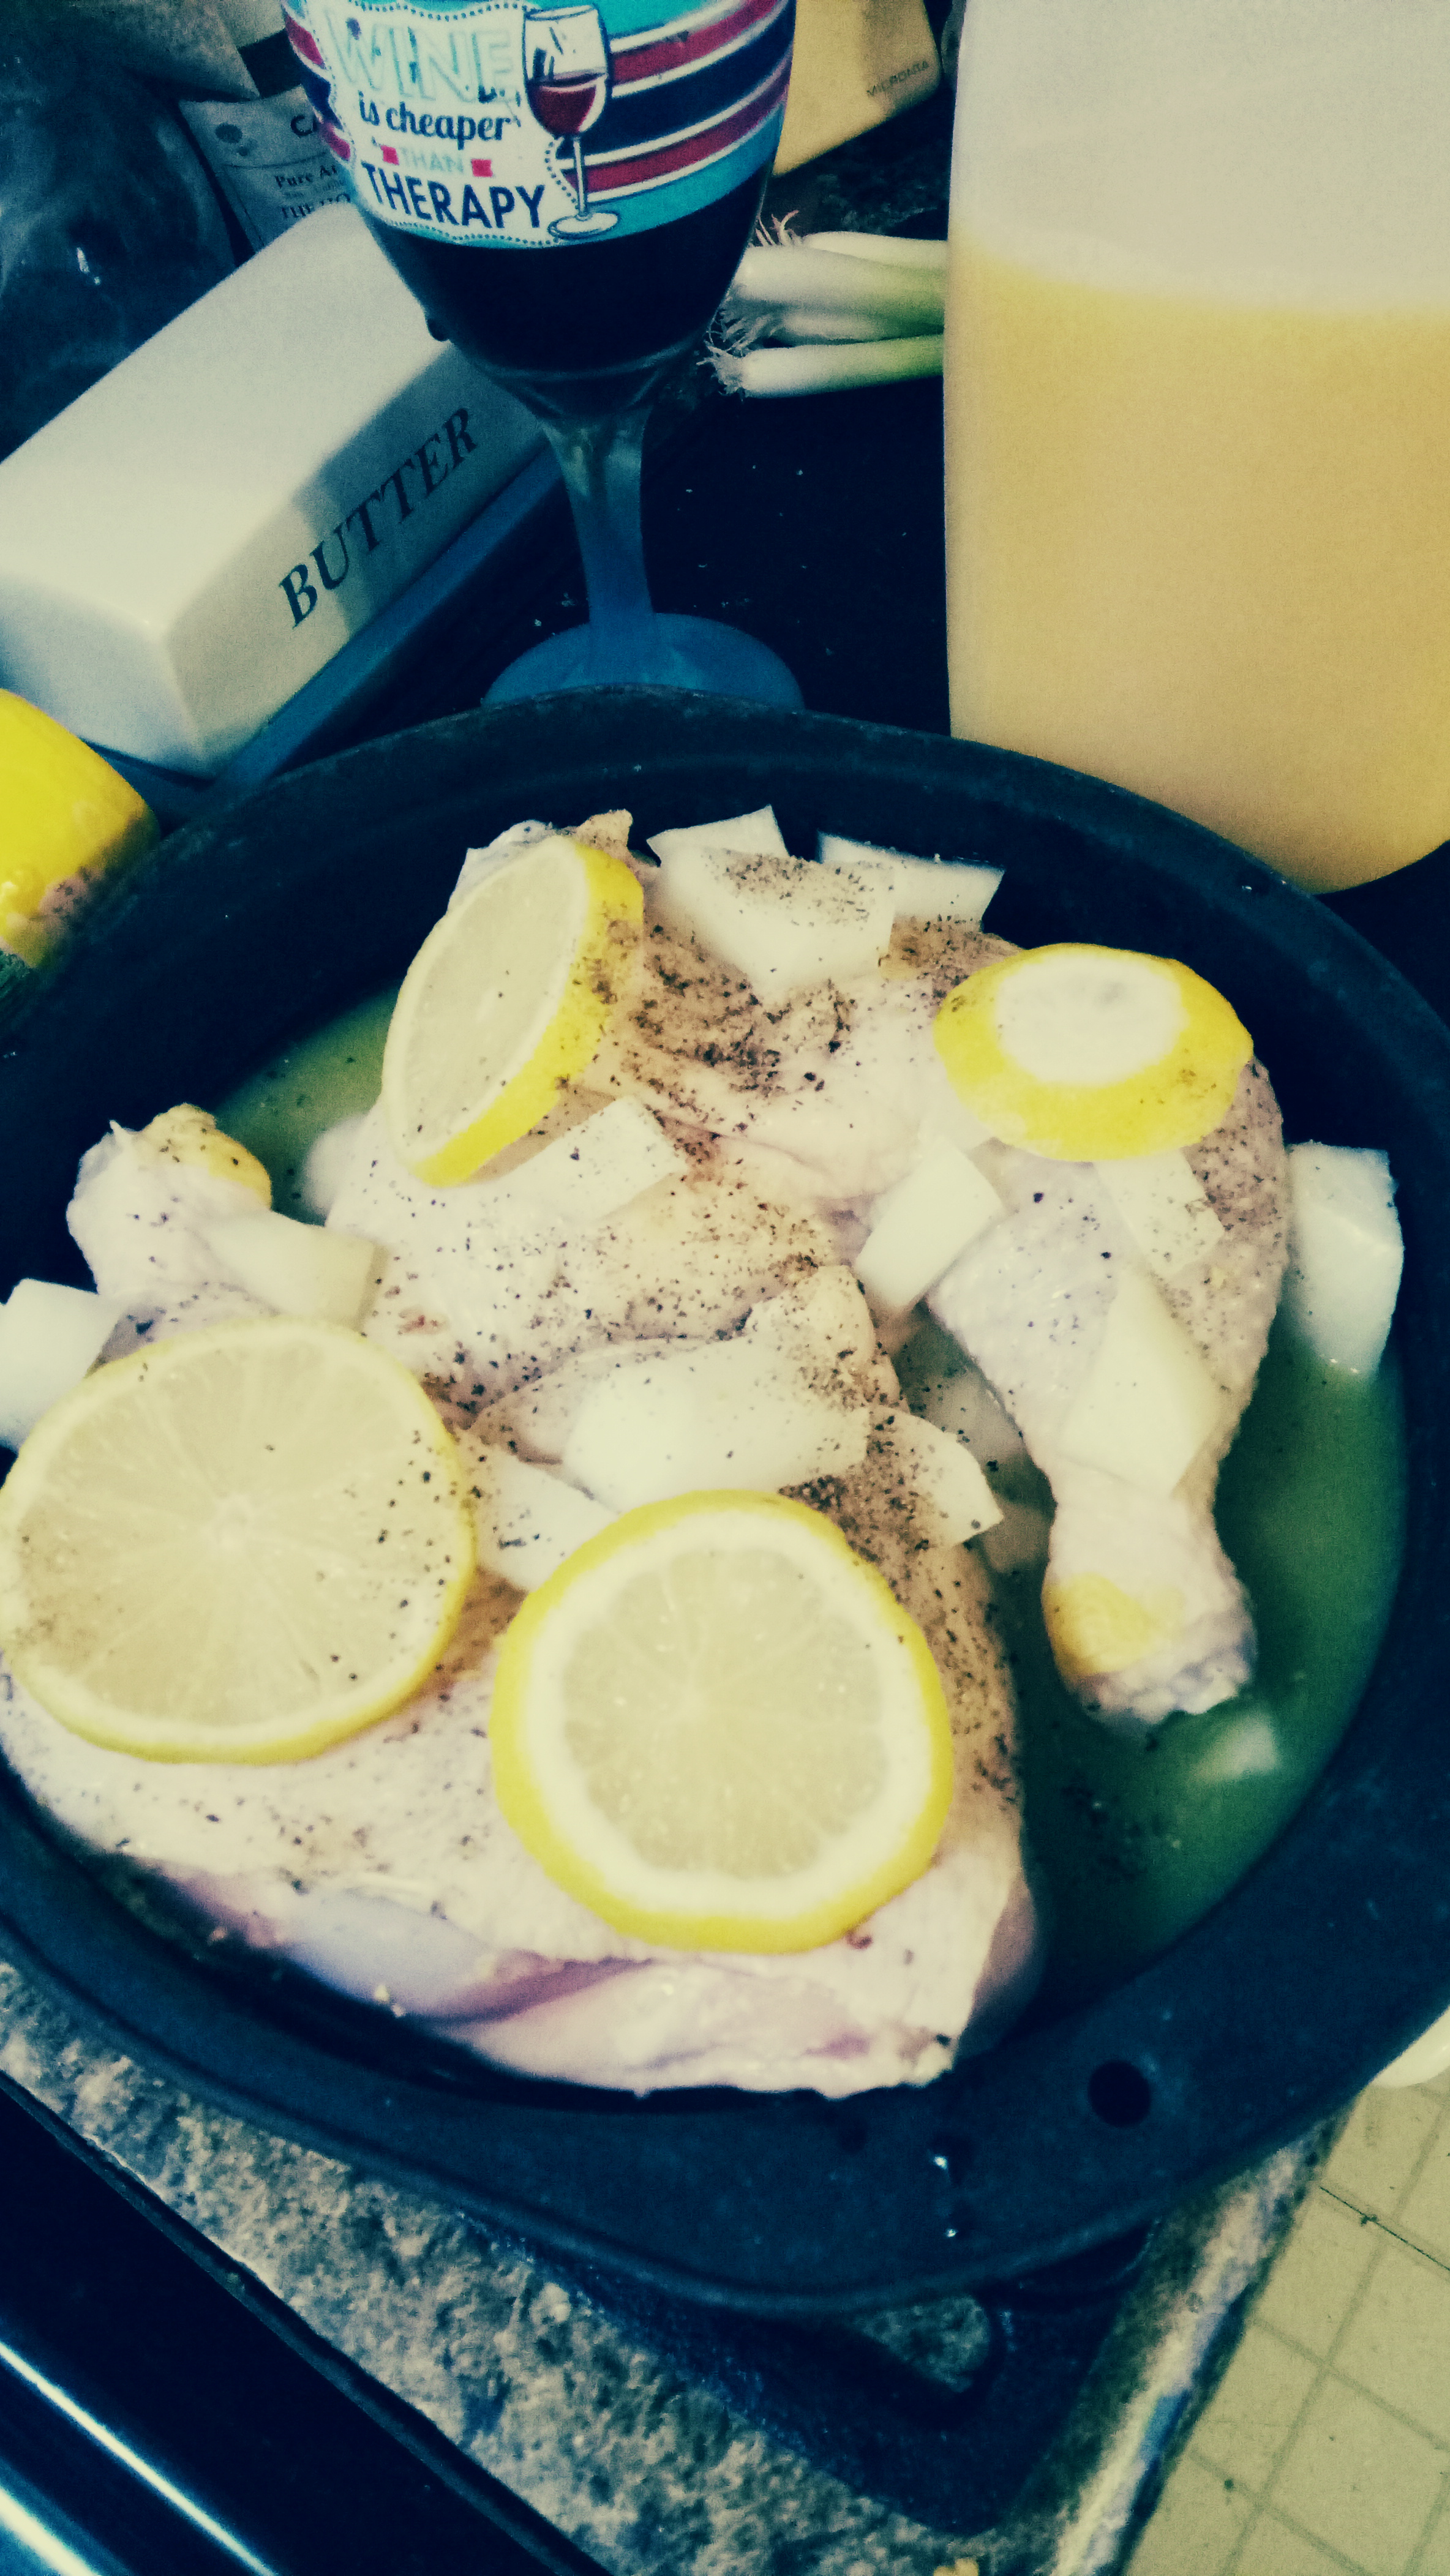
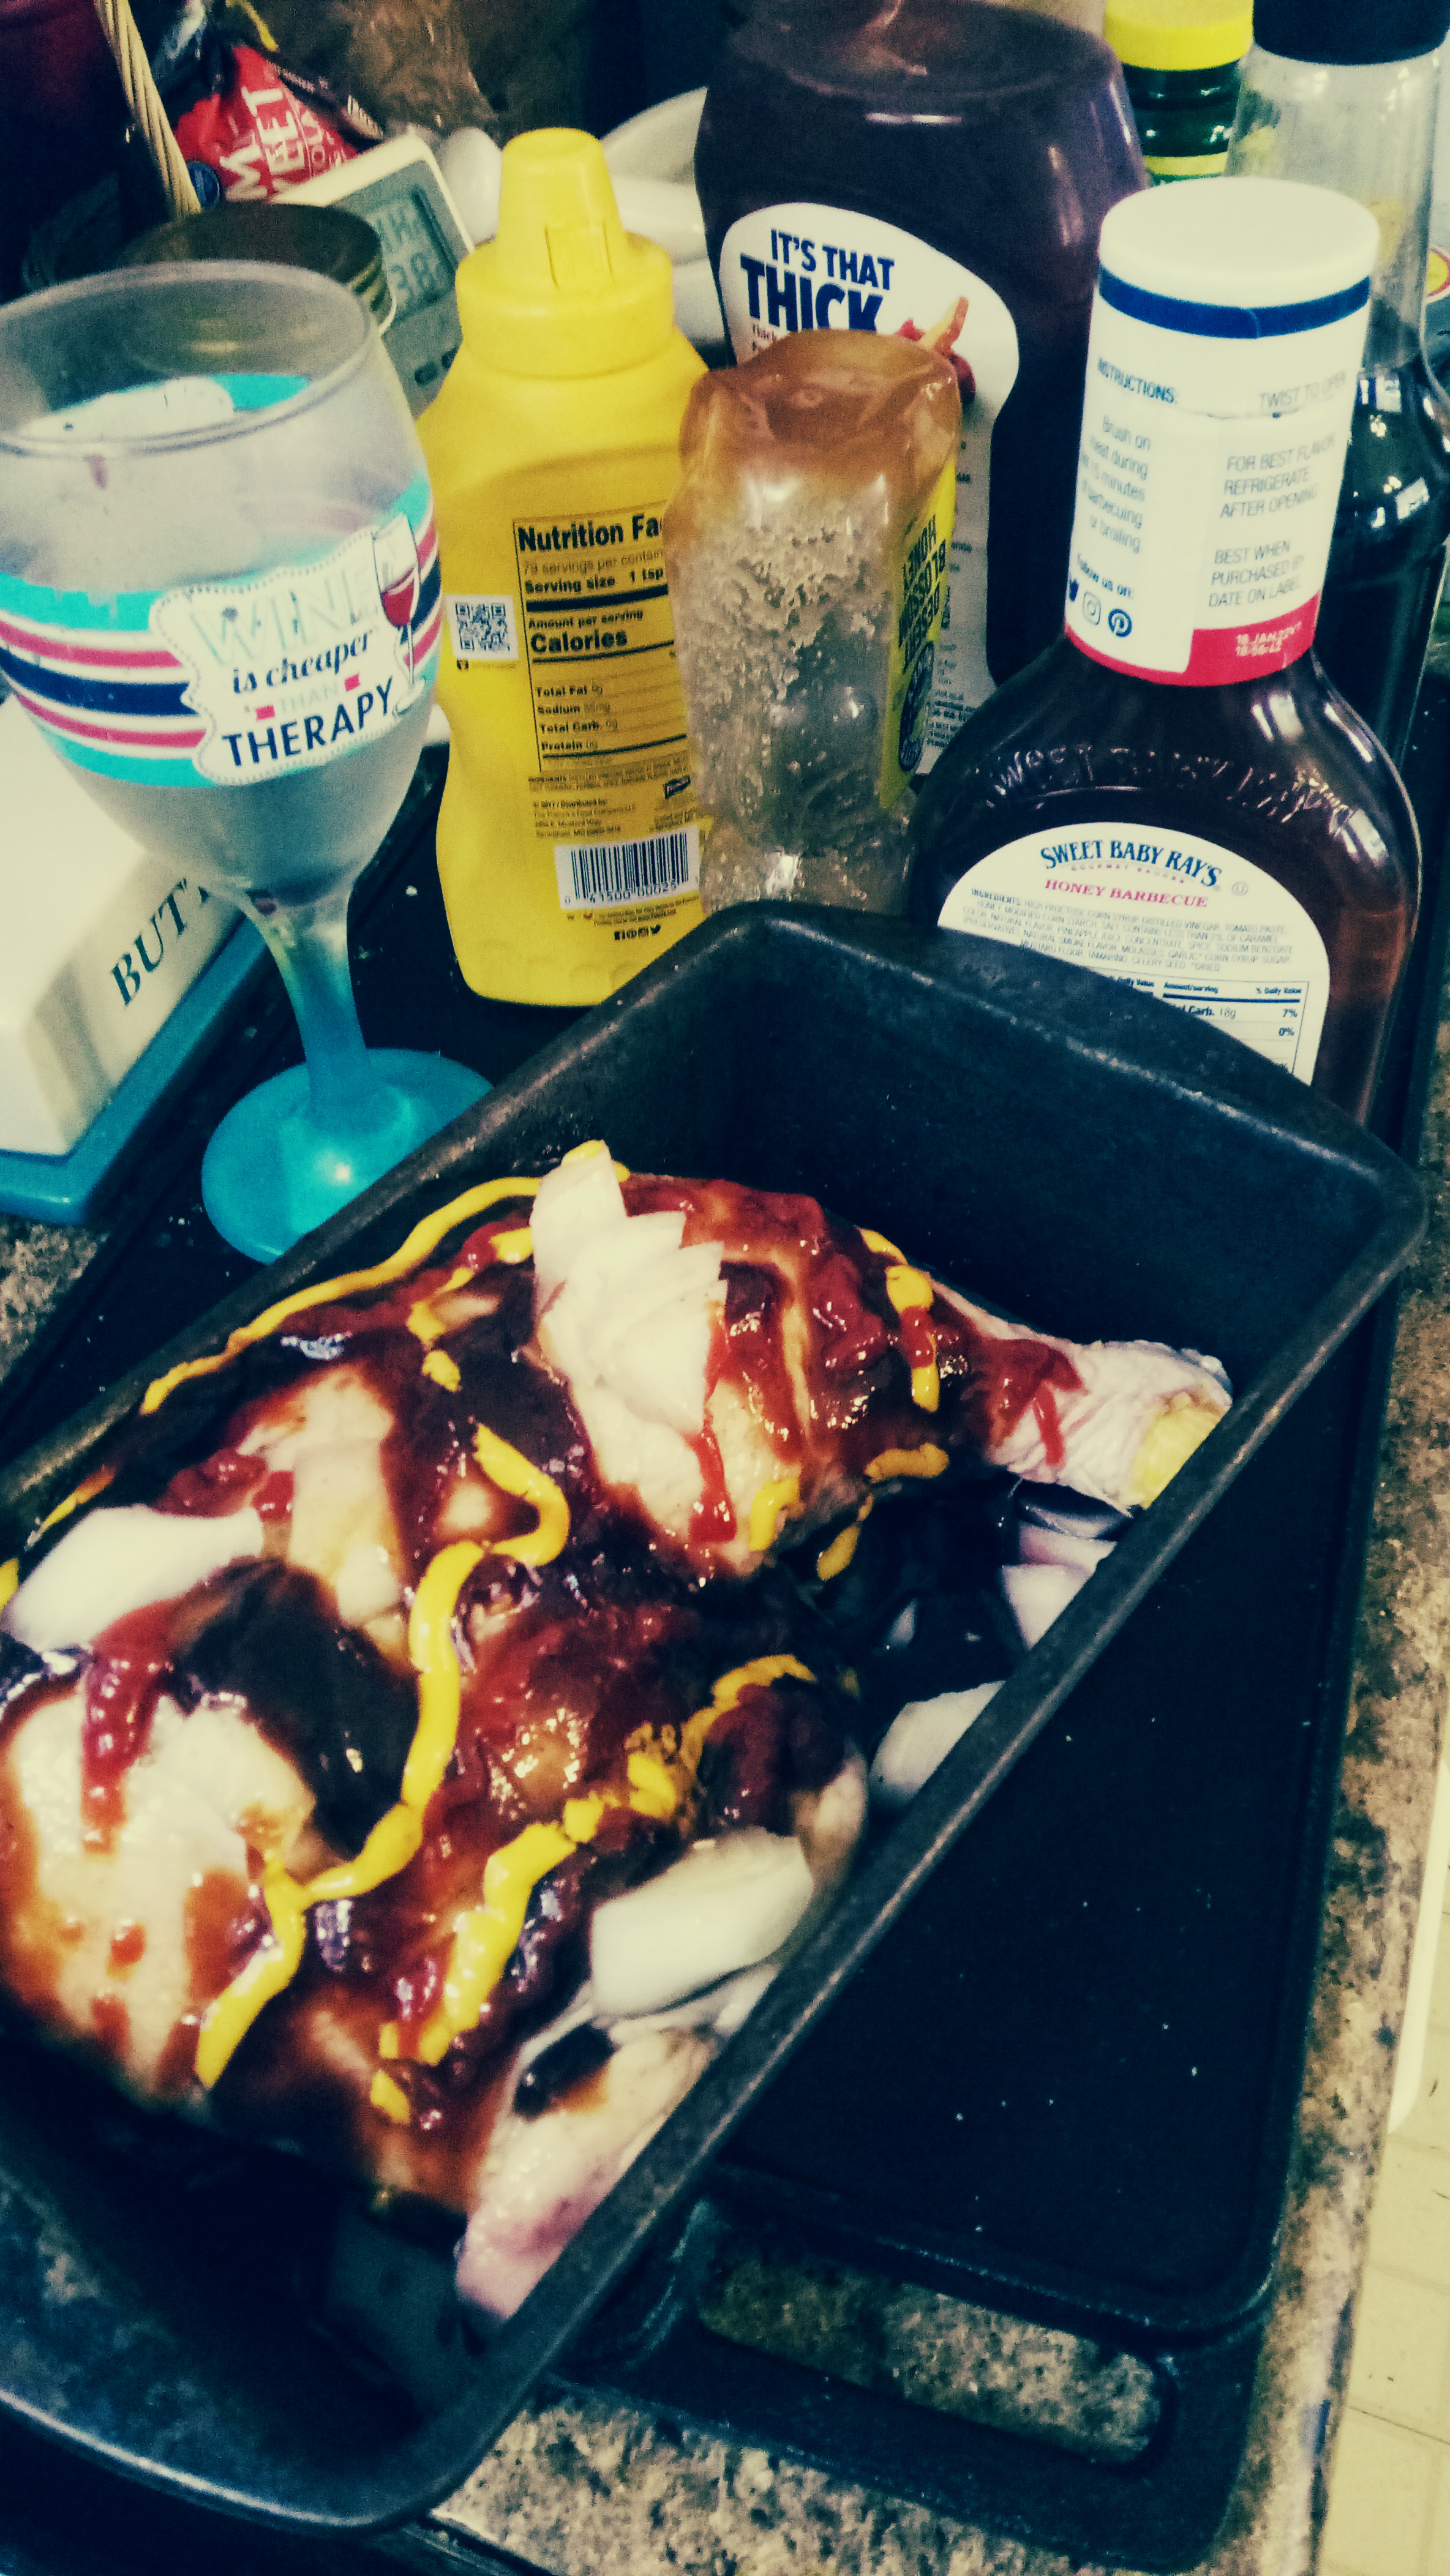
Now that you’re home open the wine (or ale) and pour a glass. Now pull out a bowl, open the steaks and put them in the bowl. Sprinkle with garlic, pepper, paprika, basil and whatever spices you like, then sprinkle with Worcestershire, Soy sauce, beer or wine. Turn the meat so it gets on both sides. They don’t have to be swimming in it, just enough to get both sides wet. Let this marinate while you turn on the grill and start the rest.If you don’t have a grill or the weather’s bad you can use the broiler or just cook hem in a frying pan.

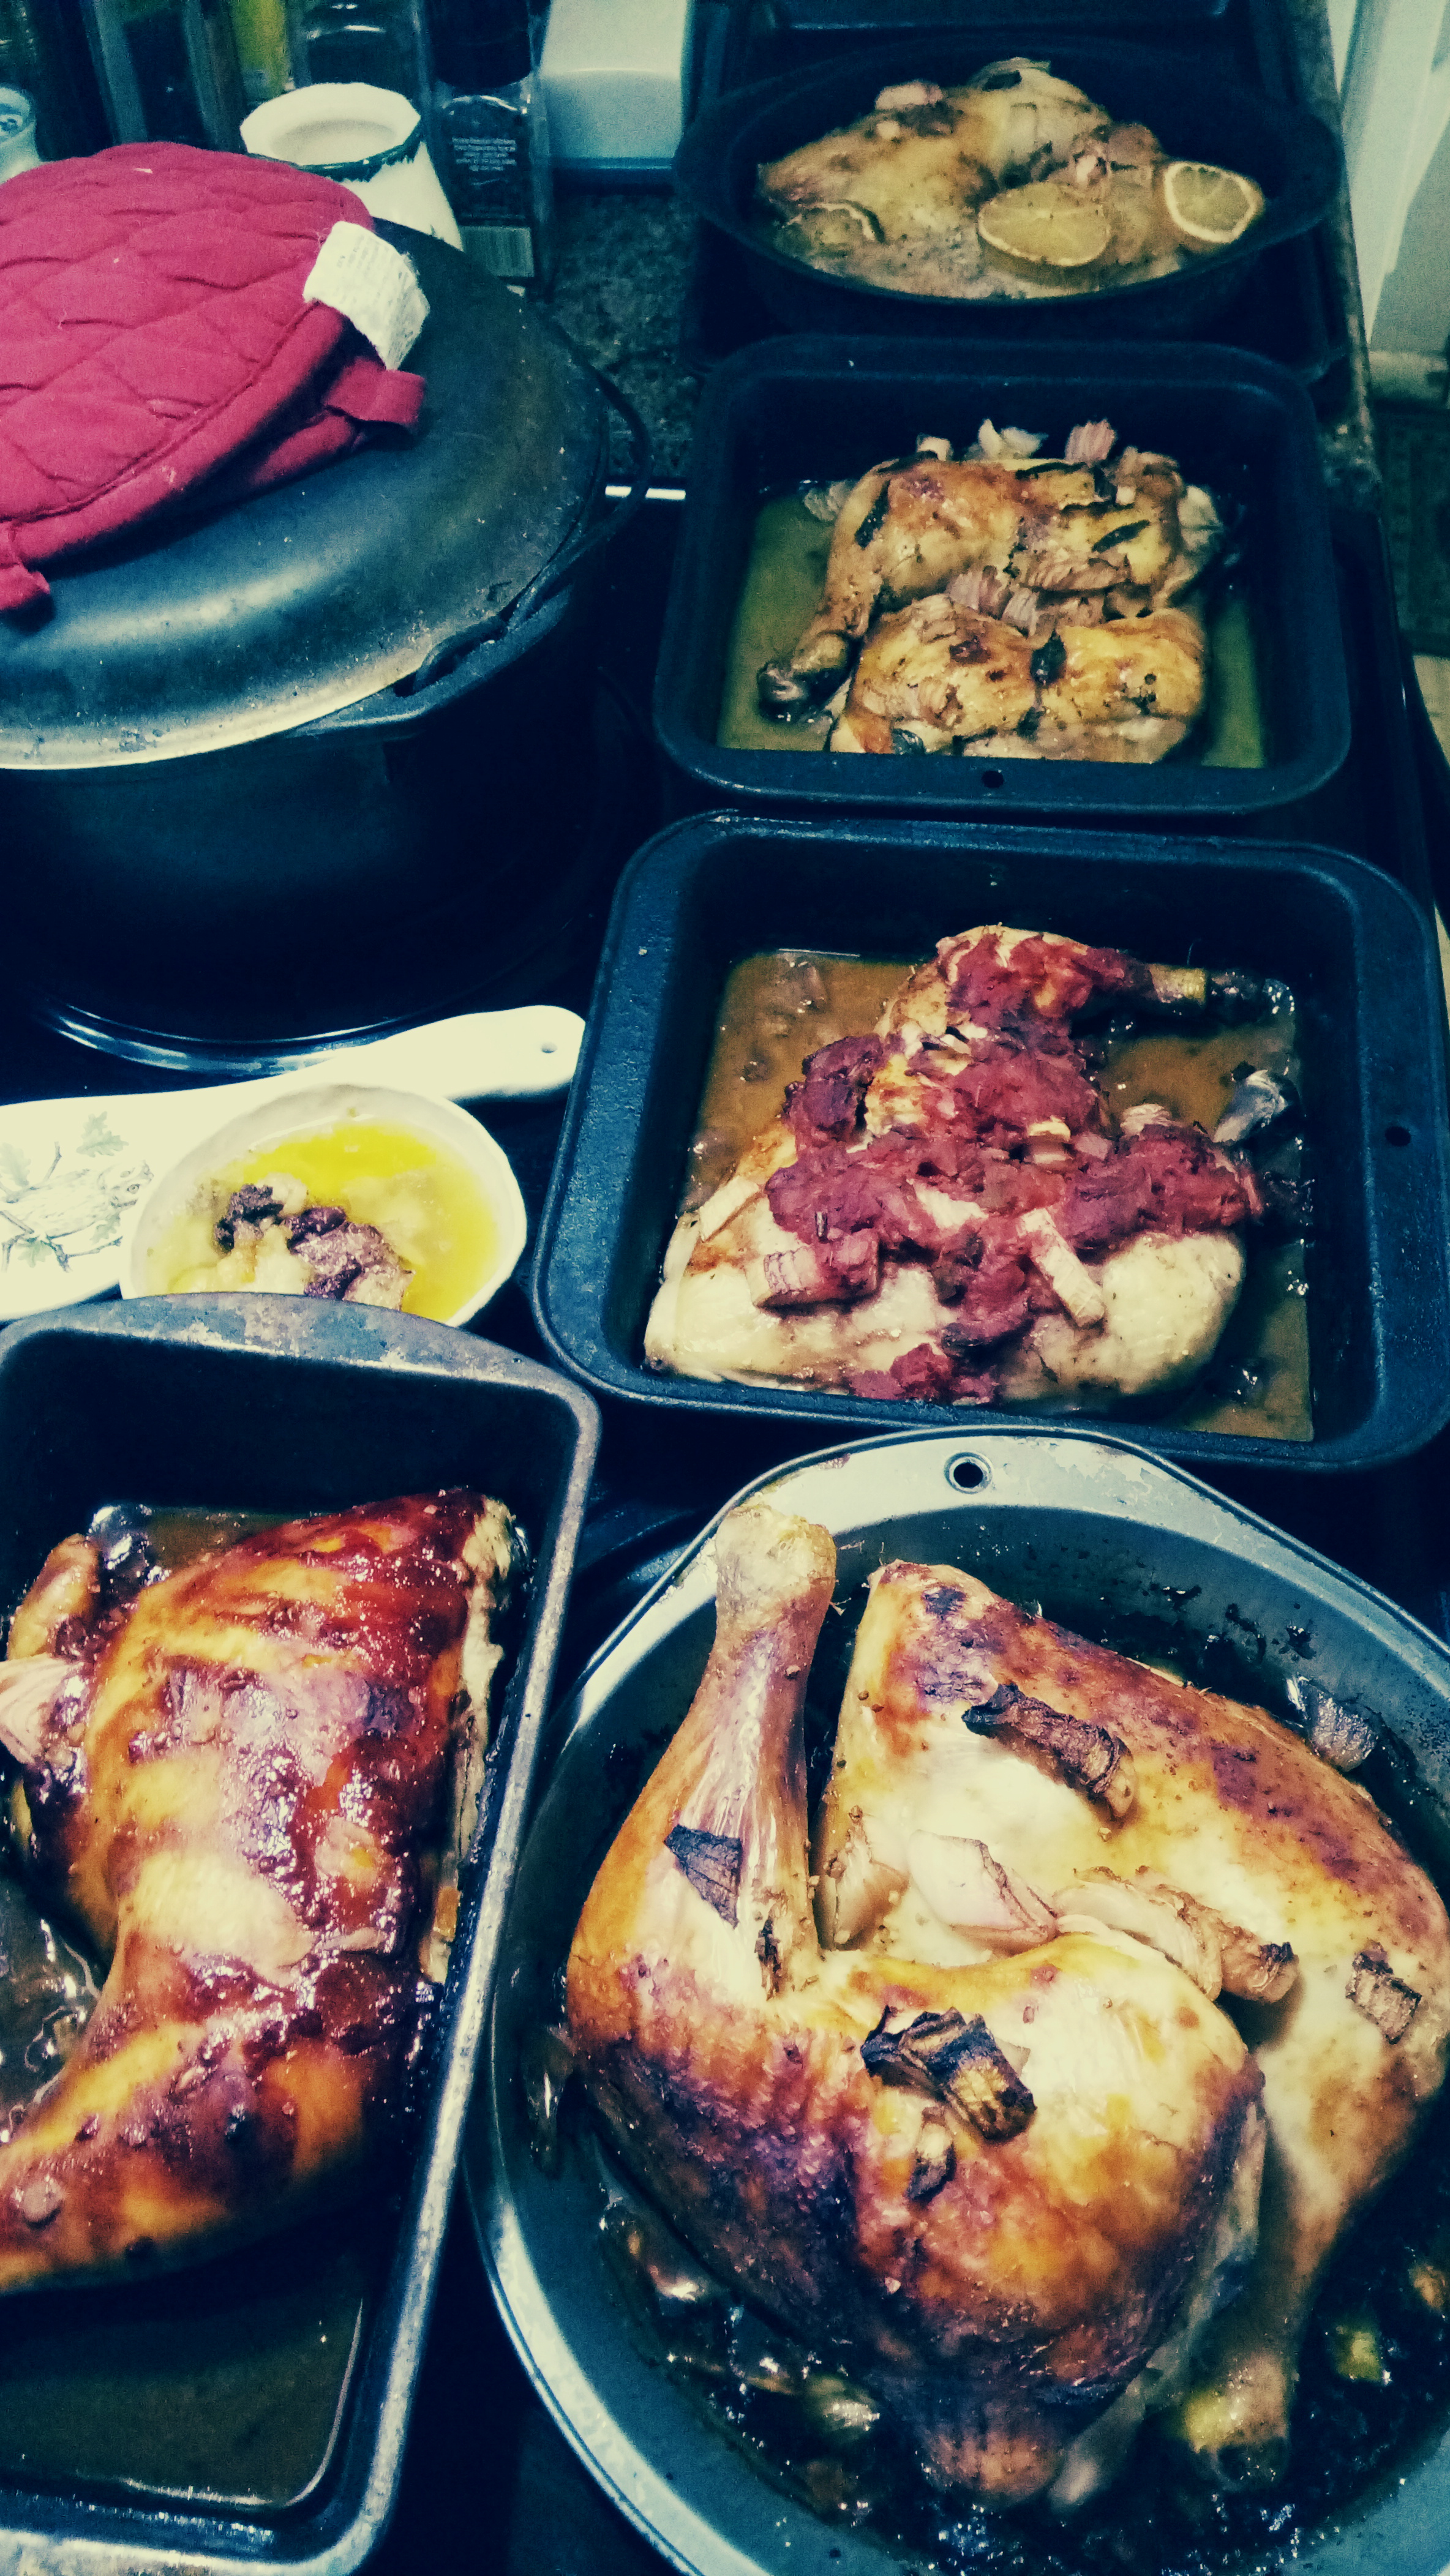
If you’re having vegis put them in a bowl in the microwave or in a pan on the stove to heat, but don’t turn them on just yet. Slice the bread unless the bakery already did it for you. Butter the bread and if you like add some garlic. Now put the meat on the grill (or under the broiler or in a lightly oiled frying pan). You’ll want 5-10 minutes per side depending on how thick they are and how rare or well done you want them. This takes a little practice since everyone’s grill and preferences are different.If you really want to go all out slice up an onion and let it sauté down to caramelized lusciousness to serve on top of the steaks (if they last that long!)…yum!!!

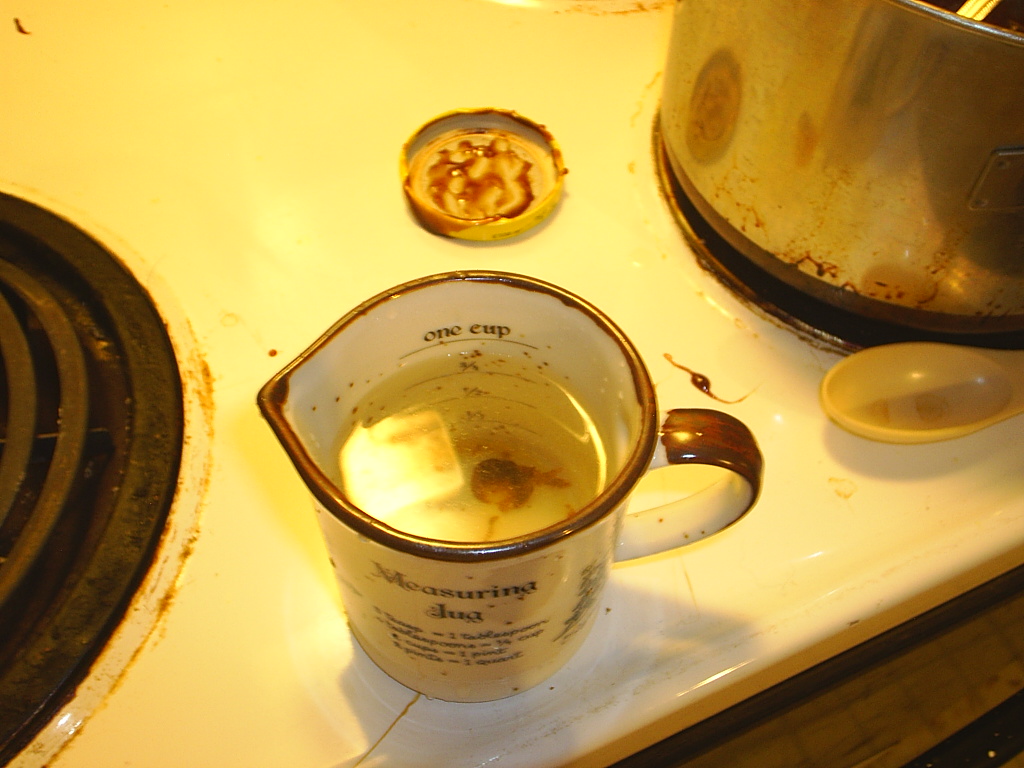
While you’re waiting to turn the meat make the salads. Those bagged things are easy but fresh heads are easy too. The problem with the heads is washing them and getting them dry enough for dinner tonight unless you have a salad spinner. Time to run to the kitchen gadget store? Maybe later. Anyway, I turn the meat every 2-3 minutes or so. If one half of a couple is outside watching the meat with a beer and the other is inside with the rest it is easier.You’ll also want to put the marinade in a saucepan, add a splash of wine or ale and simmer it down into a nice reduction sauce. It doesn’t have to be thick, just boil down so it’s not as thin as it was, about 1/2 or 1/3 of what it was. Don’t add salt!

When the meat is about 1/2 done turn on the vegis, light the candles and set the table. Of course you’ll have candles! When the meat is done it isn’t done. It has to rest for 5 to 10 minutes while it settles all it’s juices. While you’re waiting you can toast the bread on the grill or under the broiler, put the salad dressing on (if you’re having salads) and serve the vegis. Now wash your hands like good children and tuck in. You’ll want to cut the bones out first and put them on the serving plate so you can use them for broth tomorrow. Put them in the fridge right after dinner, along with any leftovers (steak and eggs for breakfast anyone?) Leave the dishes for morning, take a nice shower, turn on some music and curl up with a good book or magazine before some serious snuggle time. Desert? Maybe an apple, some grapes, a couple of cookies or maybe ice cream. Congratulations on a week well done!

Oh, don’t forget to look up my posts on making broth and French Onion Soup.

Posted by: briellethefirst | November 5, 2010

Bonfire Candy/Treacle Toffee


Dissolve sugar
Dissolve sugar
Boil
Boil
To hard-ball stage
To hard-ball stage
Pour out...
Pour out…
Score
Score
Store
Store

Just in time for Guy Fawkes Day. When I was a kid my Dad used to get treacle toffee imported from Britain. By the time I was in college I think he and I were the only people still buying it in town and it became impossible to find. I did find it once in Seattle and again in Florida years ago, but now I can’t find it even on the internet so I’m trying my hand at reproducing it. So far I’ve made three batches. The first had the right consistency and almost had the taste but was brown instead of black. The second was black but not quite the right taste and a very hard candy. This time it’s almost right, but I cooked it to hard crack stage instead of hard ball, so I guess I’ll just have to keep trying (darn!). So here it is:

4 oz. Butter or Margarine

2 Tbsp. Strong Coffee

1 Tbsp. Vinegar (I used Malt Vinegar)

3/4 c Dark Brown Sugar 

1/4 c Molasses (or Treacle if you can get it)

Melt butter in a saucepan, add coffee, vinegar, sugar and molasses, stirring until the sugar dissolves. Boil till it reaches the hard ball stage (260 F). You can use a modern thermometer or, if you don’t have one, do it the old fashioned way. Take a cup, fill with water and (after a bit of boiling) drop a small amount of syrup in the water. Push it around with your finger. If it’s a soft ball it’s not ready yet. If you can make a hard ball and pick it up it’s ready. If it forms a ball and cracks, that’s the hard crack stage and it’s over-done. Be REALLY careful! Boiling candy can cause super bad burns!

Take from heat, allow bubbles to subside and pour onto a well-buttered sheet of waxed paper on a cookie sheet. Spread into a roughly square shape with he back of a spoon. In just a few minutes (by the time I’d taken a couple of pictures) it should be cool enough to score into squares with a sharp knife. Don’t drag the knife through, just push down, lift, and move to the next area. This will create the pillow-shaped candies I remember.

When it is fully cooled it will be hard enough to break the squares apart. If the waxed paper sticks to the back of some of the pieces don’t worry, it won’t hurt you…just keep those pieces back for yourself. Store in a tin lined with waxed paper, separating each layer with waxed paper or you can cut waxed paper into squares and wrap each piece…but that takes longer to do than it did to make it!

And of course:

Remember, remember!
The fifth of November,
The Gunpowder treason and plot;
I know of no reason
Why the Gunpowder treason
Should ever be forgot!

Posted by: briellethefirst | October 27, 2010

Easy Roasted…Meat


Chicken, ribs, chops…even vegies! Whatever happens to be on sale, cook it up while you do something else and put the leftovers away for later, saving even more time. I first started doing this when my kids were young and I found chicken pieces for 15 cents a pound in 10 pound bags. I grabbed it, then had to figure out what to do with it before it went south!

Open the bag in one side of the sink.

Rinse each leg quarter. if you want, take out the organs in the leg, just run your thumb through the channel if anything’s there. I cook them in a little bow. and give them to the cat. when you’ve rinsed them and put them in pans, empty the liquid out of the bag, tie it up and throw it away.

Pull out the roaster and all the cake pans you have. Put 1 to 3 pieces in each, whatever fits, then pepper all ’round and toss on onion and garlic.

Now for the fun. Viva la difference!” (I was already bored). Put ginger, teriyaki sauce, soy sauce and rice wine (OK, any white wine you happen to have on hand will do). Got star anise? Tuck a couple of those on, too. Five spice? Sure. Then pop it in the oven

Next on the assembly line is lemon pepper chicken with orange juice. Pop that in the oven.

Oregano, salsa and beer. Don’t have beer? Red wine, white wine, tequila…whatever… Then into the oven and

NEXT! Put 2 knobs of butter on each quarter then pop out to the garden for some thyme, basil, oregano…whatever’s growing. Fennel or dill? Sure. Oregano? Grab some. Rosemary? Pinch some of that, too. Sprinkle them on, pour in some wine and pop it in the oven.

Now for the last pan. This one was enormous so it went alone into a loaf pan. I ran out of barbeque sauce so I squirted on a little ketchup, mustard, honey and Worcestershire with wine in this one too (unless you want to use beer or cider). Pop this in the oven, turn it on to 350 for an hour.

If you want baked potatoes, now is the time to put them in. Don’t forget to poke them with a fork.

Now take a shower, read a book, vacuum, take a walk around the block. Just fill 30 or 40 minutes.

Welcome back! Put on a pan of rice, another pan of stuffing, maybe some instant mashed potatoes, pop some biscuits in the oven an warm up some vegies (frozen is SO convenient!). Set the table, put all the selections on trivets and dig in. Plenty for tonight with no one complaining that they don’t get their favourite and you have leftovers to make new stuff for the rest of the week.

What isn’t eaten of the baked potatoes tonight can be made into twice-baked potatoes tomorrow, Any leftover rice can be made into fried rice, Spanish rice or ‘dirty’ rice another night. Leftover stuffing is great for breakfast! Extra mashed potatoes can be made into lefse or potato pancakes for breakfast or dinner another night. Leftover vegis can go into a soup with some leftover chicken.

If you went straight to the sides instead of taking a shower or getting something else done you have time to help the kids finish their homework. Everyone gets to choose what they want to eat, cooking’s done for the rest of the week (on a weeknight no less!) and I get to get something done while I wait for dinner! Wow! I AM A GENIUS!

If you want to try different flavours, experiment. Sesame honey chicken, honey mustard, marinara sauce, cream of mushroom or cream of celery soup, enchilada sauce, mole, peanut sauce with sambal oelek, Garam Masala, curry, onion soup mix, rosemary and wine, simple salt and pepper…the possibilities are endless! And you can do this with chicken quarters, thighs, drumsticks, breasts, turkey parts, lamb shanks, lamb chops, pork chops, pork ribs, beef ribs, chuck steak, potatoes, sweet potatoes, rutabagas, jicama…or whatever fleshy vegetables you like, even corn! If you’re roasting something that doesn’t have much fat on its own, like lean meat or vegies, do add butter, olive oil or your favourite healthy fat or oil and your choice of flavourings. How much easier could it be to start or get back into a healthy, home-cooked habit?

Possibilities for re-cooking on later evenings are soup, stew, enchiladas, fried rice, stir fry, pulled meat sandwiches, lasagna, random casseroles, shepherd’s pie…and leftovers make an easy lunch. And if there are still leftovers at the end of the week you can always give them to the chickens.

You can make serving dinner as fancy or casual as you like. White tablecloth, candles, single in a nice vase, wine or place-mats, paper plates and towels as napkins and milk or sodas to go with it. A fabulous romantic dinner doesn’t have to be hard to make and it can be as impressive as you want to make it or as easy, since paper plats mean less clean up (some are even compostable!)

Posted by: briellethefirst | September 14, 2010

Tepenade


Tepenade

Tepenade, Serving suggestion

I just made some for lunch and realized how versatile it can be. It’s easy, too, and can even be relatively inexpensive when you make it yourself. Pull out your food processor. Don’t have one? Go shopping! Or you can make do with a curved knife & matching rounded wooden bowl, one of those little spring-loaded hand-choppy-thingies or a good cutting board and chef’s knife. Your choice.  Pick some Basil leaves and put them in the bottom of the processor. Chunk up an onion (I use plain old yellow ones, but you can experiment) and throw that in, too.  Now get inexpensive olives, green, black or both, whichever you like. Put these in until the processor. Now pour in a little olive oil & Balsamic vinegar so the solids can mix into a paste. Now zap it up. If it’s too stiff add some more oil and/or vinegar depending on how much you like vinegar. If it’s too loose add more olives. Store in a covered container in the fridge. It’s so easy you can do it one-handed! The onion doesn’t need to be chopped evenly or finely, just chunked up enough to get it in the processor. Oops, you need more specifics? Ok. Start with this and play with it until you have something you like:

6 basil leaves, 1 small onion, 1/2 to 2/3 c olives, 1/4 c olive oil & 3 Tbsp Balsamic vinegar

To serve put a heaping spoonful on a plate, drizzle a little olive oil & balsamic vinegar over it and use small pieces of bread to sop & scoop bit of it & enjoy. You can also use it as a spread, in salads, on appetizers or in anything you want a touch of olives. It’s up to you if you want to add bell pepper, capers, lemon, garlic or other herbs like thyme, oregano, pepper or whatever your nose/taste buds/tummy desires. I’m sure you’ll have fun experimenting with wine pairings, too. I’d start with a Shiraz or maybe a Sangiovese. As always, have fun!

Posted by: briellethefirst | September 10, 2010

Chessboard Cake


I’m writing a book on the history of Chess rules and one chapter is about making your own chess set. I thought it would be fun to make one that’s edible. This is my first attempt at a full chessboard cake. MacKenzie helped me make it from an angel-food cake mix. Instead of baking it in the usual bundt pan or loaf pans I used 2 square cake pans and sliced them in half, cutting the tops from the bottoms. Next time I think I’ll use 2 sheet pans and press them together. I used 2 packages of Pepperidge Farm Chessmen cookies as the pieces. I didn’t have enough pawn pieces so I just turned regular-piece cookies over for the 2nd side pawns. To avoid this yourself you’ll probably want to buy 3 or 4 packages, but since the best time to make a cake like this is a party of some kind I’m sure the extra cookies won’t go to waste. I melted chocolate chips to mark the squares but changed my mind and added more butter, powdered sugar and milk to make it into an ultra-chocolaty butter-cream frosting. I should have done it the other way since I had to keep warming it up to make it spreadable. Oh well, this was a first try so the whole point was a learning experience. Another option would be to use Devil’s food and white/vanilla icing. Instead of frosting the cake you could dust it with cocoa or powdered sugar. If the whole cake is frosted the cookies might stand up, making it easier to play if you really wanted to. This is just an idea to get us started, so if you wanted to try something like this, too, here’s the pictures.

Edible Chess Set

Andrew & Kenzie playing edible chess

Edible Chees Set

Andrew and Kenzie playing edible chess

Posted by: briellethefirst | September 3, 2010

The Square Knot


I realized quite a while back that most of us aren’t boy scouts and DON’T know how to tie basic knots. This can be bad, especially when you’re moving and the rope holding your stuff to the top of your car comes loose, scattering your stuff across and along the freeway, causing a 30-car pileup. Your insurance company will NOT be amused. What? you didn’t have renter’s insurance!? Why not? Oh, right, you might just want to check if your renters/homeowner’s/auto insurance covers your belongings in the case of an accident while in transit and if so, what circumstances might make them NOT cover it…like piling things haphazardly on top of a car and tying bad knots.

So, in the interest of the furthering the use of traditional skills that can make even the most modern life better, I present *drum roll* The Square Knot!

Also known as the Reef Knot, it’s probably the most common and useful knot used away from the waterfront. You may have used it in a macrame project in art class, and you use a variation of it when you tie your shoes. Do your shoes come untied all the time? Then you’re doing it wrong. The bow is a variation of the square knot, but we’ll get to that next. First, the basic square knot.

Here’s what you need to remember to do it right: Right over left, left over right. As easy as that. The first half of the knot is also called the overhand knot.  Here’s what it looks like:

Tying a Basic Square knot

First, right over left...

Tying a Basic Square knot …then wrap under…
Tying a Basic Square knot

...then left over right...

Tying a Basic Square knot …then wrap under…
The Square Knot

...then pull snug.

You’ll notice that the knot lays flat, looks like two strings looped around each other and the strings come out of the loops on the same side together.the nice thing about this knot is that it stays secure but can be easily undone when you want to, especially if the like is sturdy and rather stiff. just push the ends toward the knot to loosen the loops. On yarn like this, though, it isn’t as easy to loosen that way. You can often undo it easily by pulling sharply on just one end, which re-aligns the knot into a new configuration.

Loosening a square knot.

loosened square knot, AKA the Lark's Head.

The line that’s still looped can now move more-or-less freely along the now-straight line. This is not possible with a granny knot. It is important to note that this is why the square knot is NOT a good thing to use to tie two lines together.  For that you’ll want to use a sheet bend…you know, the one where the bunny goes around the tree and into the hole, but more on that later.

Then there is the Granny Knot. This is NOT a secure knot and will NOT hold. It goes: Right over right, right over right. Like this:

The Granny Knot

First Right over left...

The Granny Knot

...then wrap under...

The Granny Knot

...then right over left again...

The Granny Knot

...then wrap under...

The Granny Knot

...then pull snug.

You’ll notice that the ends do not enter and exit from the same sides of the loops and the knot does not lay flat, hence the alternate name: the tumbling knot. It will not hold reliably and is not as easy to untie (paradoxically) when you want it to let go.

The Granny Knot

Pull sharply on one line and...

If you try to make this knot release like the square knot you’ll notice the other line ends up on both sides of the first, kind of in a figure-8 that can bite and hold the first line and not be easy to untie.

There are a couple of variations on the square knot. One is basically just an easy way to release it built-in while tying the knot. You start the same, right over left, left over right, but instead of pulling the end all the way through you leave an end out and wrap a loop through.

Quick-release square knot

Quick-release square knot, or 1/2 a bow.

This will hold well because it’s a square knot, but to make it release easily just pull the loose loop-end and it releases with no problems.

To tie a bow that lays flat, doesn’t come undone on it’s own and doesn’t knot unexpectedly, use the same formula as when you tie a square knot, but use loops.

The Square Bow

The bow.

I’ve left this loose so you can see the path the lines take. As you can see it lays flat and the lines are organized and don’t tangle.

Hope this clears up some mysteries for those of you who couldn’t figure out why your knots didn’t work sometimes and did work other times. It should help you around the house and garden. Watch for more knots later.

Posted by: briellethefirst | August 29, 2010

Making the Ultimate Stuffing


First you start by roasting a bird. Chicken, duck, turkey, goose, game hen…whatever you’ve got handy. Roast it in your usual way. If you don’t have a usual way see my post on How to Roast a Bird. Done that? OK, now make some broth. If you need to check out my post on that, too, go ahead.

Now take some of that home-made day-old bread and cut it into cubes. OK, as good as fresh, home-made bread is, you may have to save up the stubs in the freezer and thaw them when you have enough or cut them into cubes, dry them and keep them in a container in the pantry. If you don’t have time to make home-made bread a baguette of French or loaf of Italian or whatever will do. I think we’ve already bought everything we need while we made the other stuff  leading up to this, so I don’t think I’ll have to send you on another shopping expedition. Sorry. Ready?

Take a large bowl and pile in it the cubed stale bread. leave room to mix it later. Mince and add 1 medium yellow onion. Mince and add 1 or 2 celery ribs. If you don’t have fresh celery you can use celery seed. Generously grate in pepper and sprinkle on some basil, garlic powder (NOT garlic salt!) and a little paprika.

In a Pyrex measuring bowl or another bowl heat 1 1/2 to 2 c broth and melt 1 stick of butter in it. OK, margarine if you like. That’s right, a whole stick…there’s a LOT of bread here! Add a dash…a couple dashes…OK several dashes of Worcestershire sauce. Mix briefly just before pouring over the bread in the other bowl and mix well. You want the bread to be moist but not wet or gummy. When I made this batch I only had beef broth. That’s OK, I’m serving beef tonight and have enough left for French onion soup. Whatever broth you have left over just make into soup. get creative, soup is good. Or use it to make porridge or gruel. I’m sure if you make your own gruel you’ll like it. When you cook for yourself you can make it the way you like it to match whatever else you’re having for dinner or breakfast or lunch. 

Butter 1 or 2 cake pans (depending on how much you just made) and spread the stuffing in it/them. Bake at 350 degrees Fahrenheit and check every 10-15 minutes, stirring every time so you get as much chewy, almost-crunchy bits as you can. This should be done in about 20-30 minutes, but may take more or less time in your oven depending on how you like it.

Serve with roast turkey, chicken, stuffed pork chops or whatever you’re having. Who doesn’t love stuffing?

Posted by: briellethefirst | August 28, 2010

Simple Bread


Thick sliced, buttered with Honey Bear standing by

Thick sliced, buttered with Honey Bear standing by

This is the simplest bread recipe I’ve ever found. I saw it originally in Mother Earth News and played with it a bit. You will need a cast iron Dutch oven. I’ve played with loaf pans and it’s OK, but you’ll need to put a pan of warm water in to keep the humidity up in the oven for a nice crust. If you don’t have loaf pans get some. Oh, darn, another shopping expedition! You’ll also need tea towels (NOT nubbly! Smooth so the dough doesn’t stick and grab!). If you don’t have a nice linen tea towel, get one. And do you have a bowl large enough for the bread dough to rise in? Sure? If your bowl is just big enough to mix in it still needs to be big enough for the dough to rise to double in size with room at the top so it doesn’t overflow. While you’re out take a look at large, cheap metal bowls. Yes, plastic will do, but metal is more versatile. If you decide you really like baking you can eventually buy a really nice ceramic bowl to mix in. I used to have one just for bread, one for pizza dough, one for cookies and one for biscuits. All started with just the right size pile of flour in the middle. As each broke I had to reconstruct my recipes. Major pain, but at least I still have my pizza bowl. It really does feel nice to mix food in a bowl that’s a work of art, and in between uses they can sit in places of honor on shelves in the kitchen or dining room or even take turns on the living room coffee table. Now back to our recipe.

So, now you have something to bake the bread in after a few hours of letting yeast beasties party and a bowl to have the yeast party in. Start with

1 1/2 c water, mix in

1/2 tsp salt (not iodized), sprinkle on

1/4 tsp active dry yeast, let sink in for a minute or 2 then stir in

3 c flour

Cover with a damp tea towel and set aside to rise for at least 6-8 hours. Yup, that’s all it takes to make bread. Flour, water, yeast and sometimes a little salt. Amazing what nature has provided us with, taking elements that aren’t always very appetizing and making something gloriously yummy!

After waiting 6 hours or getting up and having breakfast and doing morning chores, maybe even 12 hours later, clean a spot on the table or counter (use simple water and soap, NOT anti-bacterial stuff that could kill your yeast!). Dry it off, sprinkle a good dusting of flour so it doesn’t stick and turn the dough out of the bowl onto the flour. Toss some flour on the top, dust your hands and start kneading. push in the middle with your left hand, grab the right side with your right hand, lift, fold, press with your left fist again. Repeat for a few minutes until it doesn’t stick anymore or you get tired. Don’t worry about over-kneading it, that’s really hard to do by hand and we modern people are usually too impatient/lazy/out of shape to do that.

Take another tea towel and flour 1/2 of it. Pick up the dough and form into a boule…basically turn the edges under until the top resembles a ball. Now put it on the floured 1/2 of the tea towel, dust with a bit of flour and cover with the other 1/2 of the towel. Let rise for about 2 hours or until doubled. After about an hour and 40 min, or 20 min before you’re ready to bake the bread, put the Dutch oven in the oven, turn on to 450 Fahrenheit and preheat. When it’s ready take the top off the Dutch oven and carefully pick up the towel with the bread and carefully turn it into the Dutch oven. Don’t worry if a little sticks to the towel, just tease it off but work fast…it’s HOT in the oven! If you want to spray or brush with butter, OK. Pouring a tablespoon or 2 of melted butter on will help keep the top crust soft-ish long enough to rise and as it melts around to the bottom it will make the bottom kind resemble a fried effect around the edge. You can also use bacon fat for a more rustic, out-doorsey flavour.

Bake for about 30 min or until golden brown. Check after 20 min or so. If it isn’t browning you can take the lid off. When done it will sound hollow when thumped on the bottom. Cool at least 15 min on a rack or propped up so the bottom doesn’t get soggy before cutting. Ok, cut right away and eat with butter, but you’ll find out that you really DO want to wait for the best fresh bread experience!

Alternatively you can butter 2 loaf pans and dust them with flour or corn meal. Instead of letting the dough rise on a tea towel divide the dough into 2 parts and put in the loaf pans to rise, covering with a damp tea towel. Put a pie tin full of salted water on the bottom shelf of the oven and pre-heat for 10-15 min. Let the dough rise about 2 hours or until doubled. Brush or spray with butter, slit the tops and bake for about 30 min at 450 Fahrenheit.

Experiment with different liquids and flours.  Milk, eggs, coffee, tea and beer are common. Whole wheat, rye, barley, rice, amaranth, and quinoa are fun to play with. To have enough gluten to get a good rise you’ll want to have at least 1/3 wheat flour in the mix. If you have left over mashed potatoes or other interesting mashed vegetables you can experiment by replacing one cup of flour with one cup of mashed vegis, but you’ll want to either adjust the flour or liquid too. You can also add a spoonful of honey, sugar, molasses or other sweet stuff to feed the yeast, but watch it…it may rise faster. A little melted butter or olive oil can help make the dough a little silkier. If you want to make a savory herbed bread try a tsp or so each of rosemary, oregano, basil, pepper or anything you fancy. If you want to try a sweet bread cinnamon, allspice, cloves and nutmeg are fun to play with along with the extra sweetener. Yummy! And easy bread for dinner!

The morning after, punched down

The morning after, punched down

Dropping onto lightly floured table

Dropping onto lightly floured table

Push...

Push…

Fold...repeat...

Fold…repeat…

Form into a ball

Form into a ball

Set on a lightly floured tea towell, cover

Set on a lightly floured tea towel, cover

Flop into the Dutch Oven

Flop into the Dutch Oven

Clost it up & bake for 30 min.

Close it up and bake for 30 min.

Fresh from the oven

Fresh from the oven. It’s hard to resist cutting right into it and smothering it with butter, jam, honey or whatever but resist you should. Besides being owie hot you’ll mess up the structure of the bread if you cut in too soon. Give it a few minutes, maybe 15 or so…while you set the table for whatever meal you made it for.

Posted by: briellethefirst | August 26, 2010

Making Broth


If you have one you can pull out a pot big enough to hold the carcass. Don’t have one? get shopping! I’m sure many of you will be thrilled to have another excuse…some of us, though, just want to get it over with. Make a list. Do you have a spoon long enough to stir but that still fits in your dishwasher? get the ruler. Do you have a sieve? And a big bowl to set it in? Do you want metal, ceramic or enamel? Think about wight, comfort and what fits in your dishwasher. When you’re shopping for anything you plan on using try it on for size. That’s right, pick it up, think about how heavy it is and how heavy it’ll be when it’s full. How comfortable are the handles? Are they easy to grip? If they aren’t pleasant to work with you won’t want to use them. You may have to compromise when choosing based on price and comfort, but you’ll probably be surprised at how nice some of the moderately priced options are. I like enamel and stainless steel, but I’ve had mine since high school. I figured that I’d eventually move out so I saved grocery stamps for their special offers on dinnerware and cookware. My first set of stemware was from a bank when I opened my first checking account, but I digress…

You might have some luck at second-hand or thrift stores. I’ve found amazing things at Goodwill, Salvation Army and other shops. Grocery stores often have pots in their aisles that display kitchen equipment or canning supplies. Try the big box stores, too…you know, the ones we love to hate. If all else fails, go to the mall and hit one of their anchor store’s kitchen sections or a gourmet shop…unless you are of the socio-economic level that enabled you to choose that option first. If you try this recipe, decide never to do this again and donate the pot to your local thrift store the rest of us thank you…and don’t forget to keep the receipt for your taxes.

You’ll most likely be doing this the day or two after you make a roast, since you won’t want to be up all night making broth for later. Just carve off all the meat that’s still left on the bones and divvy it up into containers for future use. Don’t forget to put the carcass in the fridge so (1) it doesn’t go bad and (2) the critters don’t get it.

Now that you have the pot,  saute a chopped onion in the bottom with maybe some garlic. When they’re as done as you want add some wine (white won’t add colour but red is OK) to de-glaze any fond from the bottom of the pan. De-glaze means making any brown stuff (fond) sticking to the bottom of the pan come off and mix with the liquid. This is like magic and the flavour is incomparable. Don’t loose this wonderful stuff!

IMG_20191229_135553
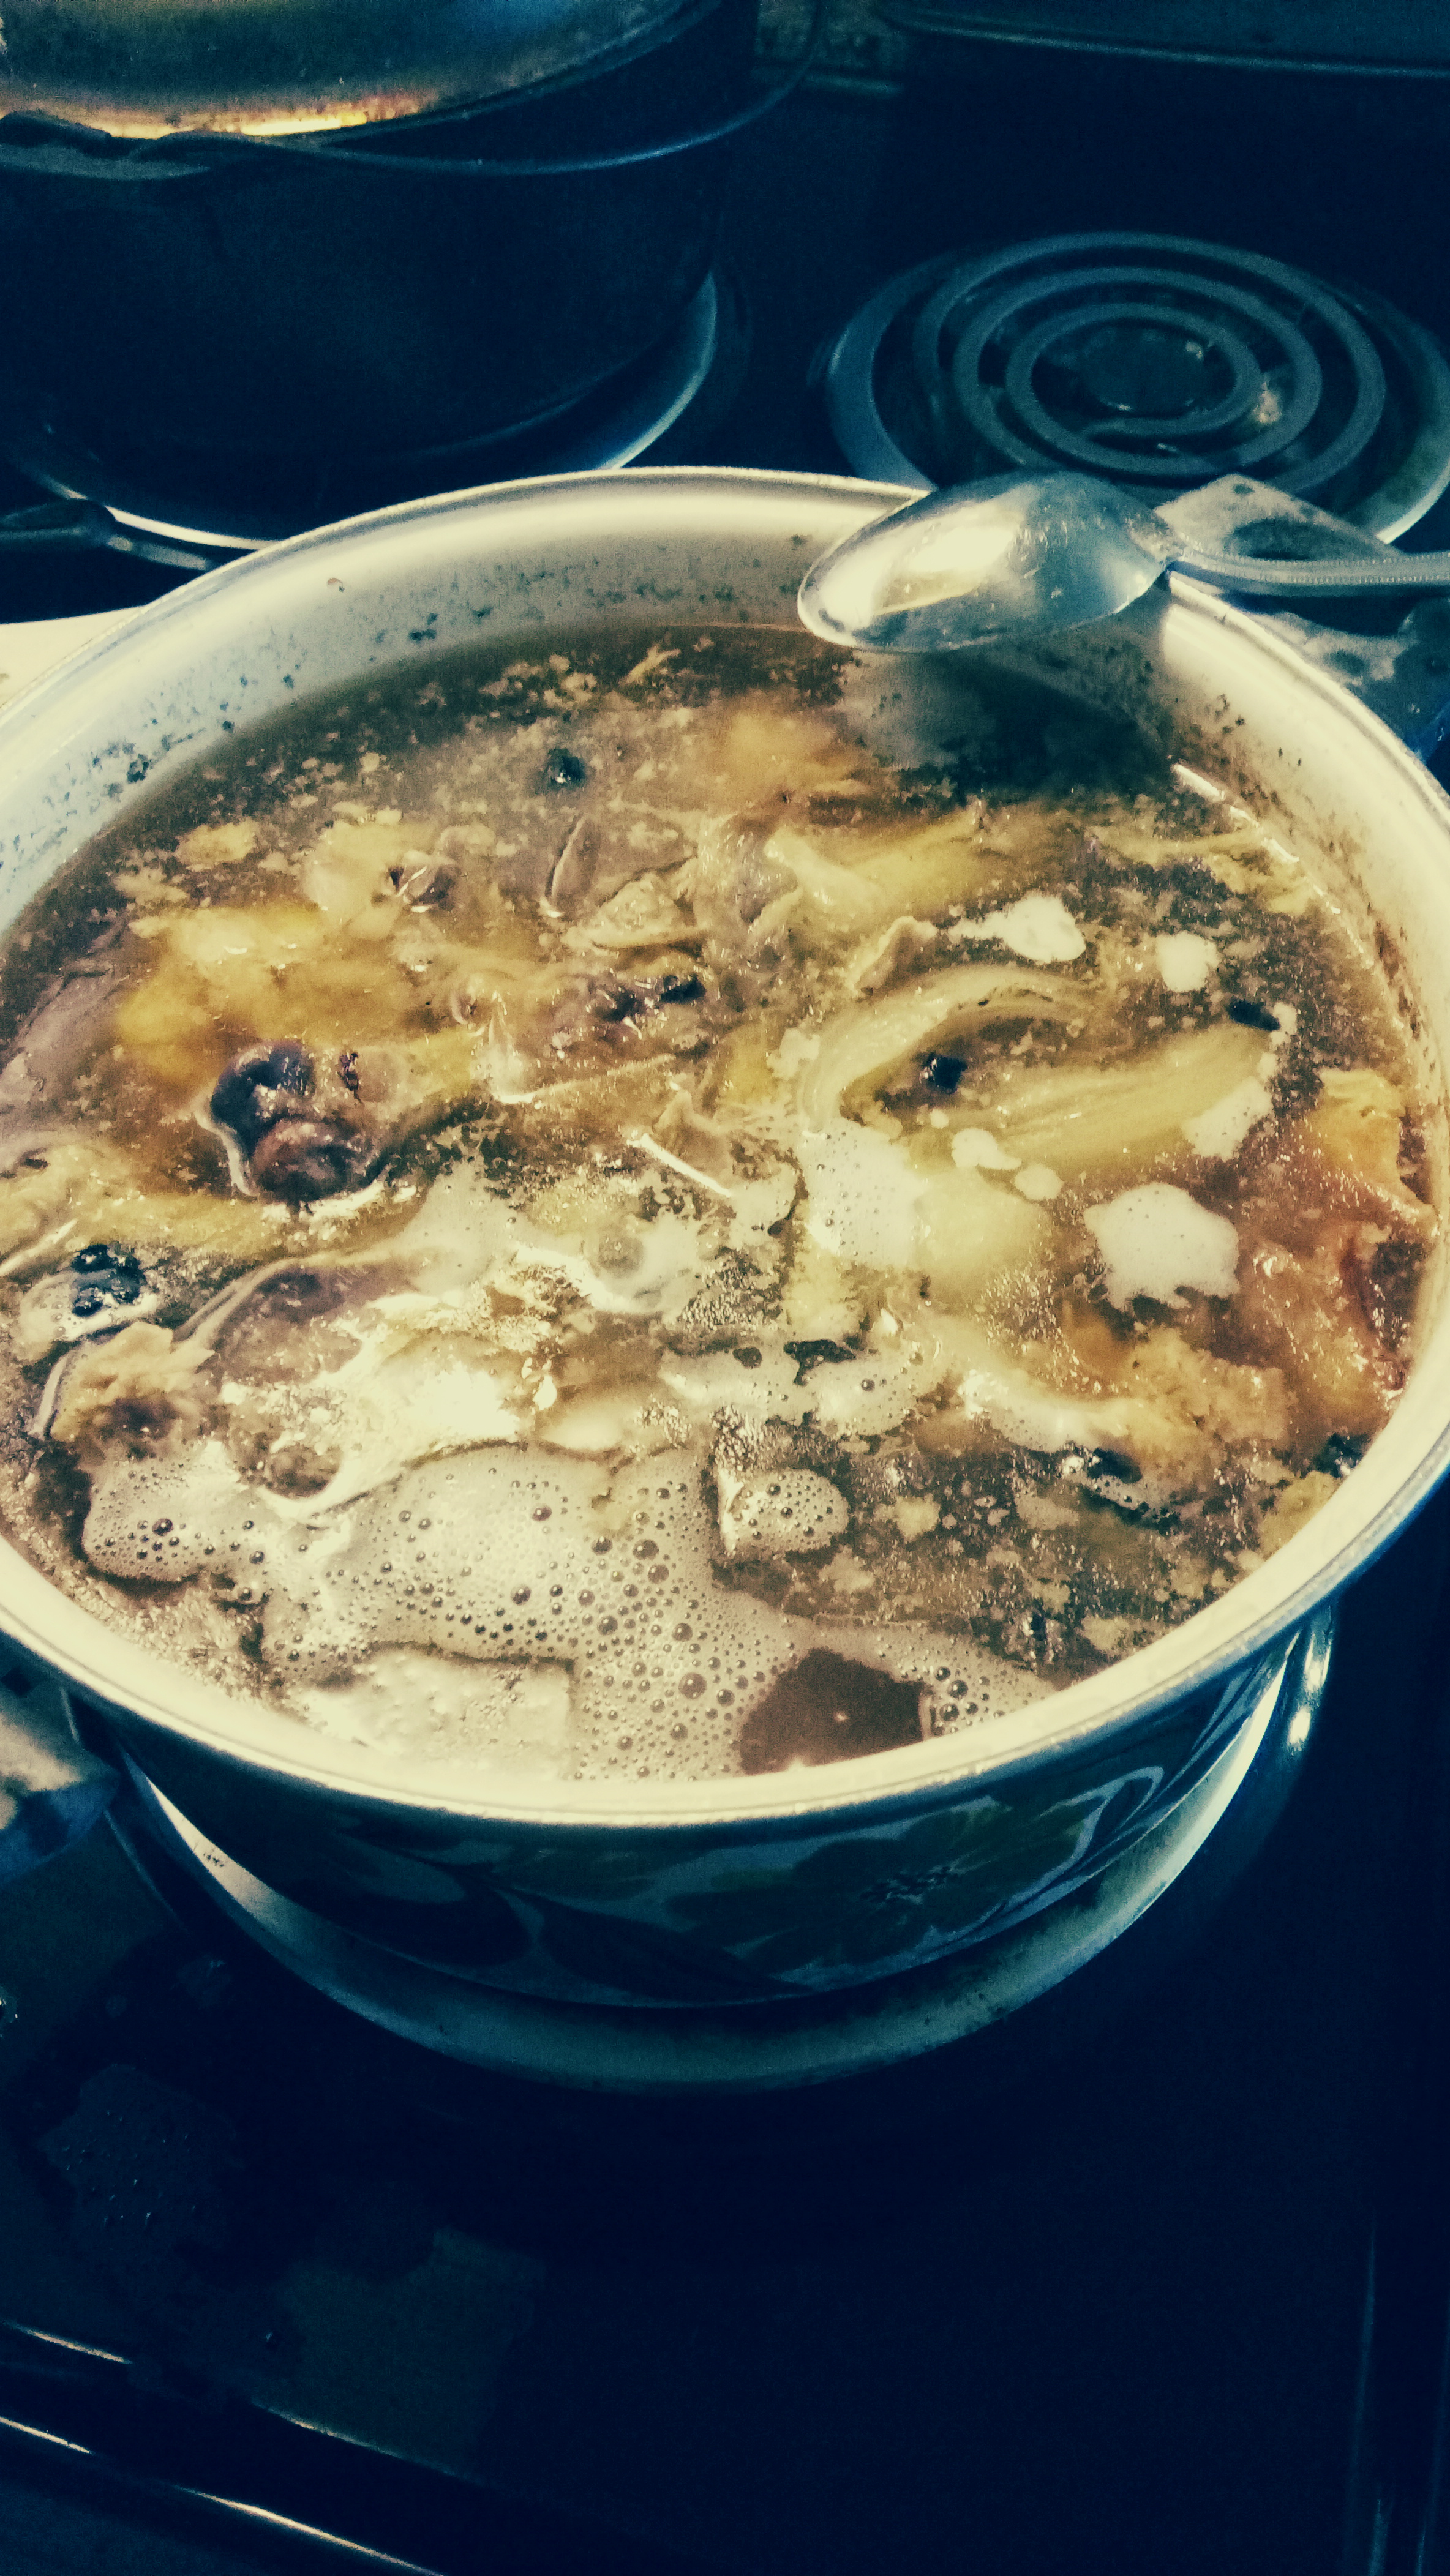
As soon as this is done add some water, put the bones in the pot and cover with water. Or just skip the sauteing and start here. Add celery and carrots for flavour if you like. Simmer for a few hours. How do you know when it’s done? When the cartilage dissolves.

When it’s done, after a few hours or when you get tired of waiting, put the colander in a bowl and strain the broth.

IMG_20191229_144022
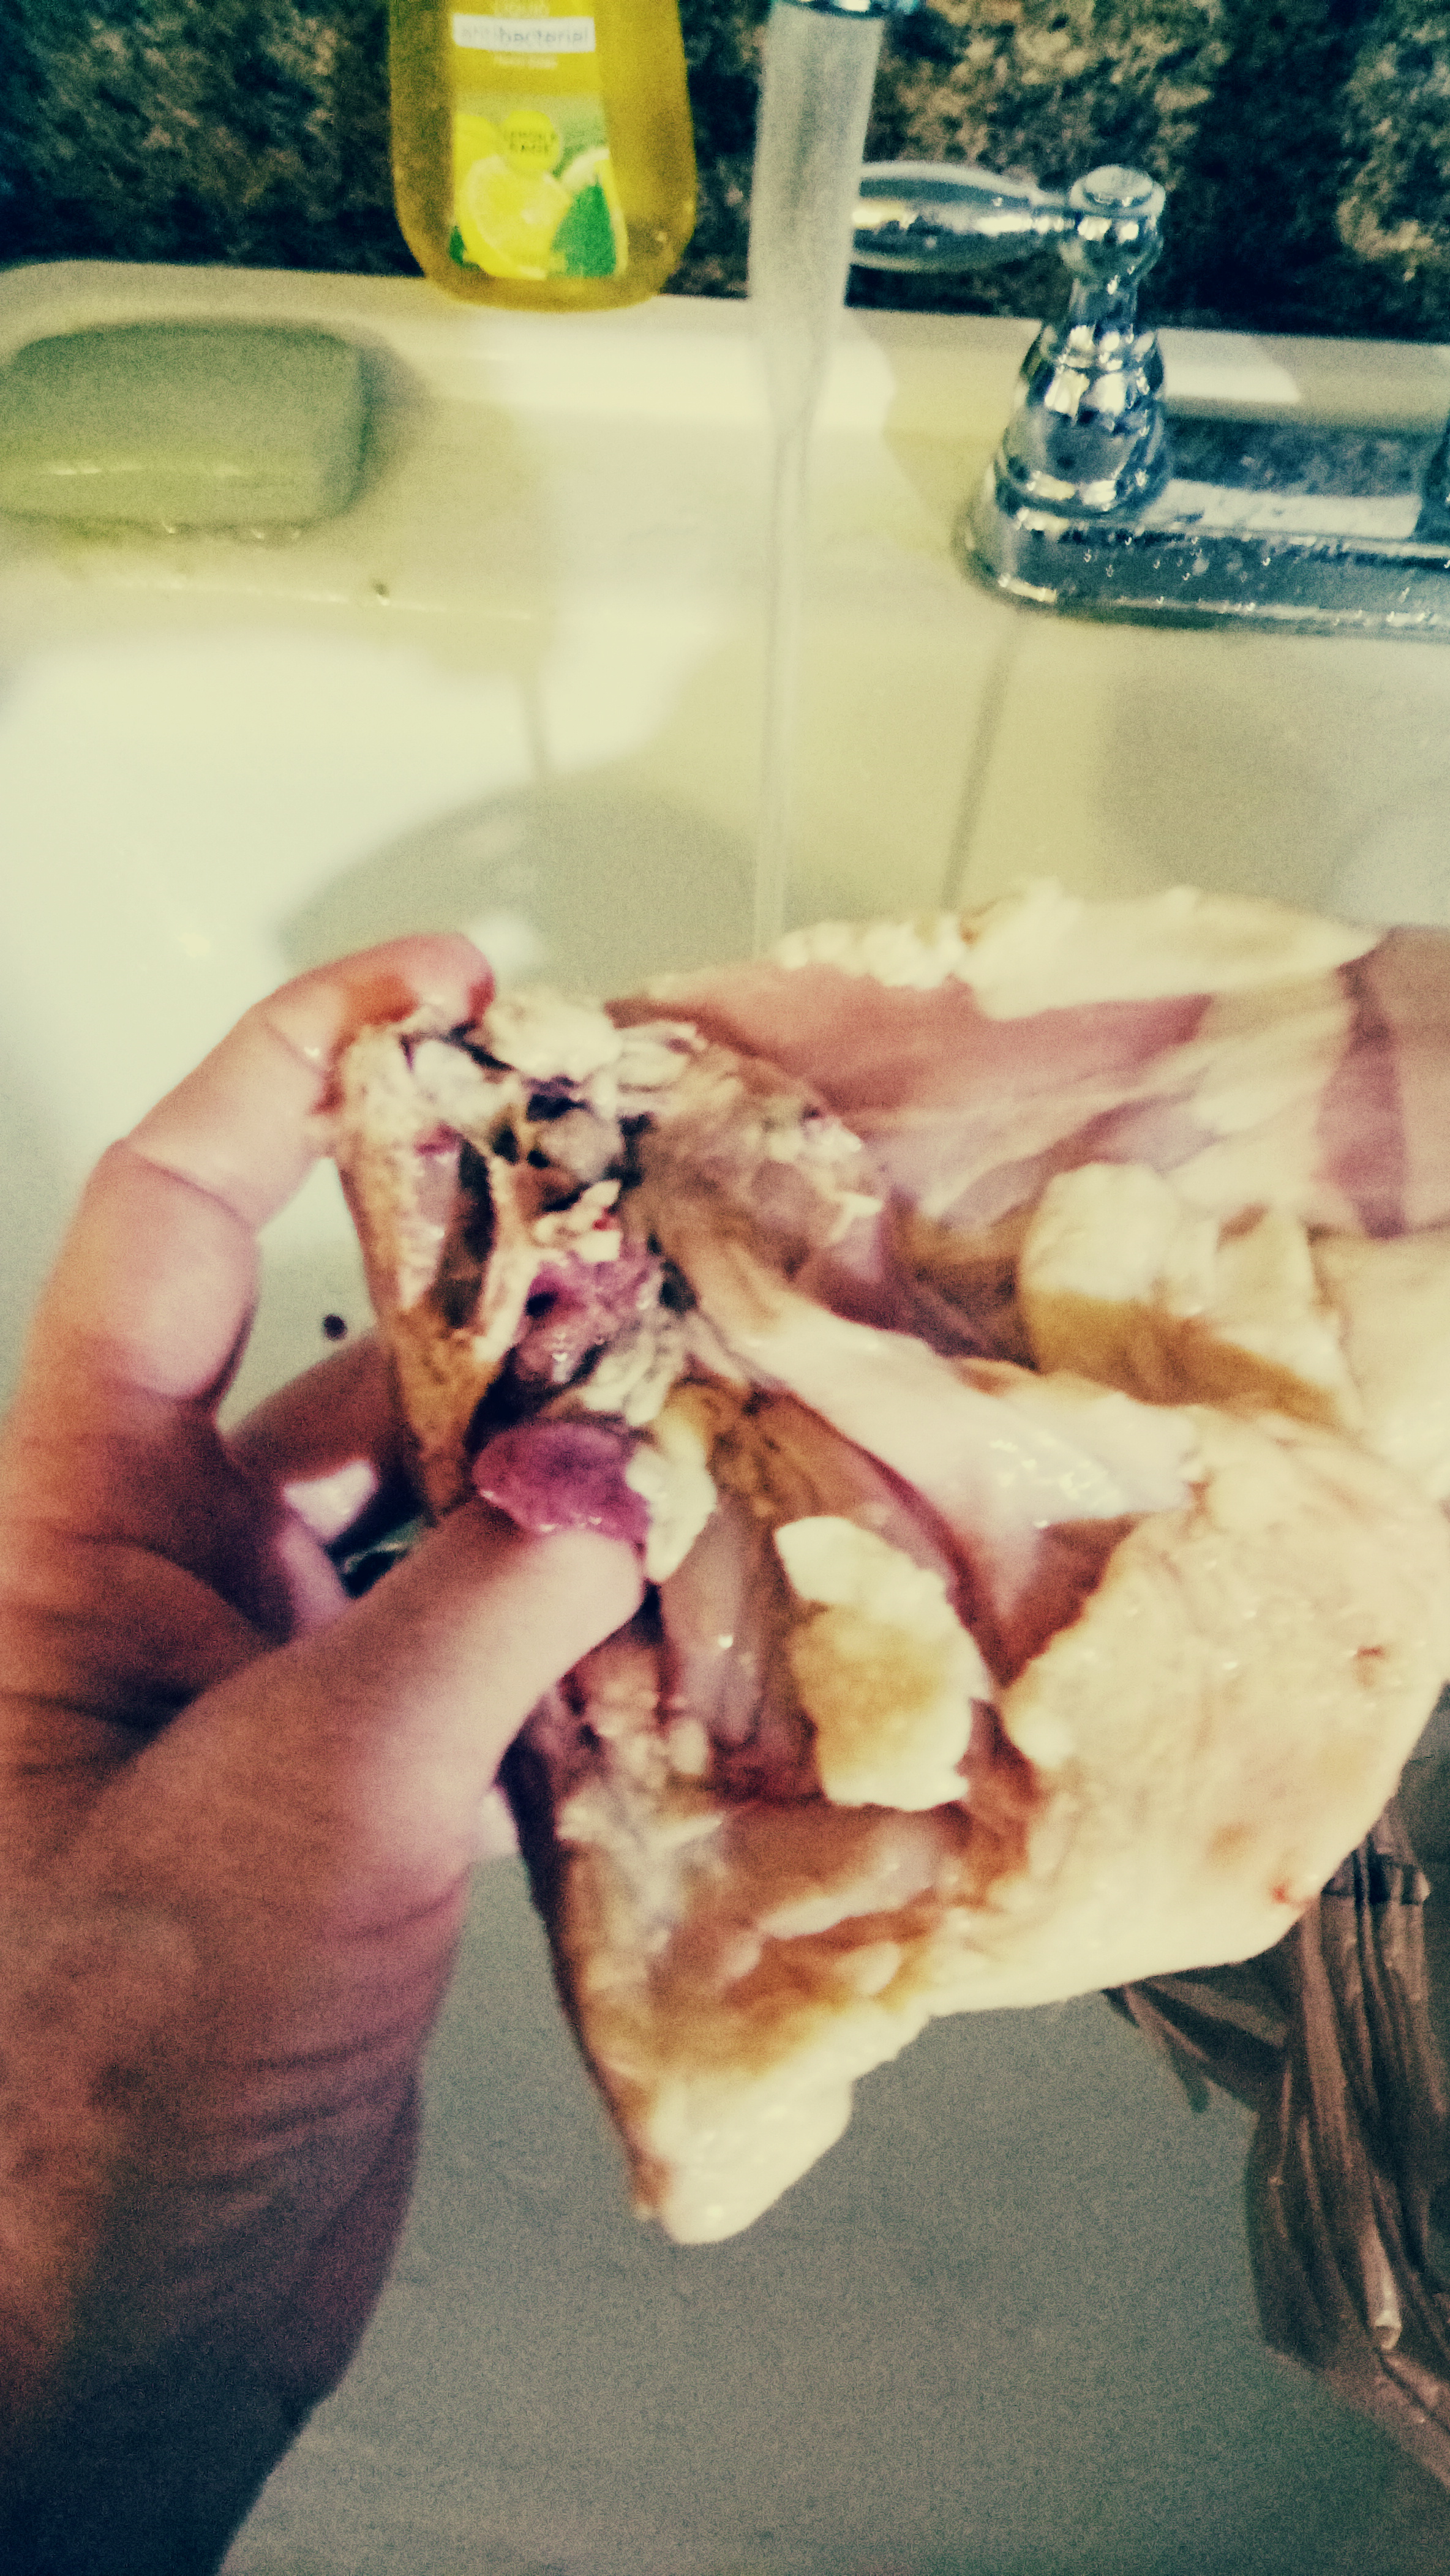
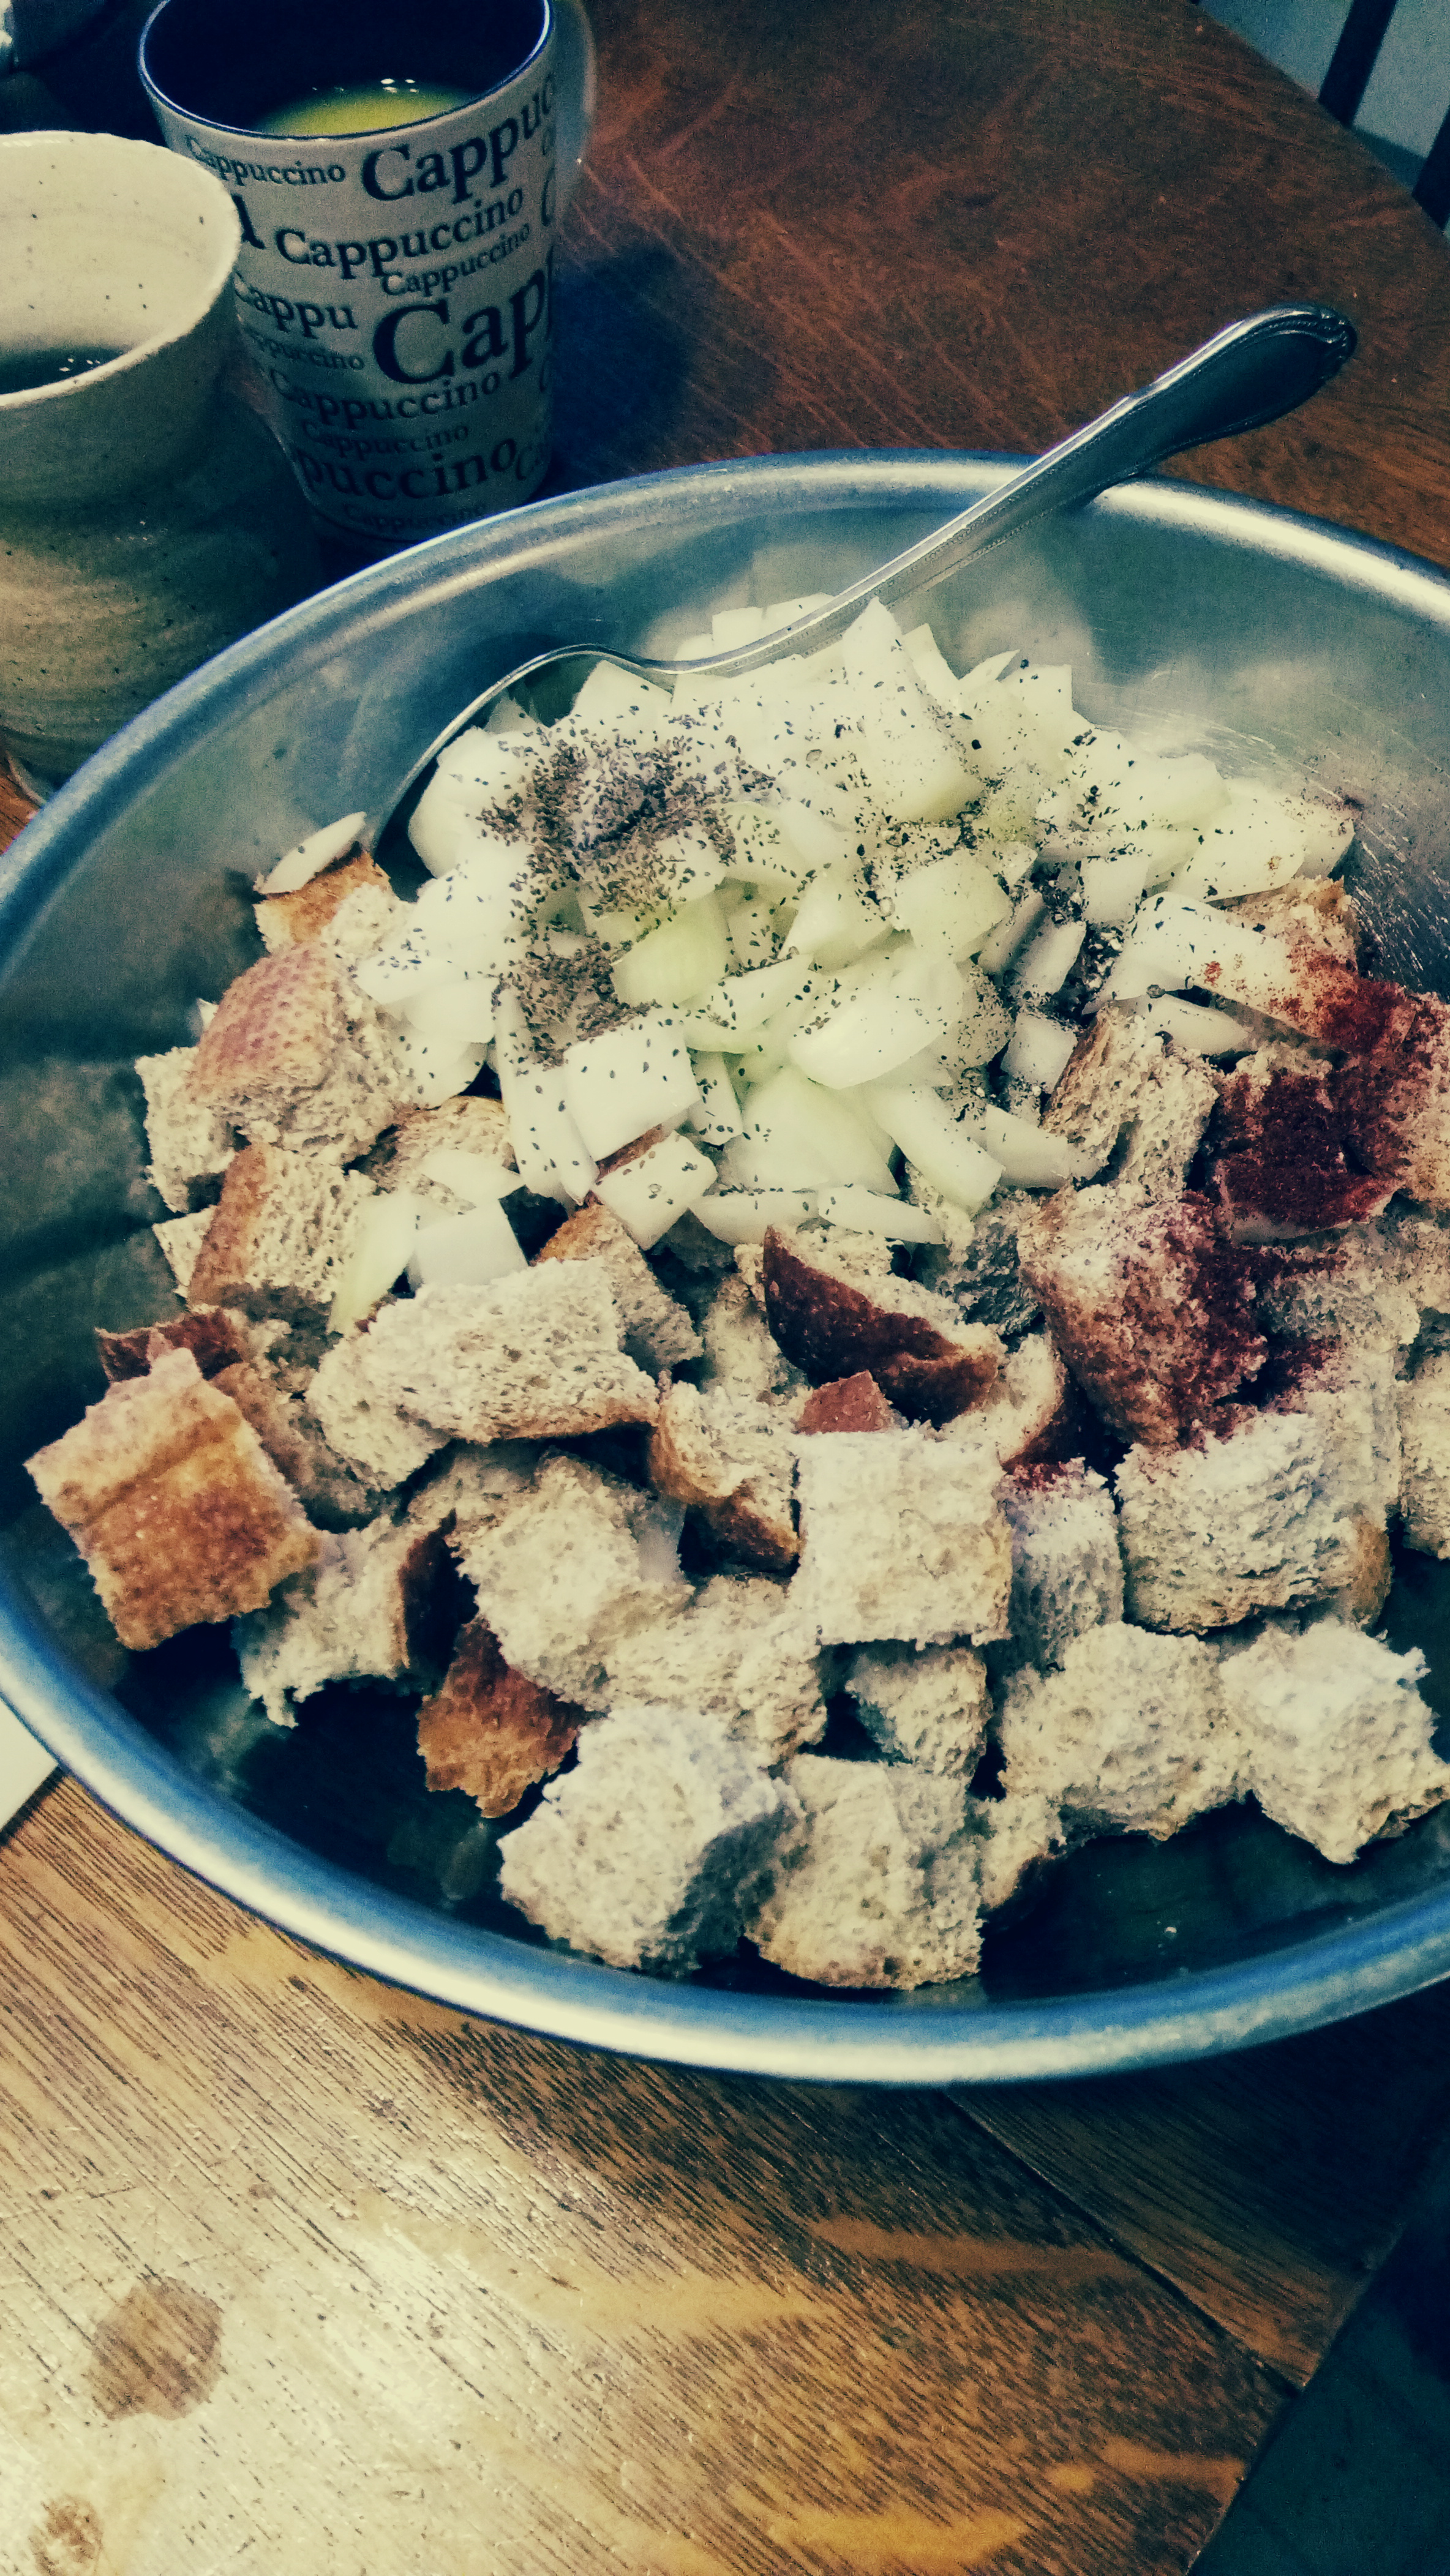
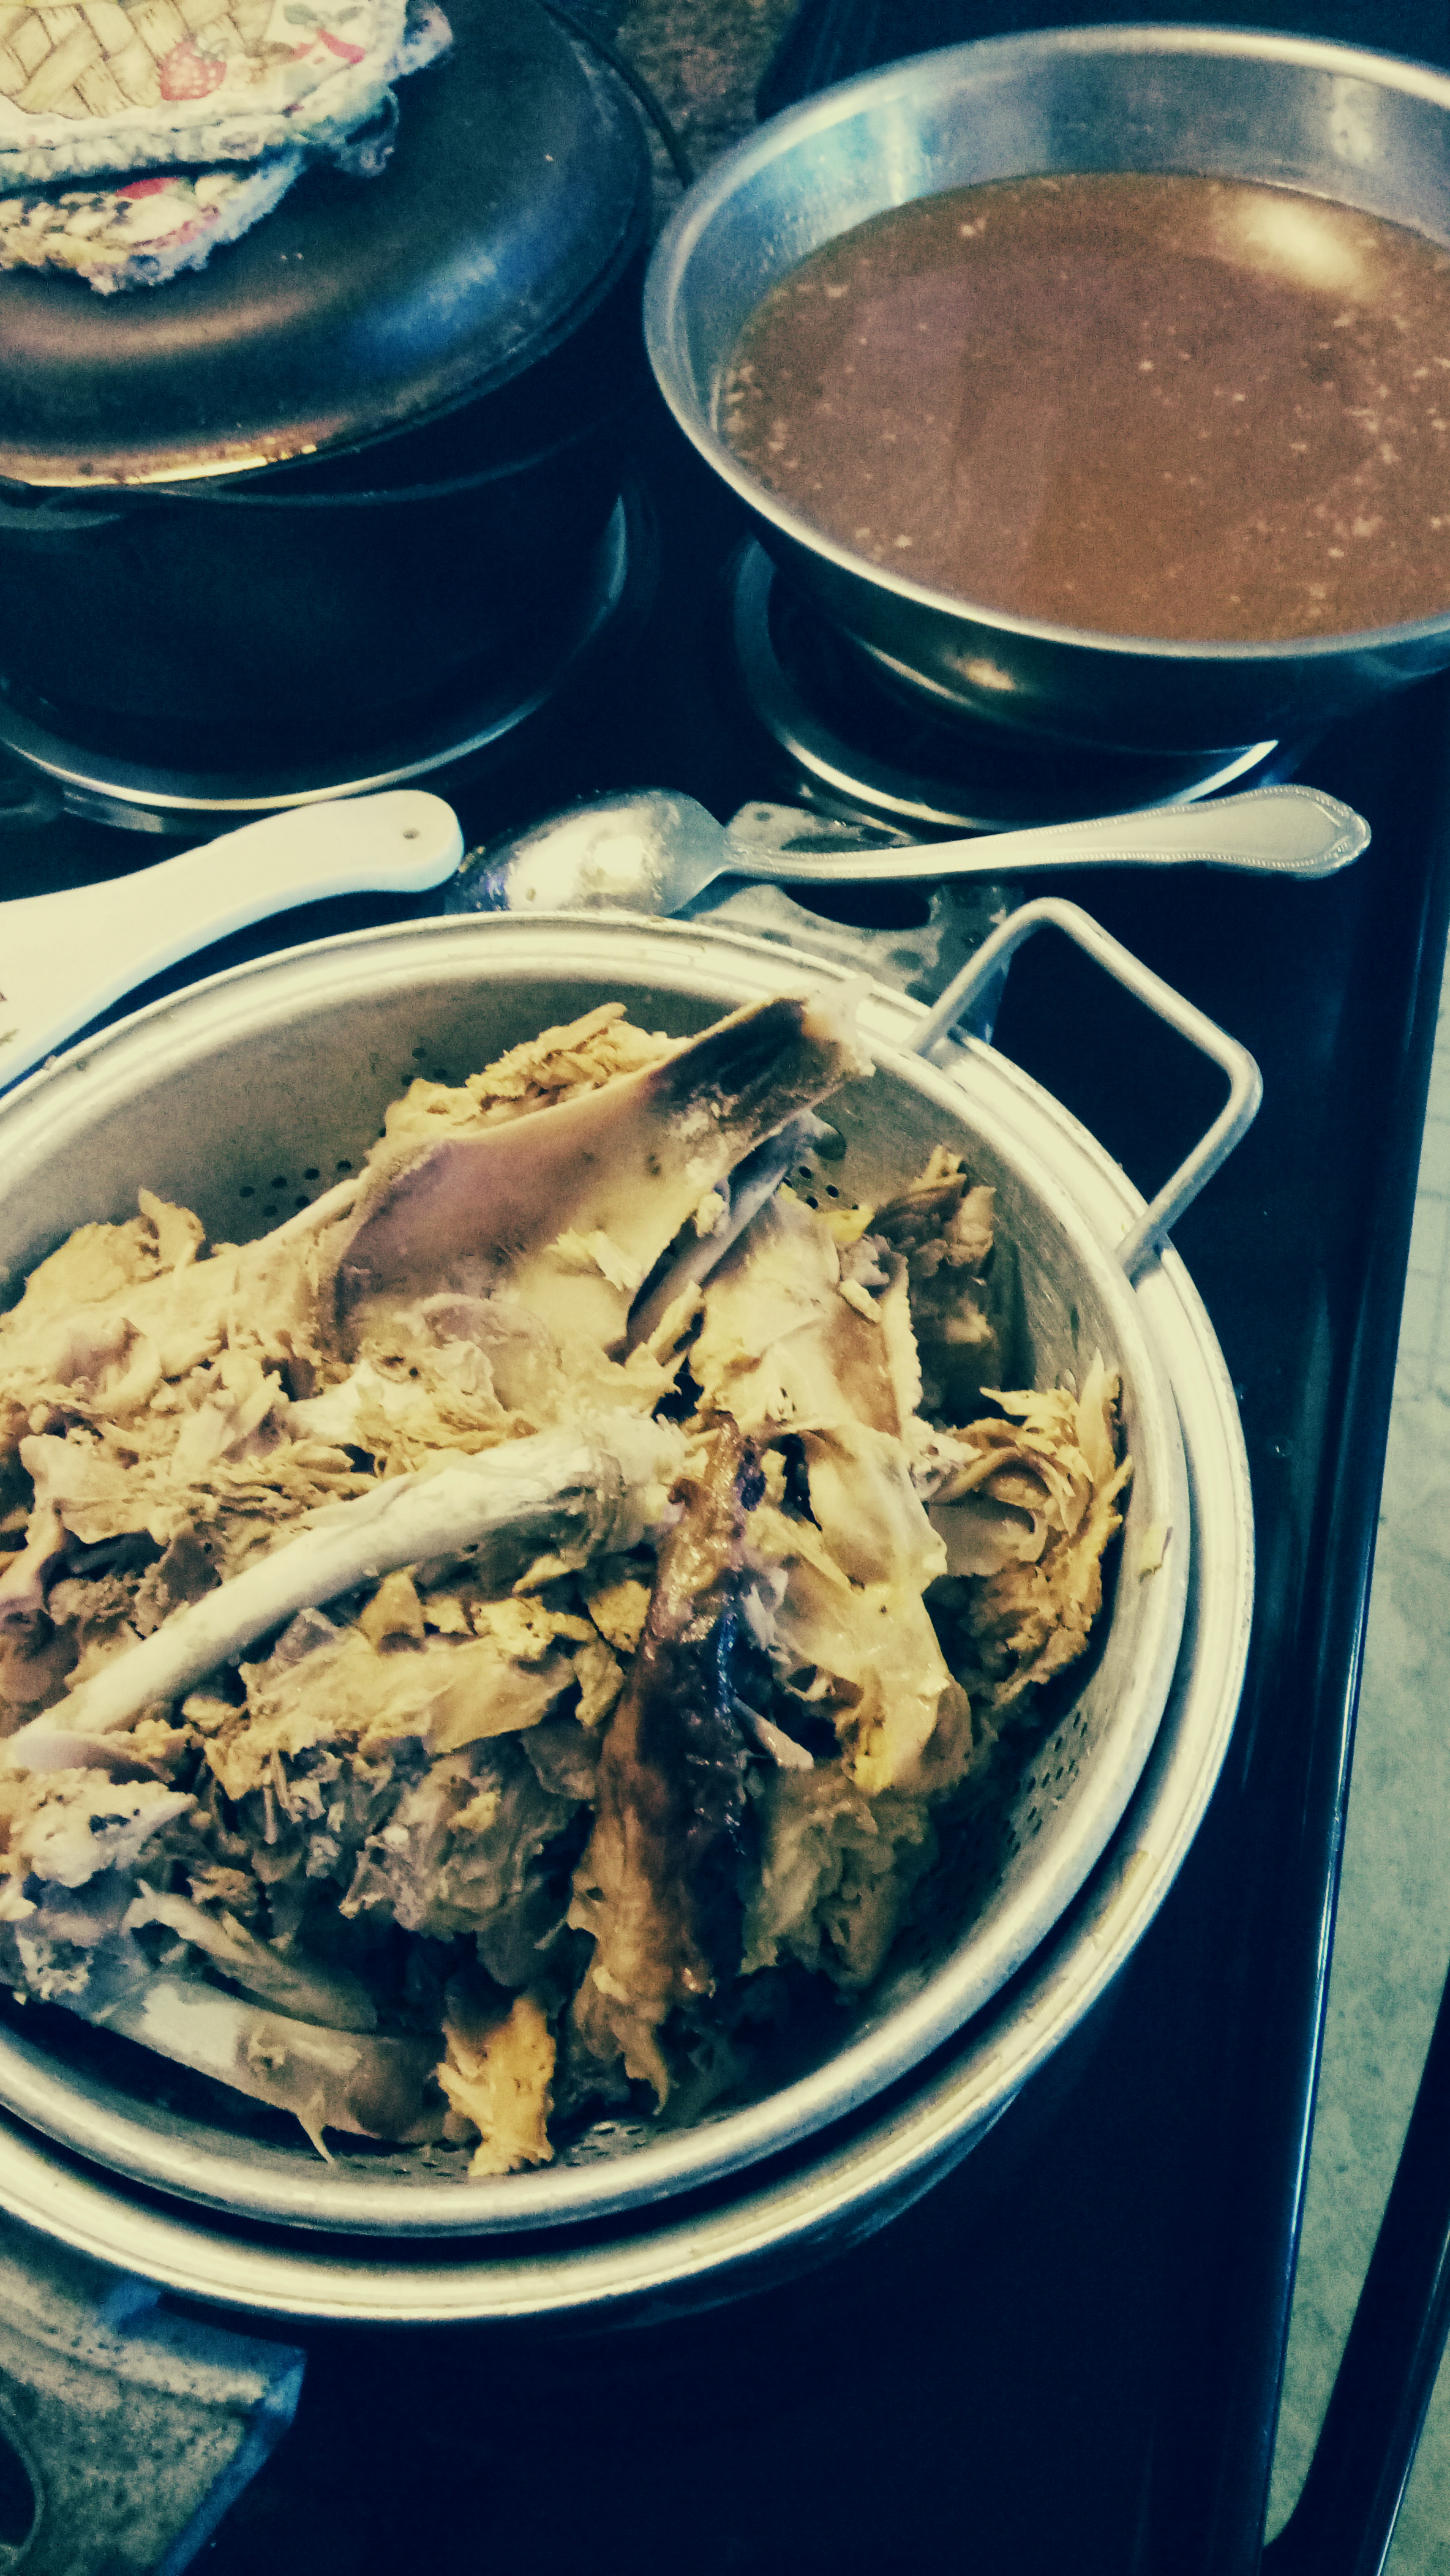
Move the colander from the bowl to a plate or back over the pot and let it cool enough to handle. Once it’s cool you can pull all the meat off to use as special treats for the critters. Make sure all the bones are out! If you’re an artist you might want to clean up some of the more interesting bones to use in art or as tools. Otherwise, toss them.

IMG_20191229_145704Save the broth in containers in the freezer until you’re ready to make stuffings, stews or soups.

Posted by: briellethefirst | August 25, 2010

How to Roast a Bird


If you don’t have a usual way to roast a bird, here’s how I do it: I’ll use a turkey, but you can use any bird you like, just adjust the amount of seasoning and other stuff…So, take 1 turkey, remove the giblets and neck (we’ll get to those in a minute) and rinse the turkey under the tap. You did clean the sink before you started, didn’t you? Anyway, put the turkey in a roasting pan and wash your hands. Of course YOU washed your hands, but we both watch the news and with the growing incidence of food poisoning that could and should be avoided with simple safe-food-handling practices we’ll just mention it for those who might forget.

Now a brief digression to address the giblets. What are giblets? They’re those things, usually in a bag, that you just pulled out of one end of your bird. Oh, you know THAT, but WHAT are THEY? Well, they’re the innards of the bird, not necessarily THIS bird, but a set of guts that this bird would have been using while s/he was walking around, the heart/lungs/liver/kidneys…stuff s/he doesn’t need anymore but lots of people think make great stuffing ingredients. if you want to add them to your stuffing…OK…but I give them to my pets as a treat. I also never feed my dogs/cats/critters raw meat. Put the giblets in a pan, add some water or wine to the bottom and roast with the bird till done. Shouldn’t take long, maybe 20 minutes or so. They’re small. Let cool & add to the dog’s dinner so they can celebrate whatever holiday too.

And another digression…the roaster…do you have one? Is it big enough for the bird you want to roast? When cooking turkey I prefer to roast birds that are 12 lbs or smaller. They cook faster and more evenly, stay juicier and are easier to handle. You don’t need a monster roaster, either, and the more reasonably-sized roasting pans fit in the dishwasher better. You may, however, need 2 roasters for holiday cooking for the family. Mine are both enamel. Love them. When shopping for one pick them up. How comfortable are the handles? Will they fit your hand while you have oven mits on? If it’s heavy to begin with it’ll be even heavier with a 10 lb bird in it. Look at your cabinet space and your dishwasher and then go shopping. Thrift stores, grocery stores, evil big-box stores and gourmet shops in malls are all options. Have fun.

So, now back to the fowl roasting. You can simply salt and pepper inside & out & roast at 350 deg. Fahrenheit for 20 min per pound, unstuffed except for an onion. How heavy was that bird again? OOPS! Go fish the packaging out of the trash, find the weight and wash your hands again. (Of COURSE you do, but for those who forget…) If you want more flavour take a small bowl and mix together 1/4 to 1/2 tsp each of your favourite herbs and spices. Garlic, basil, paprika, celery seed…whatever combination you want. Mix it then take 1/2 of it in one dry hand while holding the big end of the bird open with the other hand. Set your hand with the spices into the opening and blow it into the bird. It might take some practice but it should distribute fairly evenly. You can take a little bit more mix and do the same thing to the small end of the bird. Take what’s left and mix with whatever liquid you want to baste the bird with. Honey/wine is good, or fruit juice, beer, butter…experiment. If you like you can stud the onion with cloves or other woody spices like cinnamon or star anise if you’re doing an eastern flavour. Now add some liquid to the bottom of the pan. 1/4 to 1/2 inch is fine, more than a splash, less than a dousing. Wine or beer is good, or whatever you’re using to baste the bird with. If you’re going bare-basic-simple water is fine and once in a while we should all go with simple to remember the original, basic flavours of our ingredients.

Tip: If the bird starts to brown more than you like before it’s quite done, ‘tent’ it with a paper grocery bag or aluminum foil, or you can tent it for the 1st 1/2 of baking, experiment.

Once the bird is done let it rest for at least 10 or 20 minutes before carving. While you’re waiting I’m sure you can think of something to do…set the table, put the pie in the oven, clean up, make sure the kids wash their hands, dish out the rest of dinner…ready? Ok, so how to carve a turkey (or any bird)? Well, there are several explanations in books and I’m sure you can find one with a quick internet search. I don’t think there’s any graceful way to do it. You may want to cook 2 birds, carve 1, and have the 2nd for the ceremonial carving of the turkey breast at the table then trade out the pretty bird for the carved one for quick serving. In the kitchen you can use your hands to pull/cut the legs off, then cut slices from the breast then take off the wings and strip the rest of the meat.

Once you have the meat on a platter and the bones more or less bare it’s time to make broth. If you’ve never done this, see my post on How to Make Broth. Once you have the broth started you can sort the meat into slices for sandwiches and chunks for soups, stews, enchiladas and all sorts of other stuff. Divide into amounts appropriate for individual cooking sessions so you don’t have to worry about thawing out too much and wasting some or having to cook more than you intended. Have fun experimenting.

« Newer Posts - Older Posts »

Categories