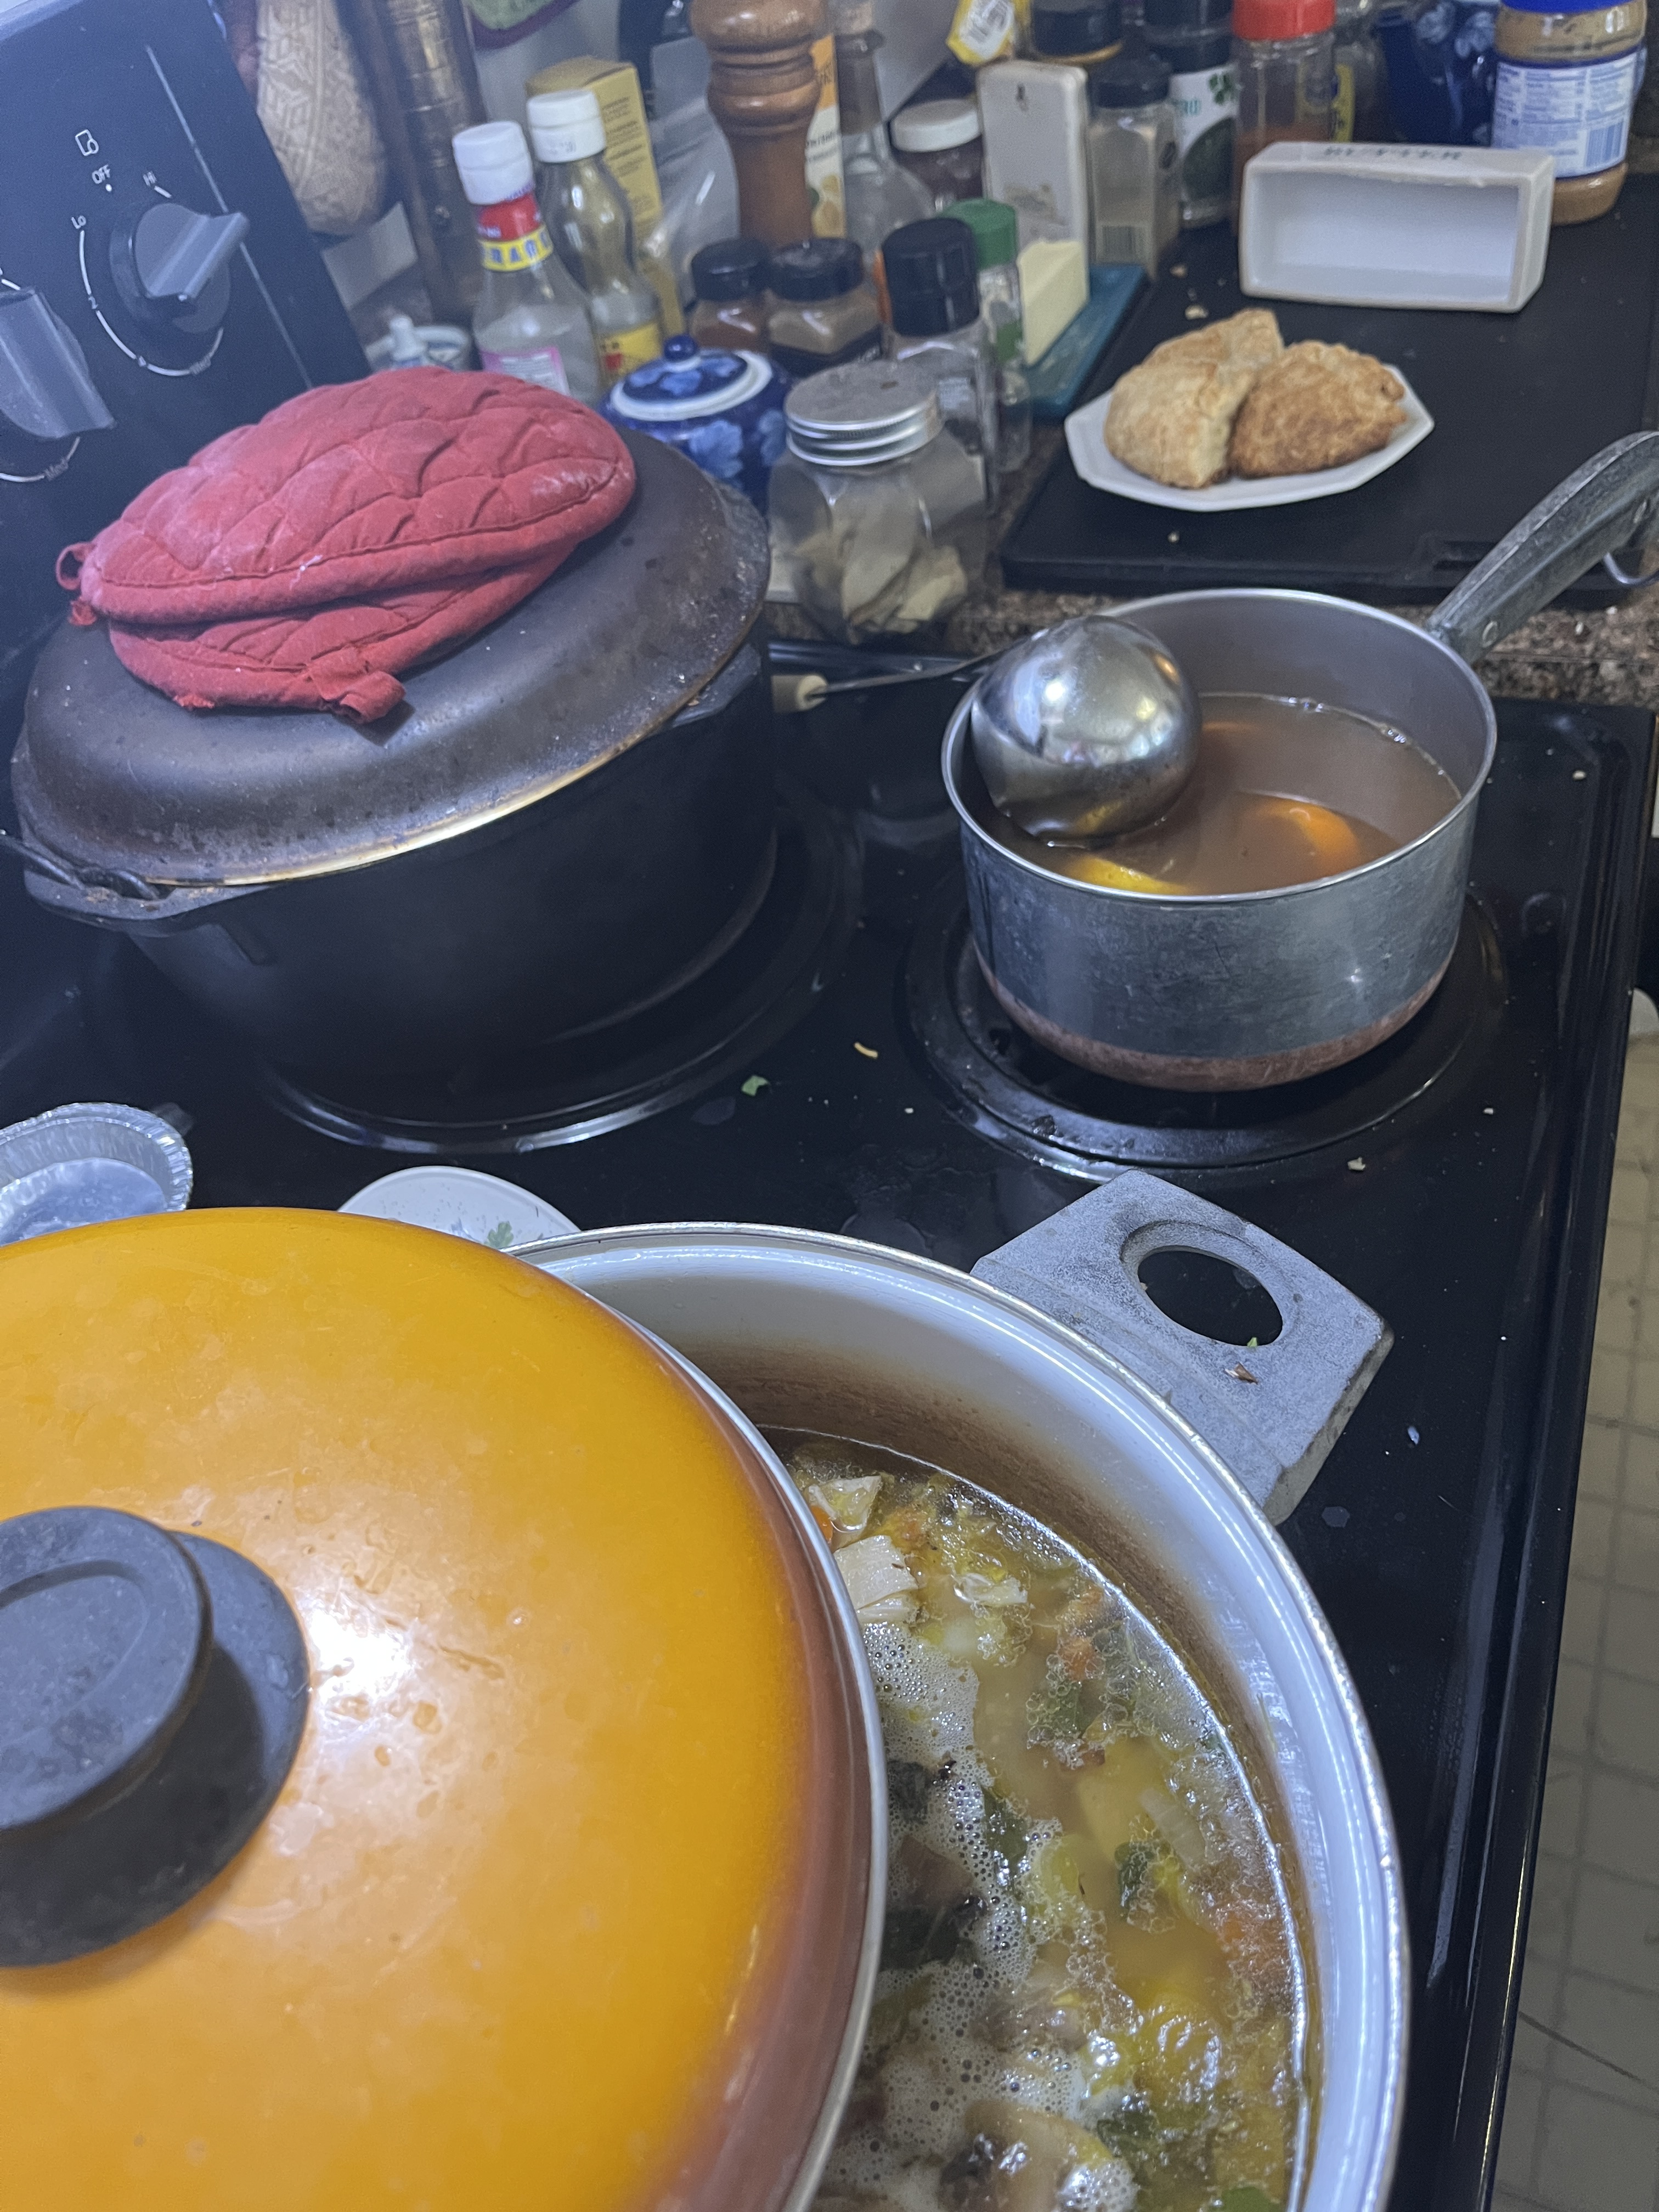
This year for Thanksgiving we’re sleeping in, not feasting and just snacking though the day. The menue plan so far is to start with scones for breakfast. As soon as that’s done I’ll throw together a big pot of chicken soup on one burner, a pot of mulled cider on another burner and put a pan of stuffing in the oven because it’s Thanksgiving and you just have to have stuffing. After that I’ll lay out a cheese board with summer sausage and crackers, put some cauliflower and broccoli next to them in a bowl so we can nom on those with ranch dip, make onion dip for ripply potato chips and bean dip for tortilla chips and finally have flatbread for humus too. I figure an hour’s work and I’ll have the day free to write, relax and watch Northern Exposure to my heart’s content. No reason for anyone to go hungry, we all serve ourselves as we please and no one works too hard cooking a feast. Scones already has their own post as does stuffing, but I haven’t done a post on chicken soup yet so here goes.
Ingredients:
Leftover chicken, taken from the carcass of a rotisserie chicken or the leftovers form the one you roasted last weekend while you warmed up the house cooking and baking.
Chicken stock, made from the last chicken you roasted or the last rotisserie chicken you bought.
Onions and garlic if you like, and you will like. It just isn’t right without onions.
Celery
Potatoes
Carrots
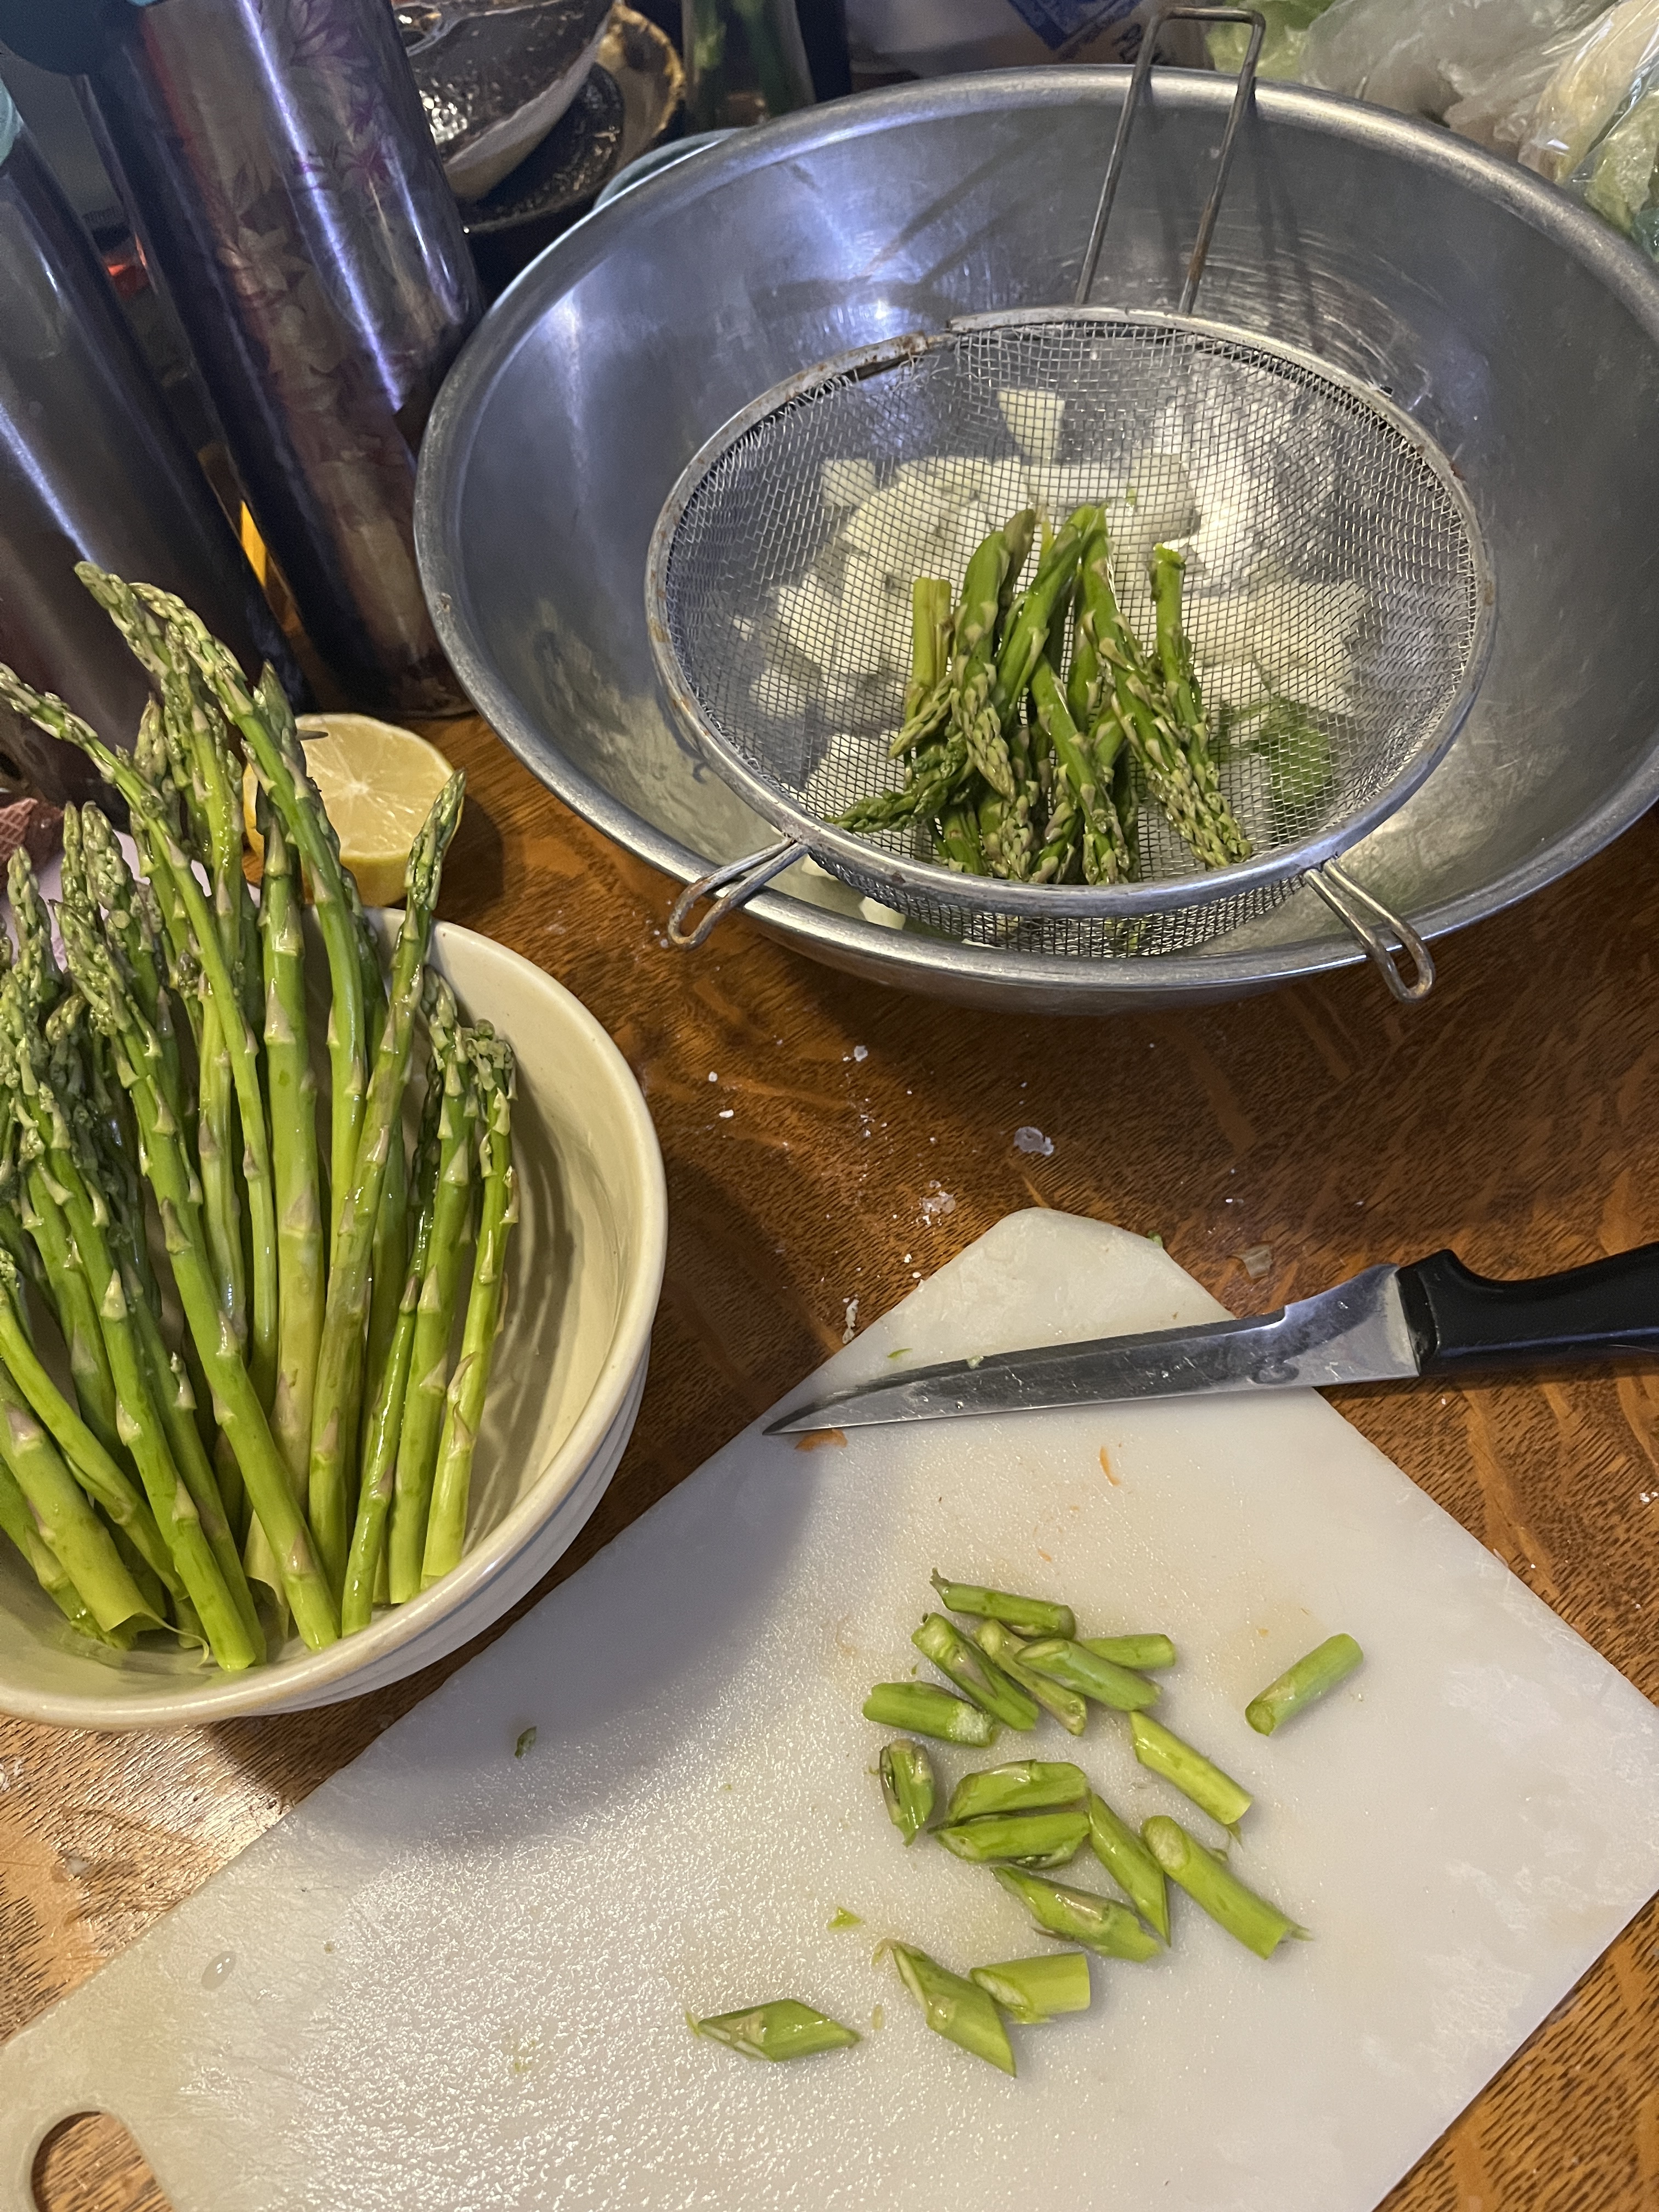
Any other vegetables you have around that you want to throw in. Peas are classic. I’ll be adding some broccoli and cauliflower because I have them and maybe some bok choi because it’s growing pretty fast this year. I’ll also add some mushrooms because I have some I didn’t use last night and I need to cook them in something soon. Even asparagus. Chop the stems and save the tops for the crudite platter.
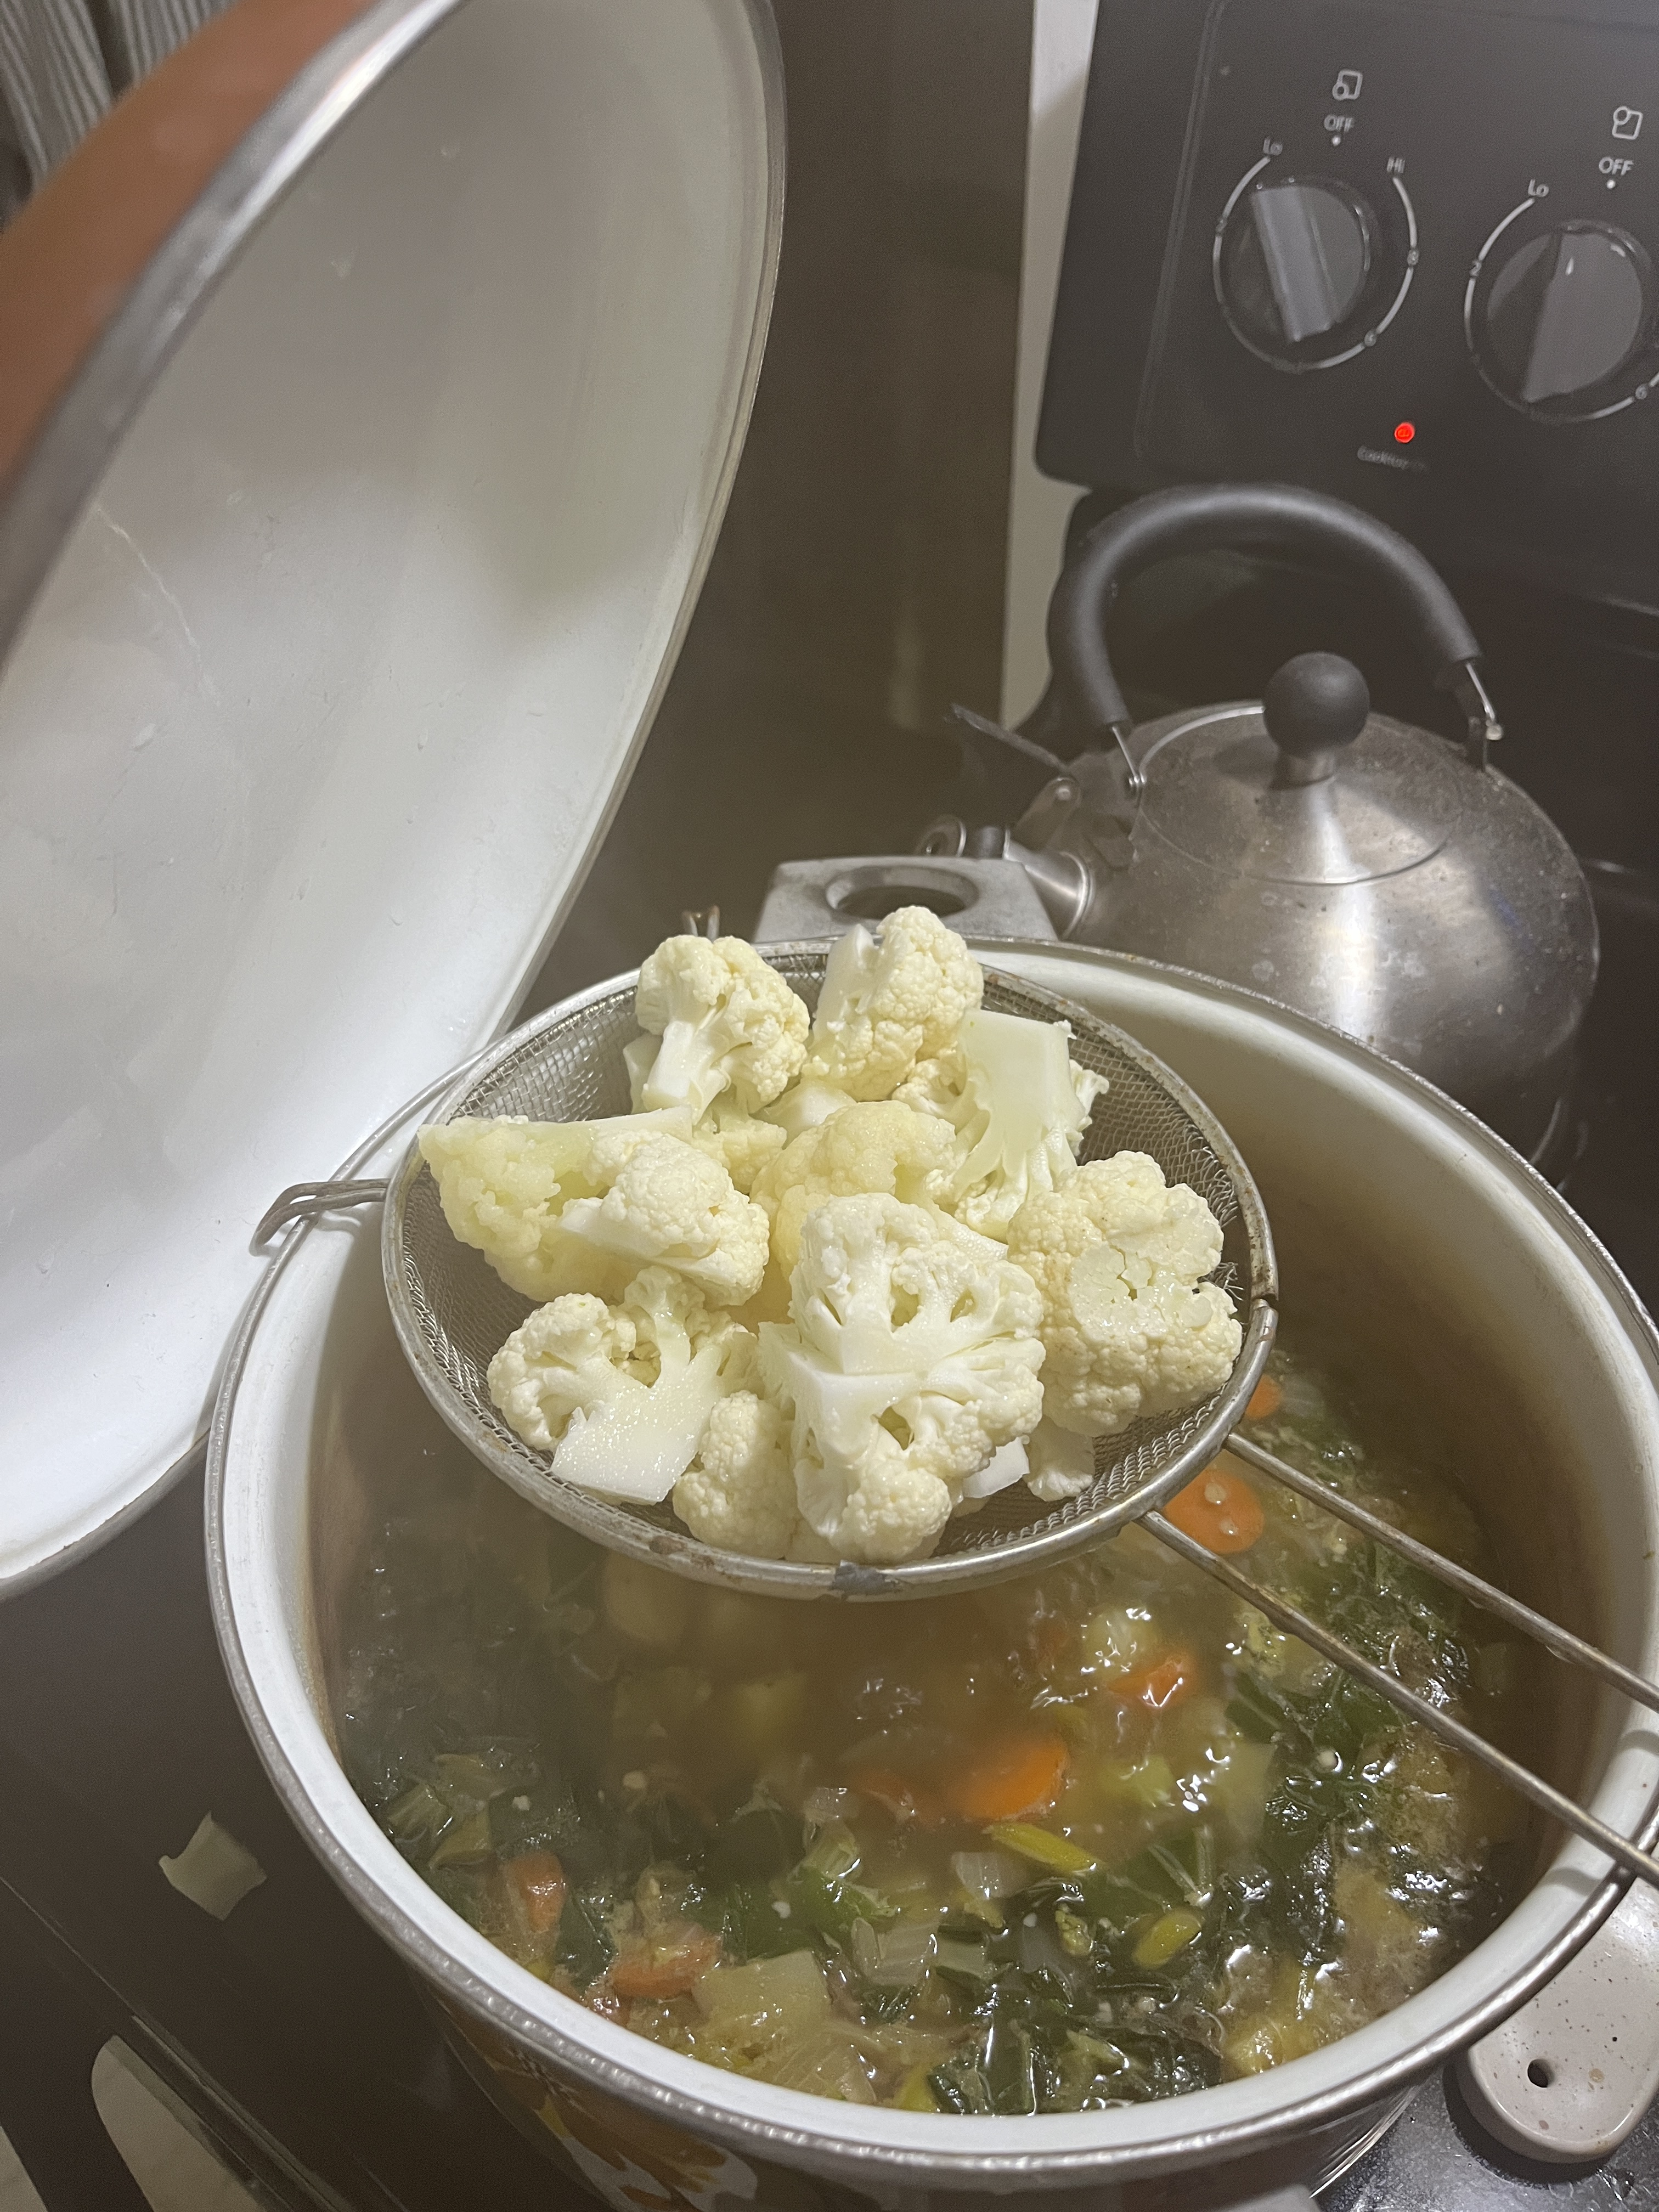
You can steam them and other things like broccoili or cauliflower in a strainer above the soup under the lid.
You can leave it at that or you can add noodles or rice to make it interesting. Up to you.
So, Chop onions of your choice (I use yellow but you can use red, white, leeks or whatever you have) and saute in the soup pot until they’re clear or even slightly caramelized. Add garlic and celery when the onions are almost ready. Garlic burns easily and turns bitter, so you don’t wan to over-do it.
Add chicken stock and deglaze the pan. If you want to deglaze the pan with white wine, that adds wonderful flavour, too.
Chop and add the carrots. They take the longest to cook. Cut them up as big or small as you like, but remember that smaller pieces cook faster and fit better on a spoon.
Chop some potatoes and add them. Make them as big or small as you want. Keep in mind that this is a soup and not a stew, so larger is appropriate for stews while smaller is better for soups, but it’s your choice and the soup can be as hearty or as delicate as you like.
Now add any other veg or mushrooms that you have, keeping in mind the general admonitions about size already mentioned.
Cut up and add the meat last, so you don’t have to use more than one cutting board.
I usually don’t add noodles or rice but if you have any leftover or feel like cooking them in the pot a little longer go ahead. Barley’s good, too.
Add water as needed to keep the liquid soupy and not stewy.
Soup is a good thing to put on the stove in the morning for a lazy day of this and that at home. Just put it on simmer, check to add water once in a while and it just gets better. When it gets low and boils down to stew consistency you can make a roux to thicken the liquid into a gravy and use it to make pot pies.
Serve with crackers, hearty bread (preferably freshly home made) or biscuits. These can be laid out on the groaning board (table) to be picked up during the day as people get peckish. As a side course it’s nice but it can be a whole light meal in itself on cold nights when you’re feeling icky and need comfort food. I tend to crumble crackers into my chicken soup. Sopping a fat hunk of bread in the soup is luxuriously delicious, too. The beverage of your choice is, of course, up to you. Wine, beer, mulled cider, milk, water…
Every once in a while I get asked about gardening or someone makes a comment about how they wish they had a garden or could garden. Sometimes I take the bait.
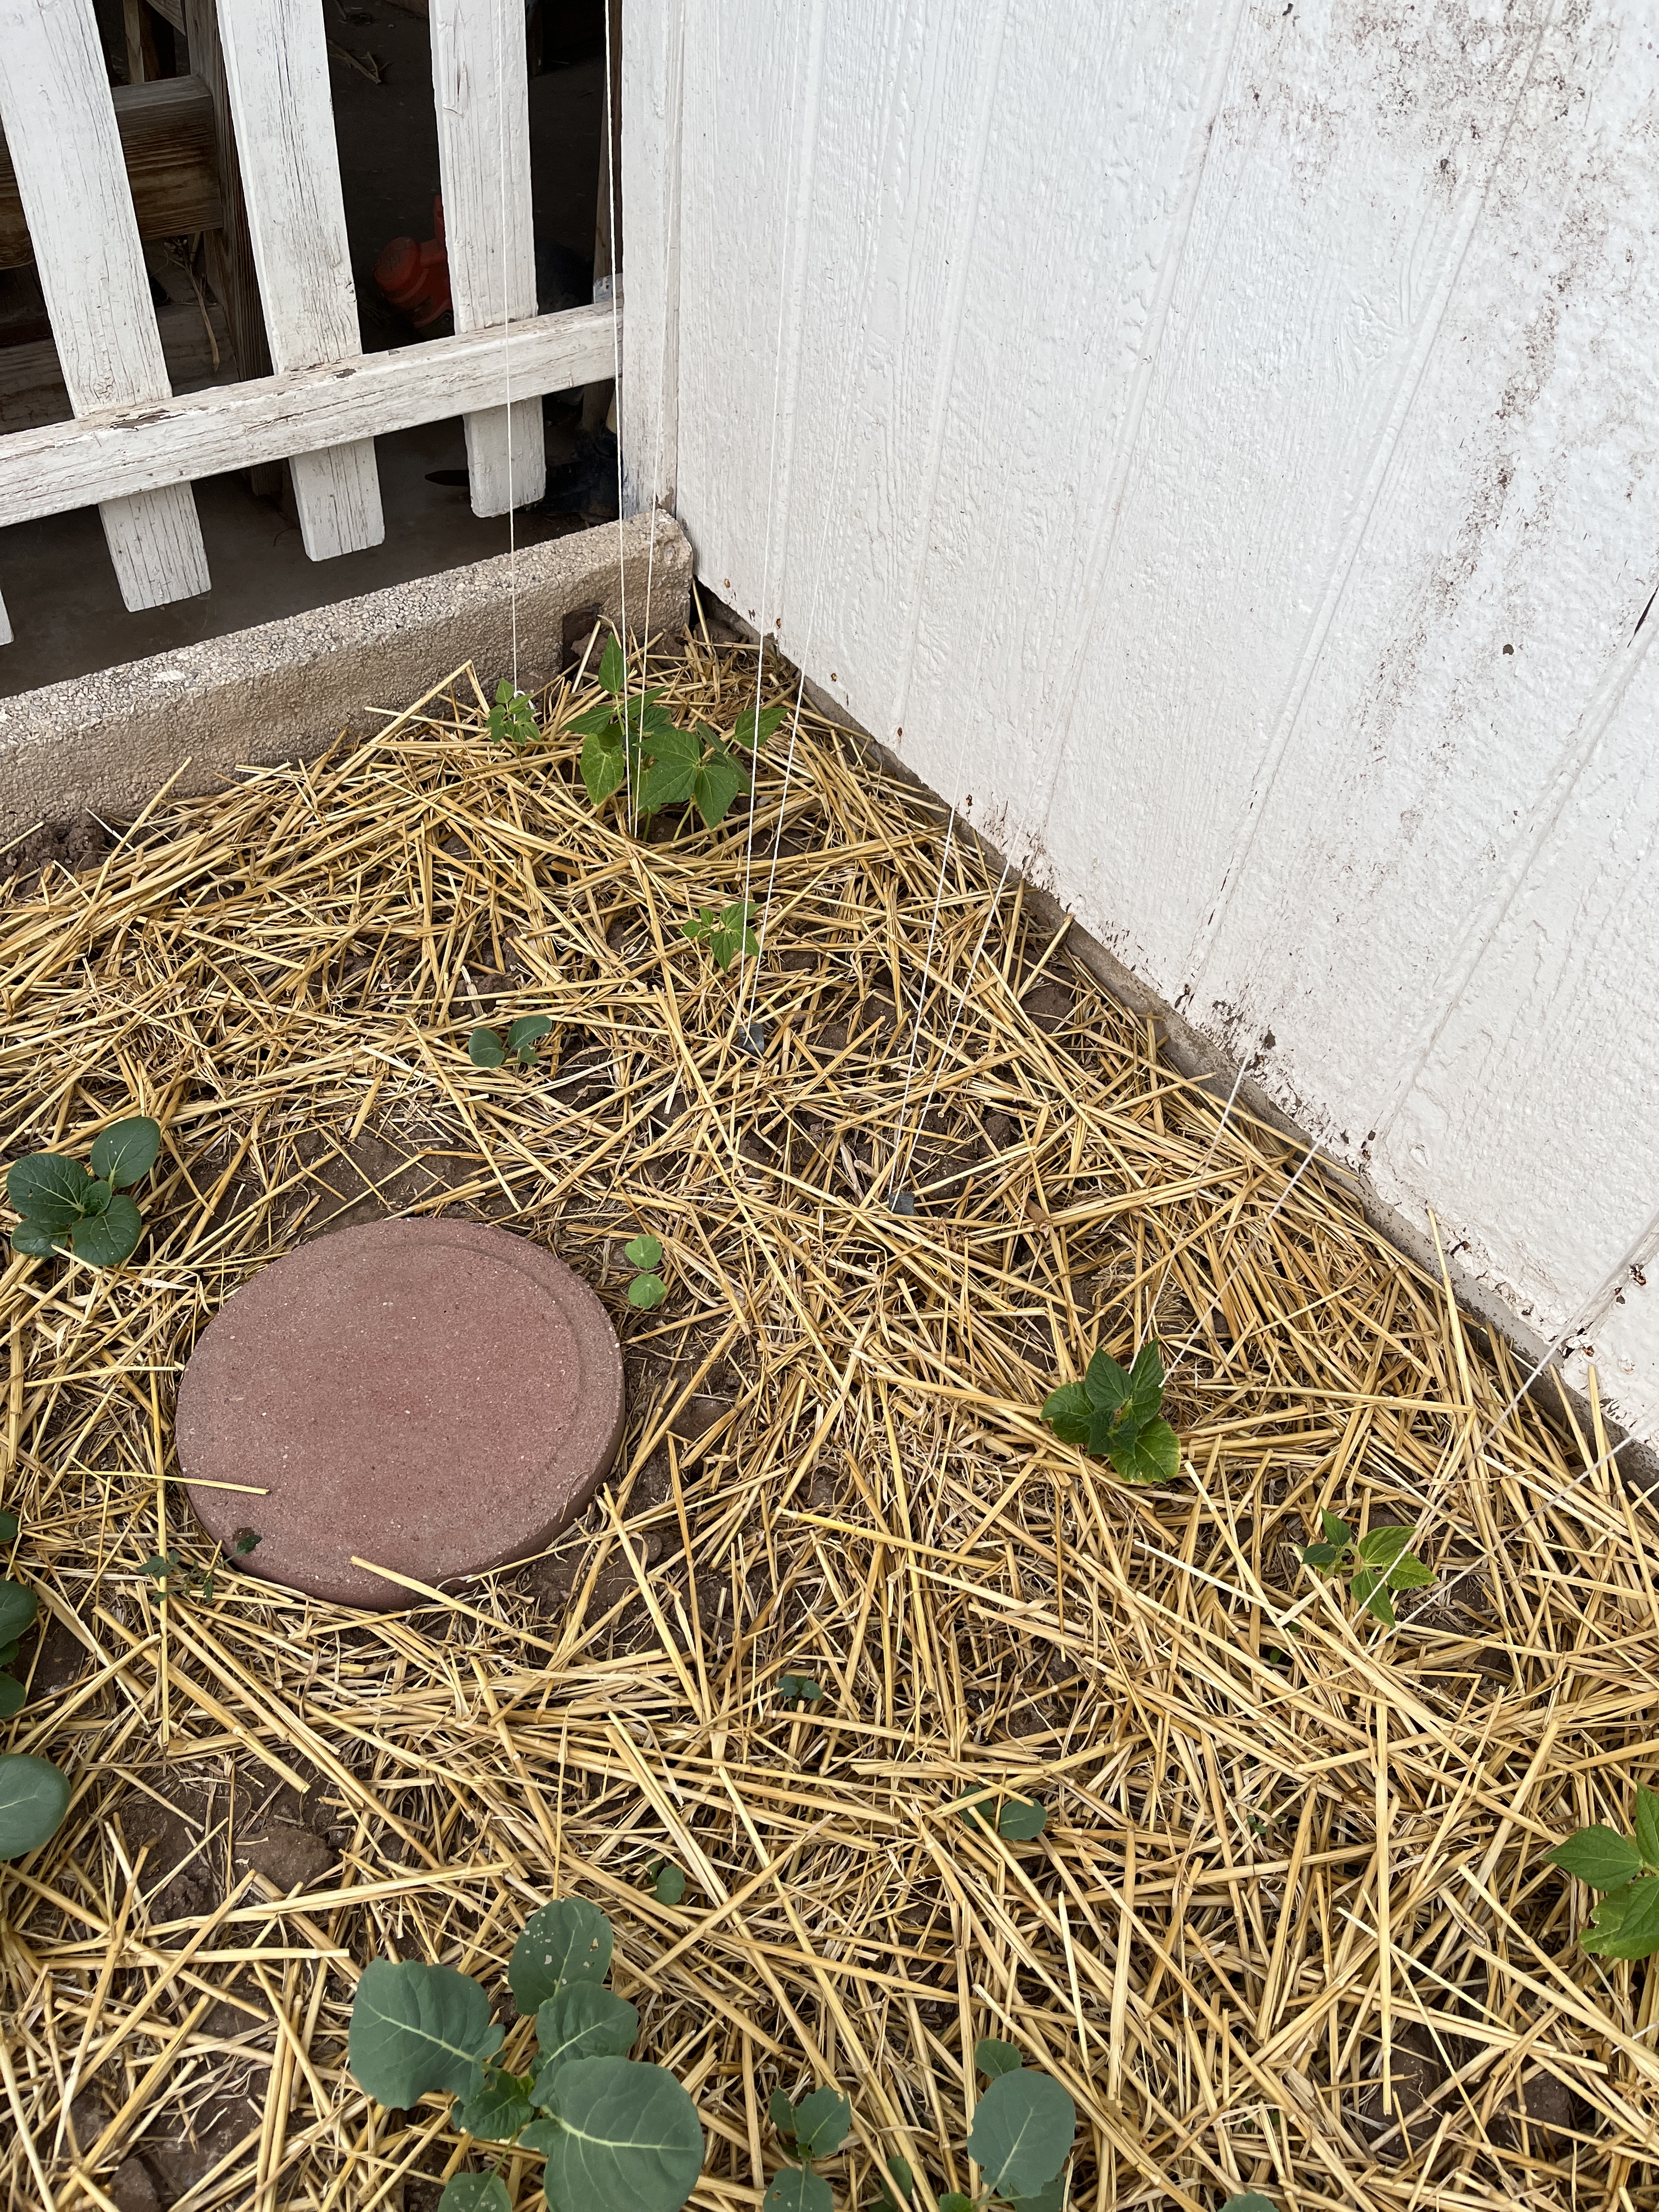
Find a nice, sunny spot, about 2 or 3′ x whatever, convenient to your kitchen door, dig out the grass, rocks and weeds, dig in some composted cow manure, maybe put in a low edging and plant a few vegies you know you like and/or herbs you’ll use or at least like to smell (lavender). Stepping stones are optional but helpful if the garden is wider than 3′. Water, weed, repeat. Don’t let it get too wet or too dry. Some of it won’t work (it never does, even for experienced gardeners) and some will do spectacularly. Go from there every season. That’s how I learned. Most people now-days don’t try things because somewhere along the line they picked up the idea that they had to learn it somewhere, had to be talented or good at something to make it worth doing. Fuck that. Give yourself permission to try stuff, push your limits, see if you like it. Give yourself permission and space to fail. Repeatedly. That’s how you learn. That’s how you decide if you like it, if it’s worth doing for YOU, whether anyone else ever cares for whatever the thing is besides you. I think I just wrote another blog post… *continued*
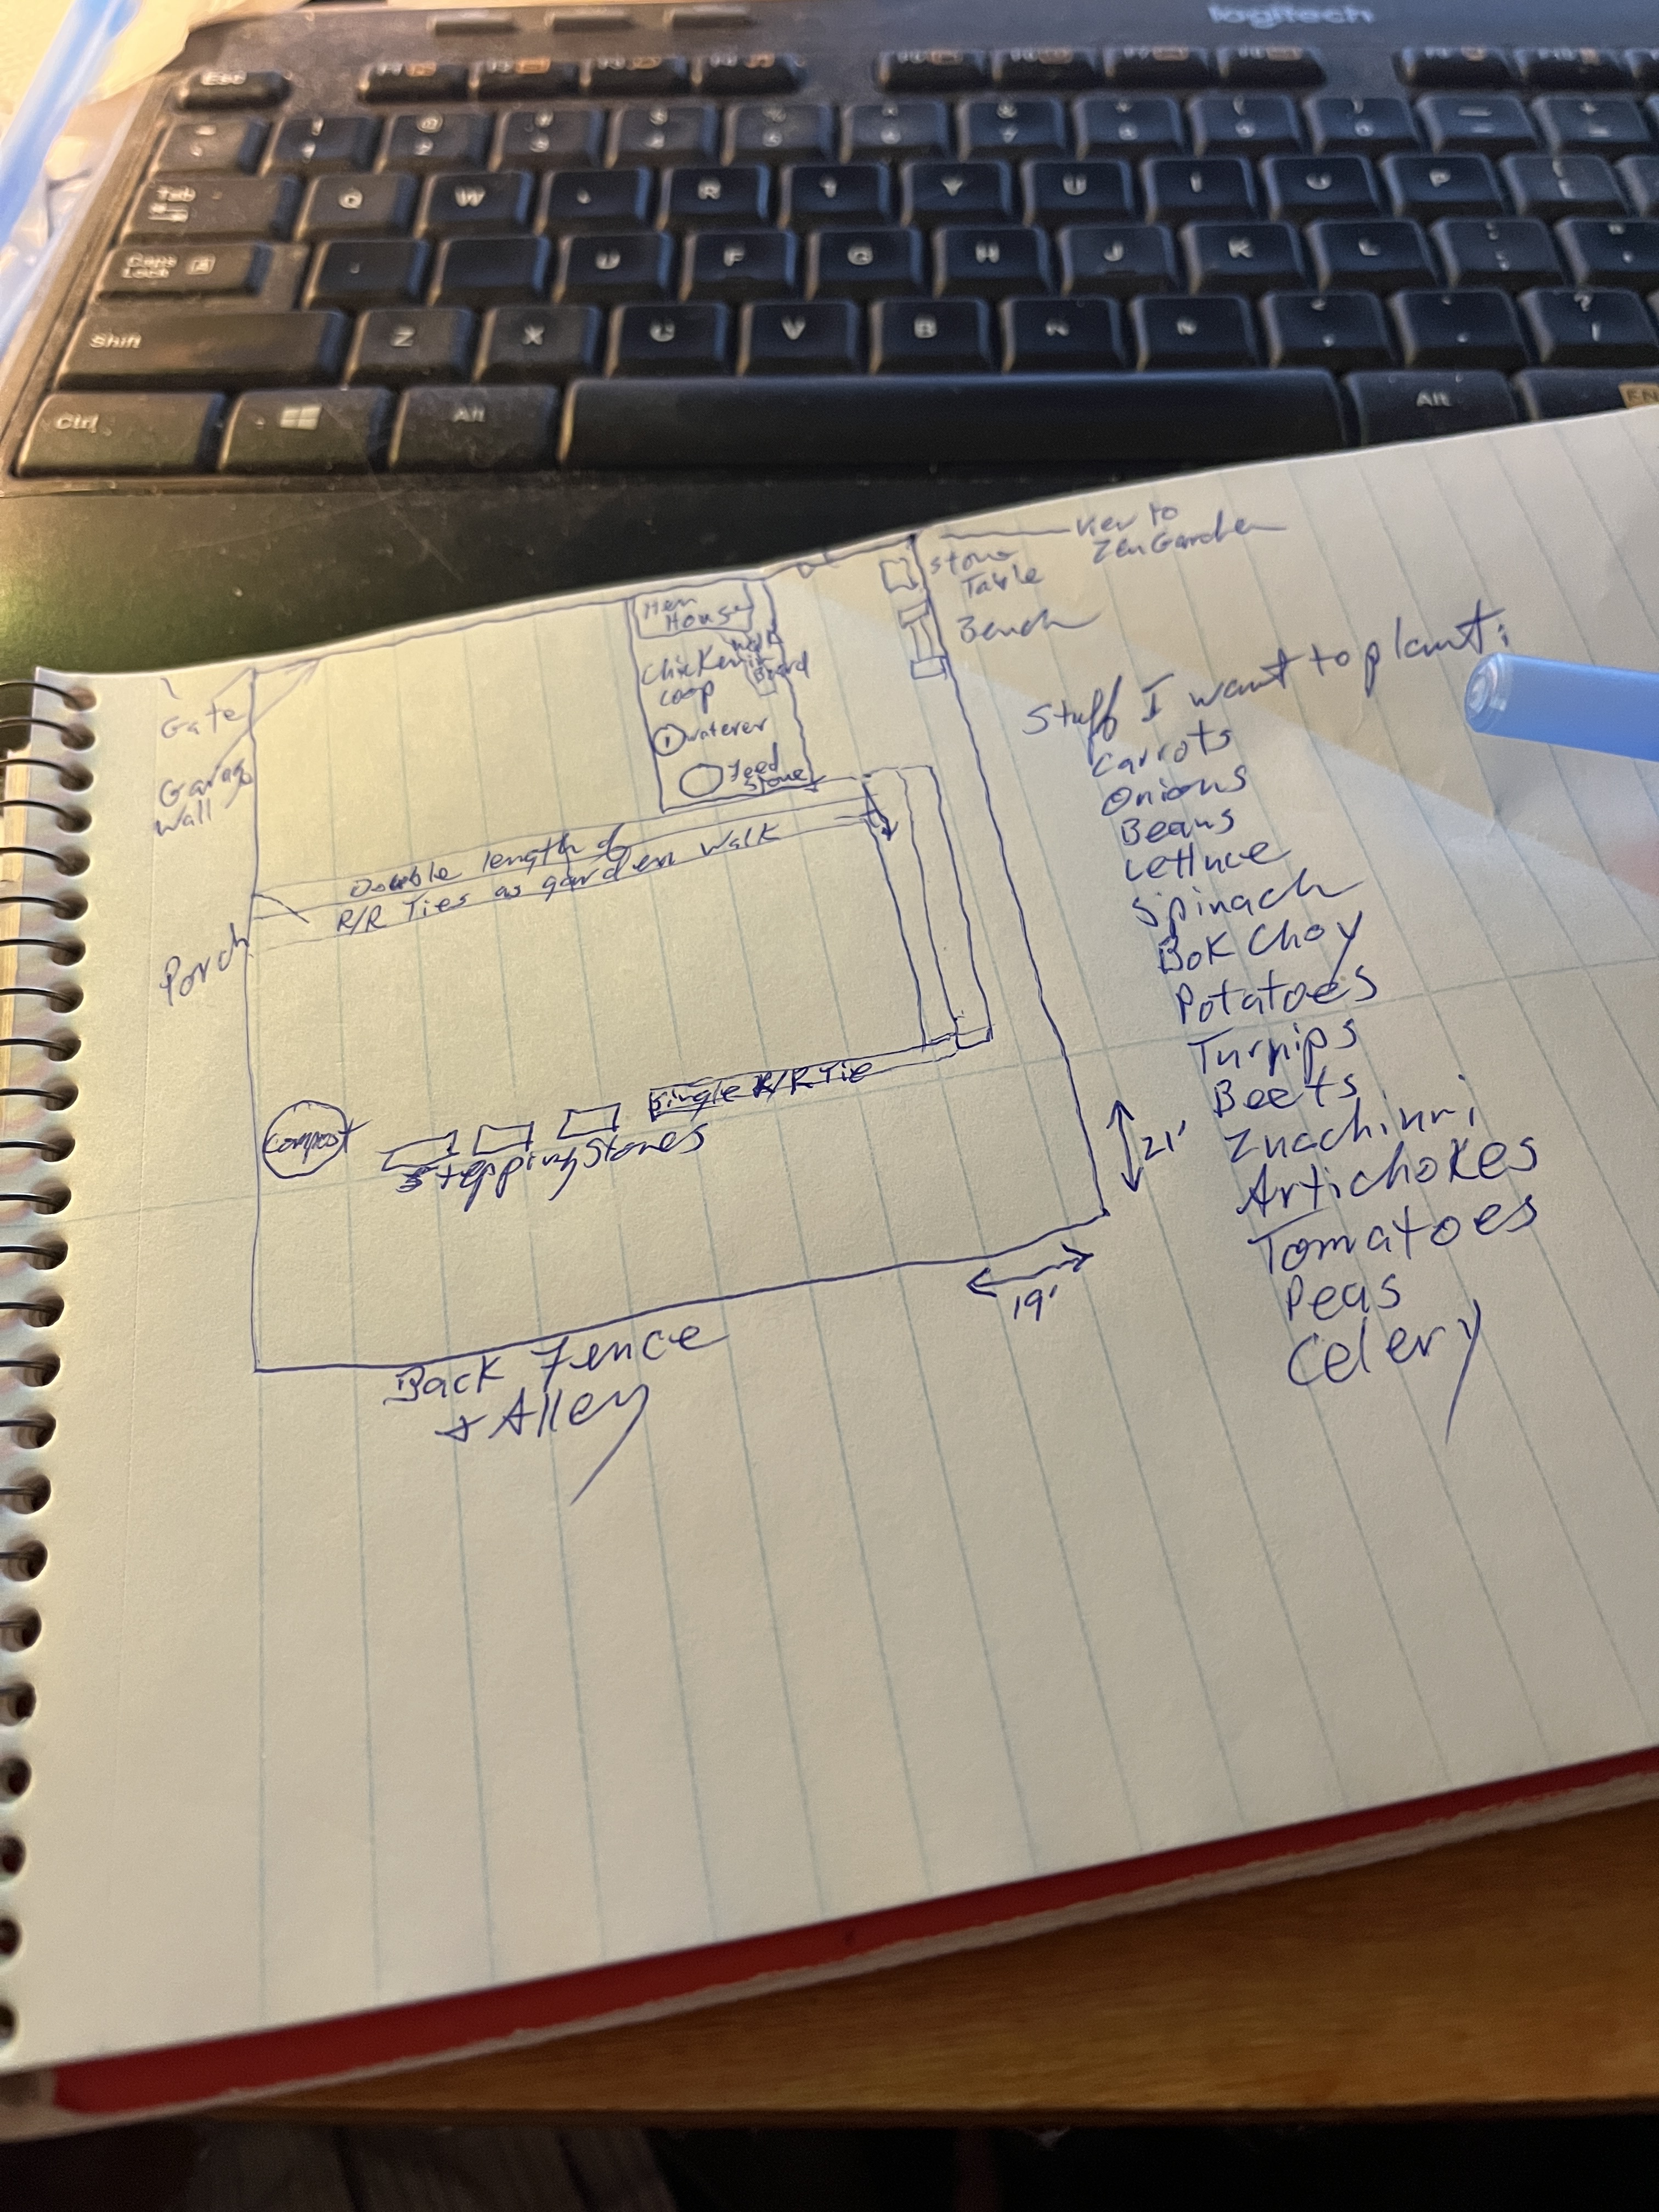
In Wisconsin (or other climes where you have winter) you might want to wait for April or May to do the actual planting and growing, though. If the ground’s still digable you can dig up the area & border it out now in preparation for spring. If not, you can measure, draw out your area and plan it out on paper. Look up how much area things need to grow. Start with square foot gardening style of gardens, they take less room and look more decorative.
Conversely, in areas like Phoenix where we hibernate through the summer because of heat you might use the summer months for planning and setting up hardscape like seating areas, pathways and trellises. Over the summer I marked the walkways with random, stones, bricks and blocks and installed the base for the seating area that will eventually have a pergola built over it and (someday, I hope) will have a Lady banks rose growing over that, I hope one grown from a cutting from the Tombstone rose will work here. I used blocks leftover from someone else’s project with old branches to edge my yard and direct feet to the pathways and away form the yard area where I’ve (finally) gotten rid of the Bermuda grass and have seeded Sonoran desert wildflowers. I’m hoping for a nice show this year. The cheap solar lights don’t give off mush light but do manage to mark the paths and look magical after dark.
Also, in the mean time, if you have sunny spaces on windowsills or on the floor near sunny windows you can plant window boxes and flower pots with herbs, peas, carrots and even tomatoes and peppers. A window box can give you lettuce and spinach for cut and come again salads once they get going. Regular flower pots can grow all sorts of herbs like lavender, basil, dill, rosemary and whatever you want to try. A bigger flower pot can grow a tomato in the middle ringed with onions close to the base, carrots between the onions and the edge and alyssum around the edge to spill over. Another big pot can have a pepper in it (bell, Anaheim for chili rellenos, paprika or whatever) and onions, carrots and allyssum or nasturtium spilling over the edge. The nice thing about indoor gardening in pots over the winter is that you can transfer much of it into the garden in spring for an instant spring garden and start the indoor stuff again or experiment of have space in the pots for all the extra stuff you buy that you don’t have room for in the garden. You’ll also find gardener friend you didn’t know you had who will trade you for your overflow or just hand you cool stuff for your garden that they don’t need. Nobody wants to let anything die unnecessarily or go to waste. Pots can also make convenient garden ornaments in between plantings,
Or even make homes for little ceramic critters you find while shopping.
I save space by landscaping with food. Ignore the orange cat, he belongs to another house. And he’s mean. And whiney. This year’s front garden has my usual allyssum, carrots and onions around the edges with jonquils along the back. Inside there is an Iceberg rose are the end point, grape hyacinth under that with some parsley, lavender d’ Provence (seems to do better here than Munstead or other varieties), Itoi onions from a friend, watermelon growing next to the improvised pea trellis that has peas starting up it, a bay tree starting under the pea trellis (I need to take off that pillow case, the bay doesn’t need the shade any more), lemon thyme, chocolate mint and peppermint between the stones, saffron, sage and tarragon between the stepping stones and jonquils. Eventually the basil will sprout and replace the lemon basil that’s not doing so well at the moment. I figure if I’m going to put in time, money, energy, water and whatever I should get something back. In FL there were evergreens in front if the front porch pillars. I put in a border of strawberries and thyme between them and ended up carrying that through along both sides of the walk leading to the front porch, too. Thyme makes the strawberries sweeter, is good in cooking and they’re both really pretty. I kind of did that sort of thing all over the property we rented. I used a square foot sort of planting method/style, bordering everything with alyssum (to attract beneficial insects), with carrots behind that (carrot tops are ferny/ lacy and pretty) and onions behind that (useful in salads and cooking if you just want to cut the occasional spike-leaf here and there and the flowers are pretty). I didn’t find out til years later when I moved back home that farming the front yards in many towns in FL was illegal. Nobody wanted to look at rows of corn or whatever in someone else’s front yard. Nobody suspected that my pretty flower bed was actually an edible garden.
Whatever you do, have fun and don’t despair if it doesn’t work out at 1st. Even if you only end up with a Zen garden that never grows anything but serenity you Have fun with gardening, no matter how big or small. And I do tend to get carried away talking about gardening.
Yesterday was Guy Fawkes Day. I looked up stuff to eat for that day and this was one of the things suggested. You can eat it anytime, but it’s special to the 5th of November. I’ve seen it mentioned on British programs but I’ve never tried it so I figured I’d make some. It looks a lot like gingerbread made with oatmeal. I looked at a few recipes before I found one in cups and spoons instead of grams but they seemed pretty similar so I’ll go with this blended one.
2 c flour
1 c oats, whizzed in a blender to break them up
1 1/2 tap baking powder
2 tsp ginger
1/3 tsp each (or so) cinnamon, nutmeg, cloves, mace allspice (if you don’t have one just leave it out)
1/4 tsp salt
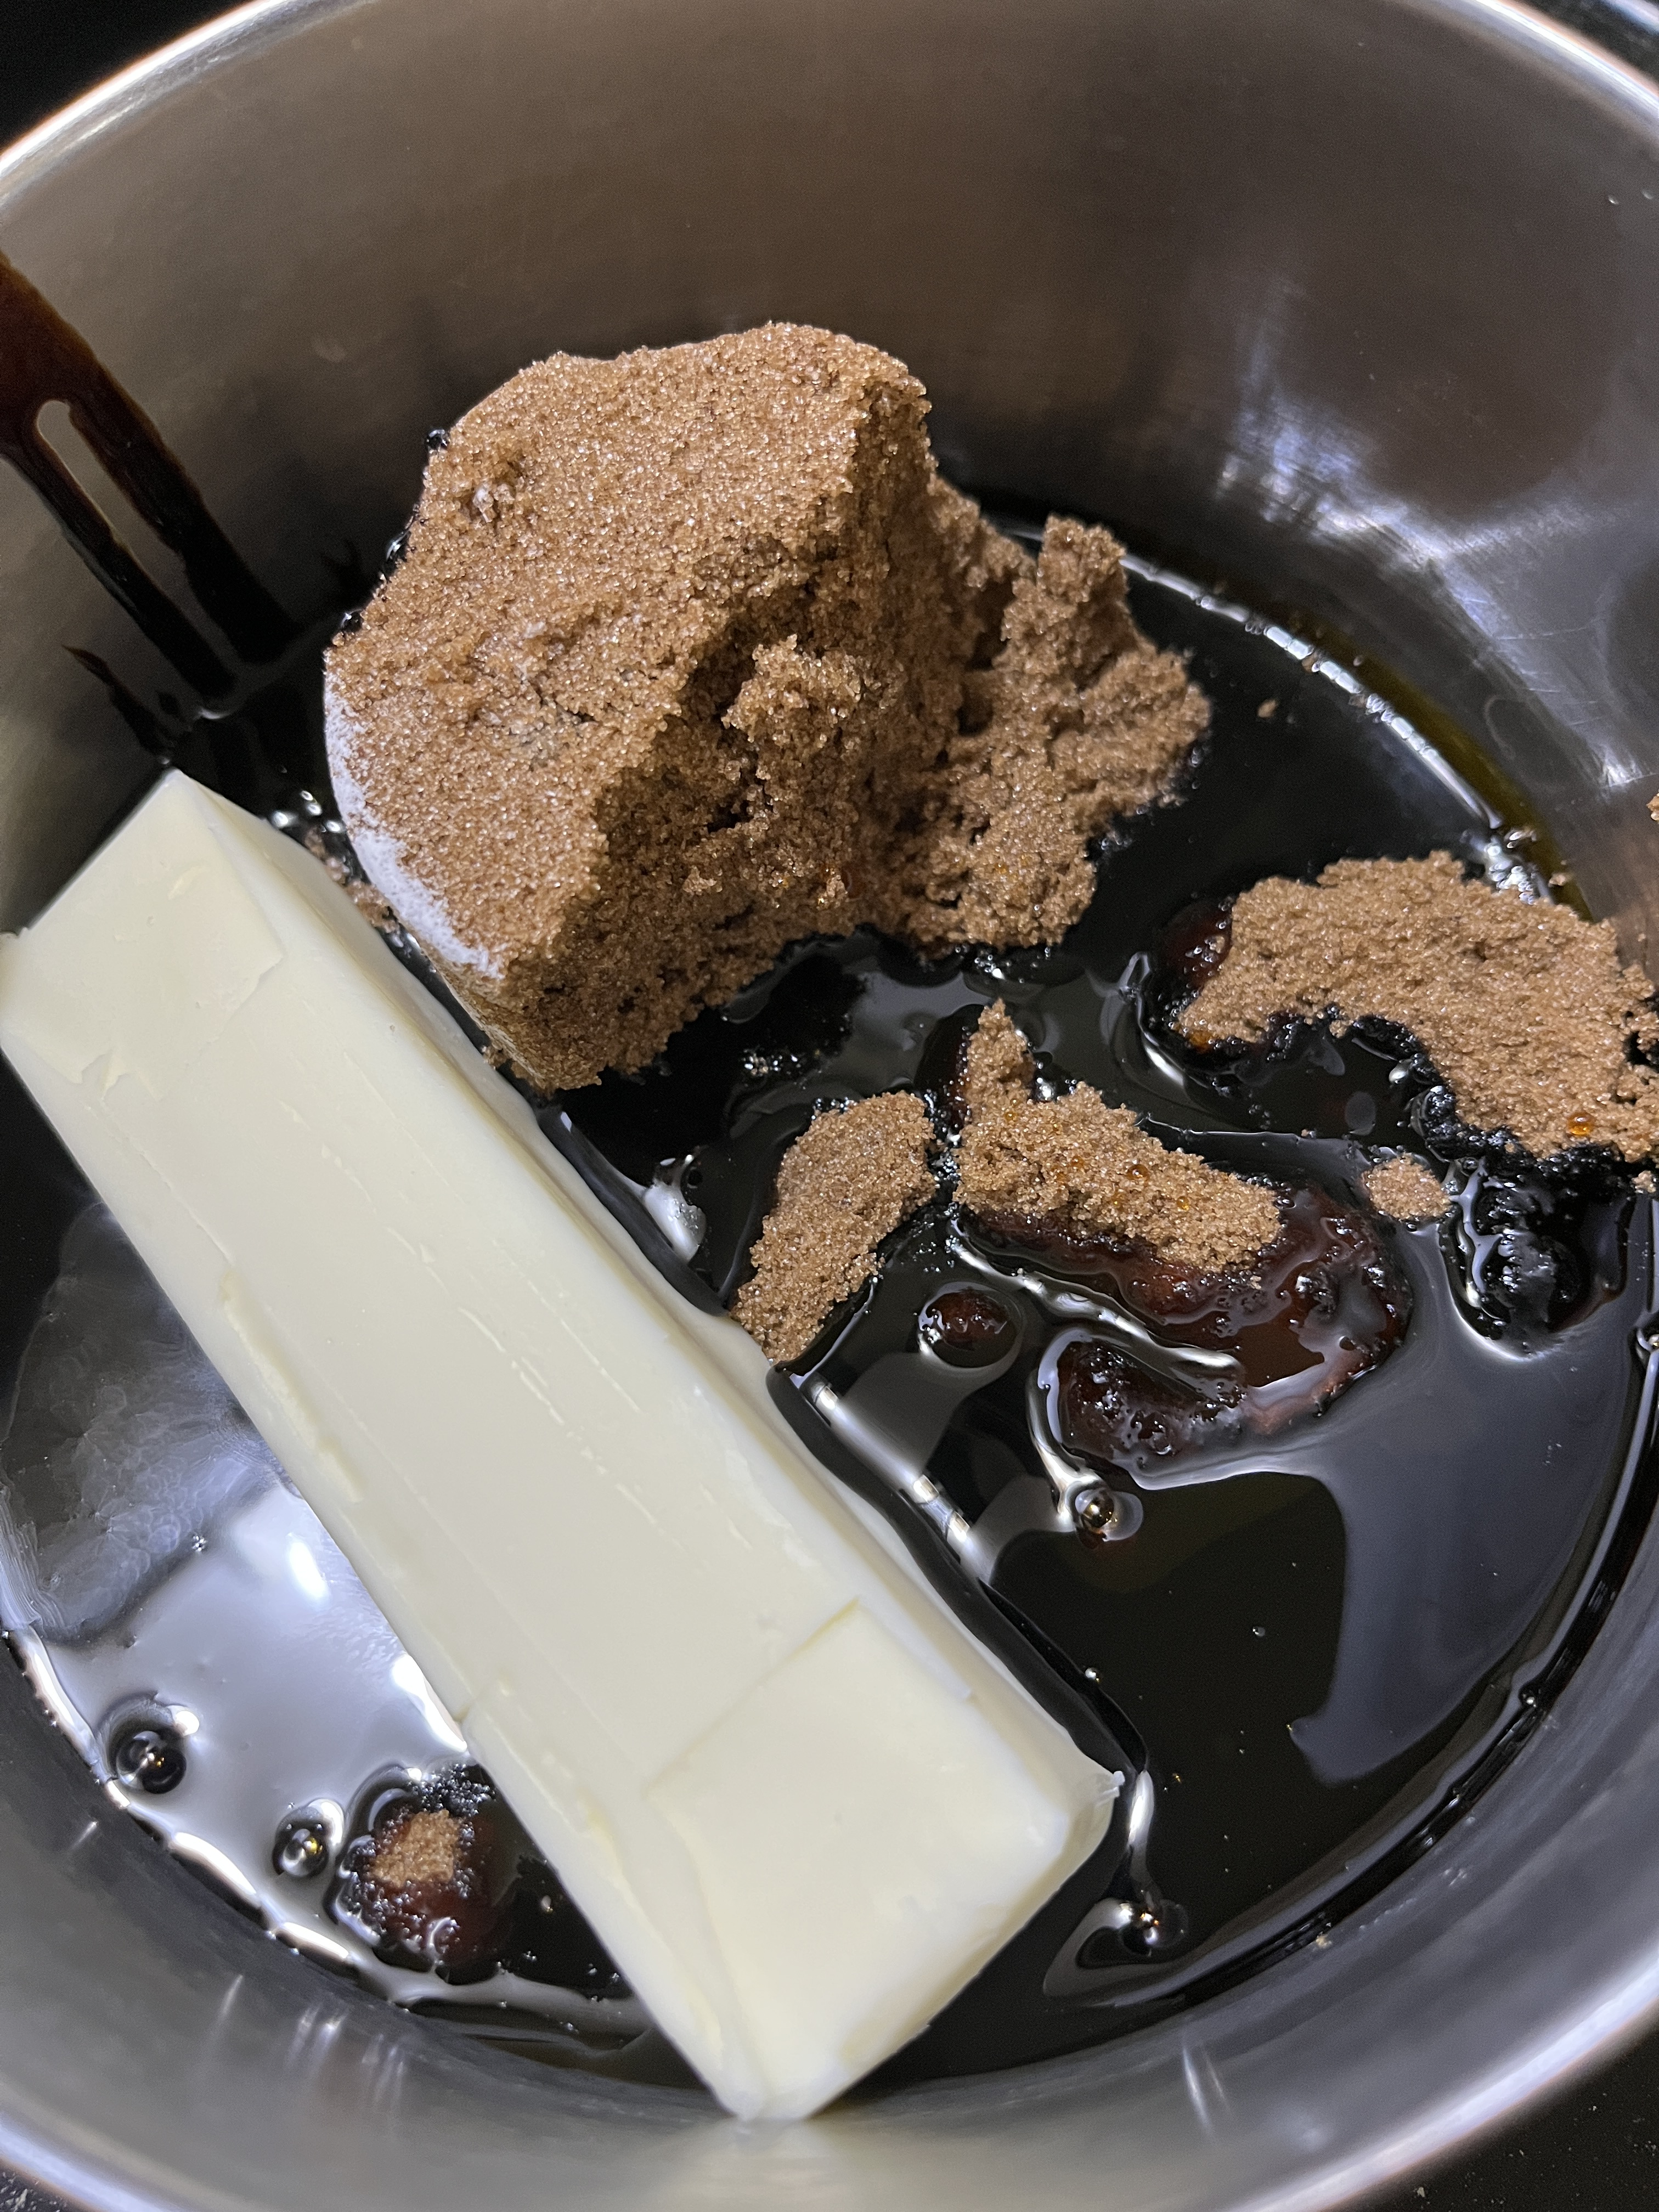
1 c molasses
1/4/c golden syrup
1 c loosely packed brown sugar
1 stick (8 oz) butter
2 large eggs
2 Tbsp whole milk if needed
In a large bowl, mix together all the dry ingredients.
Over medium heat mix together all the sweet ingredients until the butter melts and they’re well blended.
Mix sweets with drys and mix in 2 eggs. Add milk if needed. I didn’t need milk this time.
Butter a square pan and line with waxed paper or parchment.
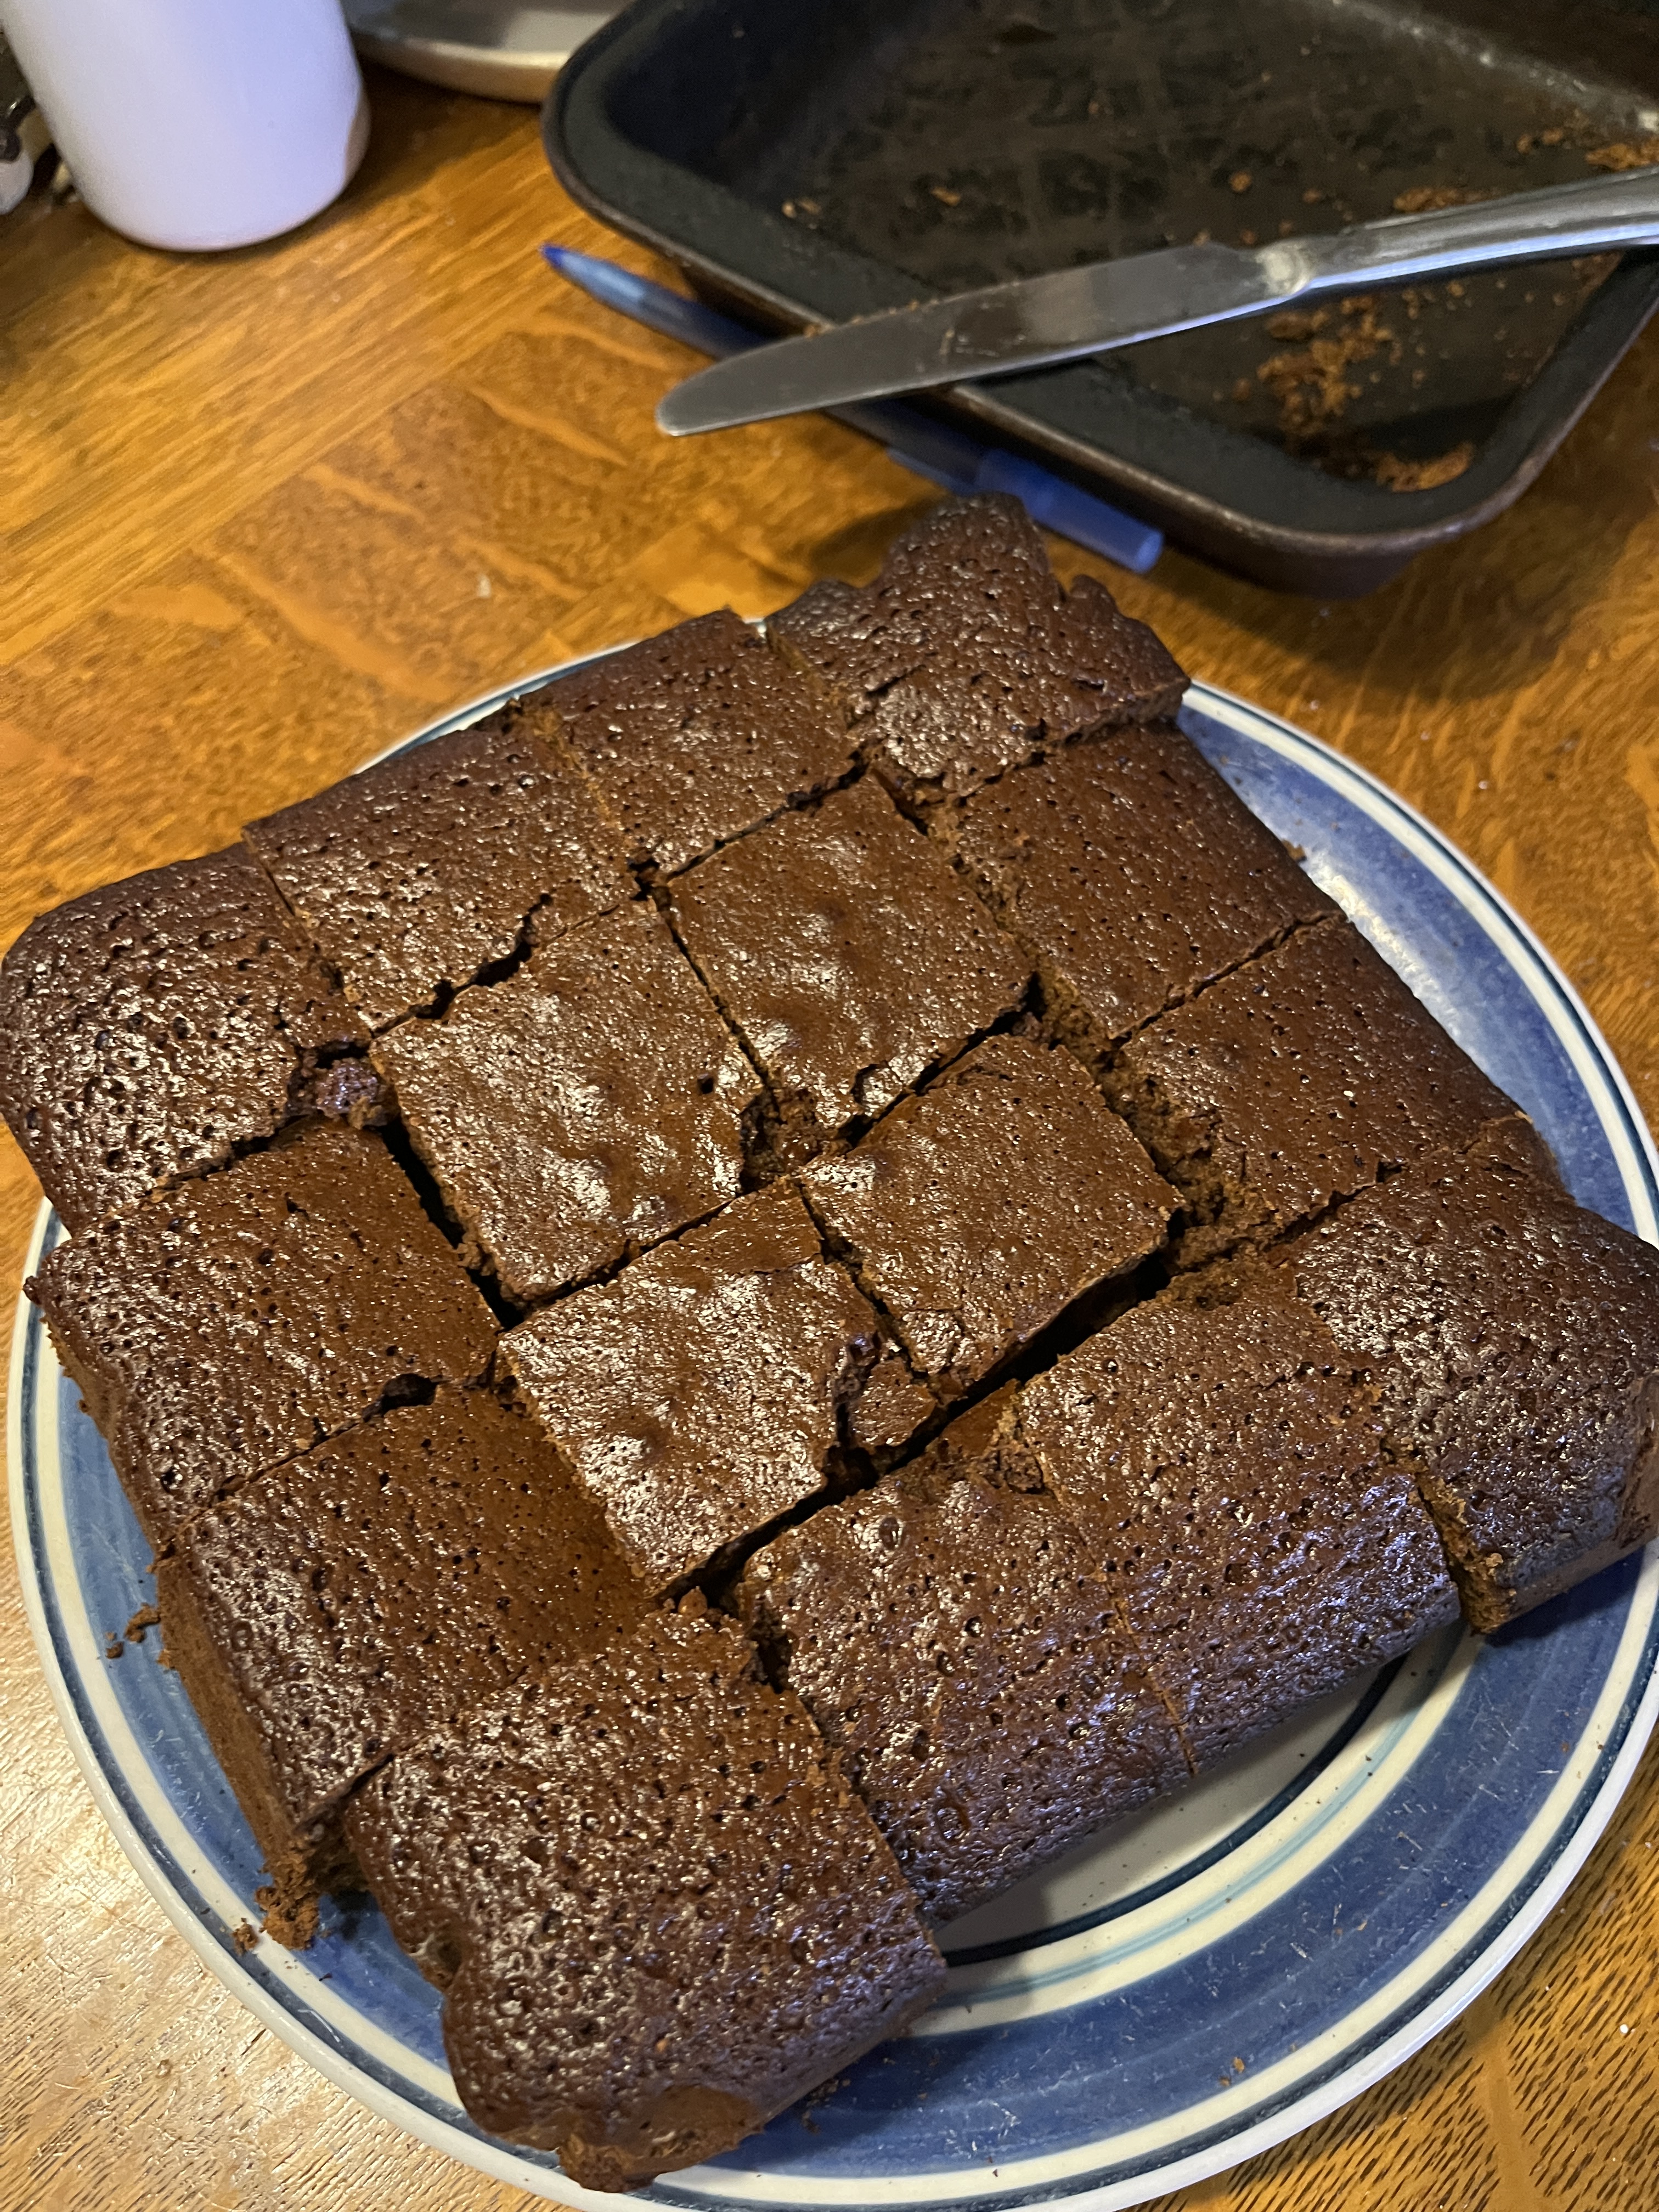
Pour the Parkin mix into the pan and bake at 350 for 60-80 minutes or until a toothpick inserted into the center comes out clean.
Let cool in the pan then turn out onto a plate and remove the waxed paper/parchment before cutting into squares. Take off the waxed paper as soon as it cools or you’ll have a devil of a time getting it off.
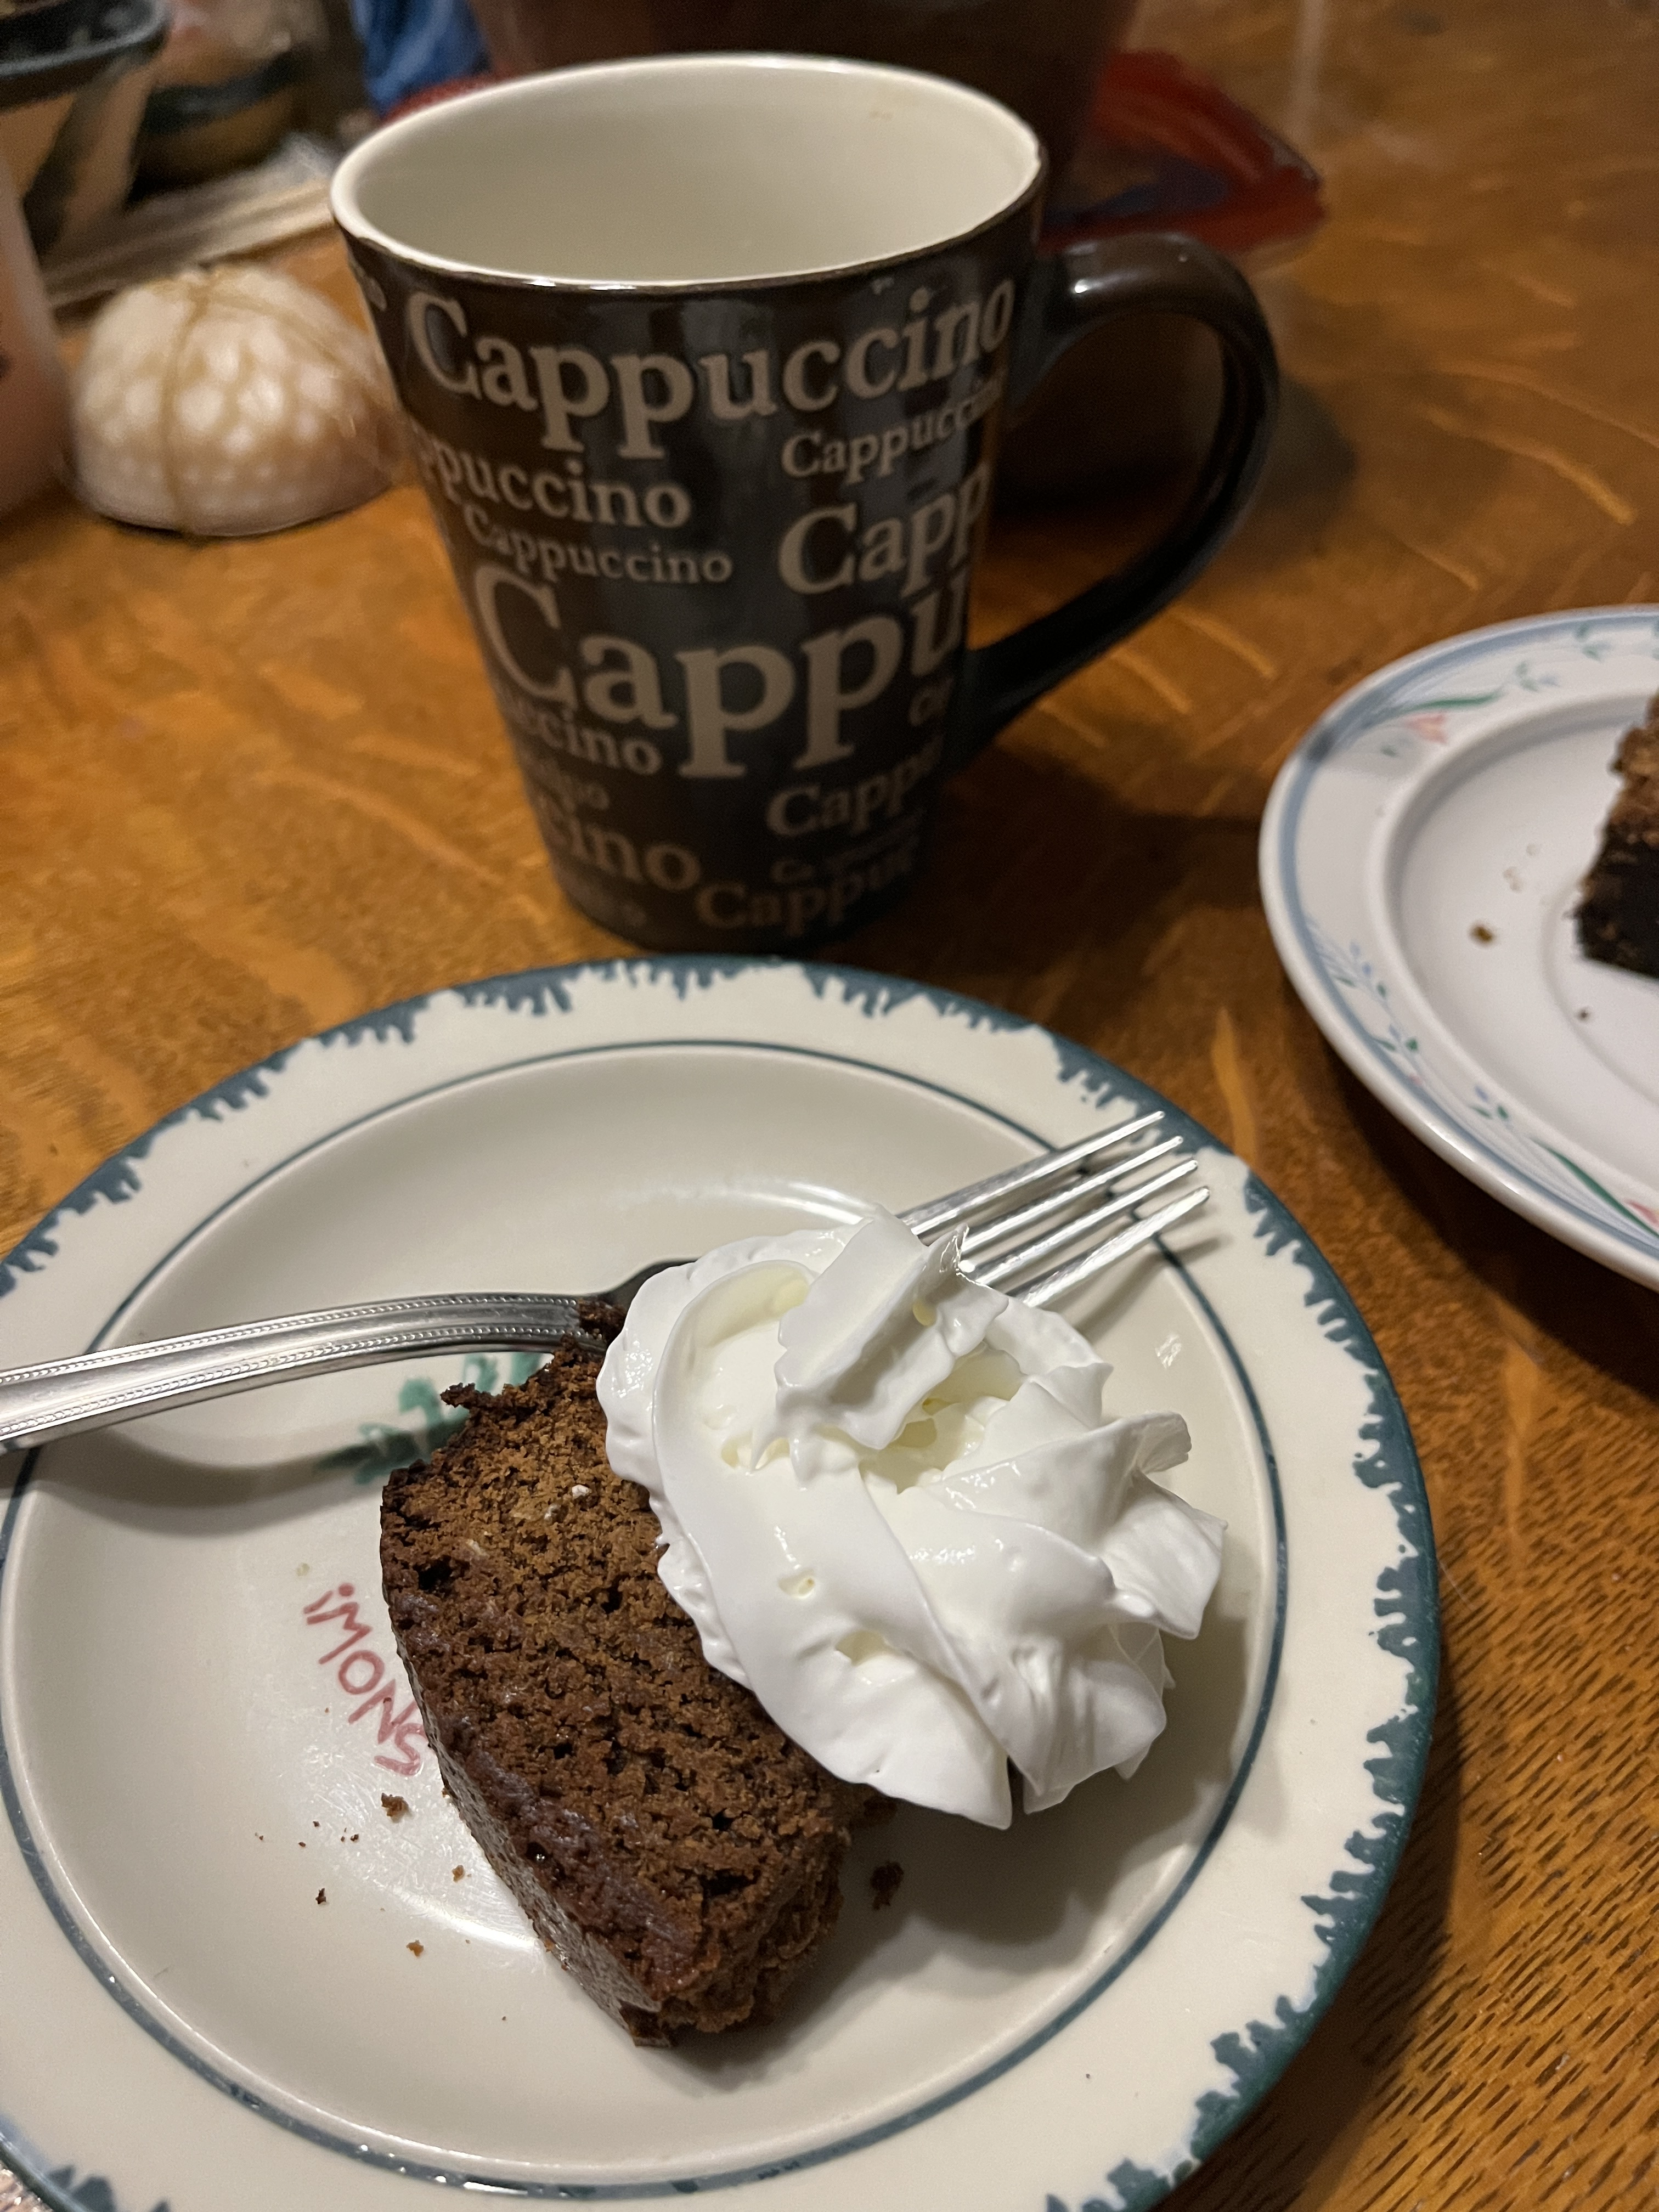
Yes, you can eat it right away, ice cream and whipped cream on top are good, but it’s even better after it’s sat a couple days in a tightly sealed tin, then it’s way yummy.
Serve plain with tea or milk or with a bit of whipped cream and maybe ice cream. If you really want to guild the lily you can pour caramel sauce over it or ice it with buttercream or cream cheese icing…but that’s not necessary, although it does make it easier to decorate if someone wants this as a birthday or other holiday cake.
Update: At work it went over well with people who like not-too-sweet things and people who like gingerbread. It is but it’s dense and best with cream, whipped or clotted is nice. ice cream is good, too, with a side of tea or coffee for sipping. The recipes suggest it’s best after a couple days in a tightly sealed tin and yes, that seems about right. As nice a culinary experiment as this was I’ll save it for the next Guy Fawkes Day celebration and just do regular ginger bread the rest of the year.
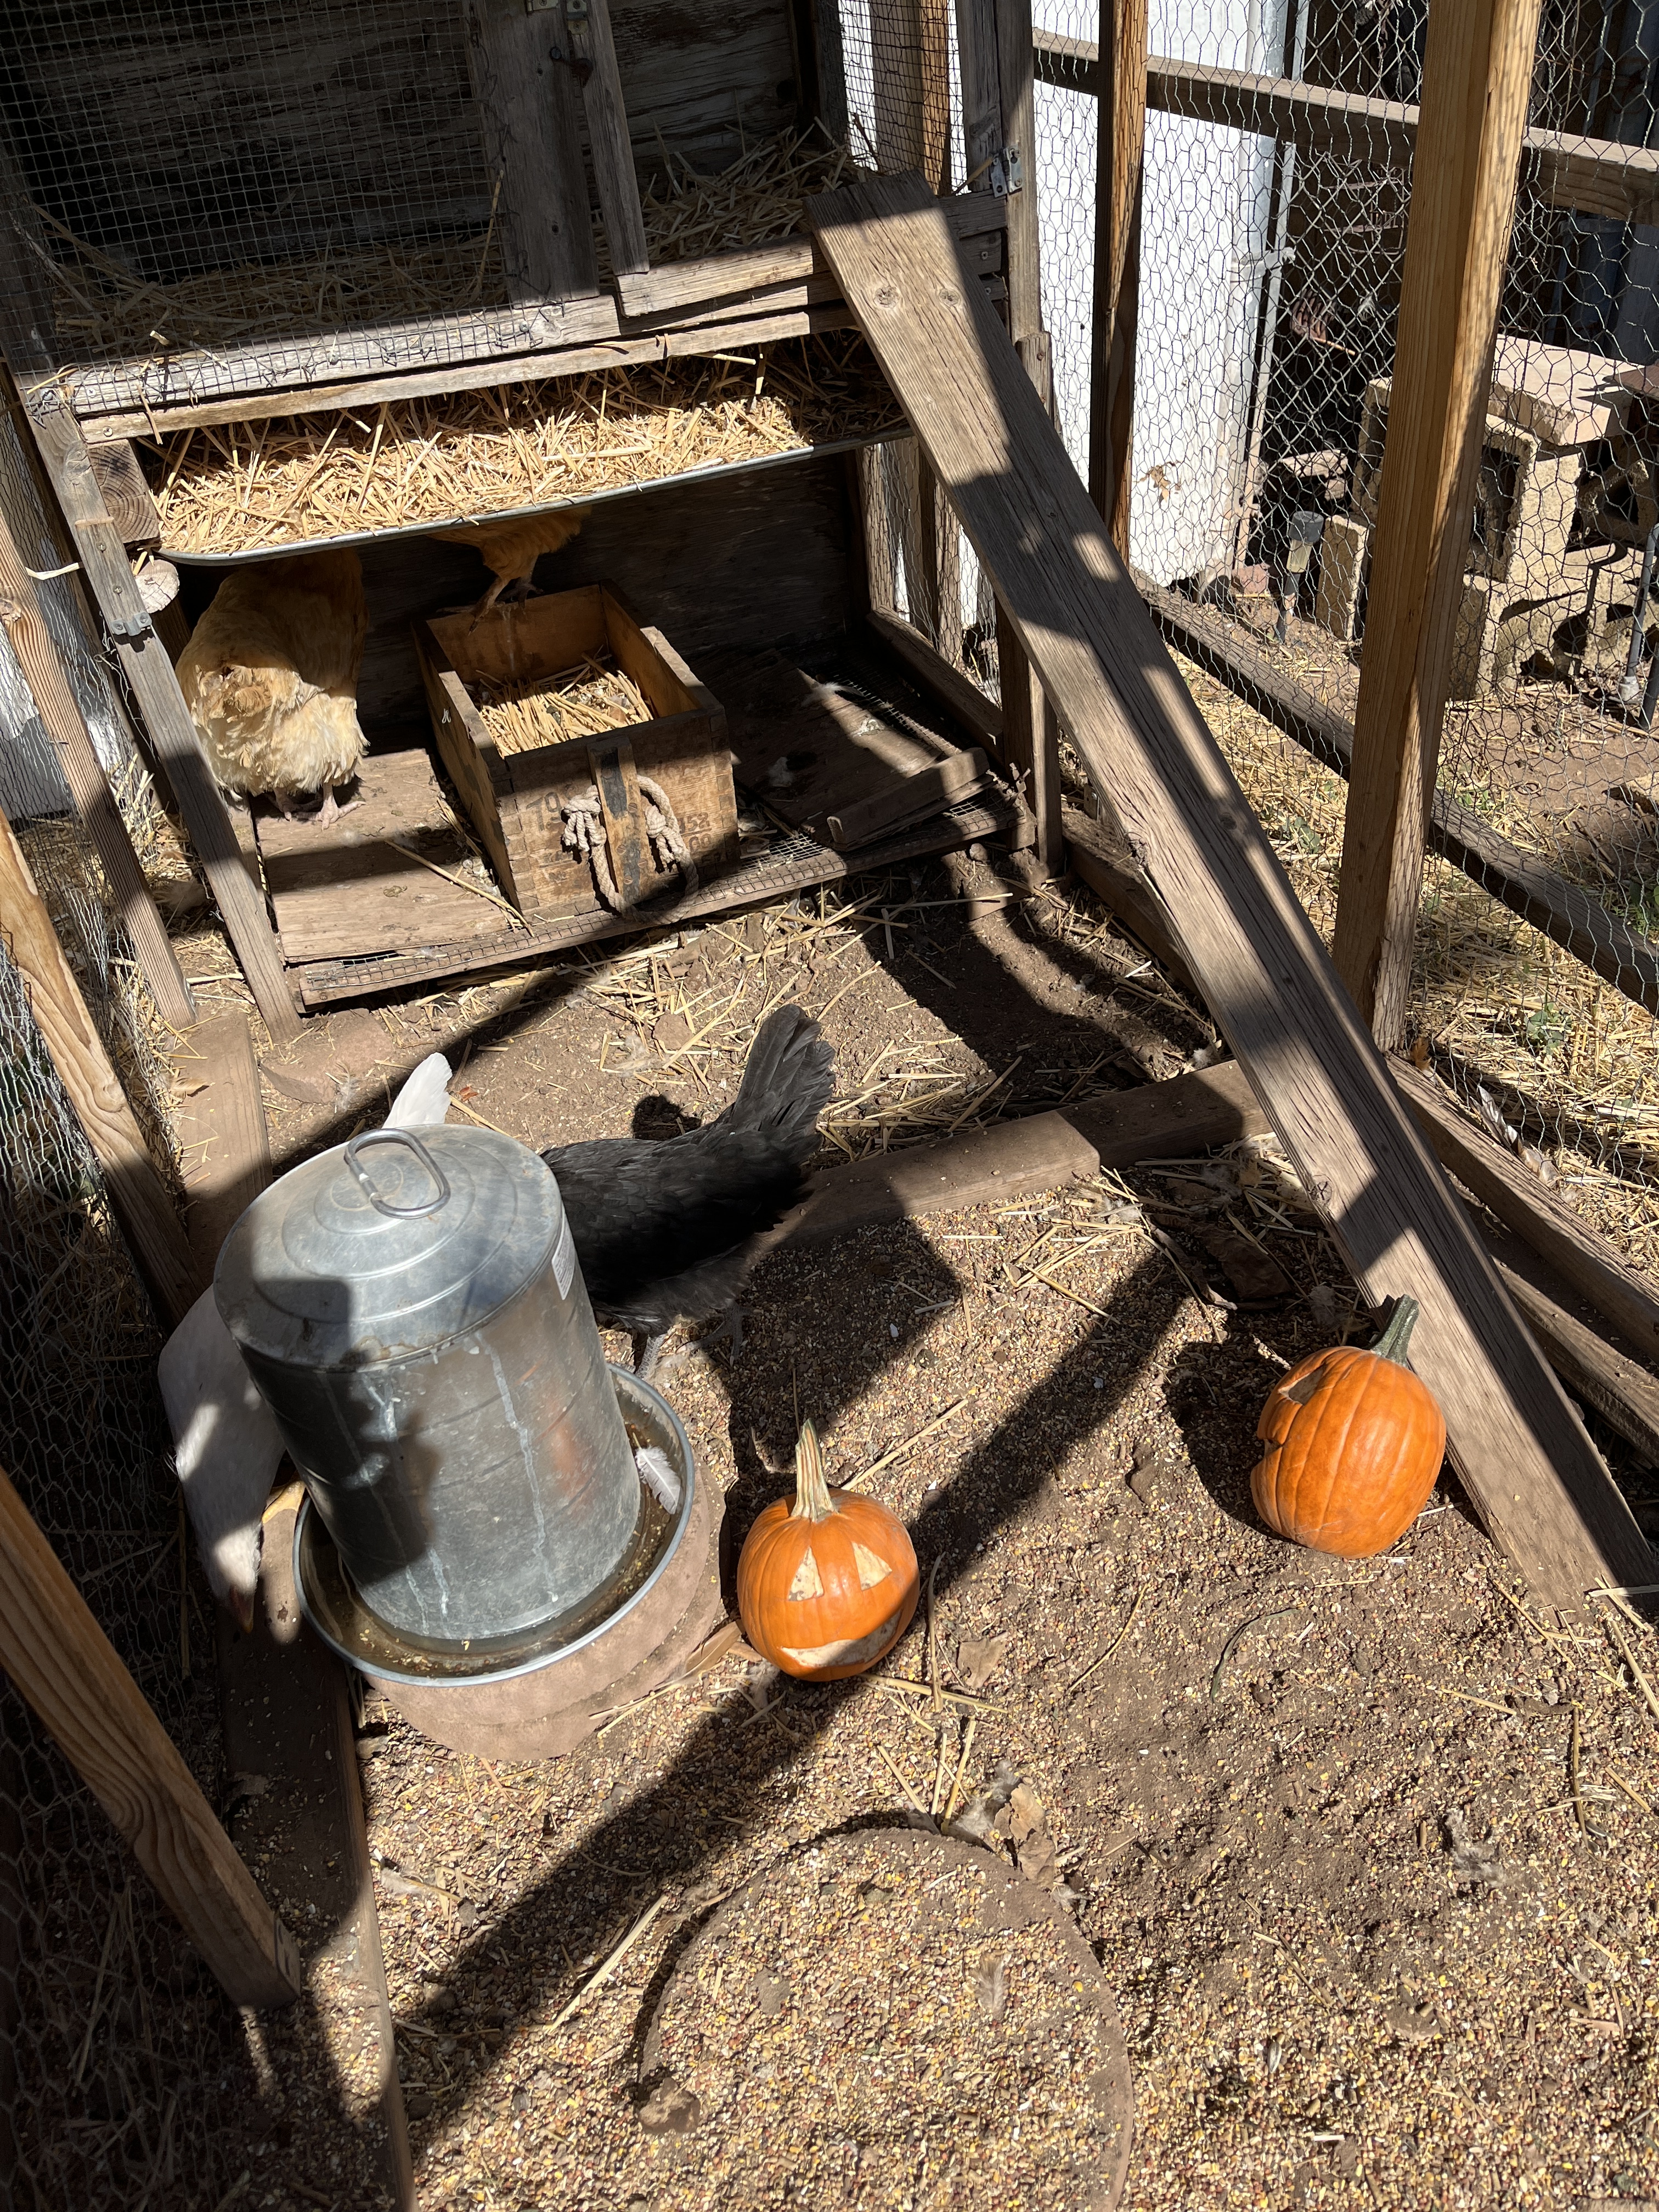
I saw on Facebook that if you have chickens you can peel a design into a pumpkin and let your chickens do the carving for you. What fun! I tried it.
I bought the pumpkins. I peeled faces on the pumpkins. I put the prepared pumpkins in the chicken coop. I waited.
The chickens waited.
And waited.
And waited.
And still ignoring the pumpkins. Silly chickens!
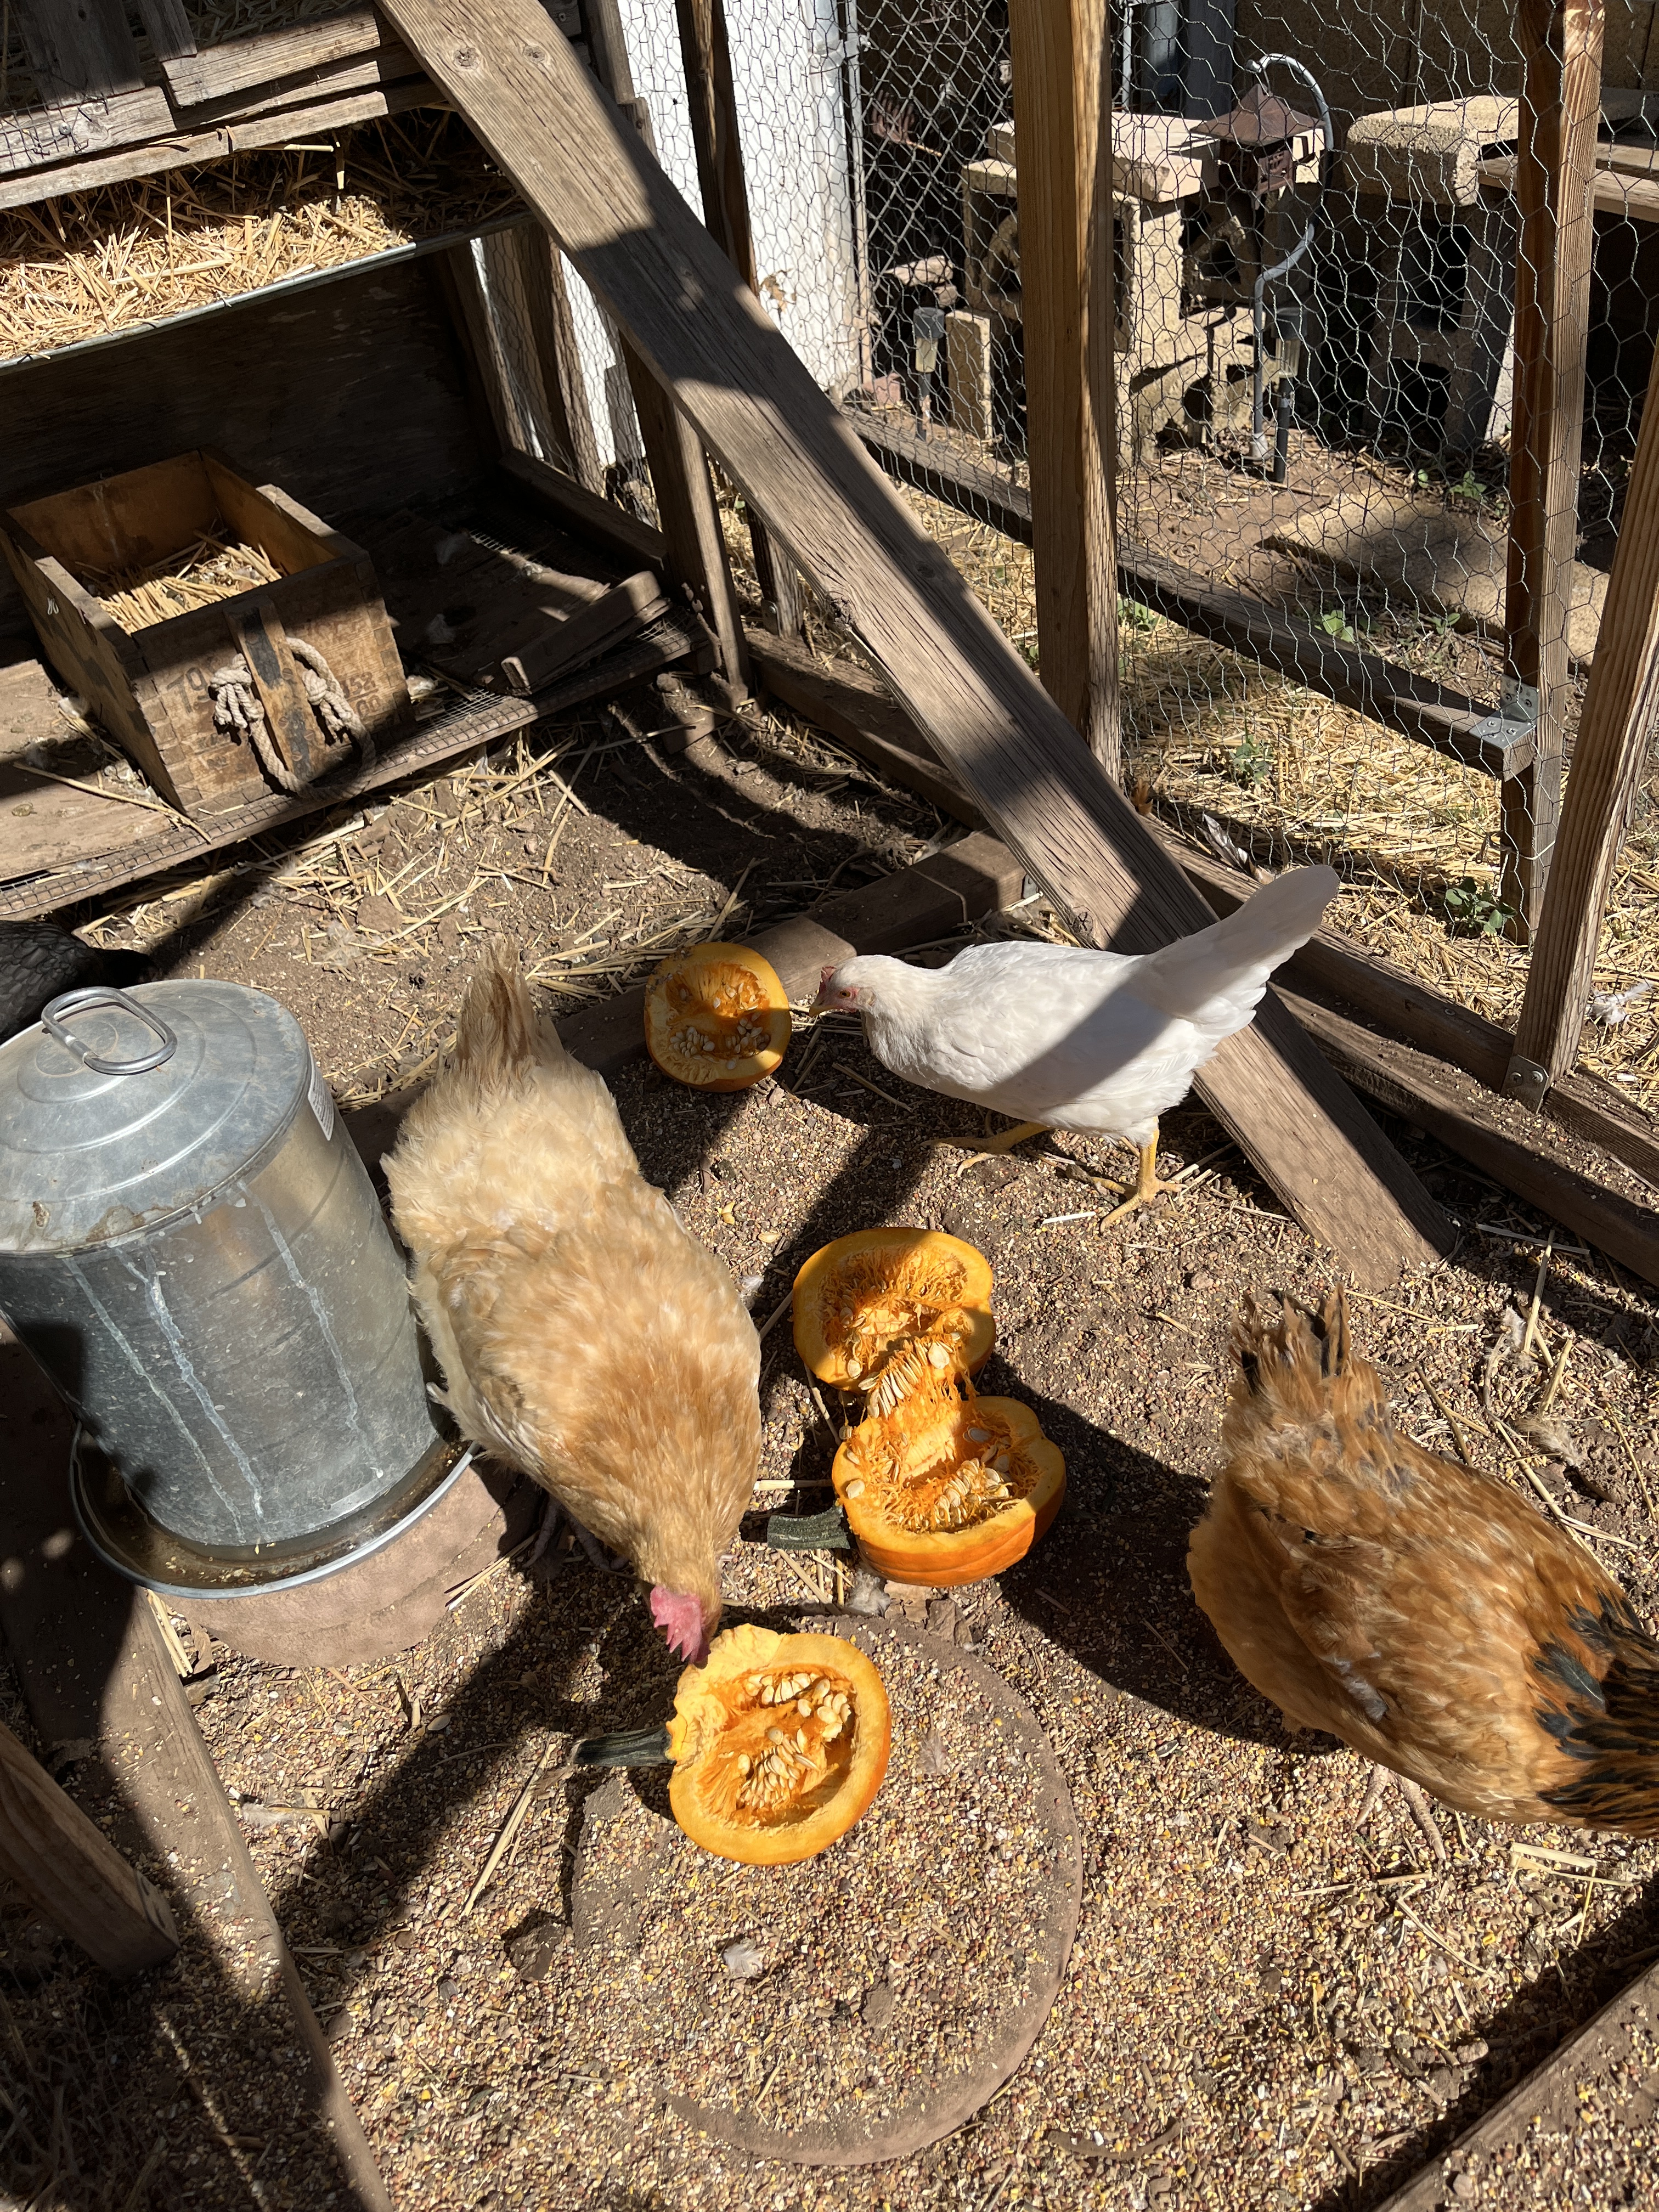
So finally I took decisive action. I grabbed a large knife and opened the pumpkins for them. At least they’d be interested in the seeds.
Well, maybe…?
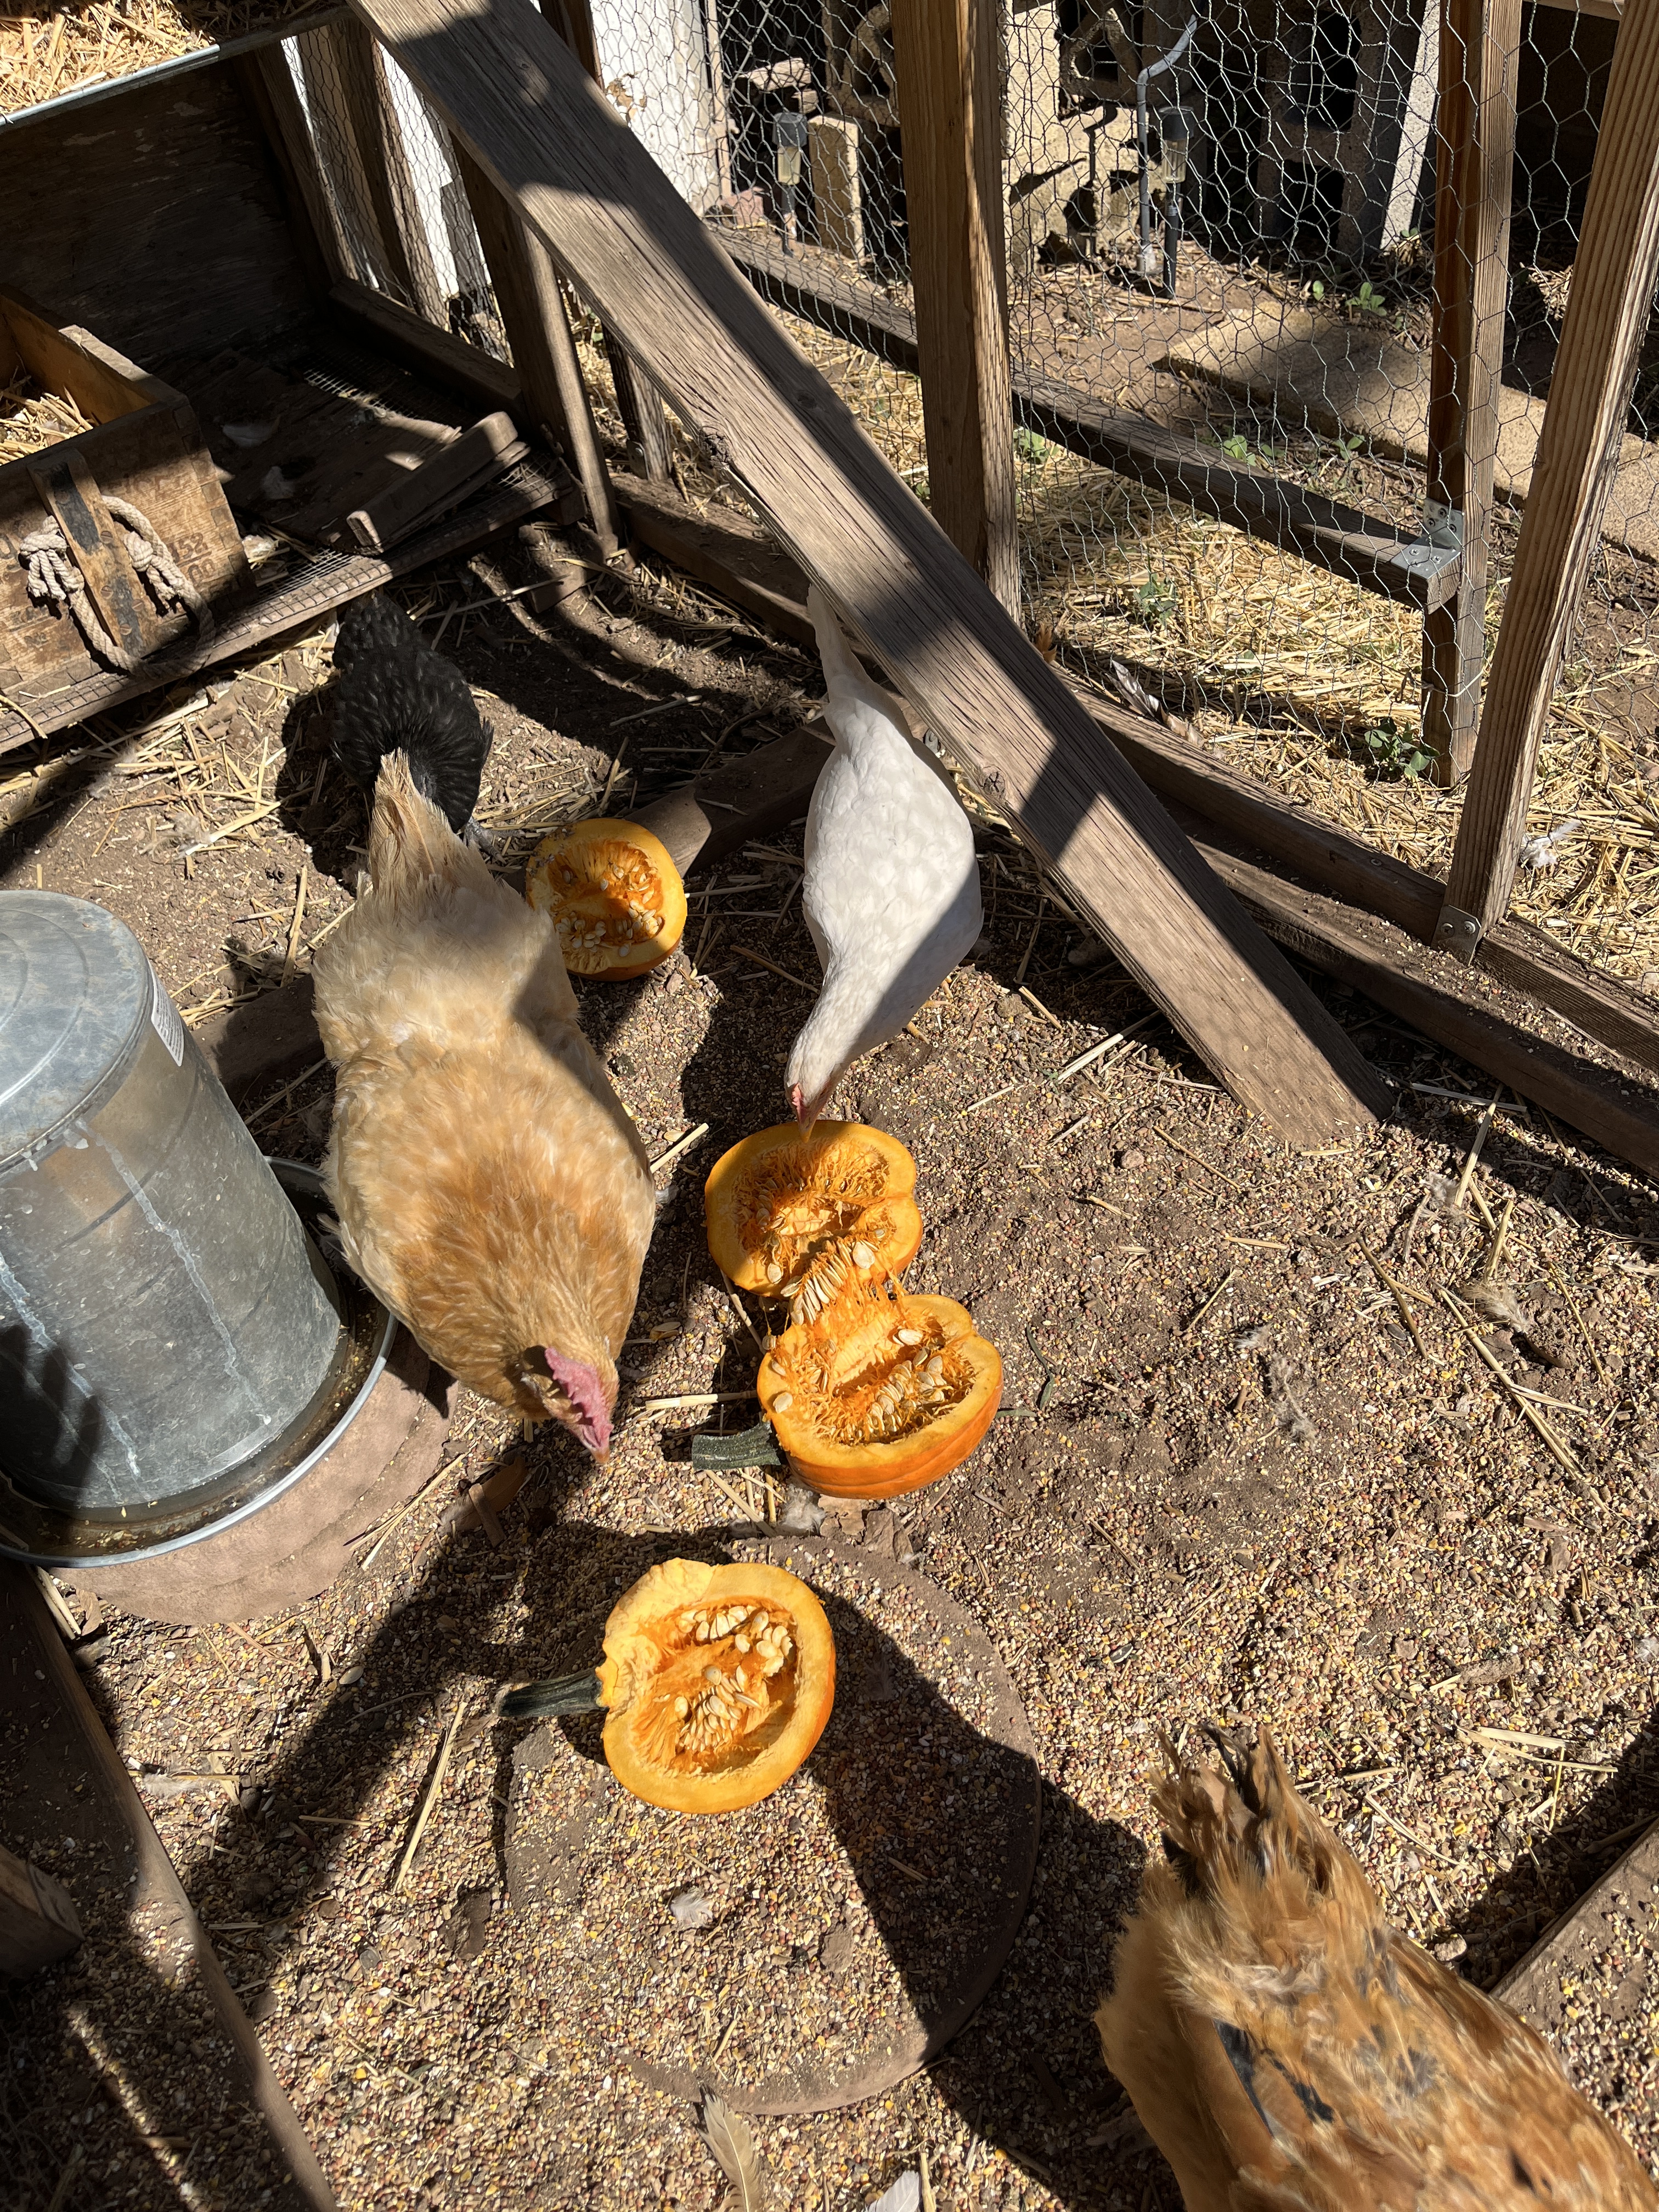
A day later and they only ate the seeds from one pumpkin and are again ignoring them. The compost pile has a bit of a new addition. Didn’t work as planned, but it was fun and I got a blog post out of it…not the post I expected but then my chickens do keep surprising me.
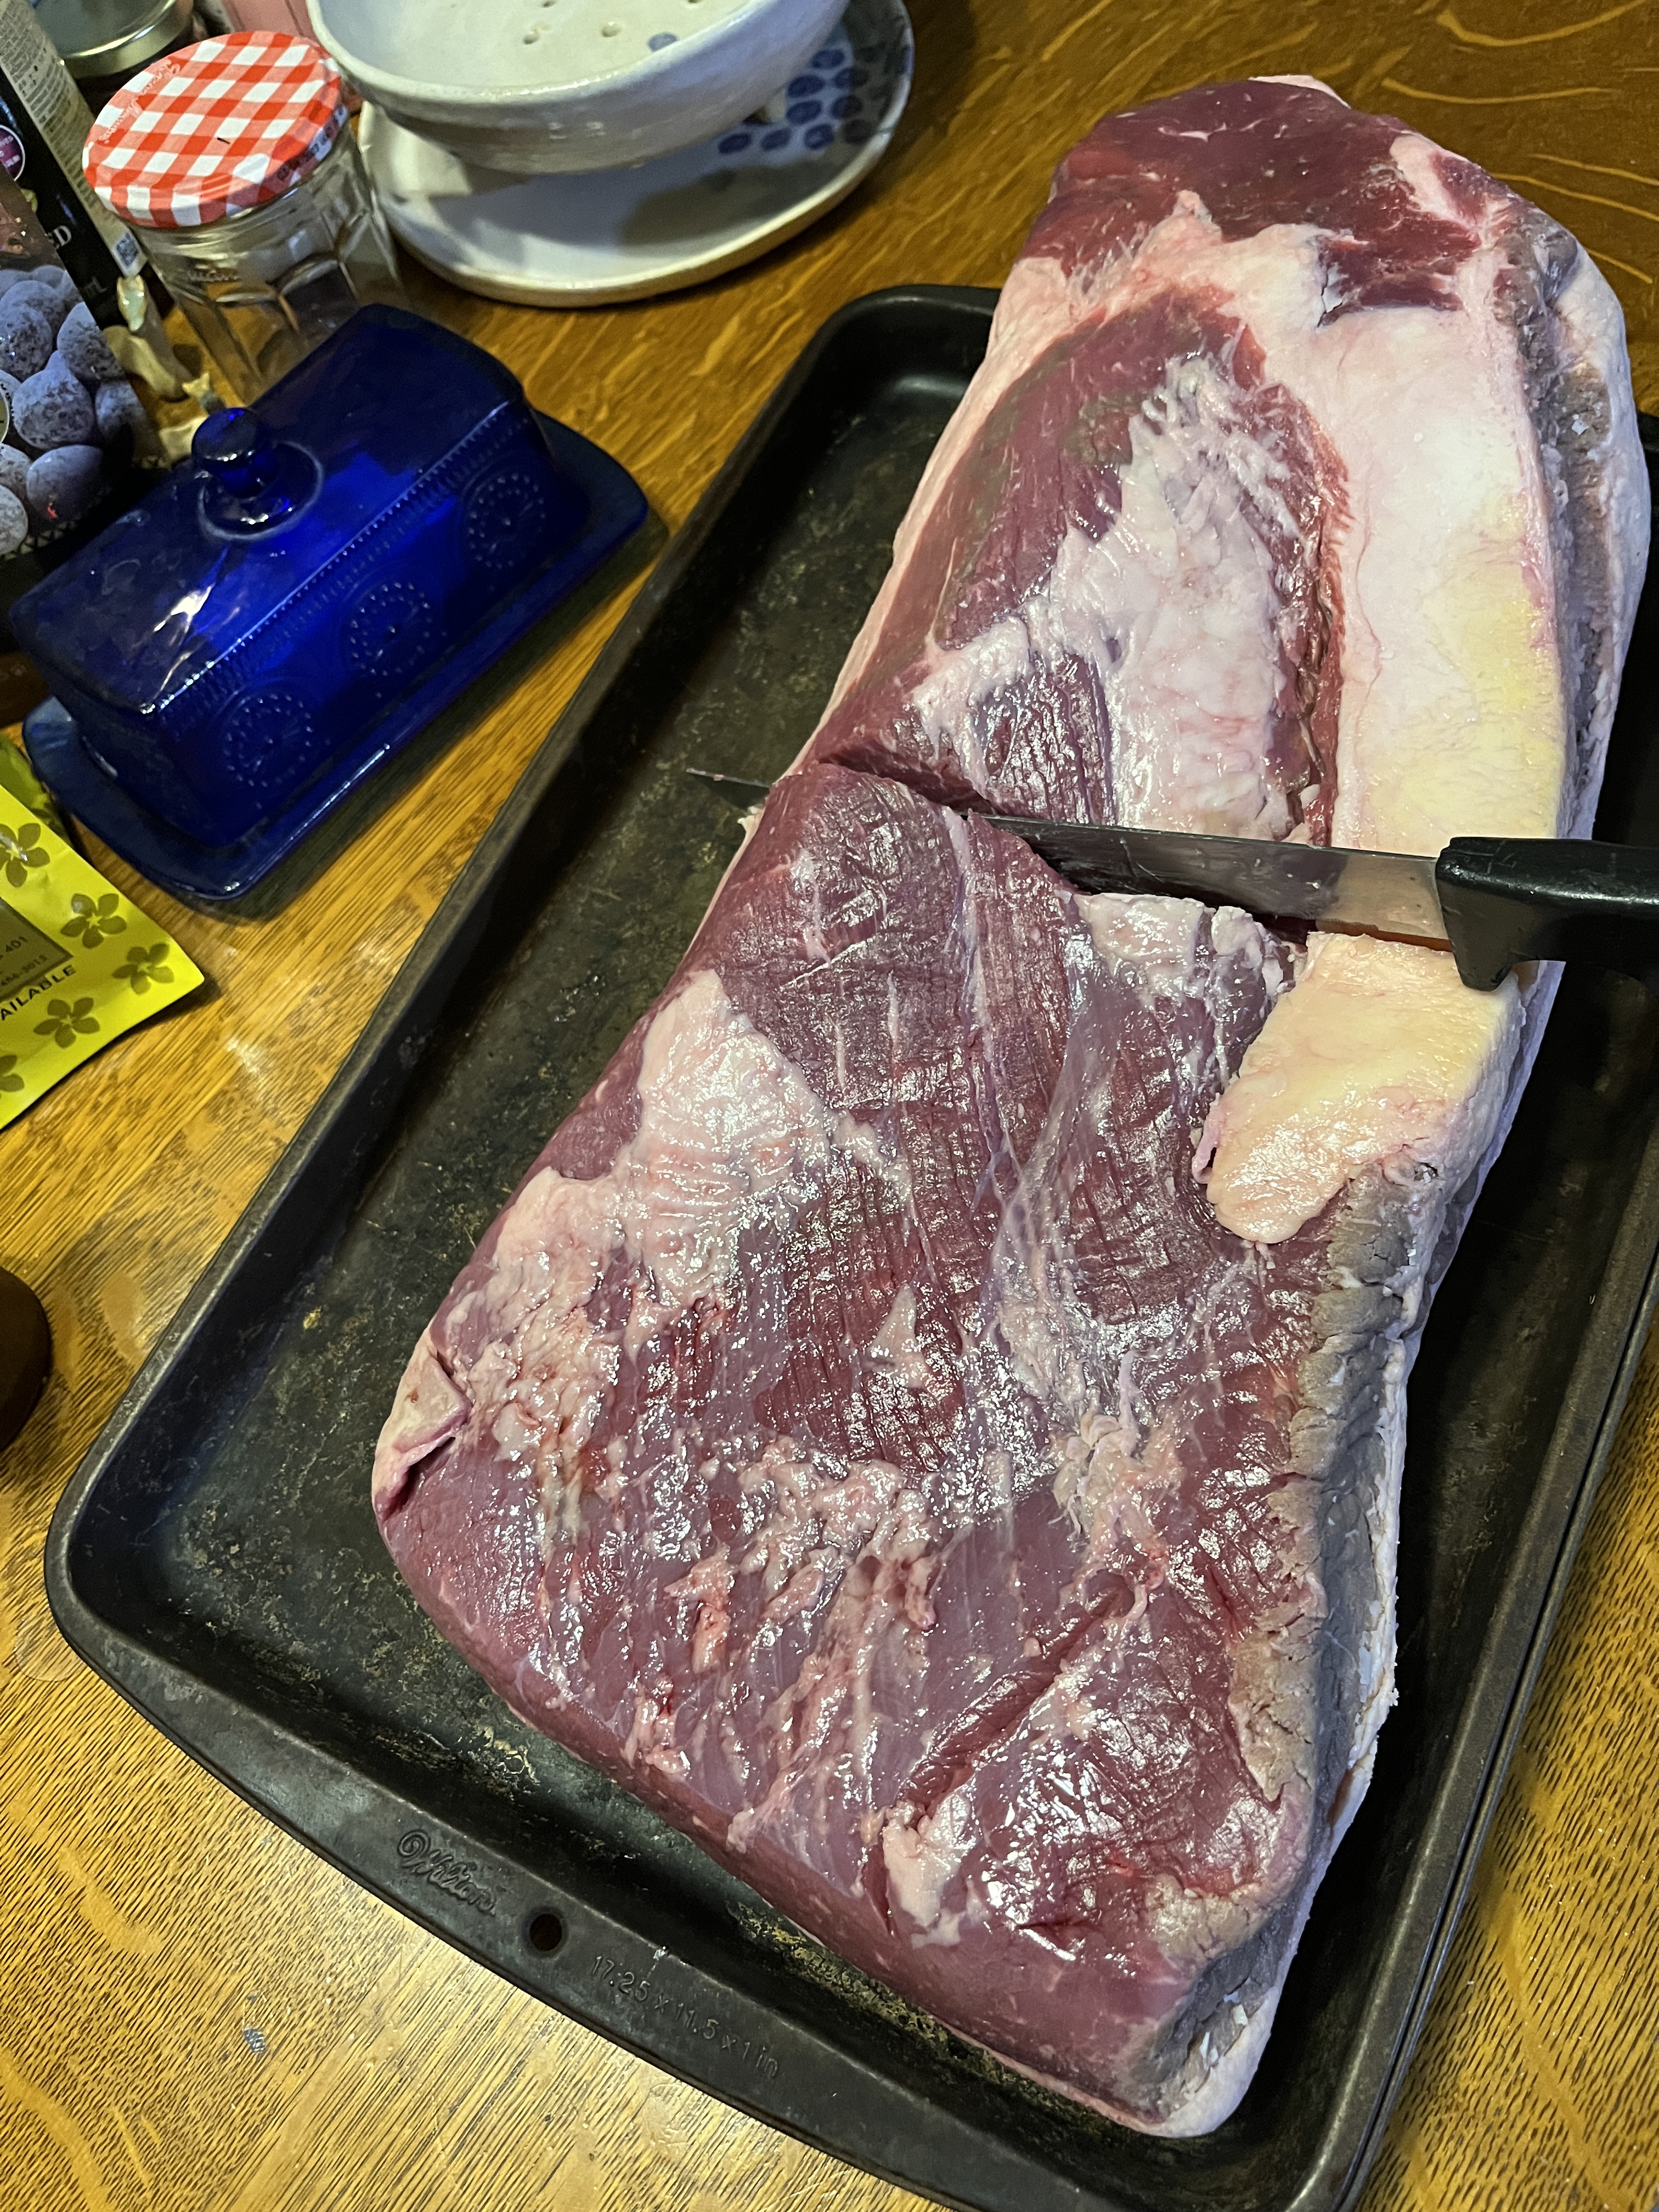
Brisket was on sale. I got a smallish one I could afford. I’ll have beef for meals for a couple months, now! I forgot to prep it this morning for grilling this afternoon, but other things took precedence and got done anyway so I’ll prep the brisket tonight and start the fire tomorrow after I get home from running errands. I only do this about once a year, it’s such a production.
Tonight. though, I put the brisket on a rimmed cookie sheet and cut it into 2 pieces, the point and flat ends. It’s easier to handle this way. If your grill’s big enough and whoever’s doing the grilling can manage go ahead and leave it whole.
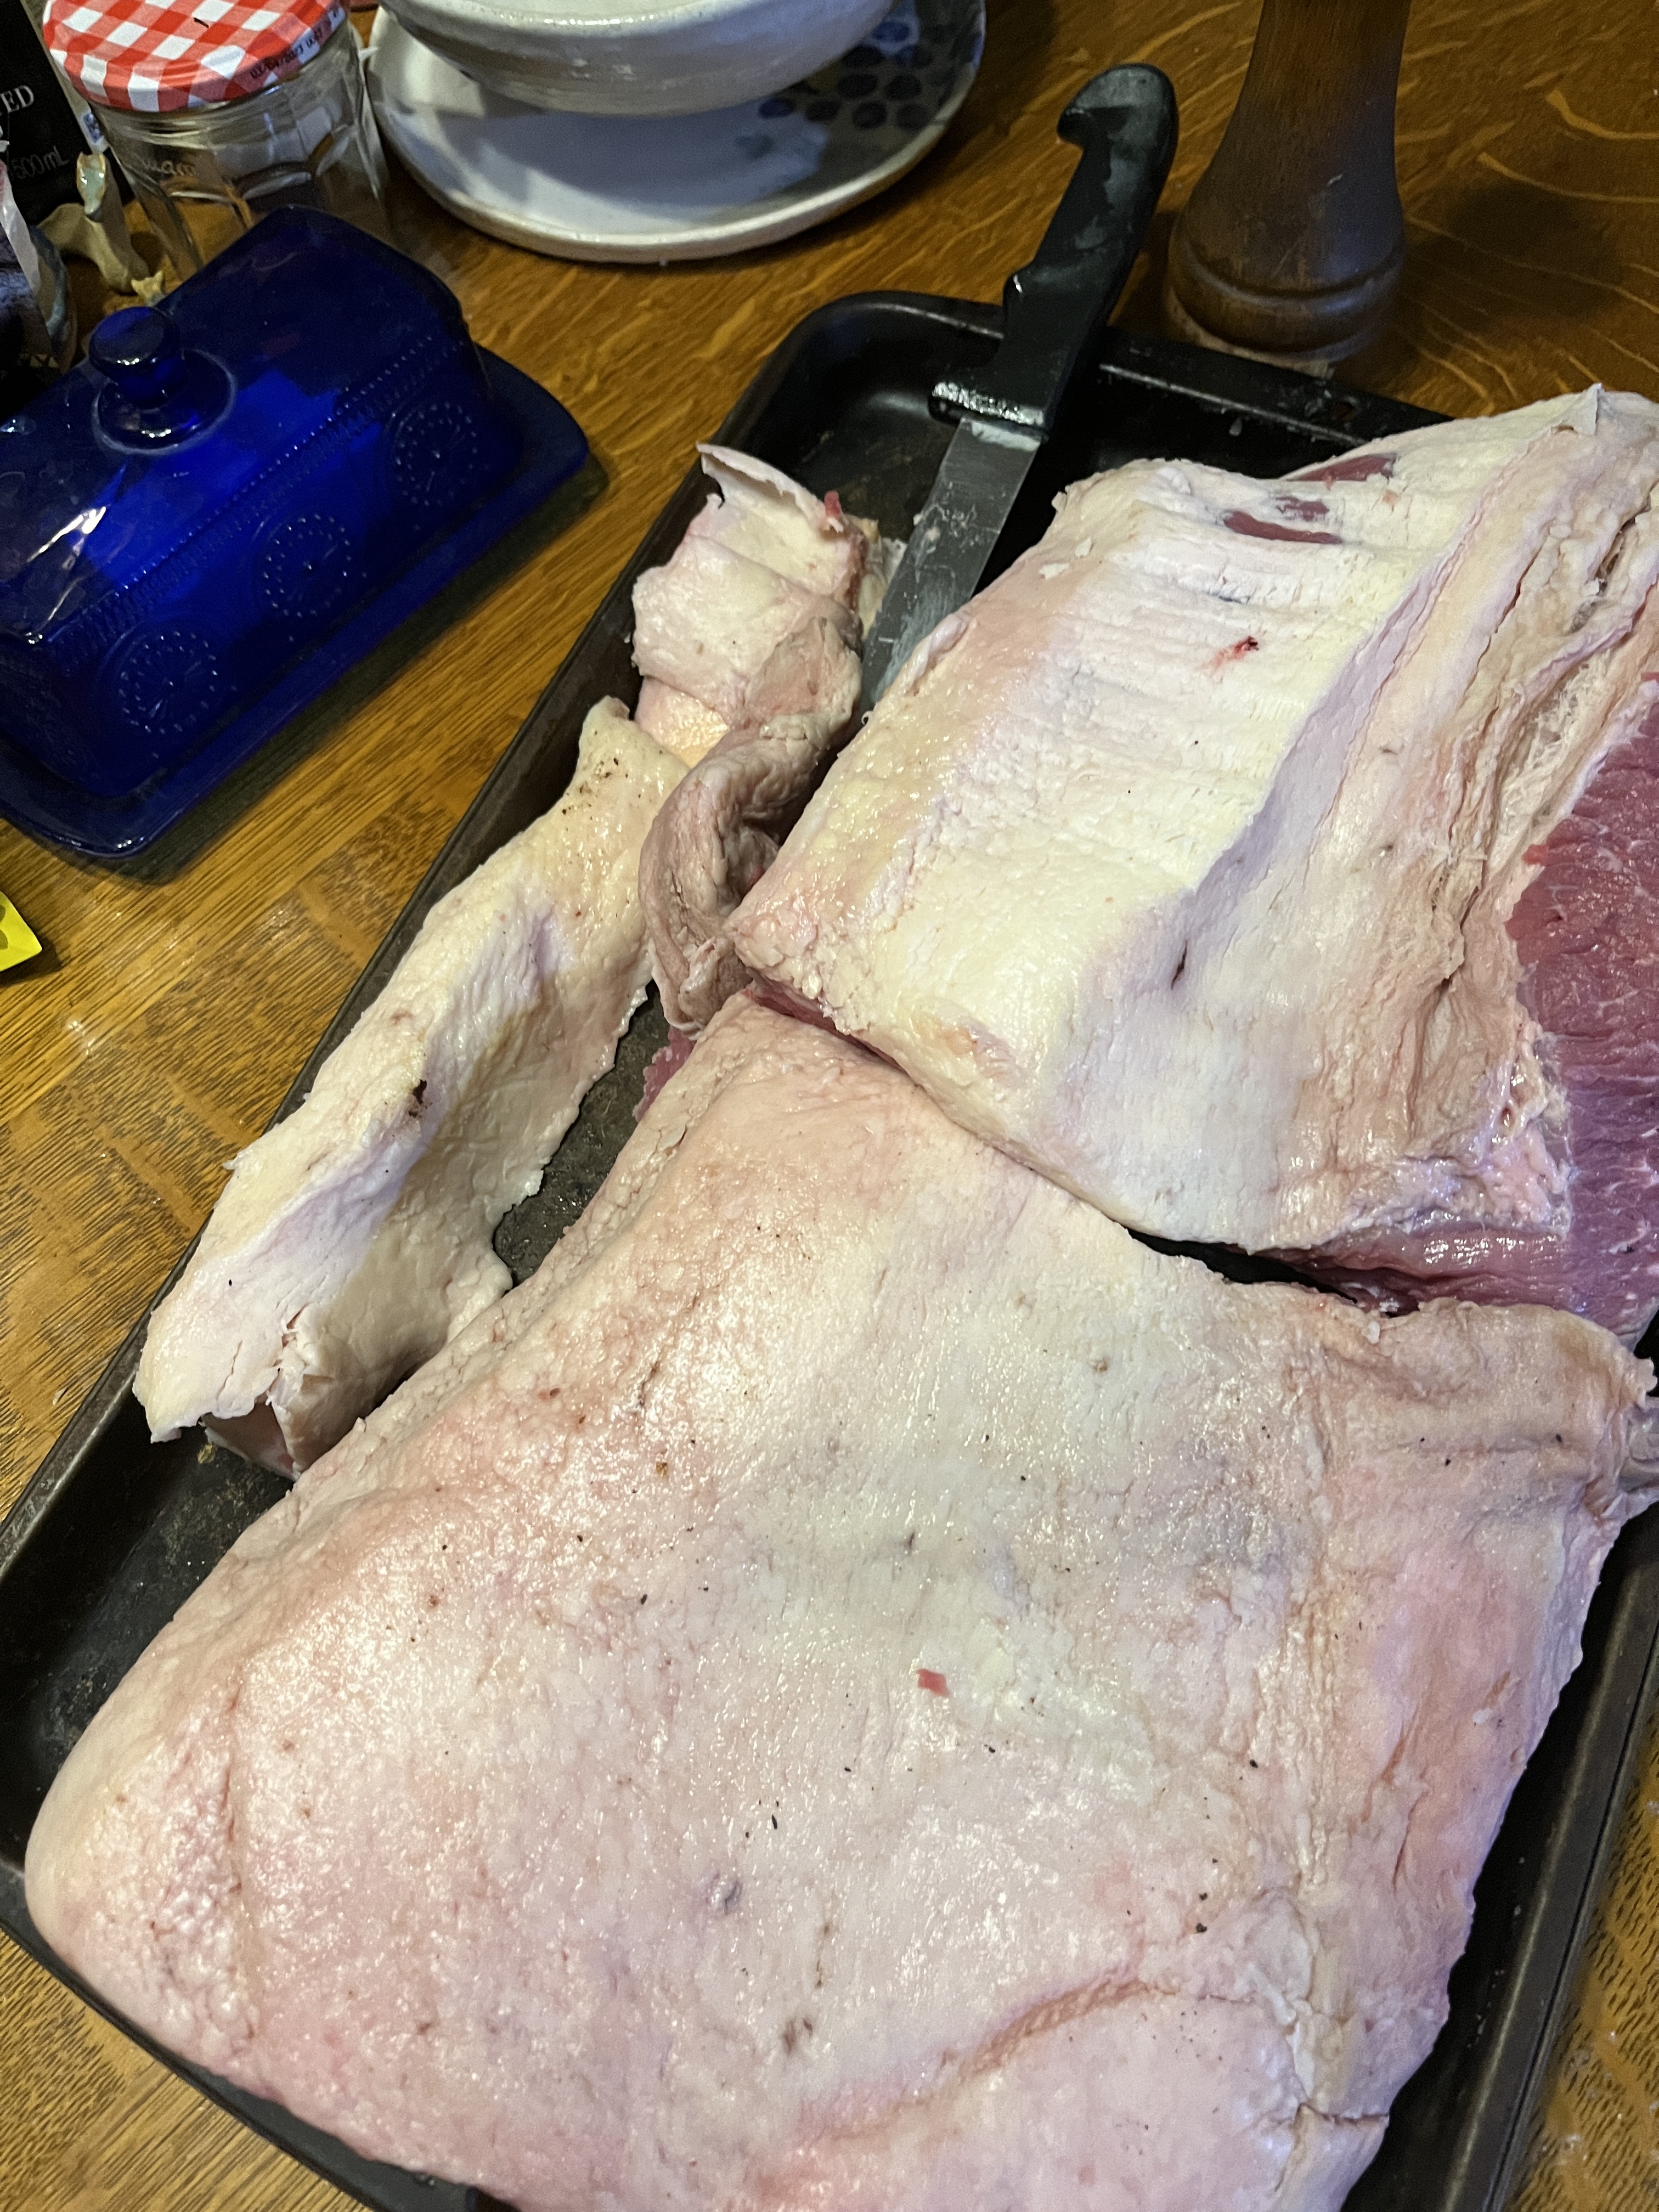
Then I trimmed off some excess fat,
Salted the meat well on all sides,
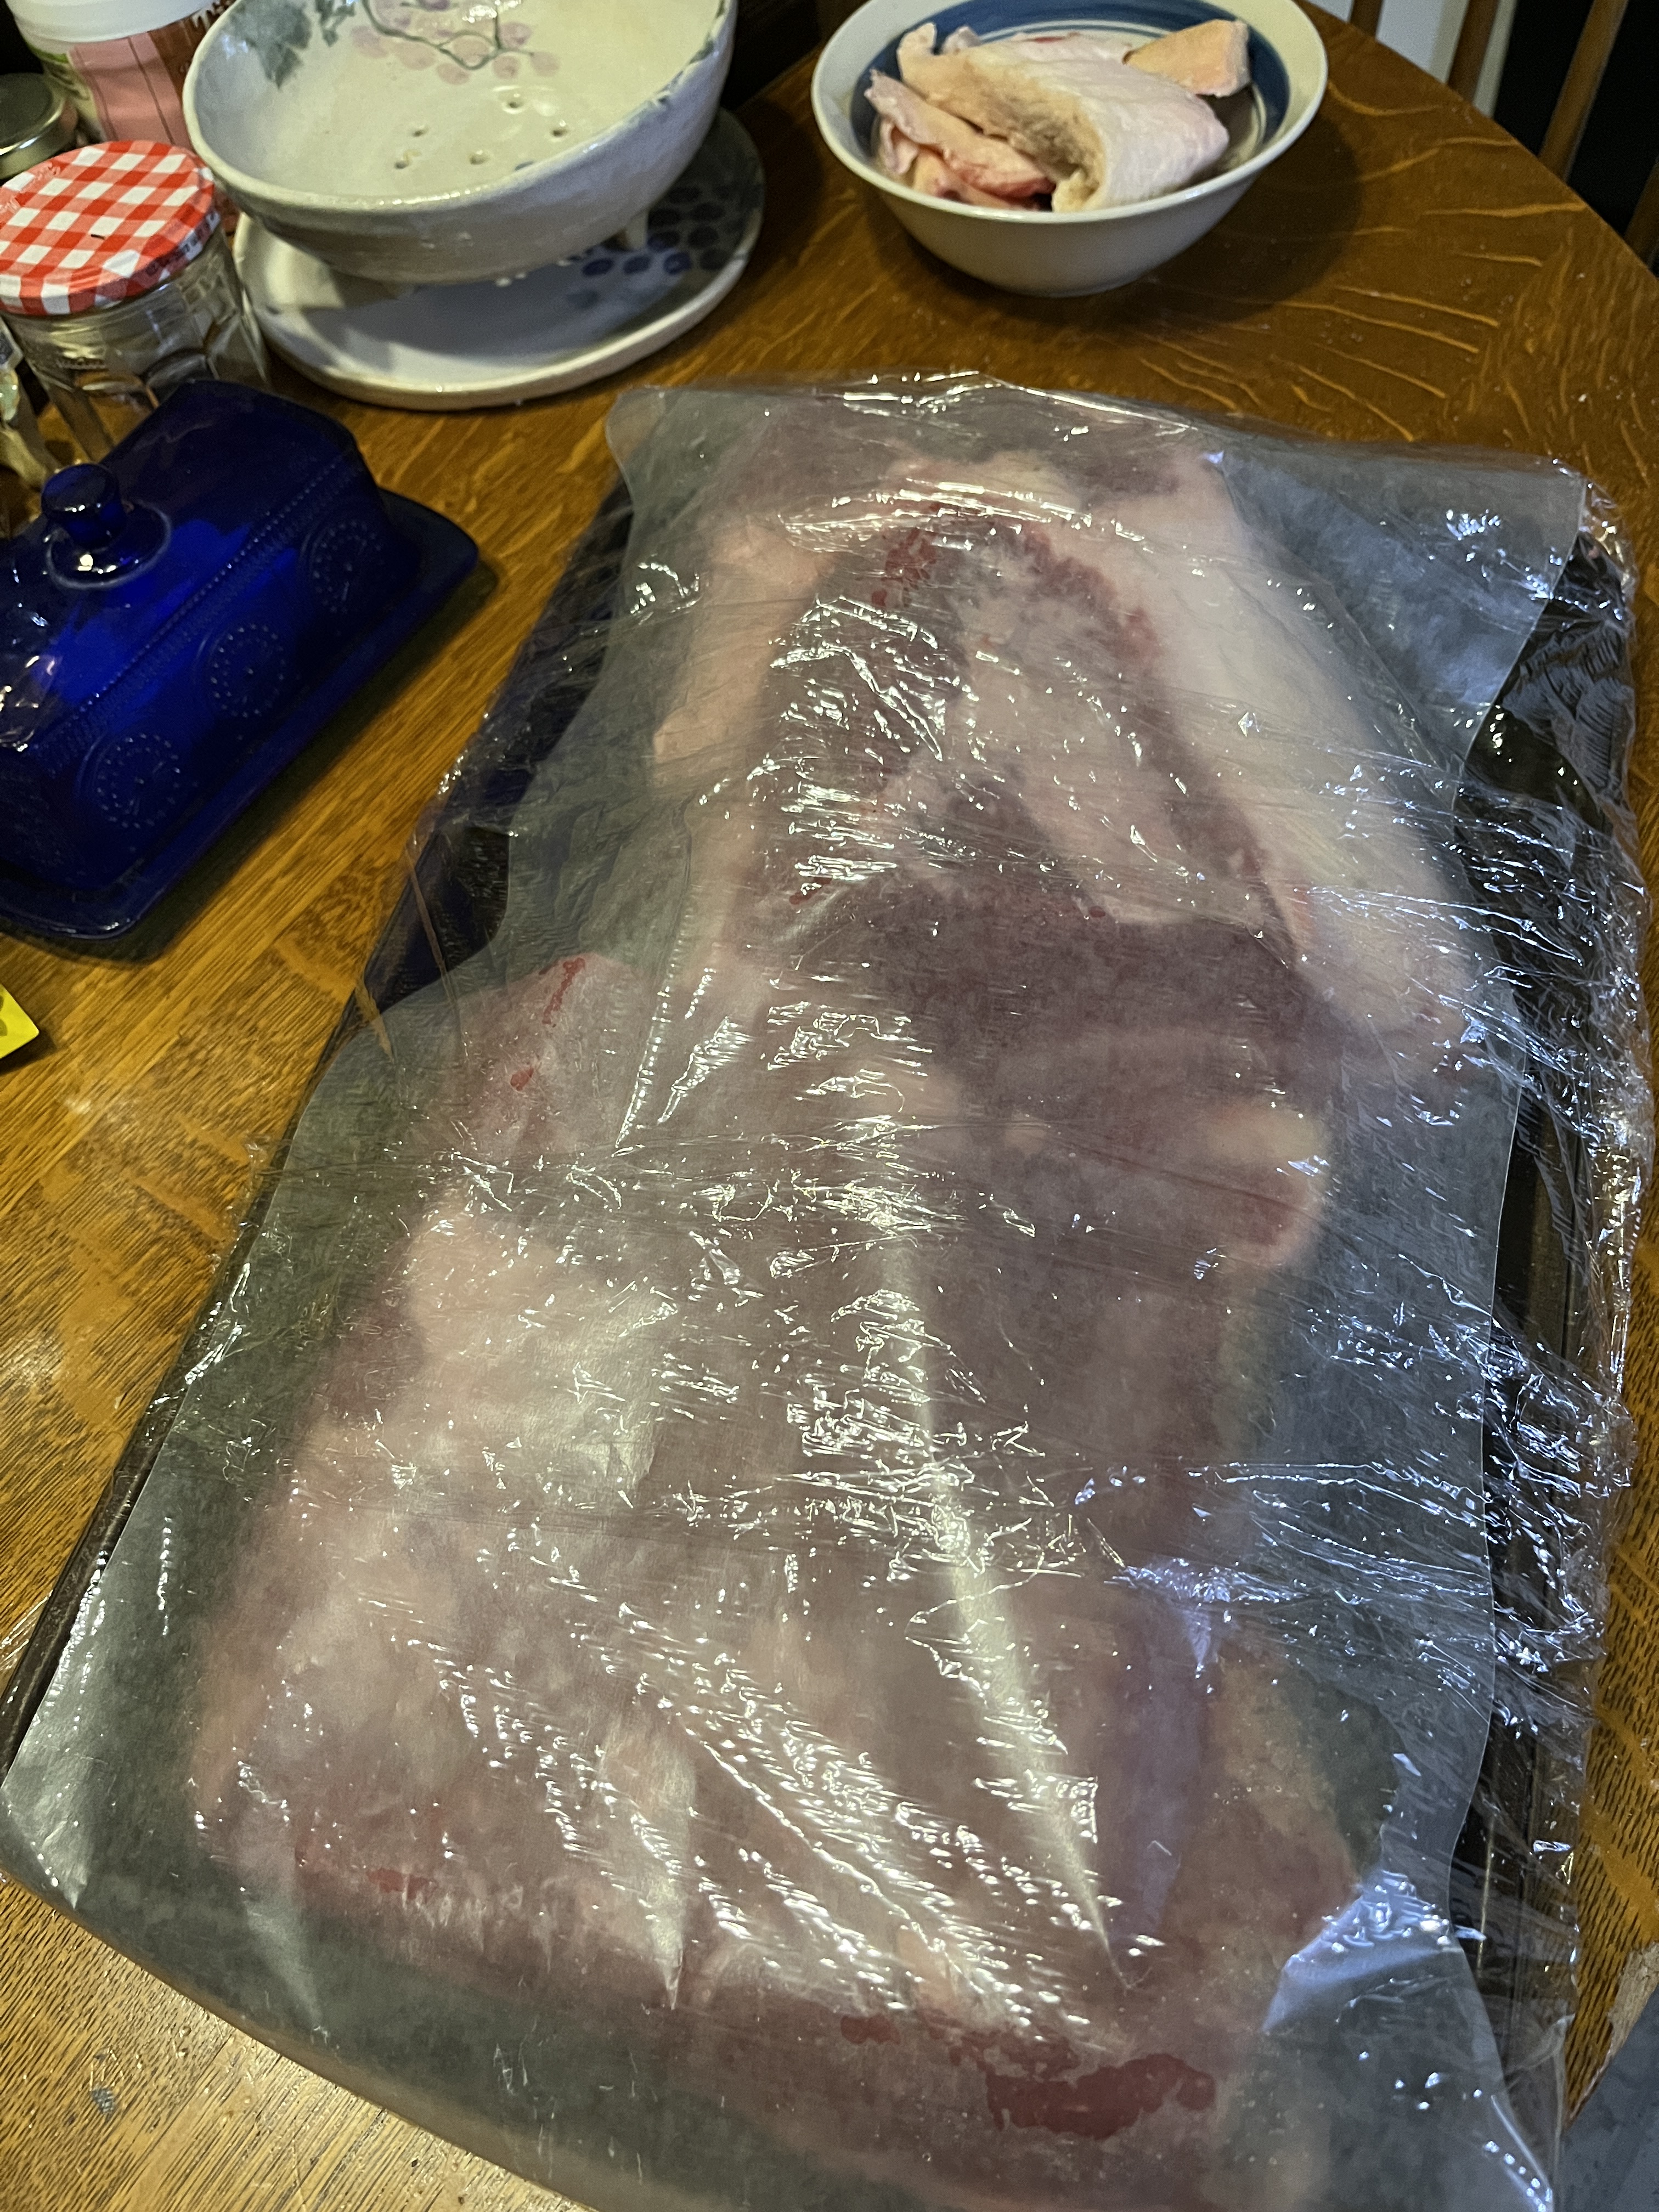
Covered it with waxed paper and plastic cling wrap,
Then somehow managed to fit it all into the fridge to sit overnight. I’ll render the fat tomorrow so I can use it in soap-making…but that’s another blog post.
After morning errands I started the fire in the firepit and put the brisket on the grill as soon as the coals were ready. After starting the fire it took about 30 minutes for the coals to be ready.
Put the point side on the ‘cooler’ side of the grill and the flat end on the ‘hotter’ side, fat side down. In about 30 minutes turn them over.
When the fat starts to render and flares up have a glass of water ready to splash on the fire. You’re not wanting to put it out, just tame the flames.
Have tools ready and don’t forget to have something to drink for yourself.
Enjoy the company
and have something to do while you’re waiting for the meat to get there. Today I’m working on a surprise project, carving some stamps made from clay from Burning Man.
After about an hour (just before noon) I got tired of hanging out in 90 degrees, 2 of the stamps I was carving were done and I was out of water so I took the brisket in and put in in a 300 degree oven with some onions. They should be done around 4ish. About 3ish I put a bunch of sliced mushrooms in the pan around the brisket.
I put a curfew (old word, I use a big flowerpot saucer for this) and finished watering down around the firepit. Finally I could go in for lunch. Of course, after lunch I checked on the coals and also periodically as I did other stuff, too, to make sure nothing flared up. Safety first.
While the brisket was cooking I put up a shade on the porch, raked the remnants of last year’s garden into the compost bin, wedged and wrapped some reconstituted clay and added to some blog posts. I finally pulled the brisket out of the oven and let it rest while I took a shower. I almost forgot to take pictures!
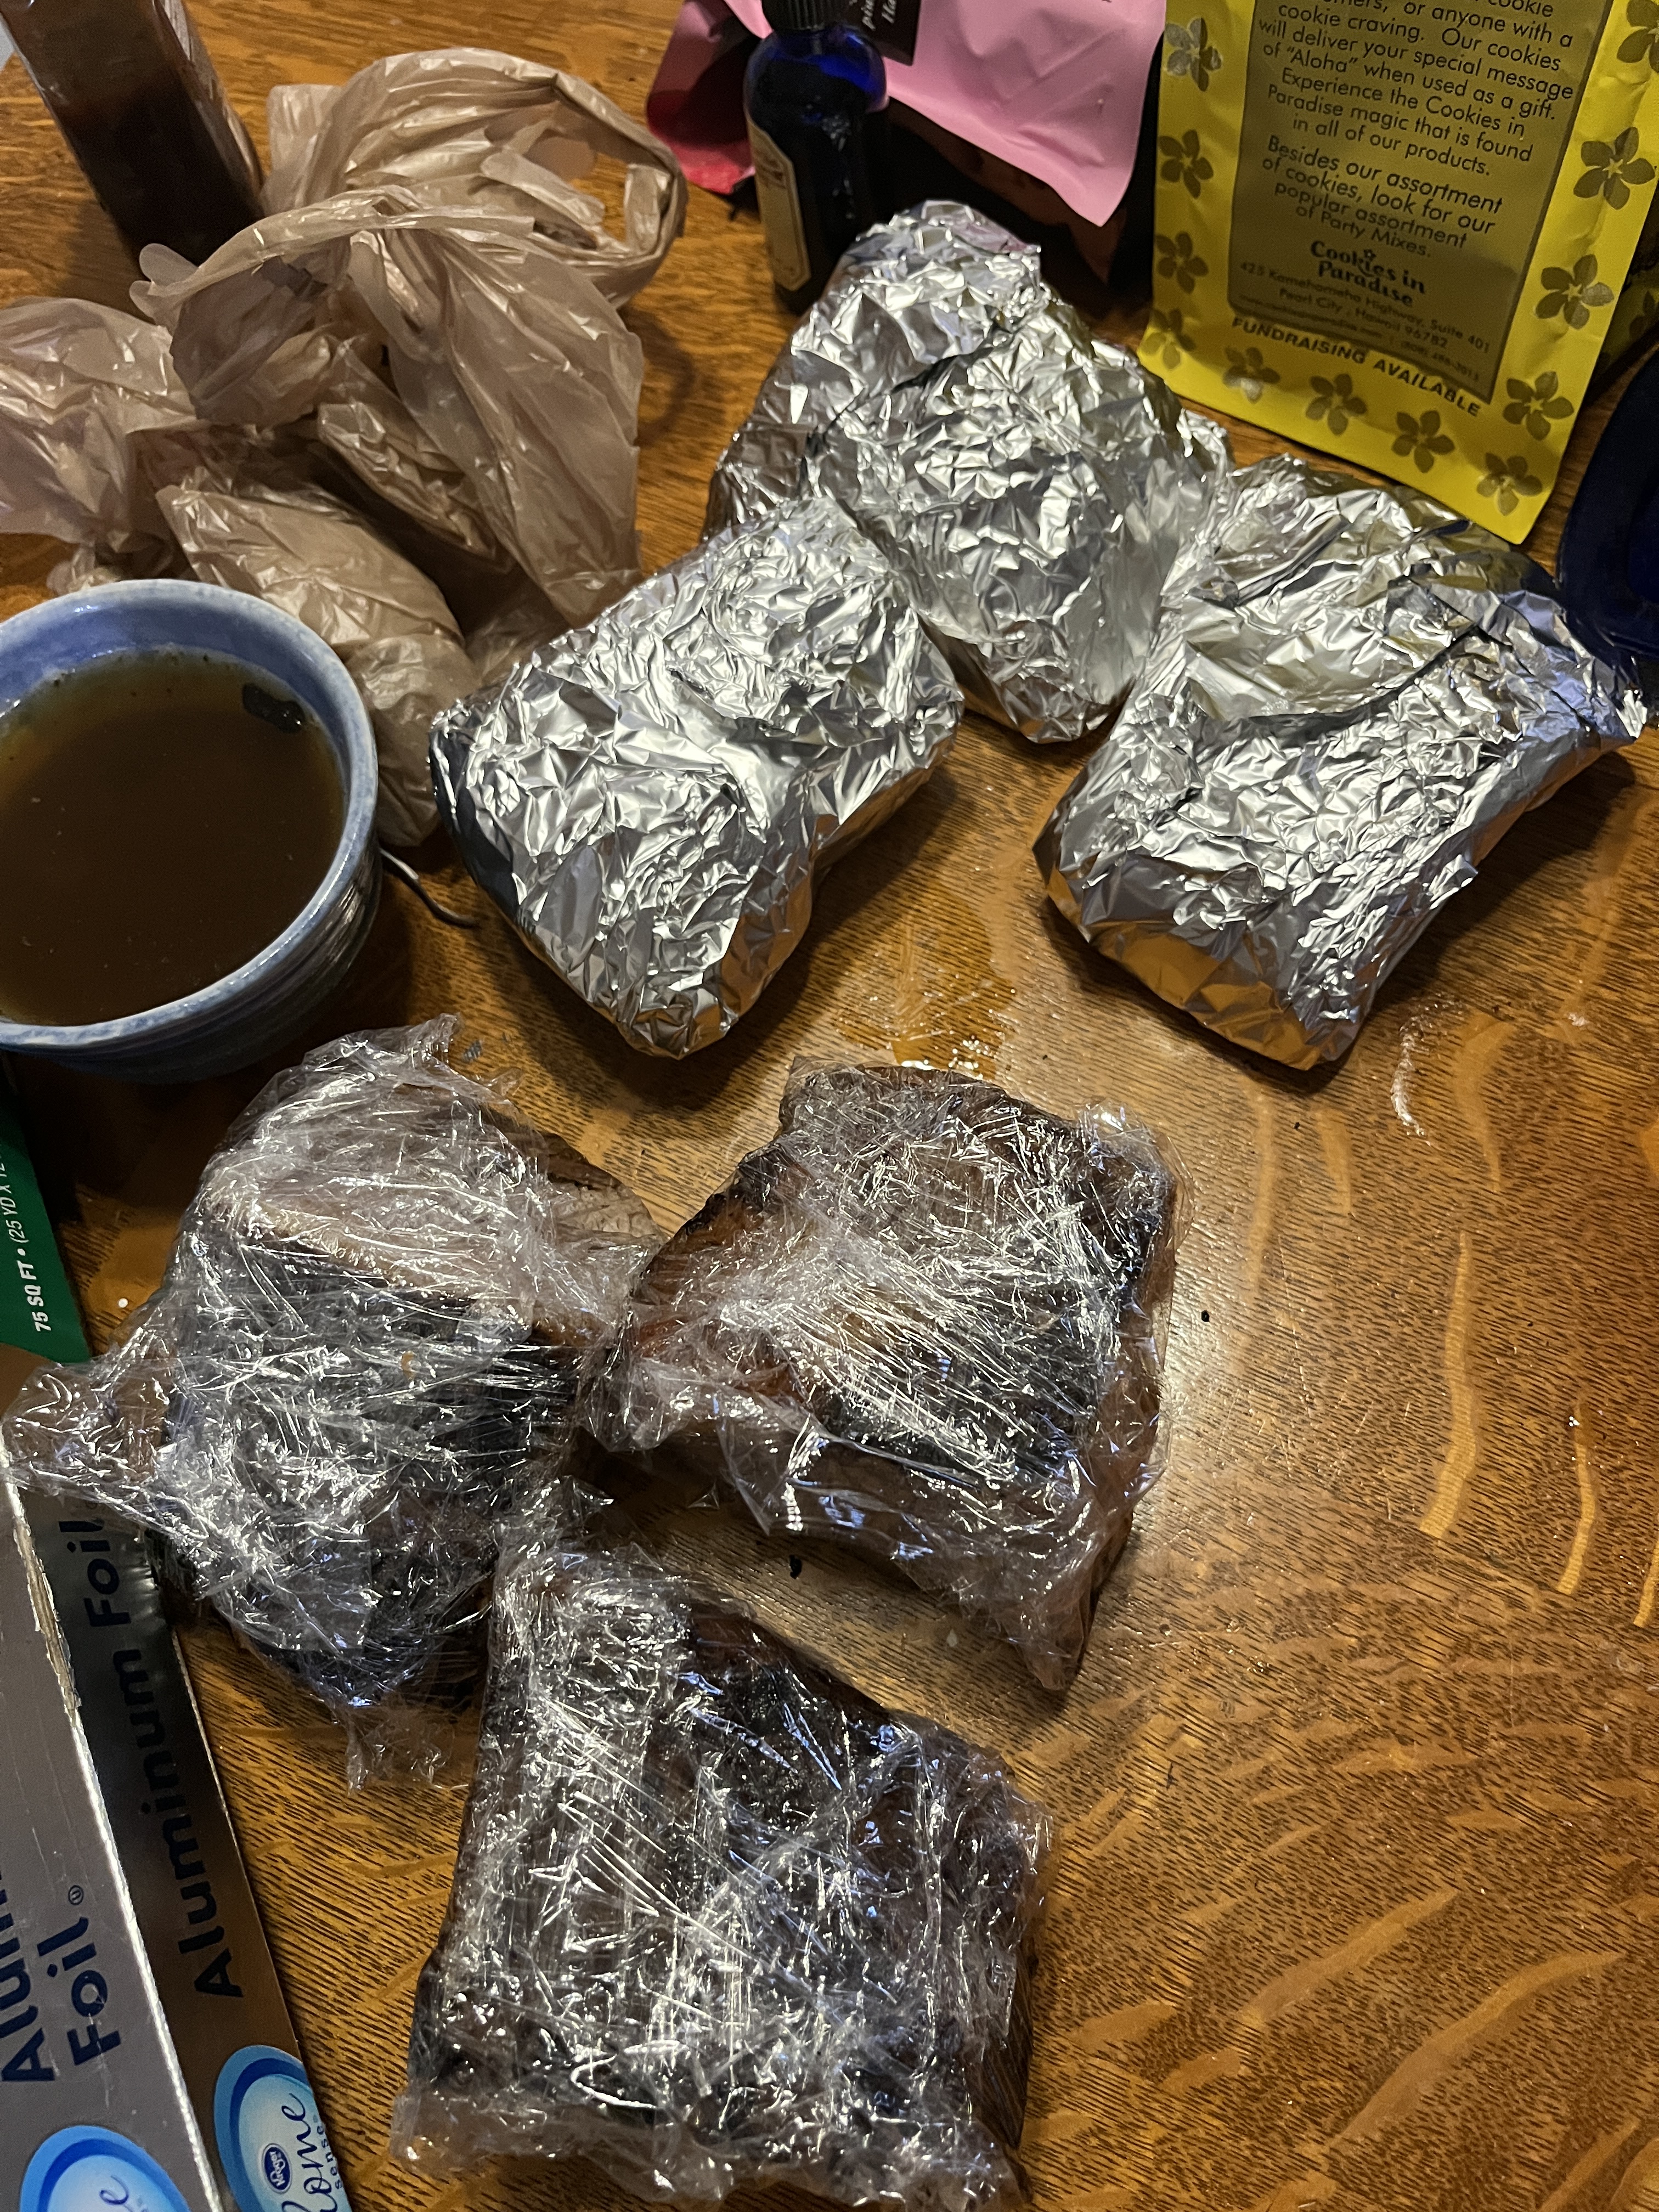
When we were done with dinner I cut the leftovers into more or less equal pieces and wrapped them in plastic wrap and aluminum foil before putting them in the freezer. Well, one went into the fridge for later in the week. We’ll be eating this for a while as I make stews, soups, enchiladas, sloppy Joes, French dip, stroganoff, tacos, shepherd’s pie and all sorts of yummy dinners.
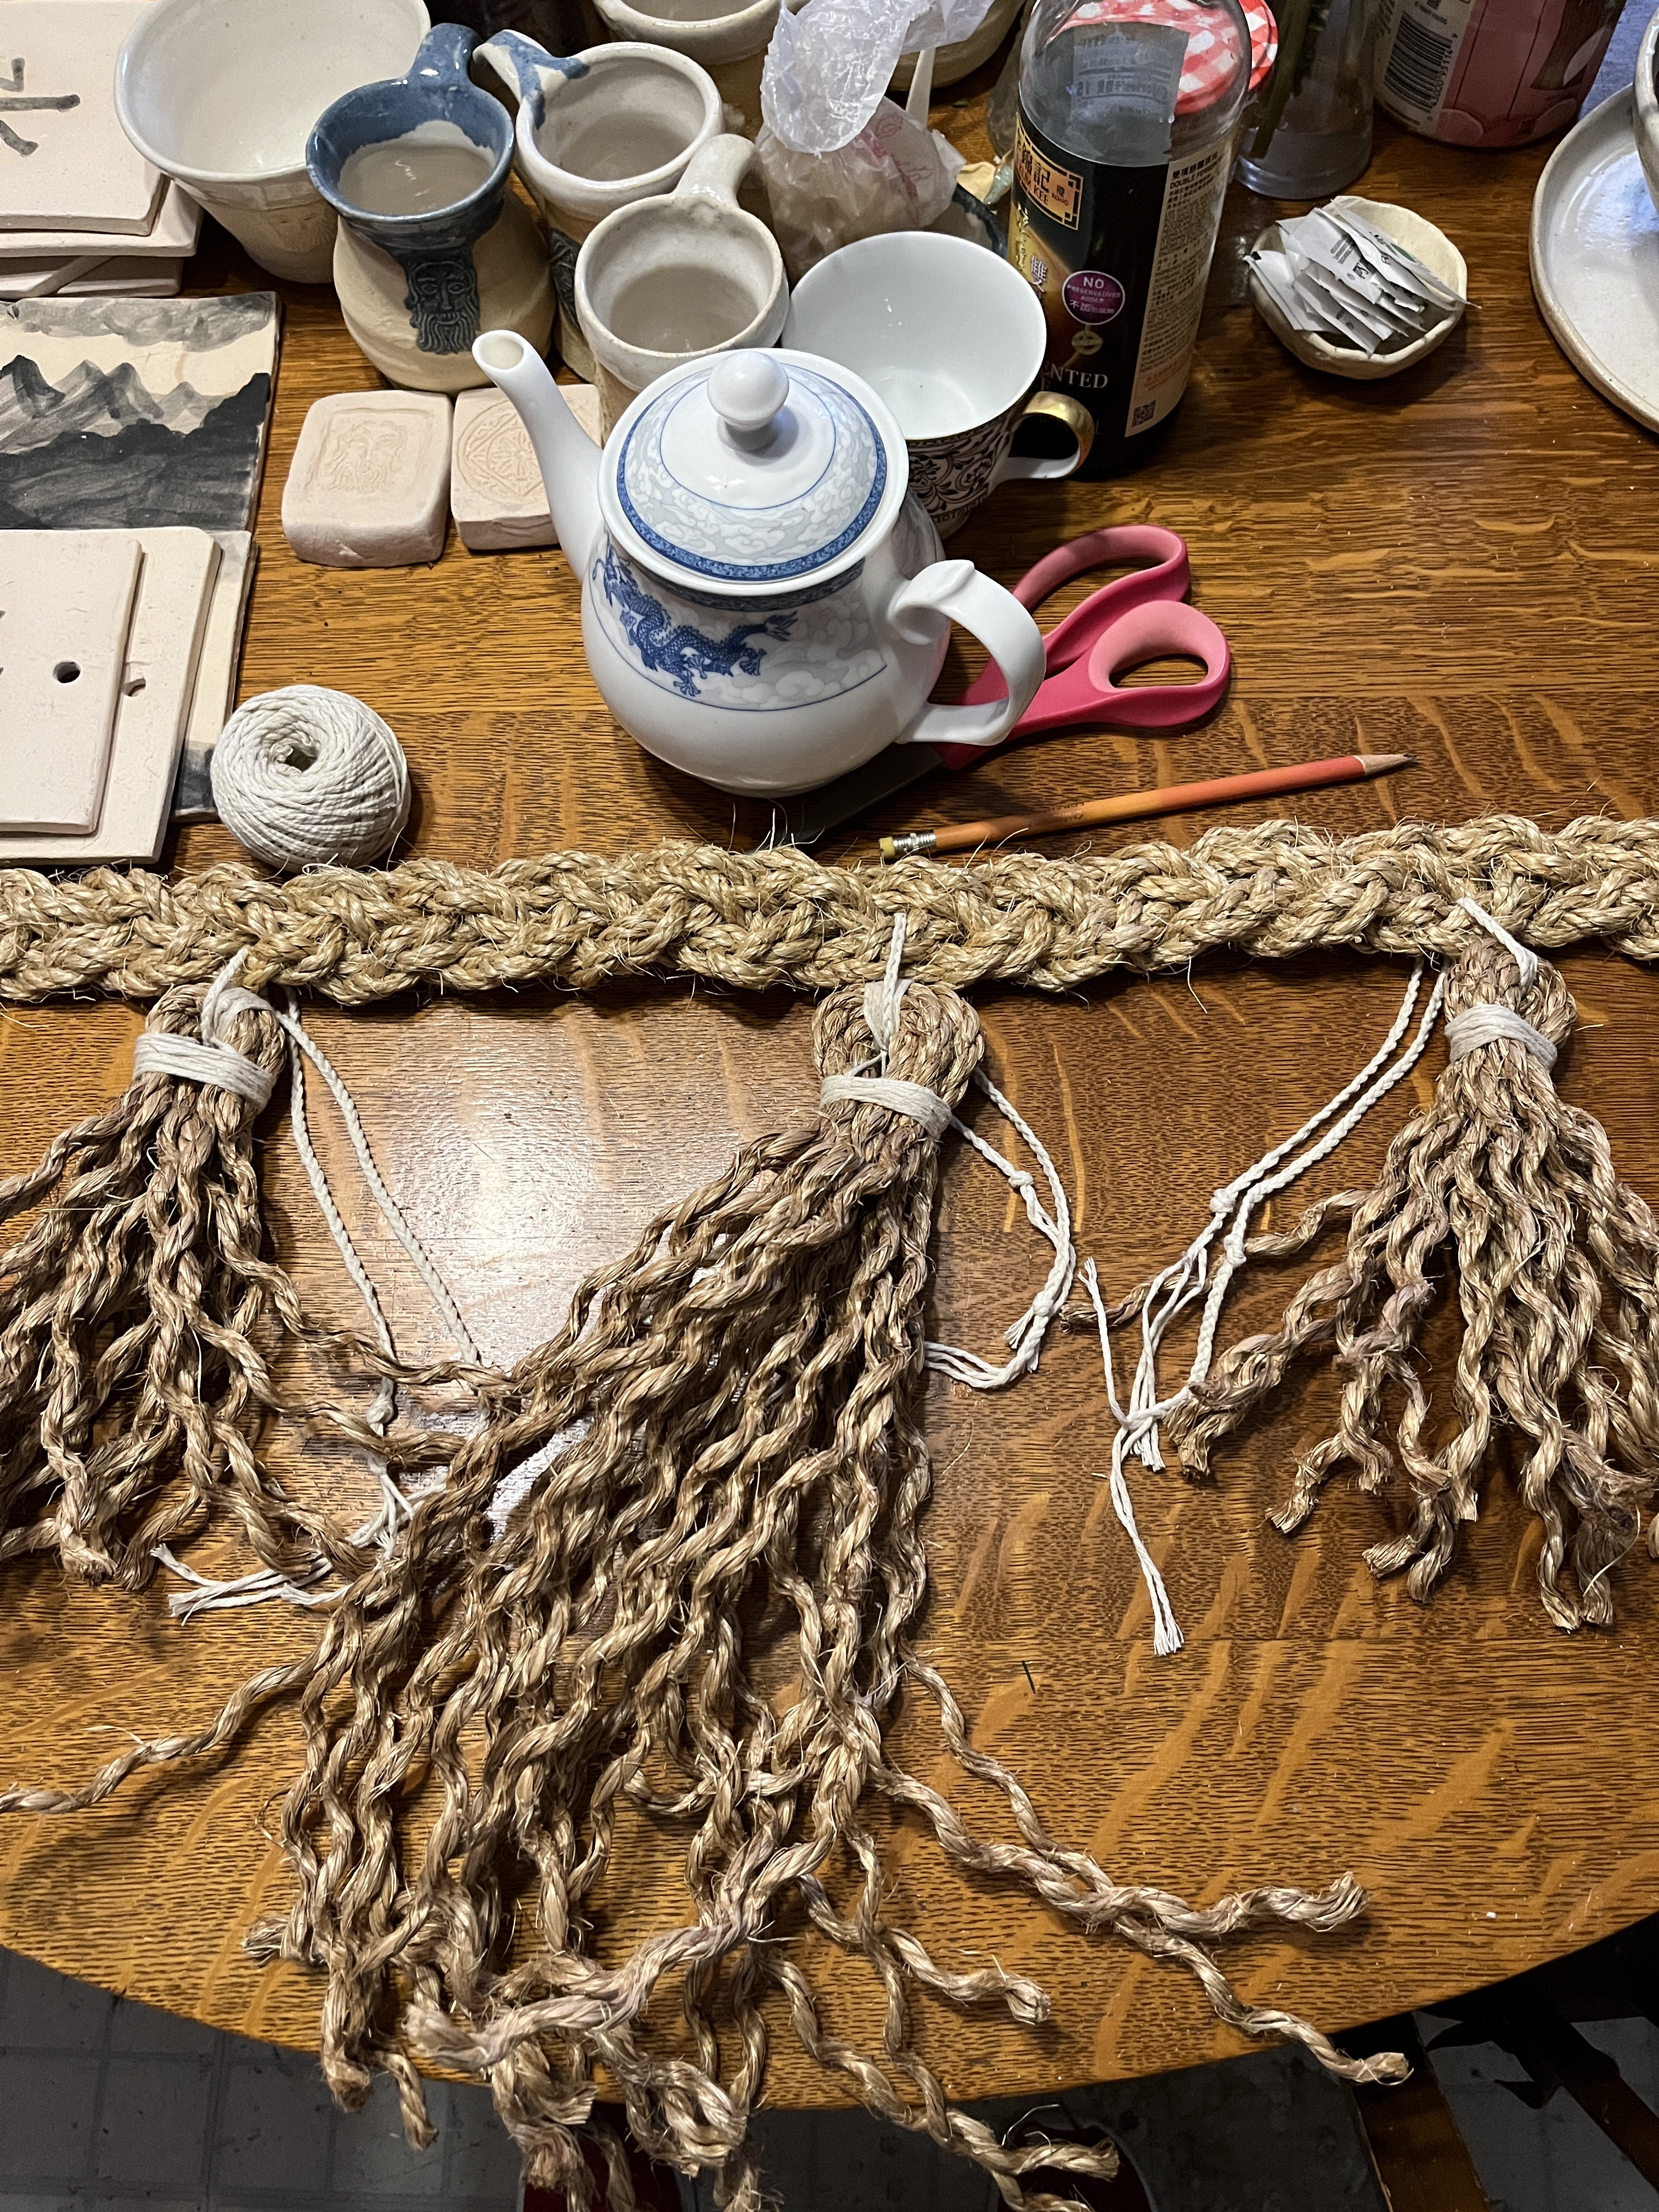
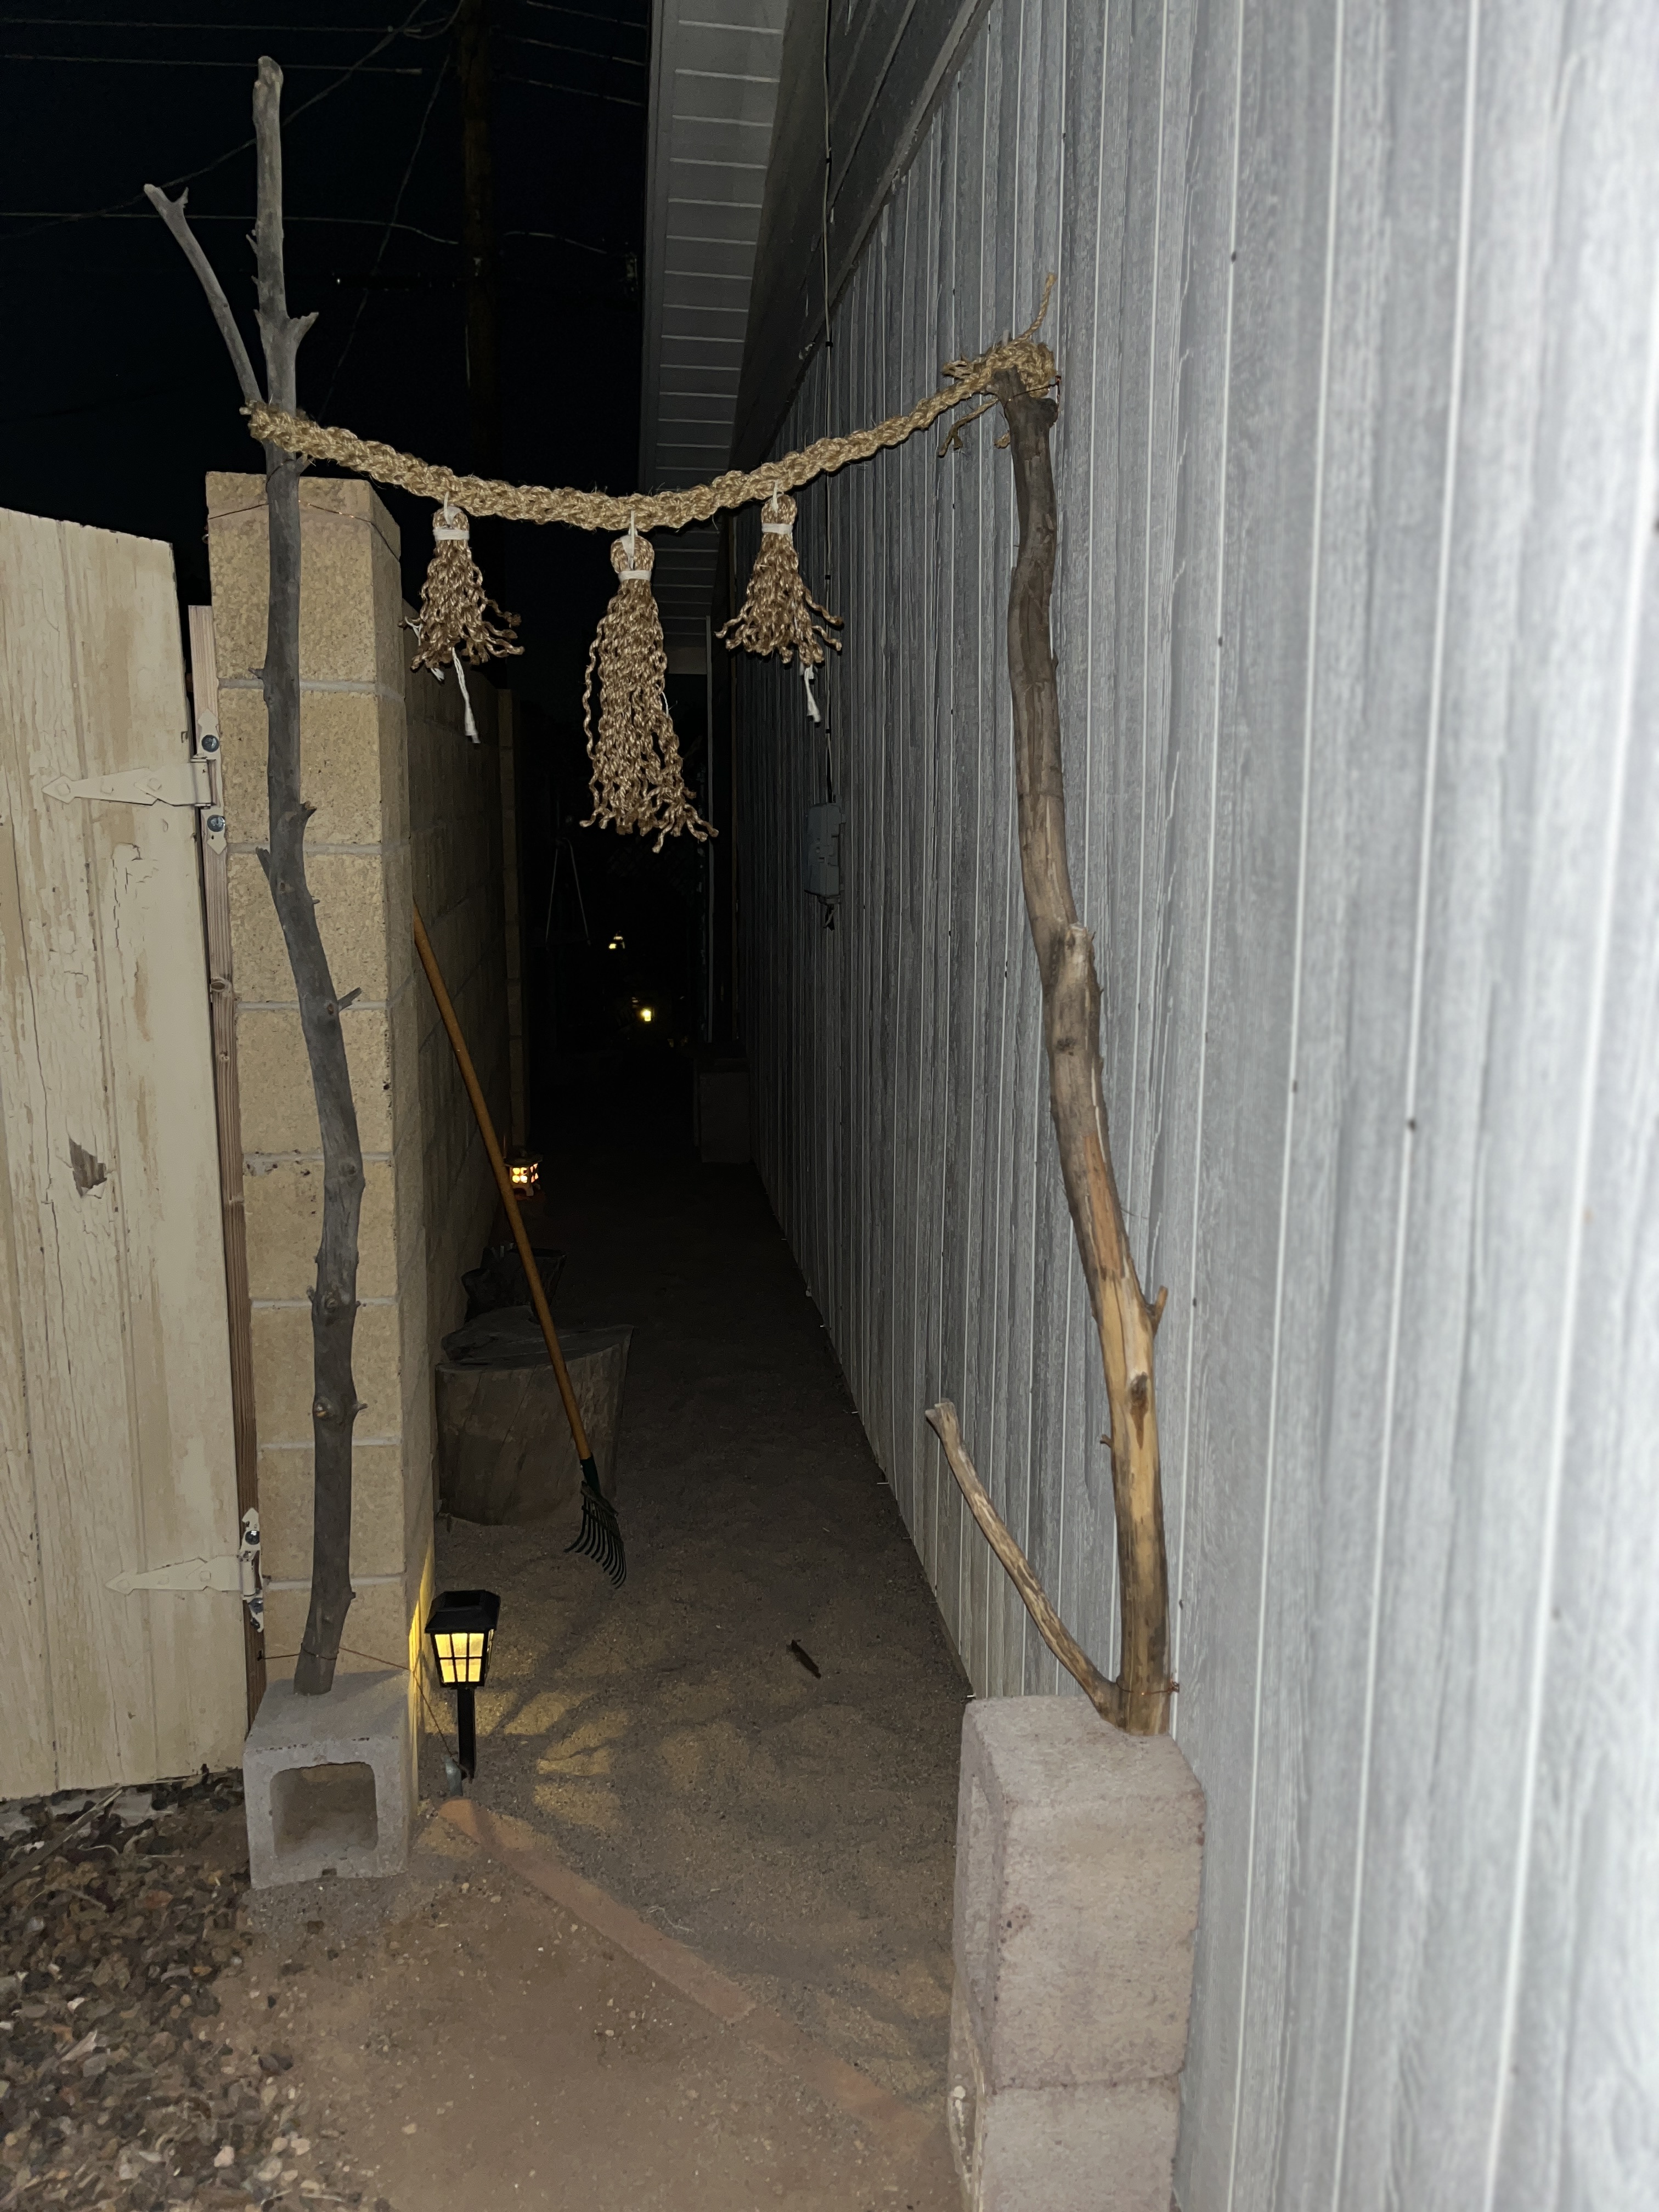
I can do basic cut-it, nail-it, screw-it carpentry but I’m not so comfortable with my skills to make a nice wooden top for a Torii Gate. An old form has rope across the top, and tassel-things, hence the swag in the middle and details. Rope. I can do that. And tassels. Yup, I’ll have a front for my Zen-ish garden soon!
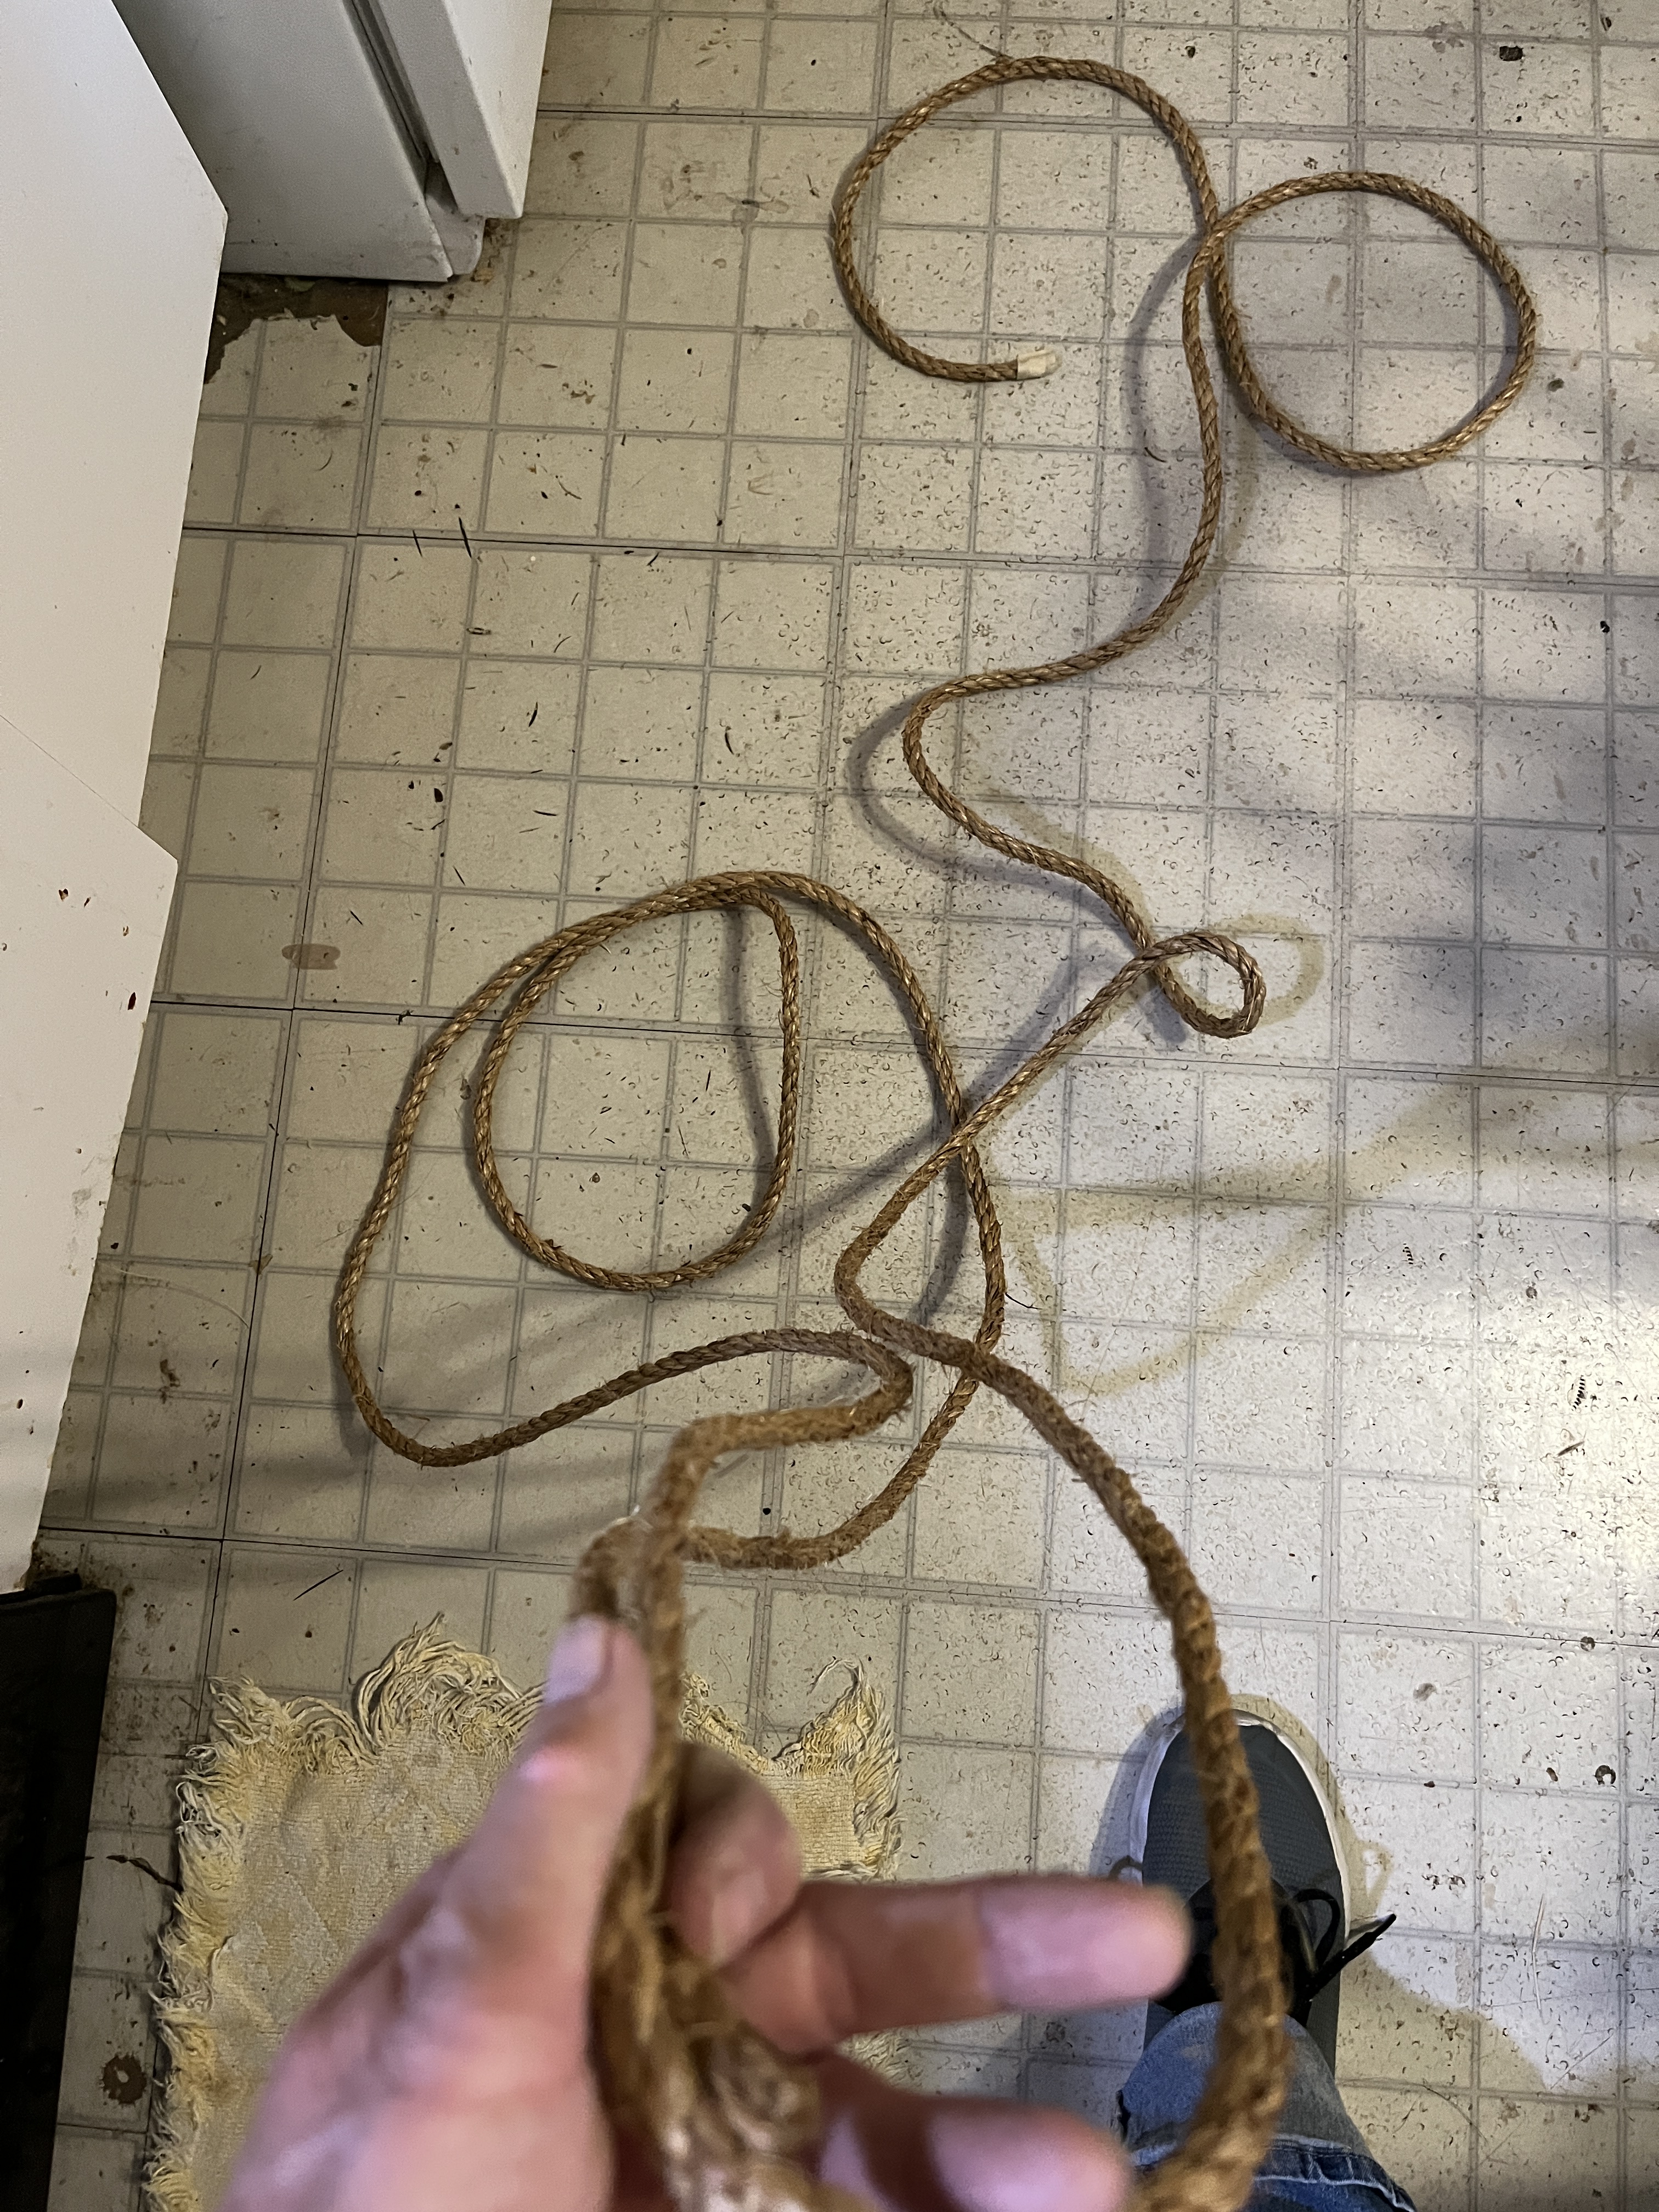
A while back (when I can a bit of extra cash) I bought some rope for this project and set it aside for when I had a bit of extra time. I bought 2 types of rope, 1 really long length for twining or braiding (I decided to braid it) and 1 shorter length to make tassels out of. The original length was about 52 feet.
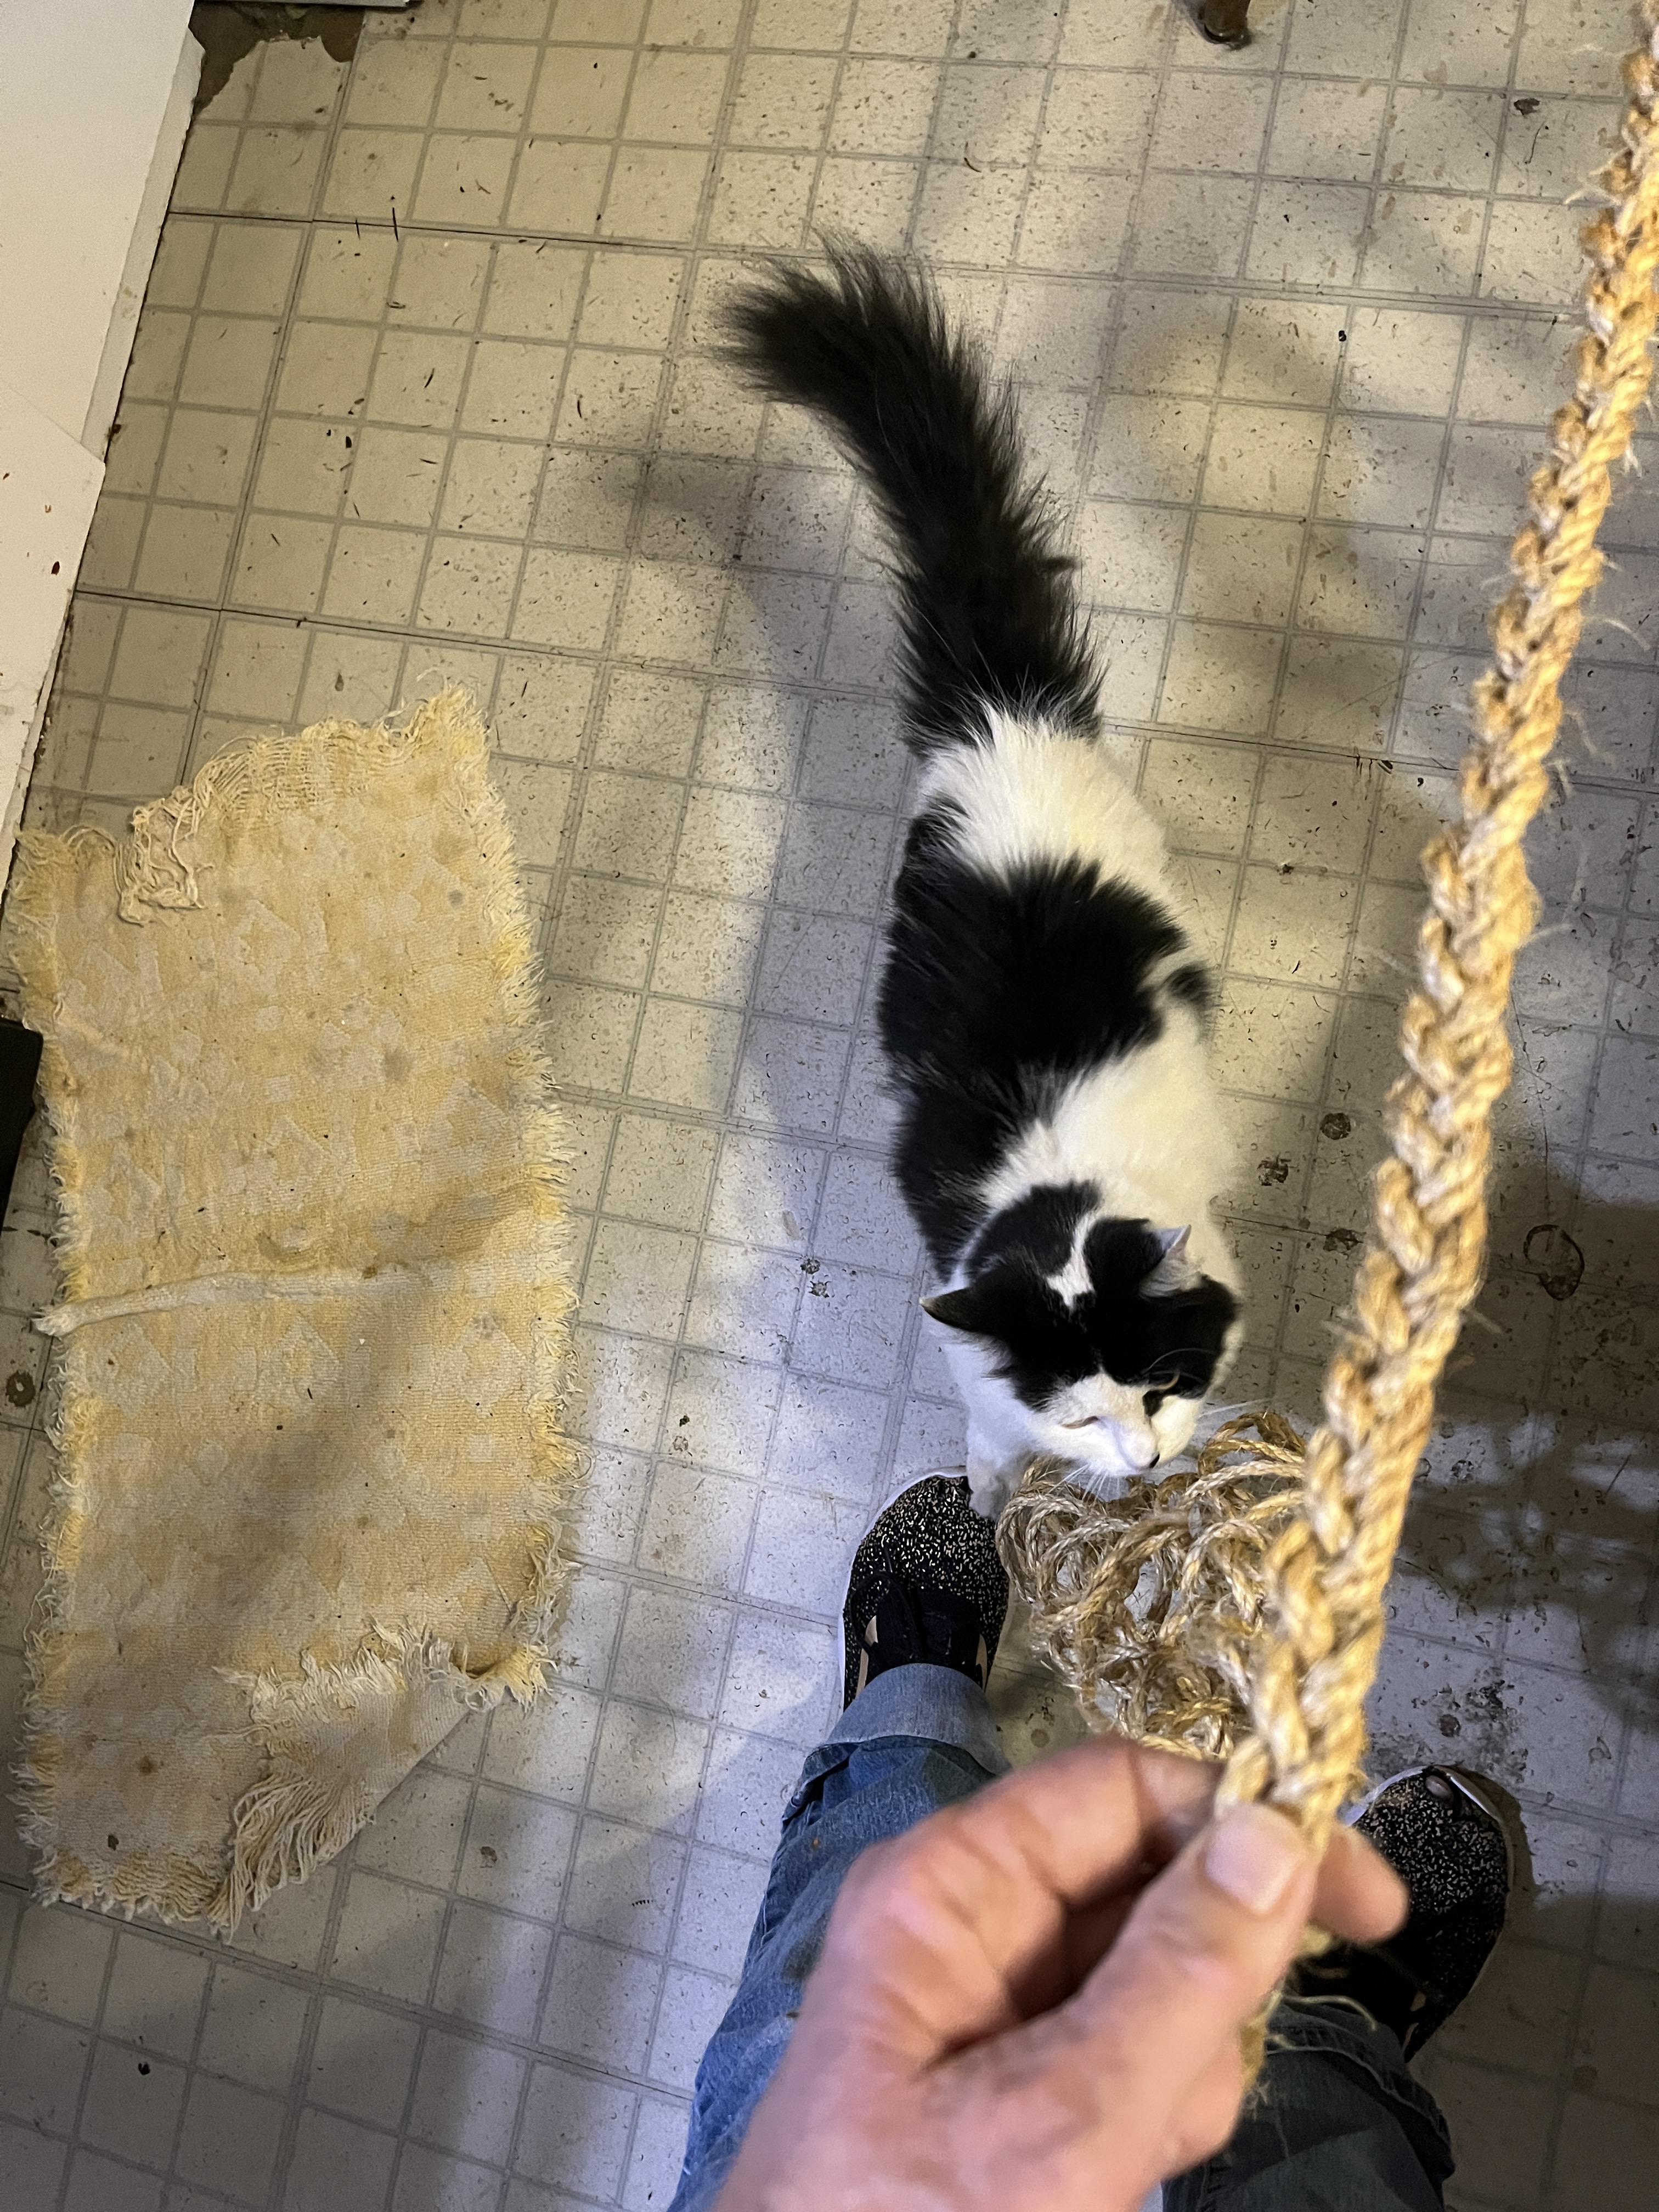
Today I planned to just hang out and listen to Radio Electra out of Burning Man and watch the live feed. Y’all know how well me just sitting around works. By midday I had to turn everything up and do something. I measured the area where the gate is going. I measured the rope. I figured it into 3 more-or-less equal lengths, affixed it to a chair so I could braid it and began to braid. When it got too tangled (very quickly) I untangled it, hand-crocheted it to manageable blobs and began again. Freyja wasn’t sure if she approved. The pattern was take one side over to center, kick the middle under to one side, take the other side over to center, kick the center to the other side, repeat. A lot. Please ignore what the Parrot has done to my floor. I’ll clean things up when the messy projects are done and Monsoon is over.
When it got longer and I realized that Escape to the Country was on I turned the chair around, moved it across the room and continued braiding. Sophie minded the tails as I finished the first braiding session. The lengths were about 17 feet and resulted in a braid about 13 feet.
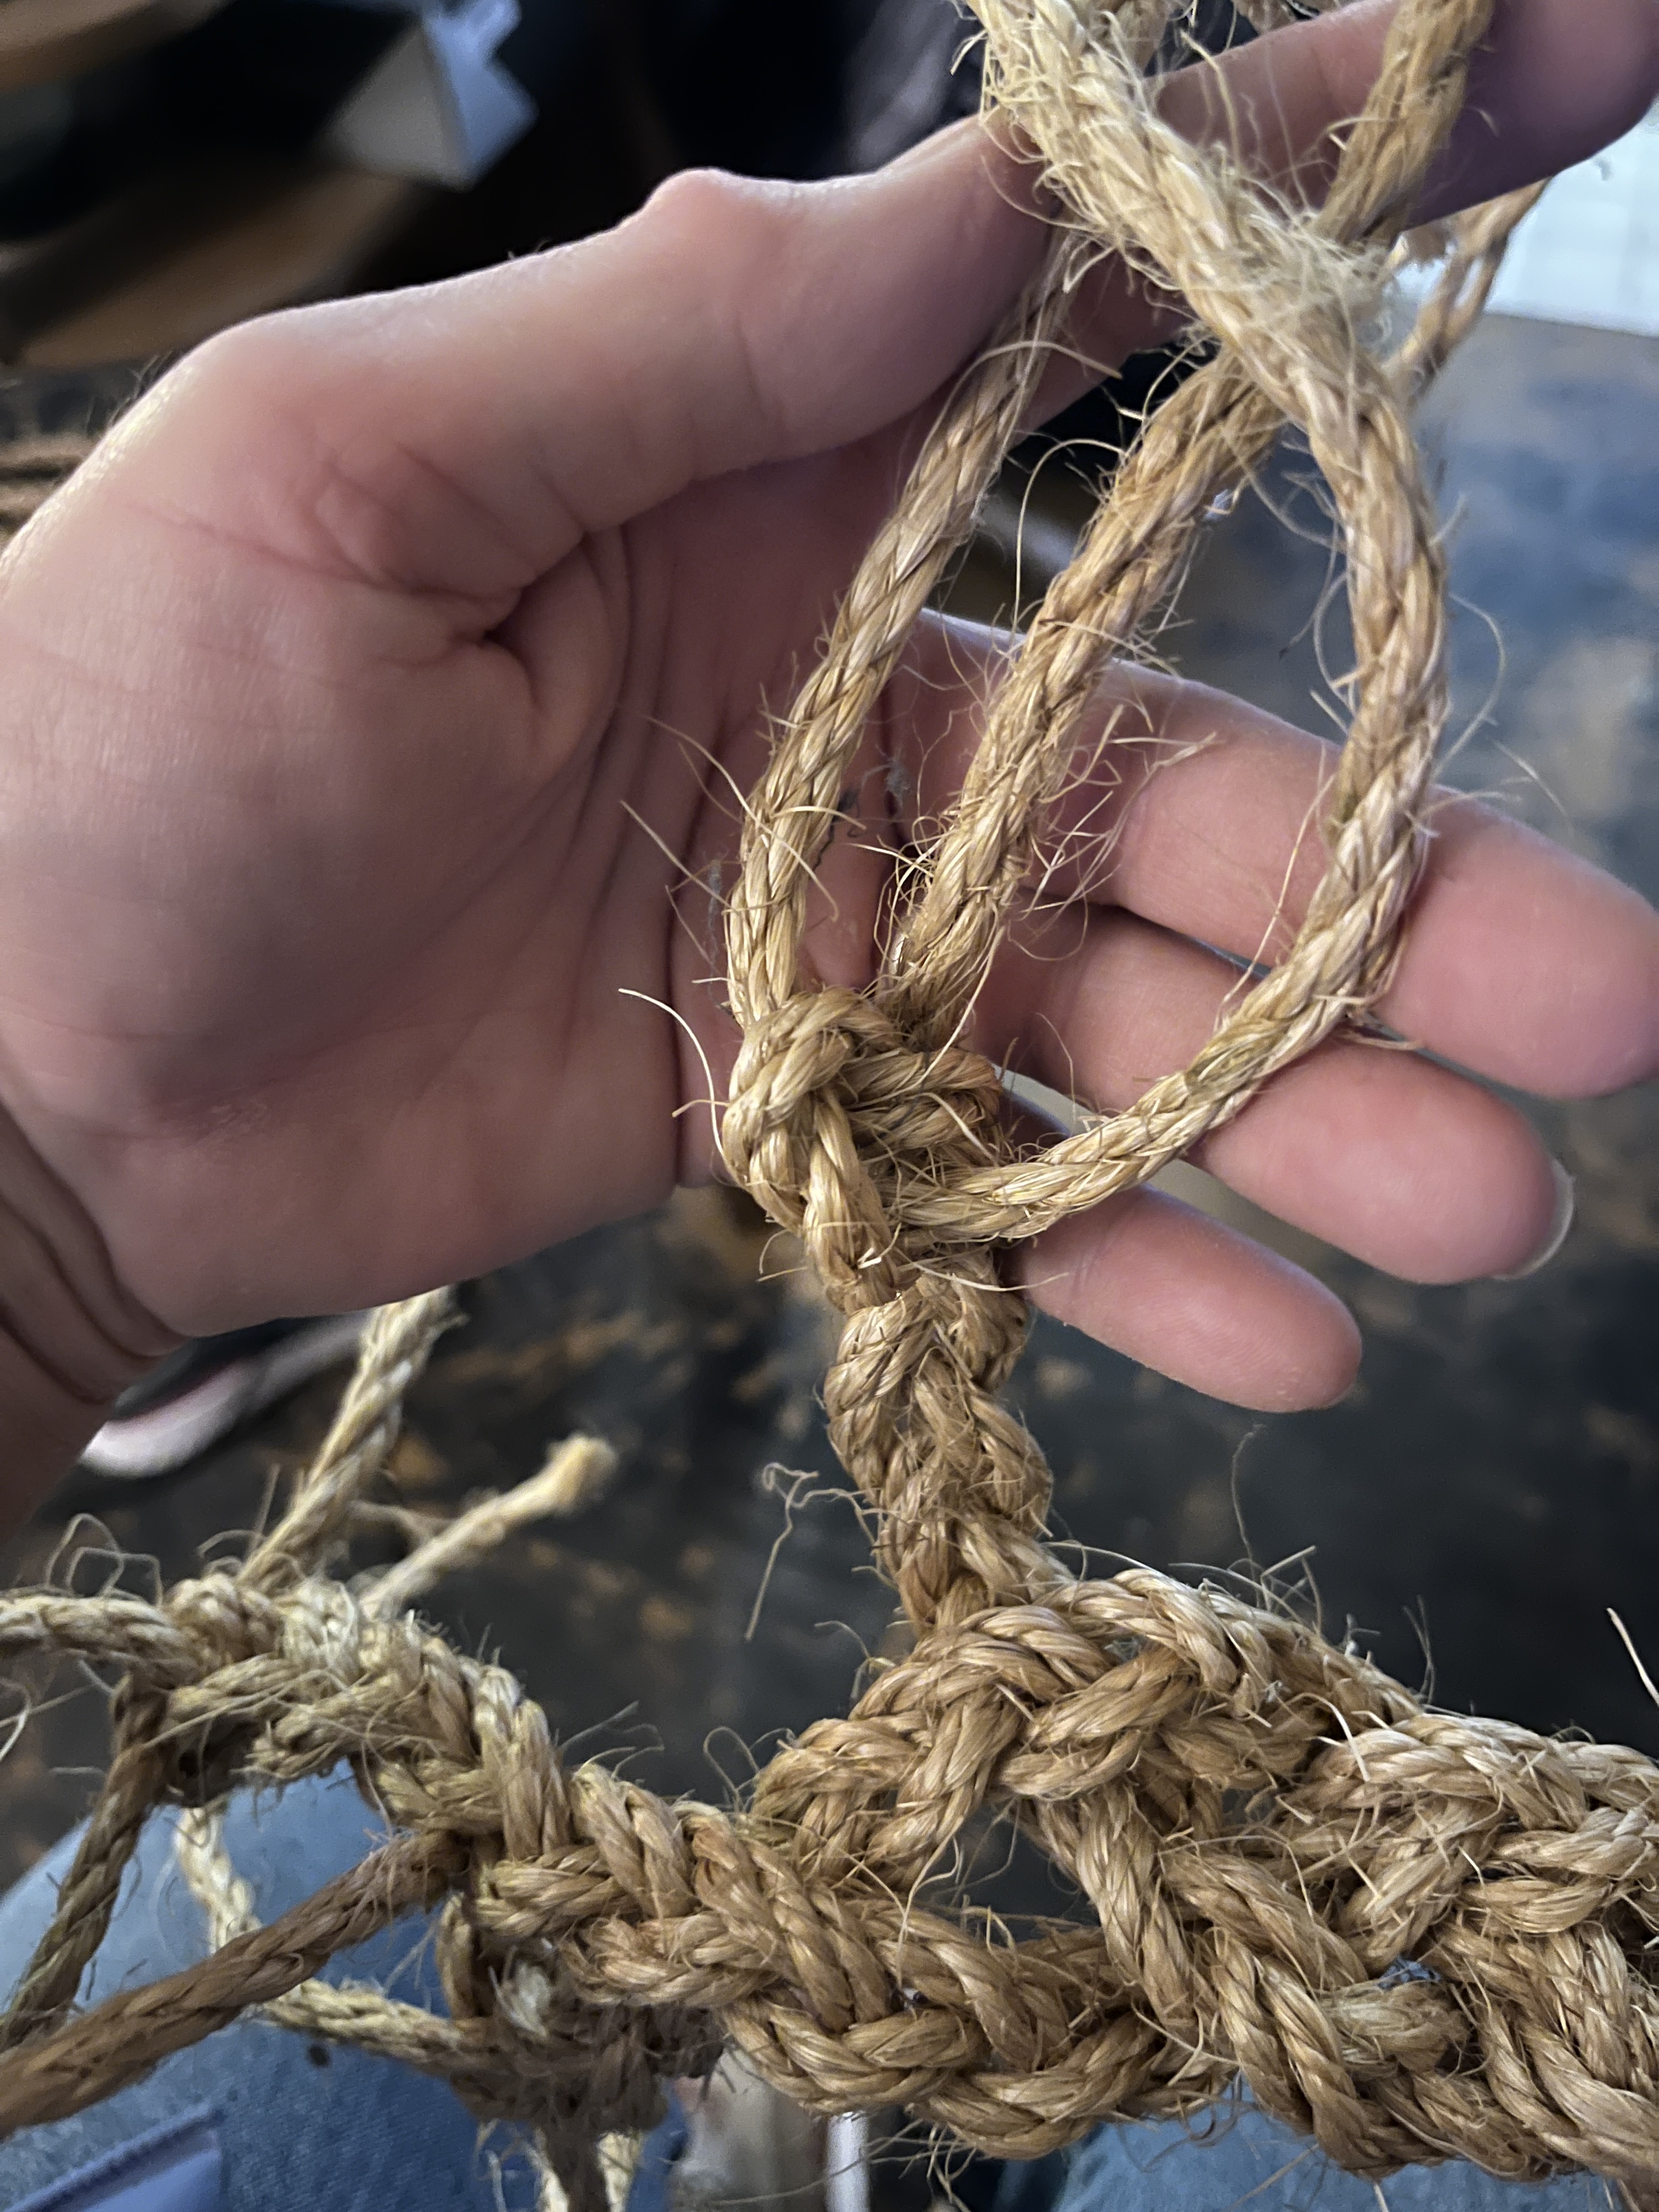
When I got to the end I tied a square know in the 2 outside lines to keep it together, cut the end off the chair and measured the rope braid into 3 mostly equal lengths. I tied the one with the long strand from the original tie on the chair back onto the chair, cut 2/3 off, tied the ends in square knots, wrapped that bit in half around the top end of the new braid (tying it in place with the other 2 ends of the original braid) and started braiding again. Yes, my floor is in desperate need of vacuuming. I figure I’ll do that when the messy projects are done.
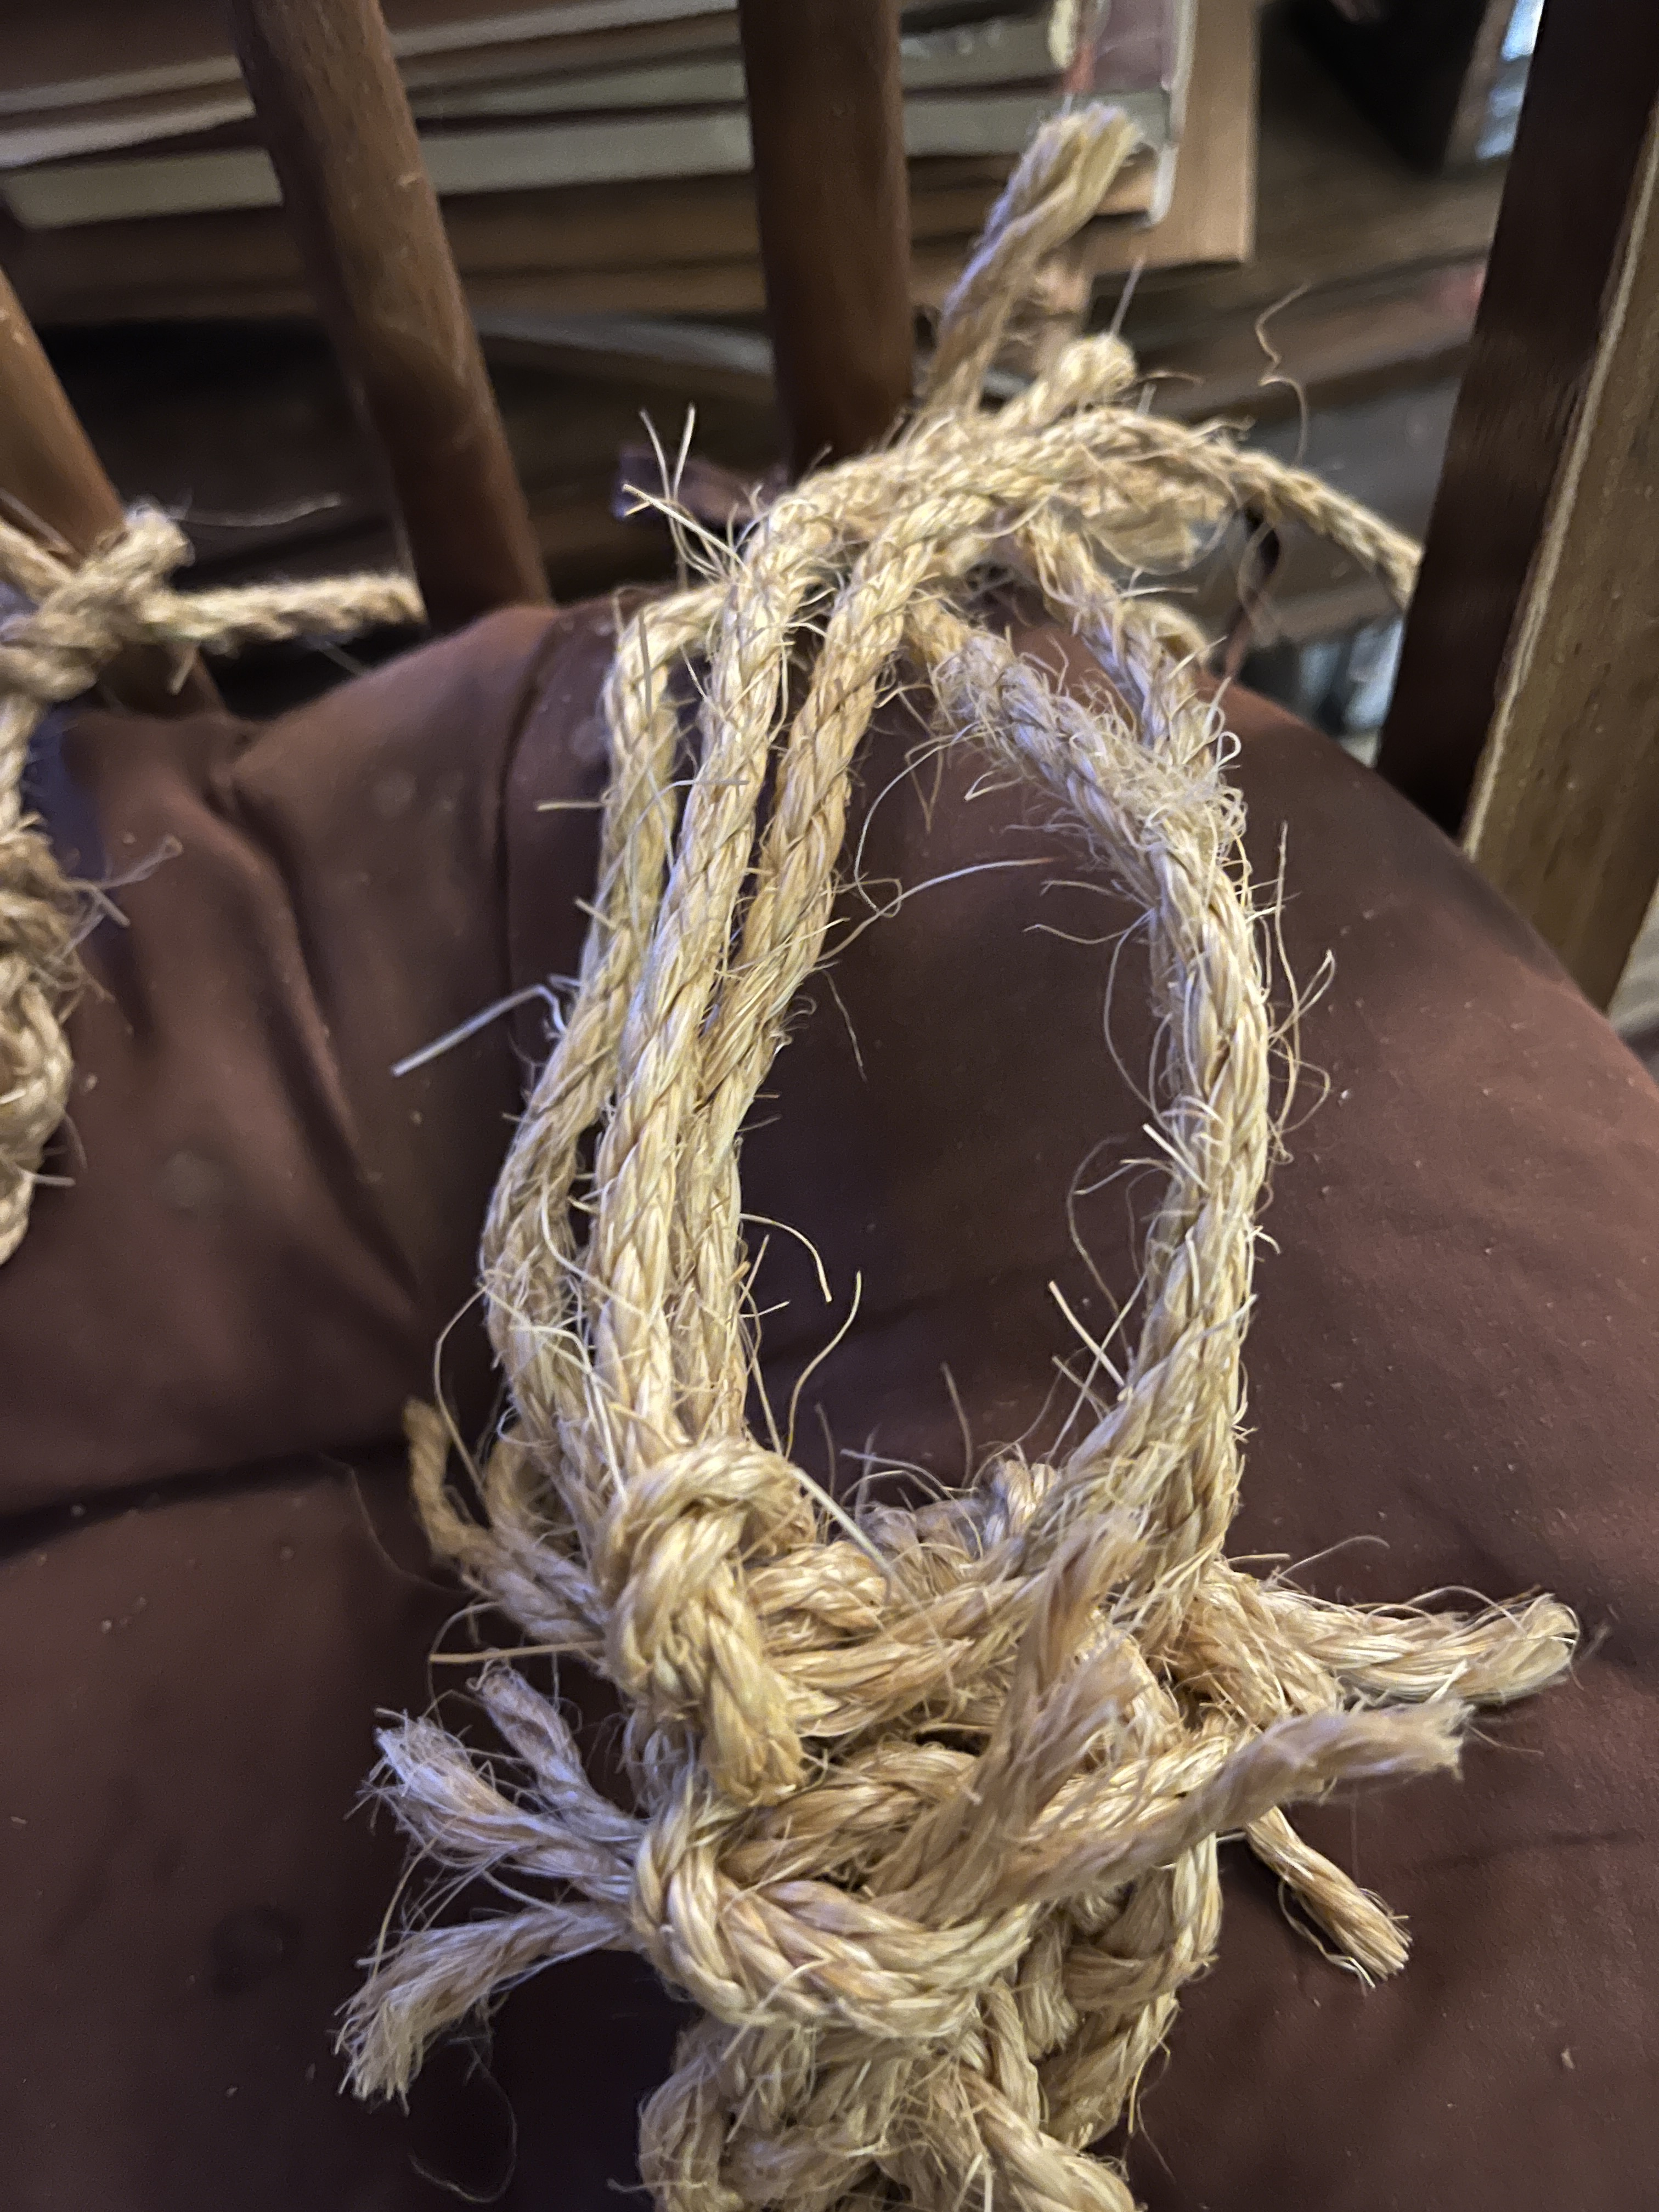
When I got to the end I untied and unbraided them enough to tie them together while leaving a central line long enough (I hope) to tie to an upright on the Gate.
Then I braided the three to the end and tied the loose ends together in square knots. Yes, it’s kind of a mess, but it’s together.
Now that I’ve watched The Man burn (this year was the year of the rain and muckyness that cancelled the burn on Saturday for the 1st time ever, delaying the burn til tonight, Monday), I can now get to bed and figure out how to make and attach the tassels tomorrow. It was a fun night listening to friends on Radio Electra commentate on the burn. And fireworks. And art cars. Looks like The Monaco’s heading off to cruise the Playa so good night for now.
It’s tomorrow and I was too busy with other things to do the tassels, but I did get a new clothes washer delivered and installed and got to watch the Temple burn before I went to bed, so it was a productive day with a philosophical finale for the evening.
It’s been all week, (it’s Saturday now) and I now know that making the tassels after work is not going to happen. All kinds of things fill the time between getting home and dream time. Feeding the critters, feeding me, paying bills, communicating with friends, finding cool stuff on the internet that gives me new ideas for the pottery or other projects (chess, writing, leatherwork, garden, cooking…) and suddenly there’s no time to measure, bind, fray etc… so the tassels aren’t done yet but I did cut the lengths ao they’re ready to do tomorrow after work (when I can stay up late and sleep in) or Monday.
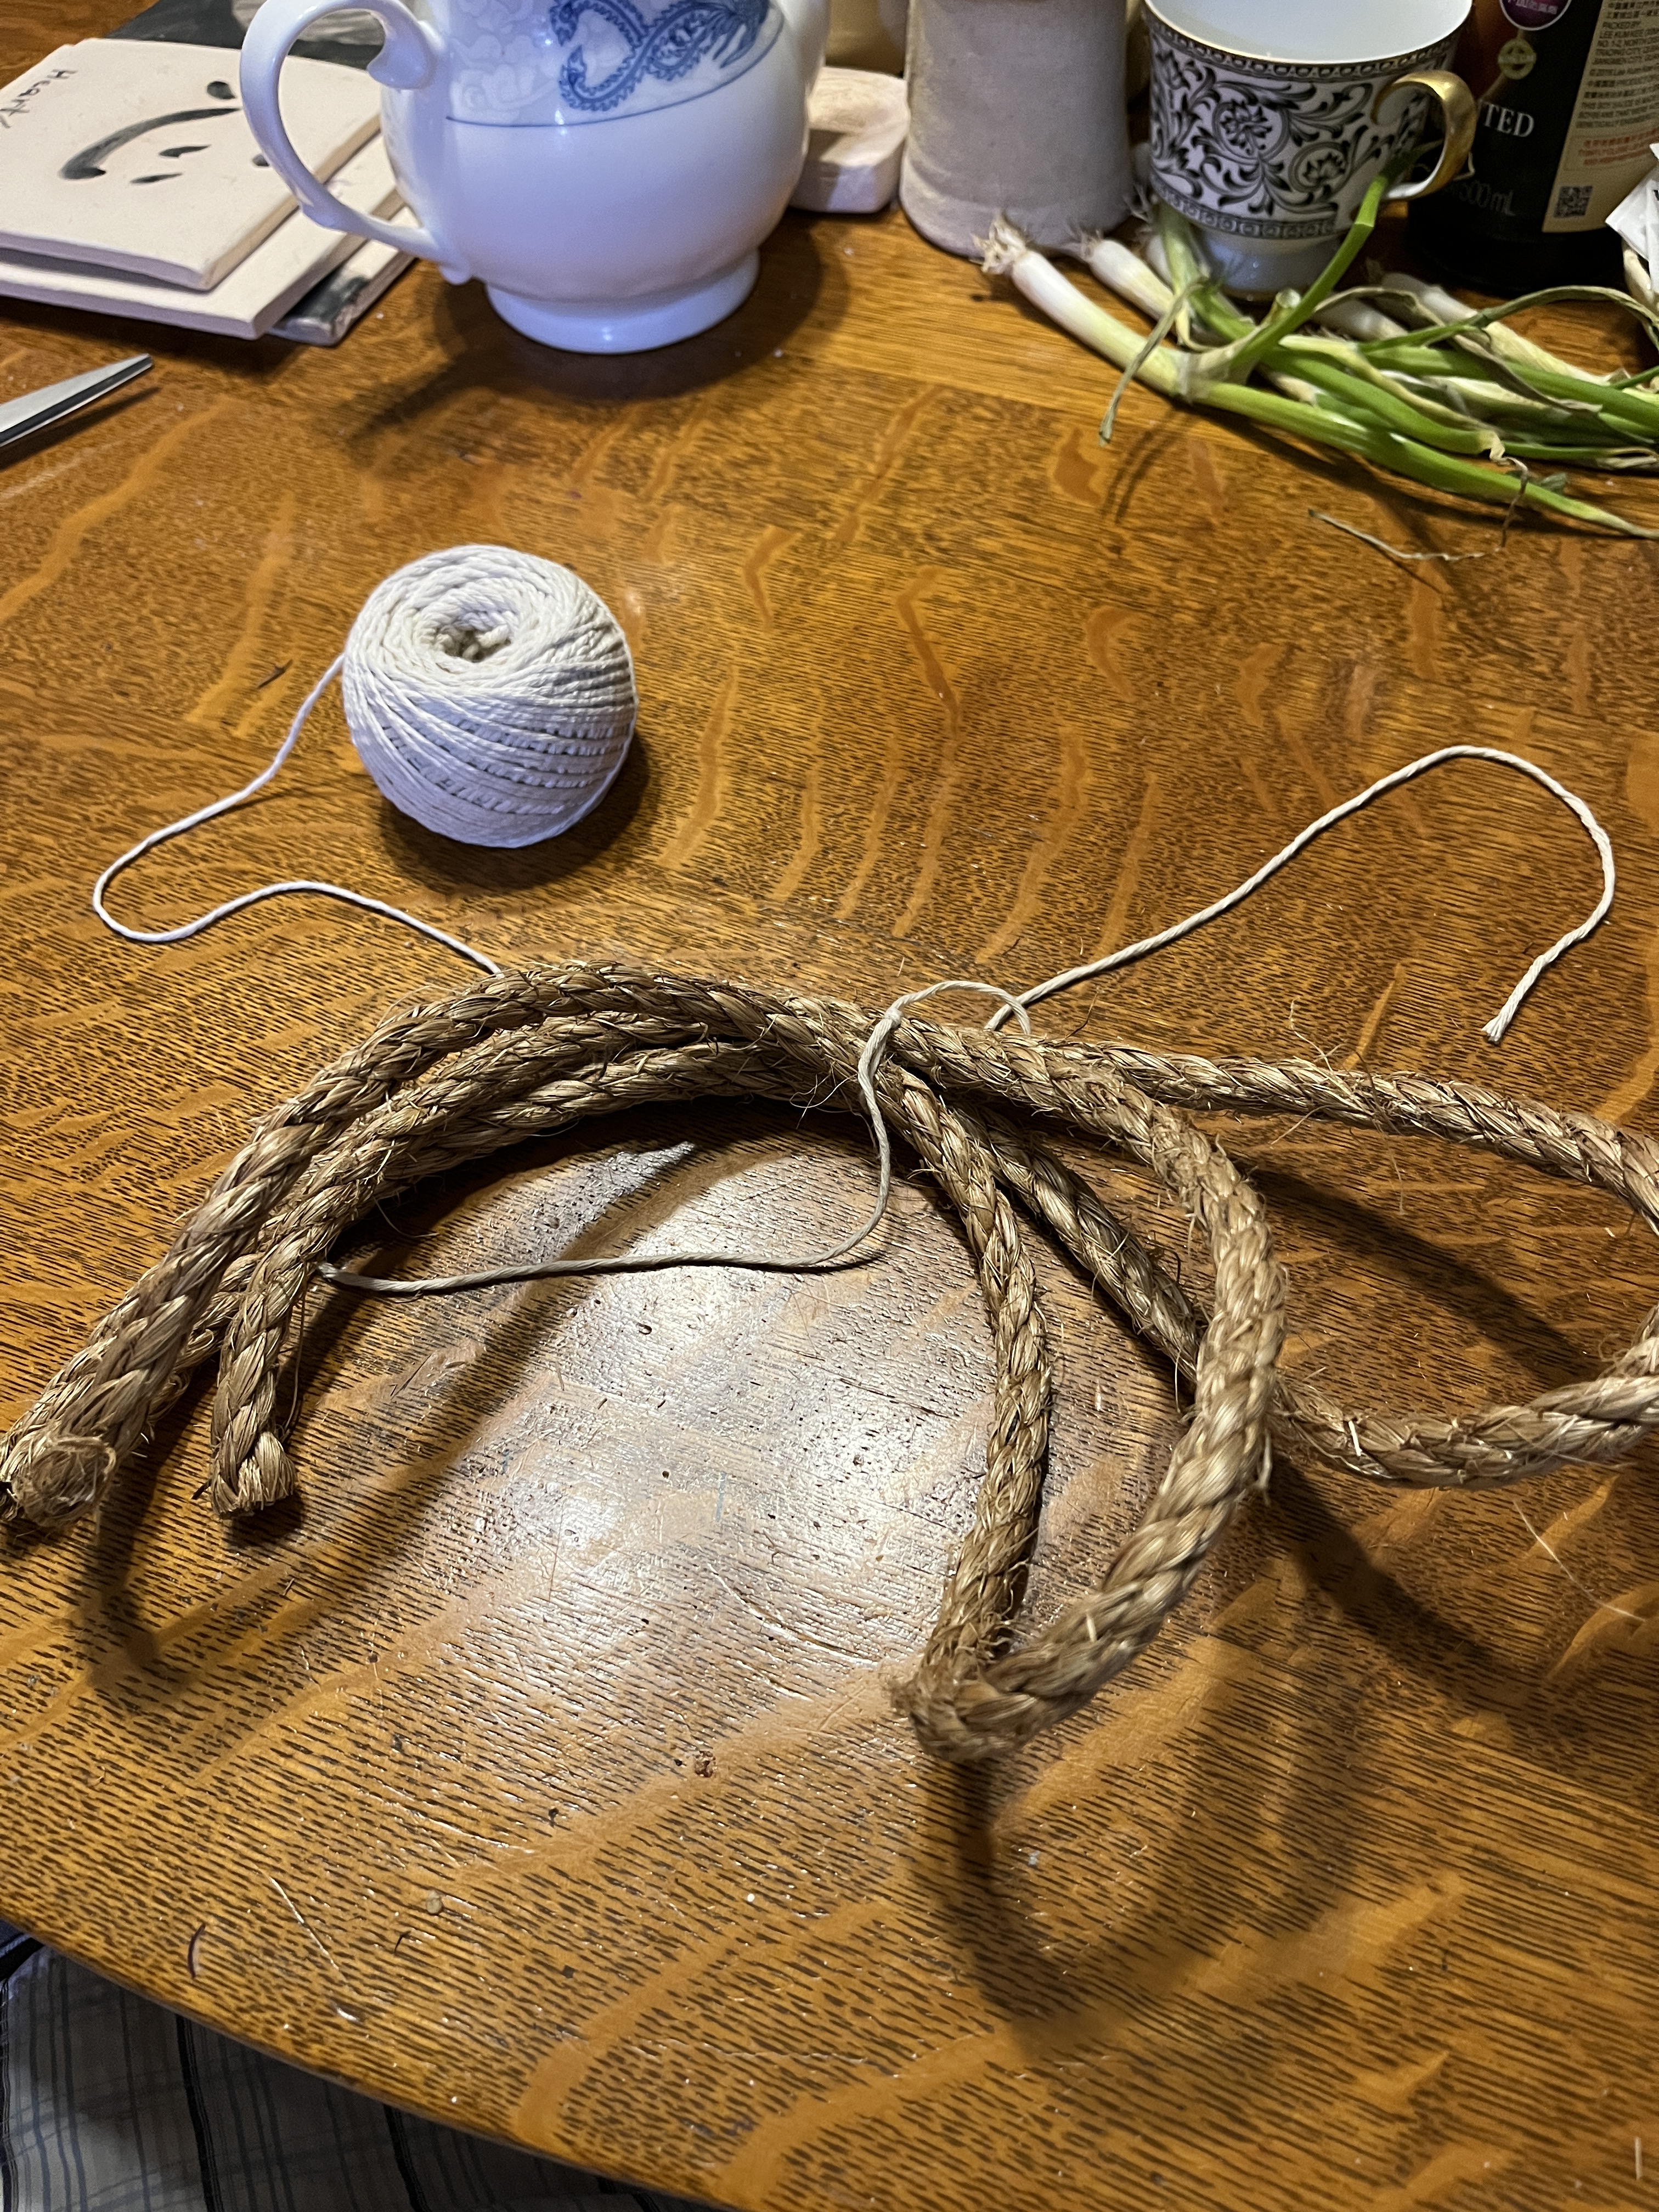
The darker, thicker rope was a bit over 19 feet. I figure divide it into 3 sections, 2 equal and 1 longer so the middle tassel will be bigger. That ended up being 2 at 5 feet and the other was whatever was left over at about 9 feet.
Whoops. It’s Sunday and I didn’t make the tassels. I did slake some clay, though, and did a load of laundry. The best laid plans…well, there’s always tomorrow…
Finally! Monday and I have time to make the tassels! After dinner, but I’m going to get these done!
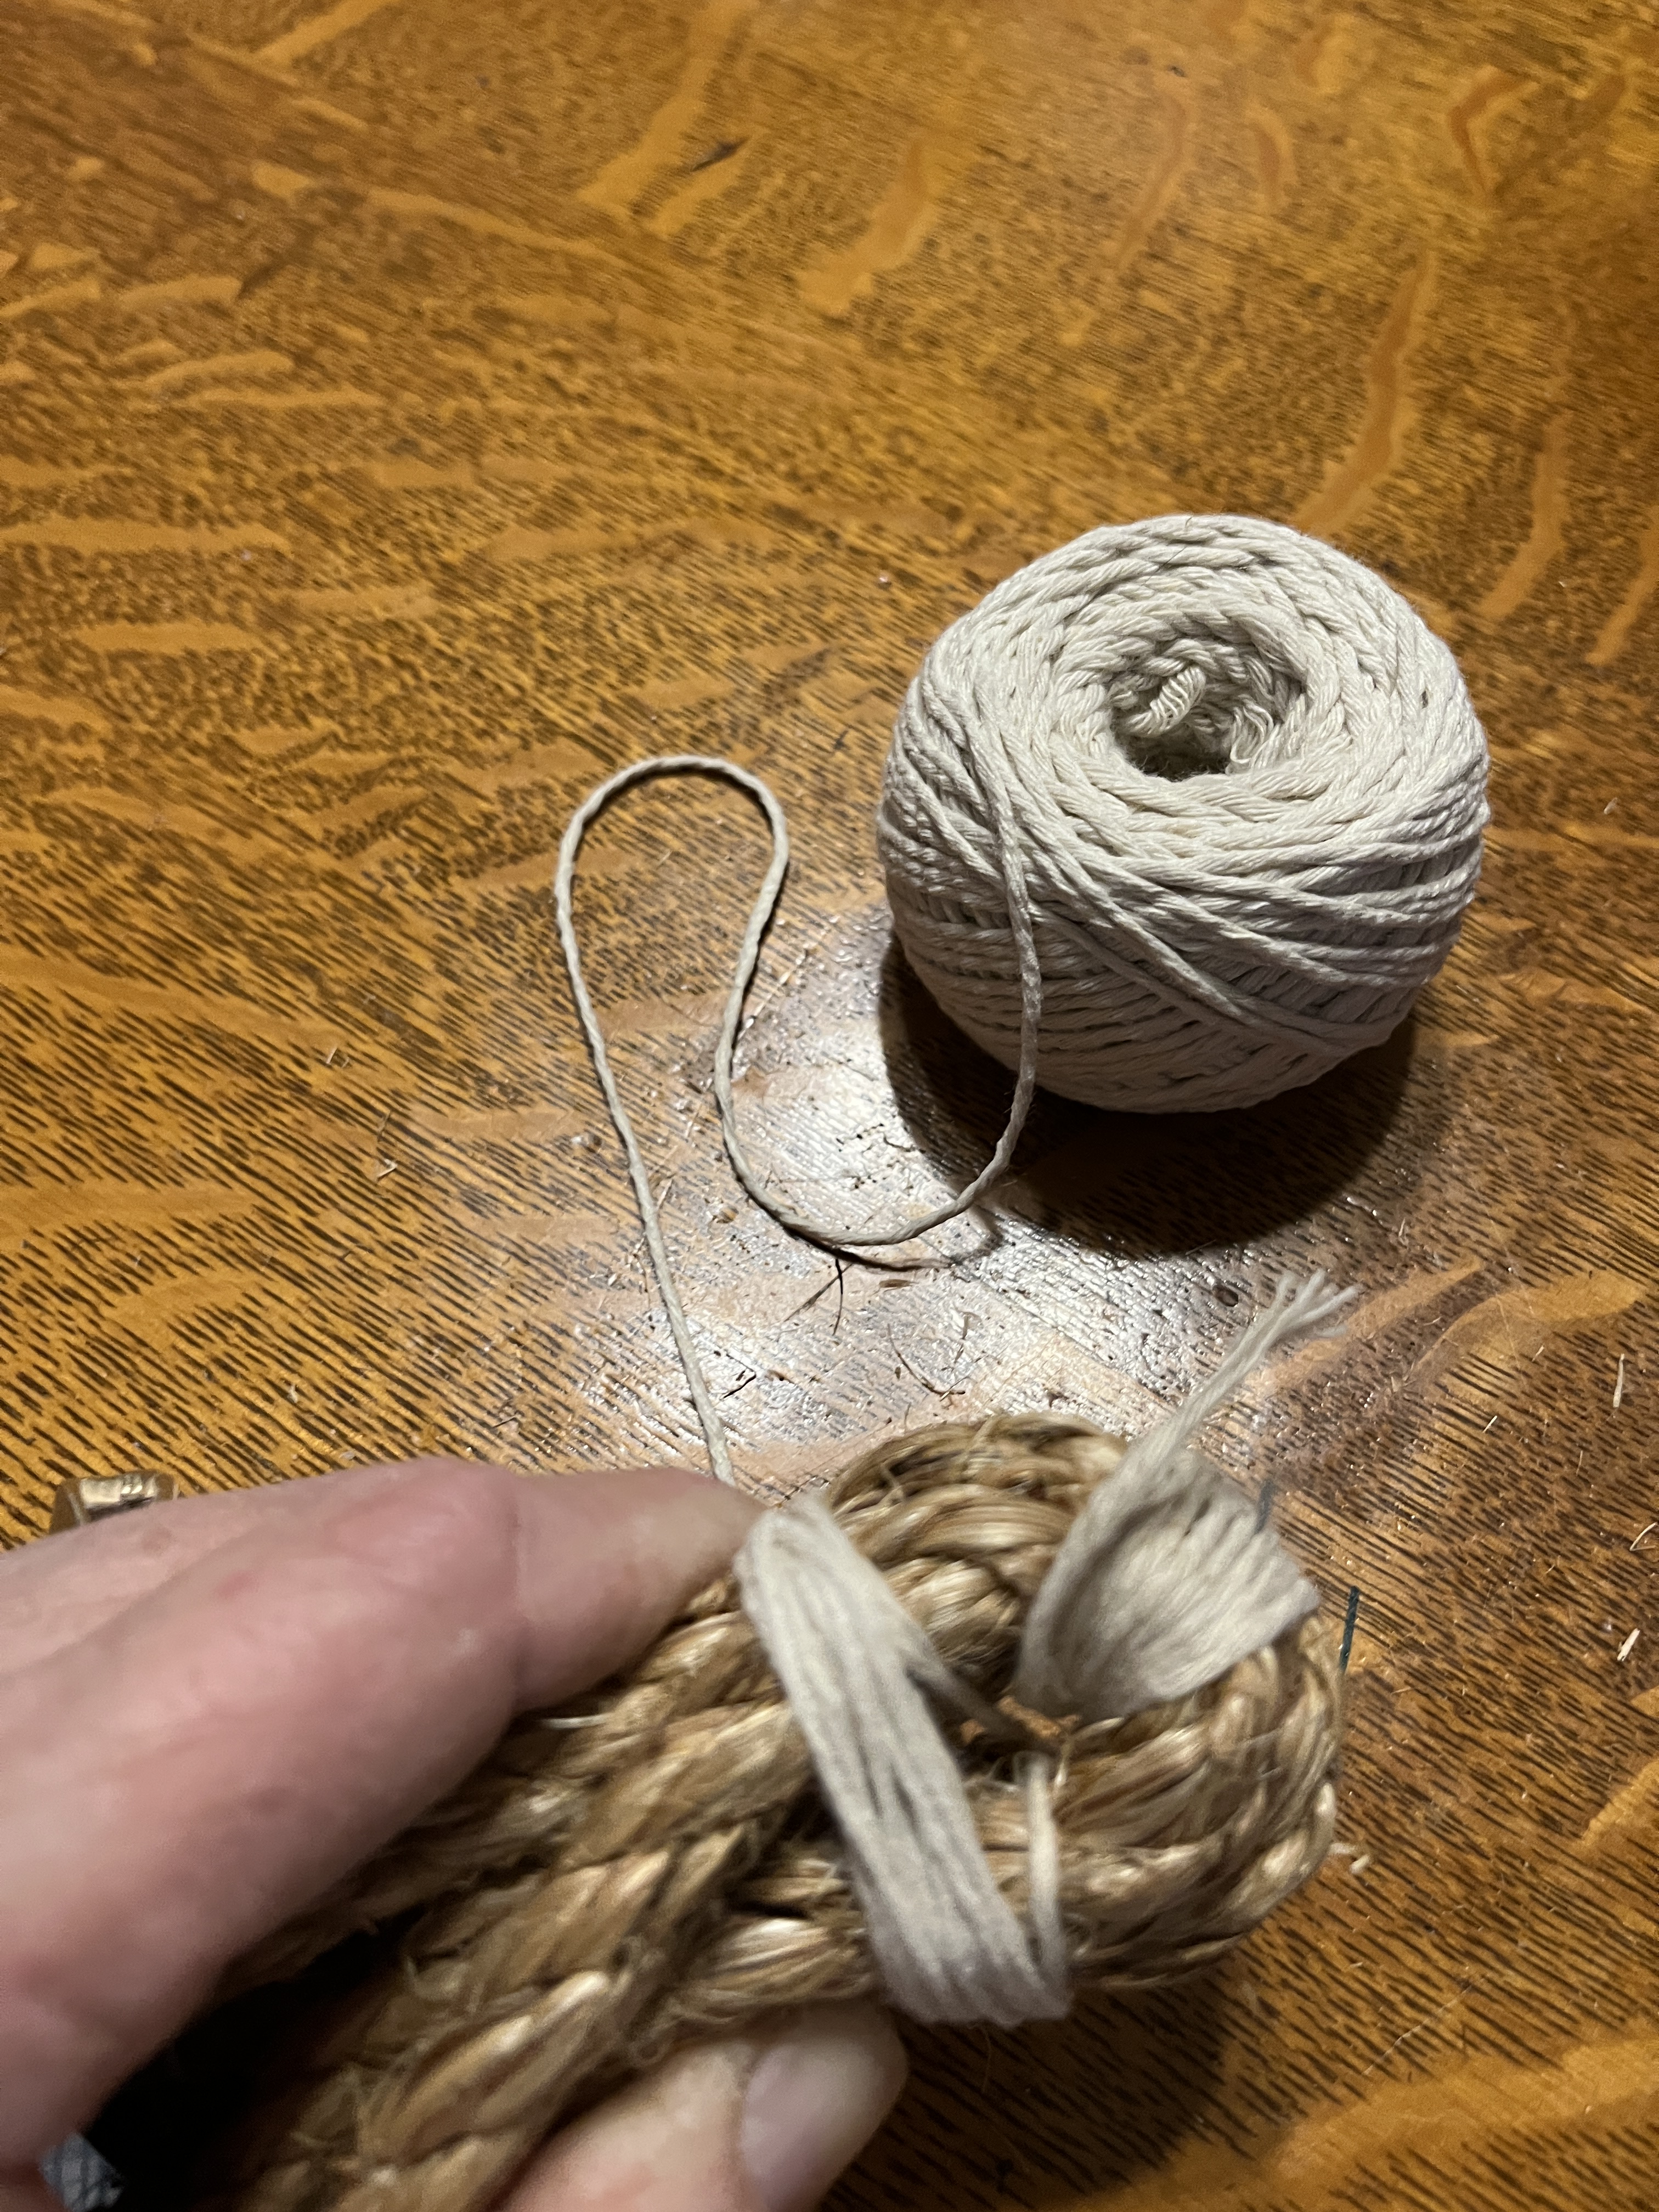
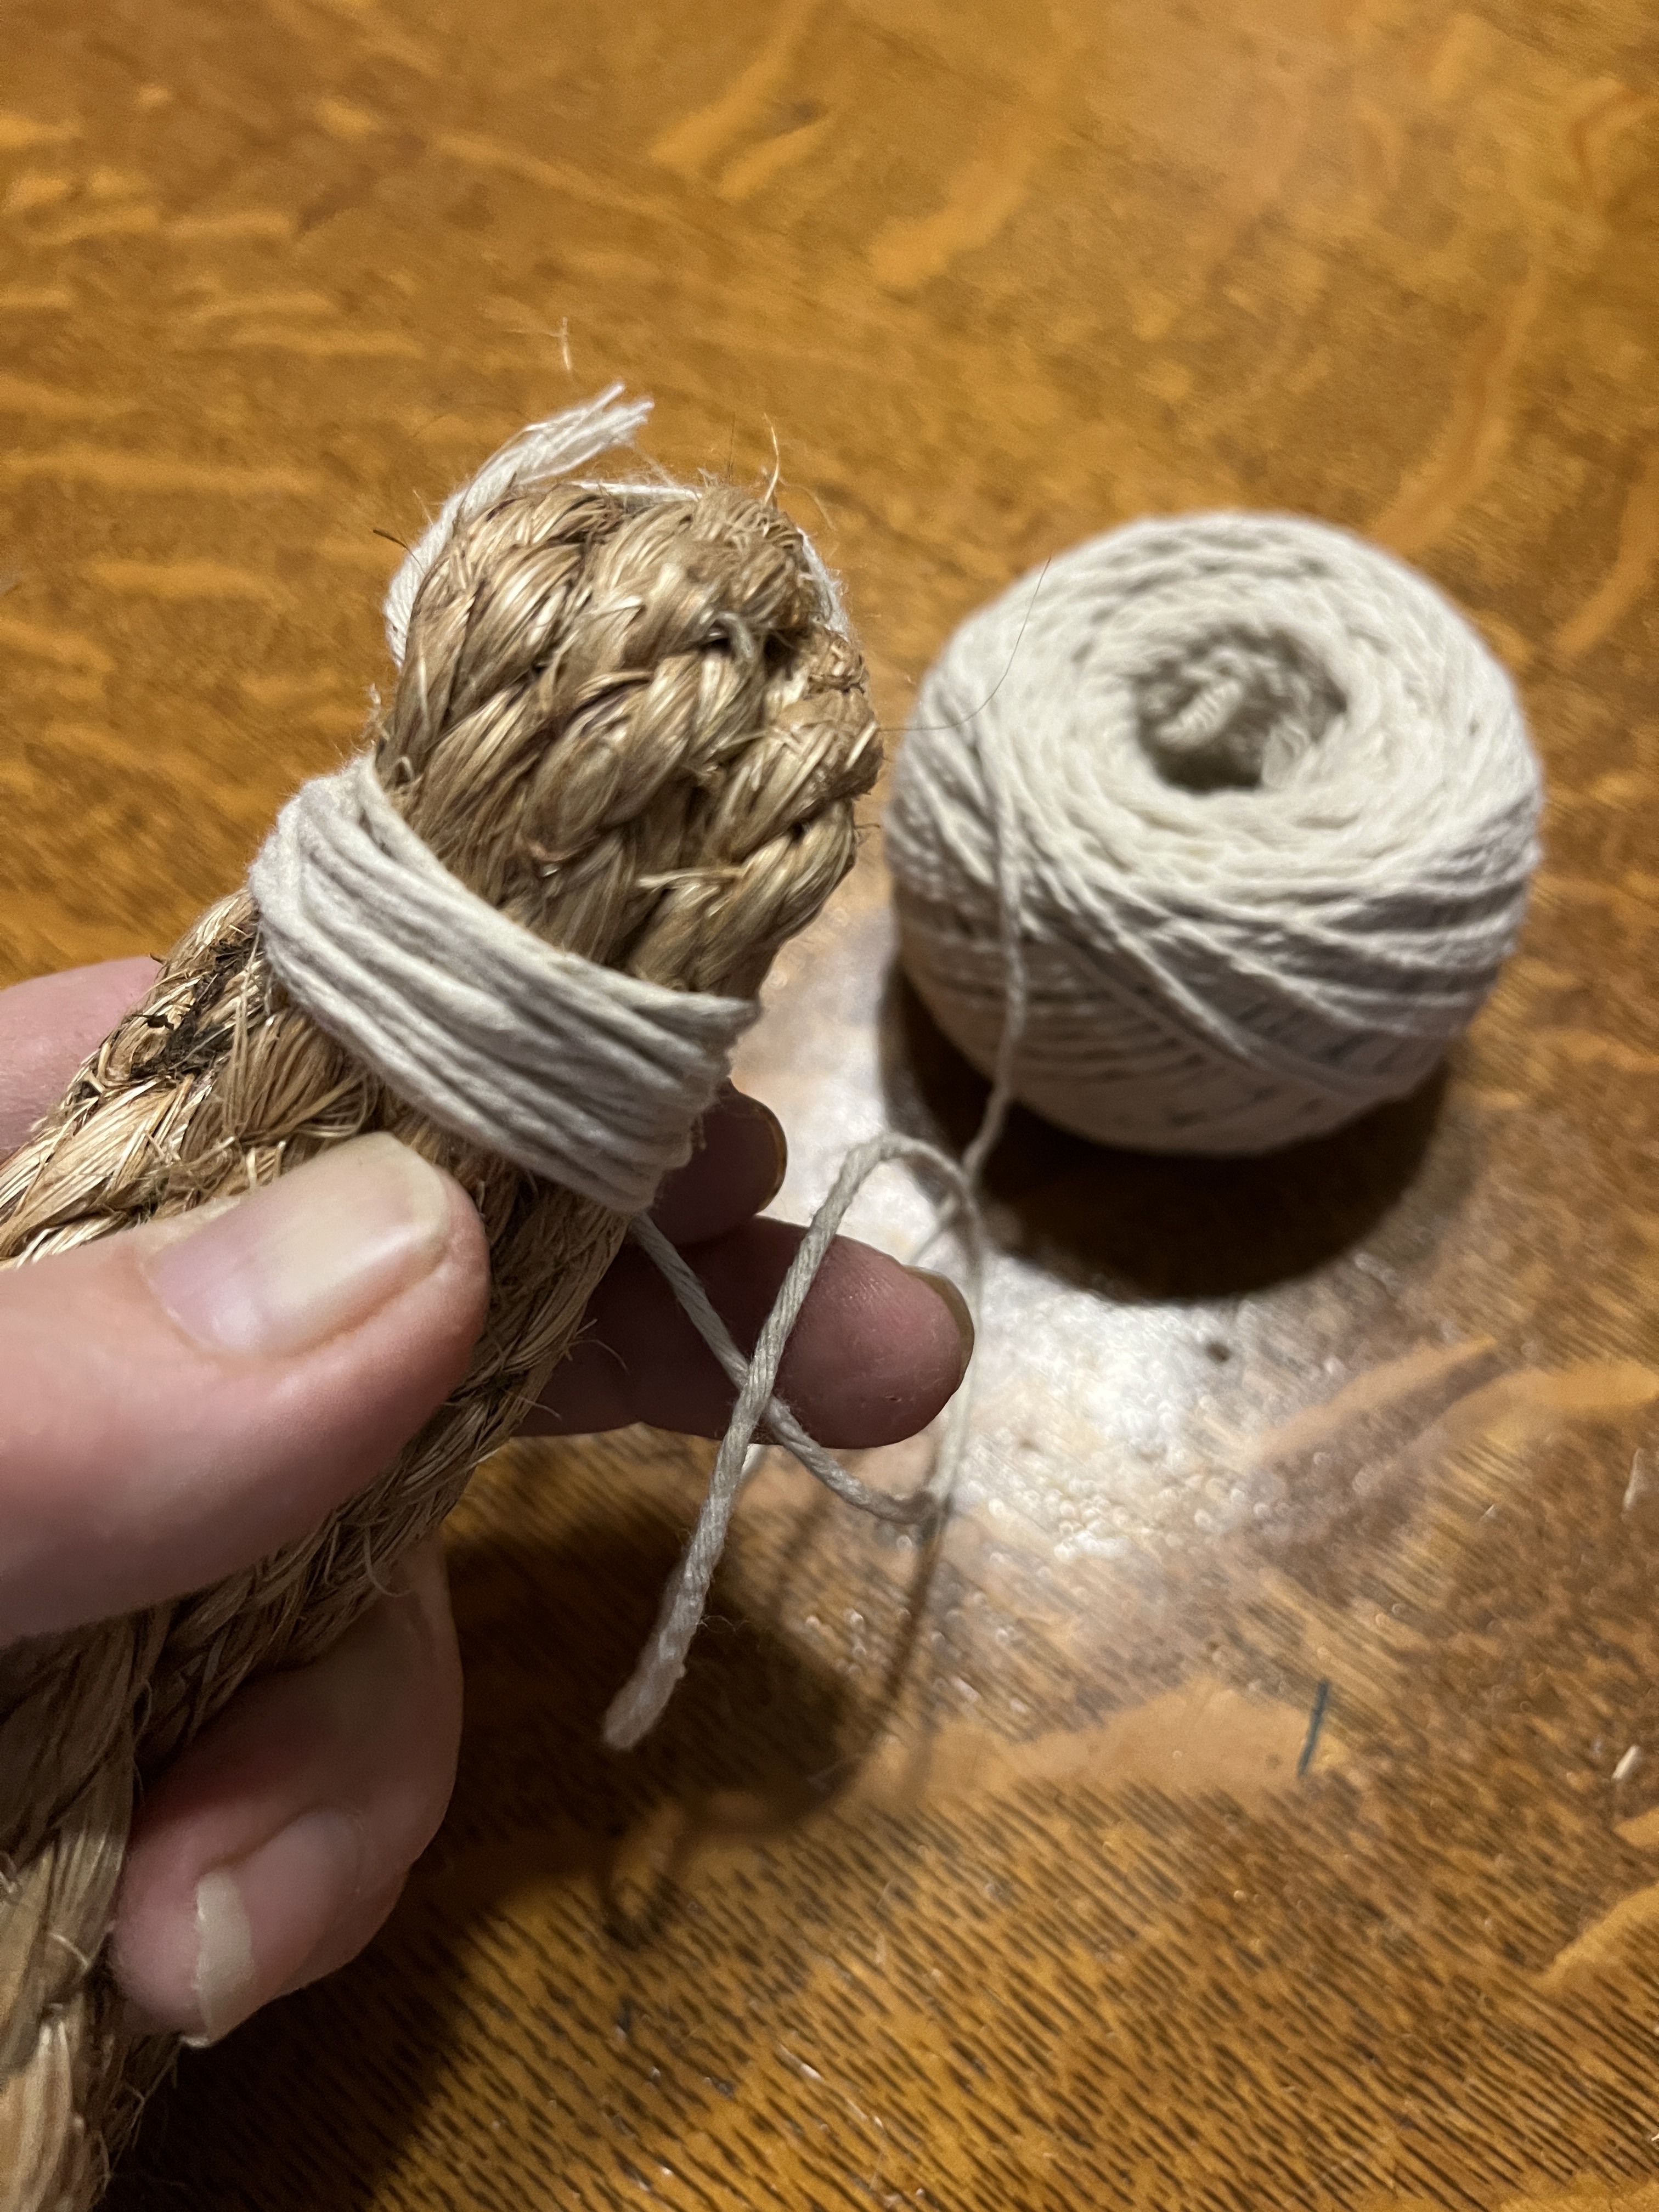
I started with one of the 2 shorter lengths, divided it in half then half again. I found the center point of that and tied it tight with cotton twine, leaving enough tail to wrap the center of the head tightly.
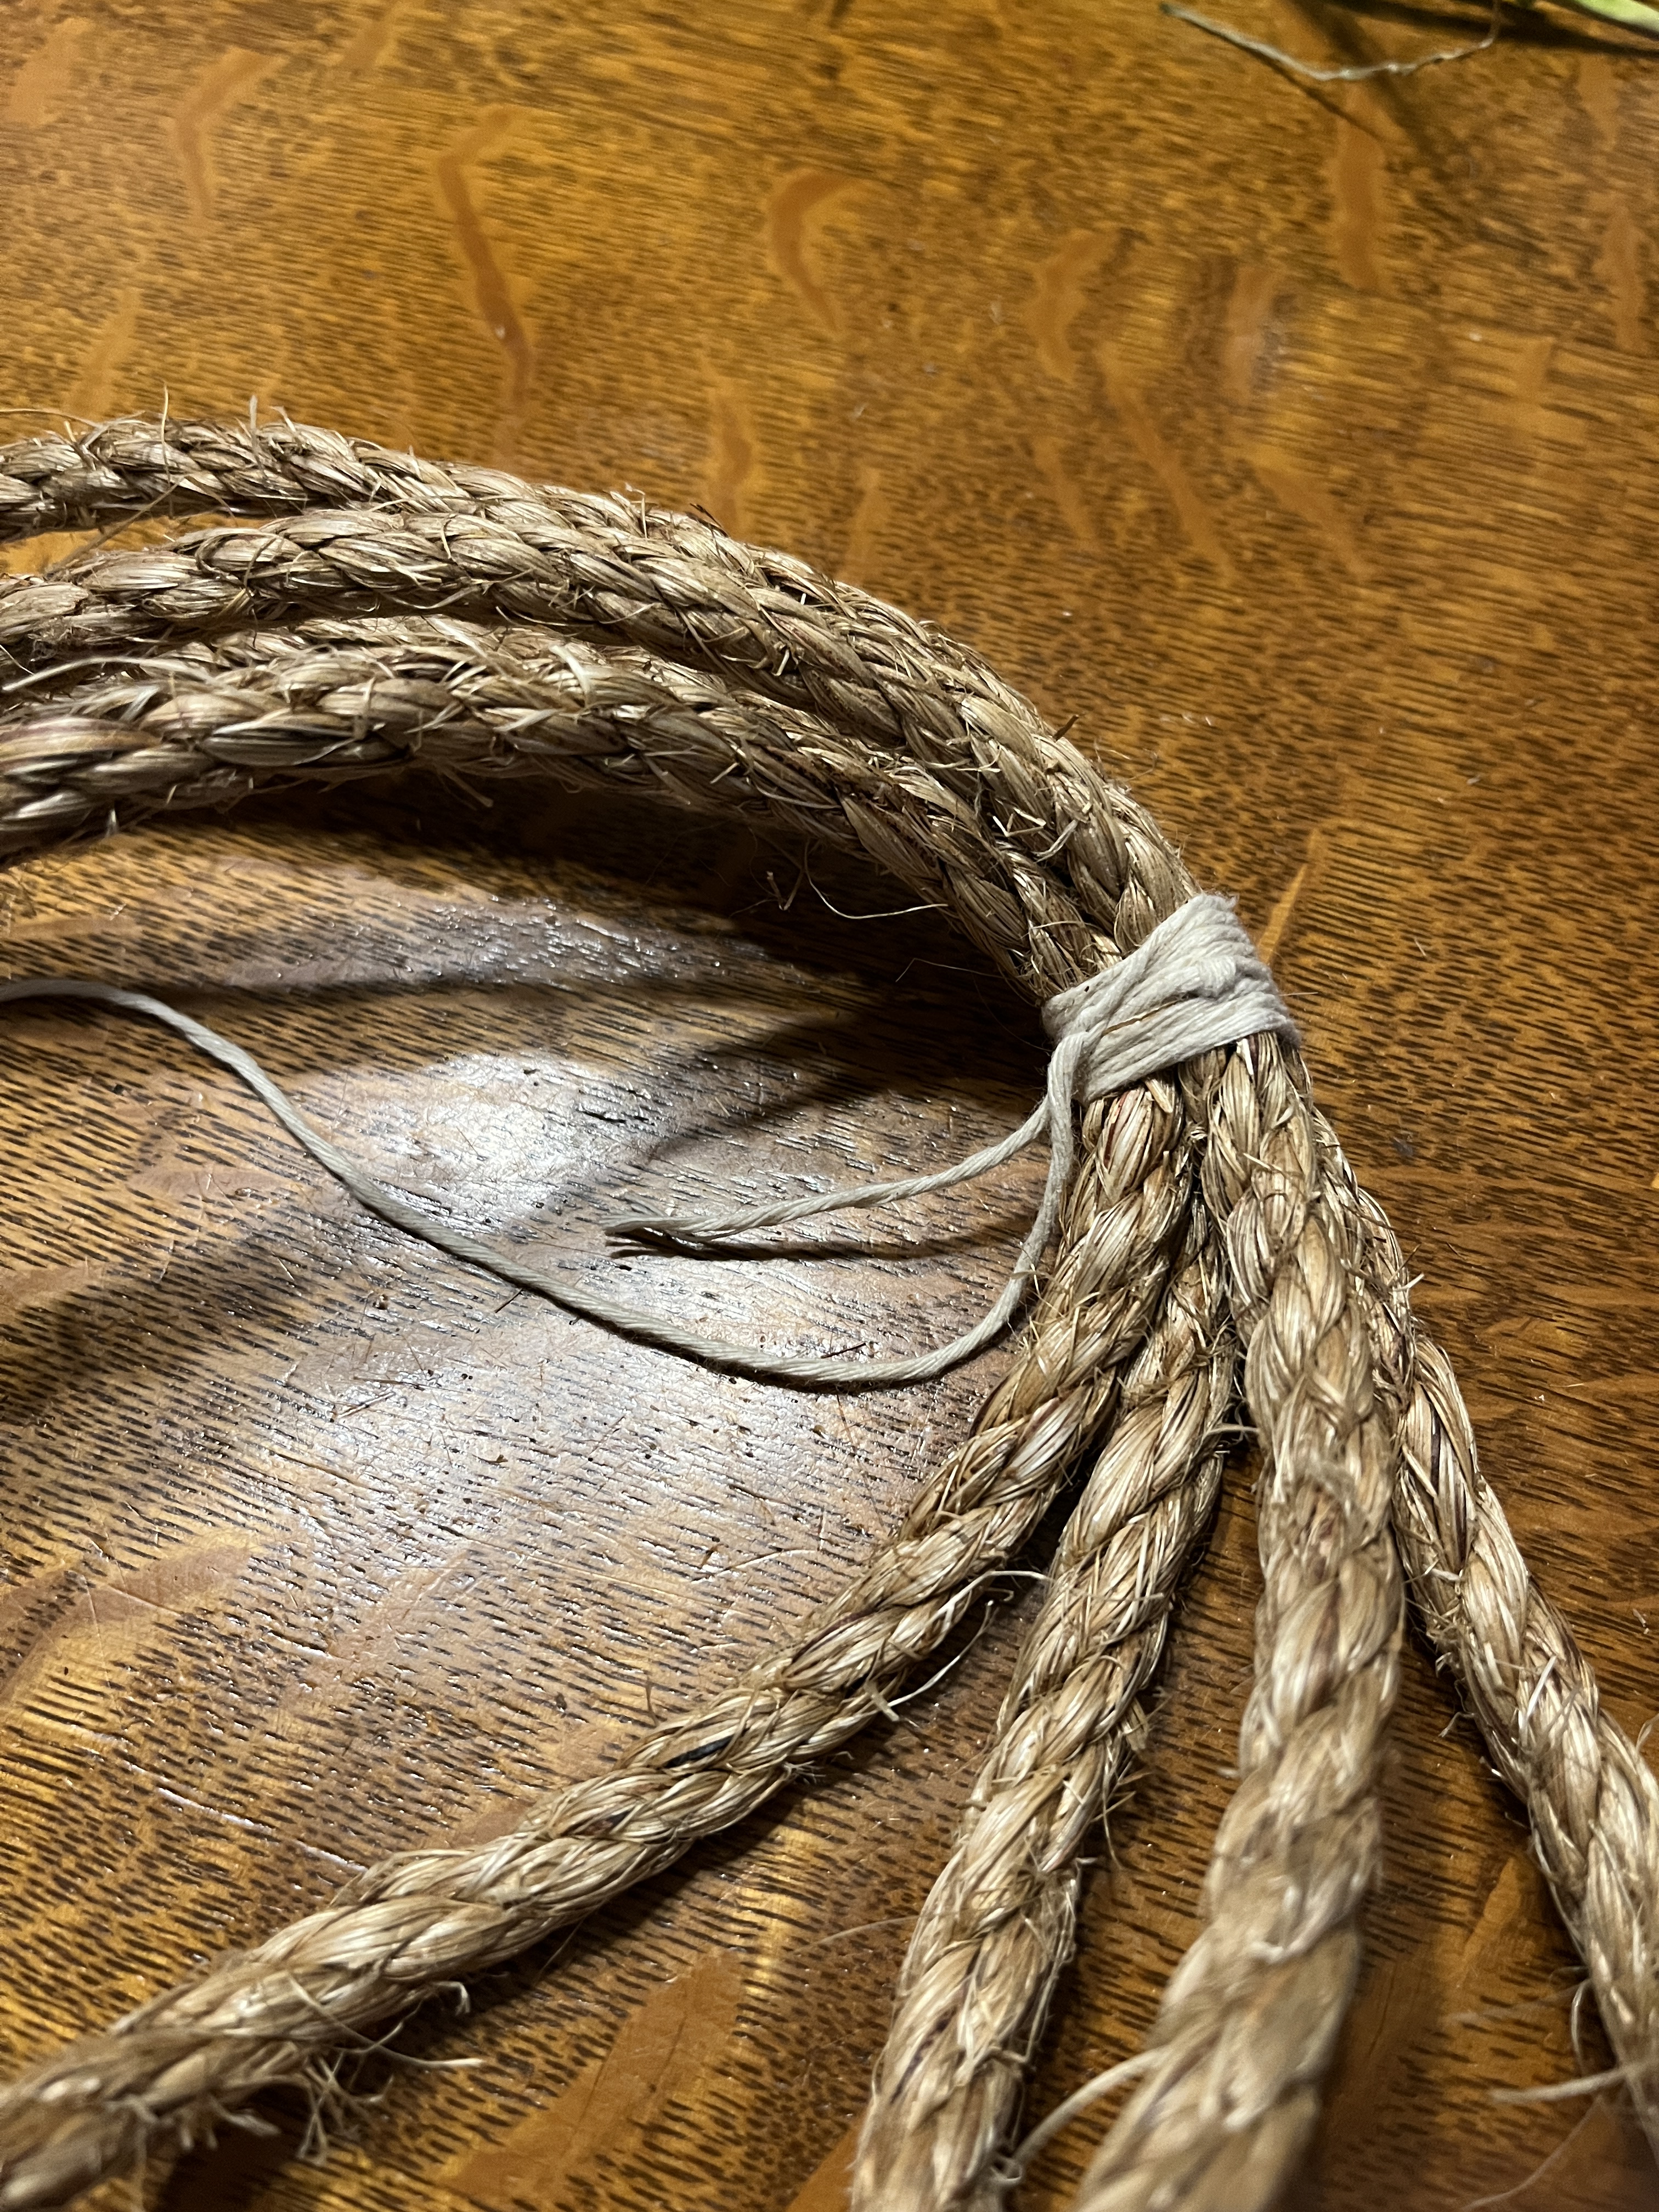
Then I wrapped the tail around one side as tightly as I could front to back about 4 or 6 winds and then the other end back to front 4 to 6 very tight winds and tied them securely with a square knot.
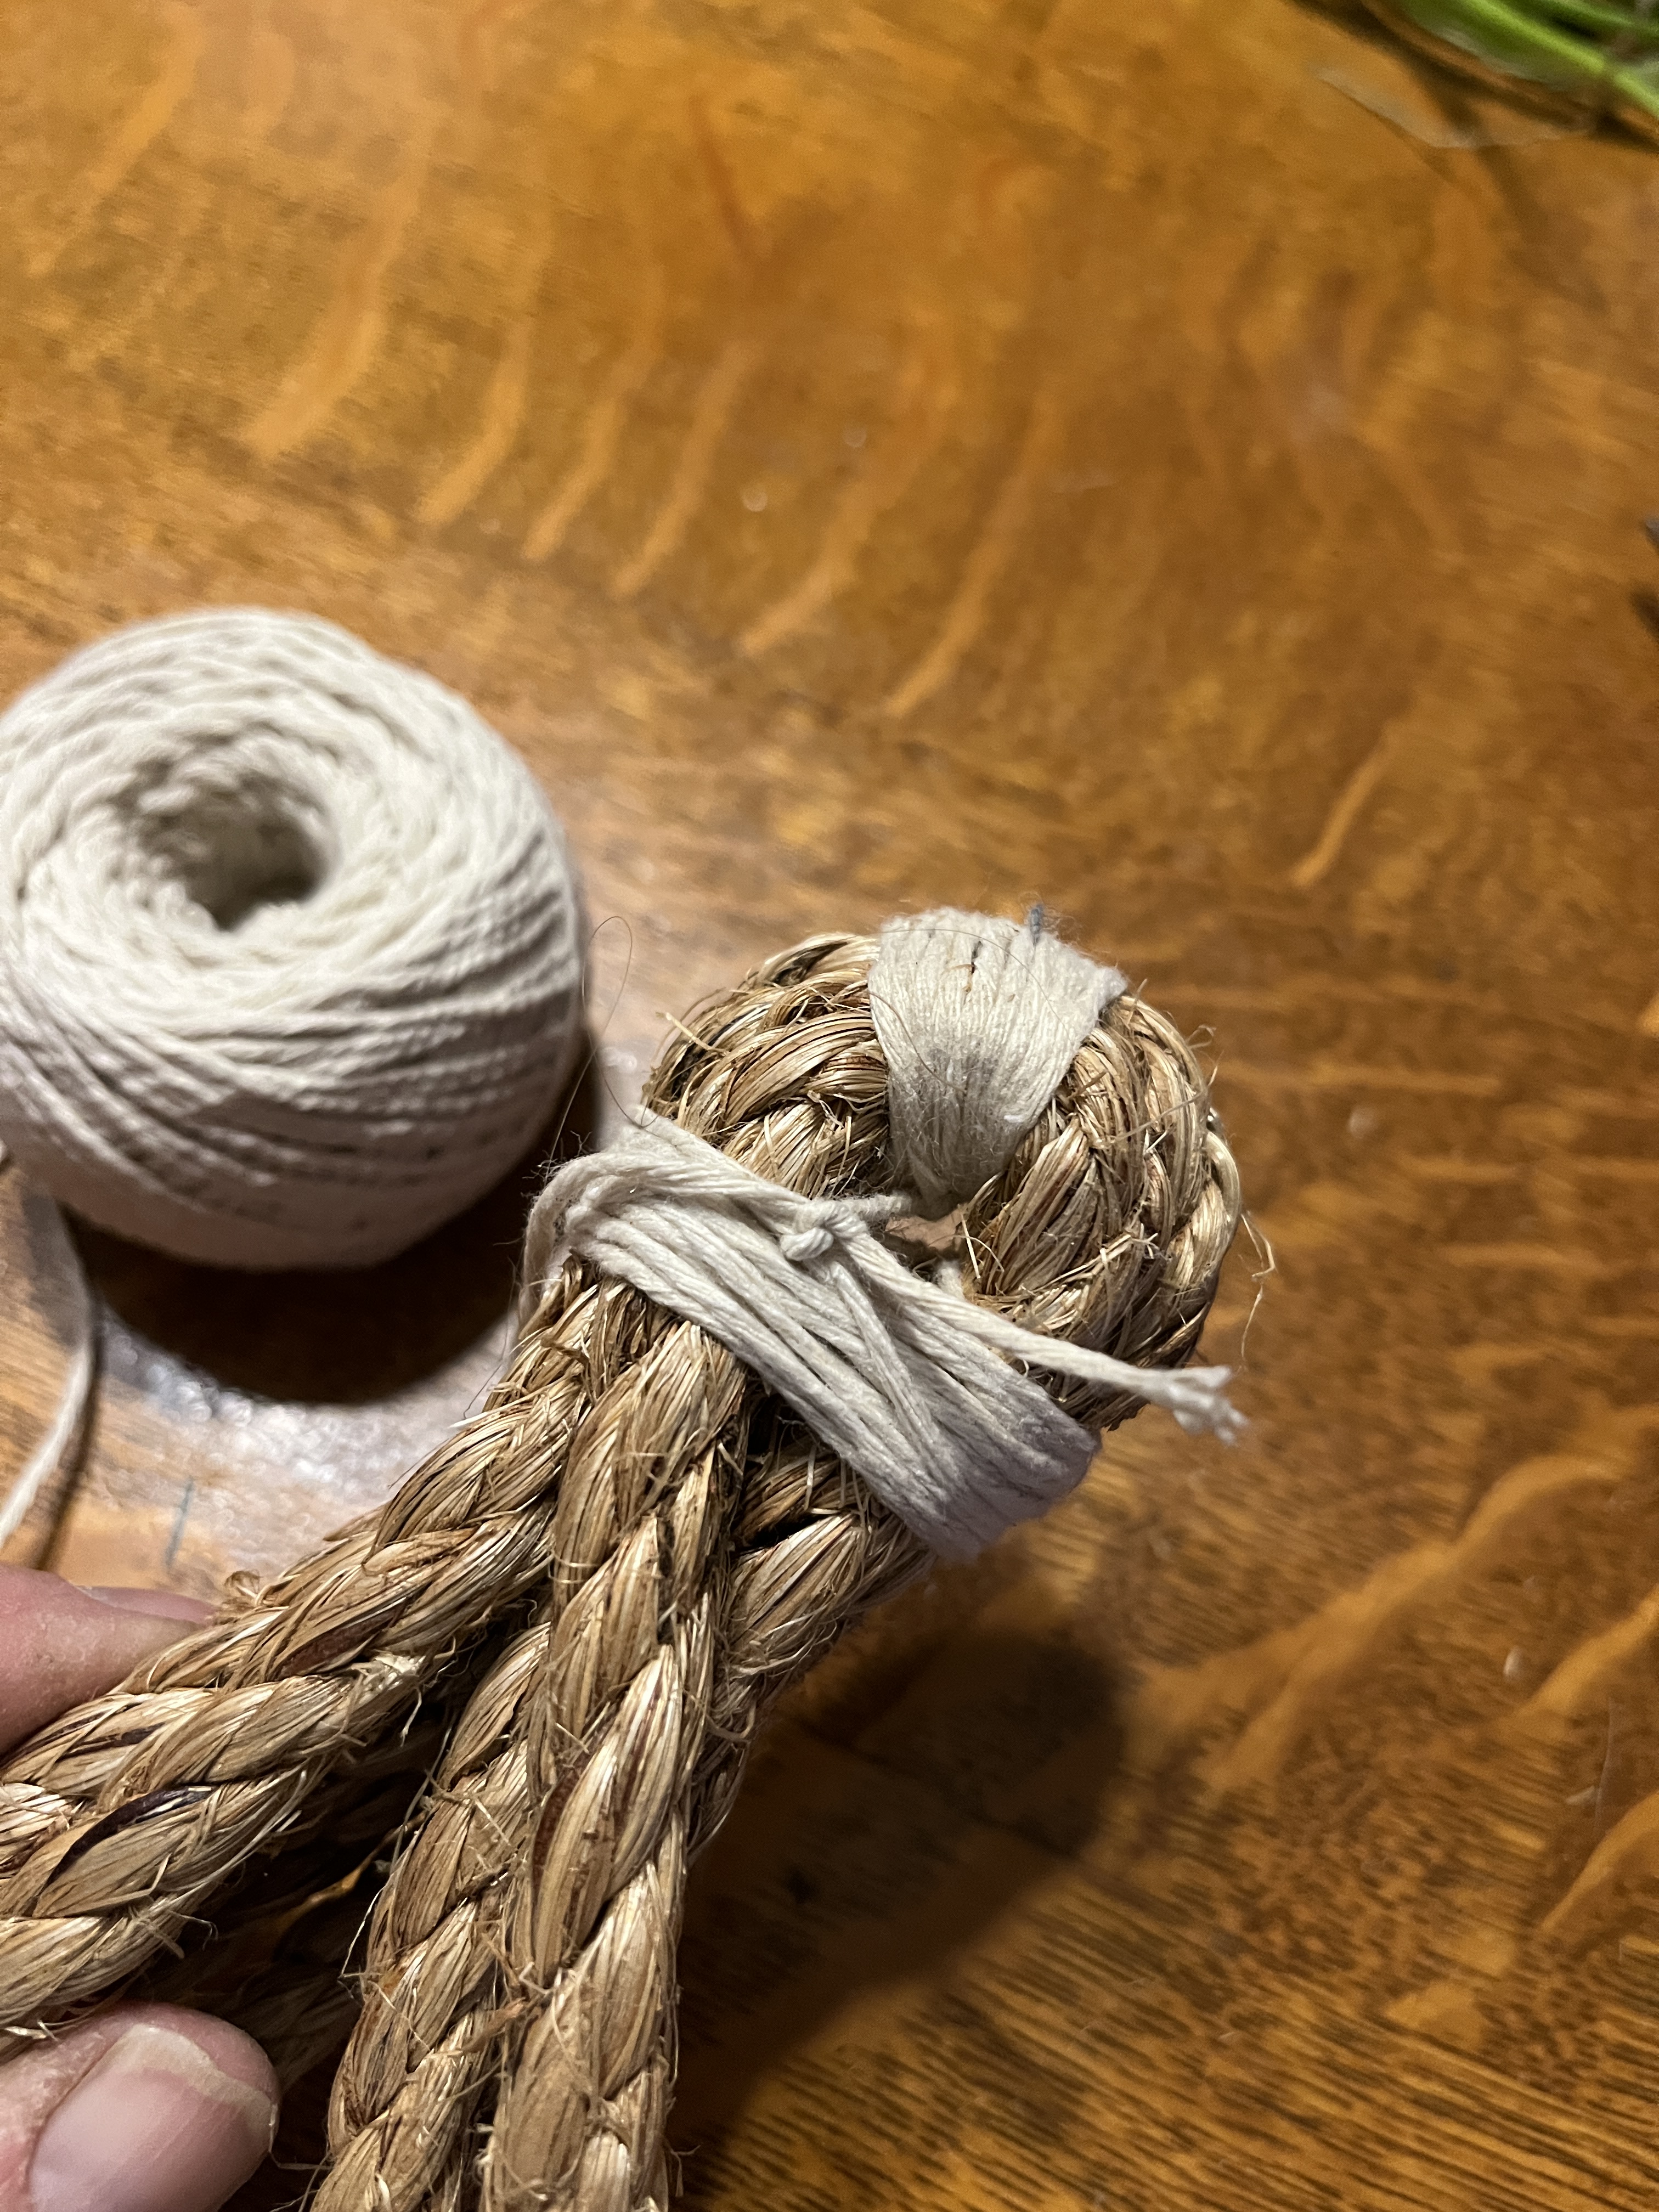
Next I ran the string (the side connected to the ball of twine) around the bend in a figure-8 to help me get it bent and held tightly so I could wrap the tassel form together.
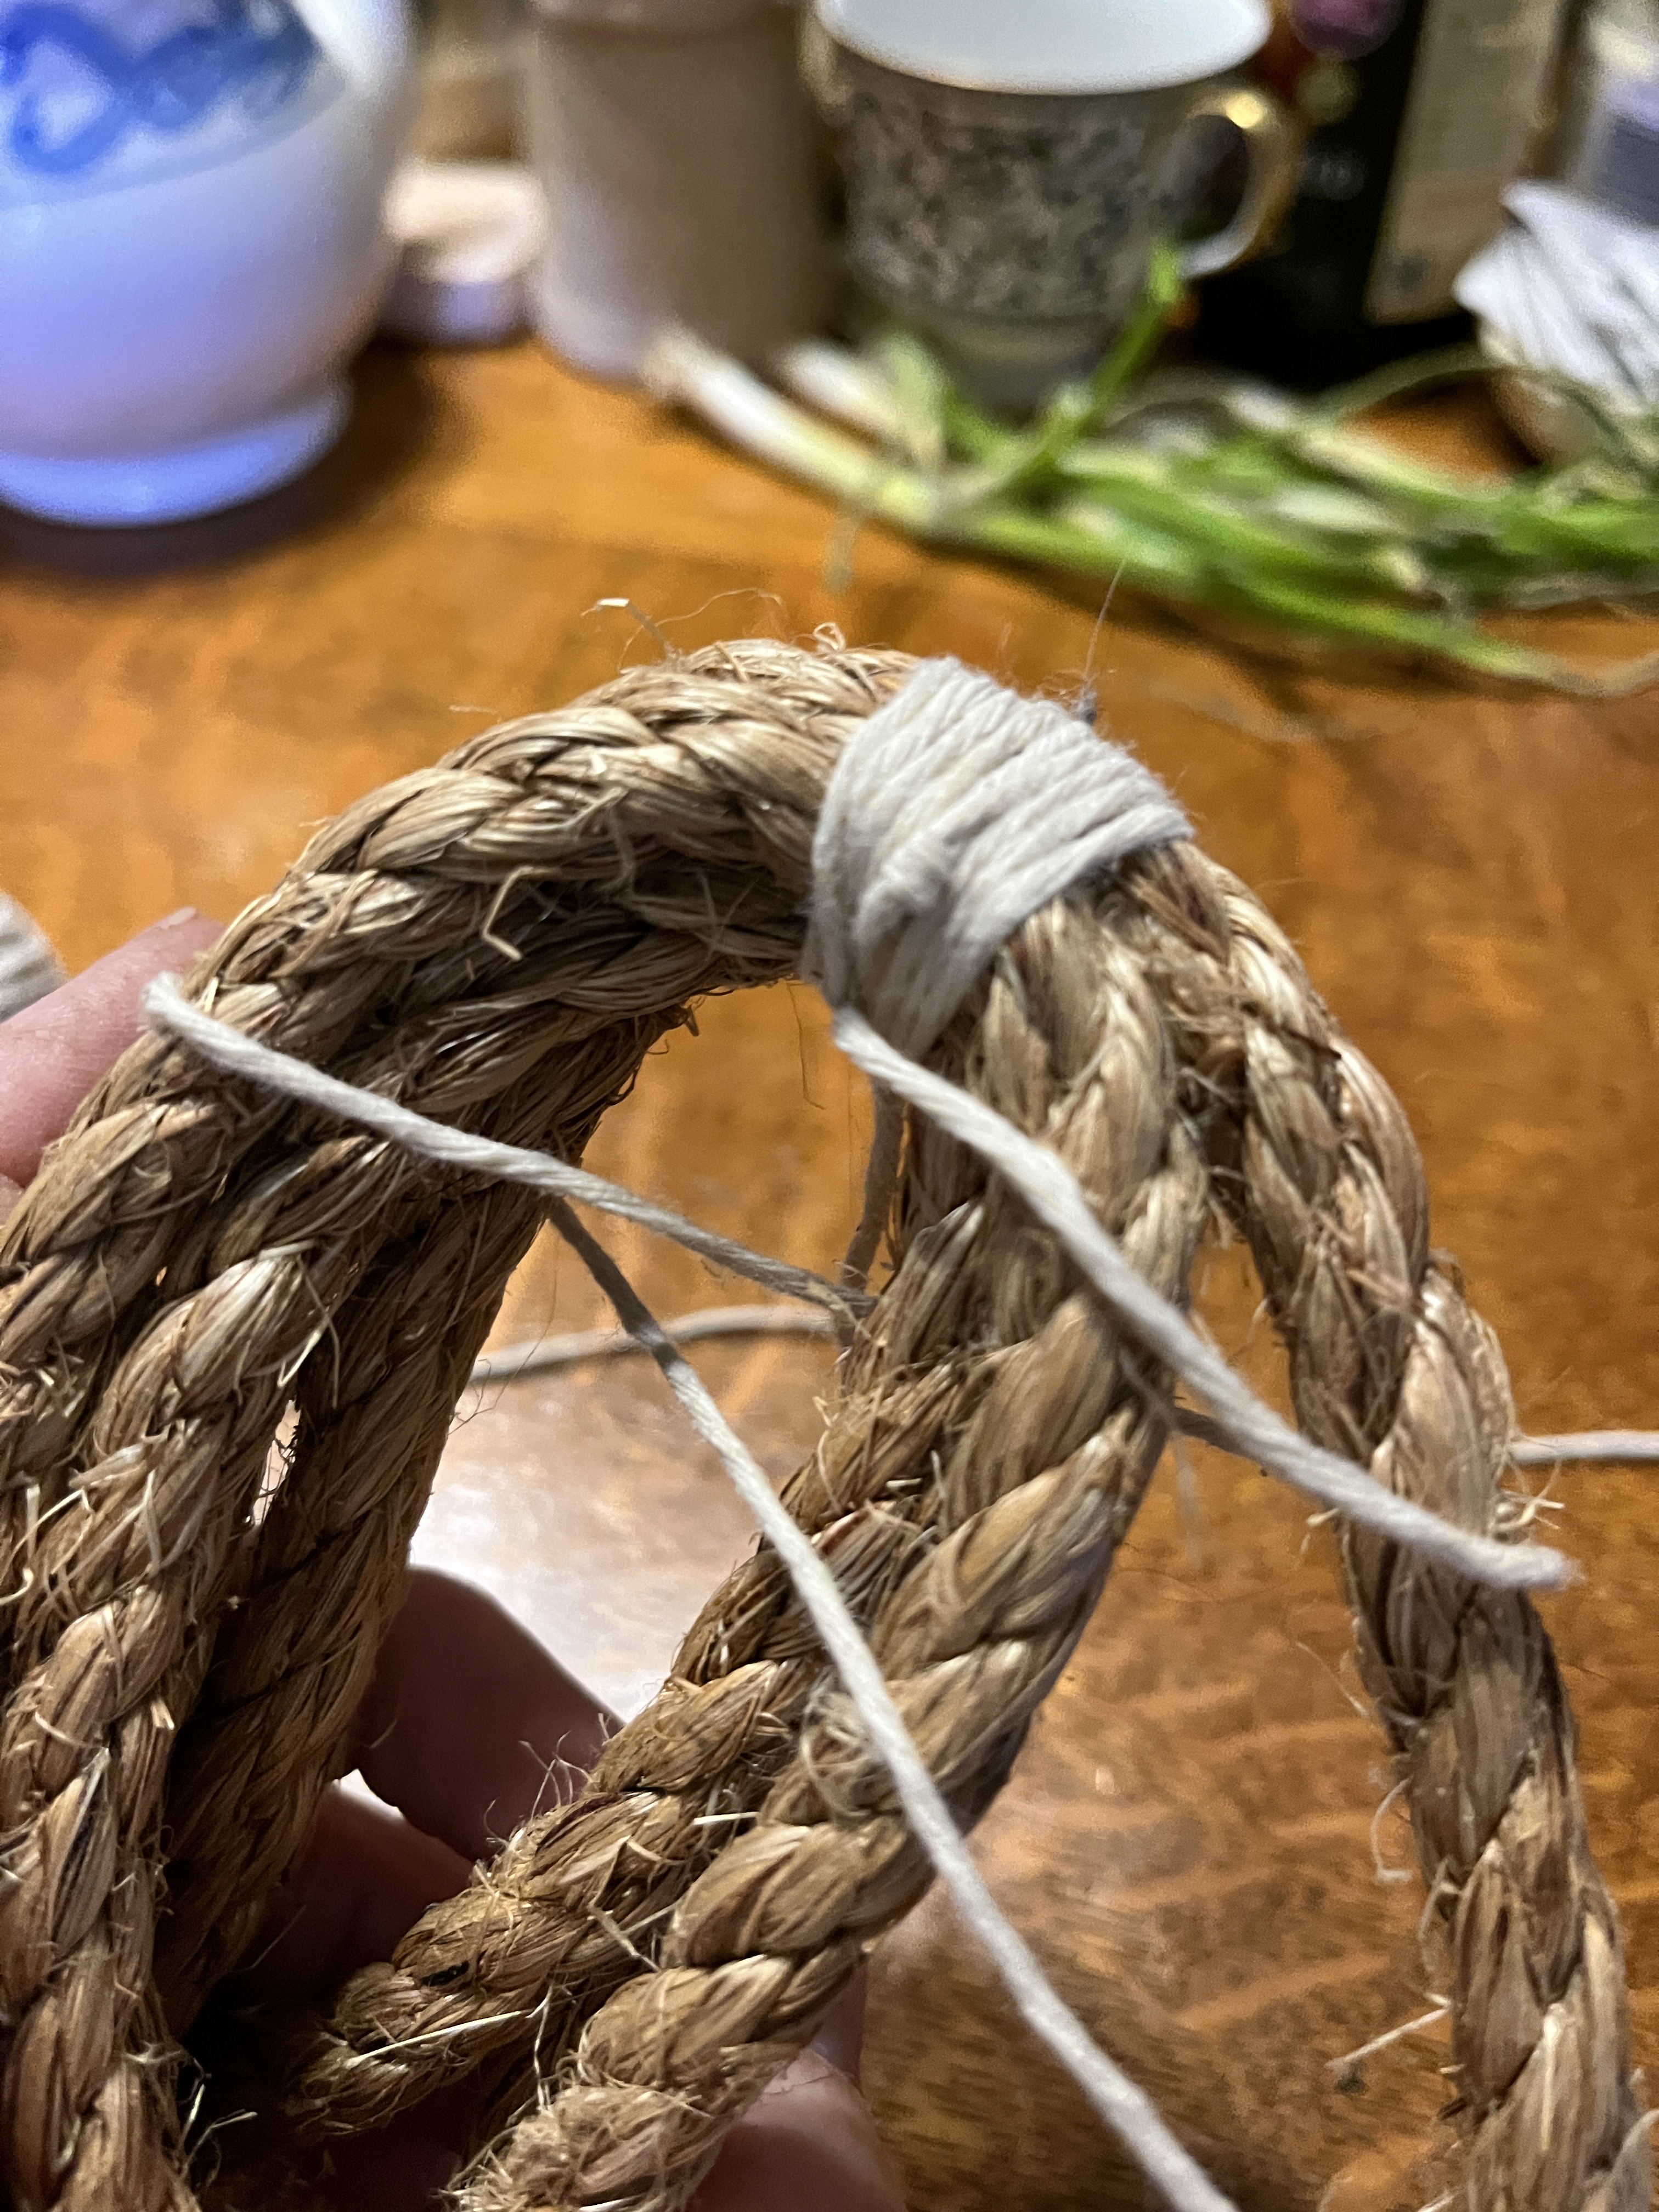
From there I kept holding it tightly while I wrapped the tassel closed. Keep it tight as you go and make sure you don’t wrap the tail into the winding. Wind about a dozen times or so.
The last 2 winds put a twist in the string so the windings hold the string tight while you tie it off with the tail in another square knot.
Cut off the ends.
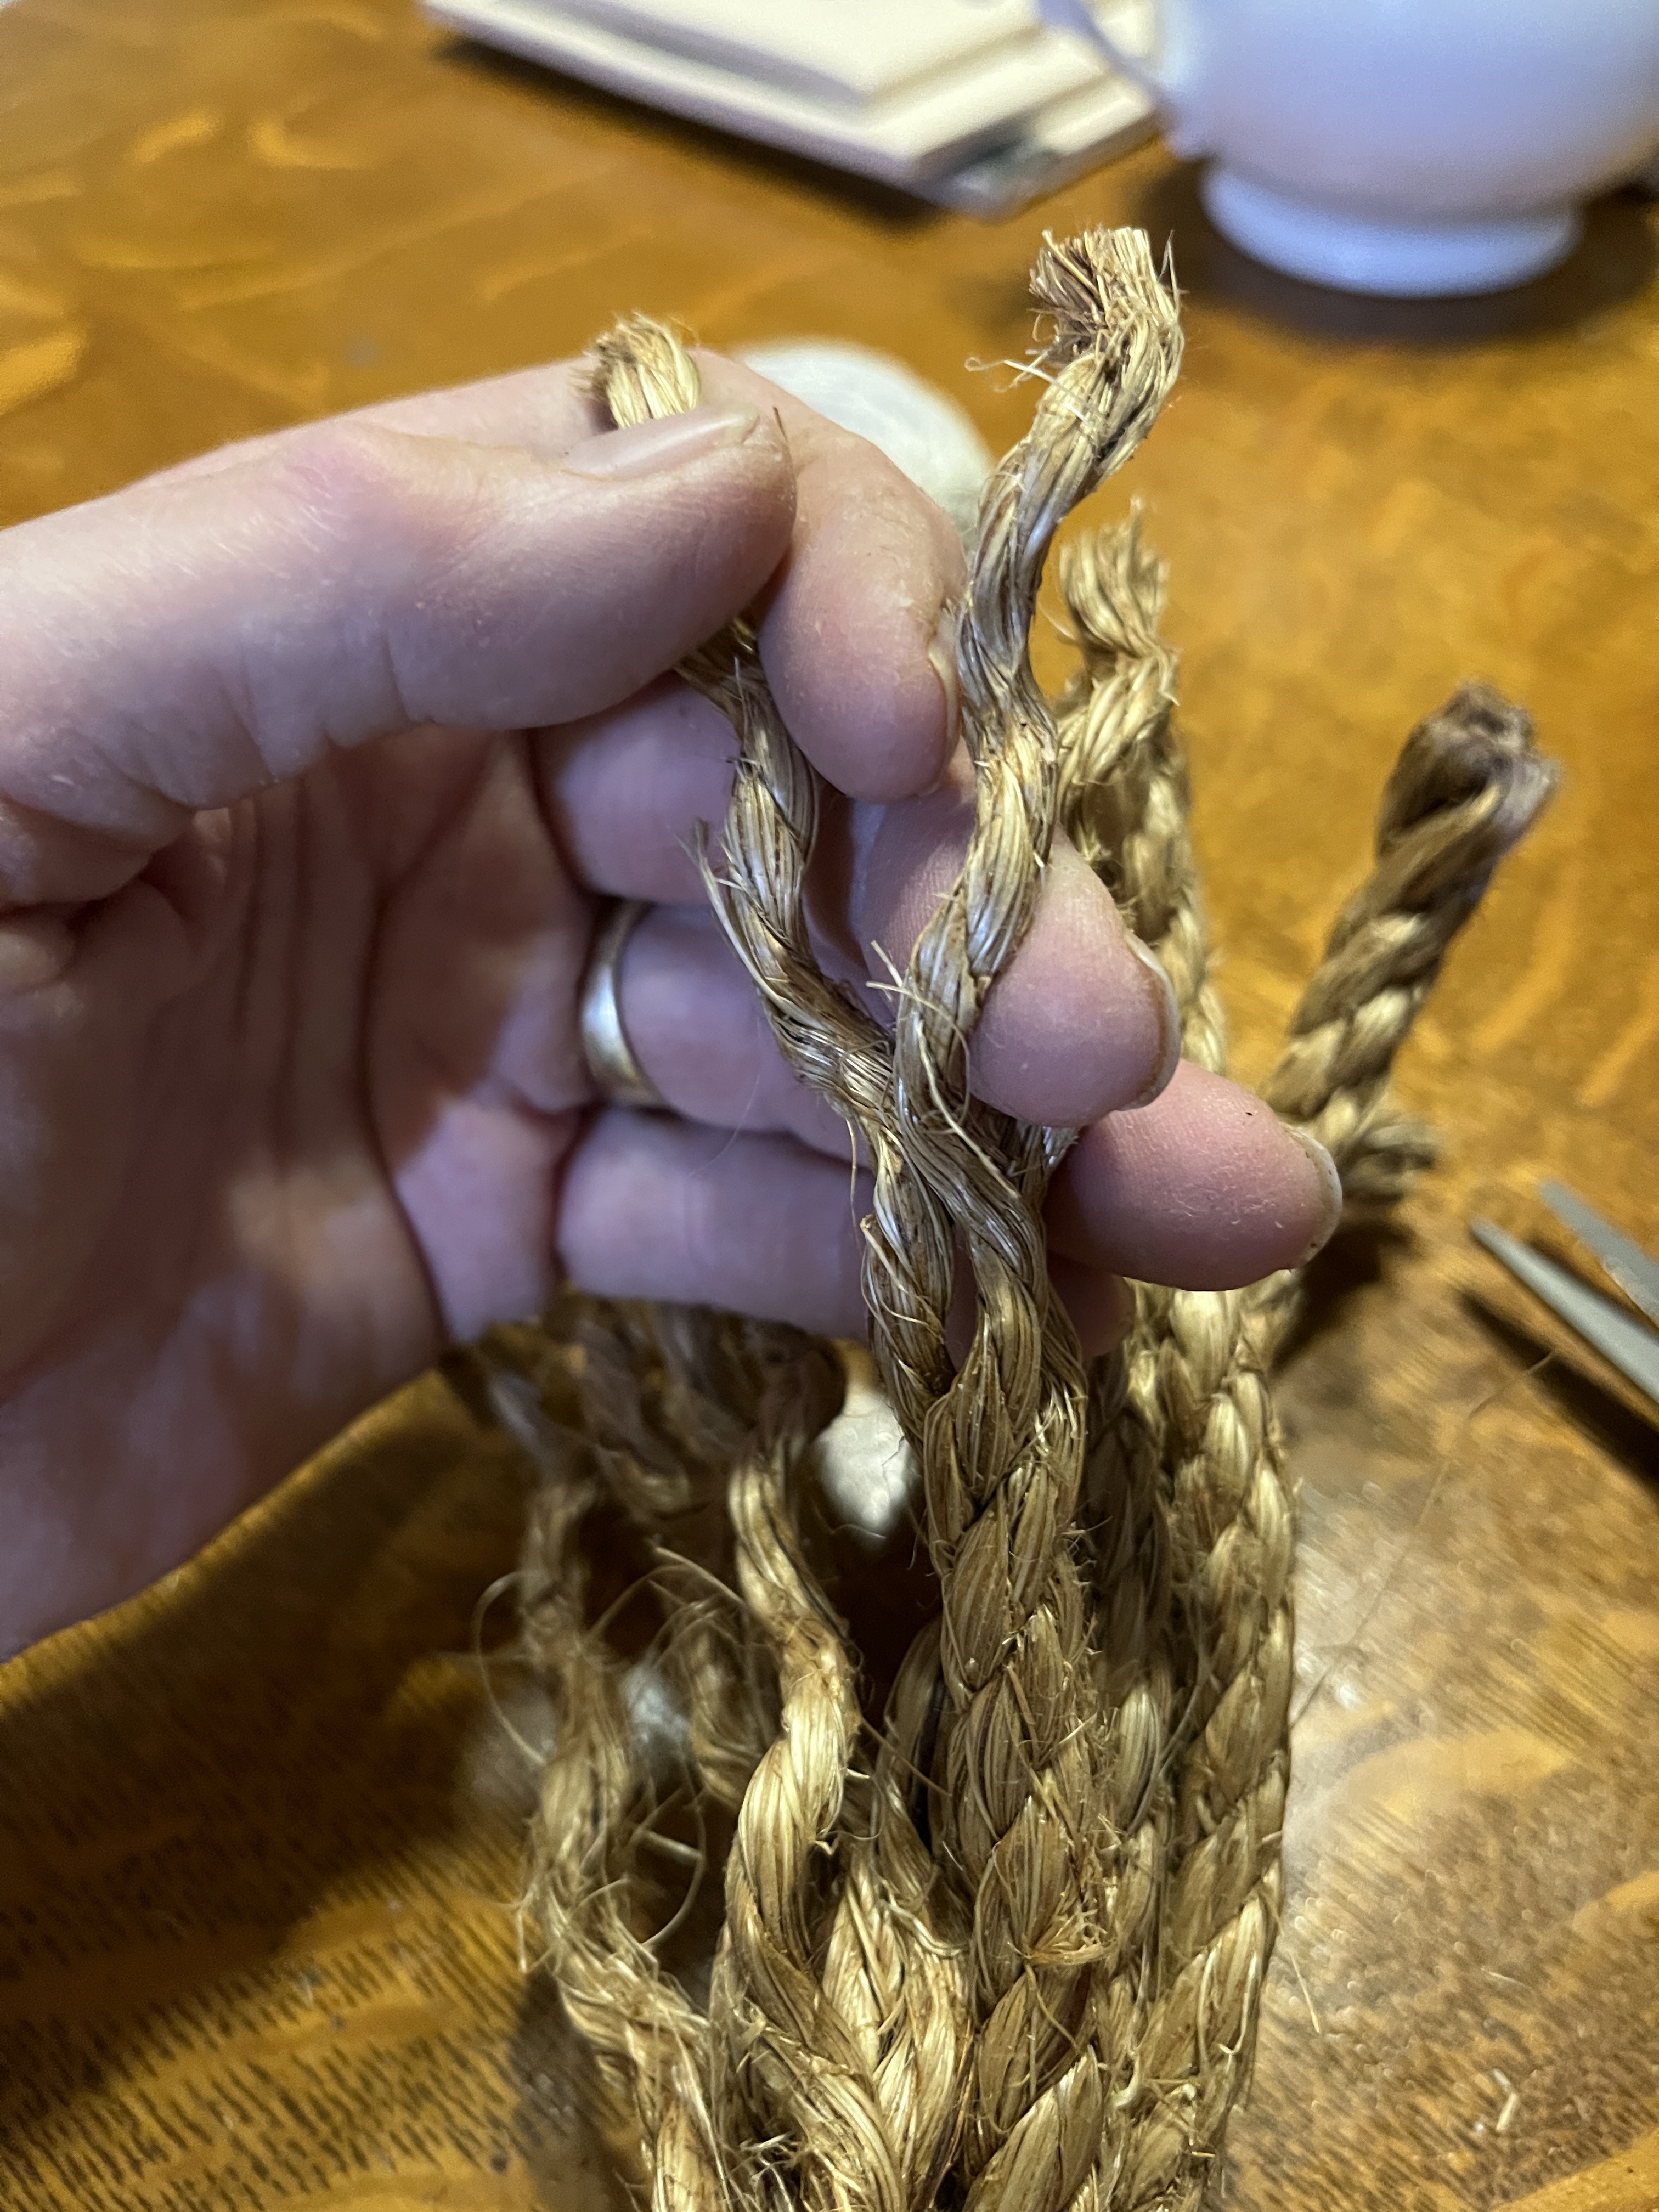
Then cut the bends in the end of the tassel
And unravel the ropes to the binding.
A finished tassel
All 3 tassels done! They should relax and fluff as they weather and age. This will be interesting to observe. I’m hoping they last a good few years. So 90 minutes, a shower and an antihistamine later and I’m ready for bed. The rest tomorrow, unless it rains.
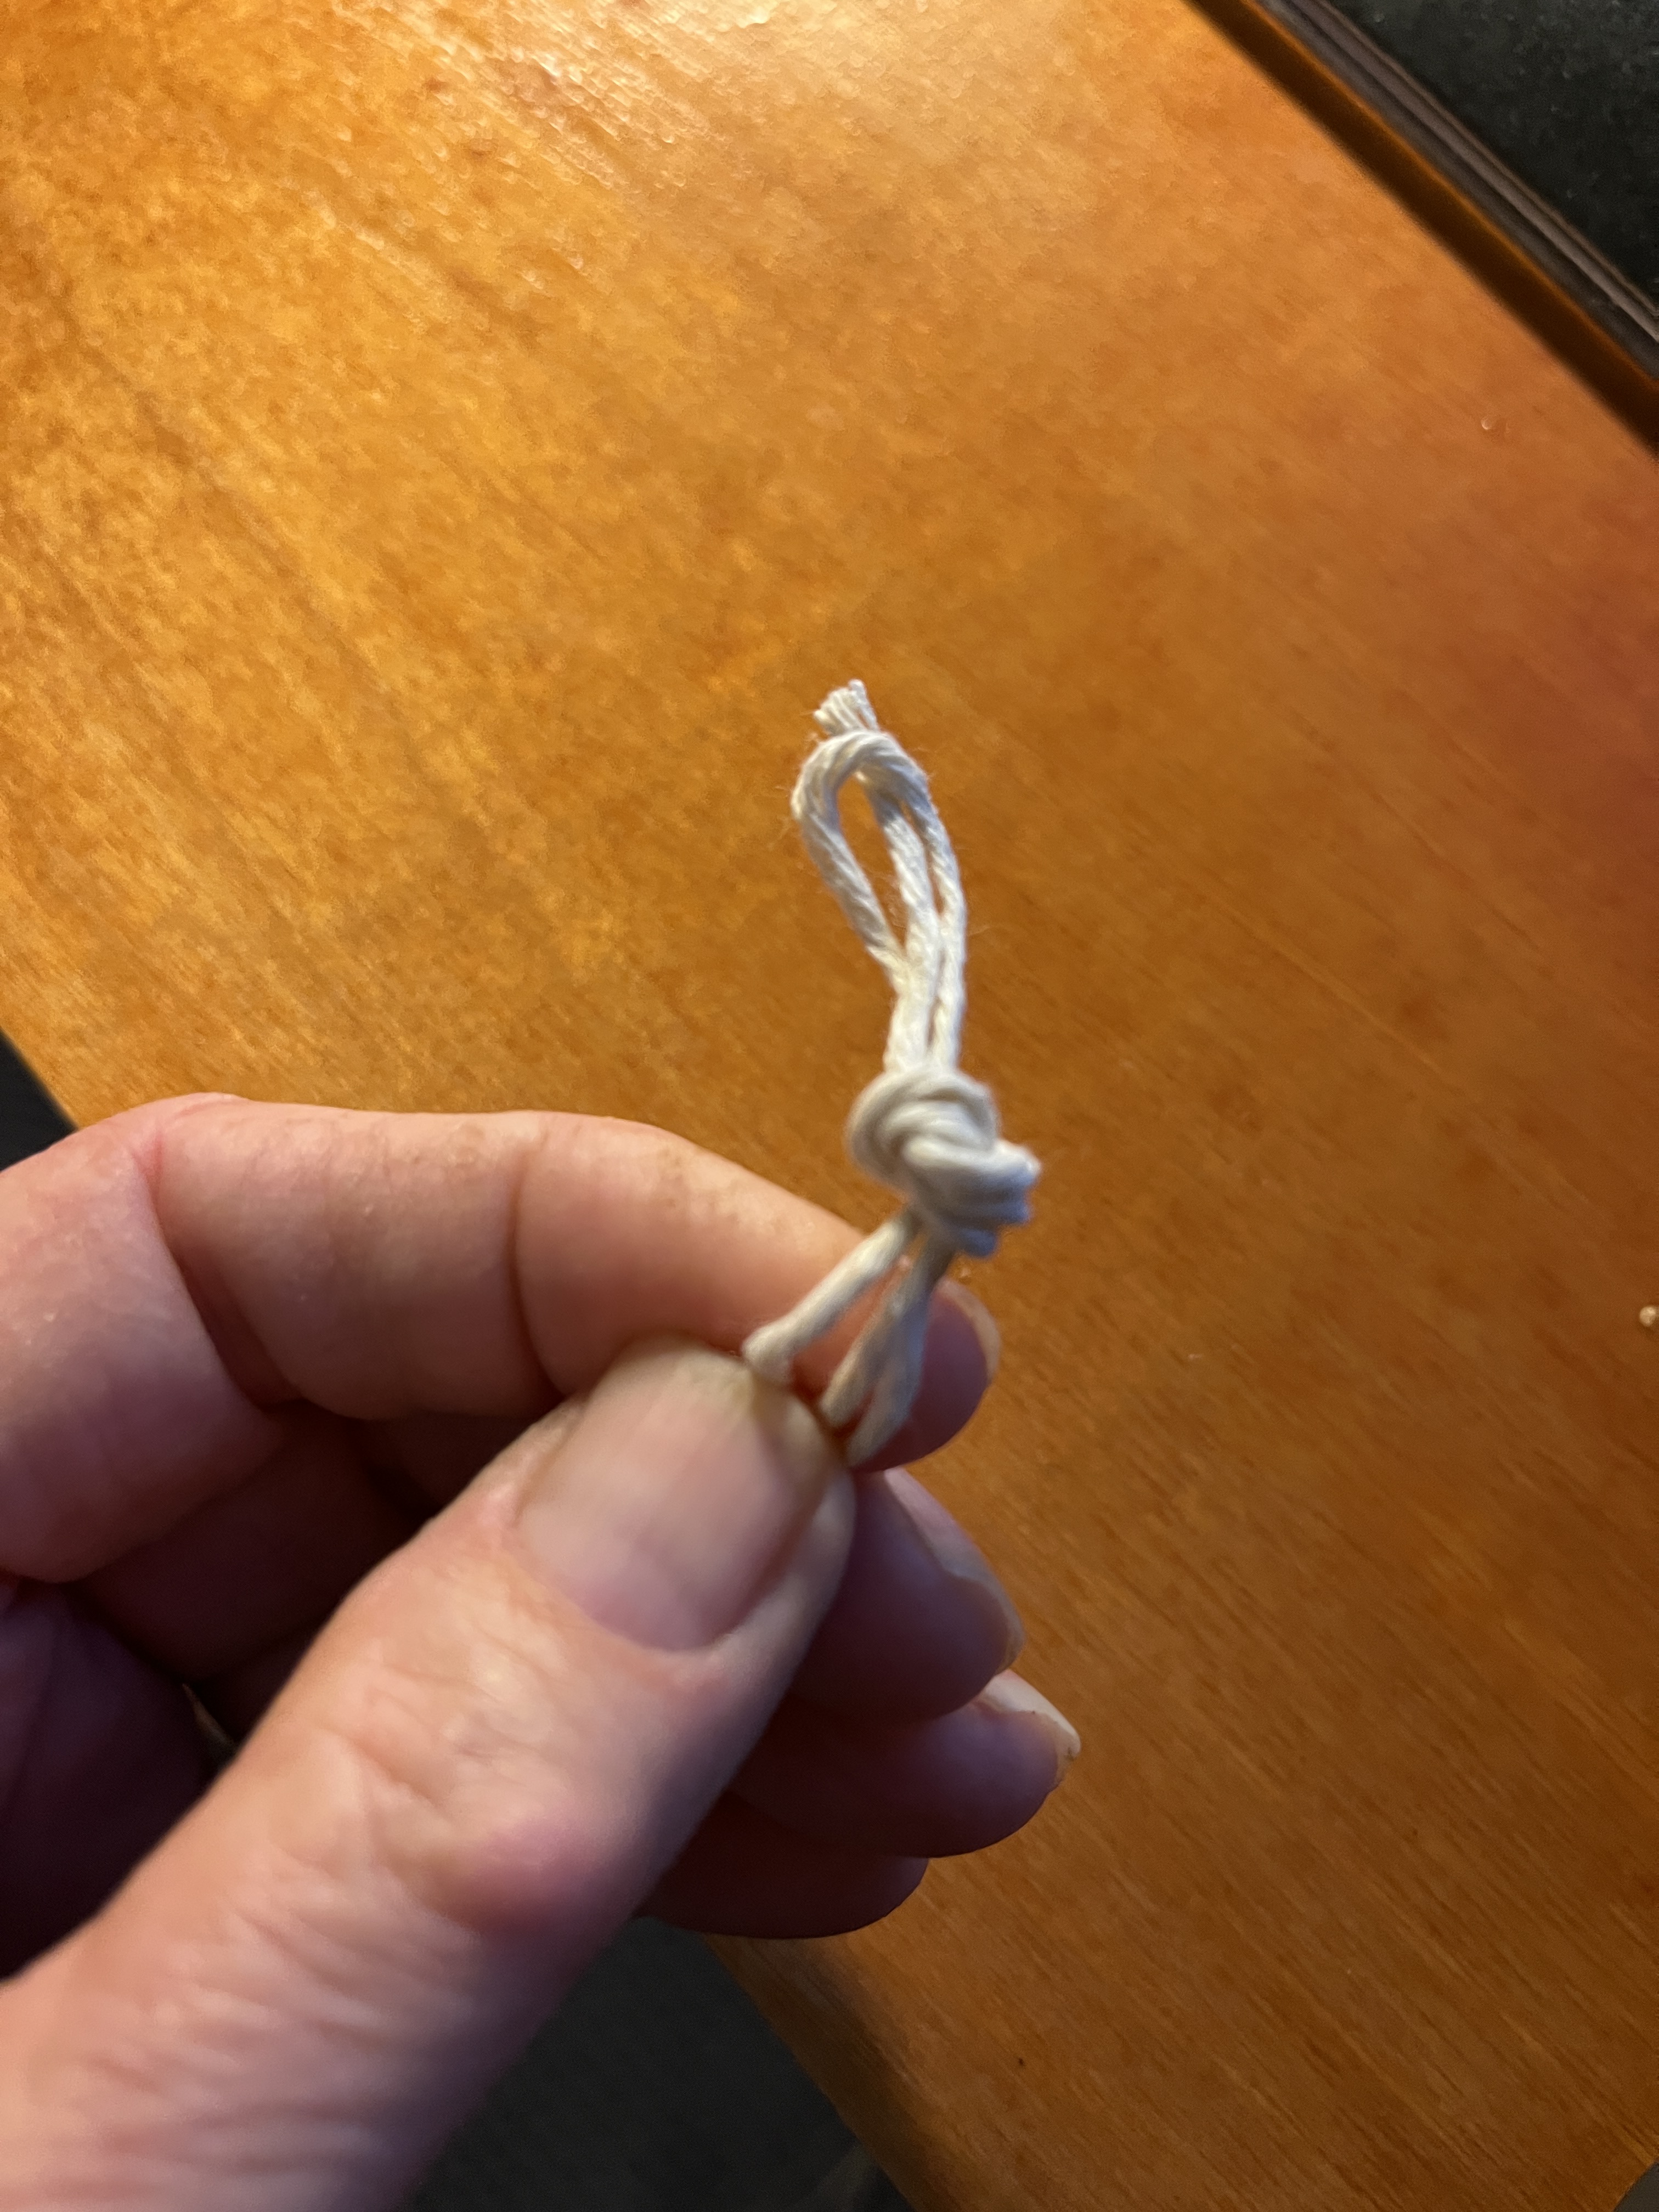
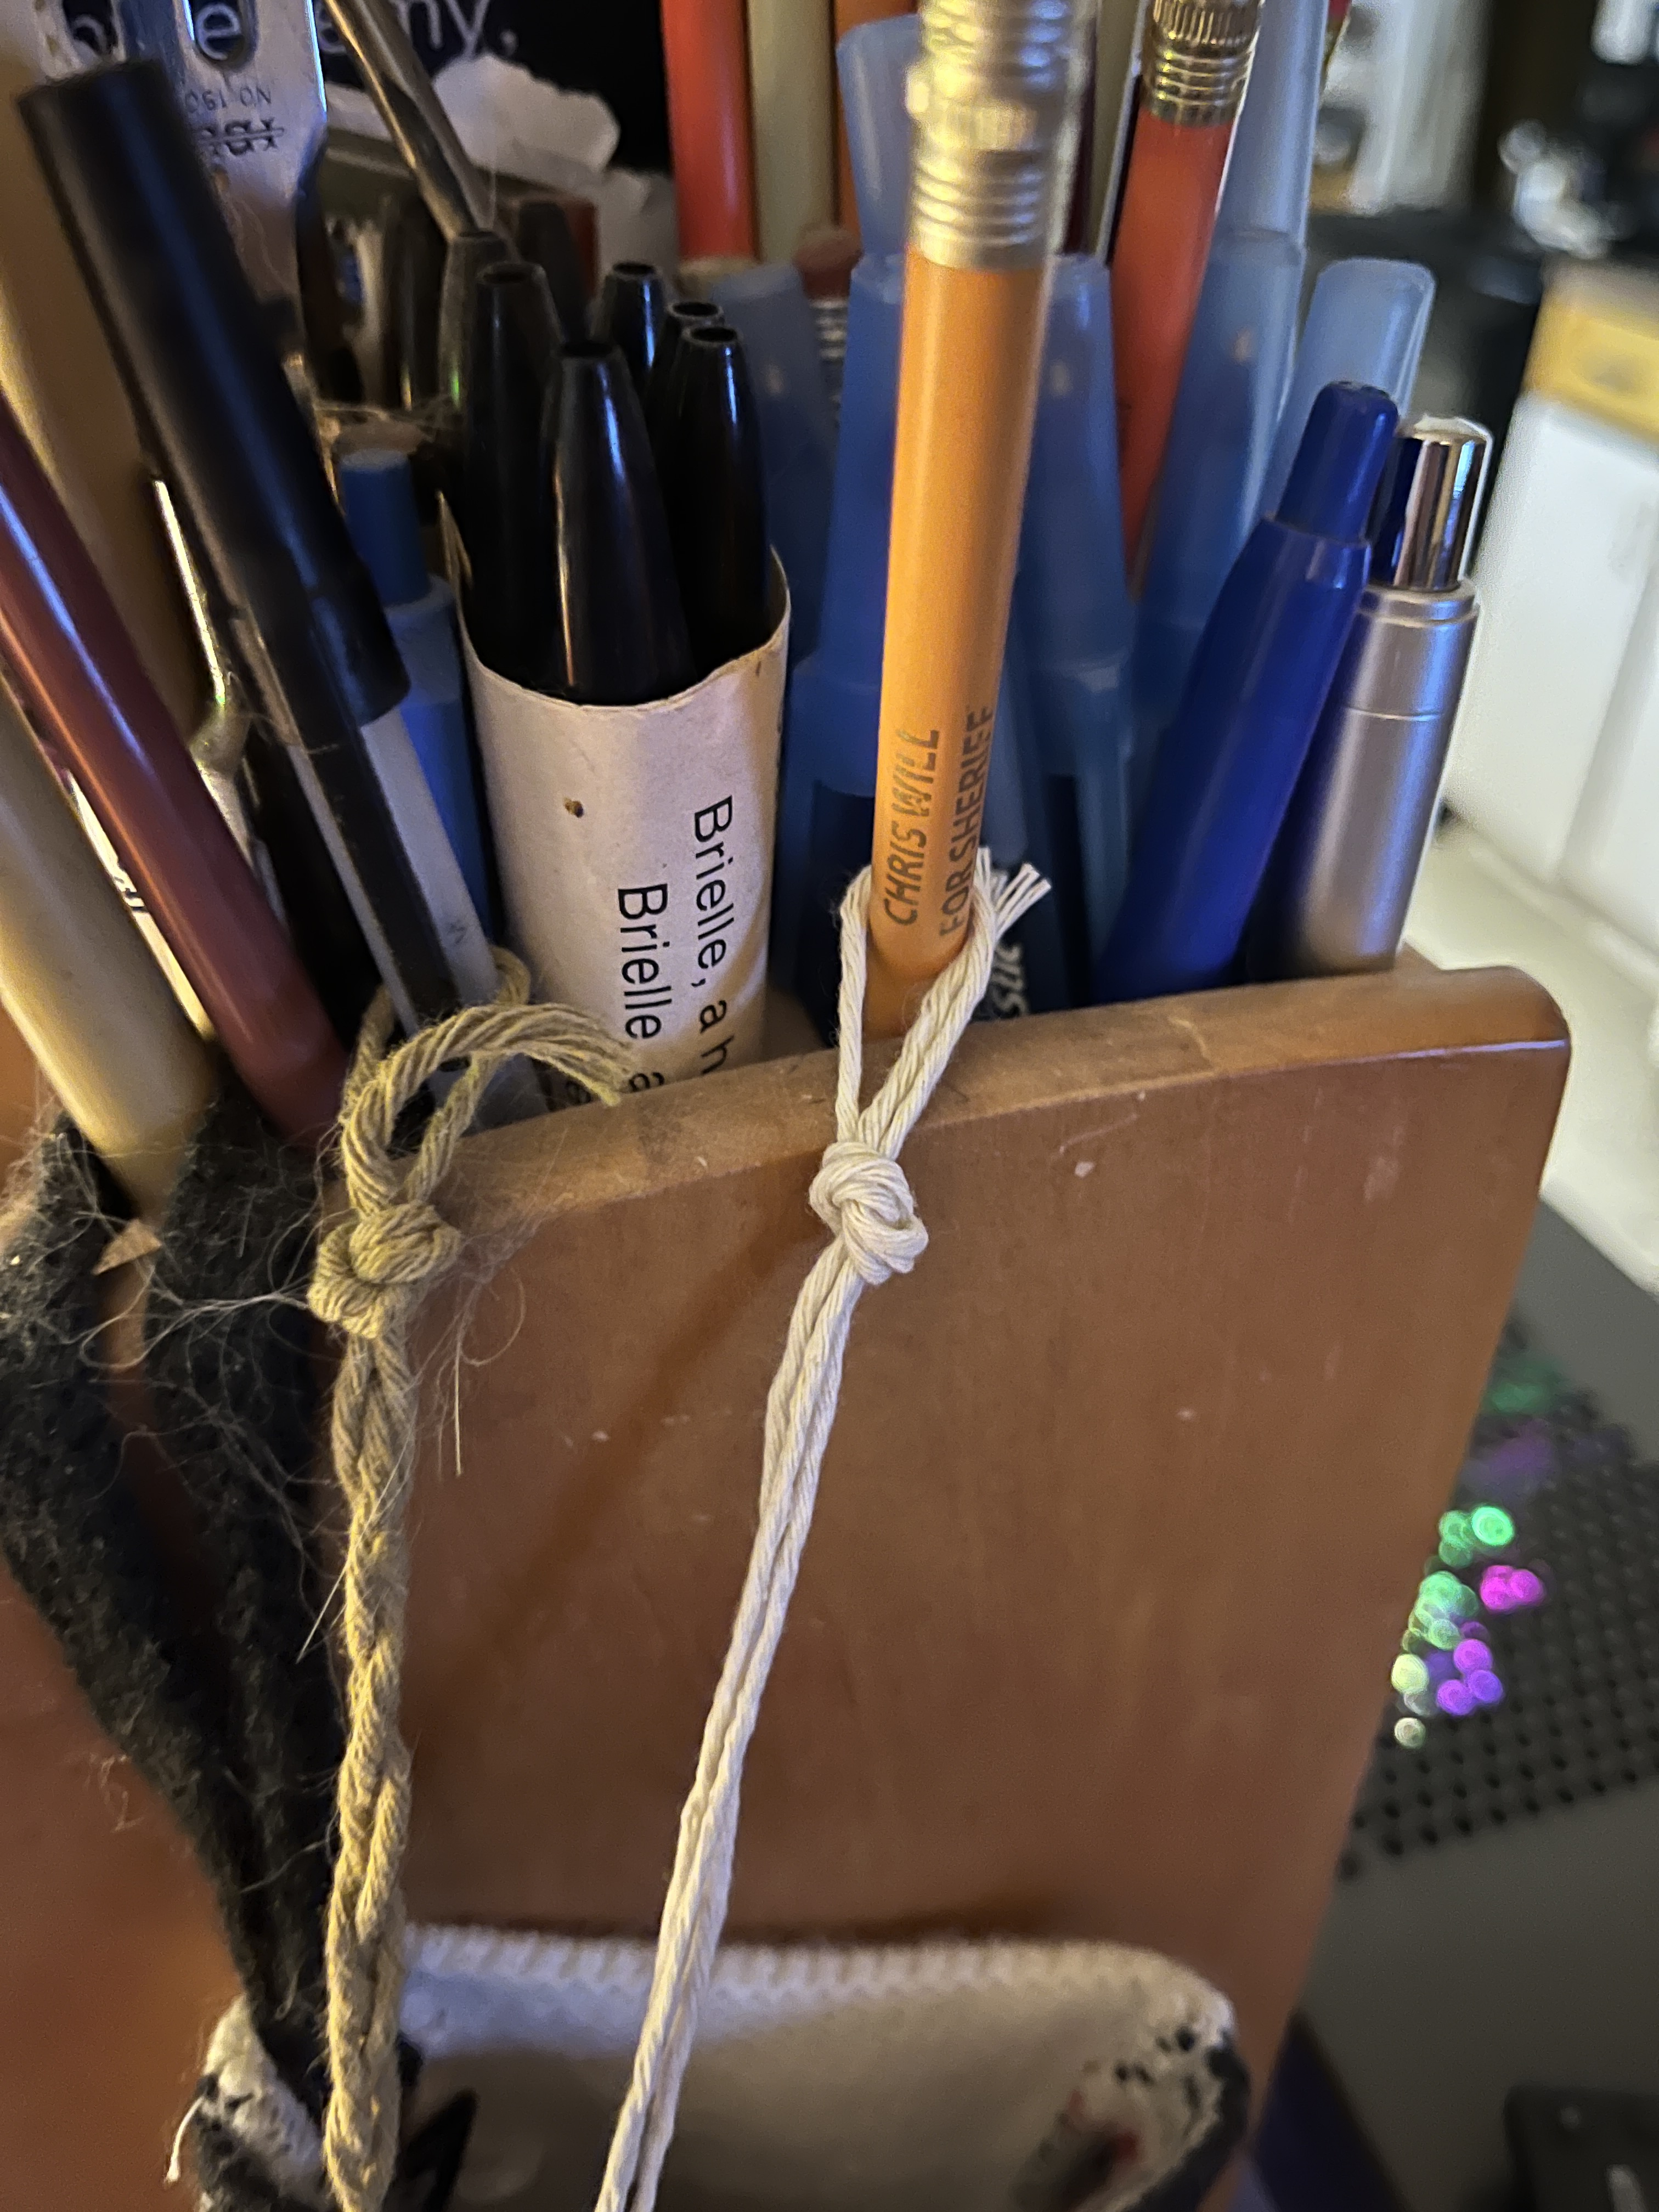
Now to attach the tassels to the Torii top. I figure I’d tie mine on but the cotton twine is a bit thin so I’d braid it. I measured an arm-length if twine, then held the end while measuring another arms length and yet another. Then I tied an overhand know to one end,
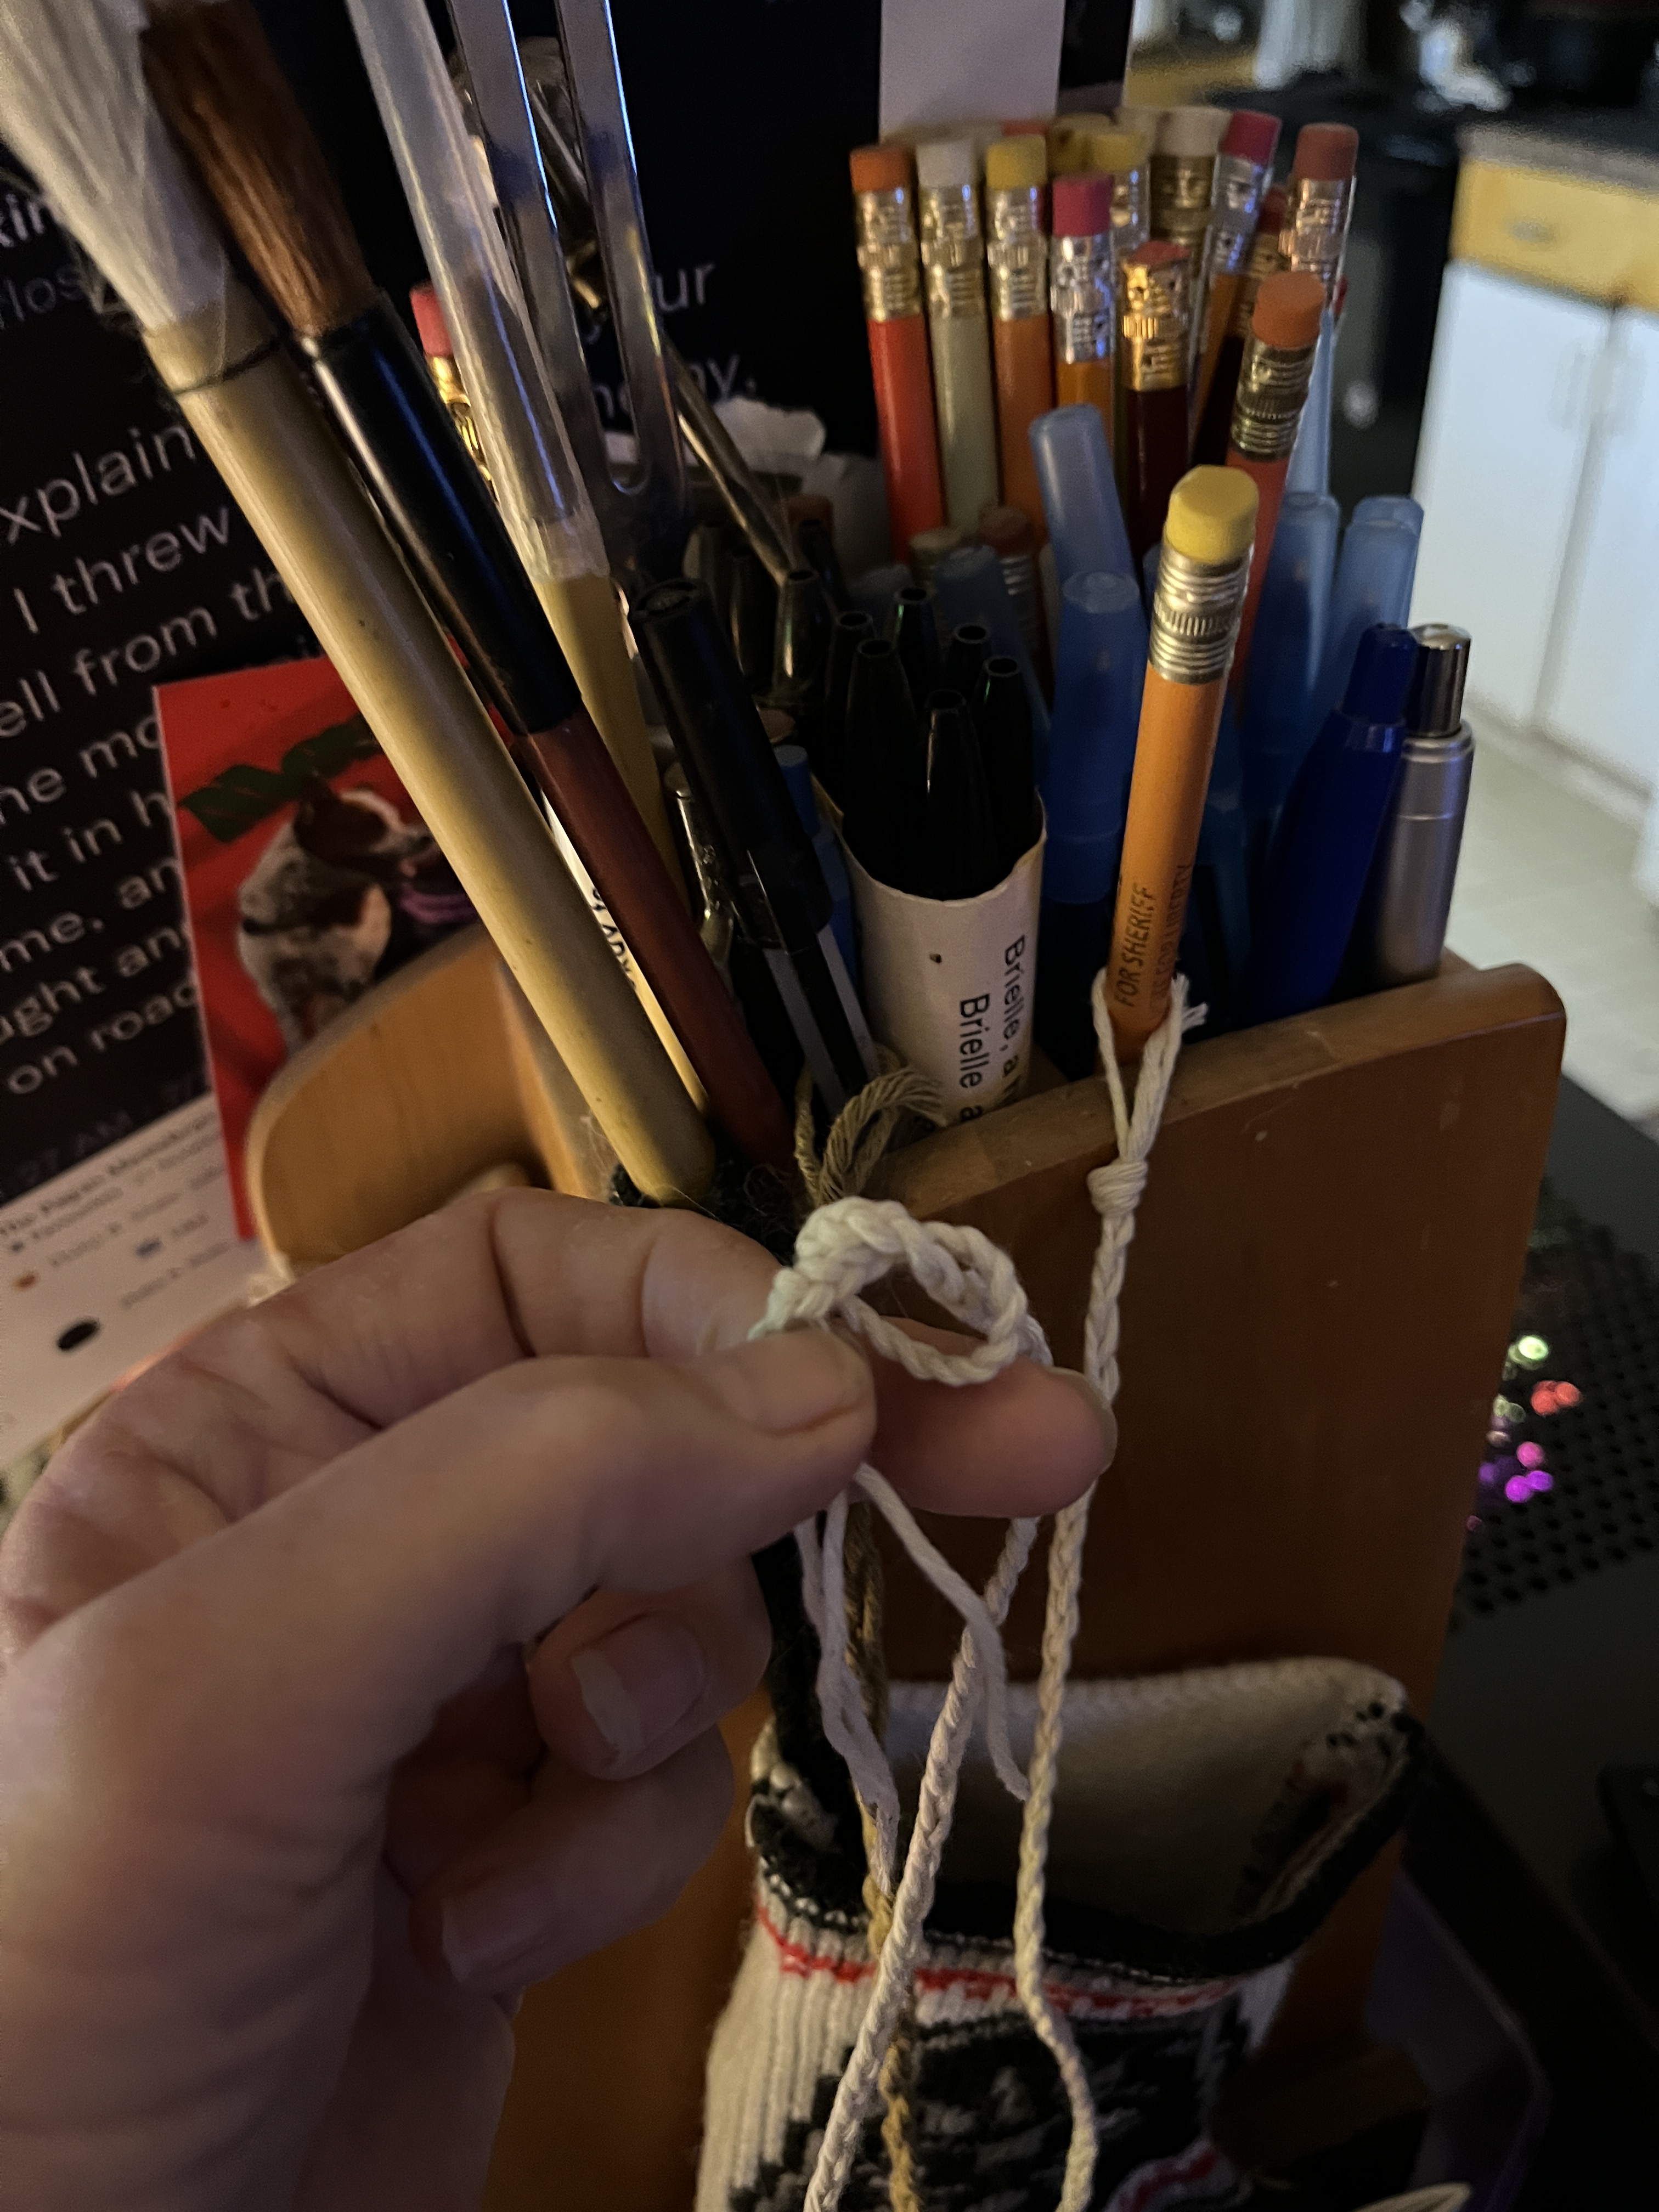
leaving a loop big enough to slide over a pencil to hold the end while I braided it. Yes, there’s a lot of braiding in this project.
Then I cut the other end loose so it wouldn’t loop and tangle while I braided and proceeded to braid until I got almost to the end. Yes, that’s a promotional pencil from when I ran for Sheriff once upon a time.
At the end, even though there’s still more left, I tied another overhand knot. I figure natural tassels at the ends won’t hurt and can continue the theme.
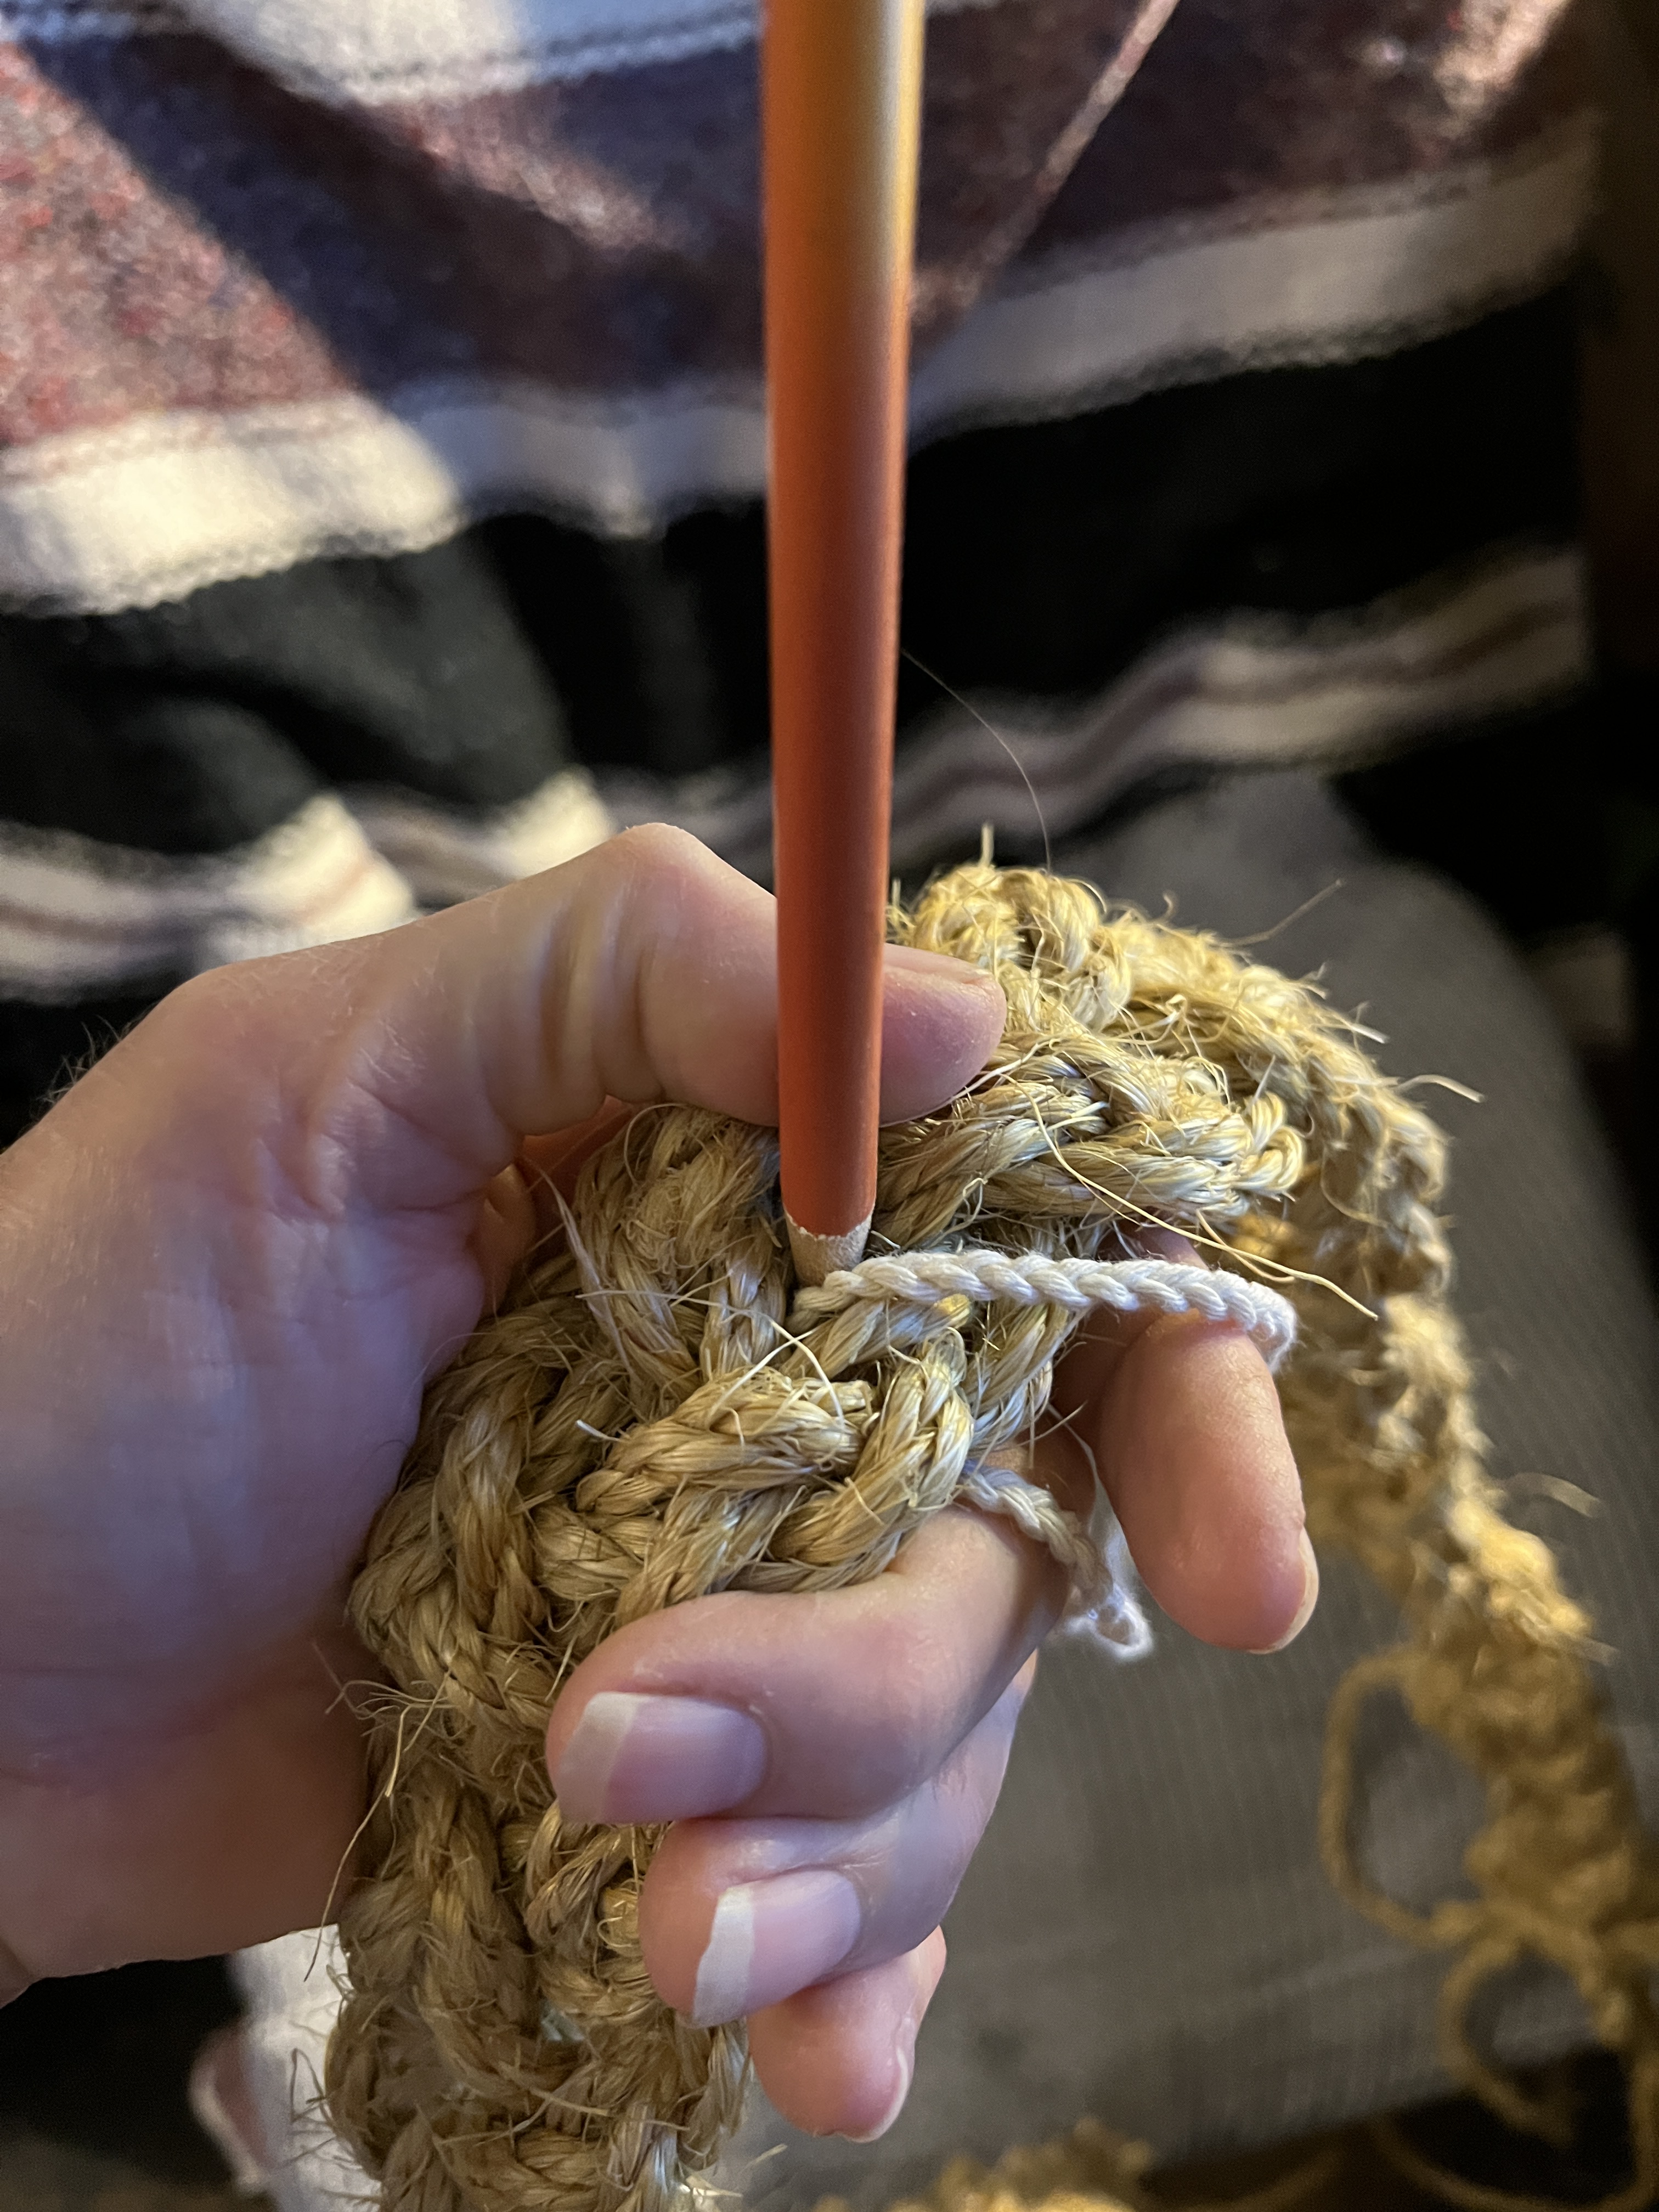
Now to attach the big tassel. I determined which side was the front an which was the back of the Torii top, then found the middle of the Torii top and pushed one end of this braid through the braid with a pencil. Pencils are delightful multi-use tools.
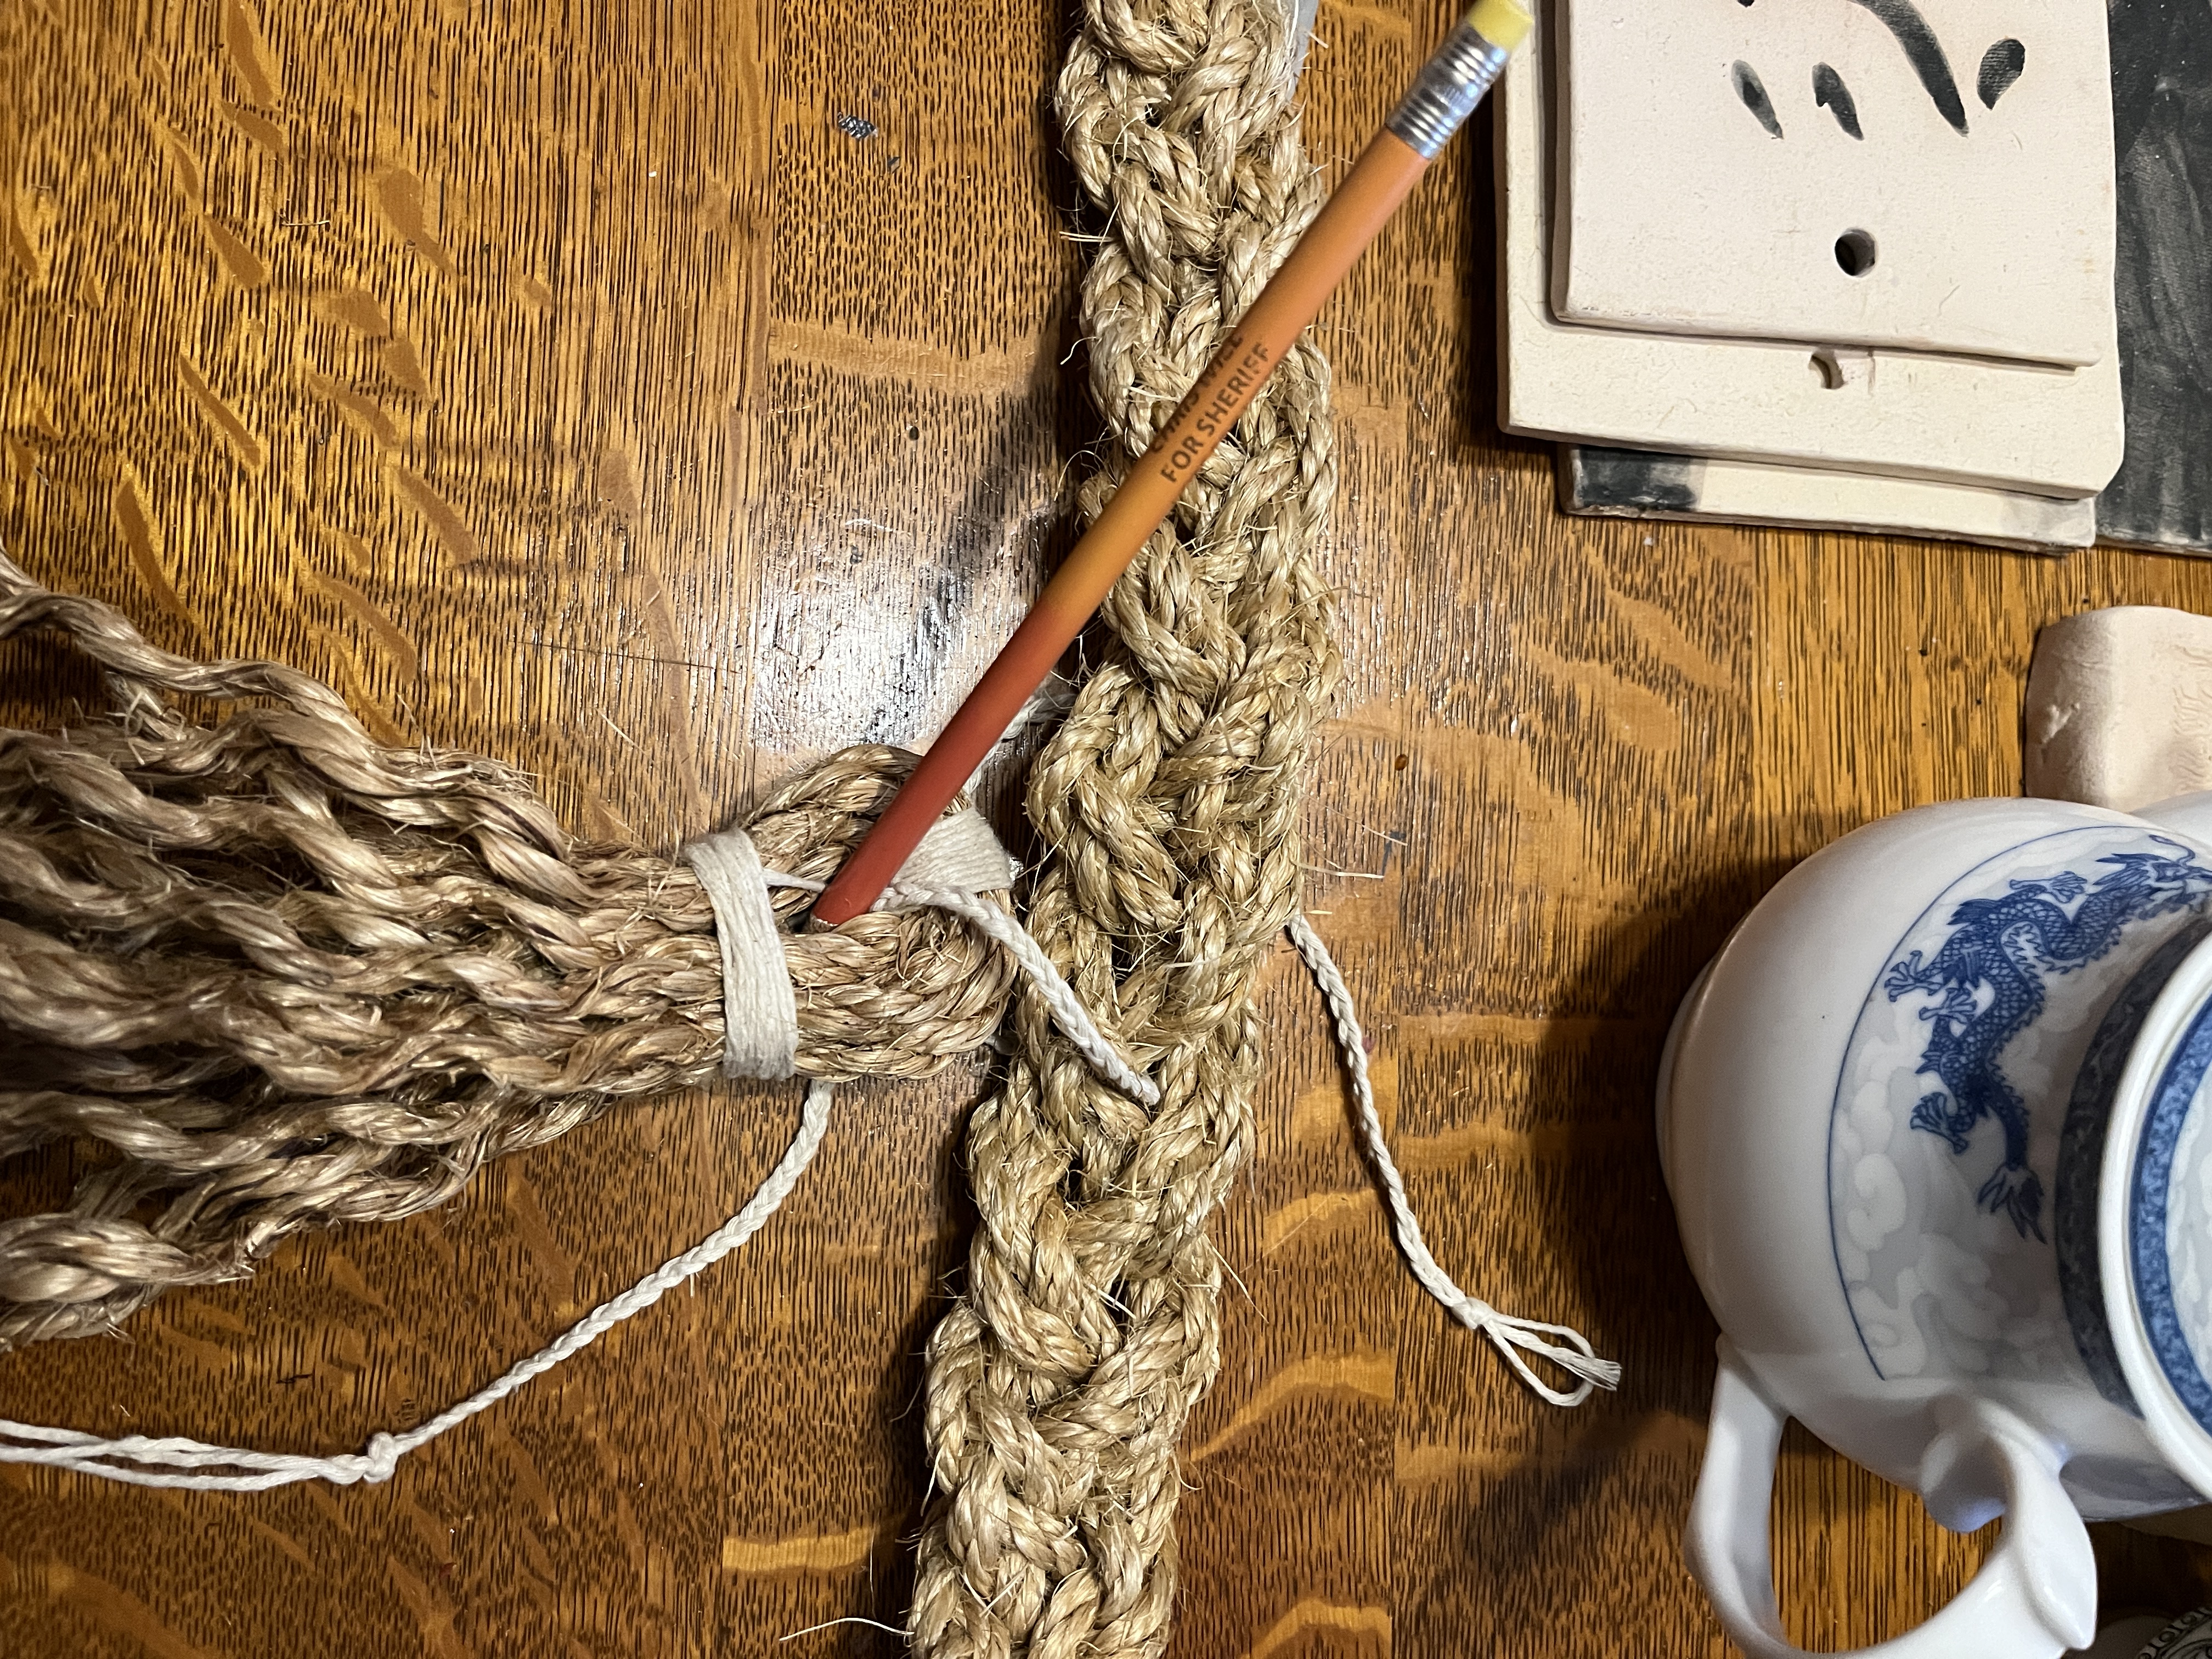
Next I decided which side was the front of the large tassel and poked the braid through that.
Turning the whole thing over I tied it on in the back of the top with a square knot. Yes, I tightened the knot, but this shows it’s a proper square knot.
Then made nice tassels in the ends of the small tie-braid by re-tying and unbraiding part of the braid that hangs down. If you’re tired of fussing you can just let the wind and weather unbraid it.
Now repeat for the 2 smaller tassels. Eventually it’ll be ready to put up…as soon as the uprights are in.
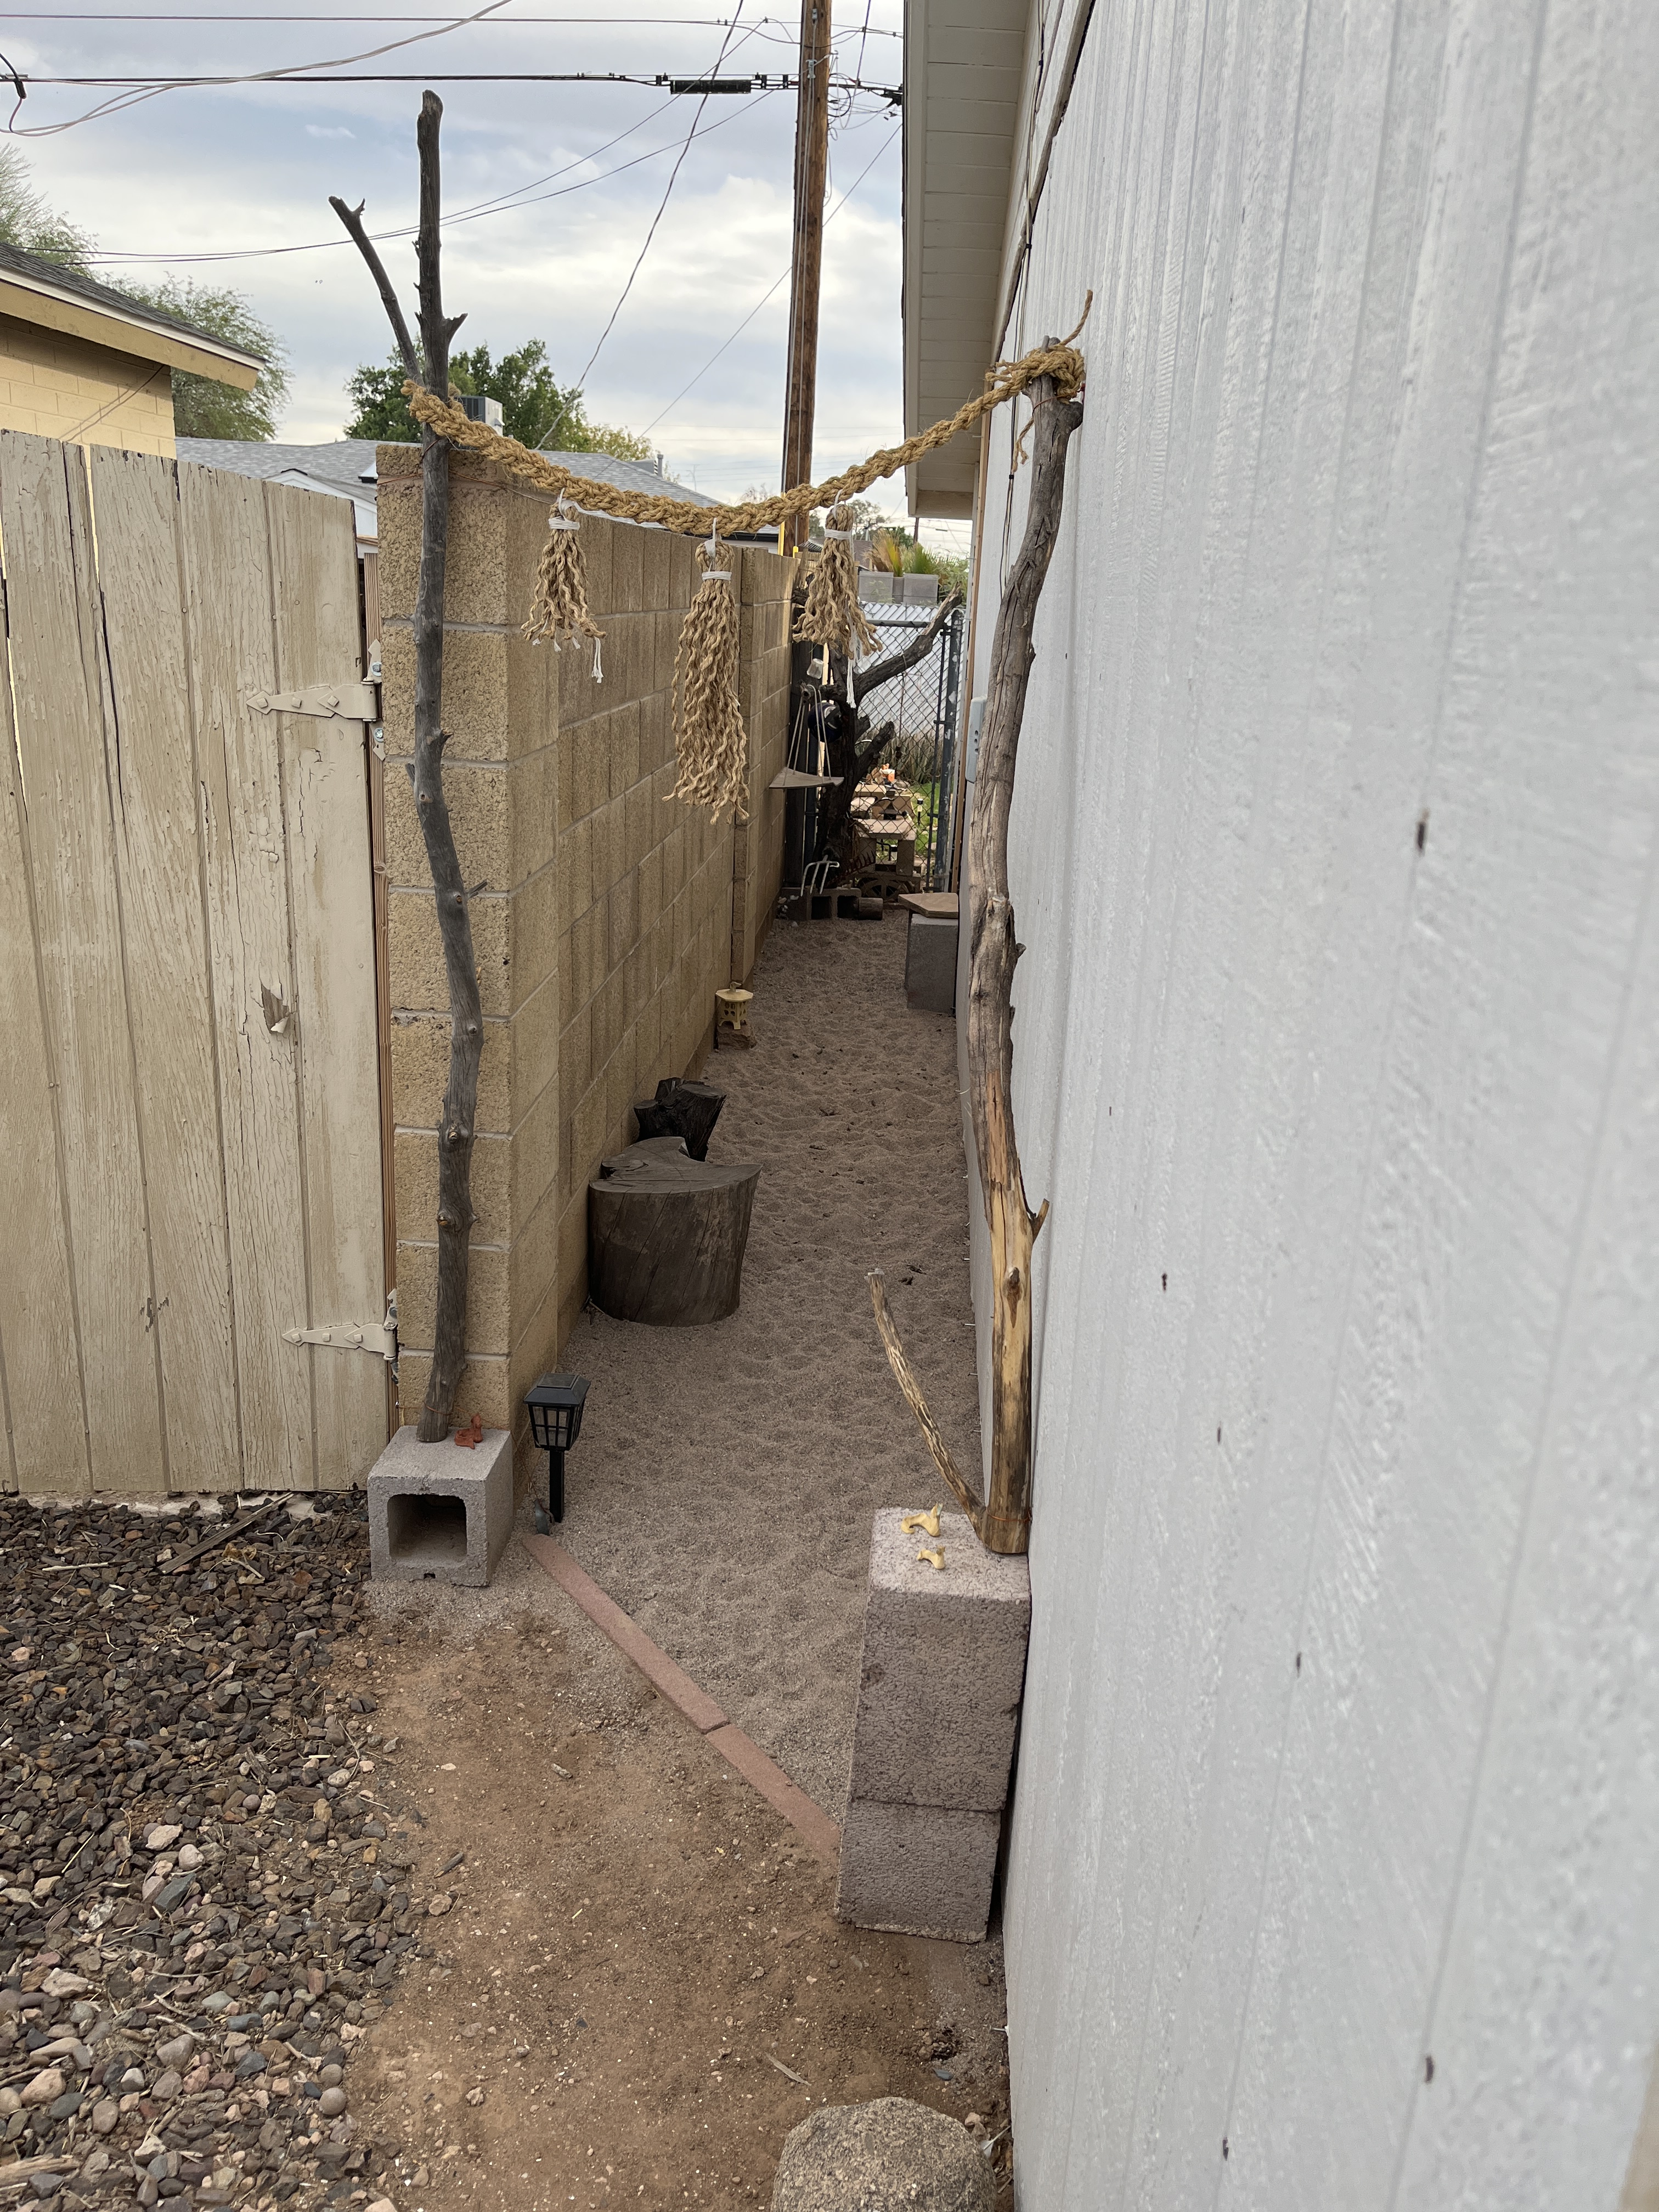
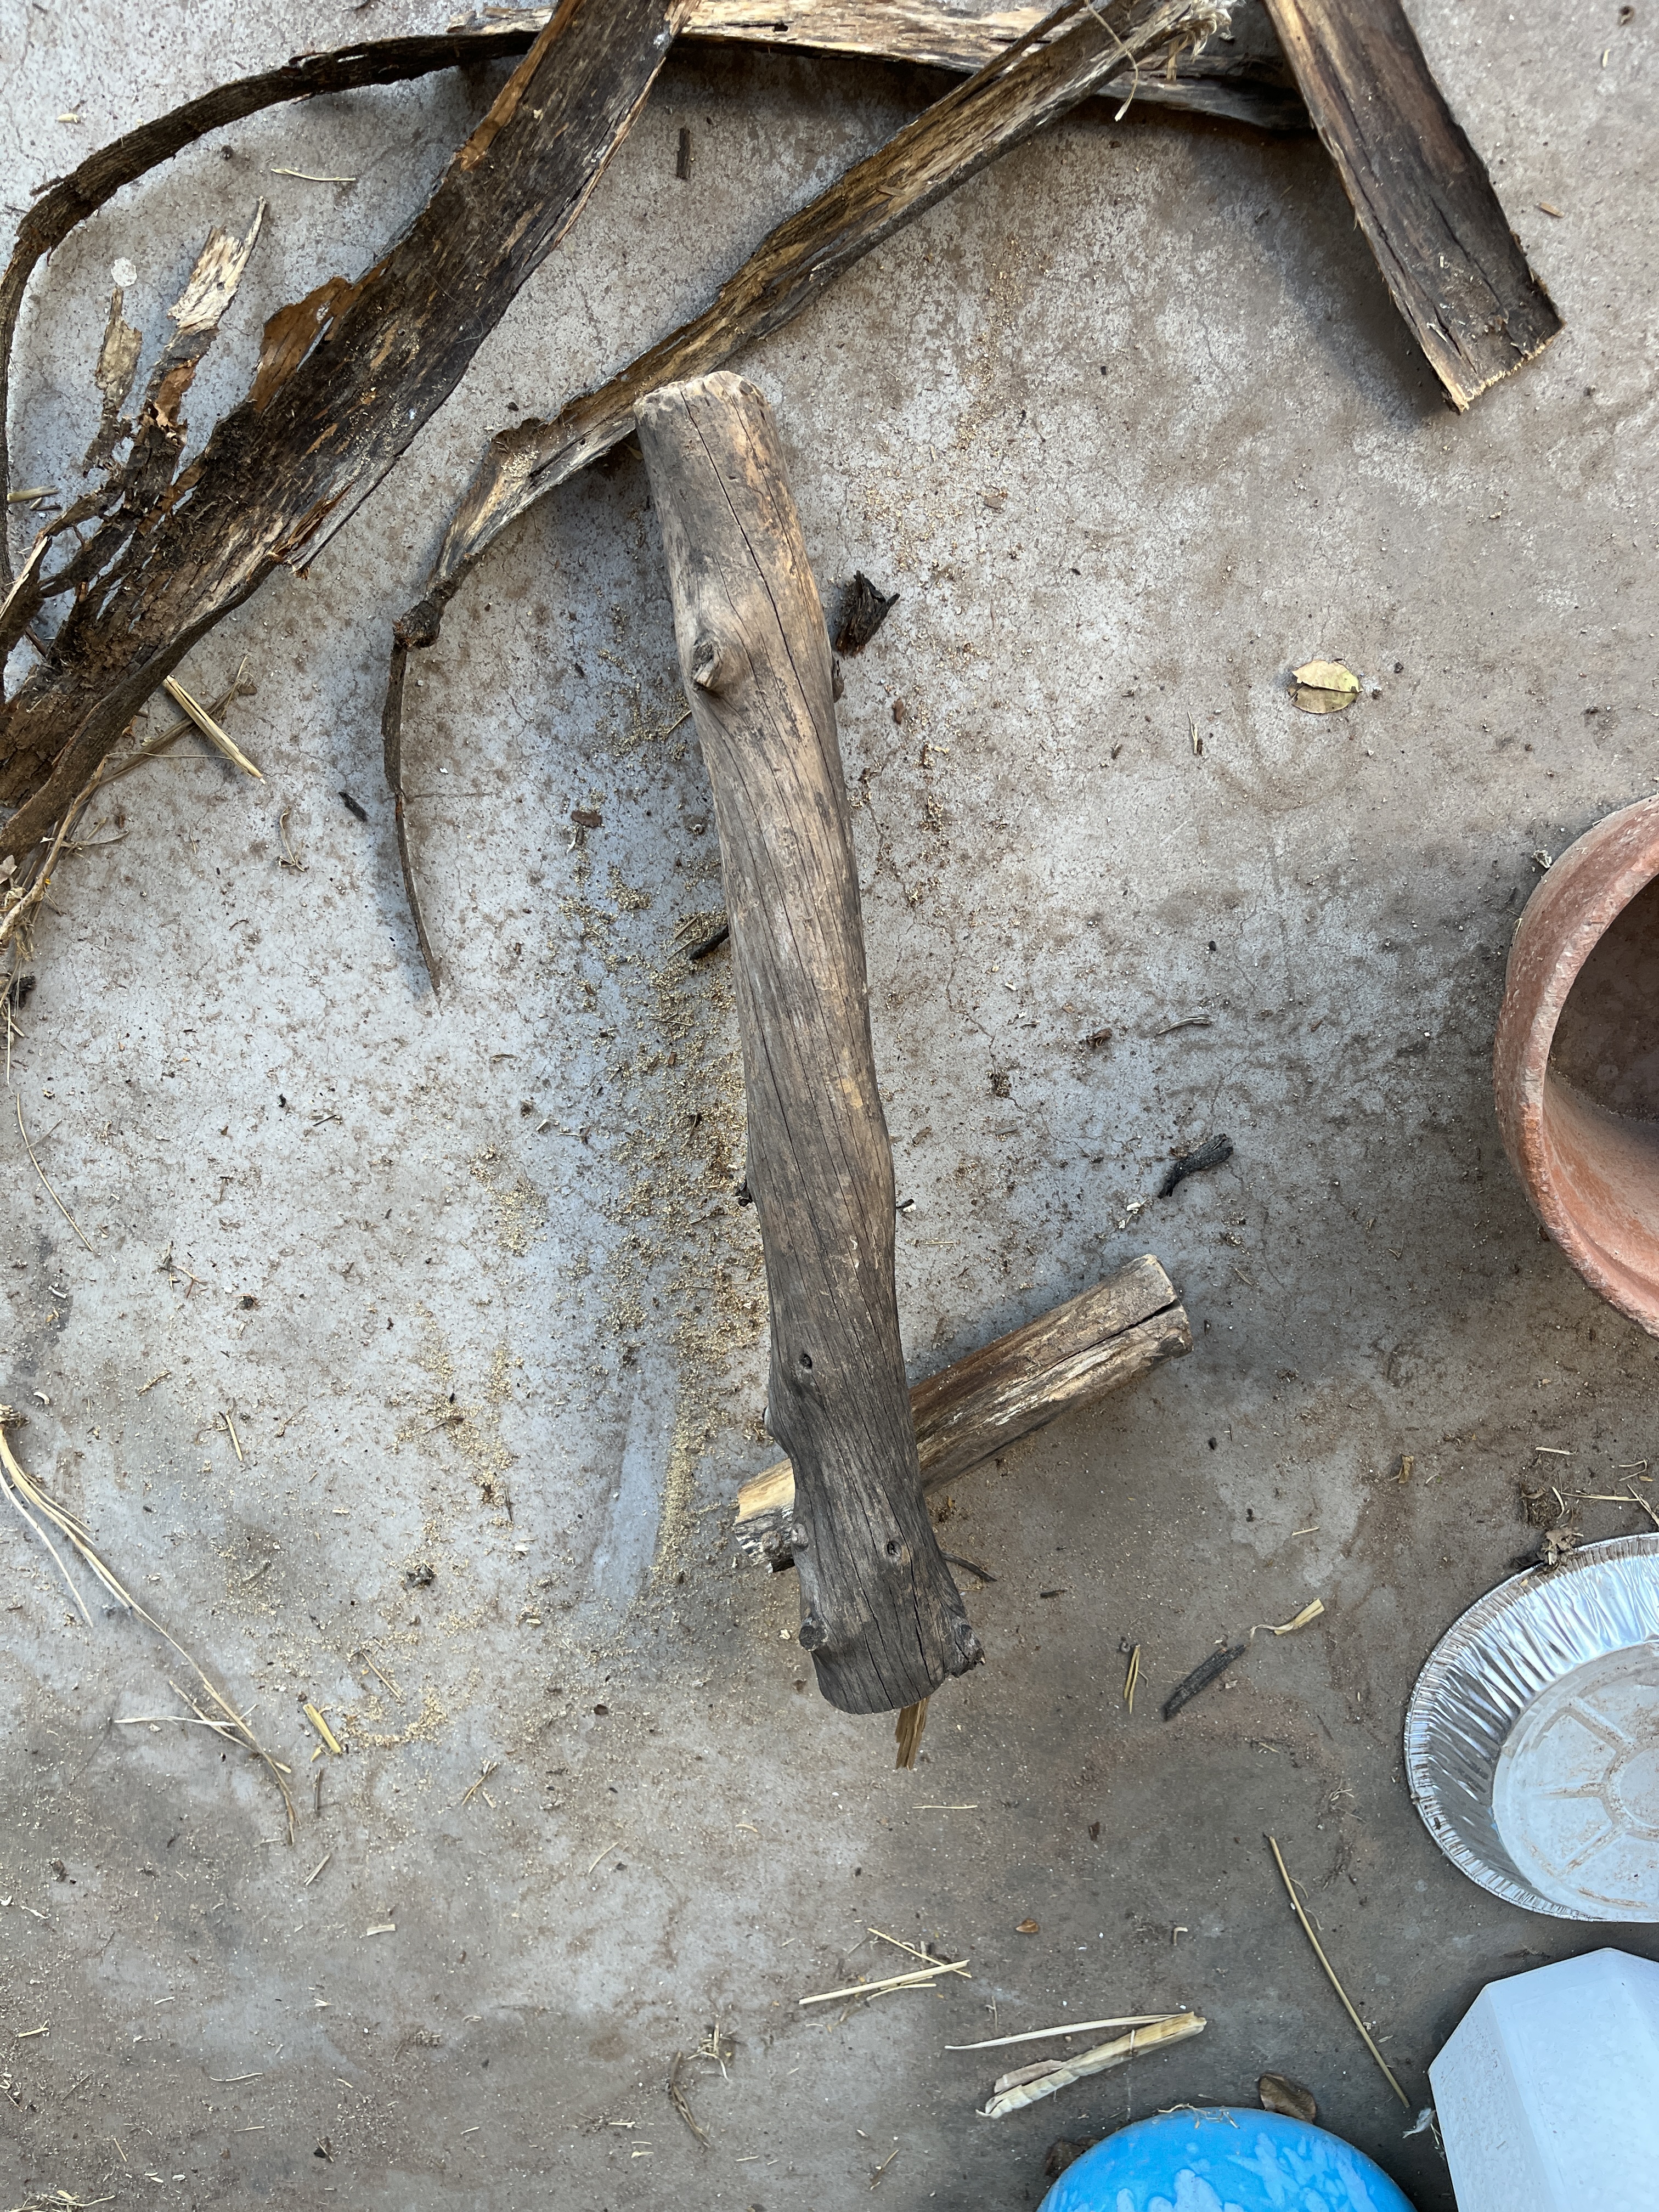
I finally had time to measure and cut the poles for the Torii gate. I pulled off some bark that was still clinging on, too.
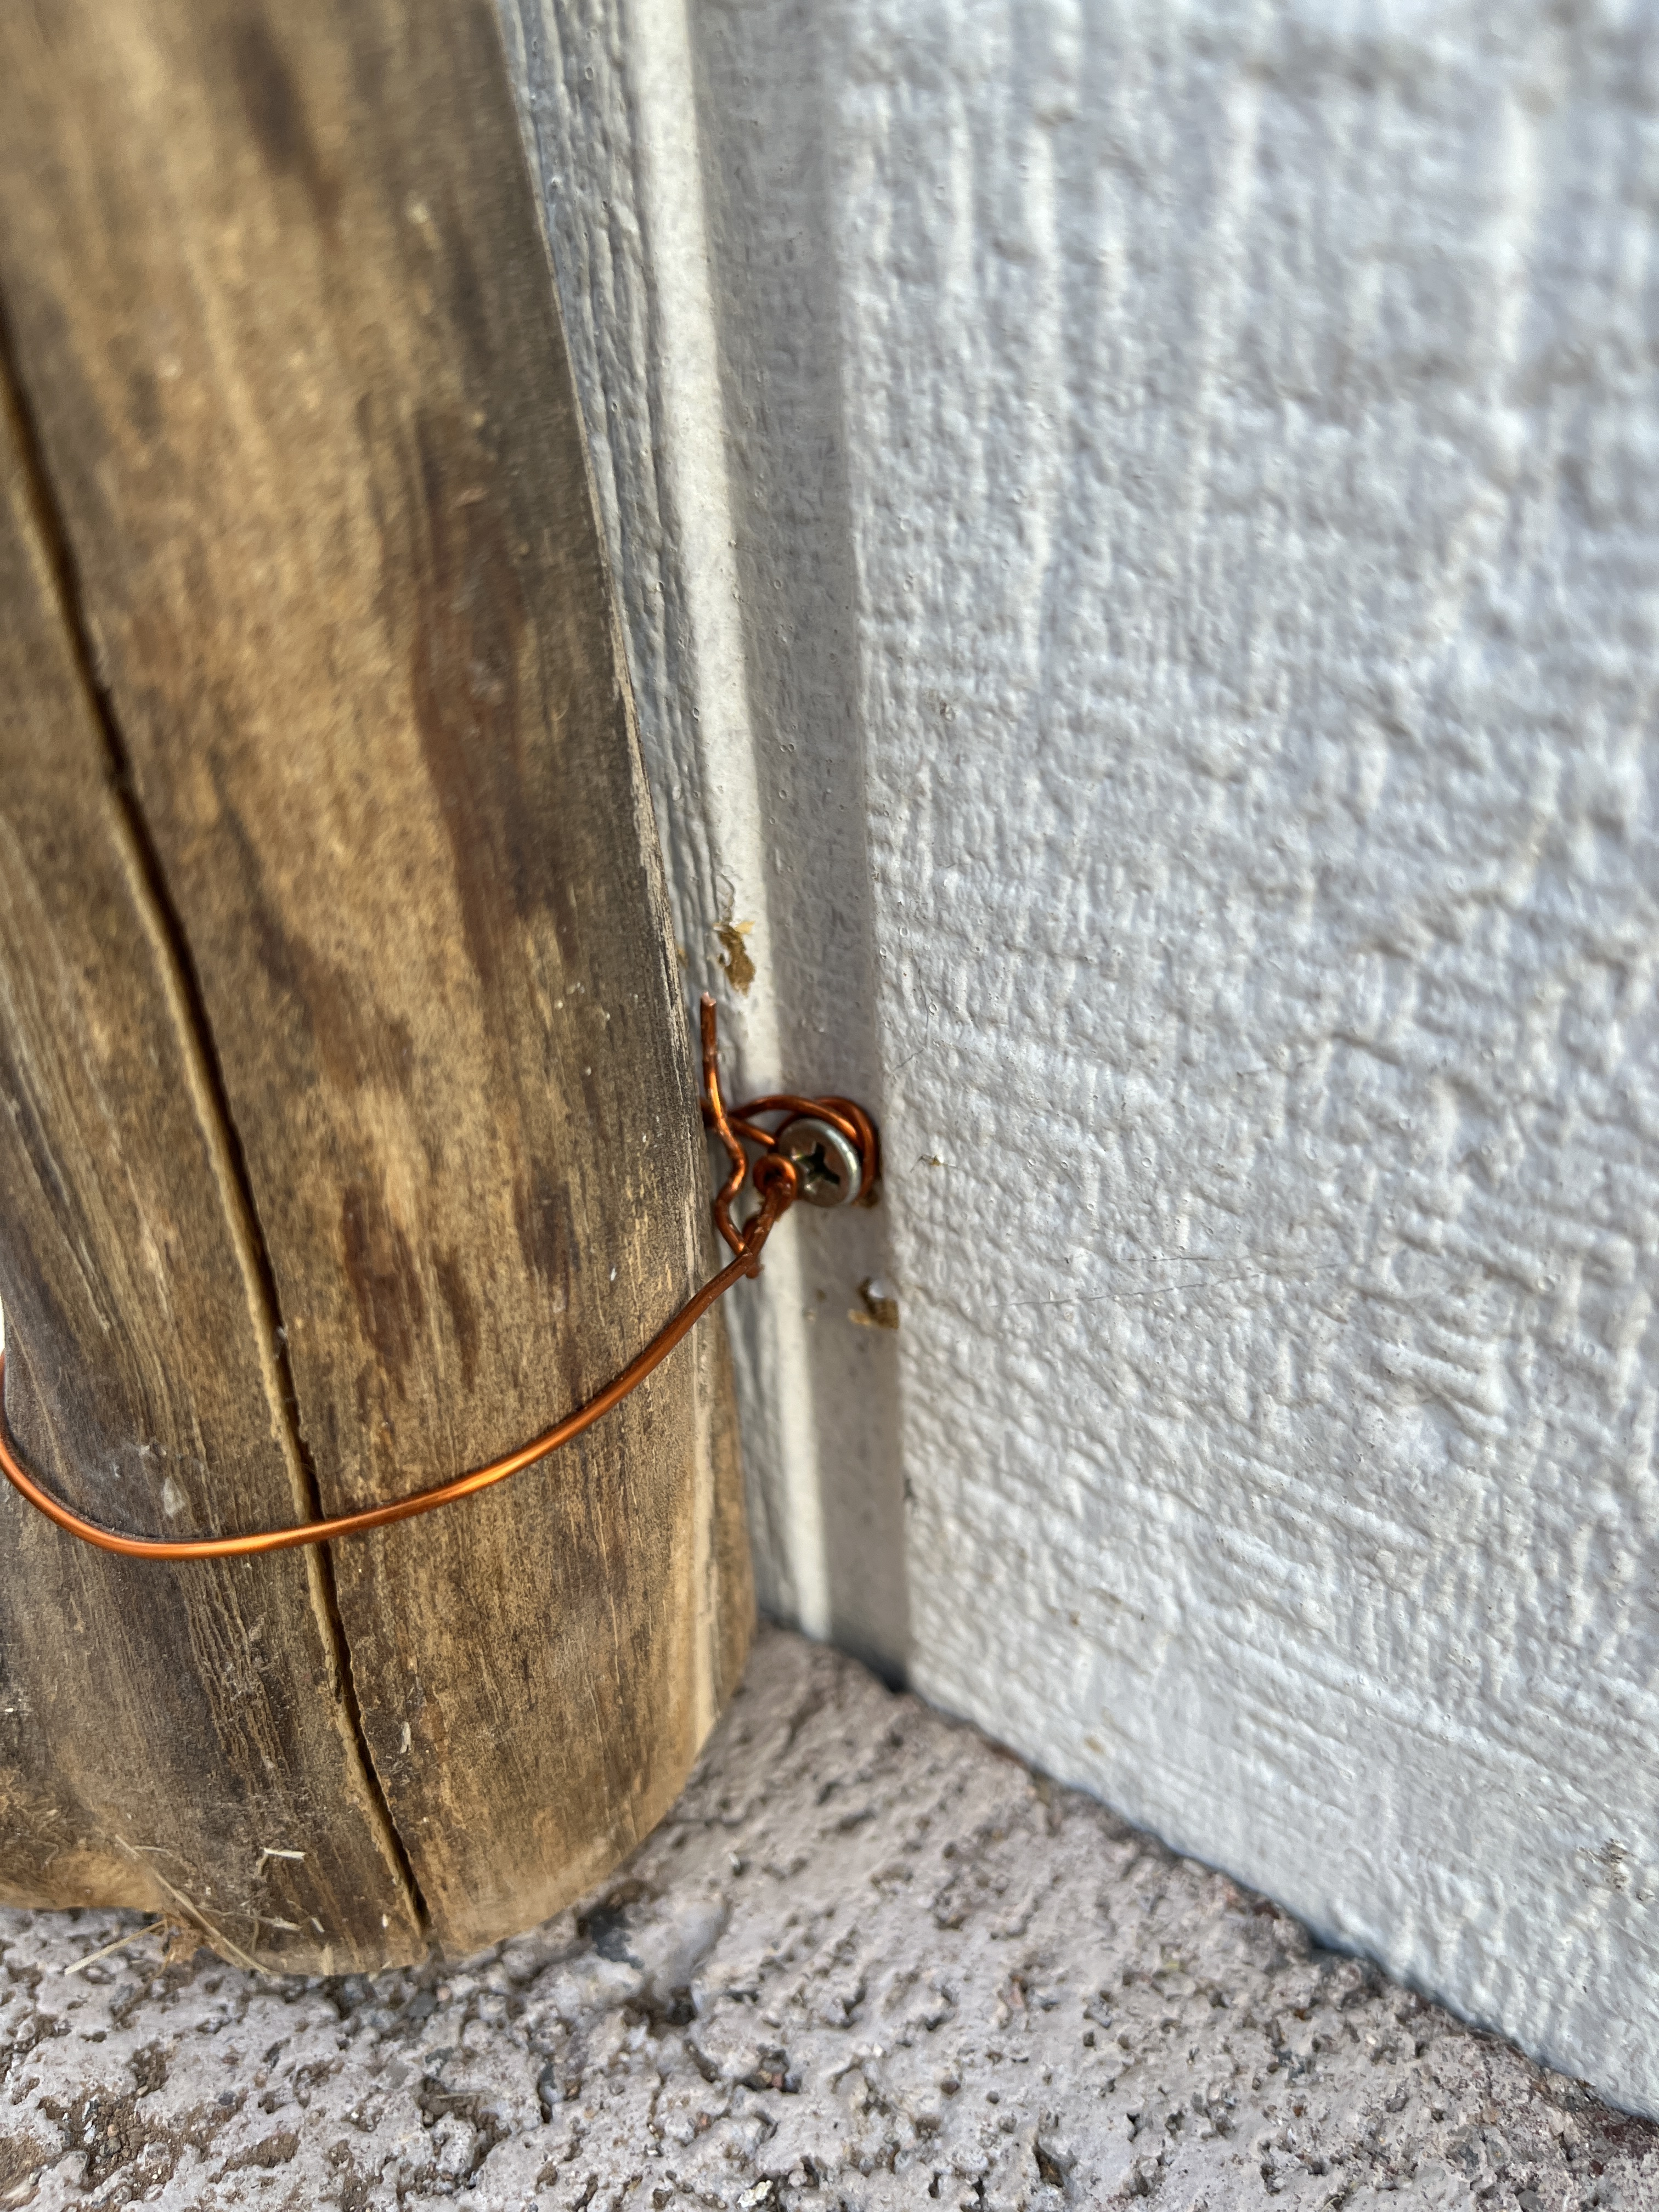
For the post by the house I found some wide-headed screws to wrap the copper wire ties around, top…
And Bottom
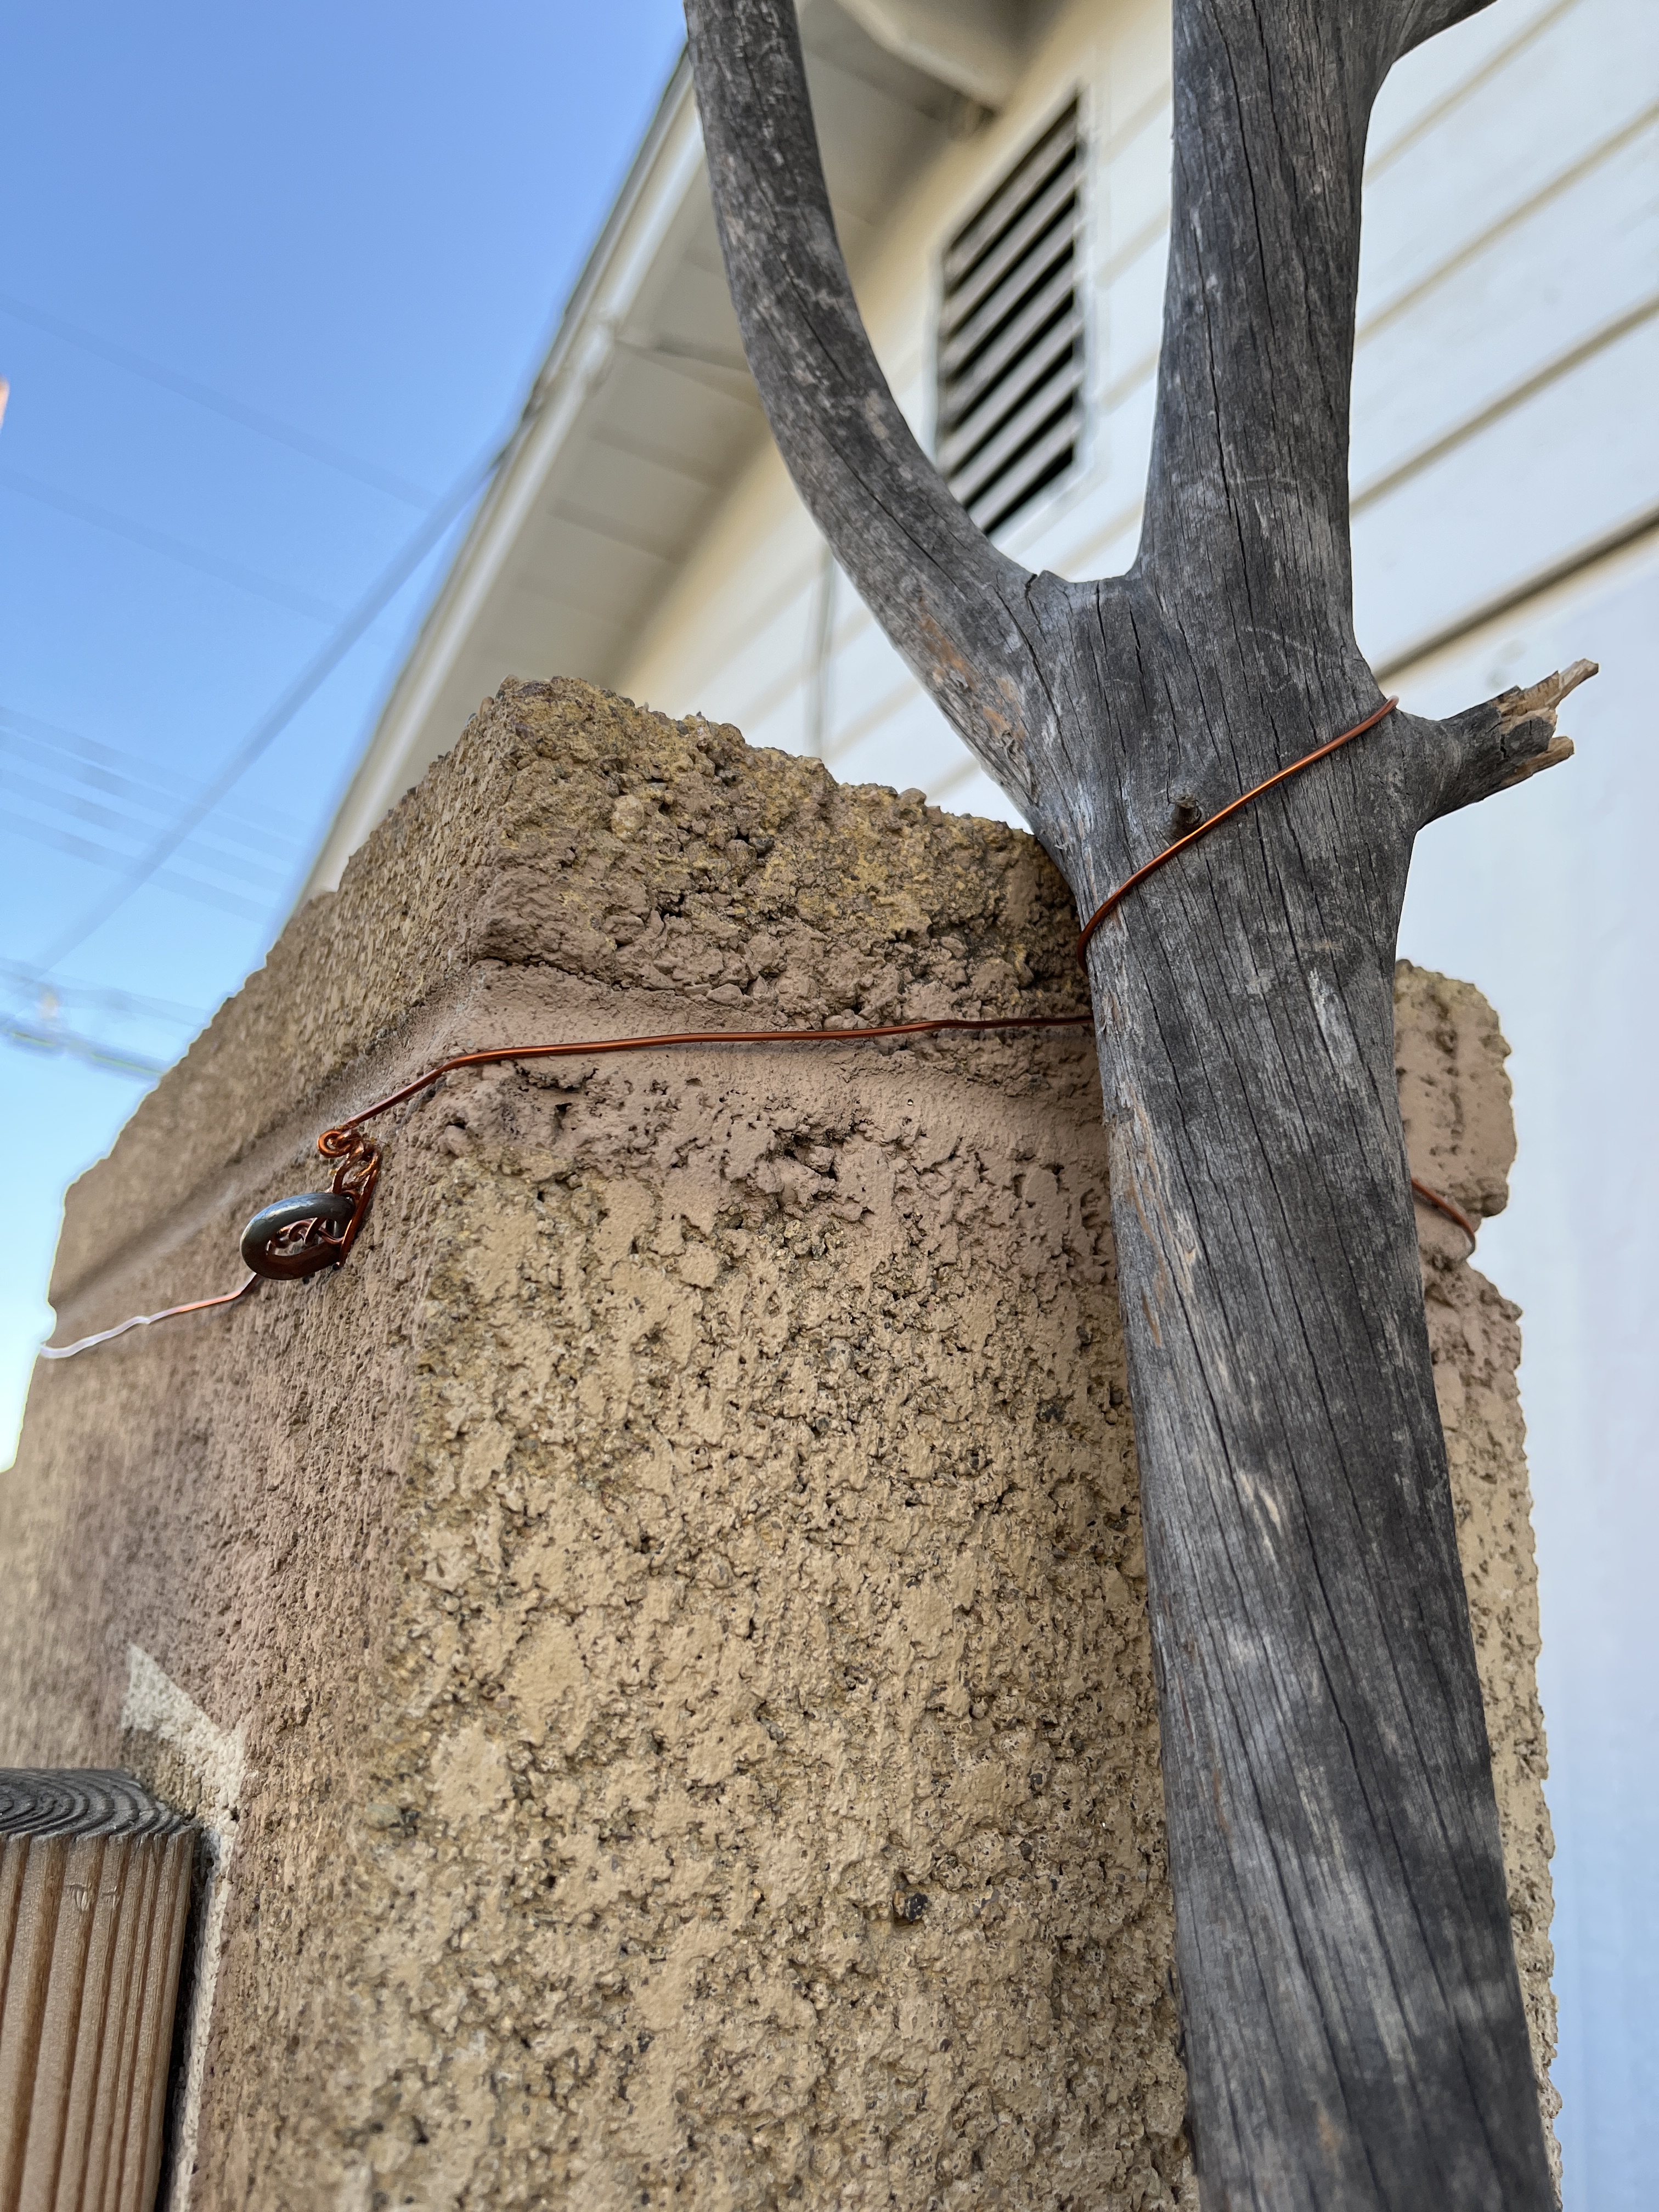
The other pole was a bit more challenging but I managed the top pretty well by using an existing eye-screw to secure the copper wire and wrapped the wire around the top of the concrete block wall post.
For the bottom I’d planned to just stake it down but the concrete wall foundation foiled that plan. A run to the hardware store for another eye screw and I was back in business, since a stake worked on my side of the wall.
Dinner was ready so ran inside for that, then realized what time it was and had to put away this morning’s project and re-cover their roosting spot on my workbench before they went to bed and messed up my stuff. By the time I got back out to finish I had to work by the light of the school athletic lights but I managed with square knots on the side by the house and 2 half hitches on the block wall side.
My first picture was with a flash,
Then with ambient light, which I like better.
Next I got a shot of the lantern with its first candle, the solar lights of the vegetable garden shining in the background and a nice bit of twilight sky showing.
First thing the next morning I raked all the cat offerings out of the sand and made some proper raked designs in the sand. So now it’s officially a garden, but I don’t think it’ll ever be done. I’m sure I’ll be making things to put in, taking things out, gifting stuff, being gifted things, selling stuff…a work in progress that changes over the seasons as a garden should.
Note: I’m not trying to be authentic. I’m taking inspiration from things in the broader world to make things in my world. If I were trying to recreate an authentic Zen garden and authentic Torii gate I would use the correct materials and techniques. Instead, I’ve used materials at hand with skills and techniques I have and understand to create a pleasant area in a form that solves some minor problems with a formerly unaesthetic, unused area.
I saw something on the internet and realized I had the stuff to make one. I also realized that it could double as a porch table so I had a reason to clean my porch today. The supplies are easy to find and relatively cheap if you don’t already have them. I did have the good sense to put it together where I wanted it to be as moving it, once finished, would be problematic. So here goes.
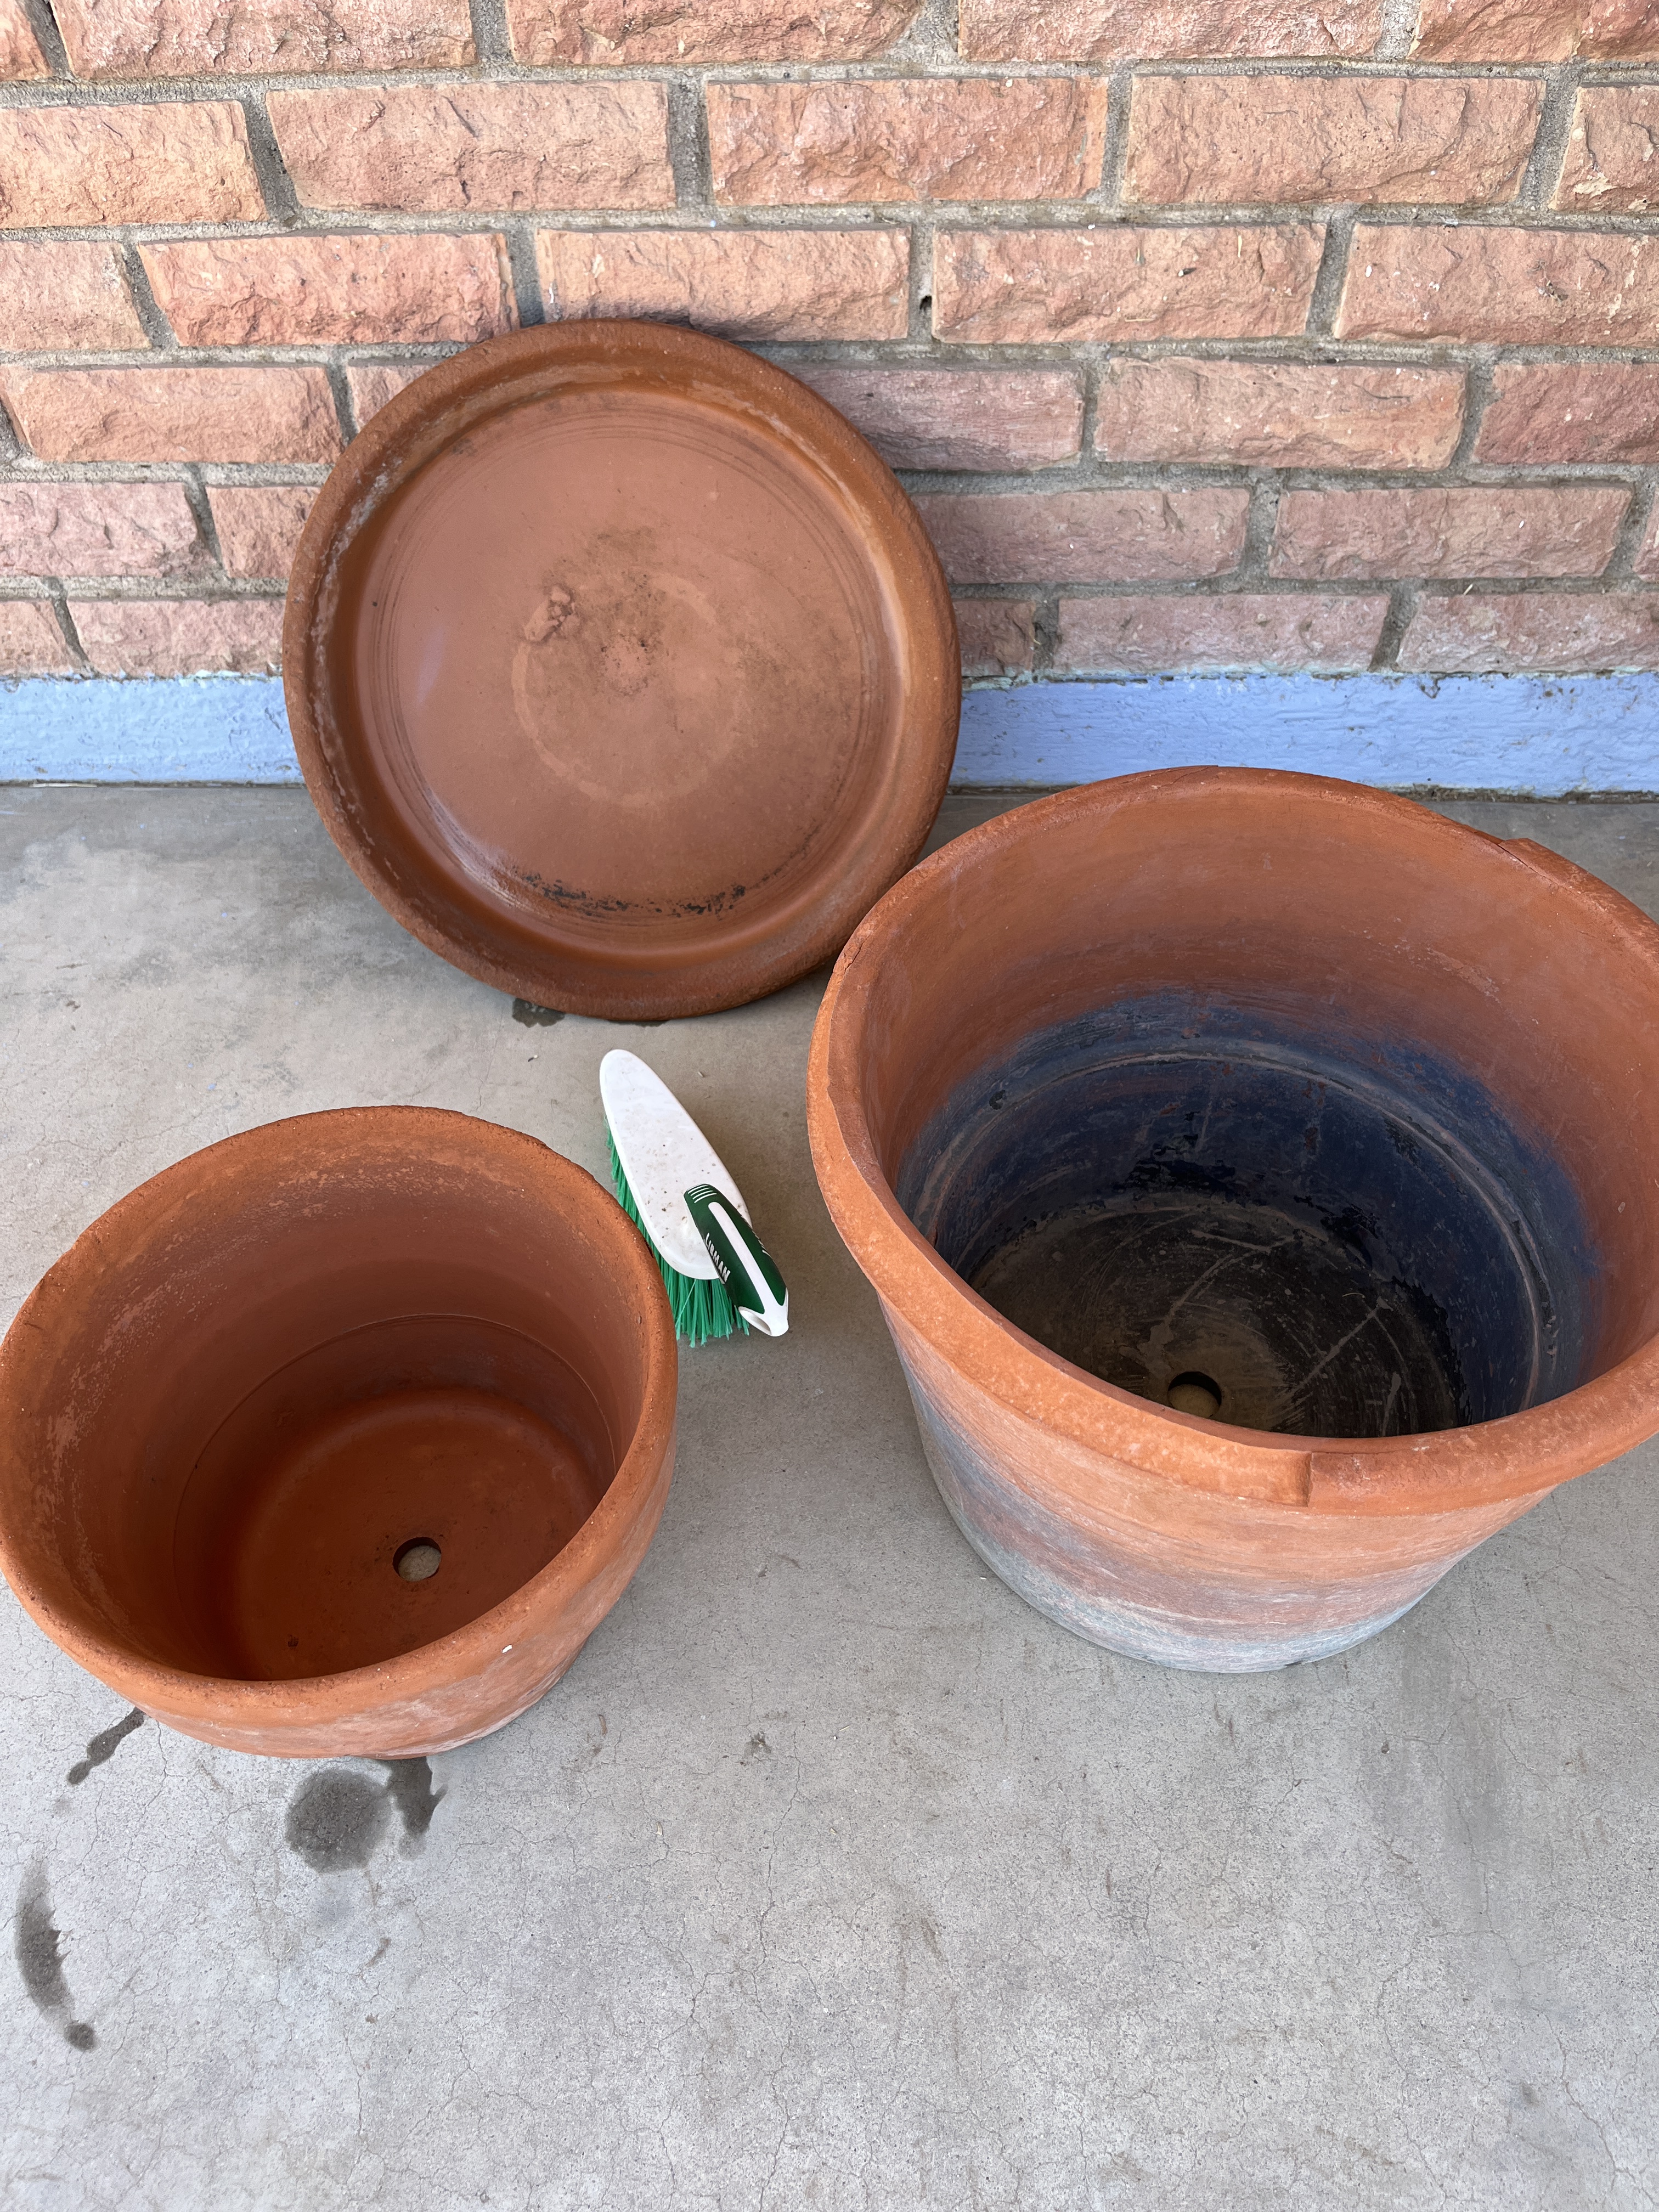
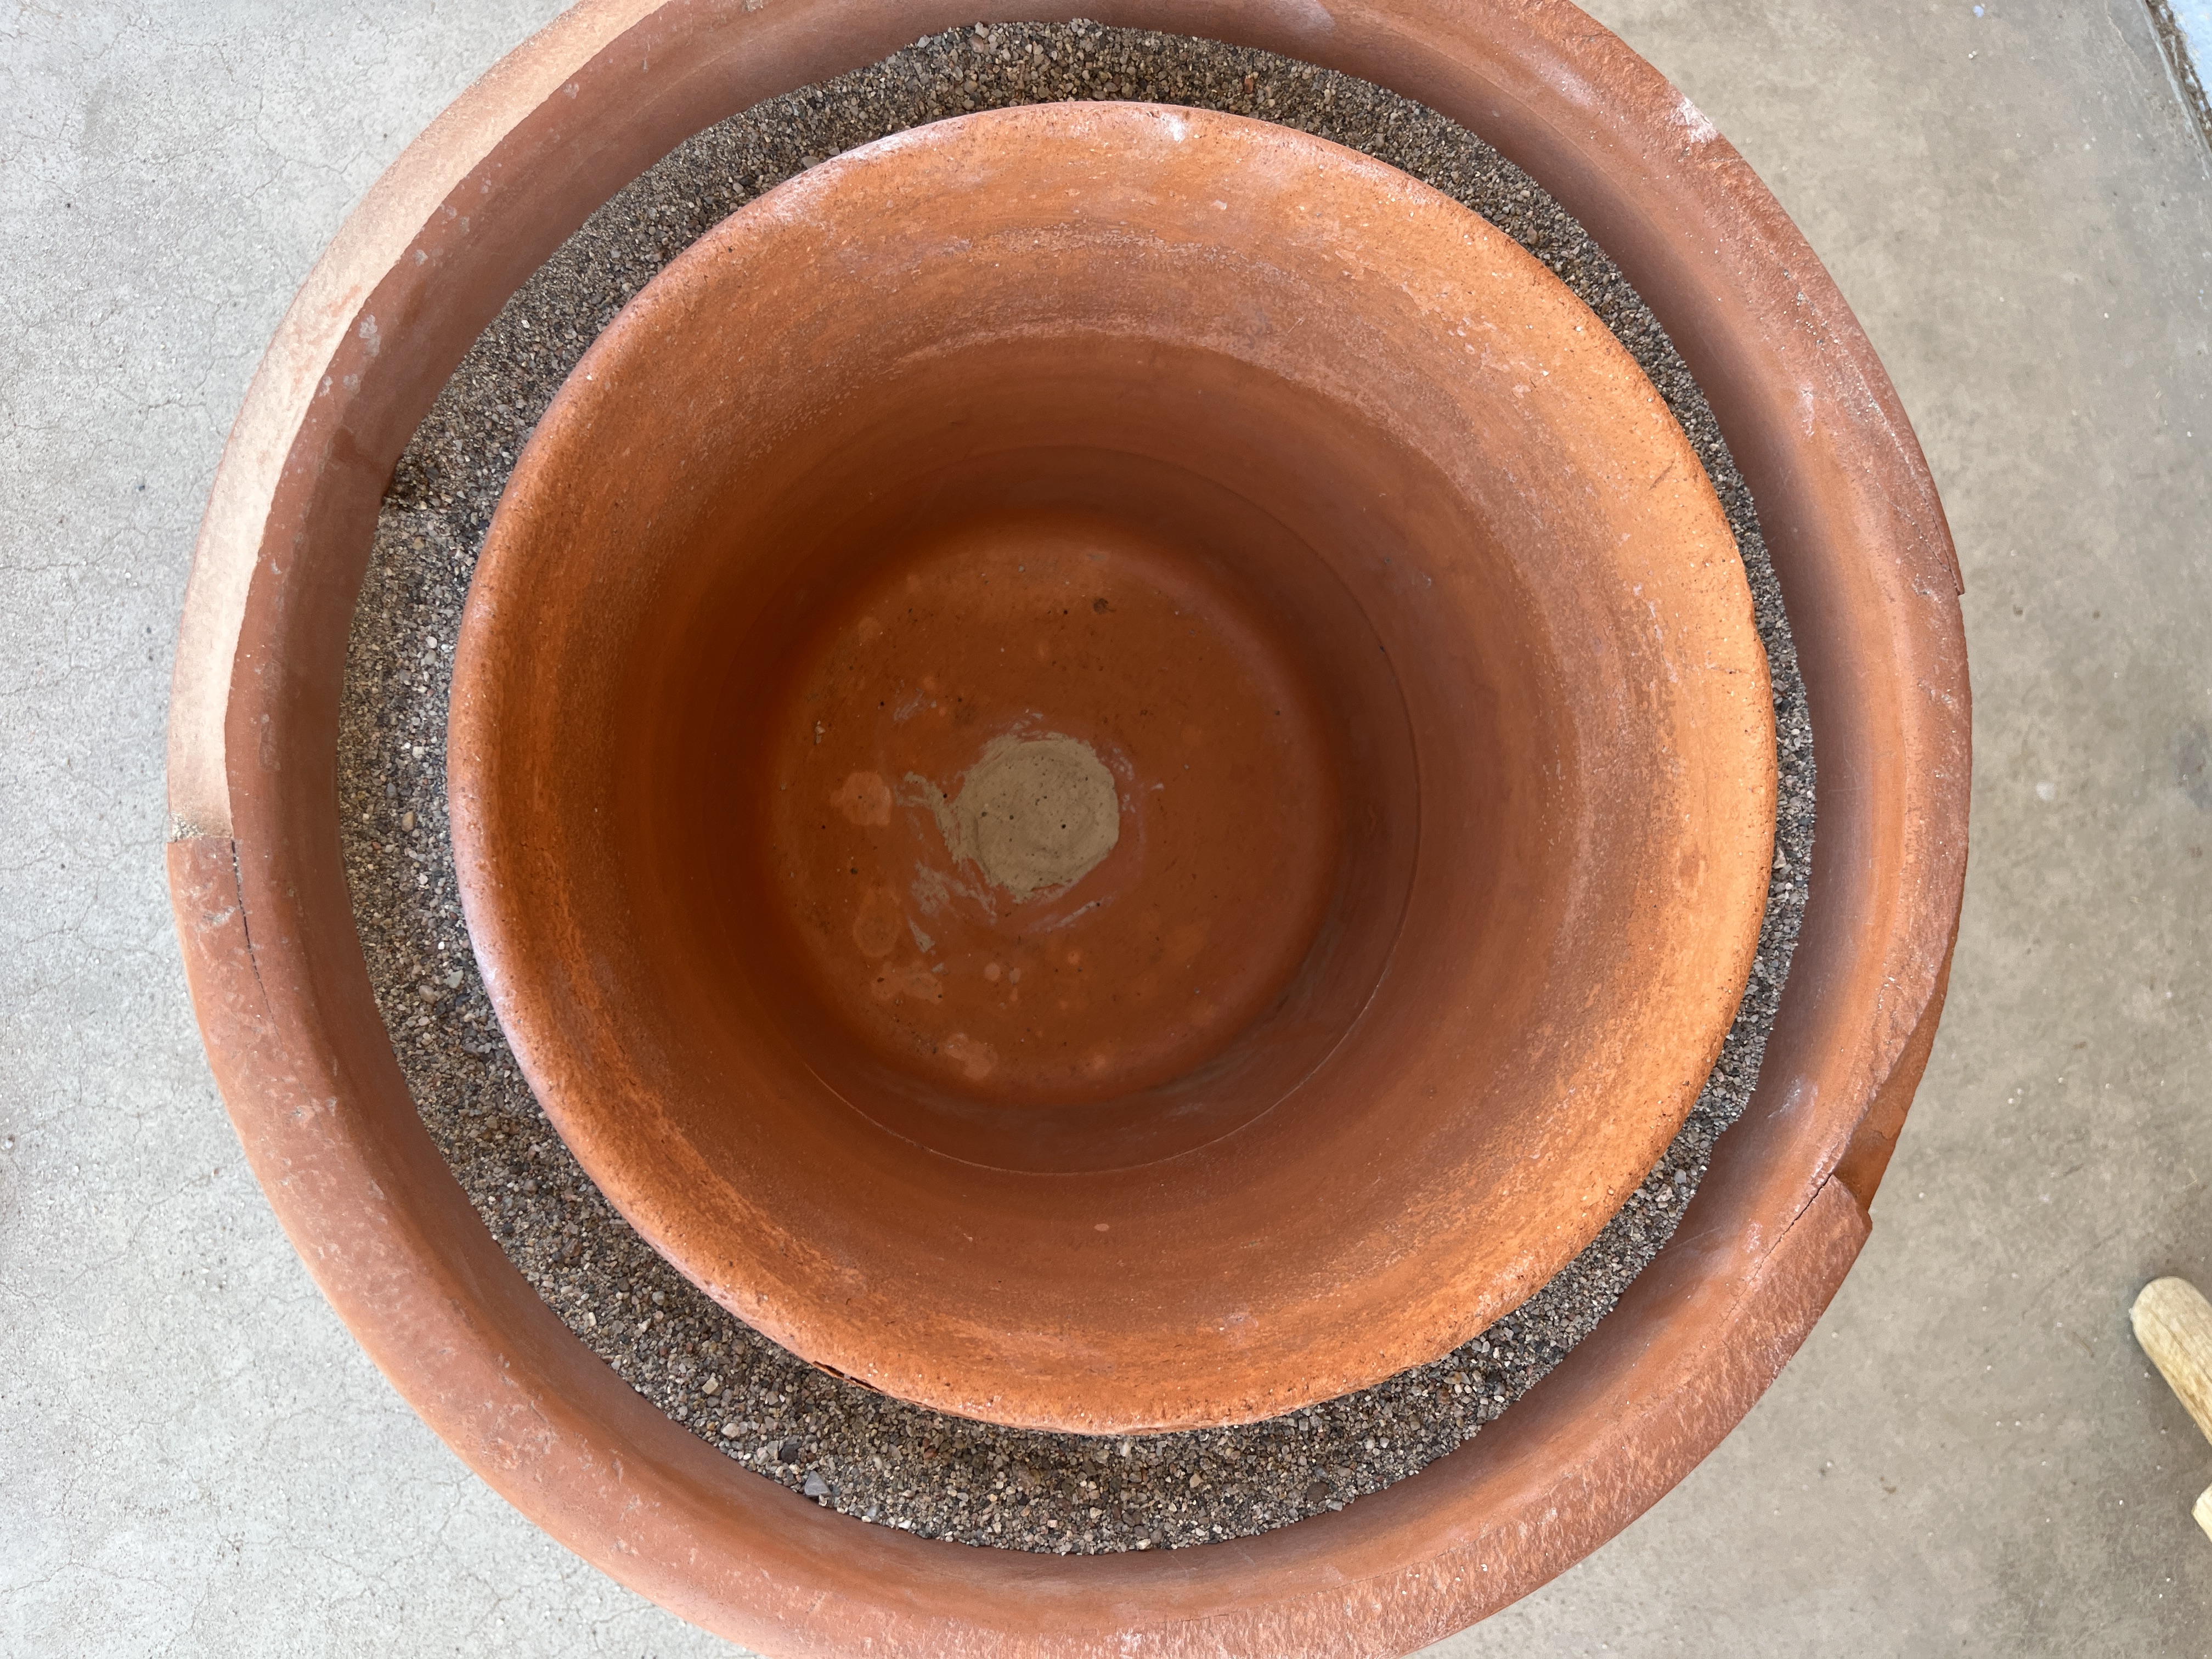
Find 2 pots, one large and one smaller, preferably with about 2 inches gap between their walls. I didn’t manage that gap, but it can always be pulled apart and remade if I so choose. They need to be unglazed terracotta so water can permeate therm and evaporate, causing the evaporative cooling effect that keeps stuff inside cool. I gave them a good scrubbing out in the yard before bringing them onto the porch.
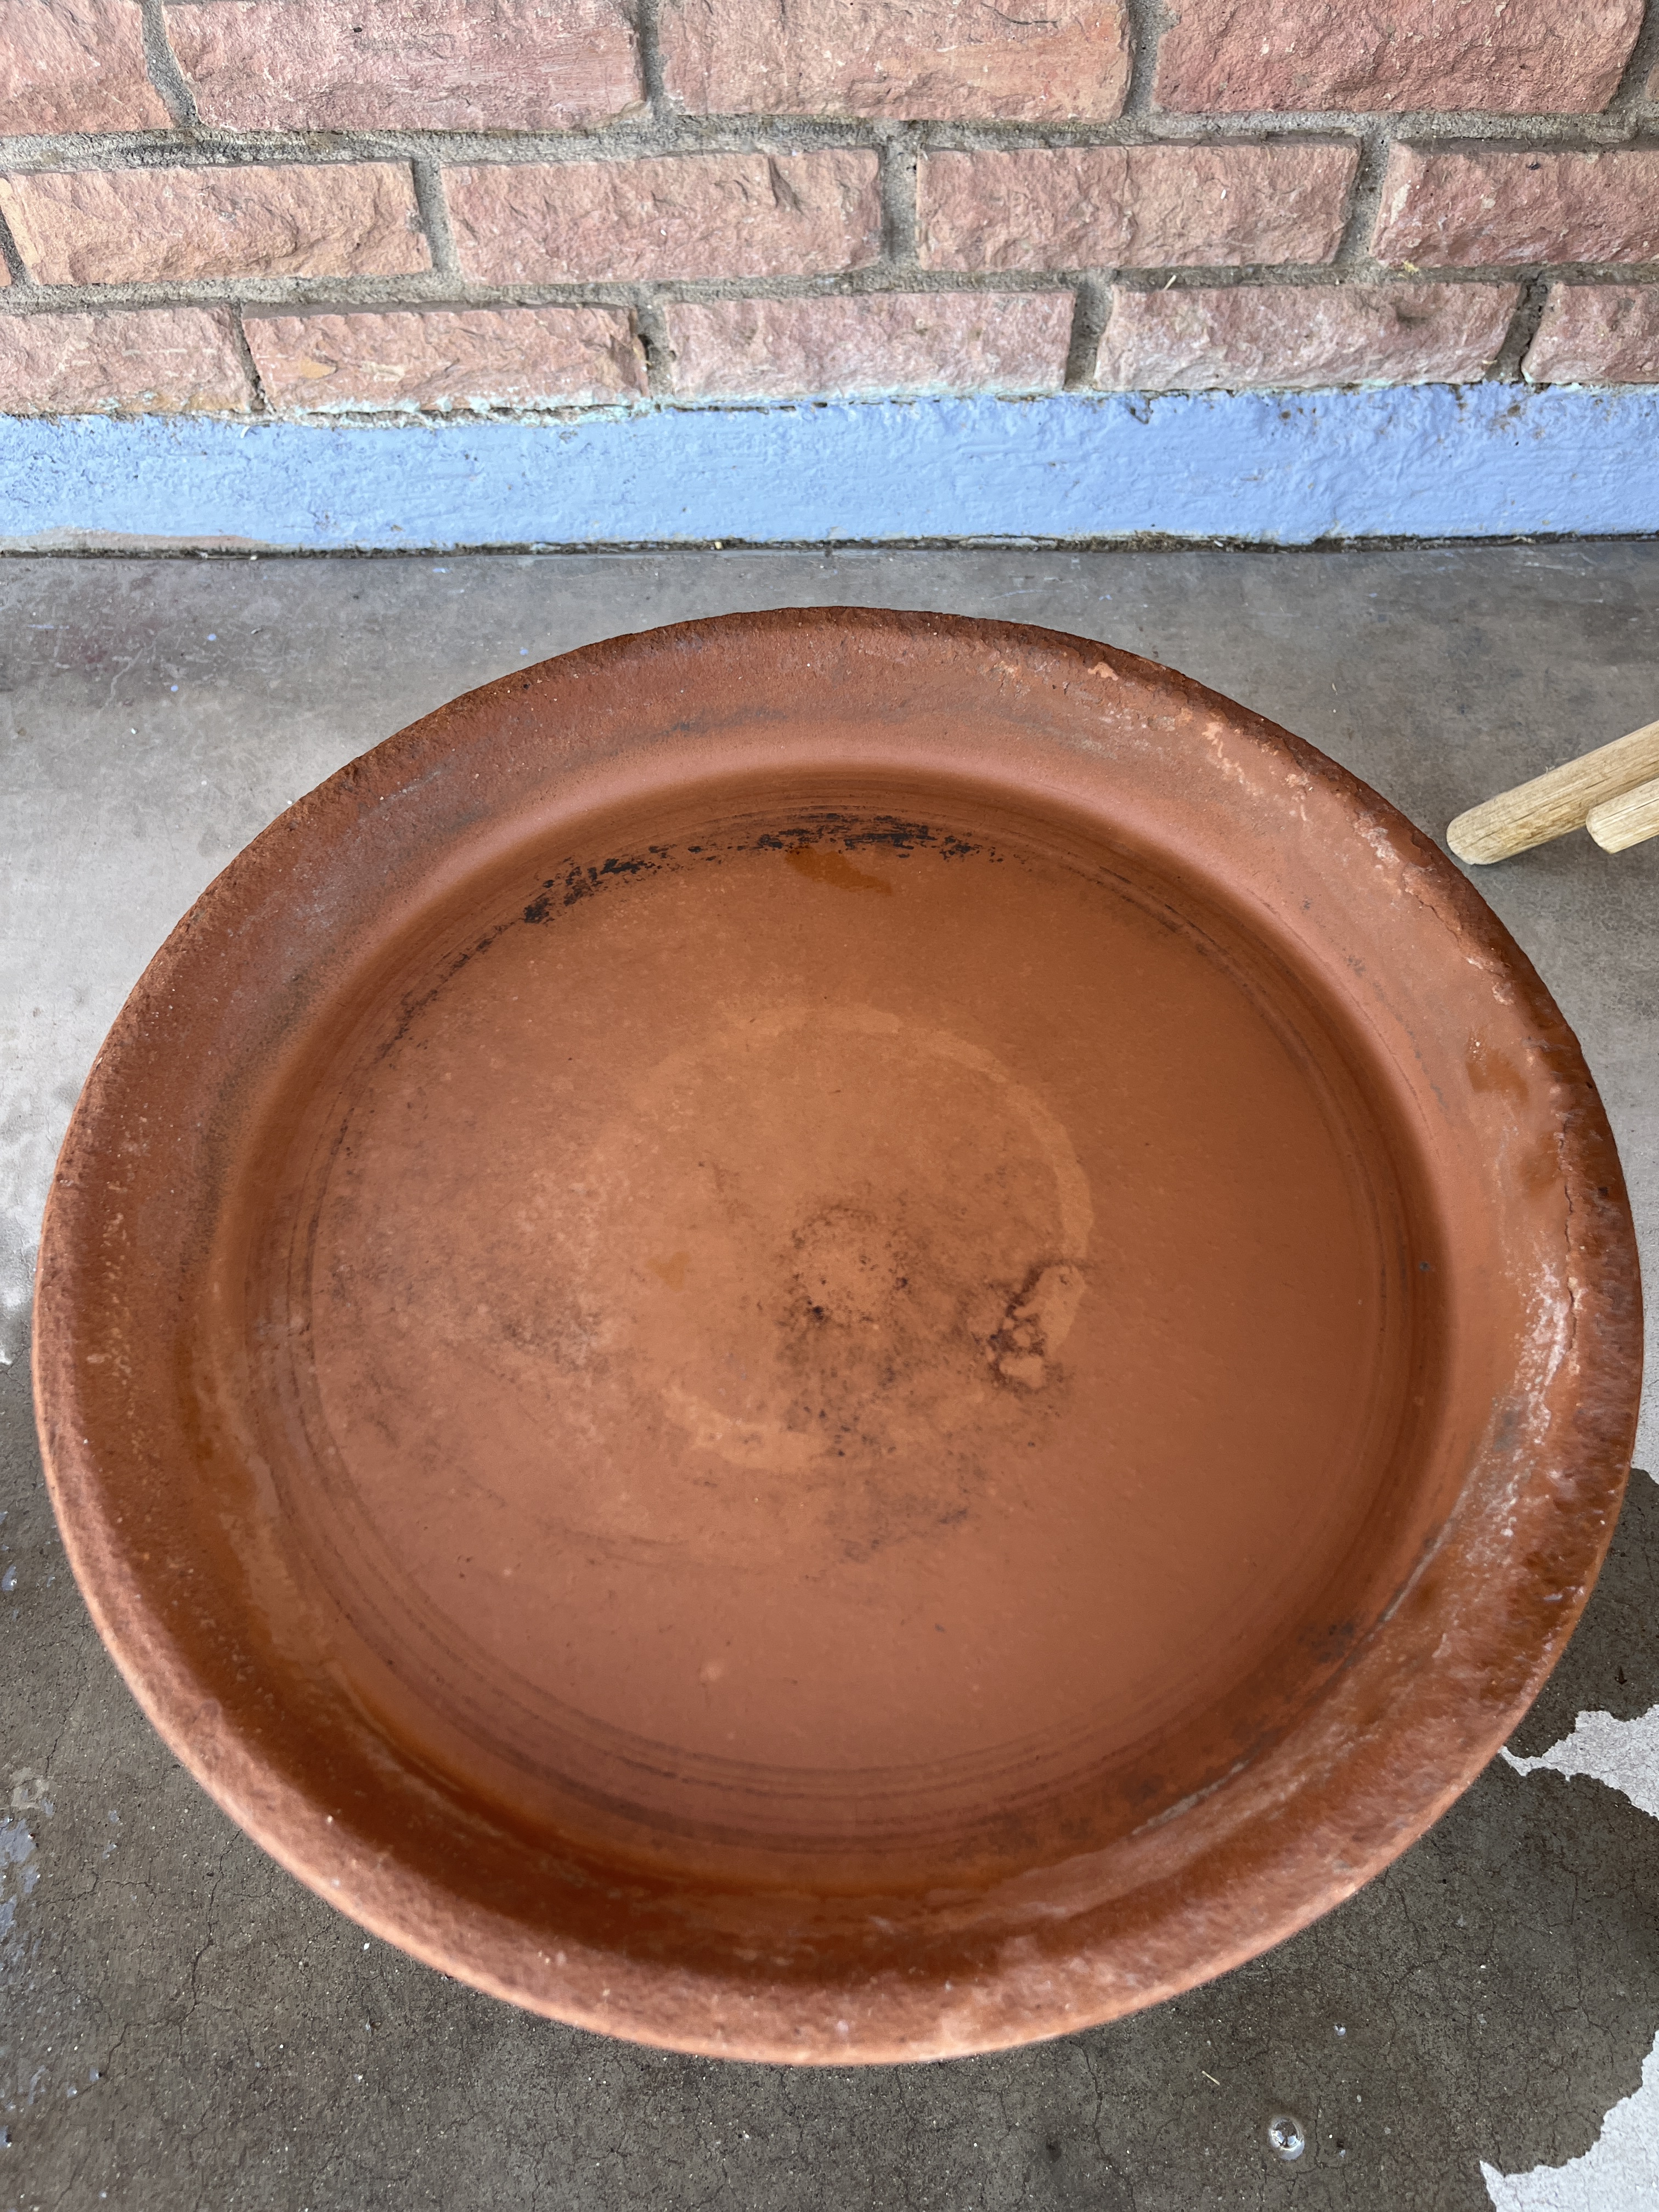
You’ll need, as well, a saucer big enough to go on top. It should also be terracotta.
When you’re ready to assemble your cooler you’ll need something to bung the holes so the sand stays where it’s supposed to stay. I used clay because I had some and it’s reversible but you can use corks or anything that’s handy.
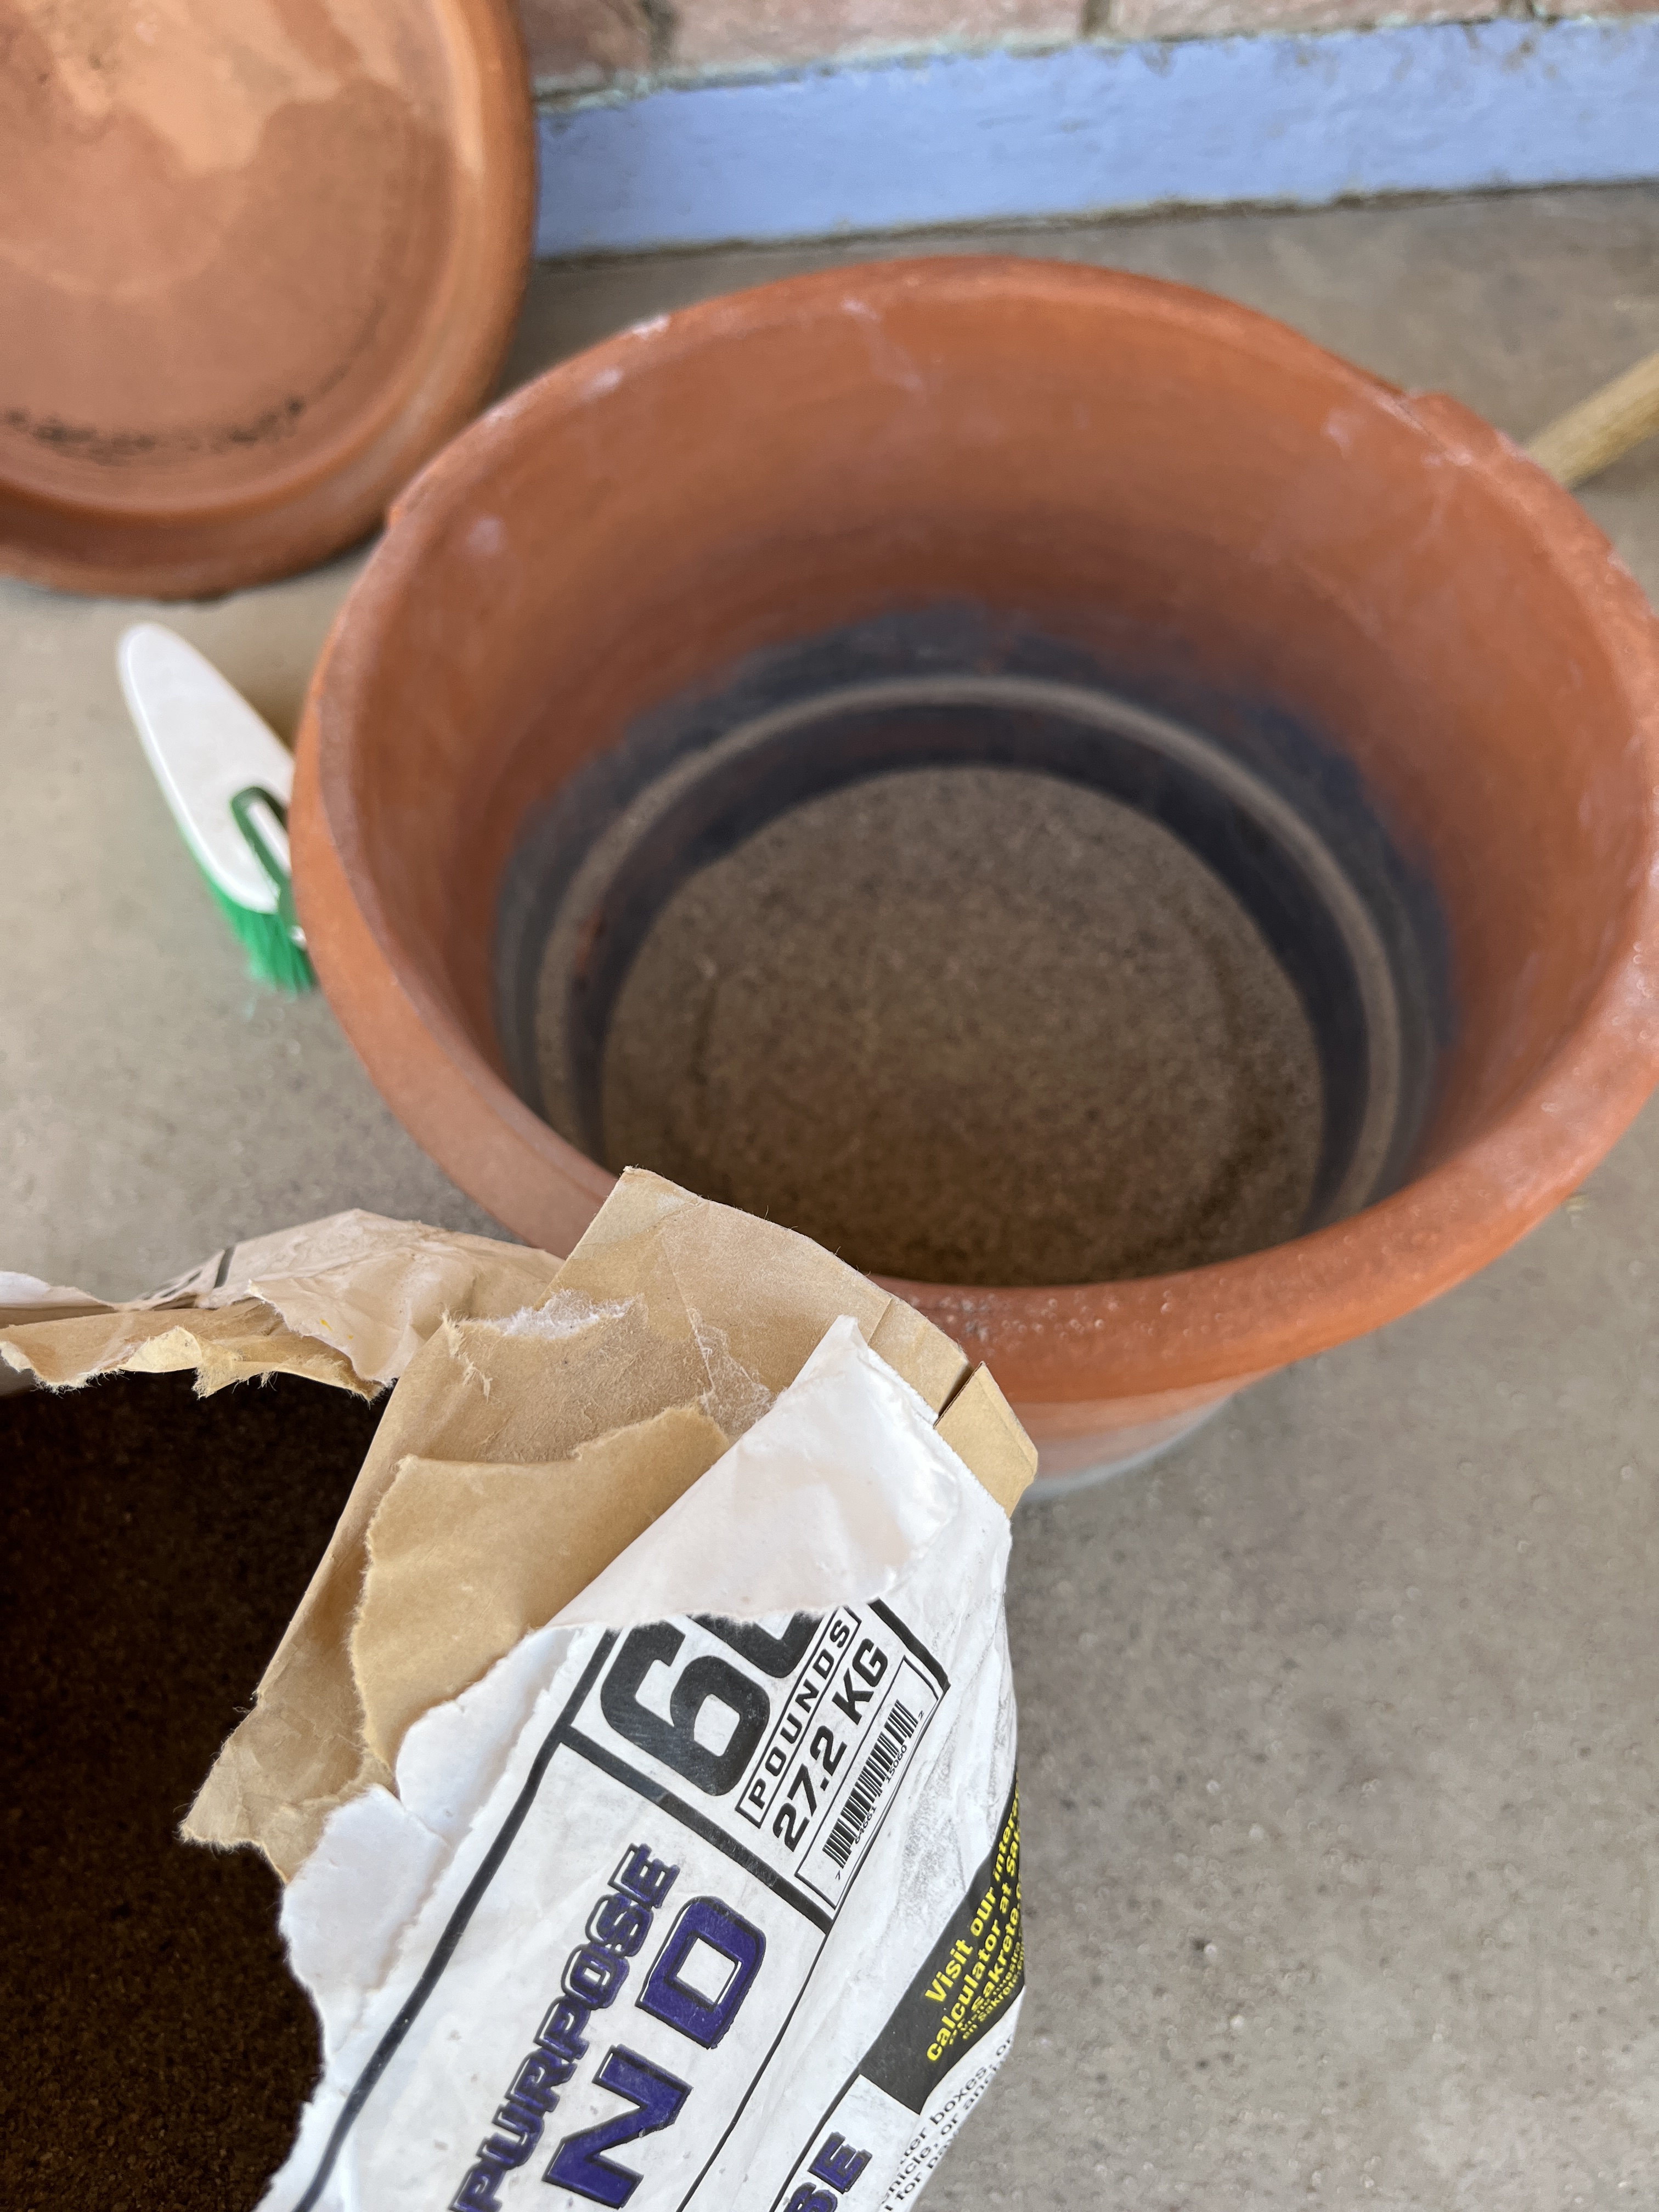
You’ll also need sand for the insulation between and under the pots. Play sand is fine. I used general purpose construction sand that I had bought for my Zen(ish) garden because the cats like it less than play sand, the nice, fine stuff parents buy for their kid’s sandboxes to play in…until the neighbourhood cats discover it. I put a layer in the bottom of the big pot until the smaller pot was almost as high as the big pot.
Quick safety note: There will be some dust so if you’re concerned you can wear a mask or bandana. I’ve used bandanas all my life so they’re handy. Fortunately I was standing upwind of the project so this wasn’t much of an issue.
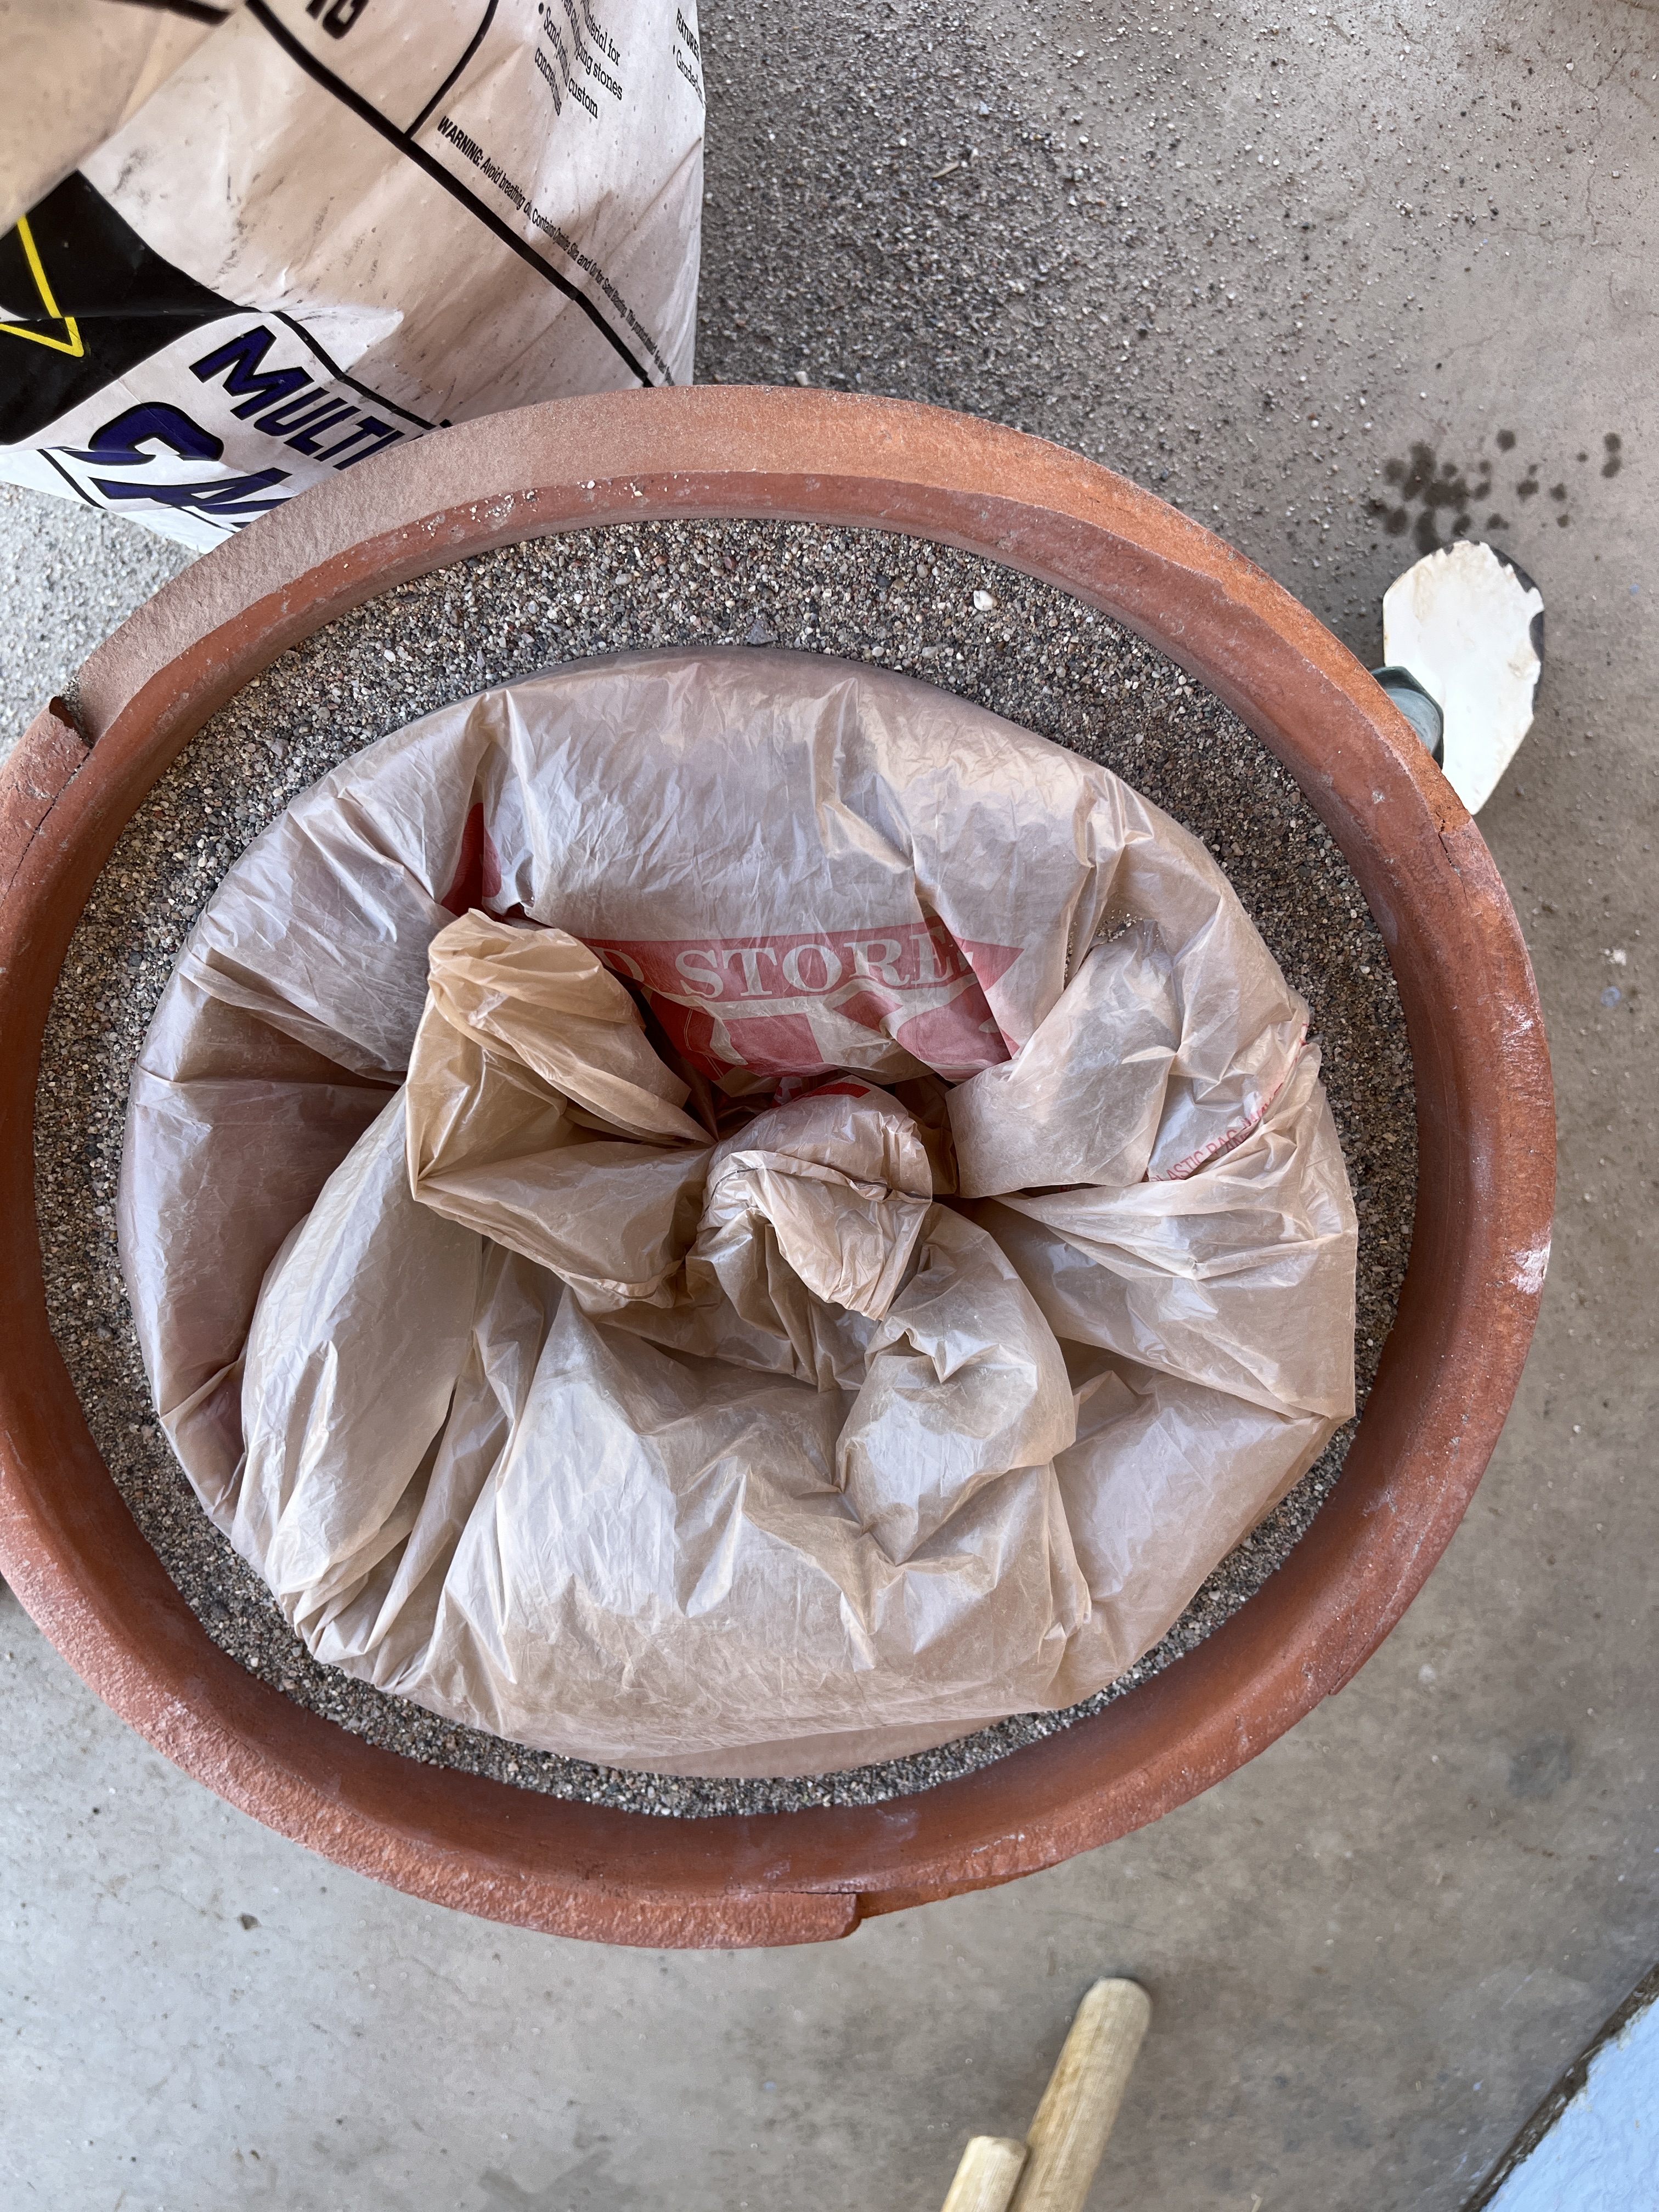
To keep the inside of the small pot clean I double-bagged it on top. Yes, my day-off get-stuff-done shoes have holes in the toes but they’re comfy.
I then carefully shoveled sand into the gap between the pots with a little trowel til it’s just shy of the rims and even it out. You don’t want any spilling into the cooler.
It’s OK if some spills out, you can sweep it into the garden. It won’t hurt the garden.
Now take the bags off the top of the inside pot. Of course some sand will get on the bag so it’s easy enough to knock the sand off the outside bag into the gap without getting any in the small pot because the inside bag prevents this. YAY! Taking the second bag off is easier now that you have some experience. If any sand gets inside just wipe it out with an old washcloth or shop rag.
At this point I had to come back inside to write this up because my I Phone got too hot and had to cool off before I could take any more pictures. I guess 112 is a bit warm and re hydrating wouldn’t do me any harm.
Now to take advantage of the evaporative cooling process. Turn the hose on low and slowly add water to the sand. Try not to wash sand into the small pot. When water starts pooling st the bottom of the small pot you’re done. Use that washcloth or shop-rag to wipe any sand out of the small pot.
Soak the top saucer down and place it on top. Either way is fine.
I like it this way better.
I finished wiping down the rocking chair, set it in place, laid down my welcome mat and took the picture before the phone got too hot again. By this time it was 115 out.
The chickens deserve a treat, too, so I smashed a watermelon for them out back. After a shower I went out to check and the inside is a bit cooler than the outside…granted, 100 is cooler than 115 but I did start with hot stuff. I’ll see how it goes tomorrow after a good overnight cool-down and maybe a top-off of water. 20 or so degrees cooler on an 80 degree day after yard, car or workshop projects would be a good thing. All in all a productive day. Not bad for the (expected) last REALLY hot day of the hottest summer on record.
Somehow I have a carton of milk in the fridge that expires tomorrow. I haven’t opened it yet, but it REALLY needs to get used. If there were a couple cups I’d make pudding. If it were just a smidge left I’d give it to the neighbourhood strays or pour it around the tomatoes to give them a calcium boost, but this is a whole, unopened 2 quart carton of milk, so, since I haven’t made milk candy in YEARS I might as well make some now. Also, I came home from work with a migraine, so I’m not up for anything that takes much effort and I can’t sleep so sitting, stirring and watching random stuff on TV is about all I can handle. At least I won’t feel totally worthless since I’m making something and not wasting milk.
You’ll need: a 2 quart saucepan, a cake-pan lined with foil or waxed paper, spoon for stirring
2 quarts milk, 1 c sugar (brown sugar if you want darker candy with a richer flavour), 1 tsp vanilla
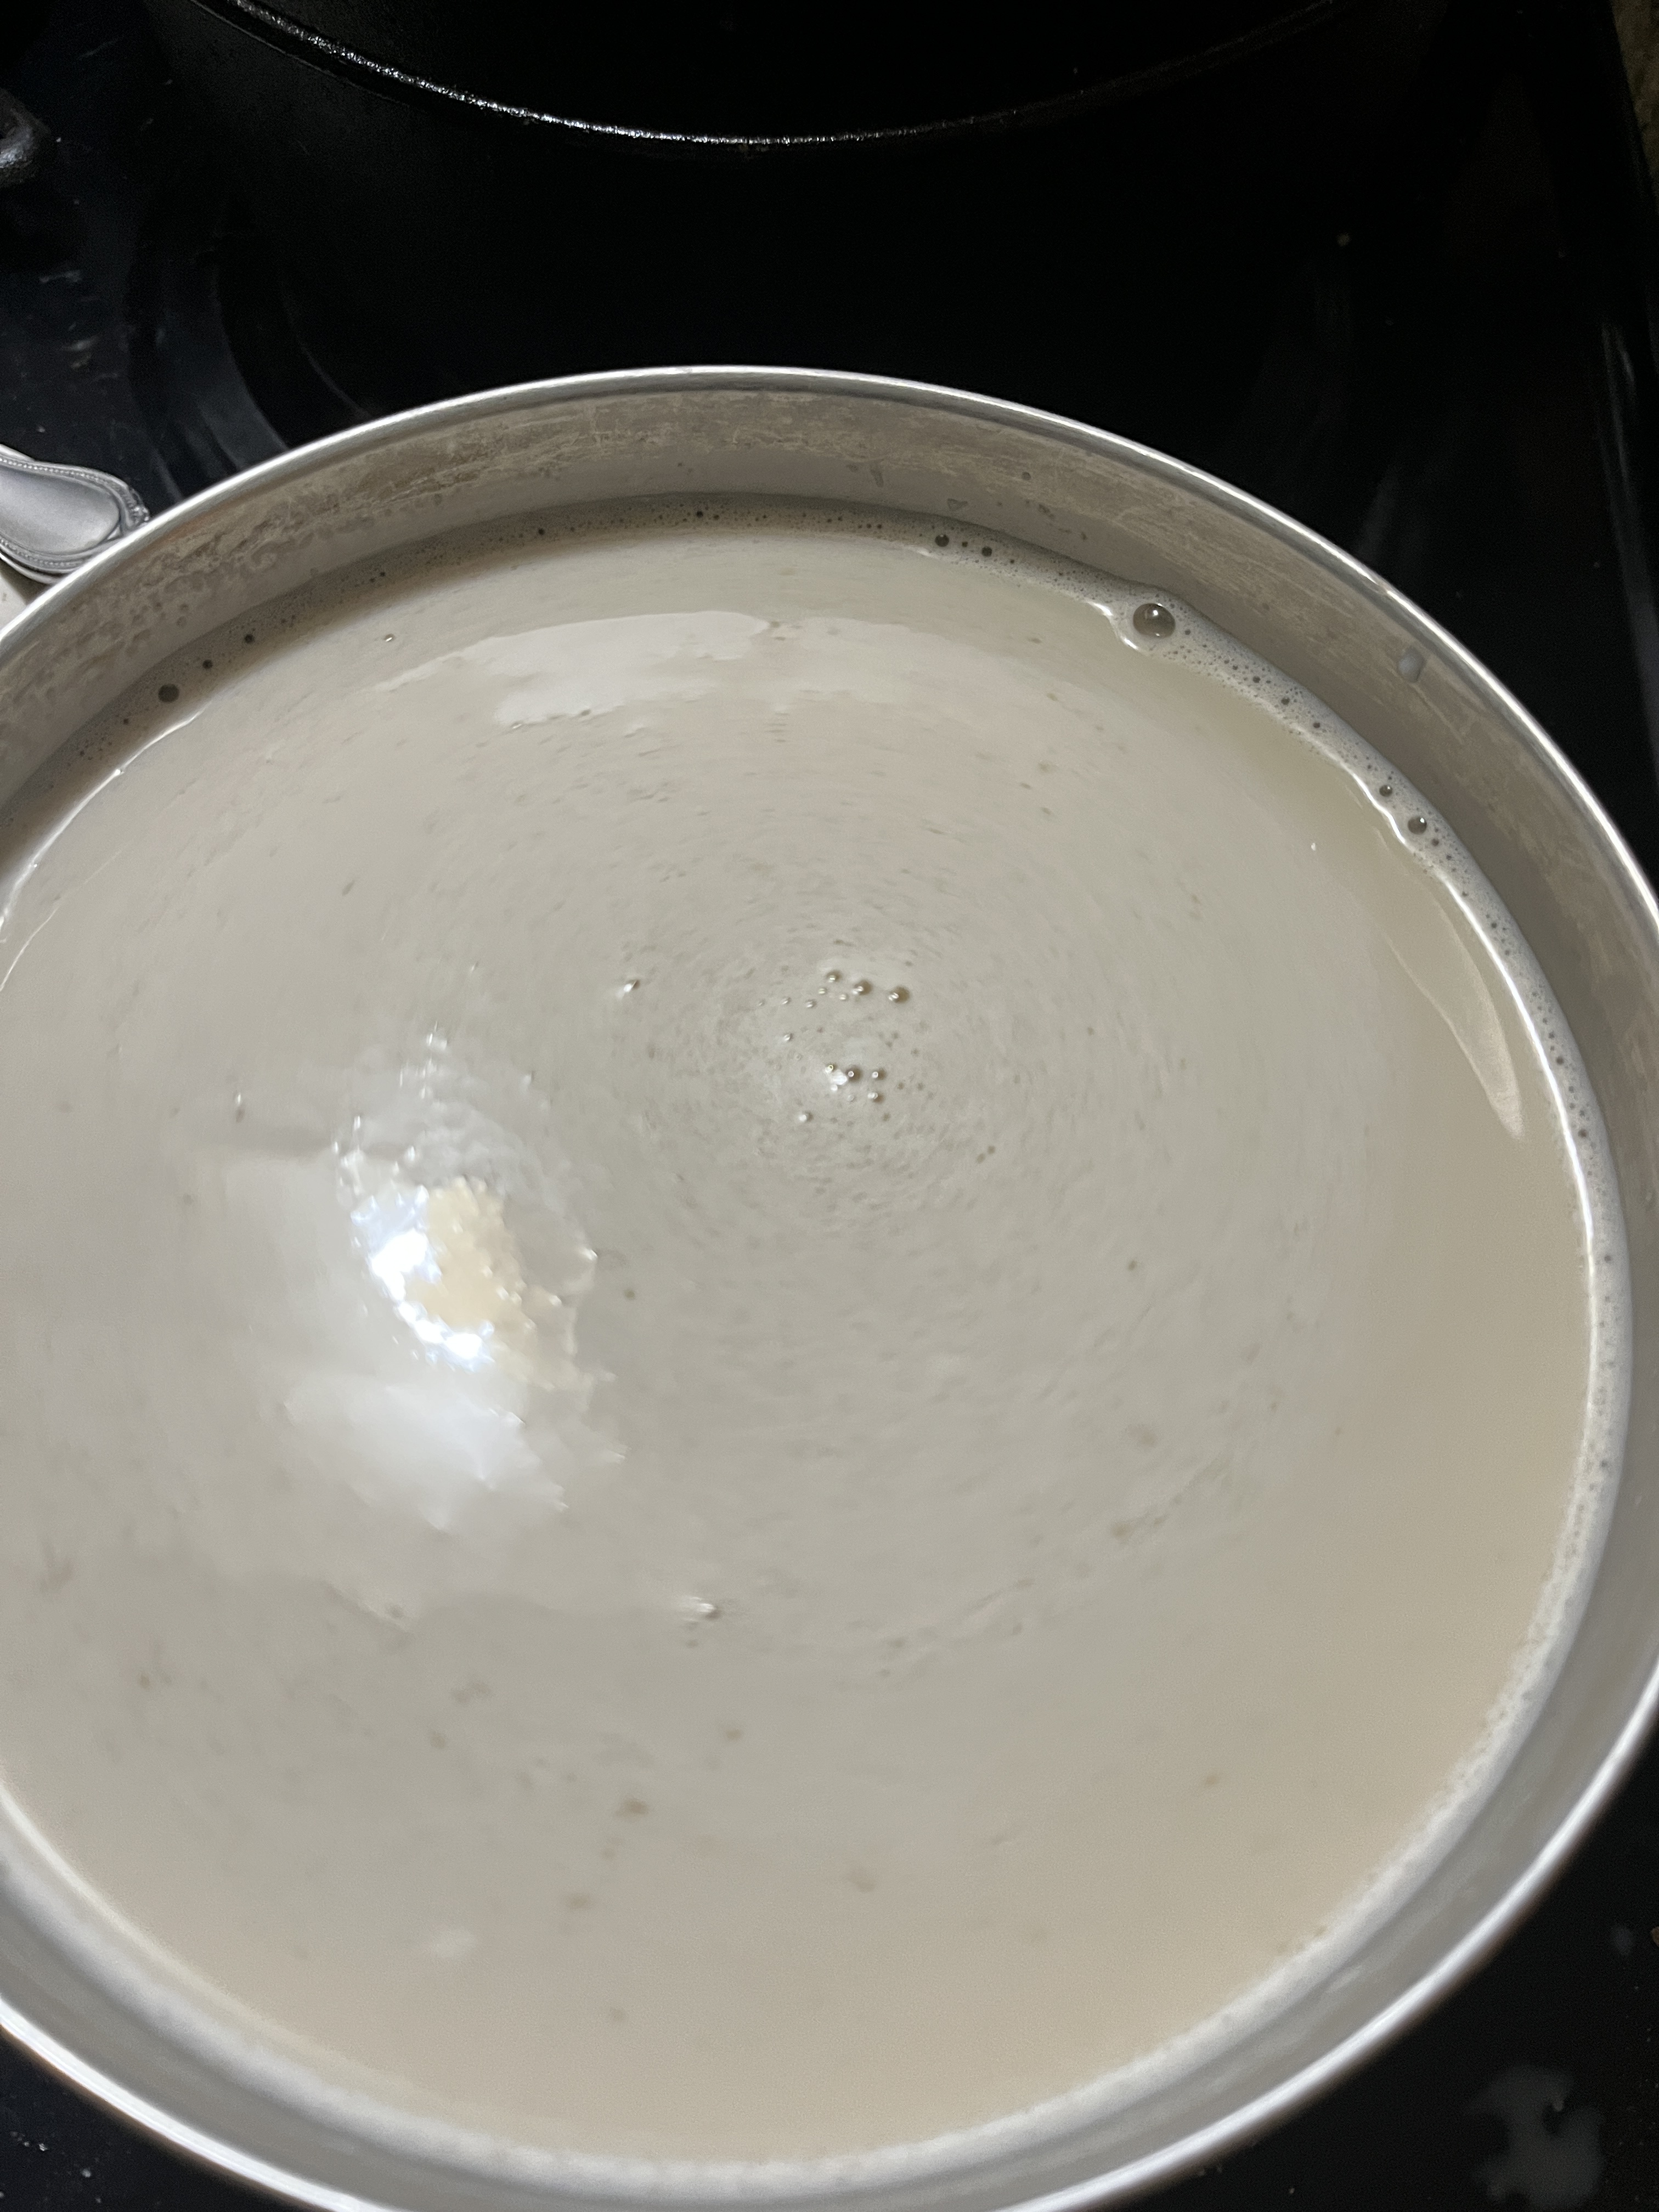
Pour the milk into a 2 quart saucepan. The whole carton won’t fit, so just wait til the milk reduces to make room for the rest.
Add sugar. If you use brown sugar be sure it’s a packed.
I’m using brown sugar this time, so it makes the milk a bit darker and richer. Turn the burner on between medium and medium high and start stirring.
If you use a 2 quart pan the whole 2 quarts won’t fit and leave room to not boil over, so add most or all of the rest when it’s simmered down in 20-30 minutes. Get a stool and a glass of your preferred beverage and stir. Keep stirring. This will take a while, so maybe have a movie on, maybe stream something on the laptop or at least get the remote for some channel surfing or binge-watching so you have something to amuse yourself for the next few hours while you wait for this to thicken. Popcorn or another easy snack wouldn’t go amiss.
Also, get the cake pan ready, line it with foil and spray with oil.
You don’t have to stir vigorously, but you do need to keep stirring and keep the milk from singeing on the bottom.
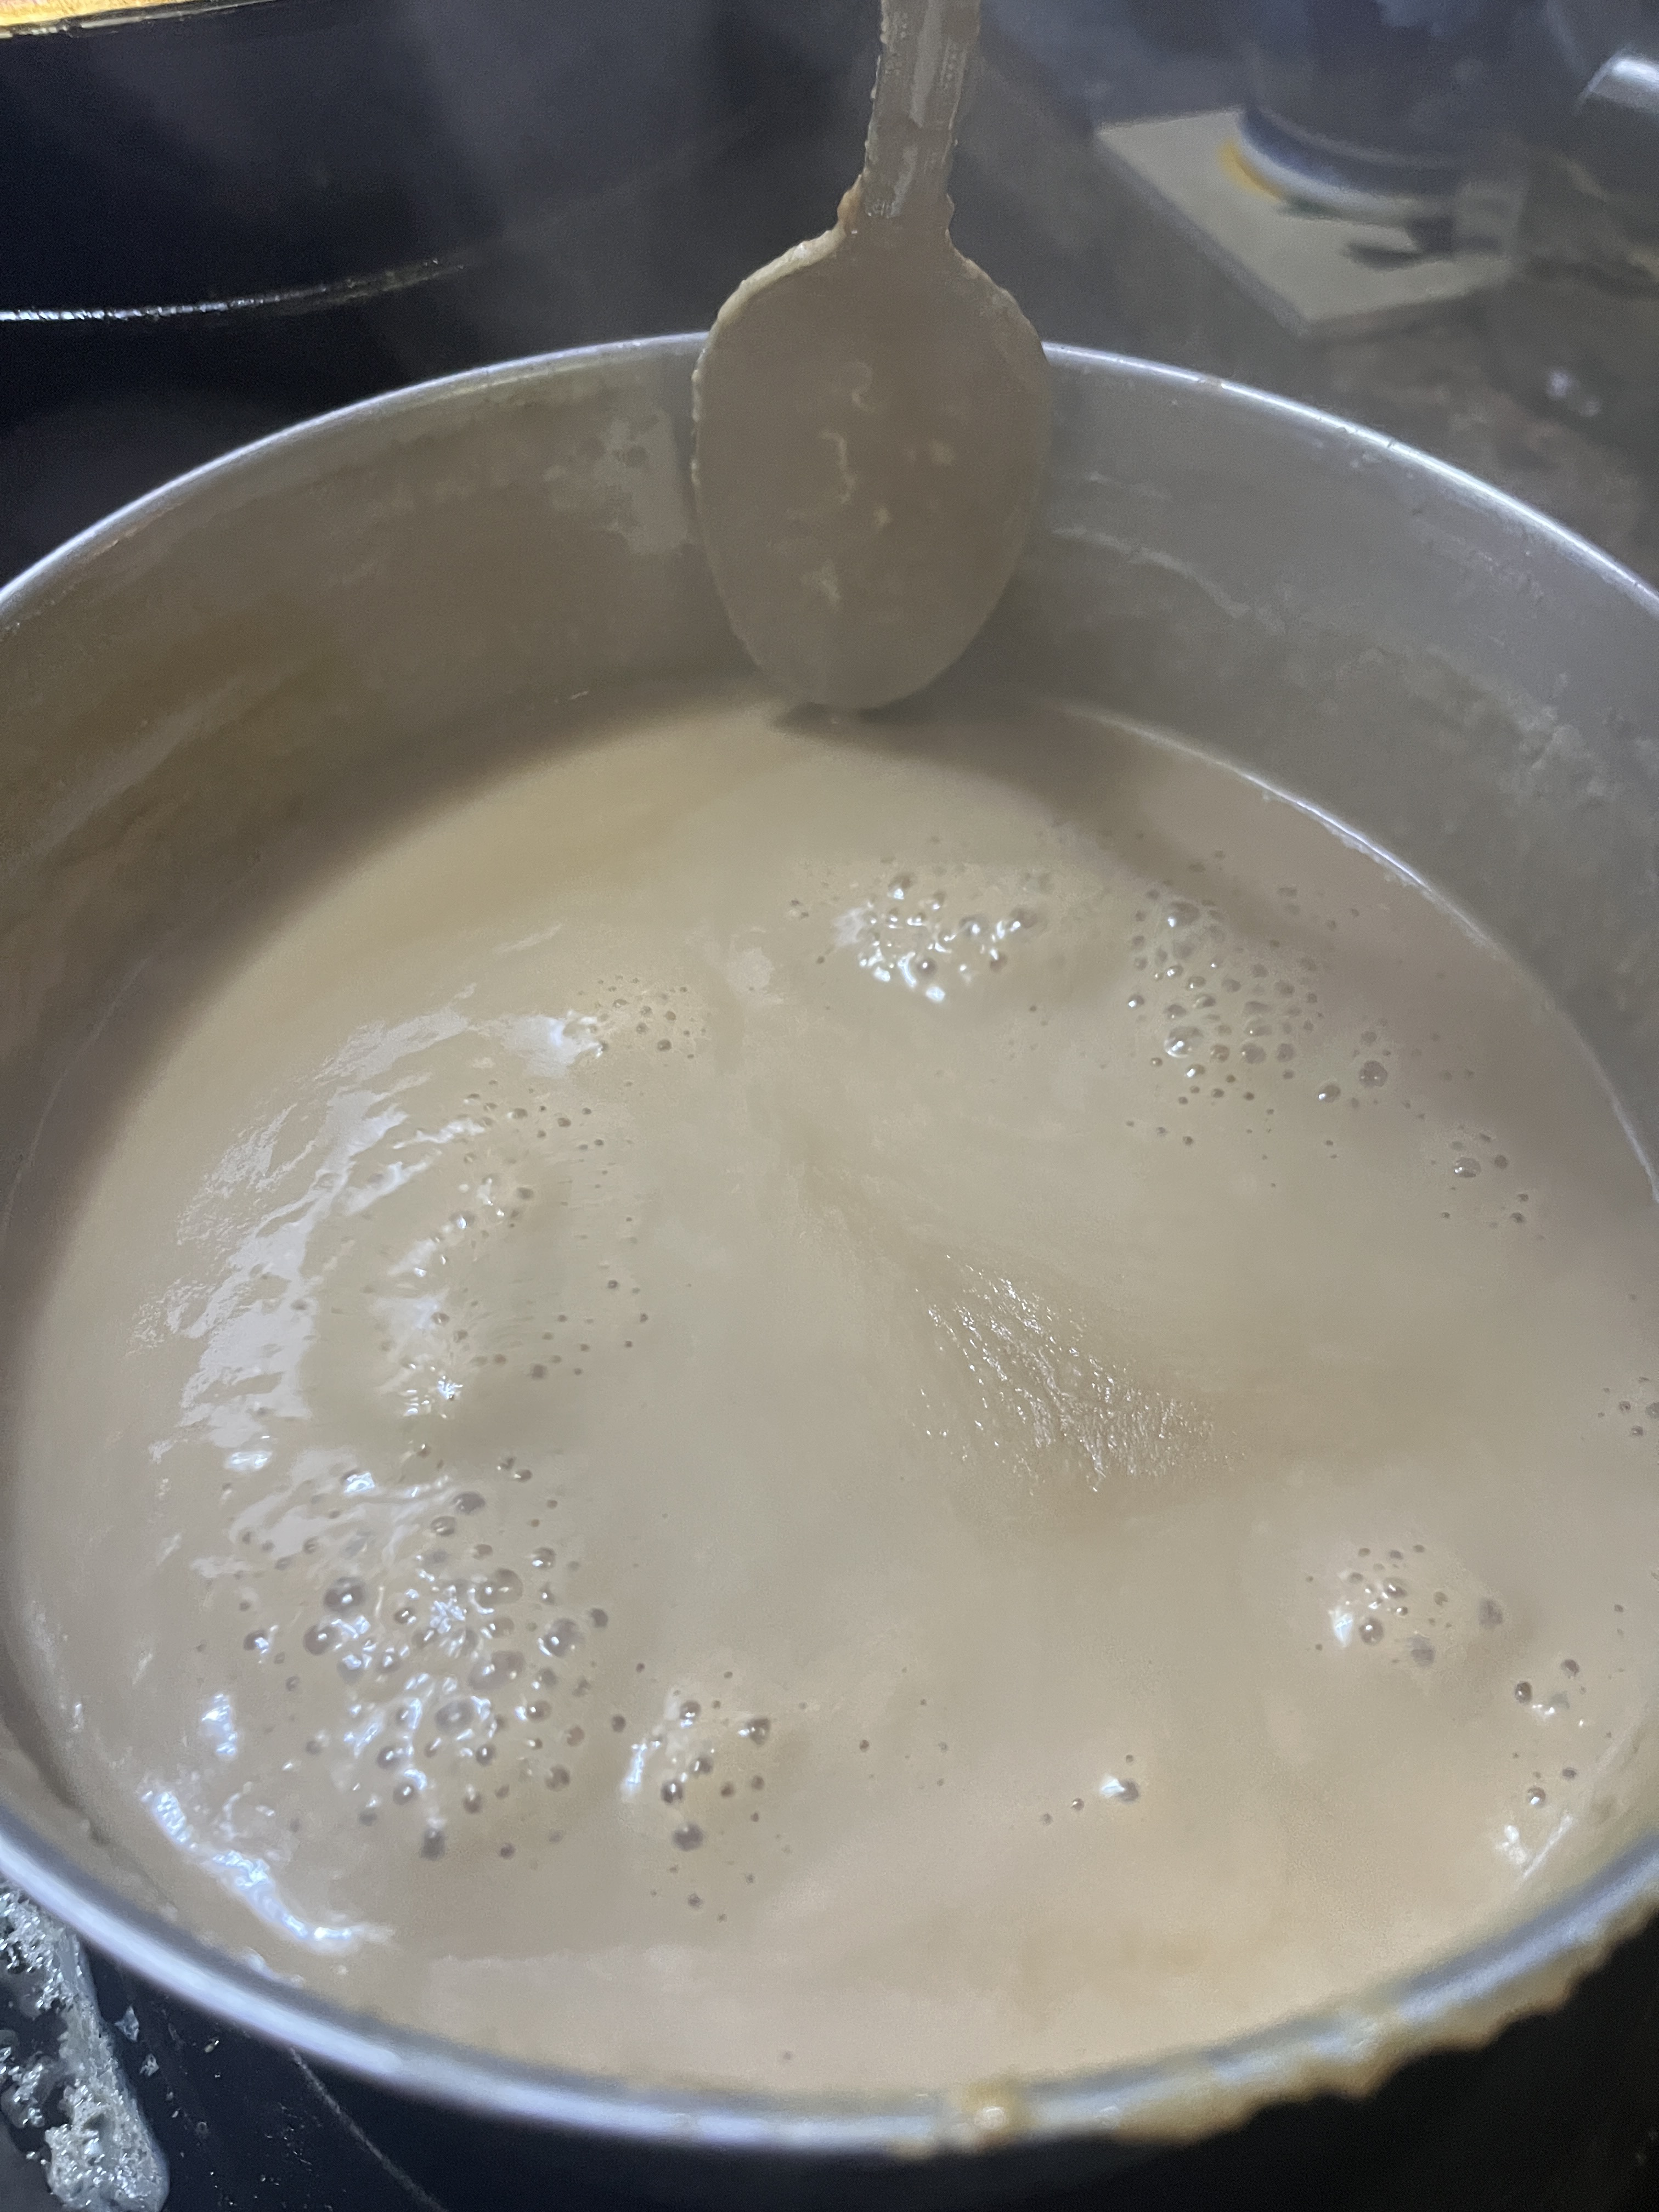
You’re looking to get the milk to reduce to a little more than half what it was. You can use the spoon to measure how far the milk’s gone down. Compare the spoon from the tip at the top of the milk and note where it compares to the original level of the milk,
Then sink the spoon into the remaining milk and see how it compares to the 1st spoon measurement.
You can test the sturdiness of the milk by dropping a touch on a plate and drawing your finger through it.
Keep stirring. It’ll be somewhere between 2 1/2 to 3 hours. When it’s finally a bit less than half the original volume it’ll be quite a bit thicker with big, spattery bubbles and the spoon will start to leave traces.
Put the pan in a bowl of cool water with some ice and add the vanilla.
When cool enough to hold in your lap start beating it with a whisk or spoon, like when you make fudge. Keep beating until it’s thickened a bit.
Then pour into the prepared cake-pan.
If it firms up enough to cut into fudgey squares that’s wonderful If it doesn’t you can heat it into a nice, thick sauce for desserts. Last time I reduced it more and it made fudgey squares. This time I spooned it into a container for a thick dessert sauce on cakes, ice cream, cookies or anything that seems nice to dip it in or spoon it over. It should keep in the fridge about a week or until it’s used up…whichever comes first.
When you’re ready to use it it’s good warmed up (in a small dish in the microwave is fine) and it’s yummy on ice cream, it got the Andrew vote of approval. He’s not into chocolate but he likes caramel, butterscotch and such like things.
I now realize why I haven’t made this in years. Sitting stirring for 2 to 3 hours is tedious, even if you’re not up to doing anything else and have something to watch. Next time I’ll use evaporated milk, like the online recipes suggest, and cut stirring time in about half. And maybe next time I have an extra 1/2 gallon of milk I’ll think about making cheese instead. If/when I do make it again I might change up the flavour with a cinnamon stick for a horchata-like flavour or maybe mix in some chocolate or maybe leave it vanilla and cover it with a layer of fudge. There are options…hmm…
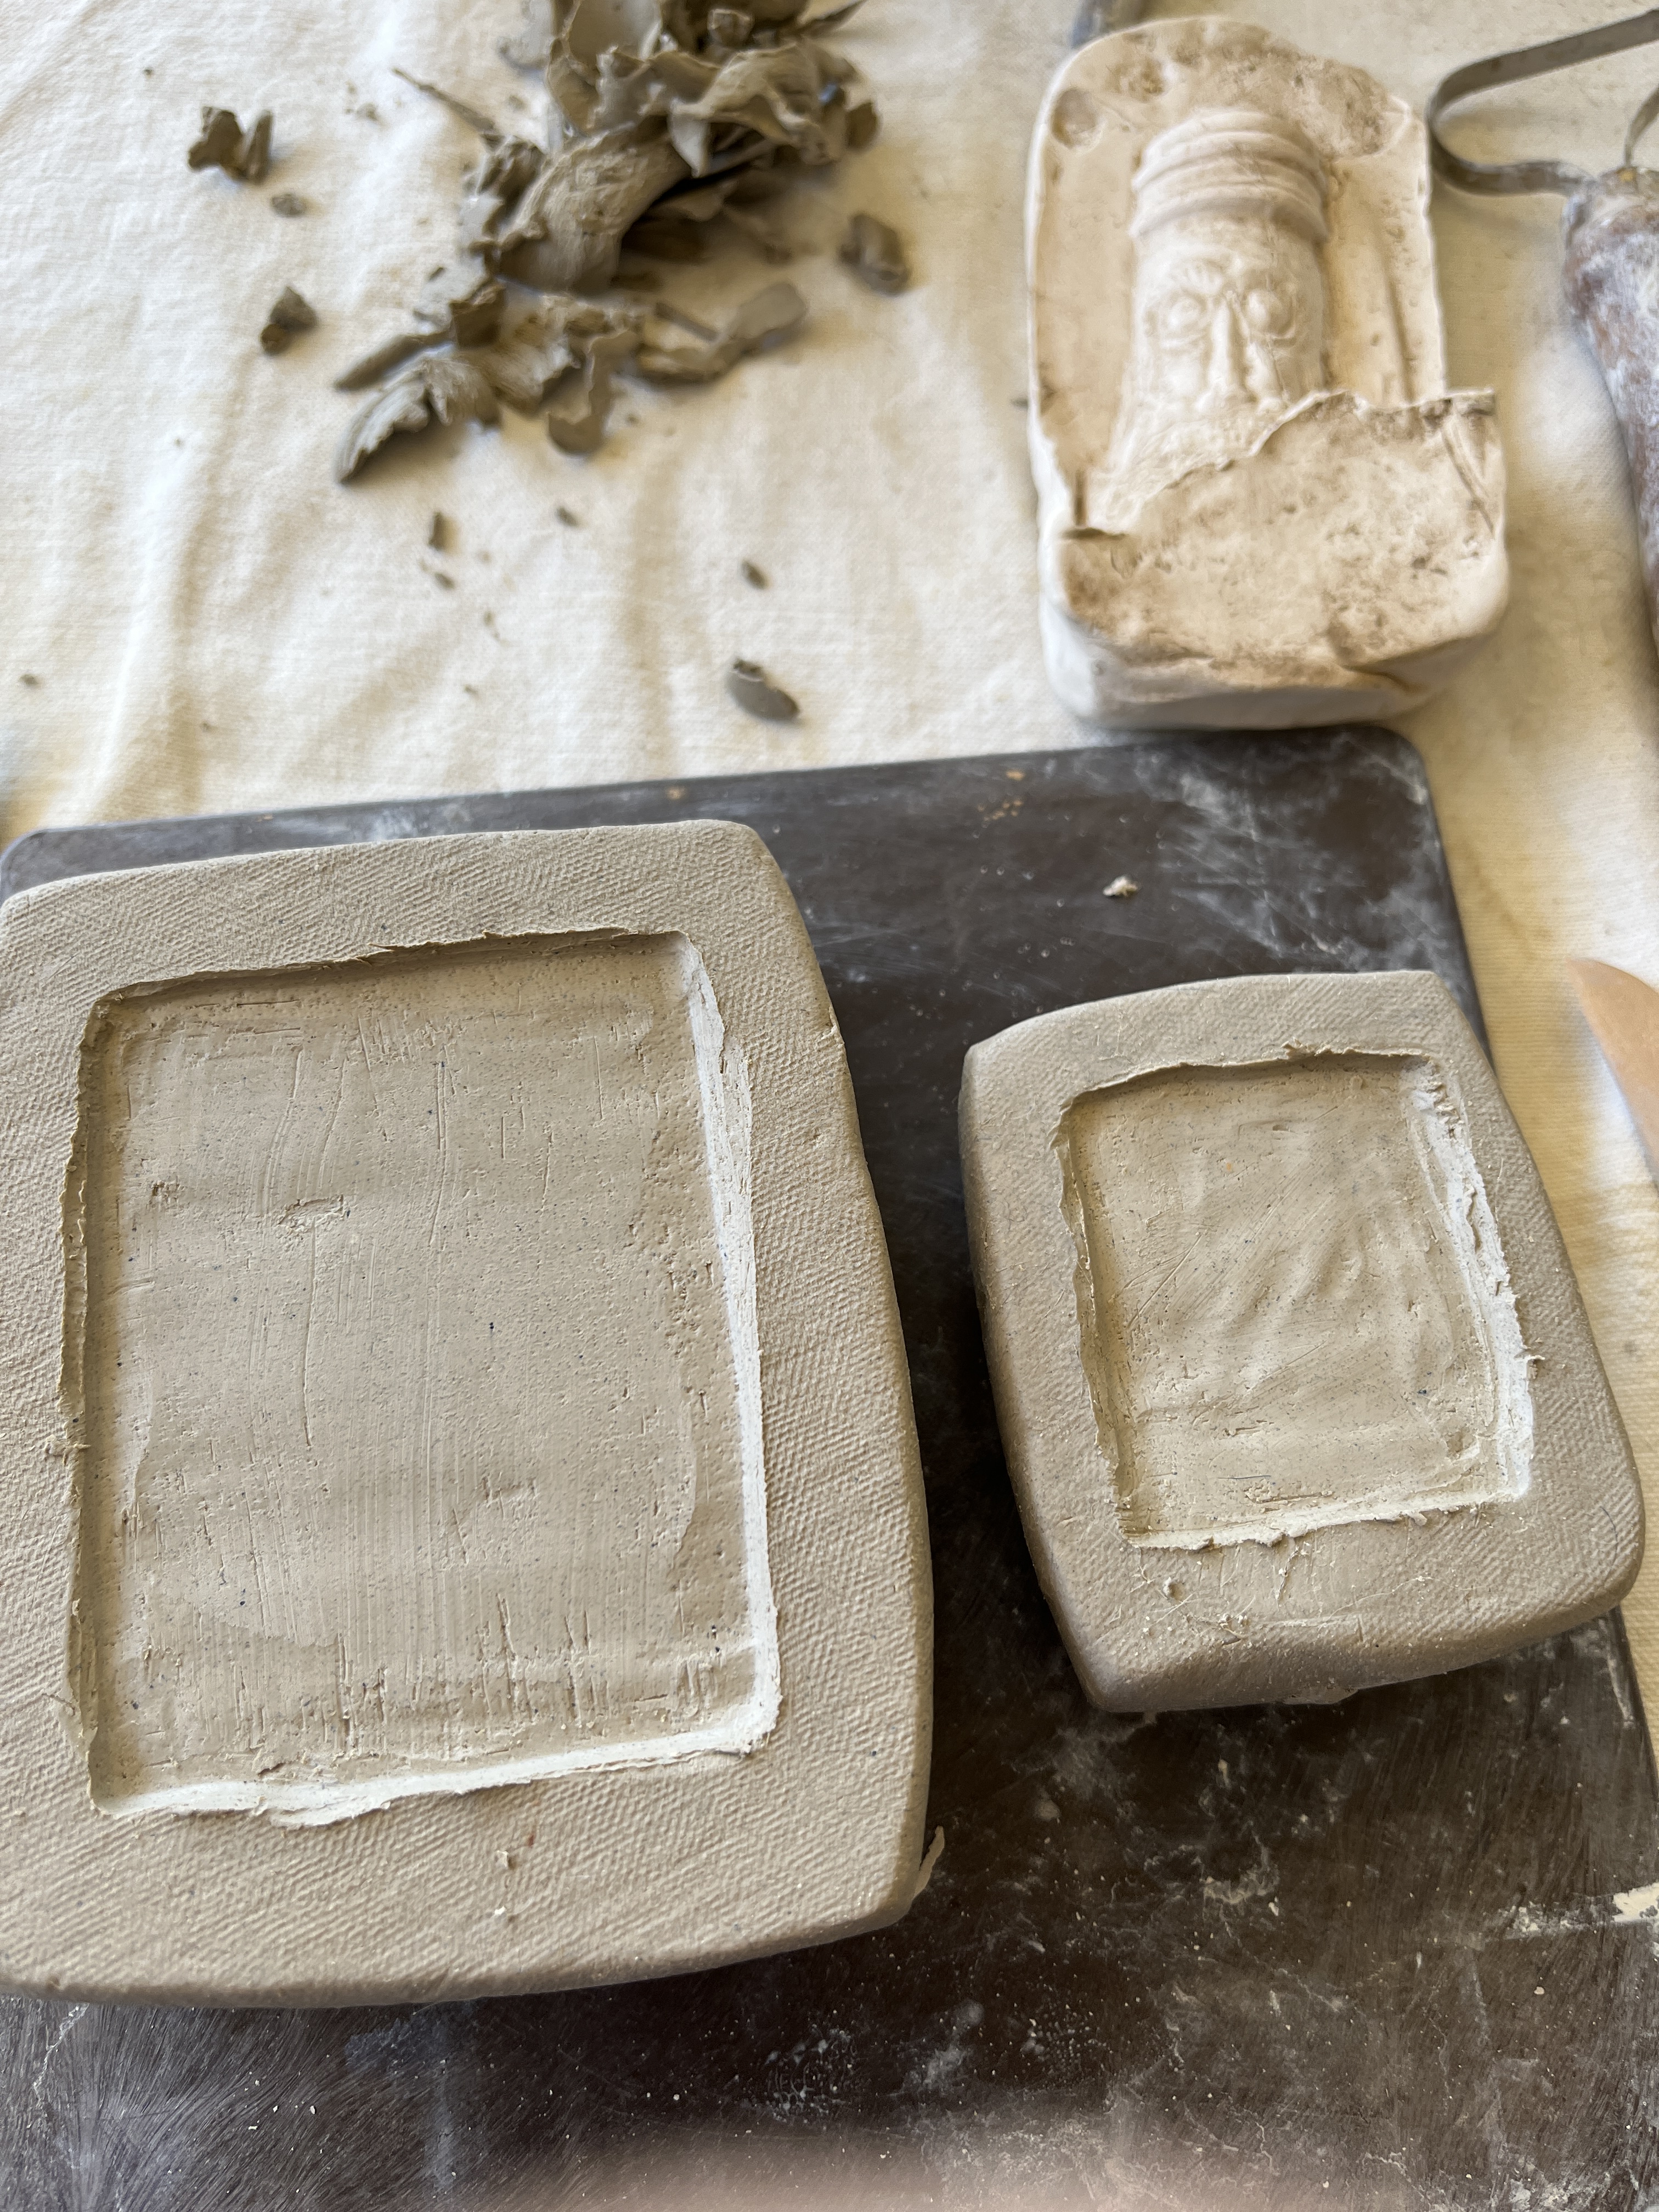
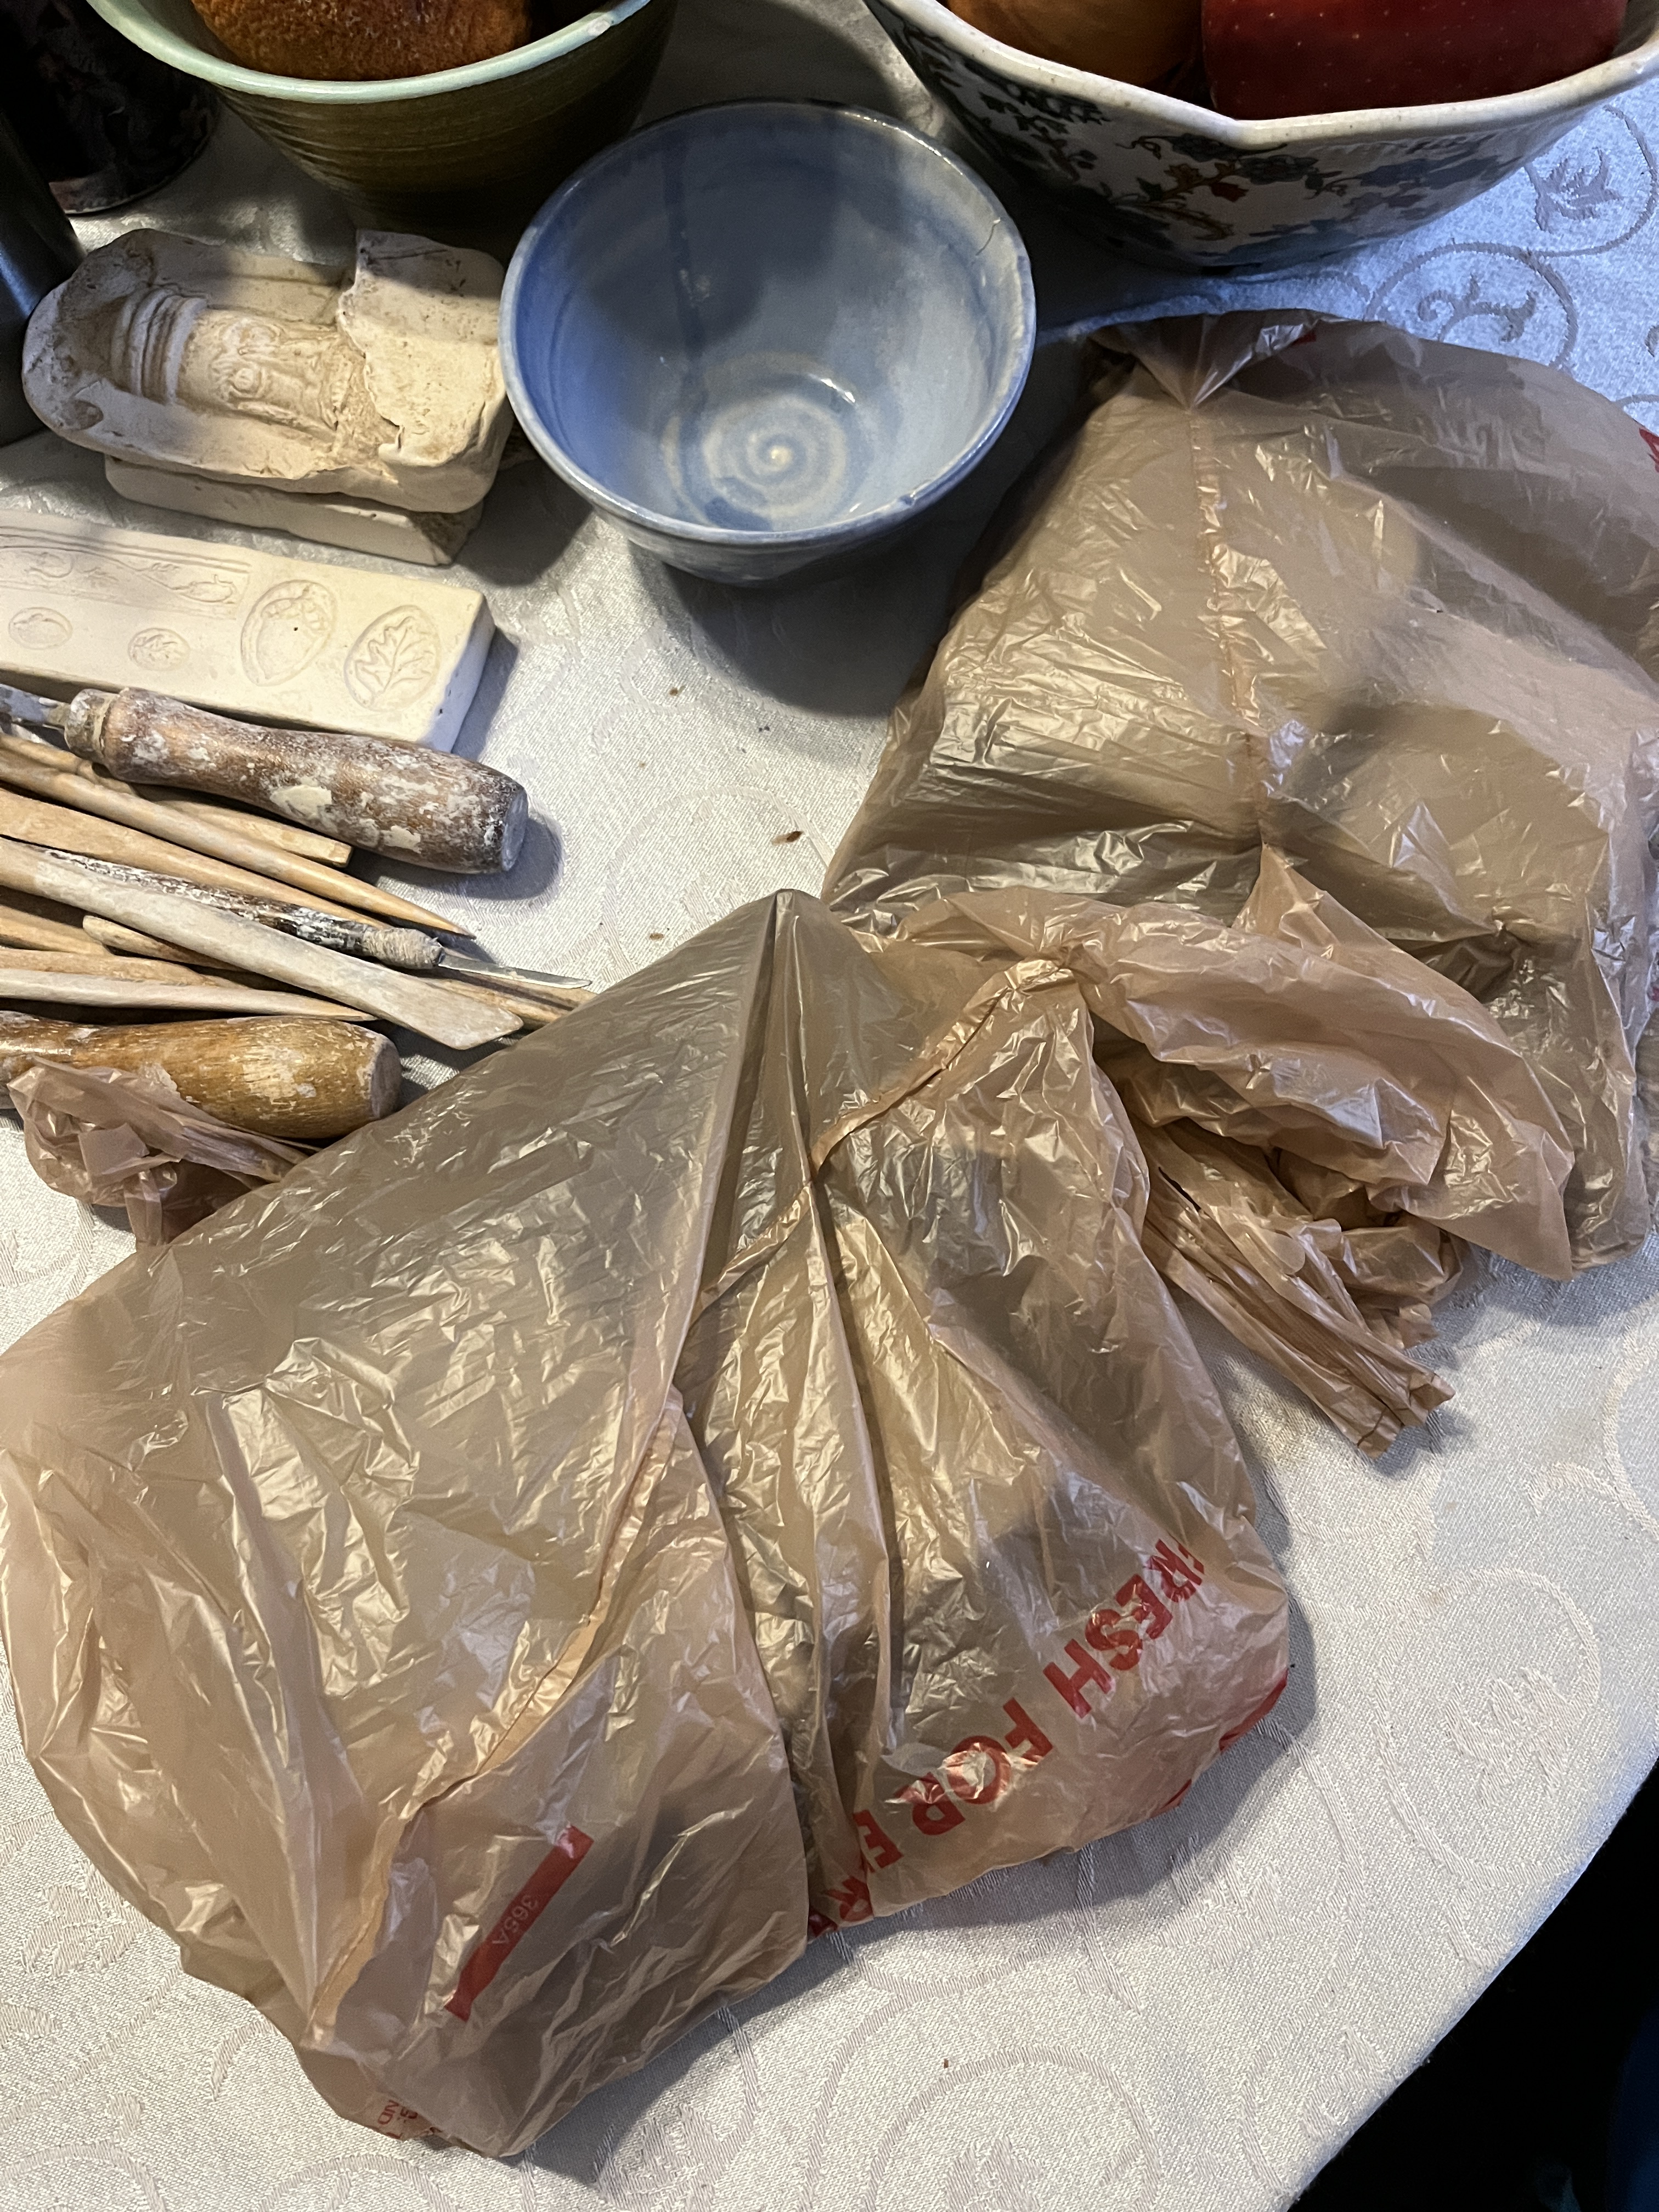
I’ve been meaning to make a face mold for Bellarmine Jugs for a very long time. I just haven’t had the confidence. I finally decided it doesn’t matter, I’ll just do it. The clay I bought a while back is too hard for throwing but still workable enough to make molds from. I’ve made sprig molds before, so this is just another, maybe a bit more fussy in the carving. I’m a bit nervous about the nose and eyes. We’ll see how it turns out but after looking at pictures of many originals I’m a lot more confident that at least I won’t be worse than them. I also have a plaster cast of an original a friend made for us once upon a time (a couple decades ago). Yeah, life keeps getting in the way of me getting my want list done even when I get out of my own way. At least I have a window to work it this week.
I’ve made 2 blanks, one for normal size and one for smaller pieces. I had enough clay so I decided to make a large and small roundel for each one, too. I already have sprig molds for trims so I’ll see if I can use those for inspiration, too.
First I sketched the general outlines of a face in each one.
Then I hollowed out the body of the mold
and more or less flattened the inside.
Then I sketched a bit again
The blanks were too thick so I cut them in half and used the backs for the roundel molds and carved the space out there, too.
Then I waited for the blanks to get dryer/firmer so they’d be easier to carve. I also took them inside where it’s cooler, or at least not 100 degrees. While I wait I’m making pasties for work lunches for the next month. While you wait here’s a picture of the plaster face casts.
And a picture of sprig molds I made a few years back.
And the sprig molds on the back of the sprig molds. I don’t remember why I made a flying pig in this one.
Come to think of it, I could carve molds into the back of the new molds. Hmm…
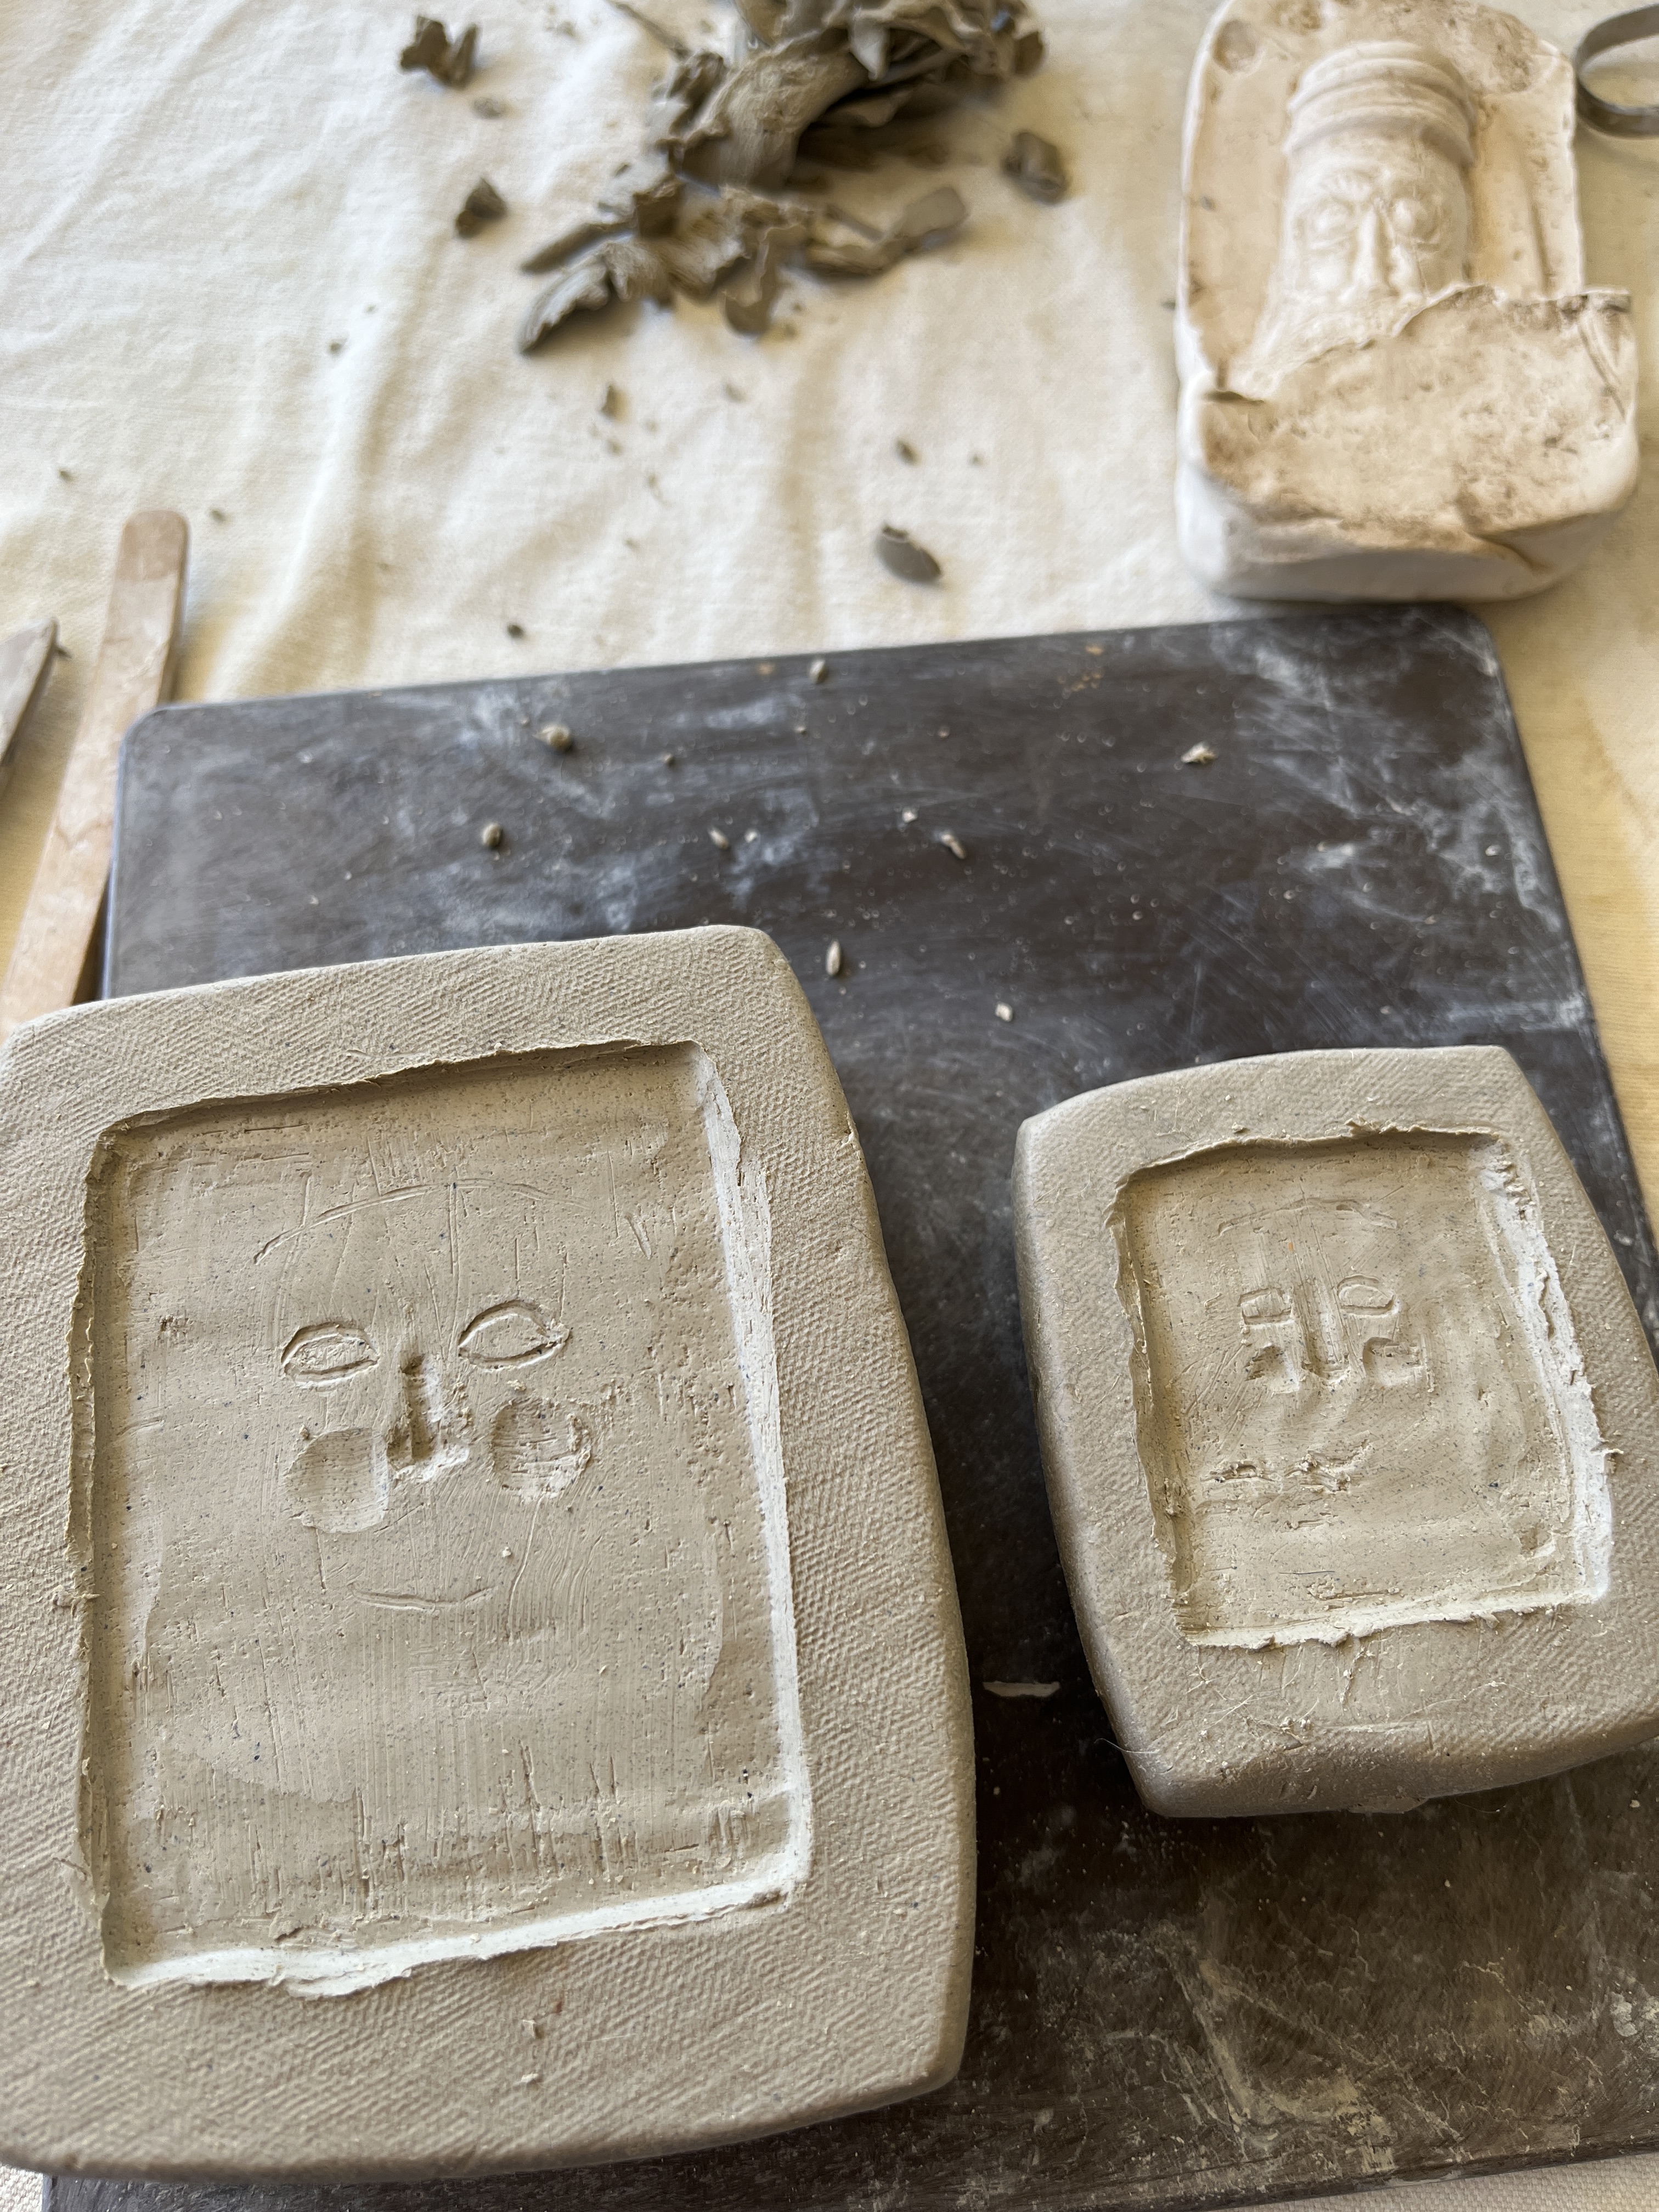
Then I started carving in earnest.
That’s a good start, now tuck them in to rest while I rest and get some housework done. Doing it in a few sessions is a good thing. When you get tired and try to push it is when you make mistakes and mess things up. Take it slow, refine it little by little and it’ll turn out better. Now’s also a good time to design a couple roundels.
Also, if you cover them with damp paper towels while they wait in plastic they dry more slowly. This is important if you live in a desert with humidity in single digits.
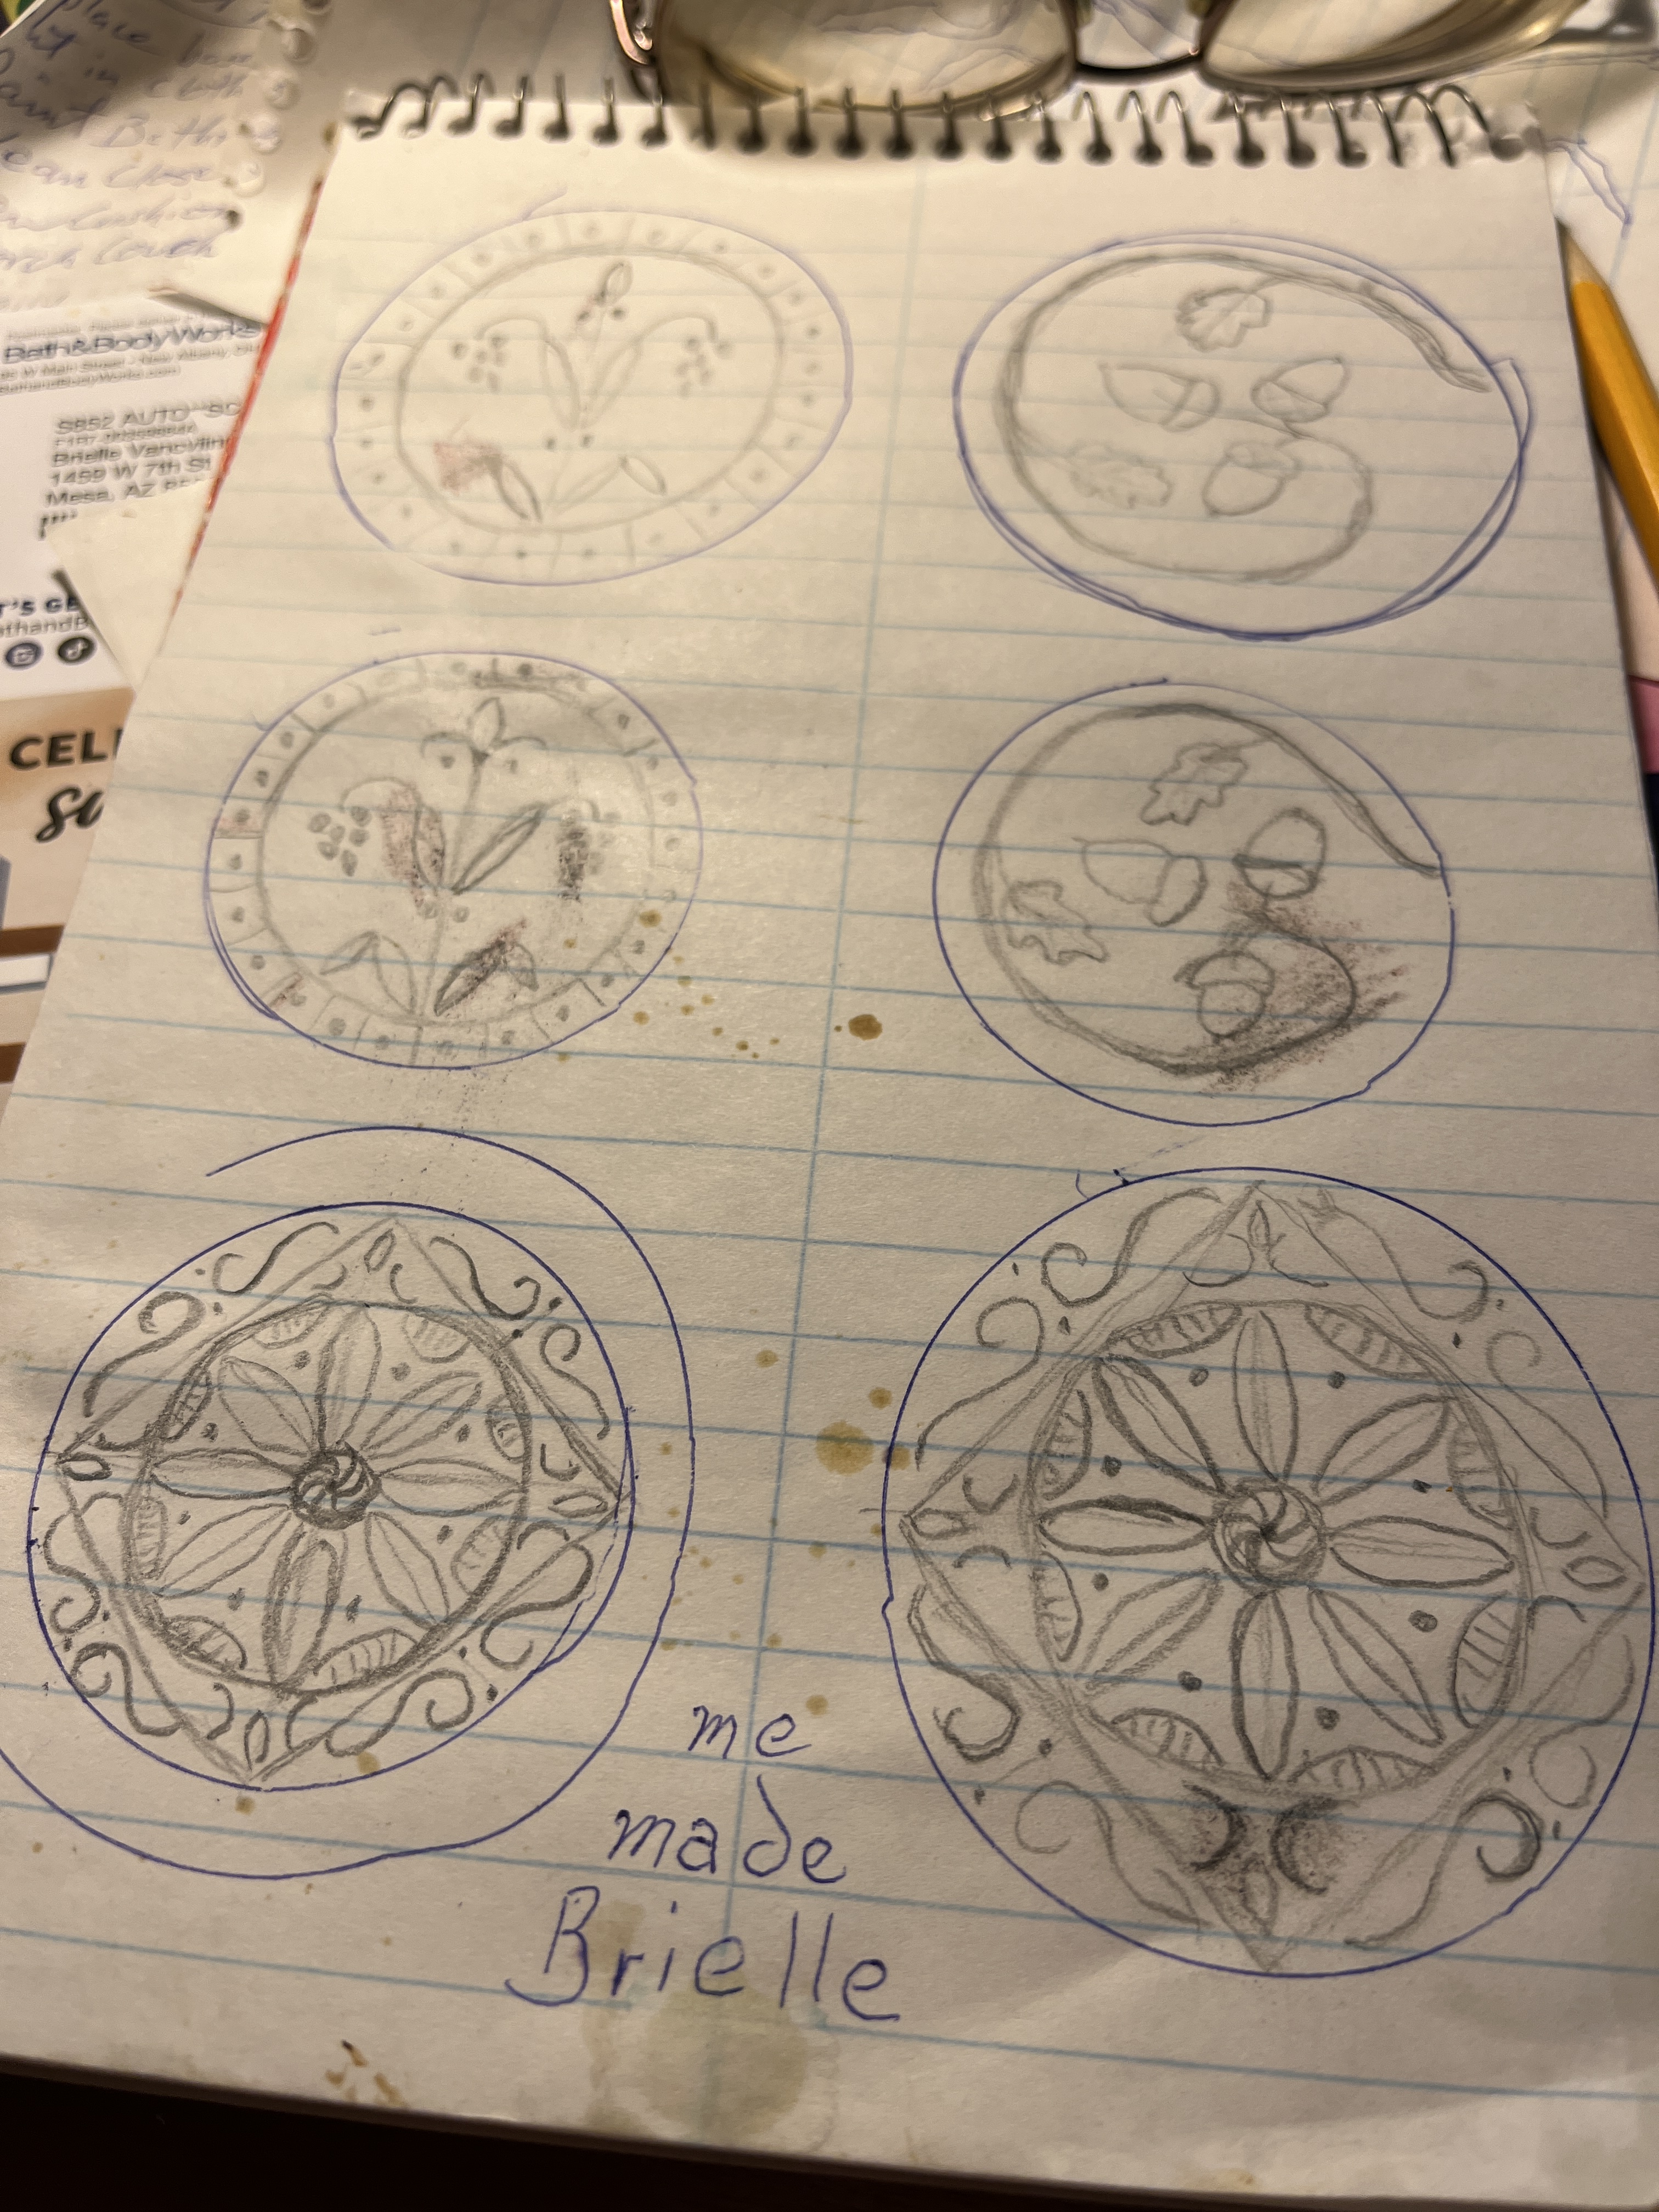
Do some research and design some roundels.
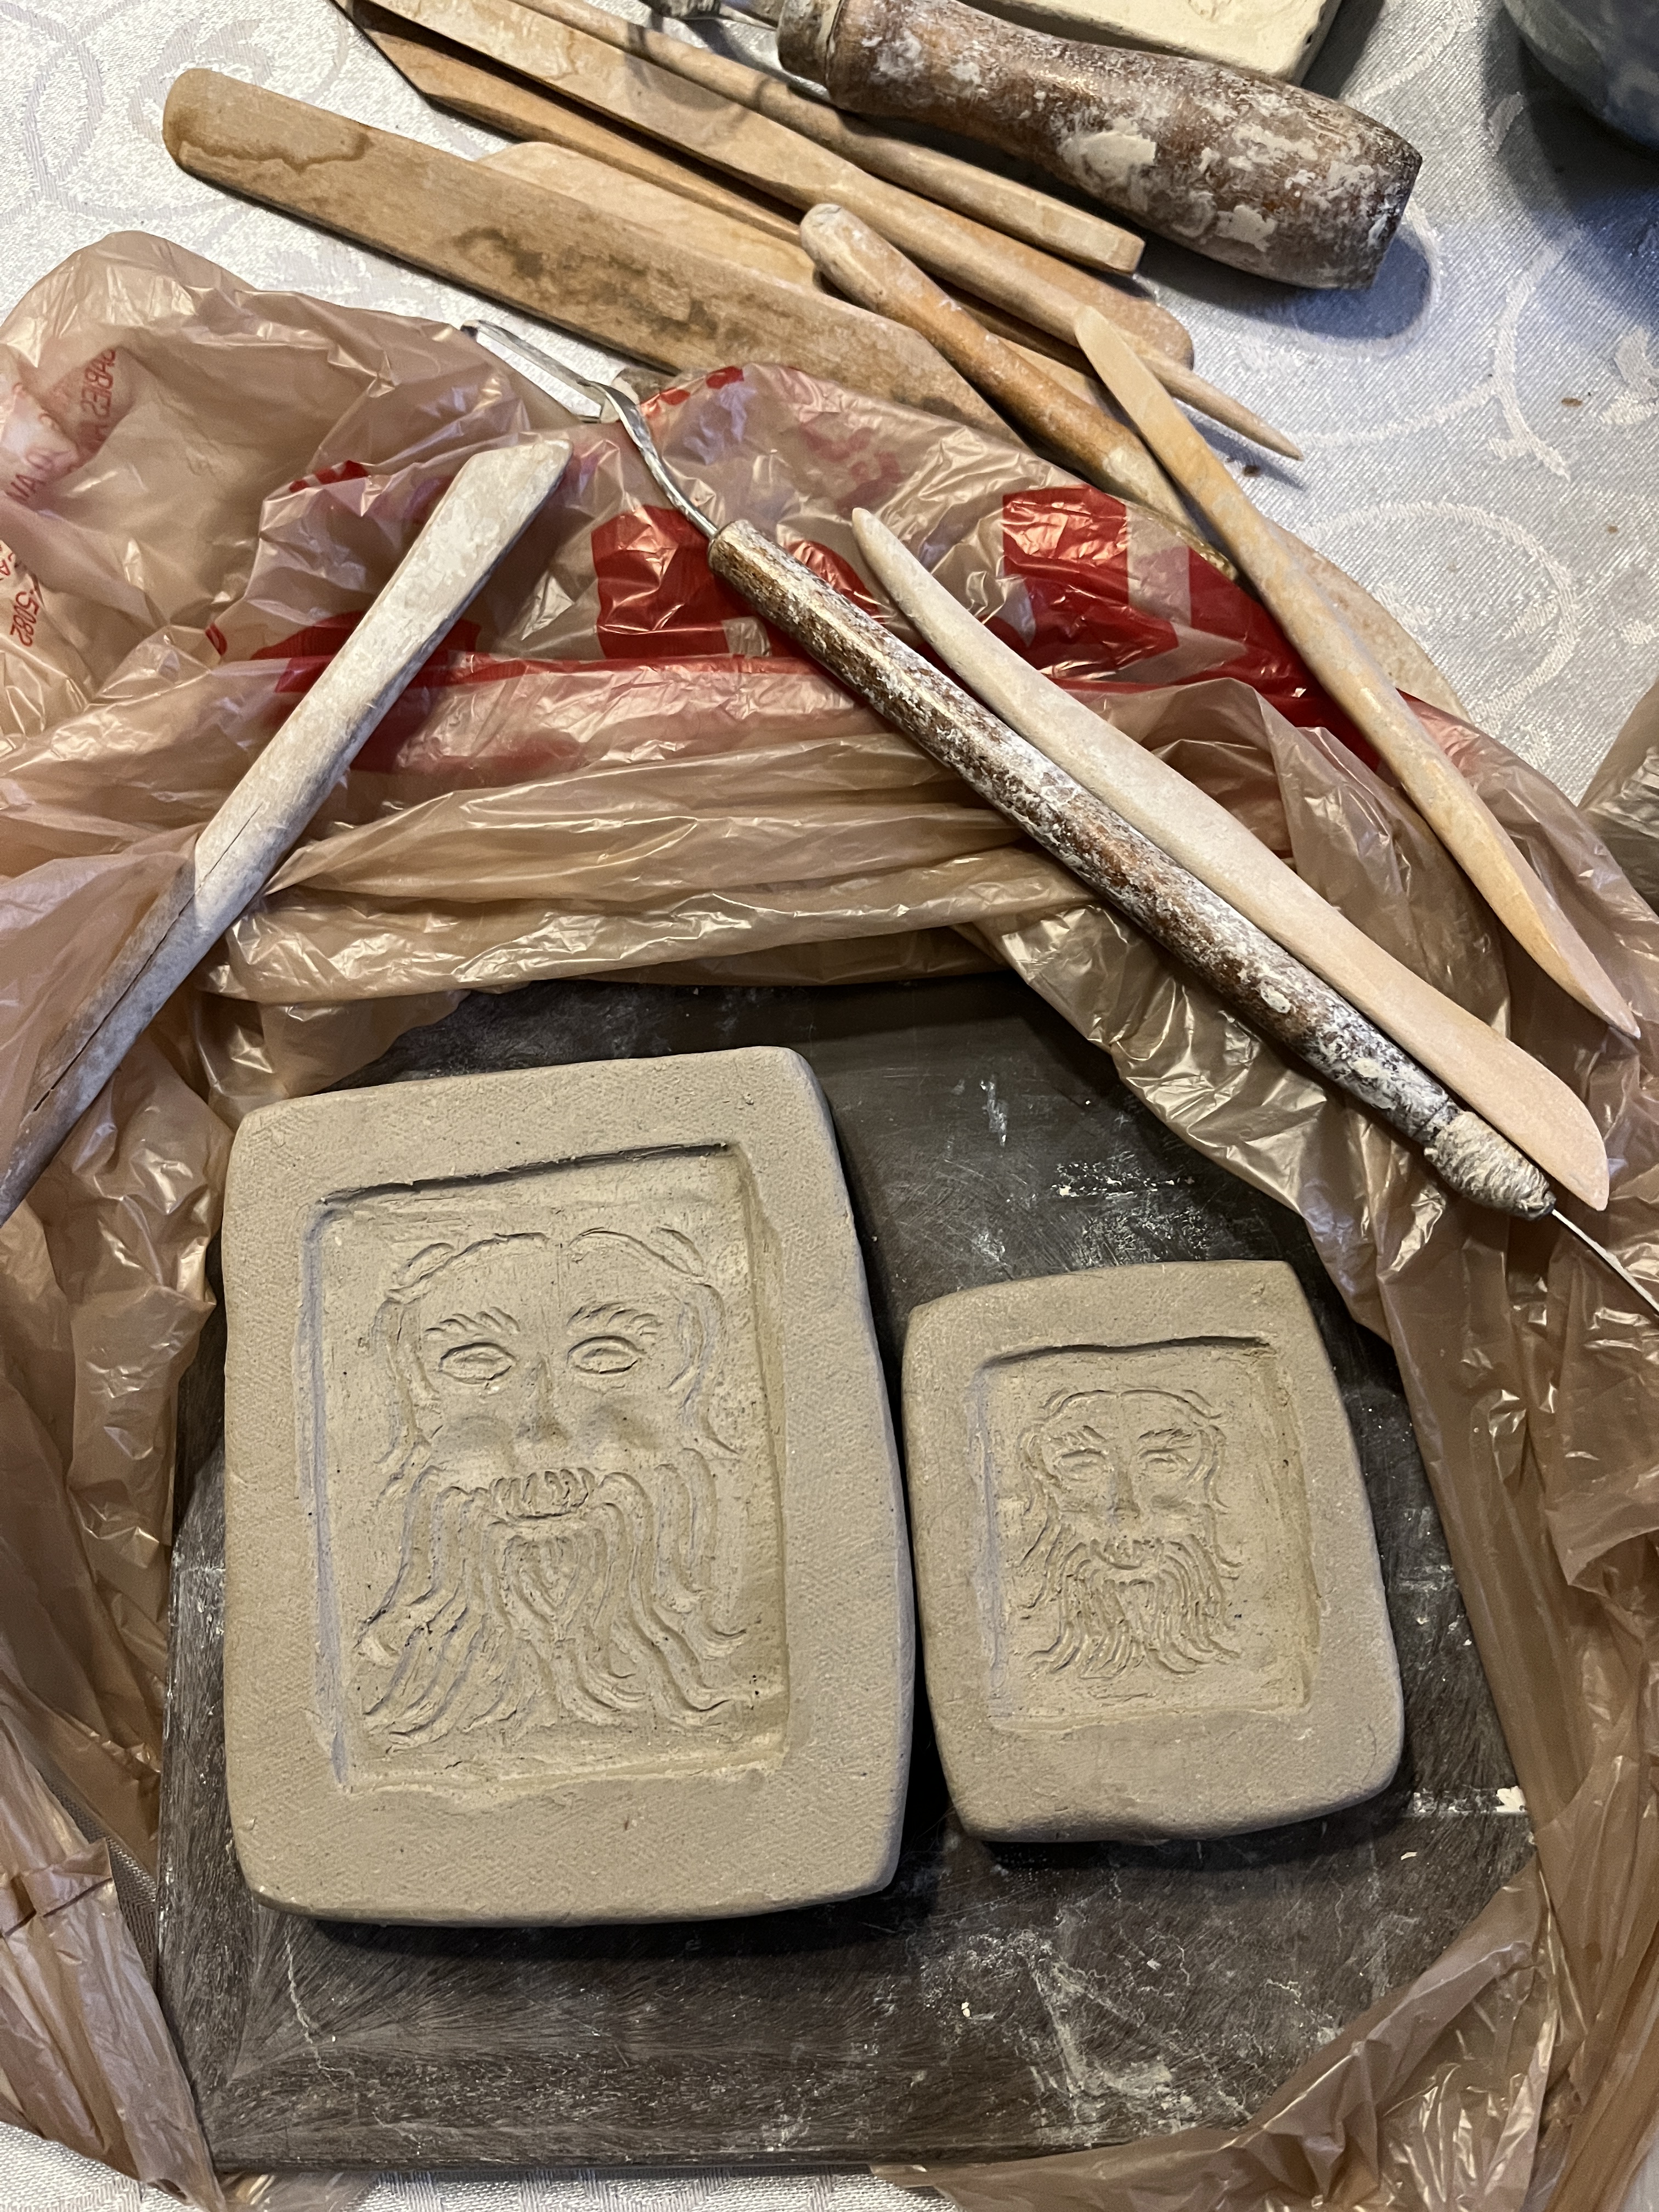
When you get out of the hospital or done with overtime at work or whatever pulled you away from the project for the better part of a week, be glad you covered the molds well and start carving. Finish up the face first. No, it’s not compleatly finished, there’s still a few days of cleaning up and perfecting as I consider it while it dries, but it’s mostly there.
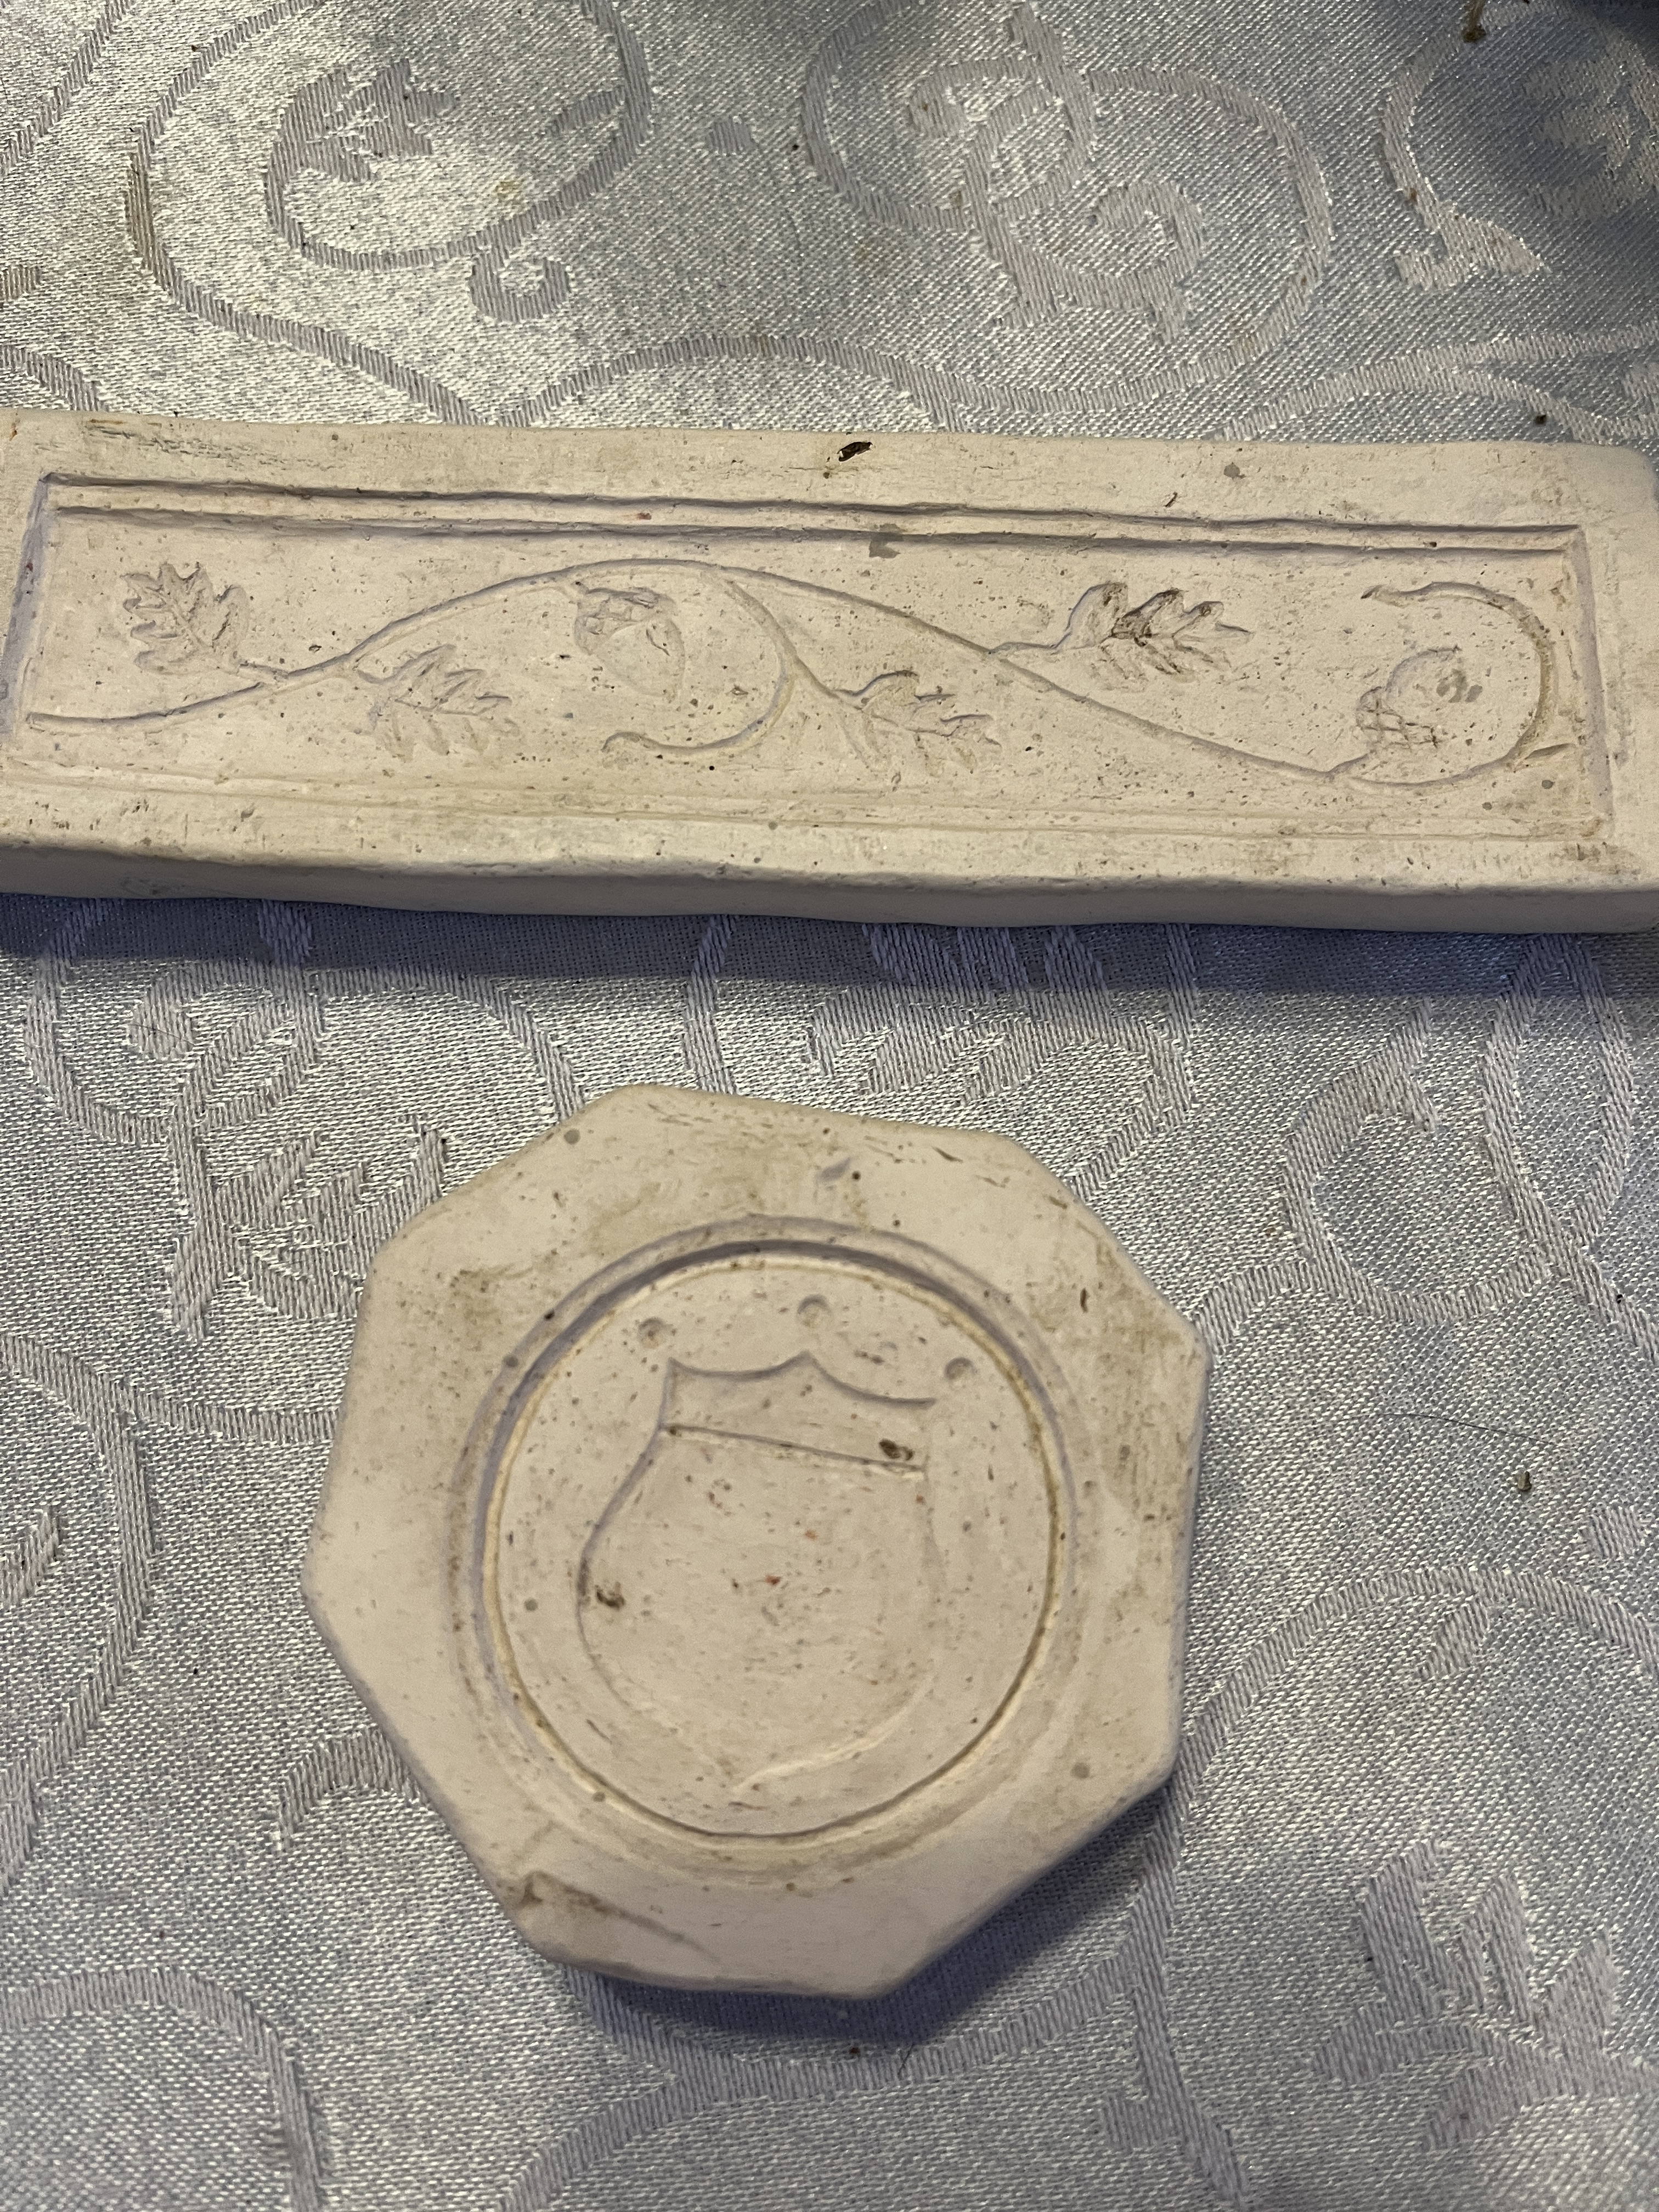
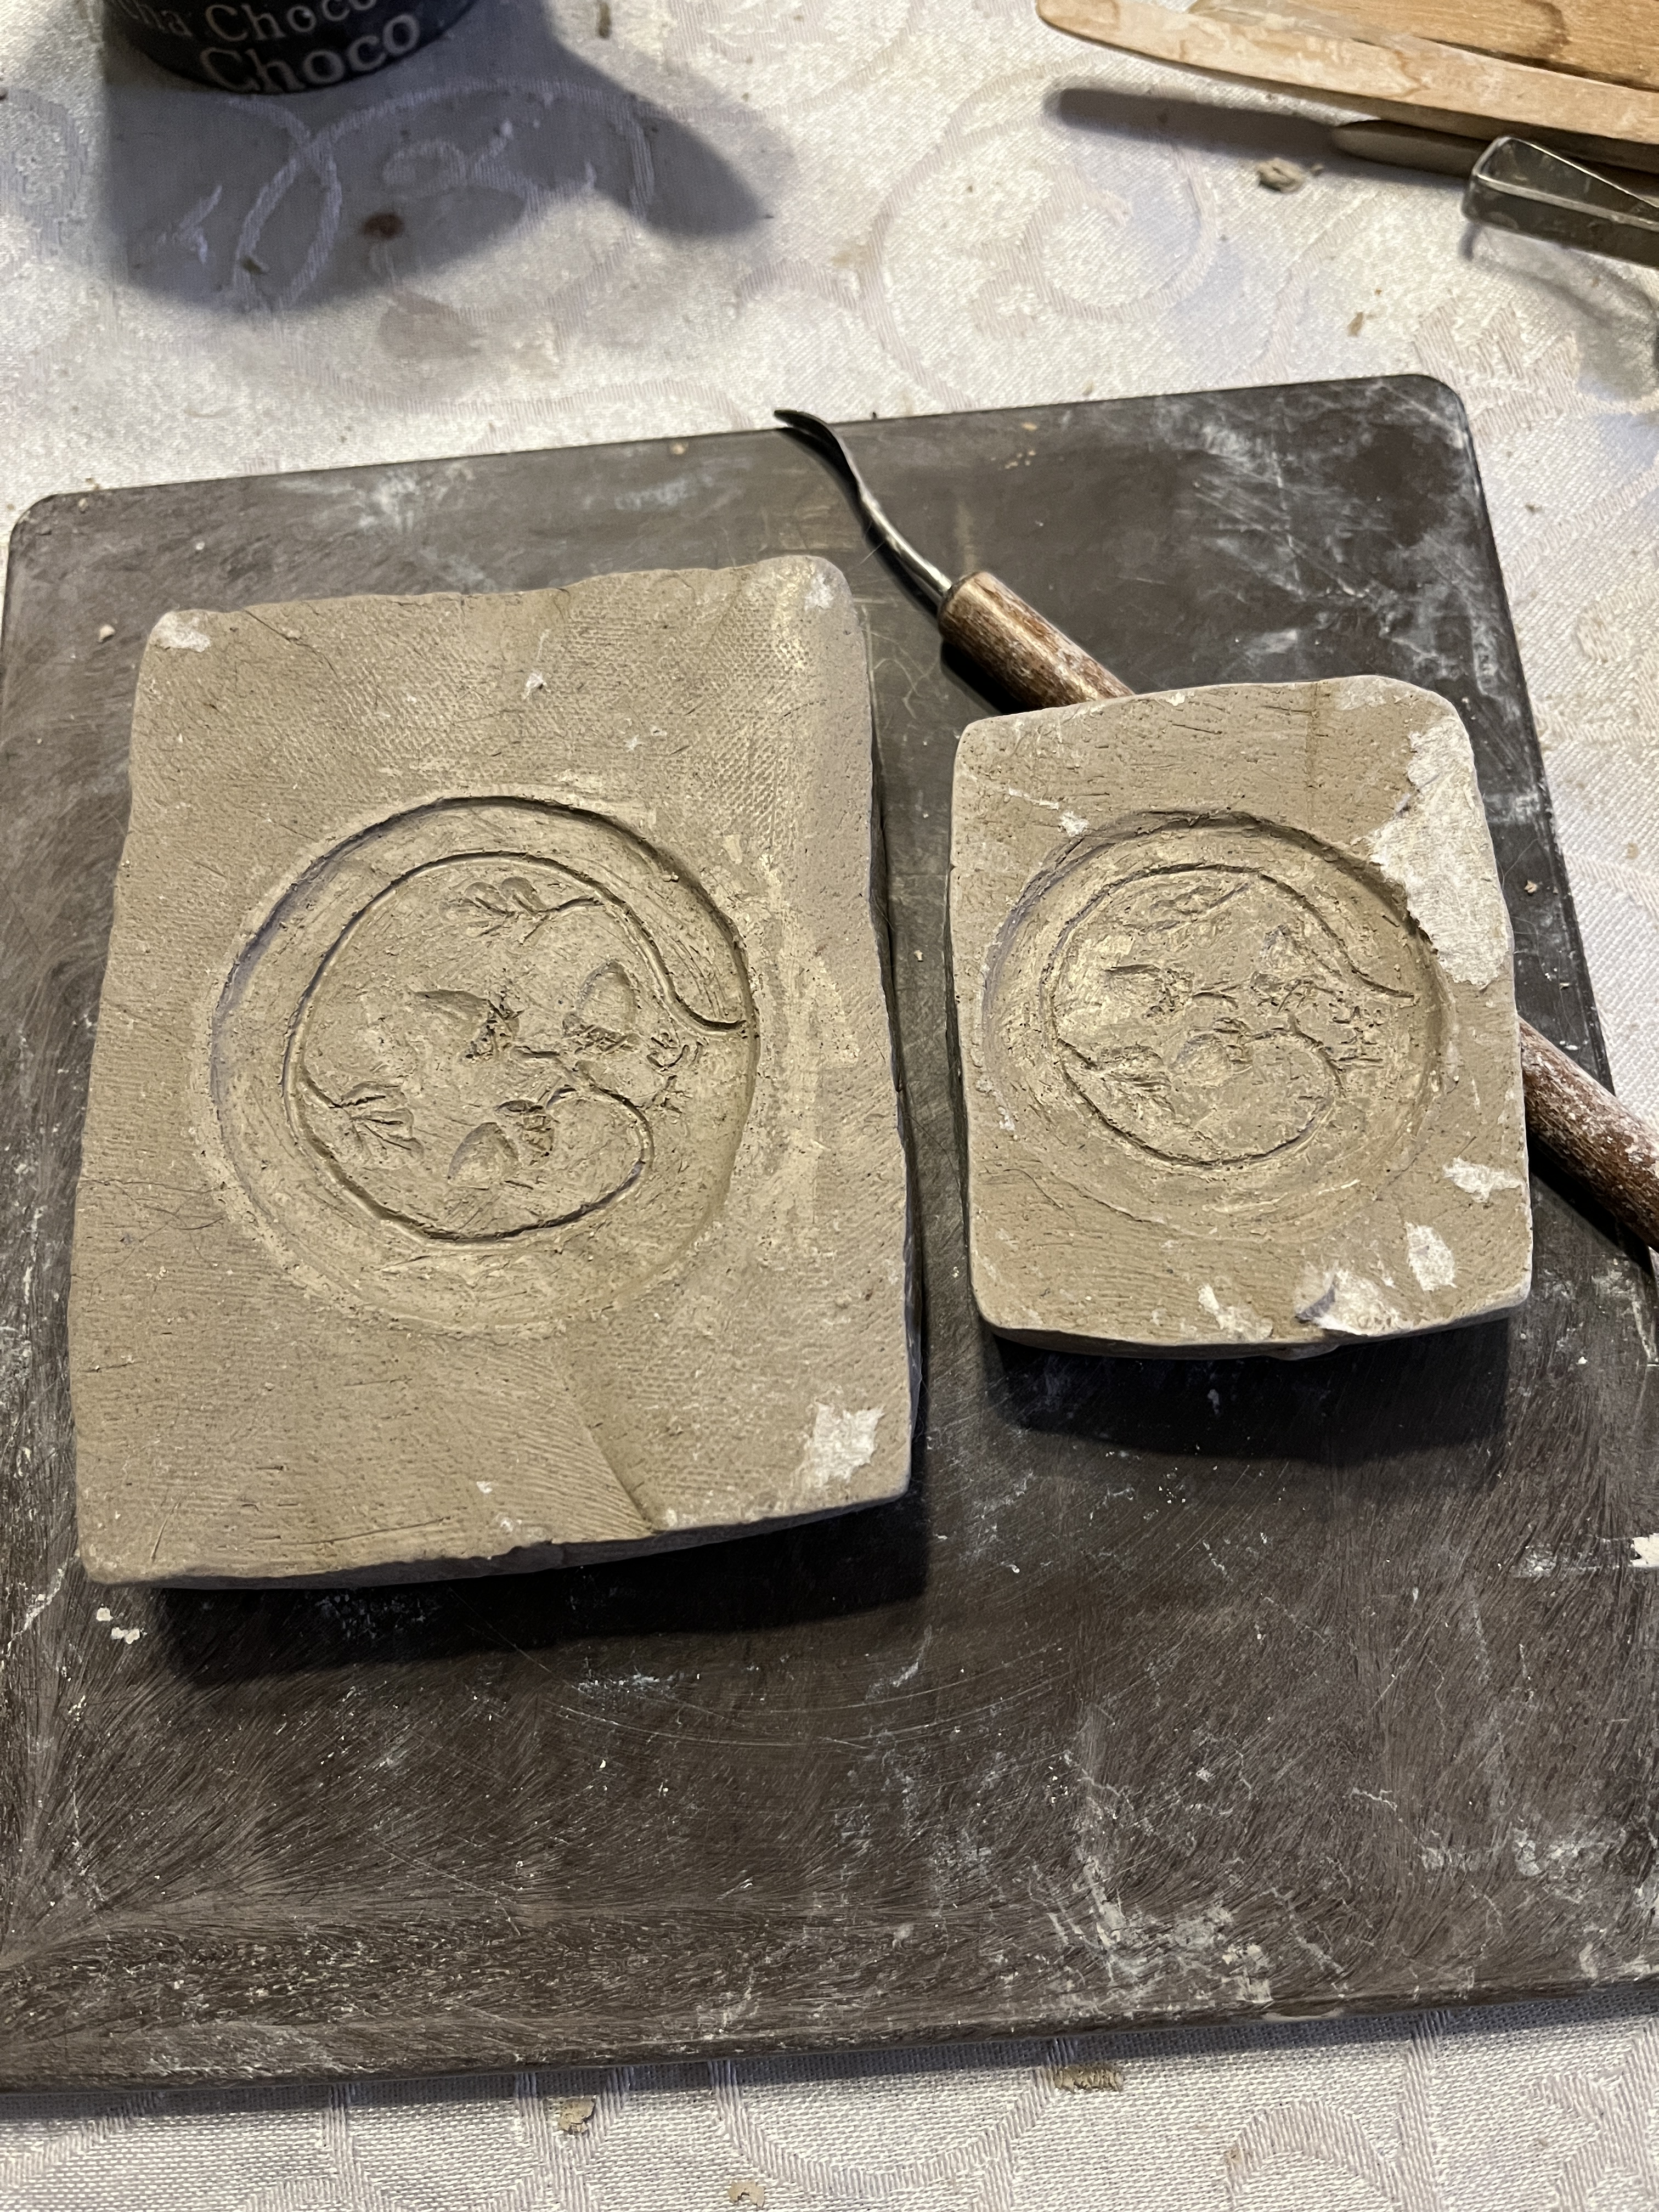
I know I titled this post for a Bellarmine face mold but other things can go on those jugs as well, so, in the spirit of anything worth doing is worth over-doing AND waste not want not, use the back to make a roundel for the belly of the vessel and another blank for stuff on both sides. Suddenly 1 project turns into 8 molds. So the first is a roundel to match the oak and acorn molds I made years ago.
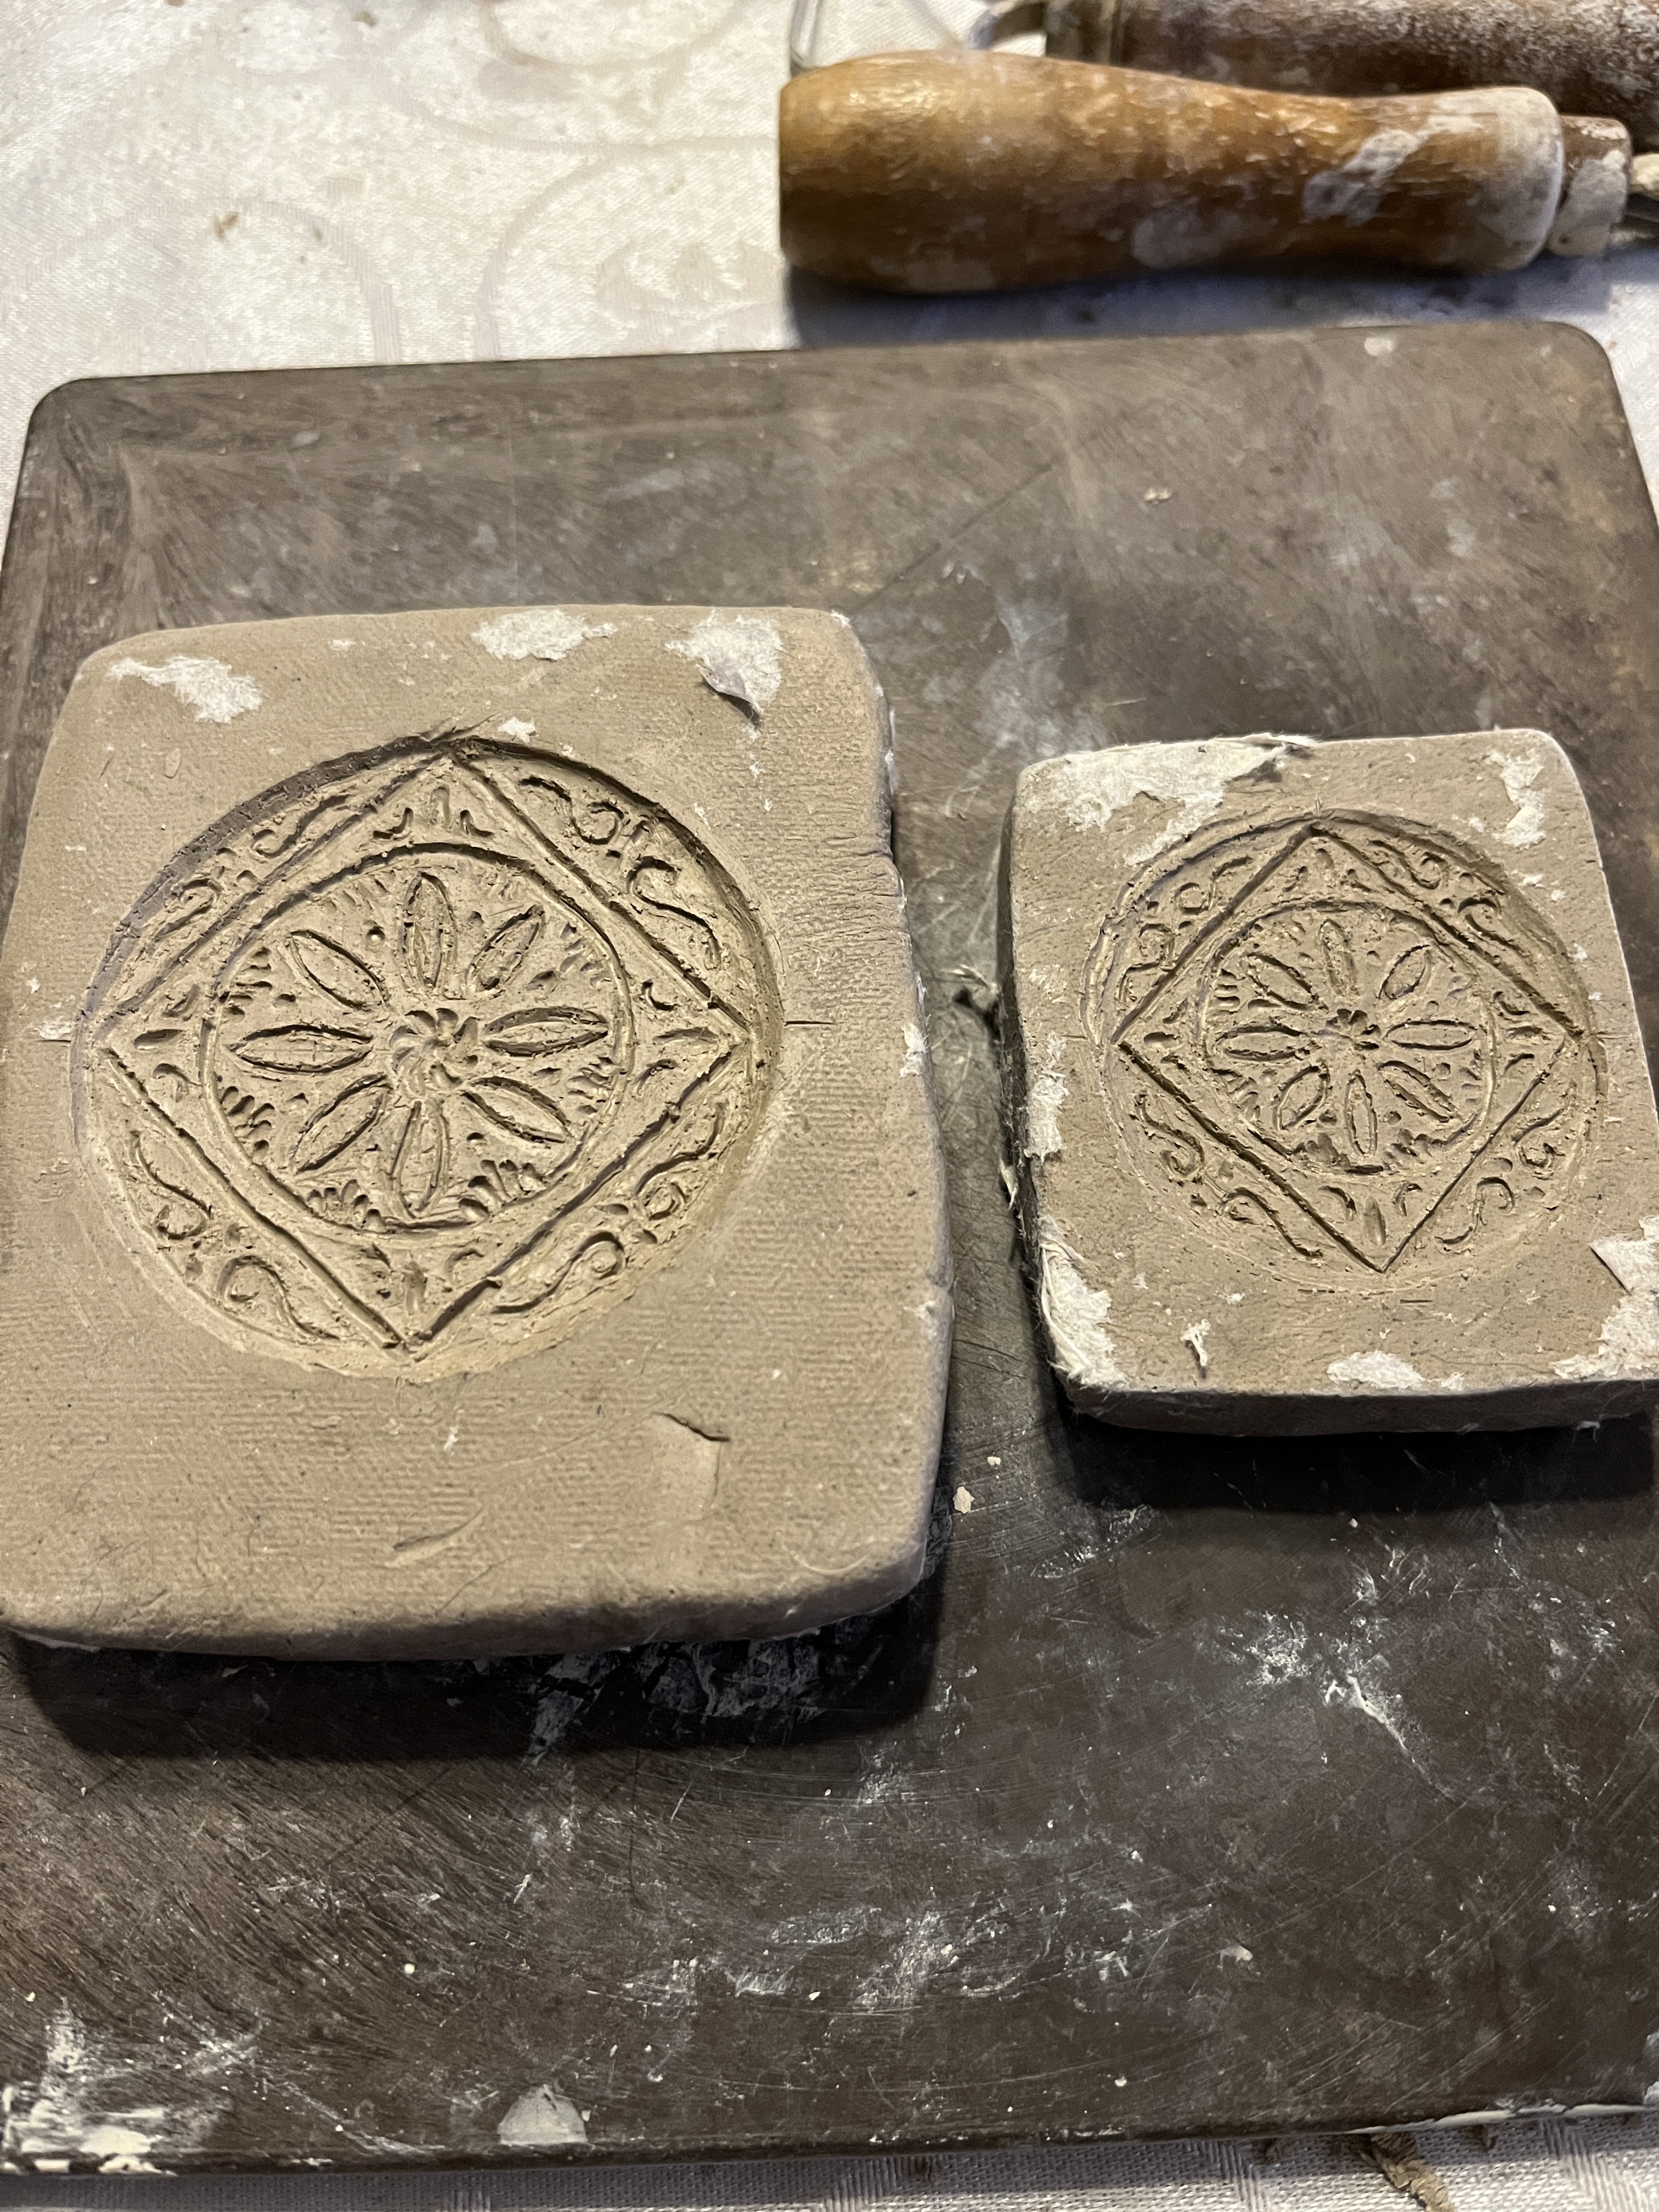
Then I did a geometric set.
Then I realized that I have the design all the way to the edge, so I added a sacrificial edge for a bit of clay to blend in without losing any of the design.
Now for the last mold with a Fruity/floral design. This time the sacrificial edge wasn’t an afterthought.
Now to cover, dry slowly and clean them up just a bit over the next few days. Less poking at any one time is better than ruining the mold with an over-eager stroke. Don’t worry about the paper towel sticking to it, that’ll burn off in the fire. You’ll want to dry these slowly for a couple weeks and maybe even finish them off in a really low over at about 175 before firing them. It’s be a real shame if they exploded in bisque because there was residual moisture in there.
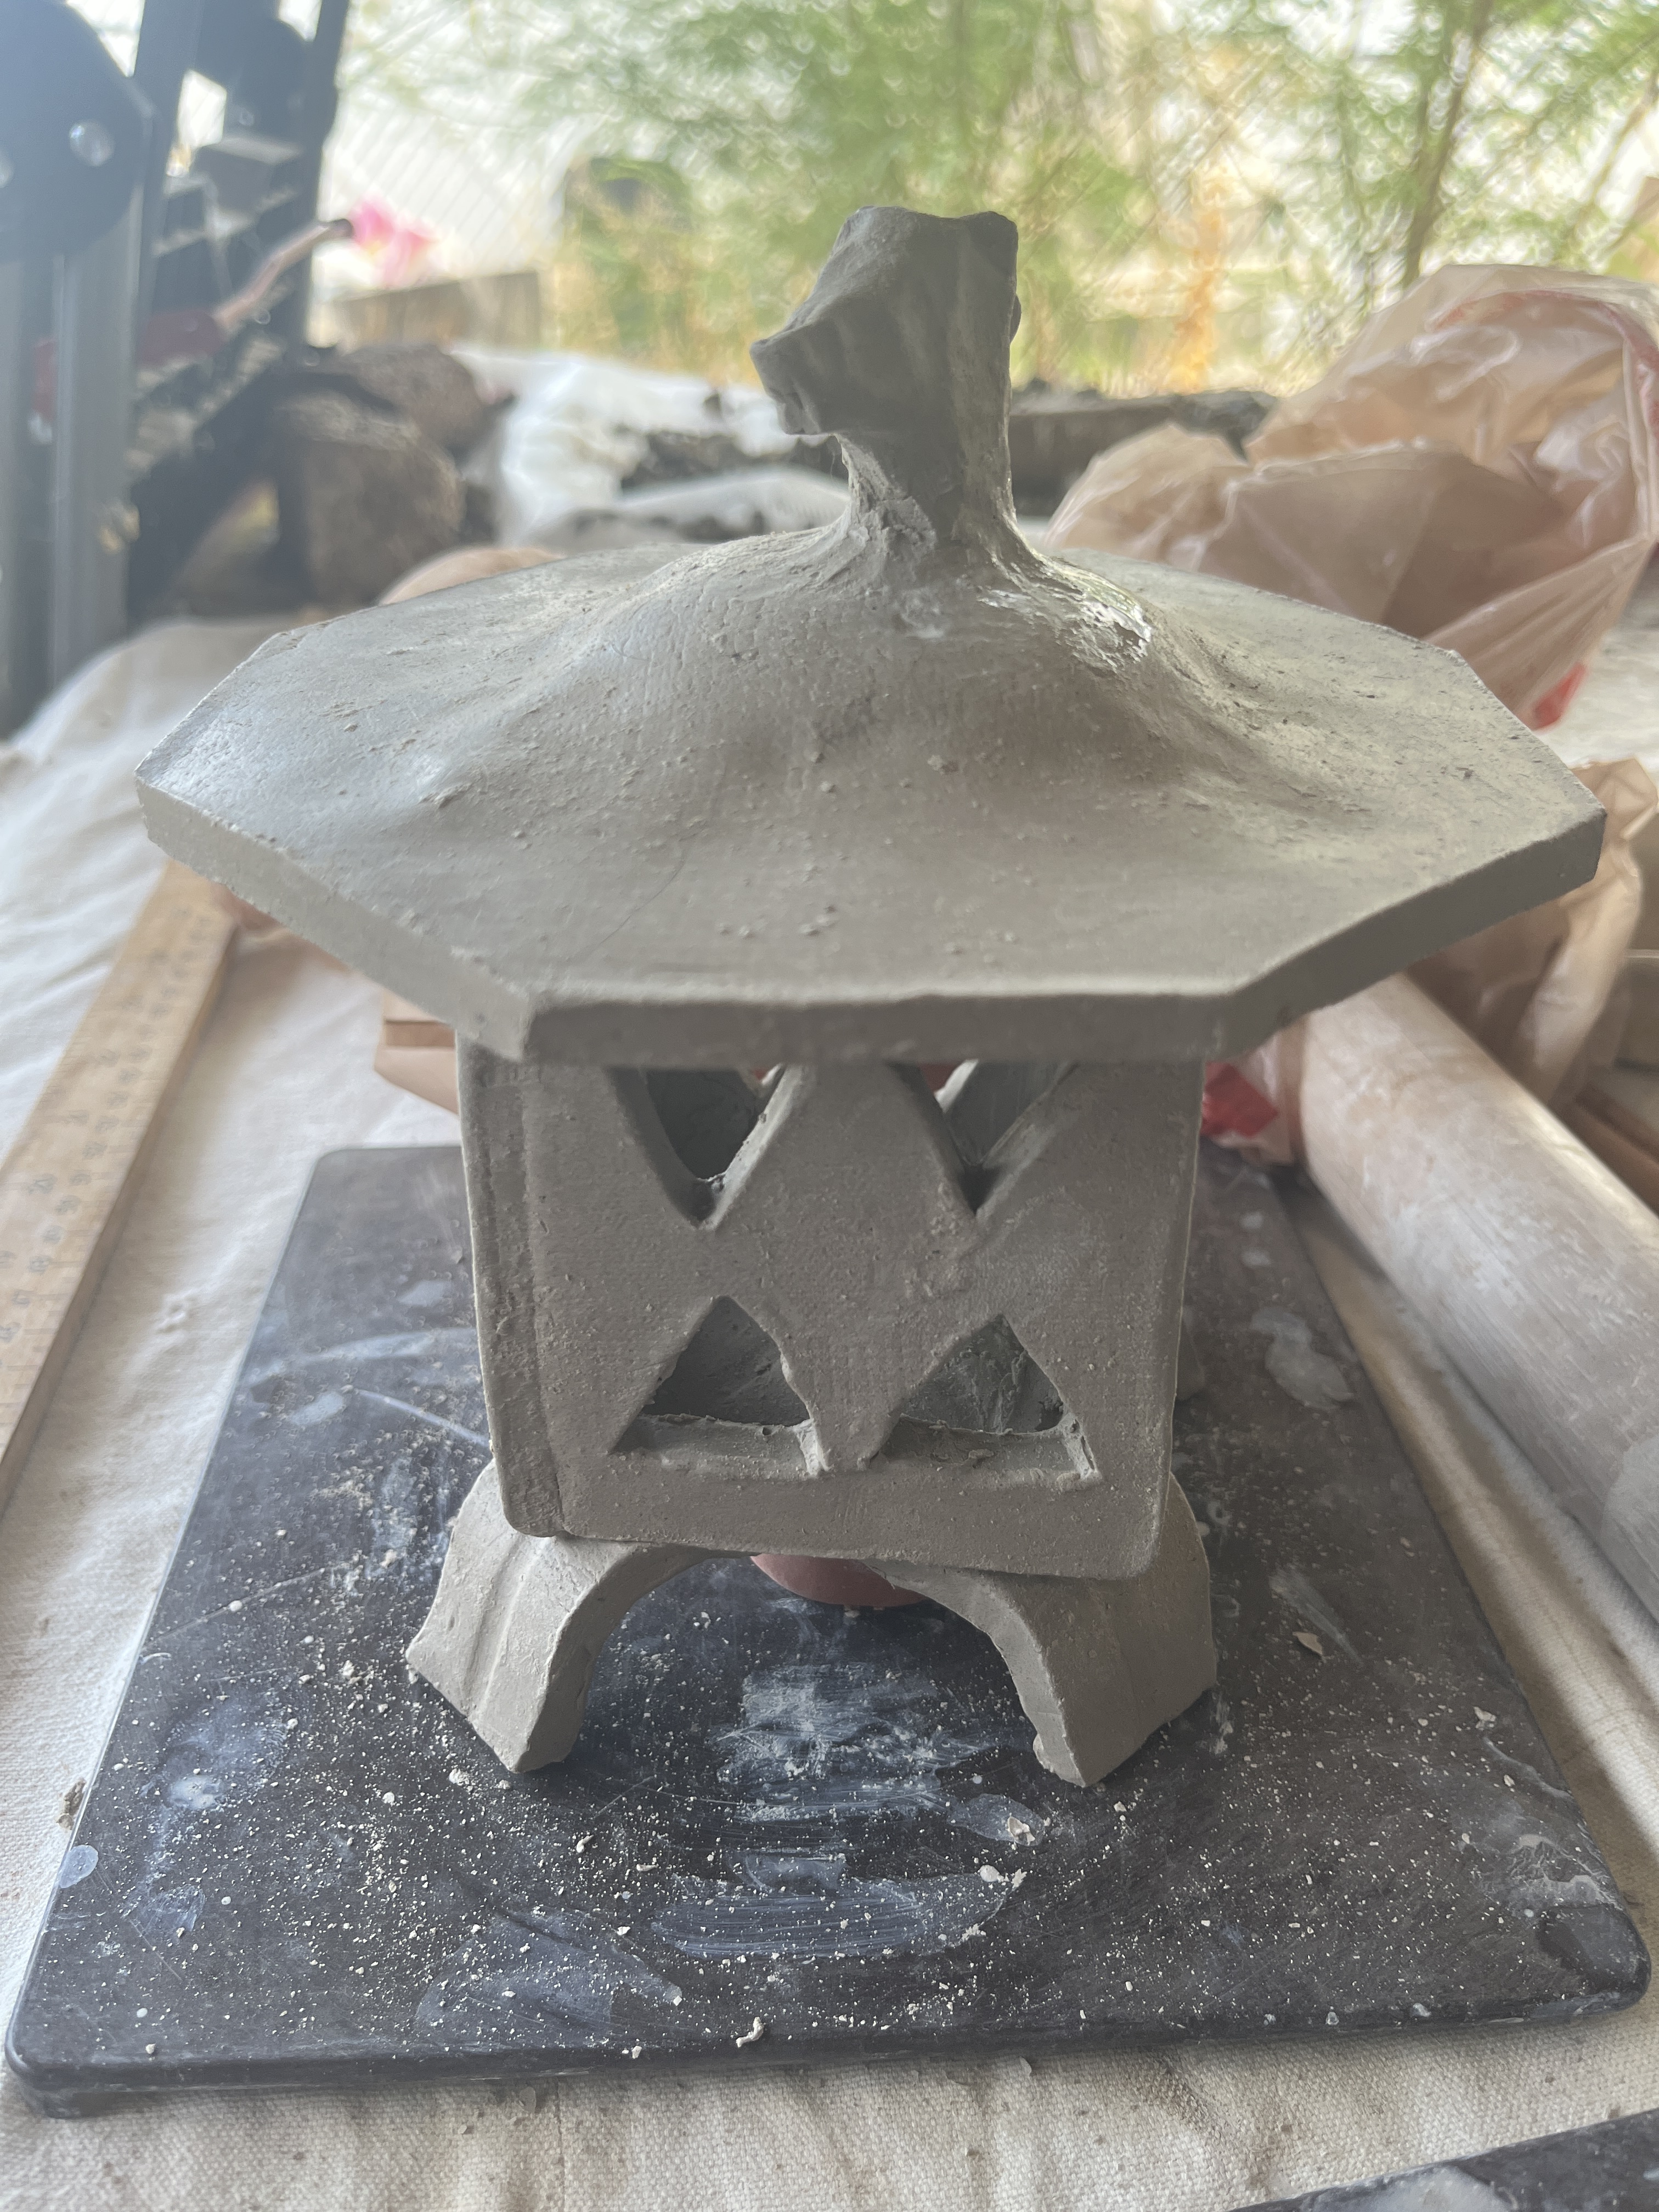
I’m making a Zen(ish) garden on the east side of my house where nothing grows anyway. I already have a focal art tree (long story), a stump seat and stump to put a teacup on, a block and stone seat with a hanging table opposite it (hanging from the art tree). I put sand in, 3 different types. The cats least like the industrial sand, so I’ll cover it all with more of that after raking out kitty pops. I also need to make a Torii gate, clay art tiles to hang, Haniwa figurines and other artworks so it’ll never be “done”, just an ongoing work in progress for me and neighbours to quietly enjoy. Yes, neighbours have already started enjoying it. Today I made the first of several garden lanterns for it.
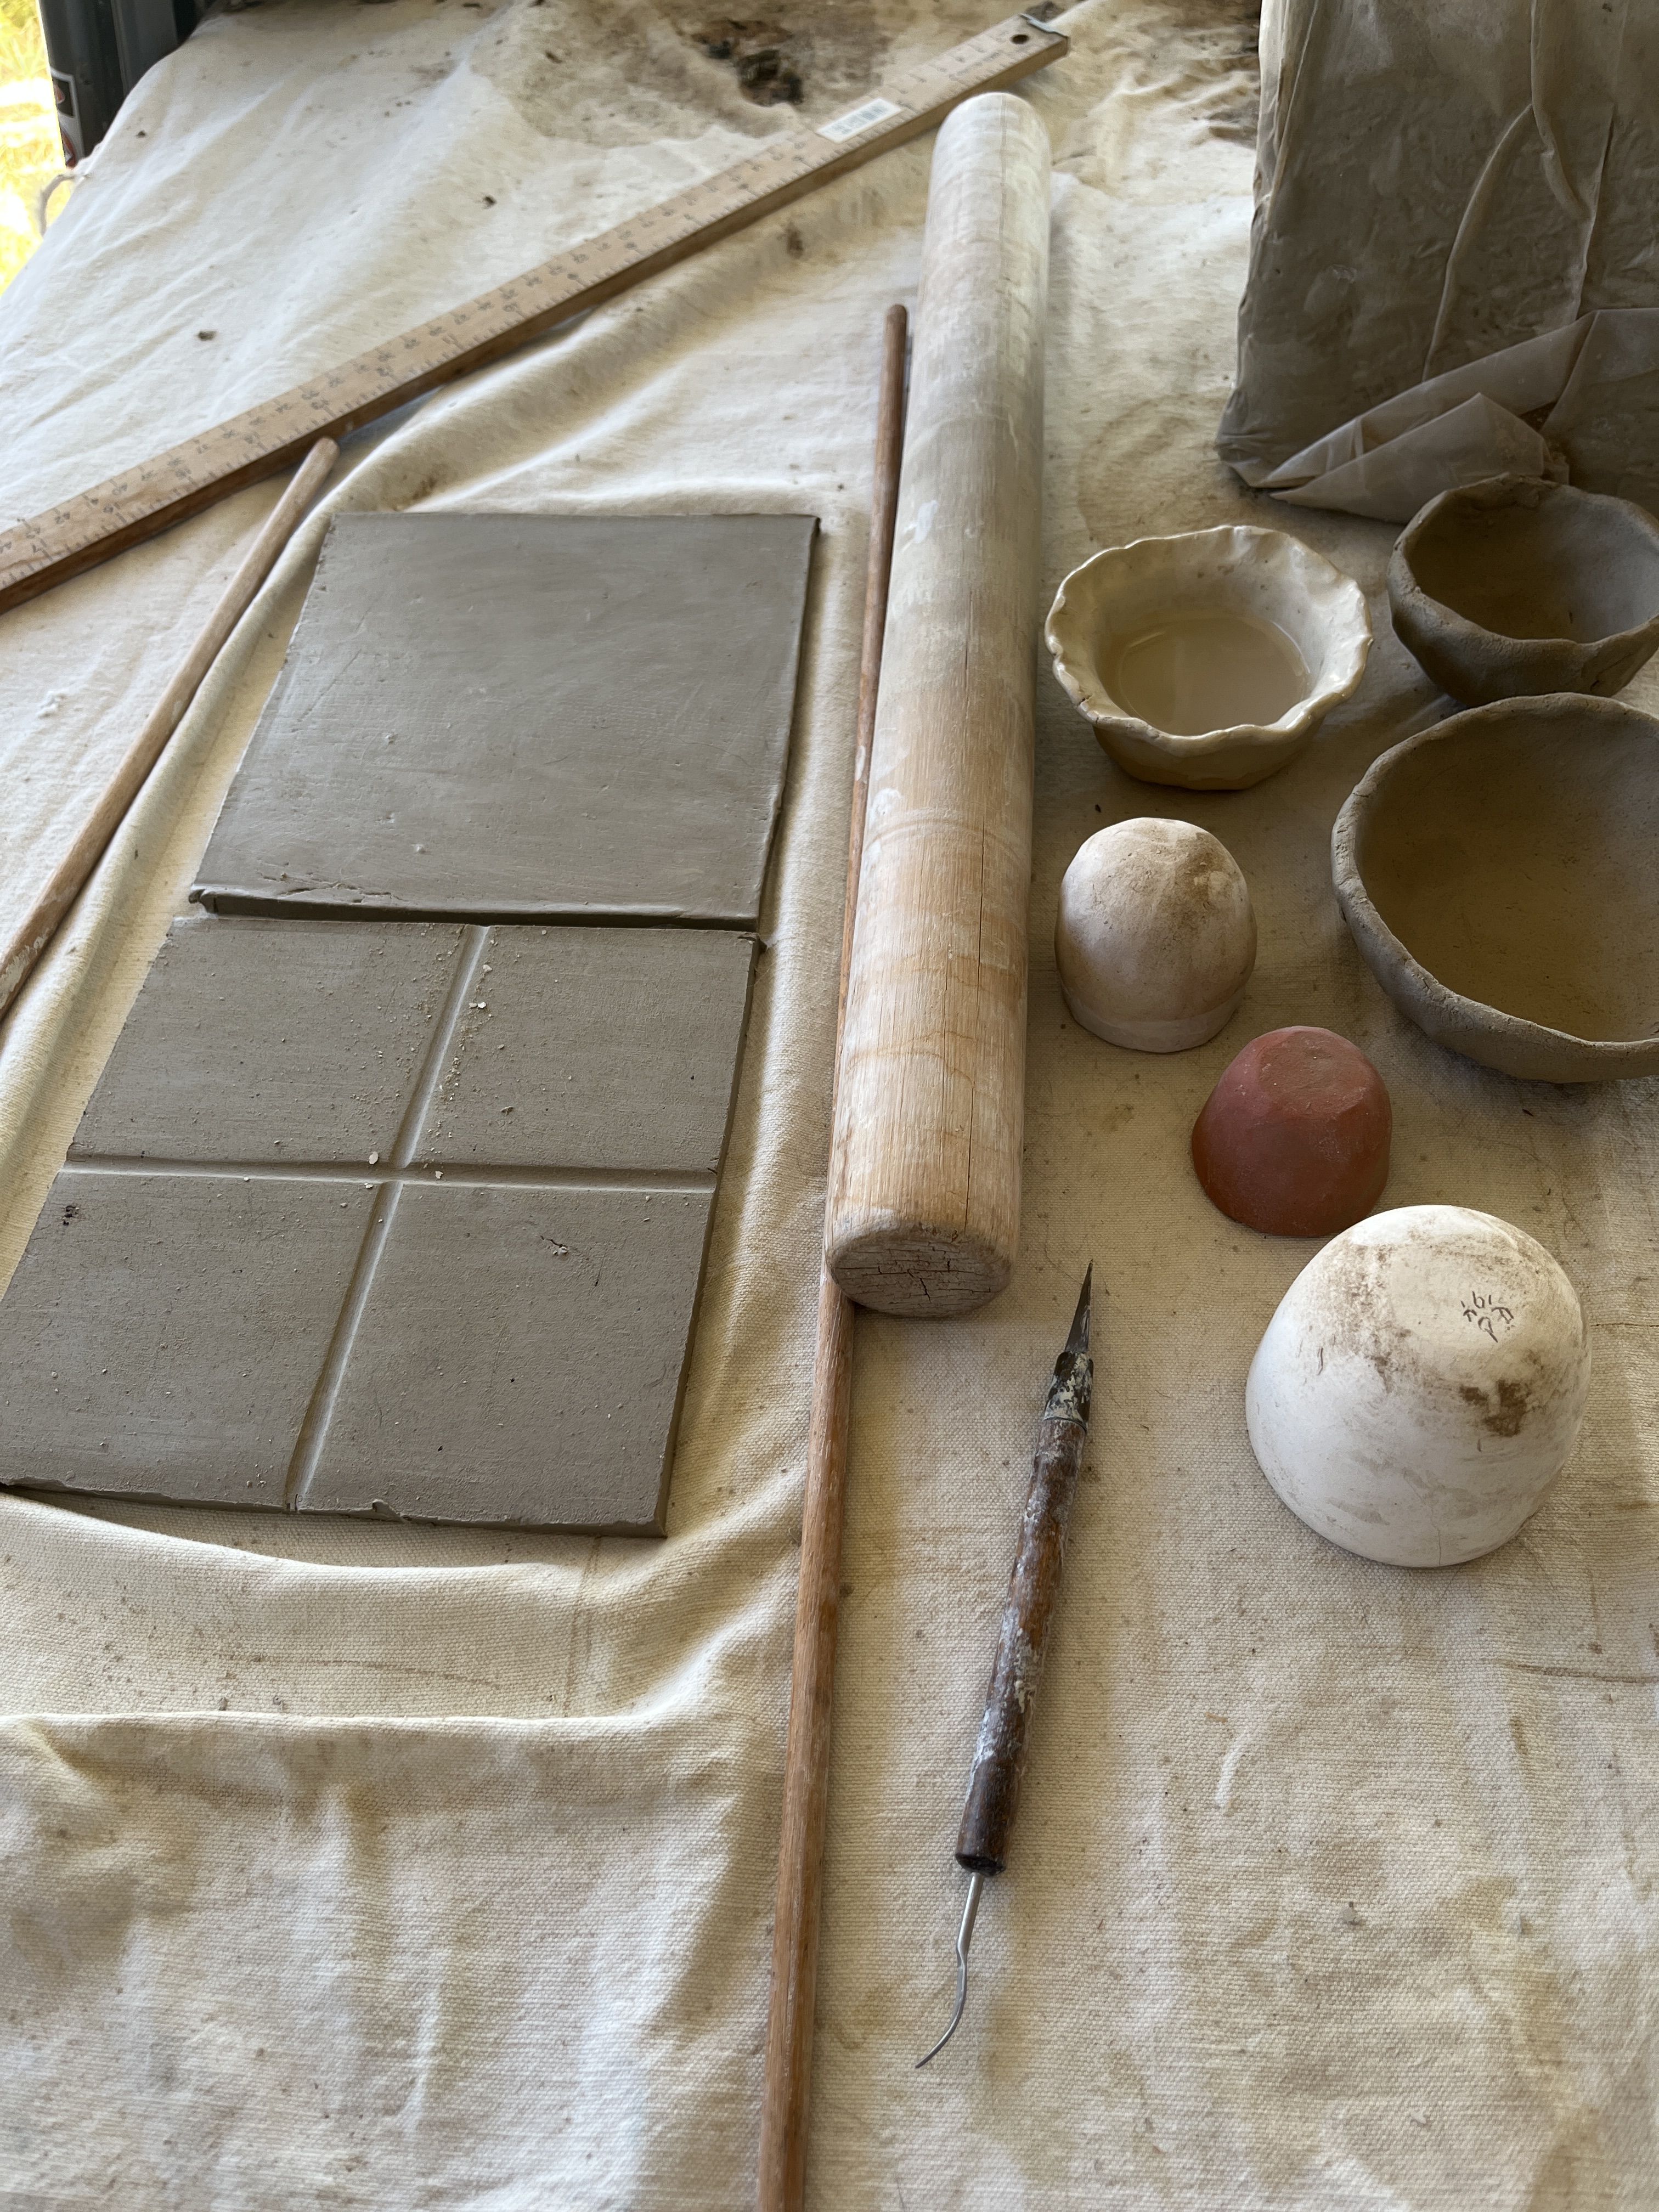
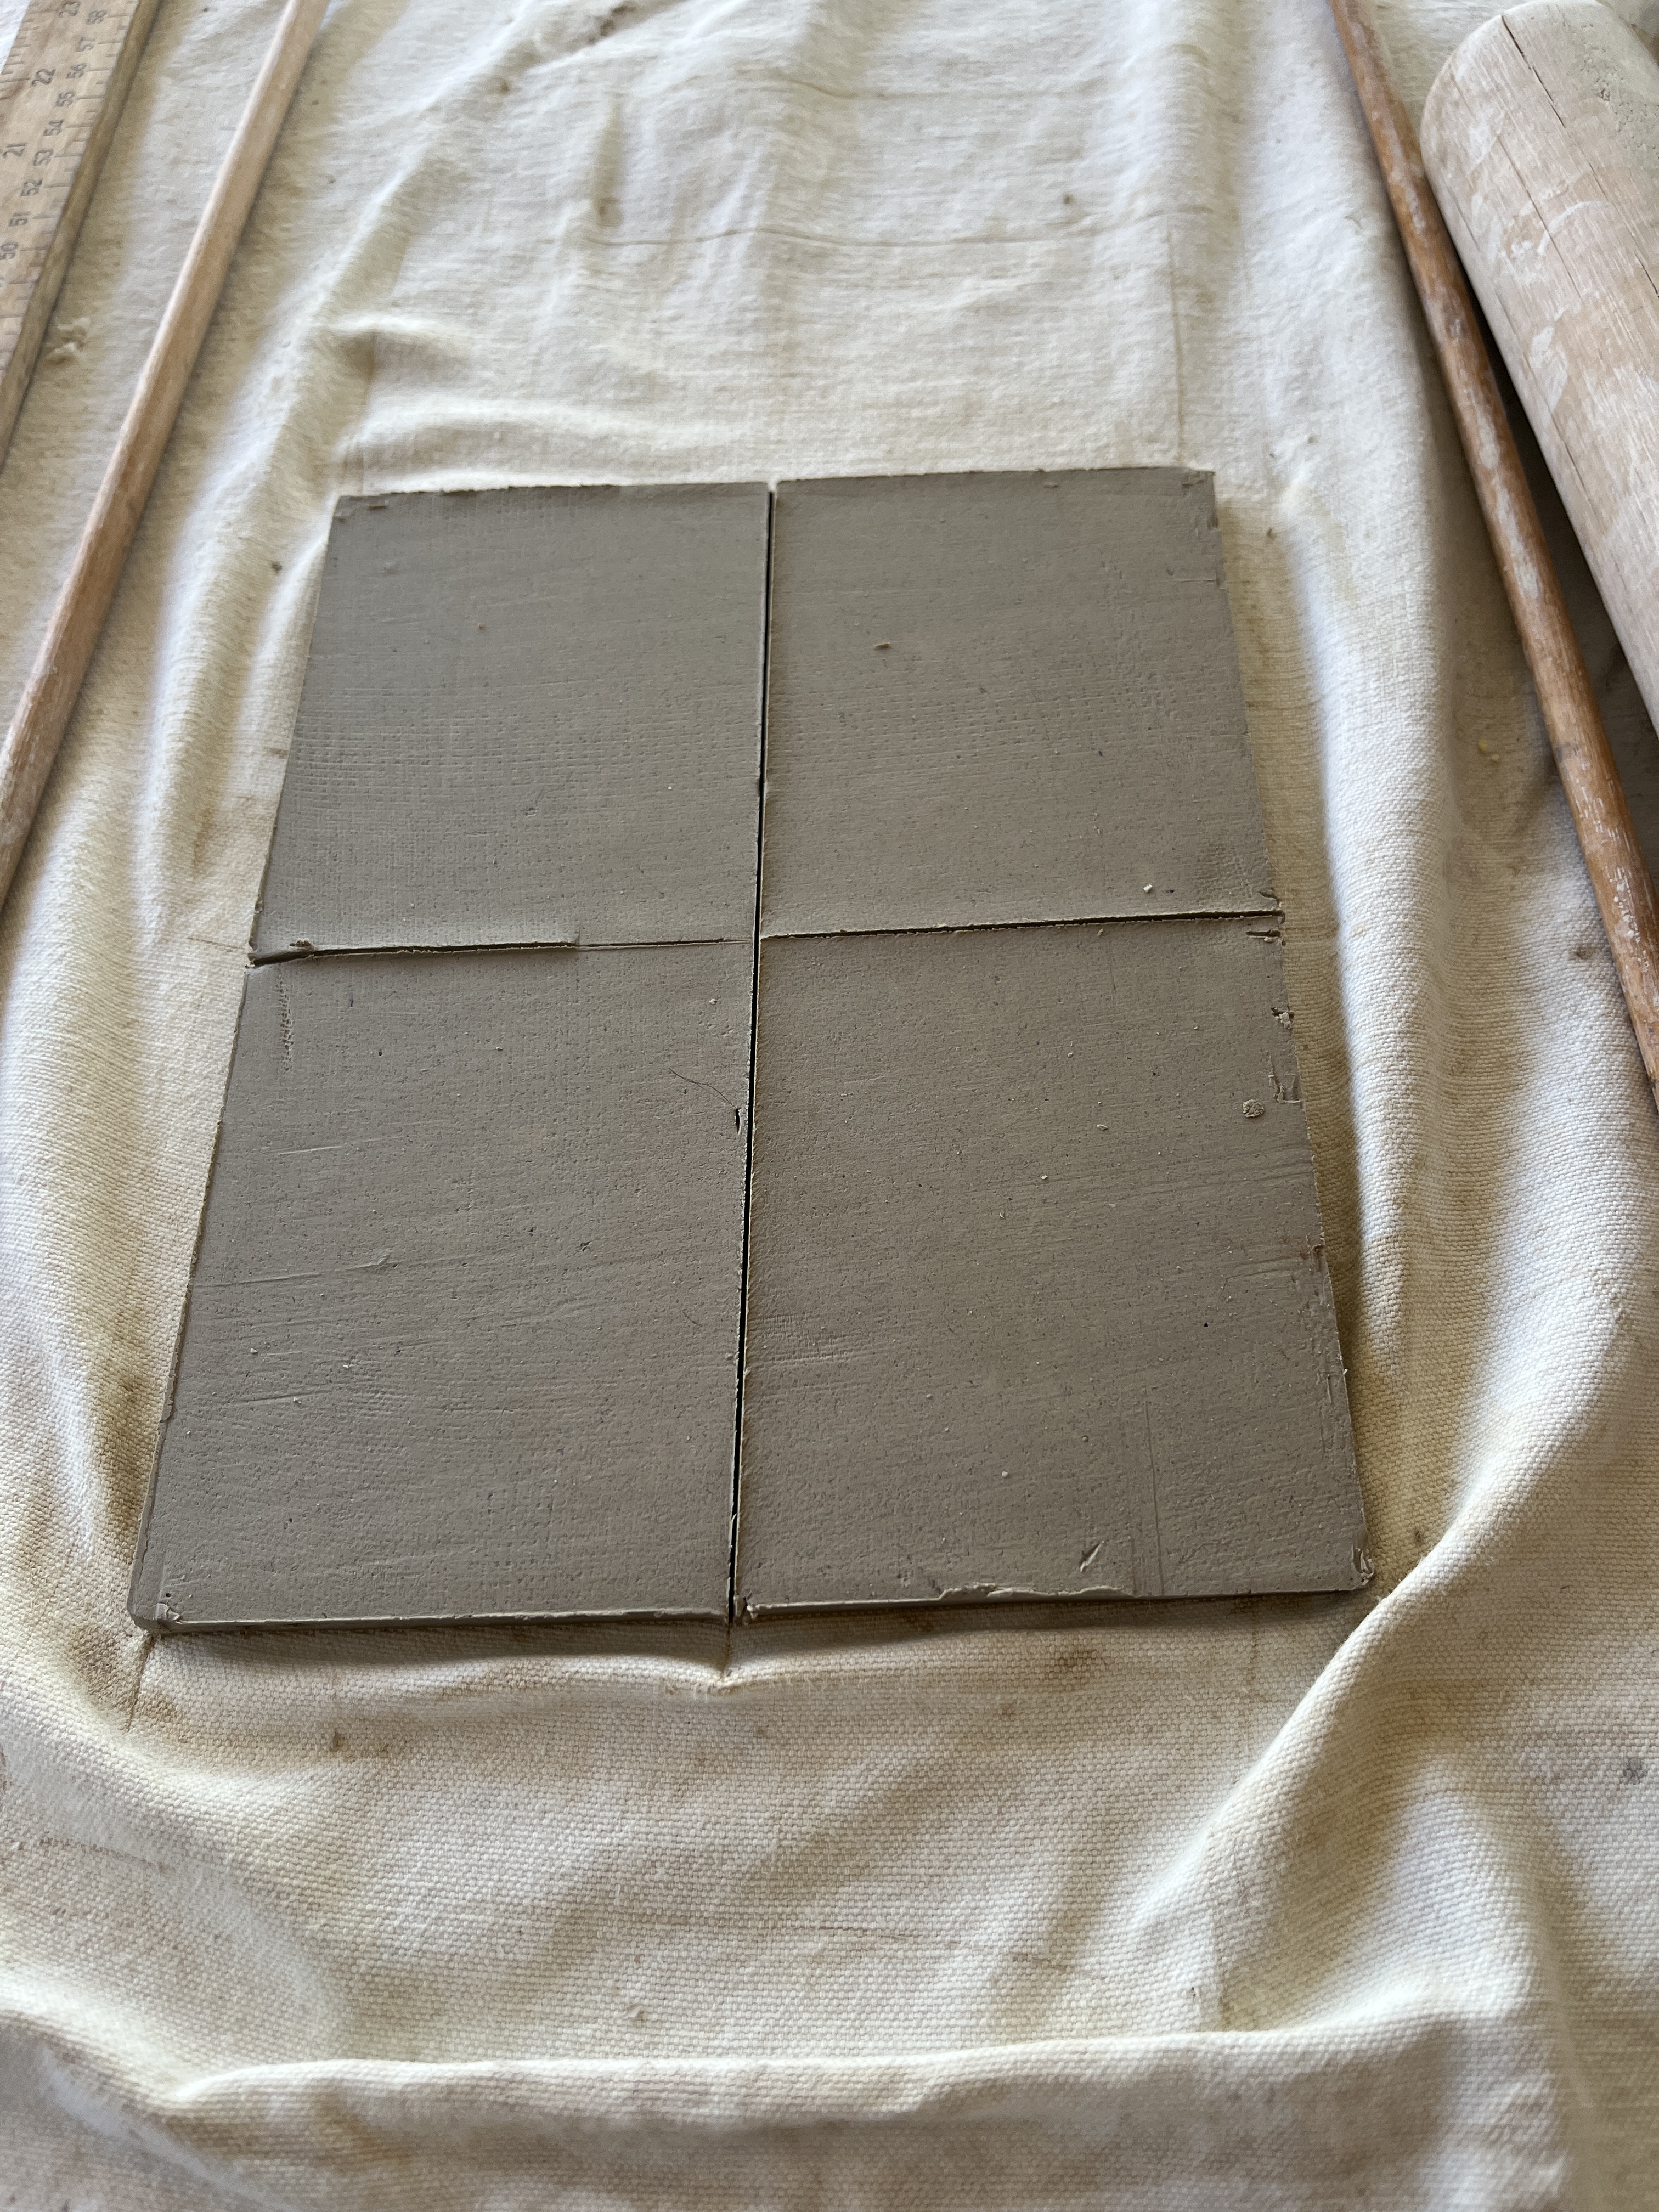
I have a block of clay that’s too stiff to use for throwing but I can cut off slabs and roll them out without too much trouble. I rolled it out, cut it into a rectangle and cut that into 2 squares, one for the top and one for the bottom. I used the depth-control dowels to make marks in the bottom.
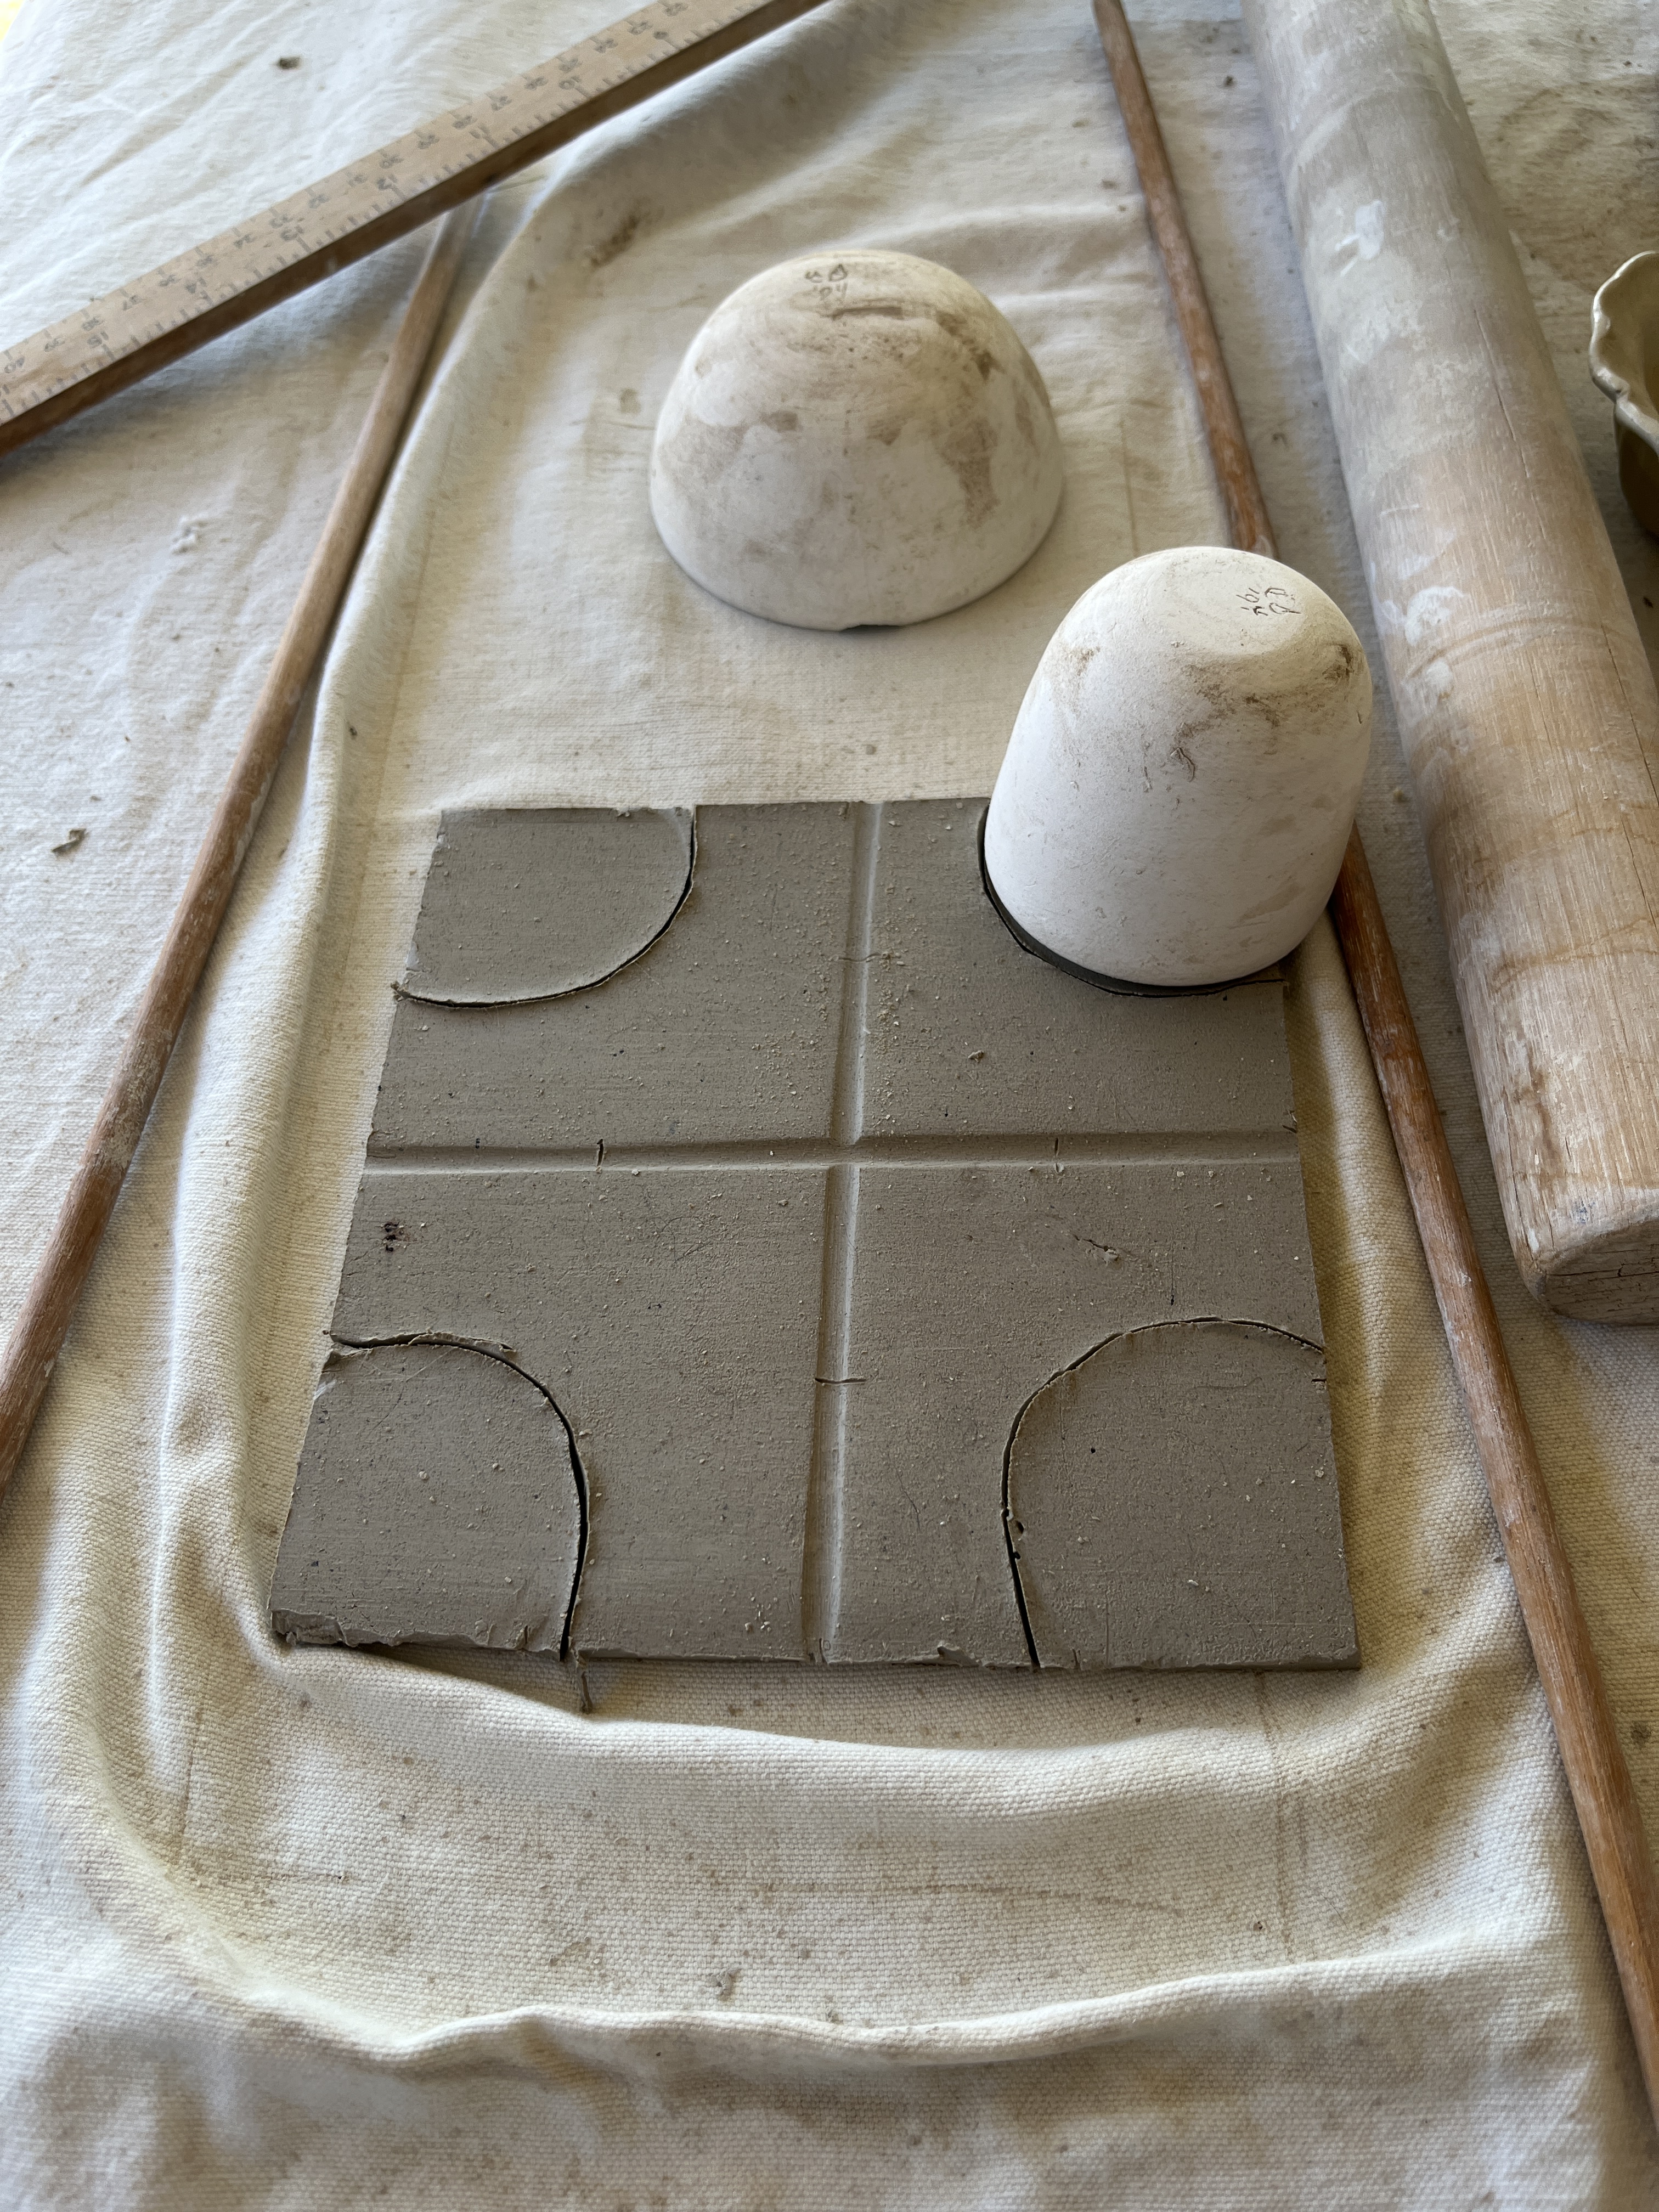
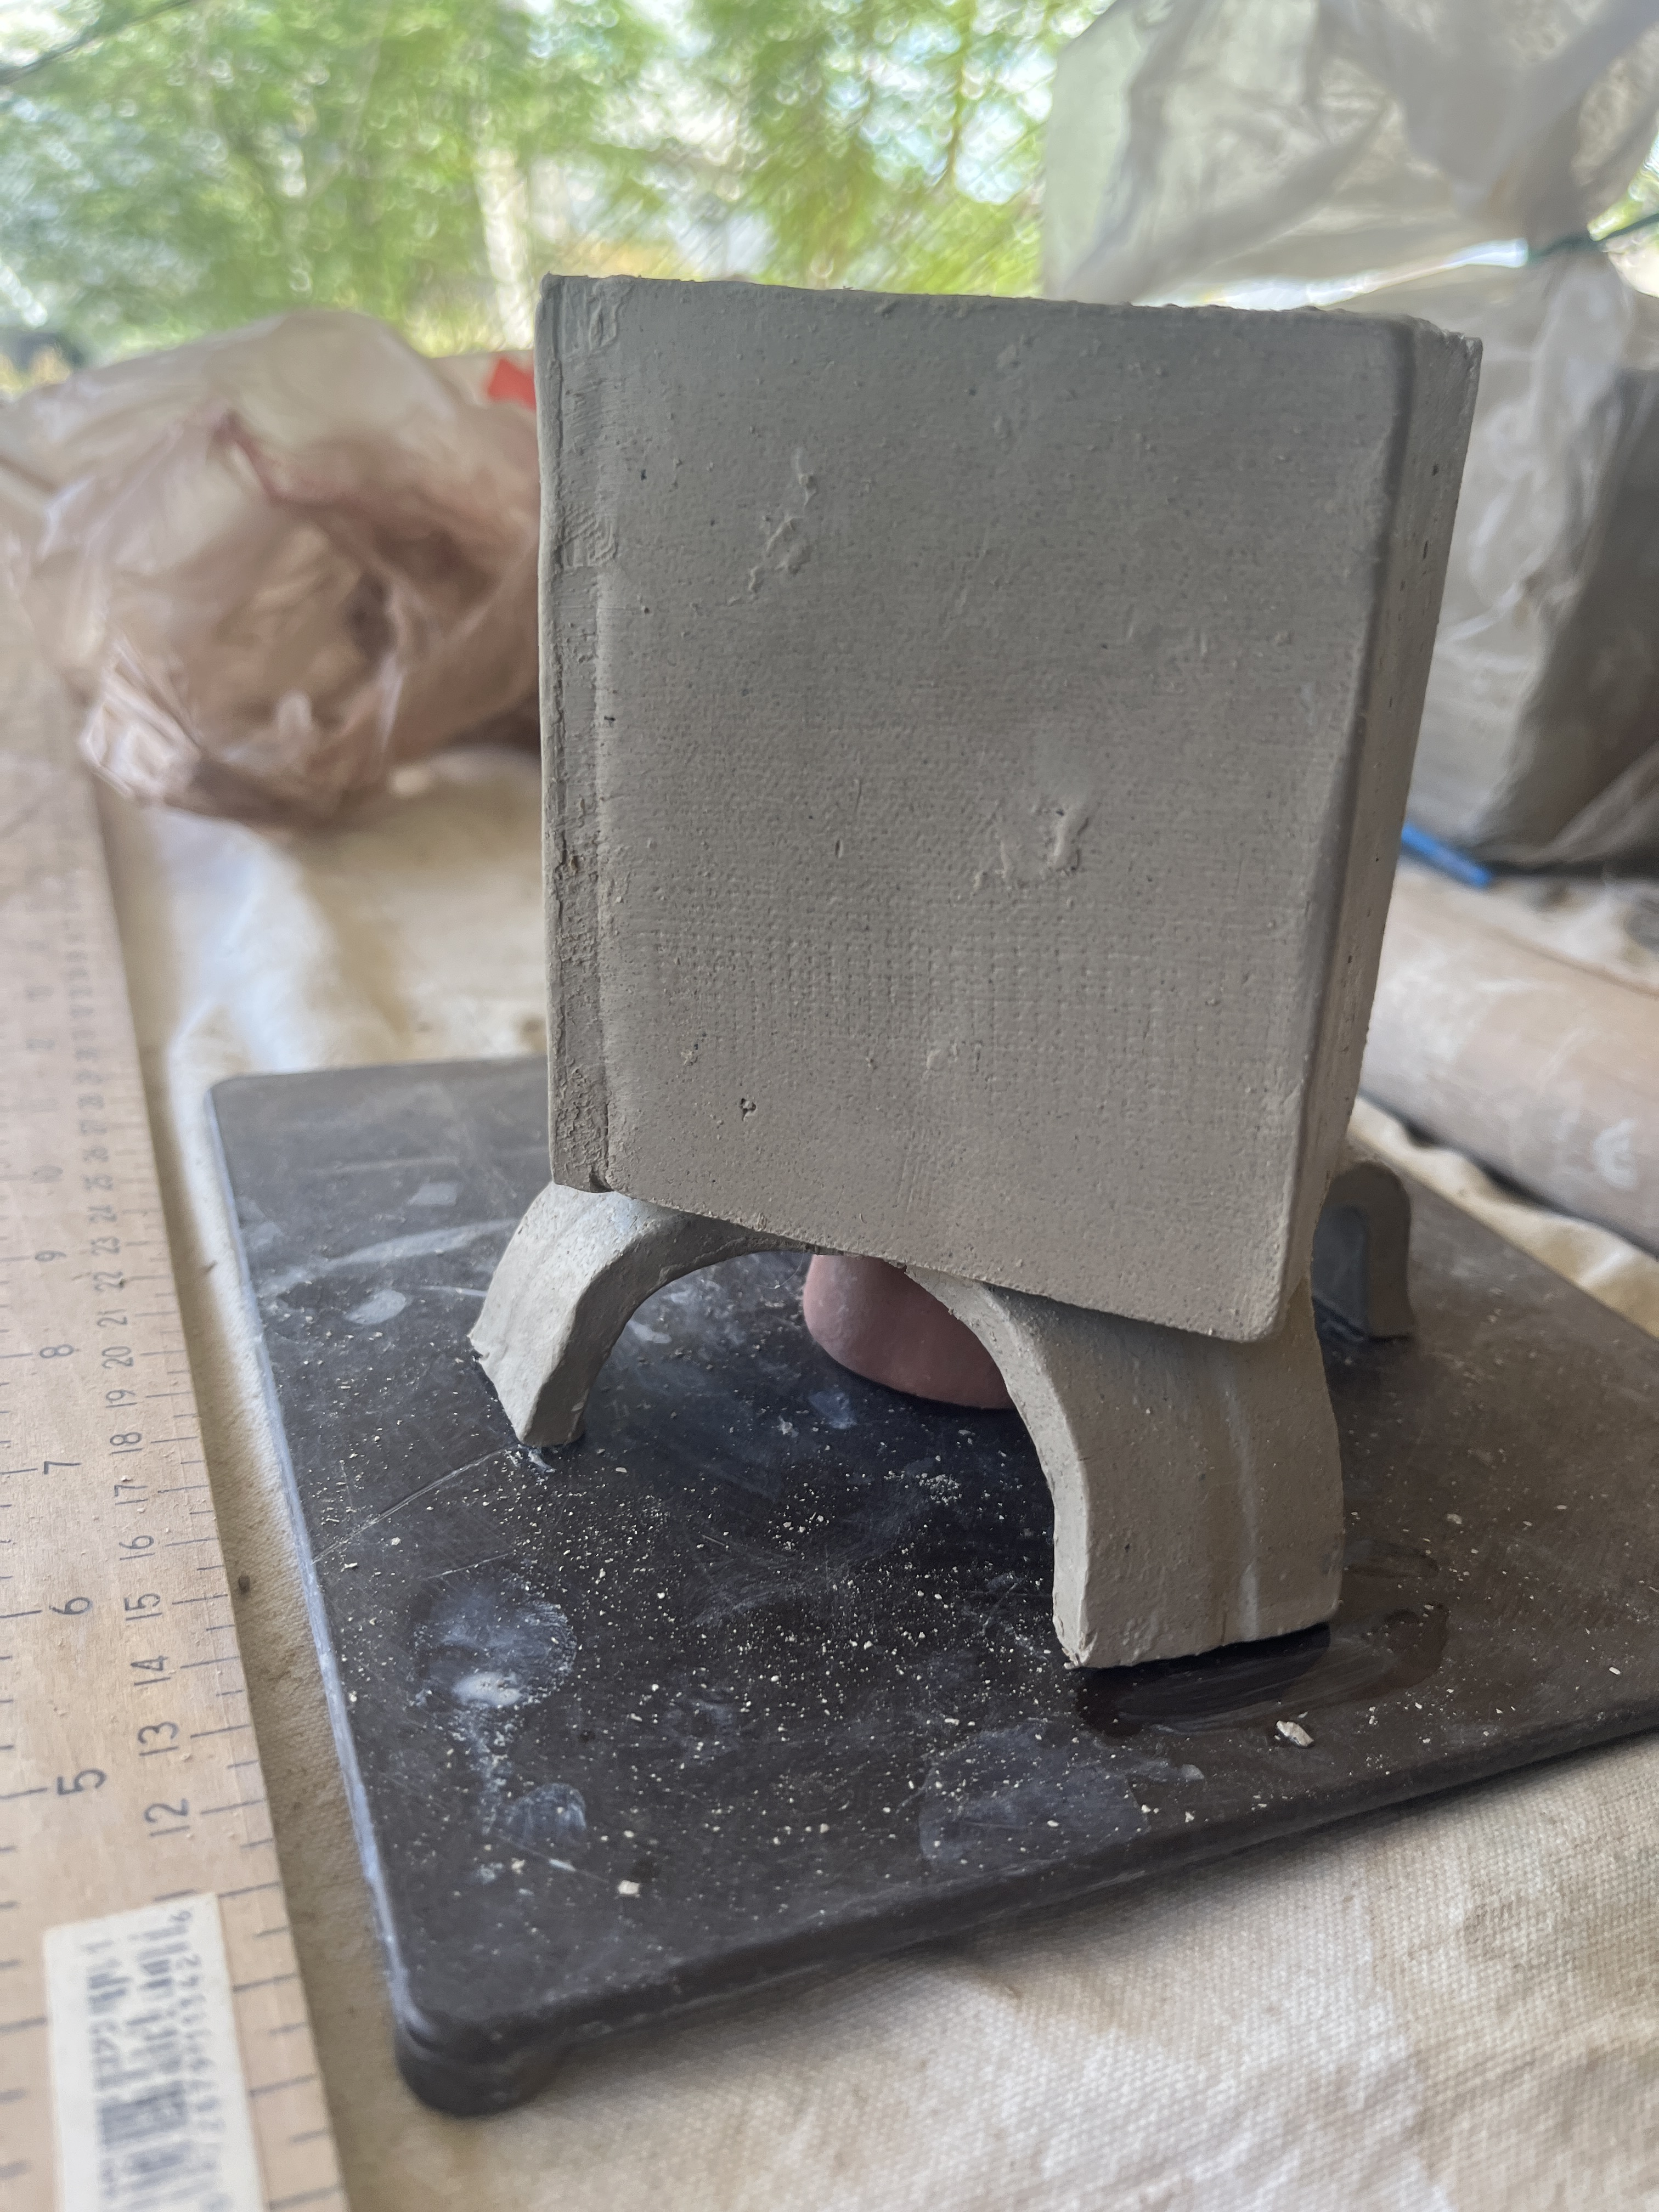
I set the top aside, whetting both sides of it, and used a hump mold to guide cutting out the legs.
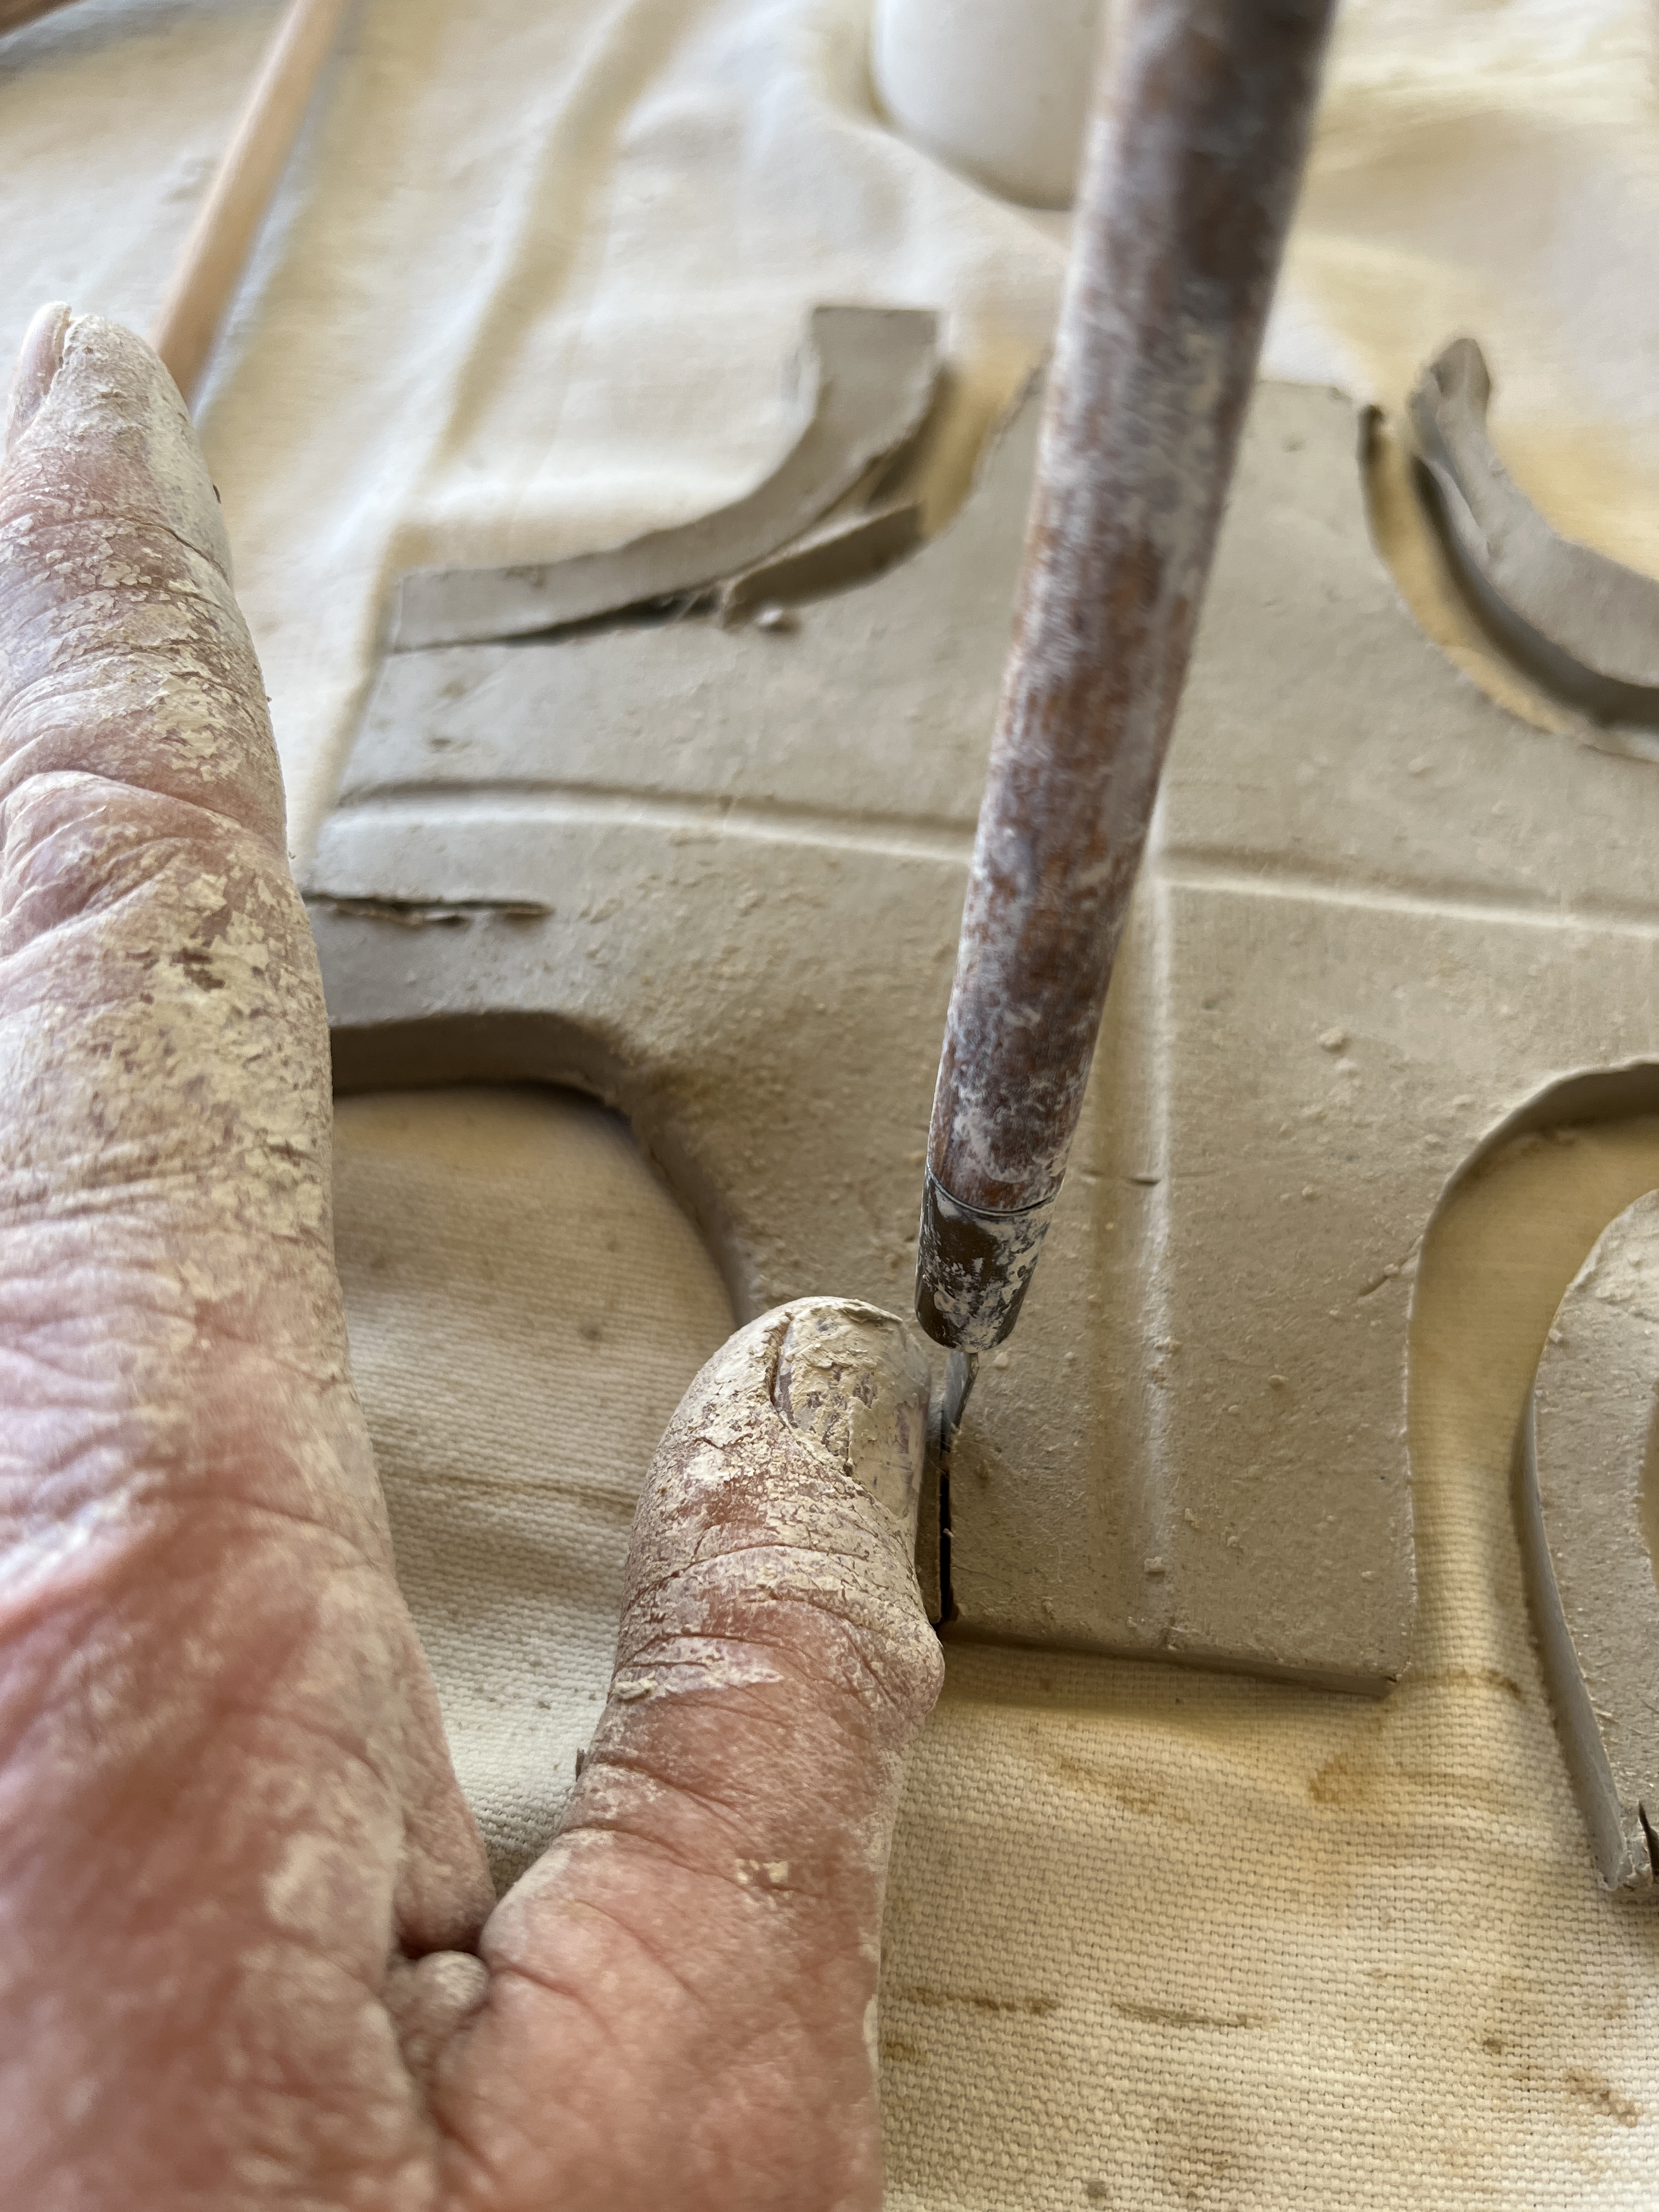
Then I decided the legs were too fat and used my thumb to measure cutting again. This is, of course, a very precisely measured project…making nit up as I go along.
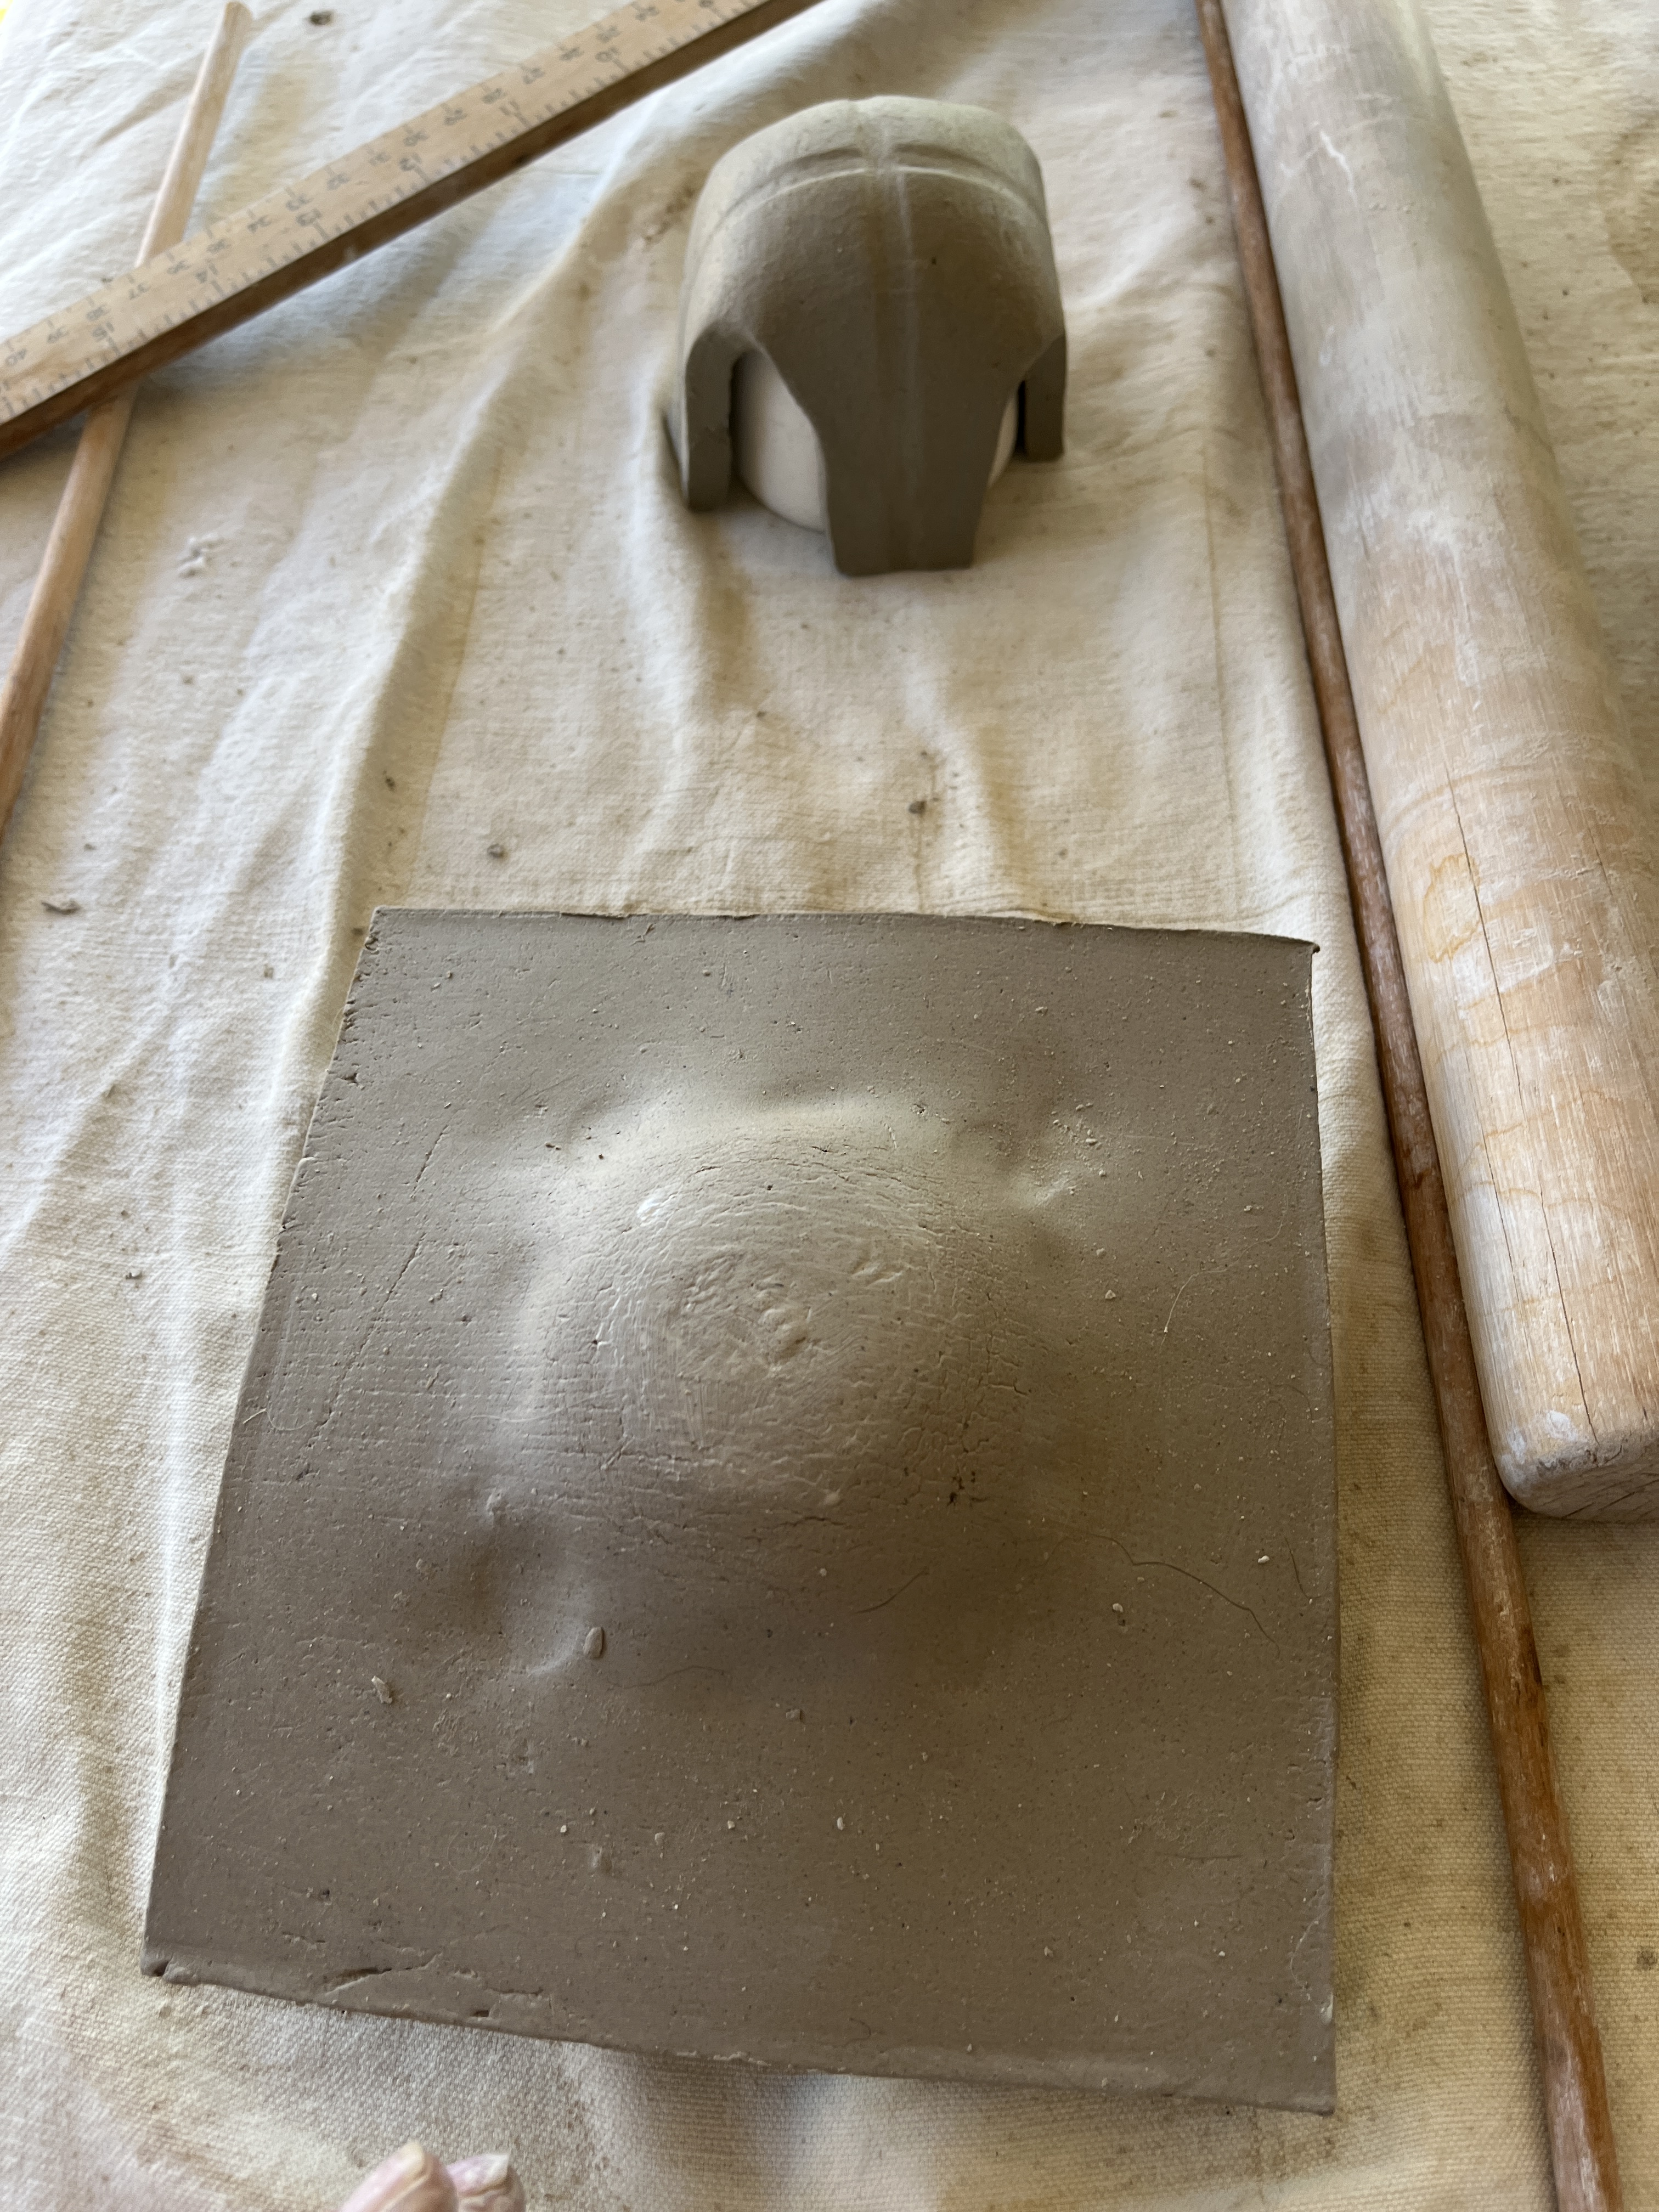
Then I whetted both sides of the bottom and draped it over the hump mold to make legs.
Next for the top. I used a different slump mold to drape it and make a bit of a hump on the roof.
I pressed down gently with 2 fingers on each side, square-wise, then used the sides of my hands to fine-tune it.
When I started to make a knob for the top out of a scrap of clay, on a whim it turned into a dragon head. I modeled it then joined it on top.
Now time to set them aside under cover til I get the body of the house made. Roll out more clay, cut slightly rectangular sides of equal size.
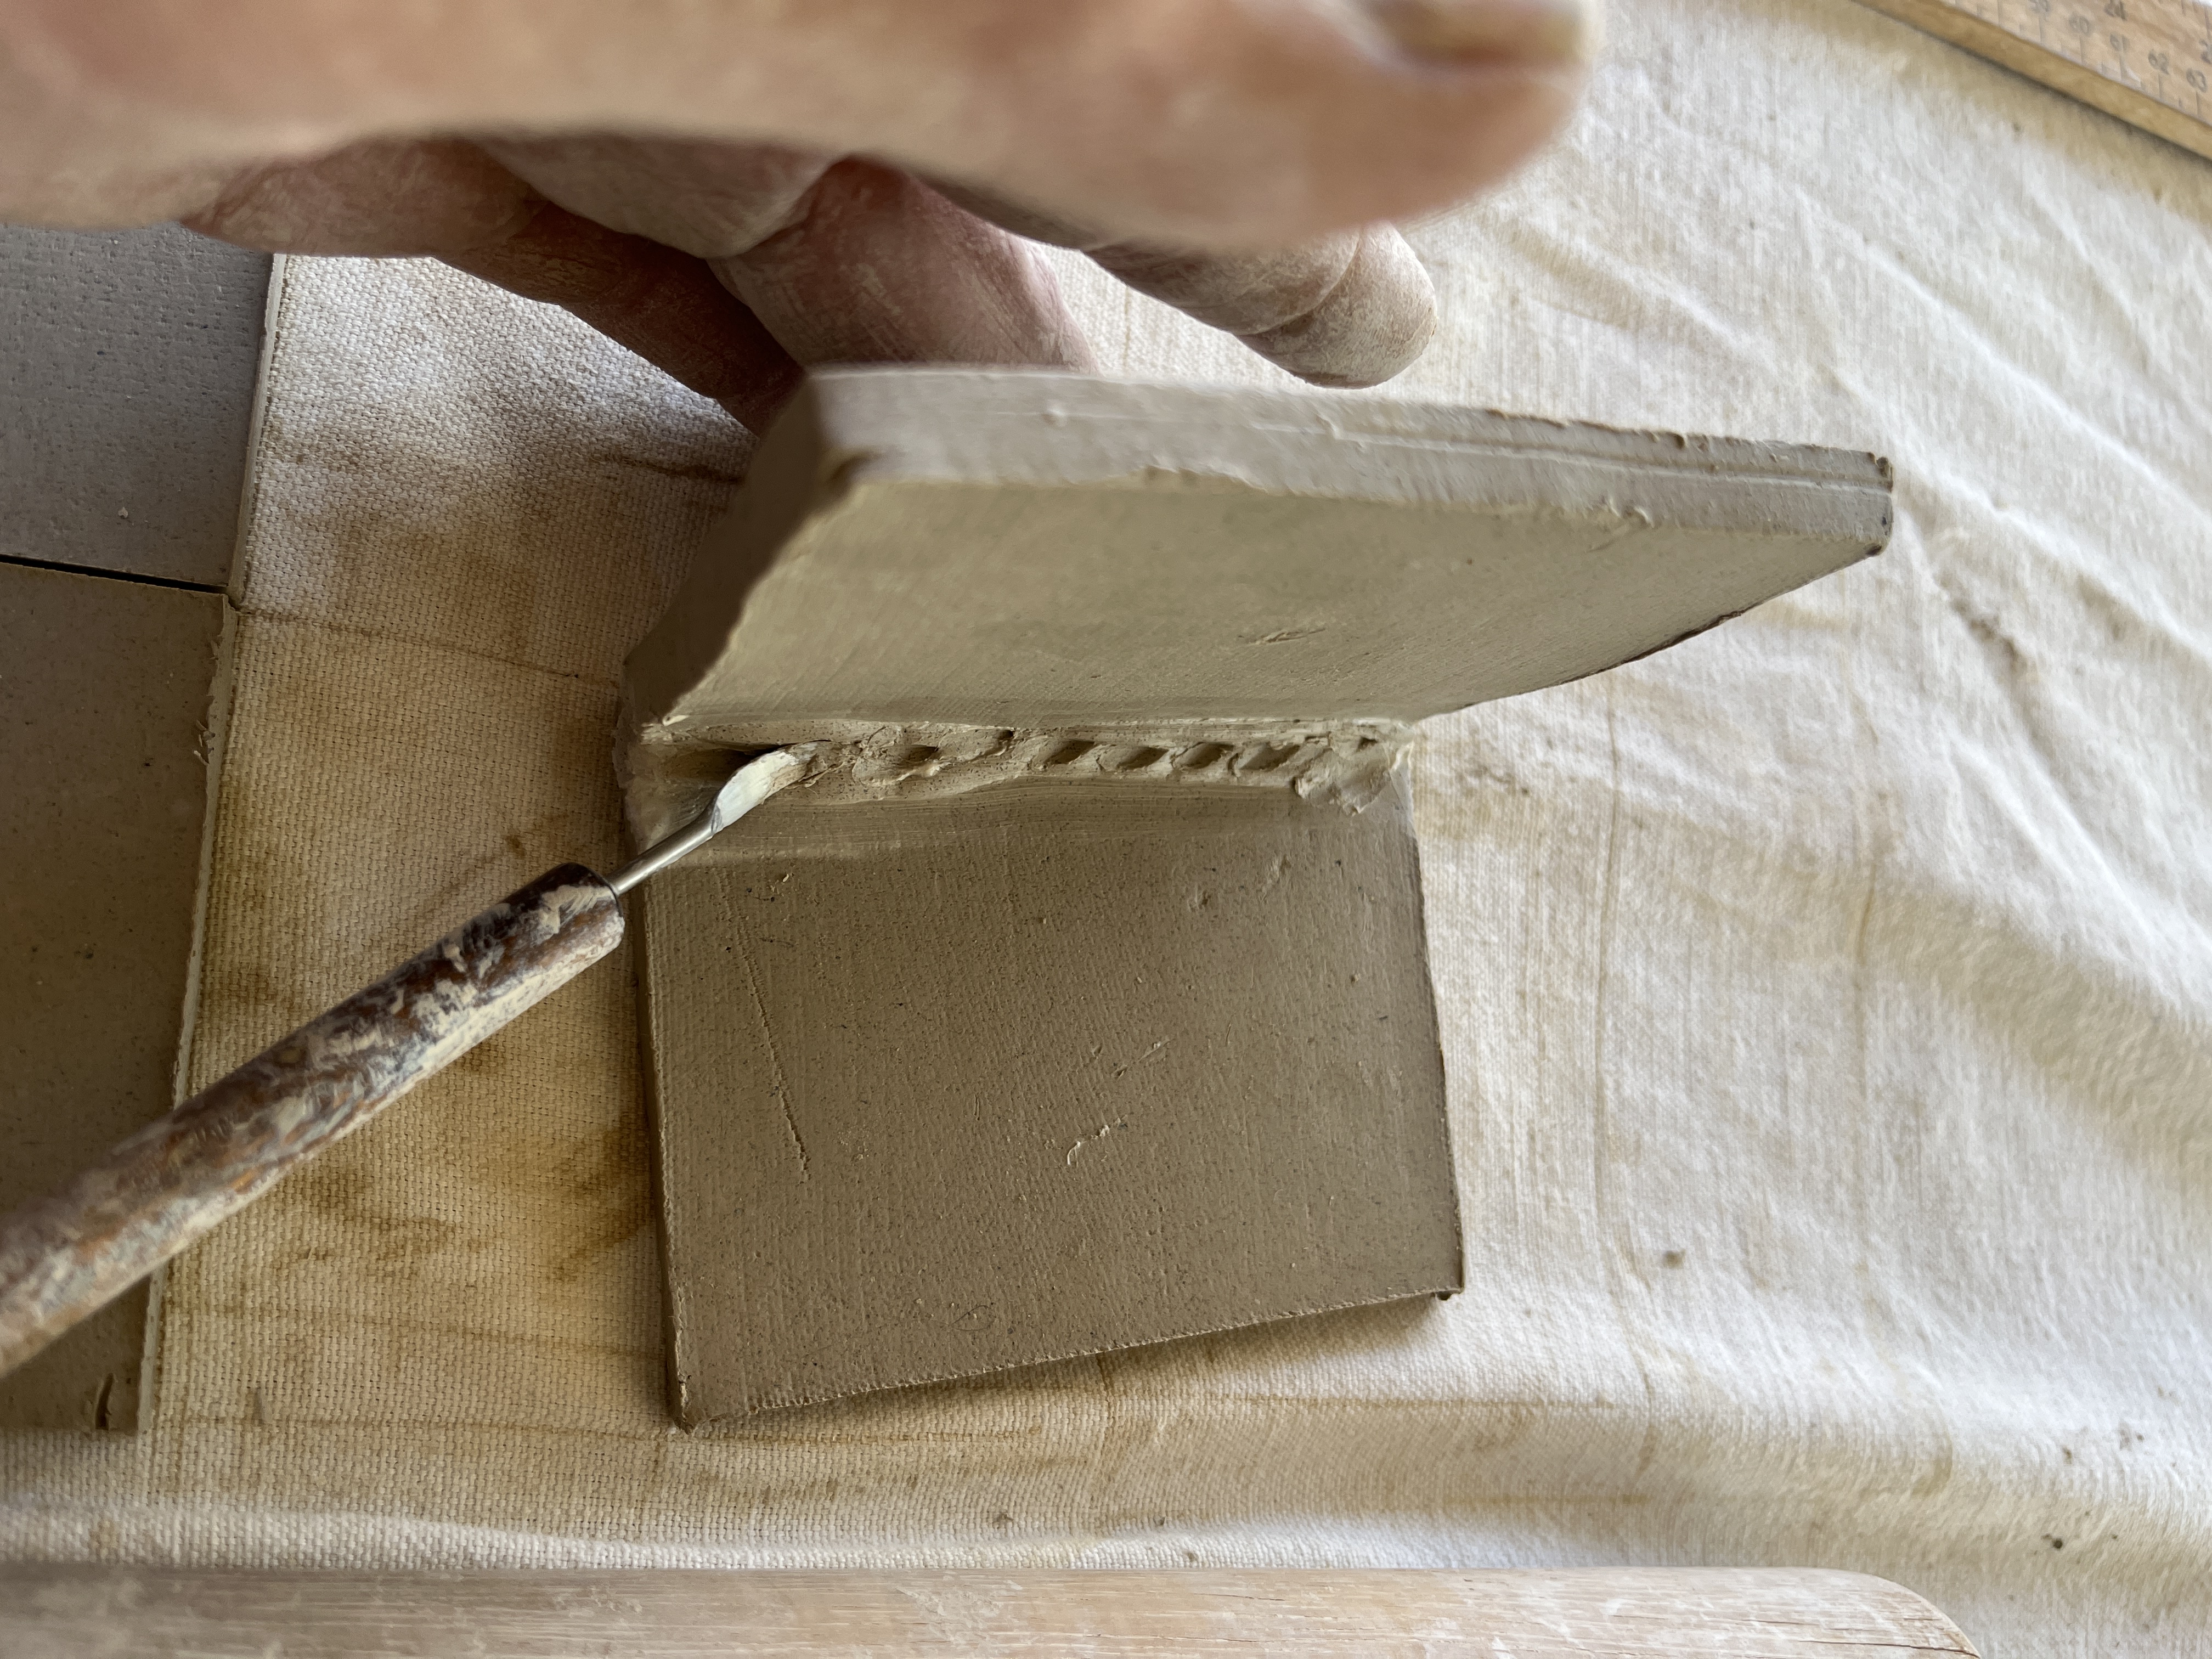
Use an old toothbrush to score and slip the edges of two sides.
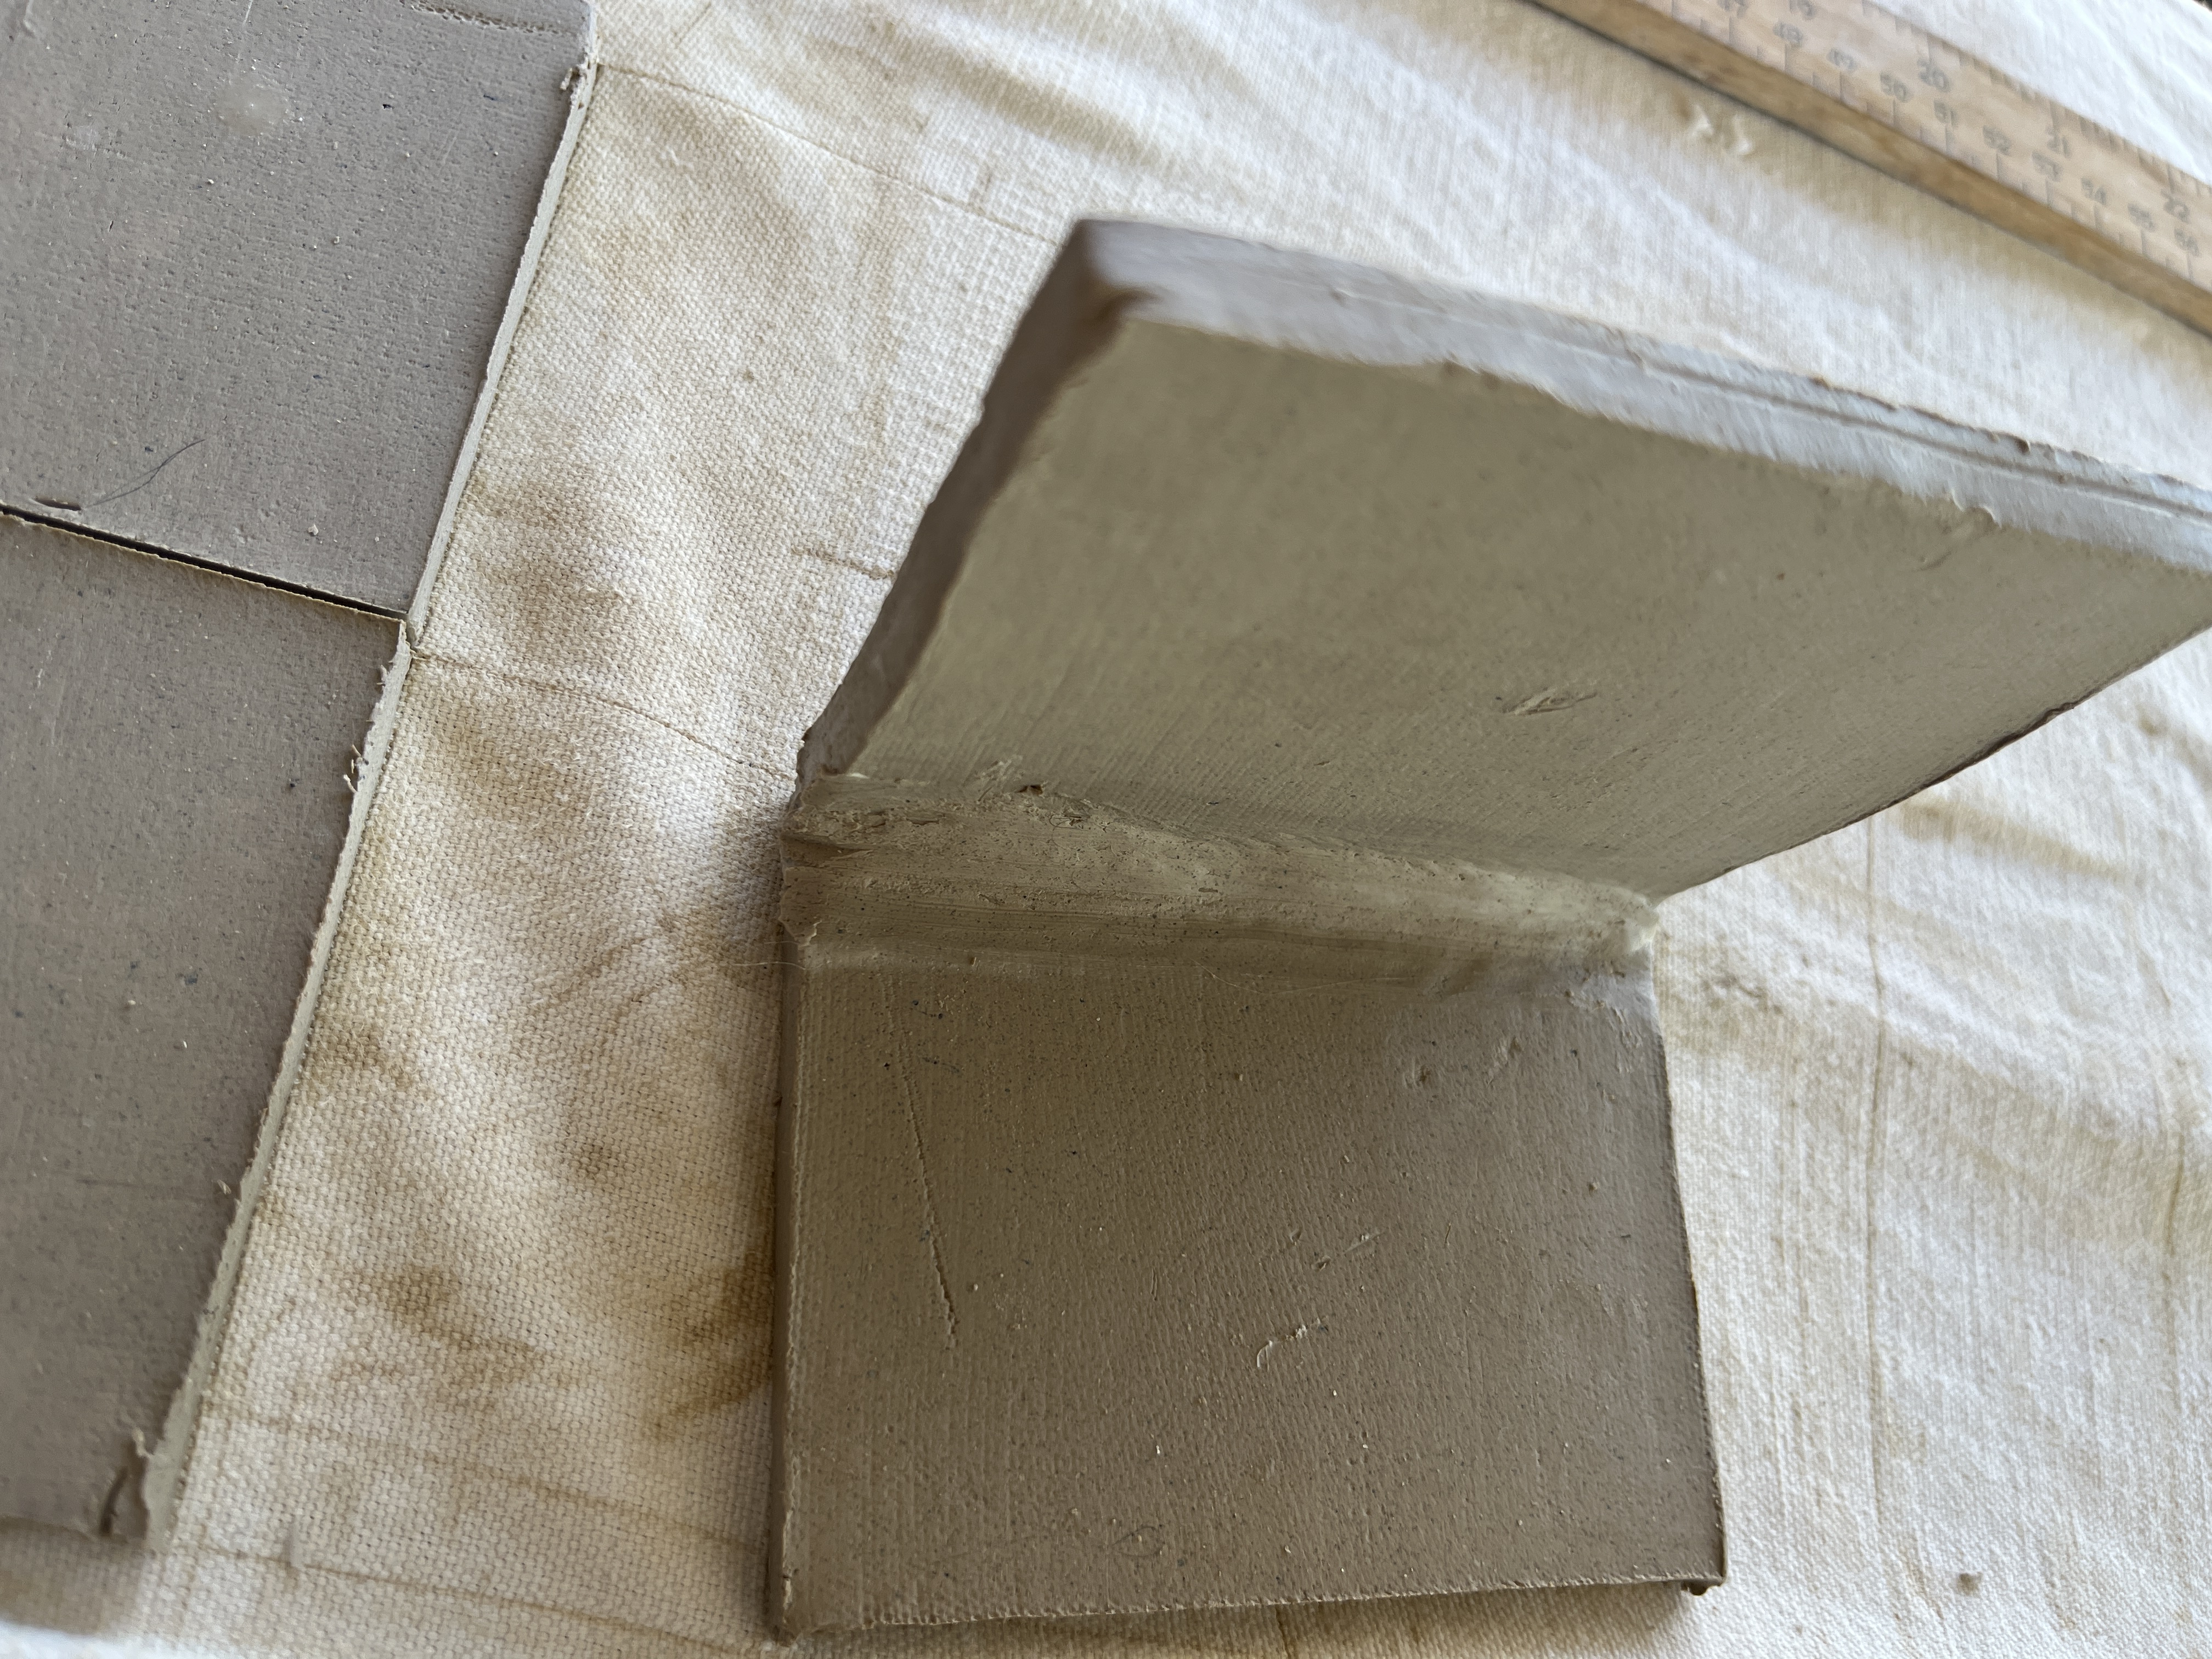
Press them firmly together, roll out a snake of clay and push it into the corner for extra support.
Smoothe it out and repeat with the other 2 sides
Use the toothbrush to slip up the next 4 edges to join the 2 sets of walls together, make snakes and smooth them into the corners for support.
Measure the base with the new top. Realize it doesn’t look right. Use a shorter slump mold to widen the base so it’s better.
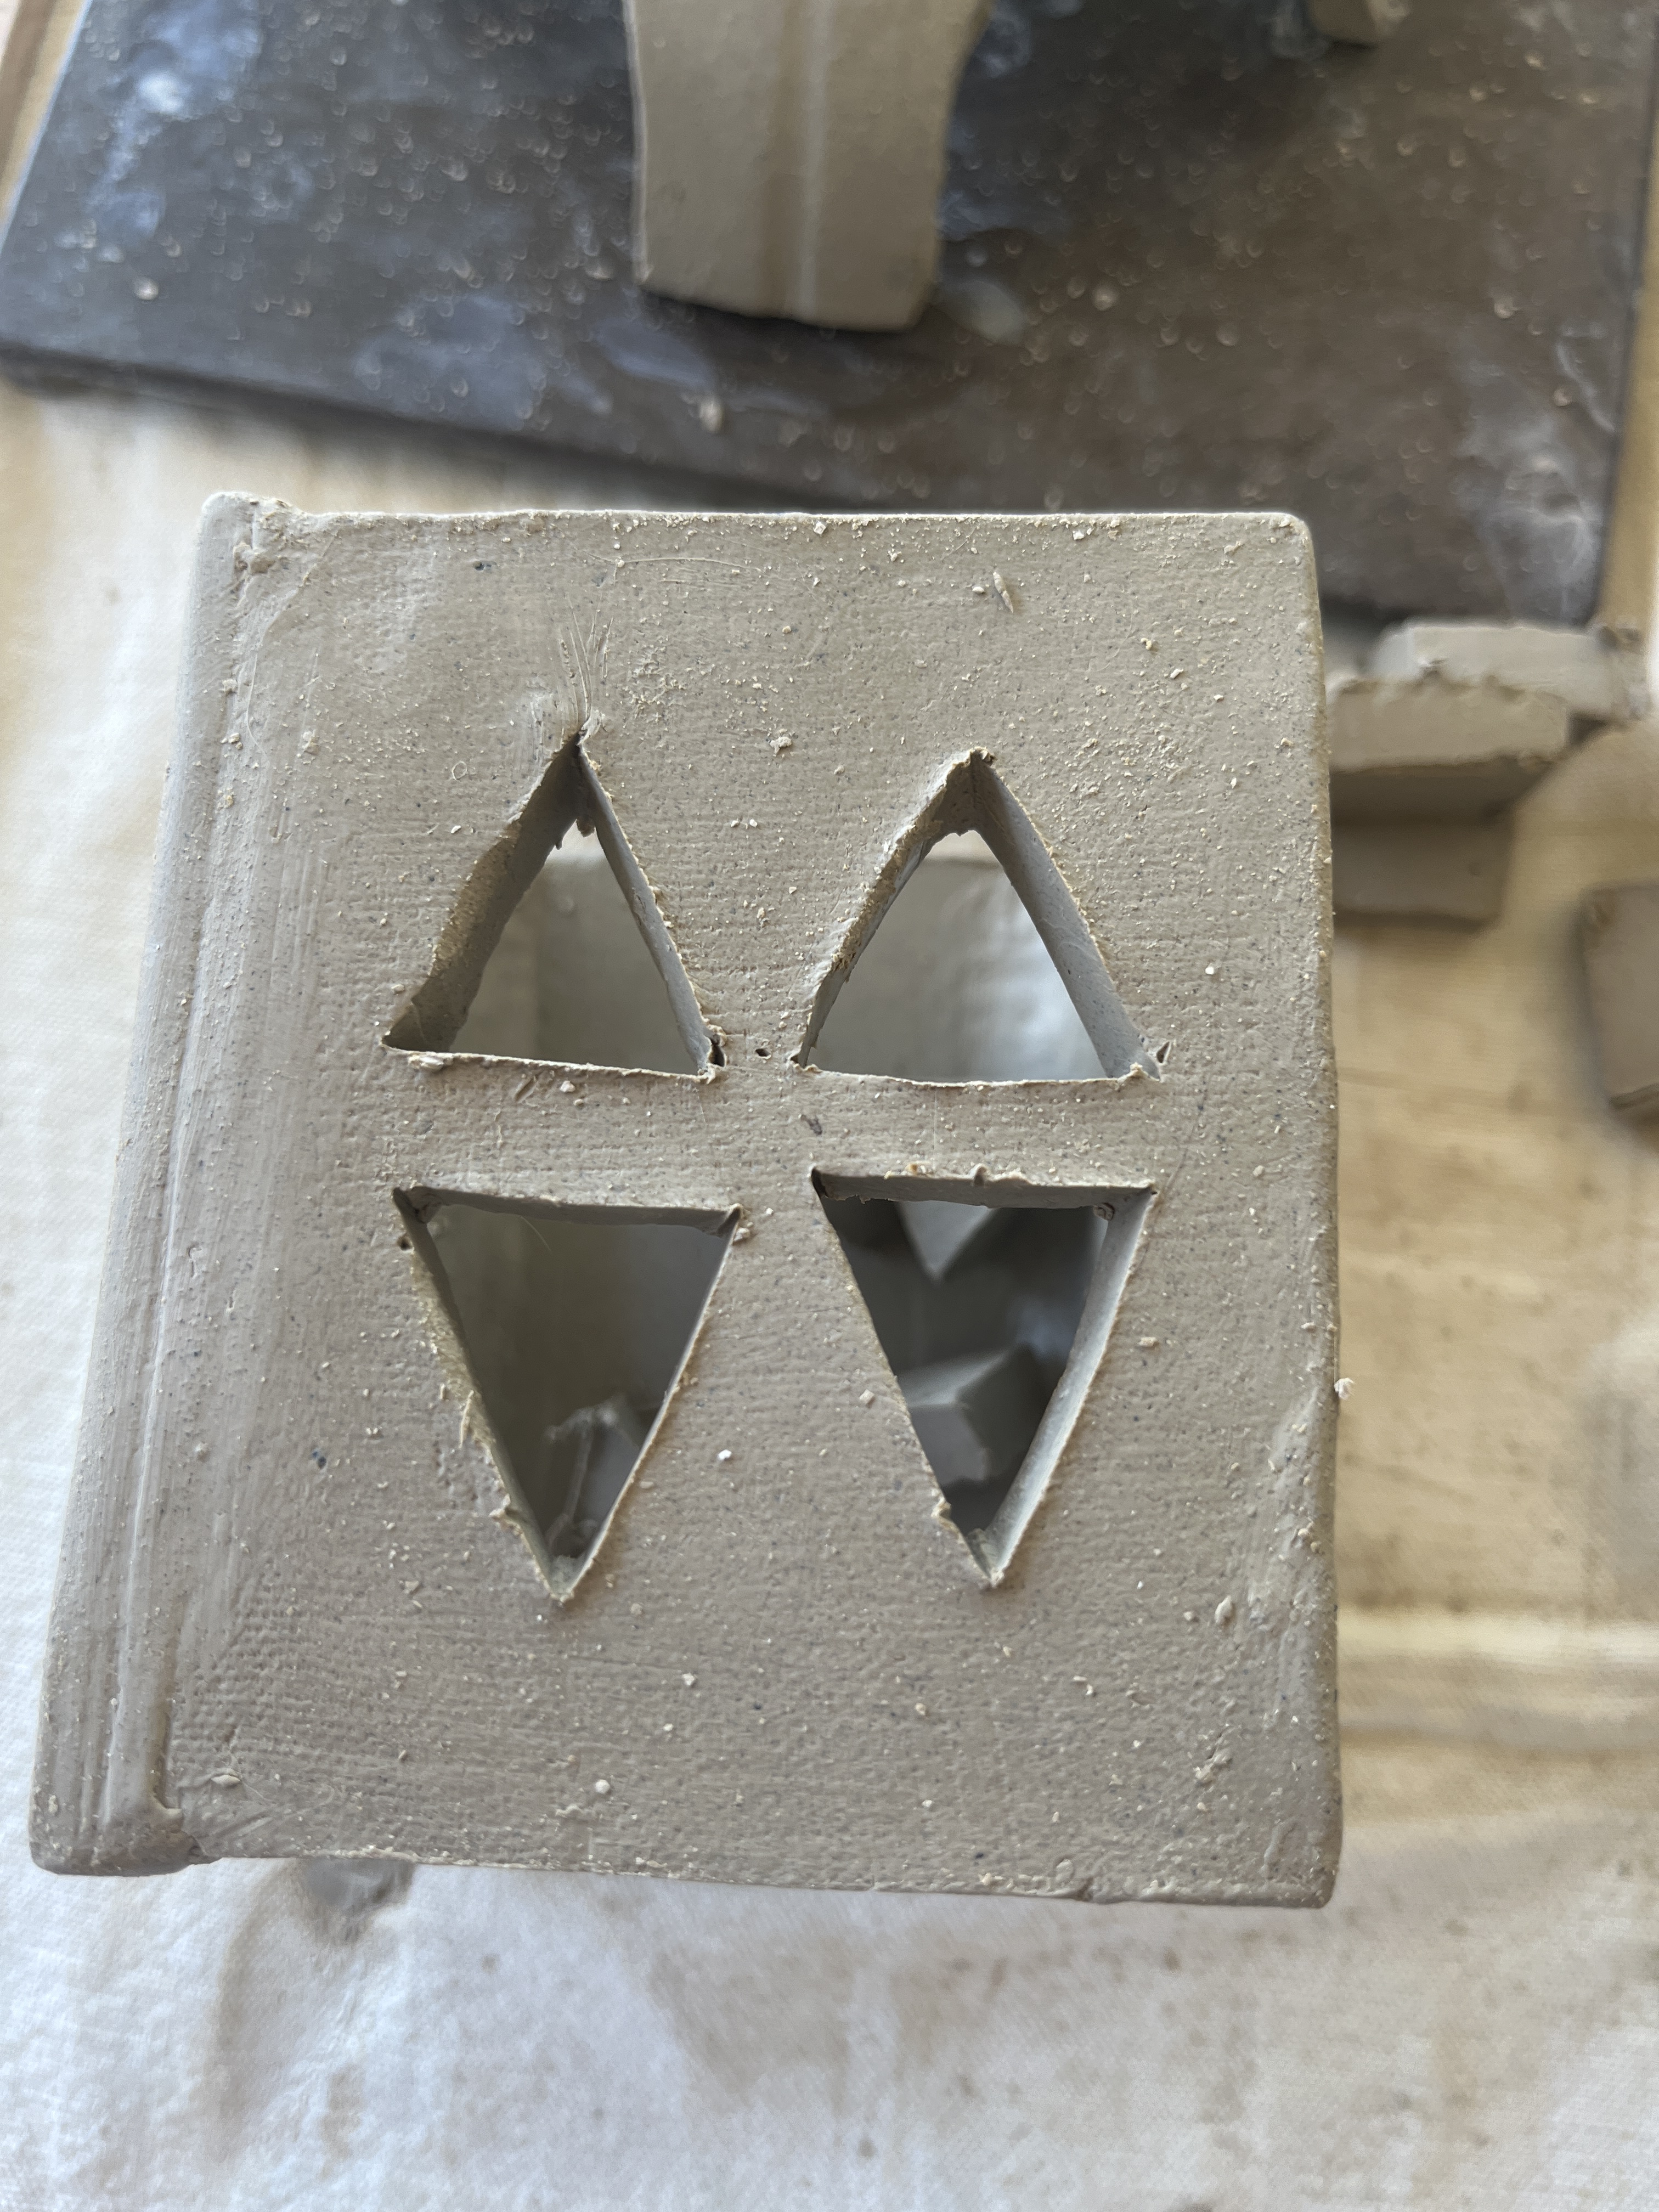
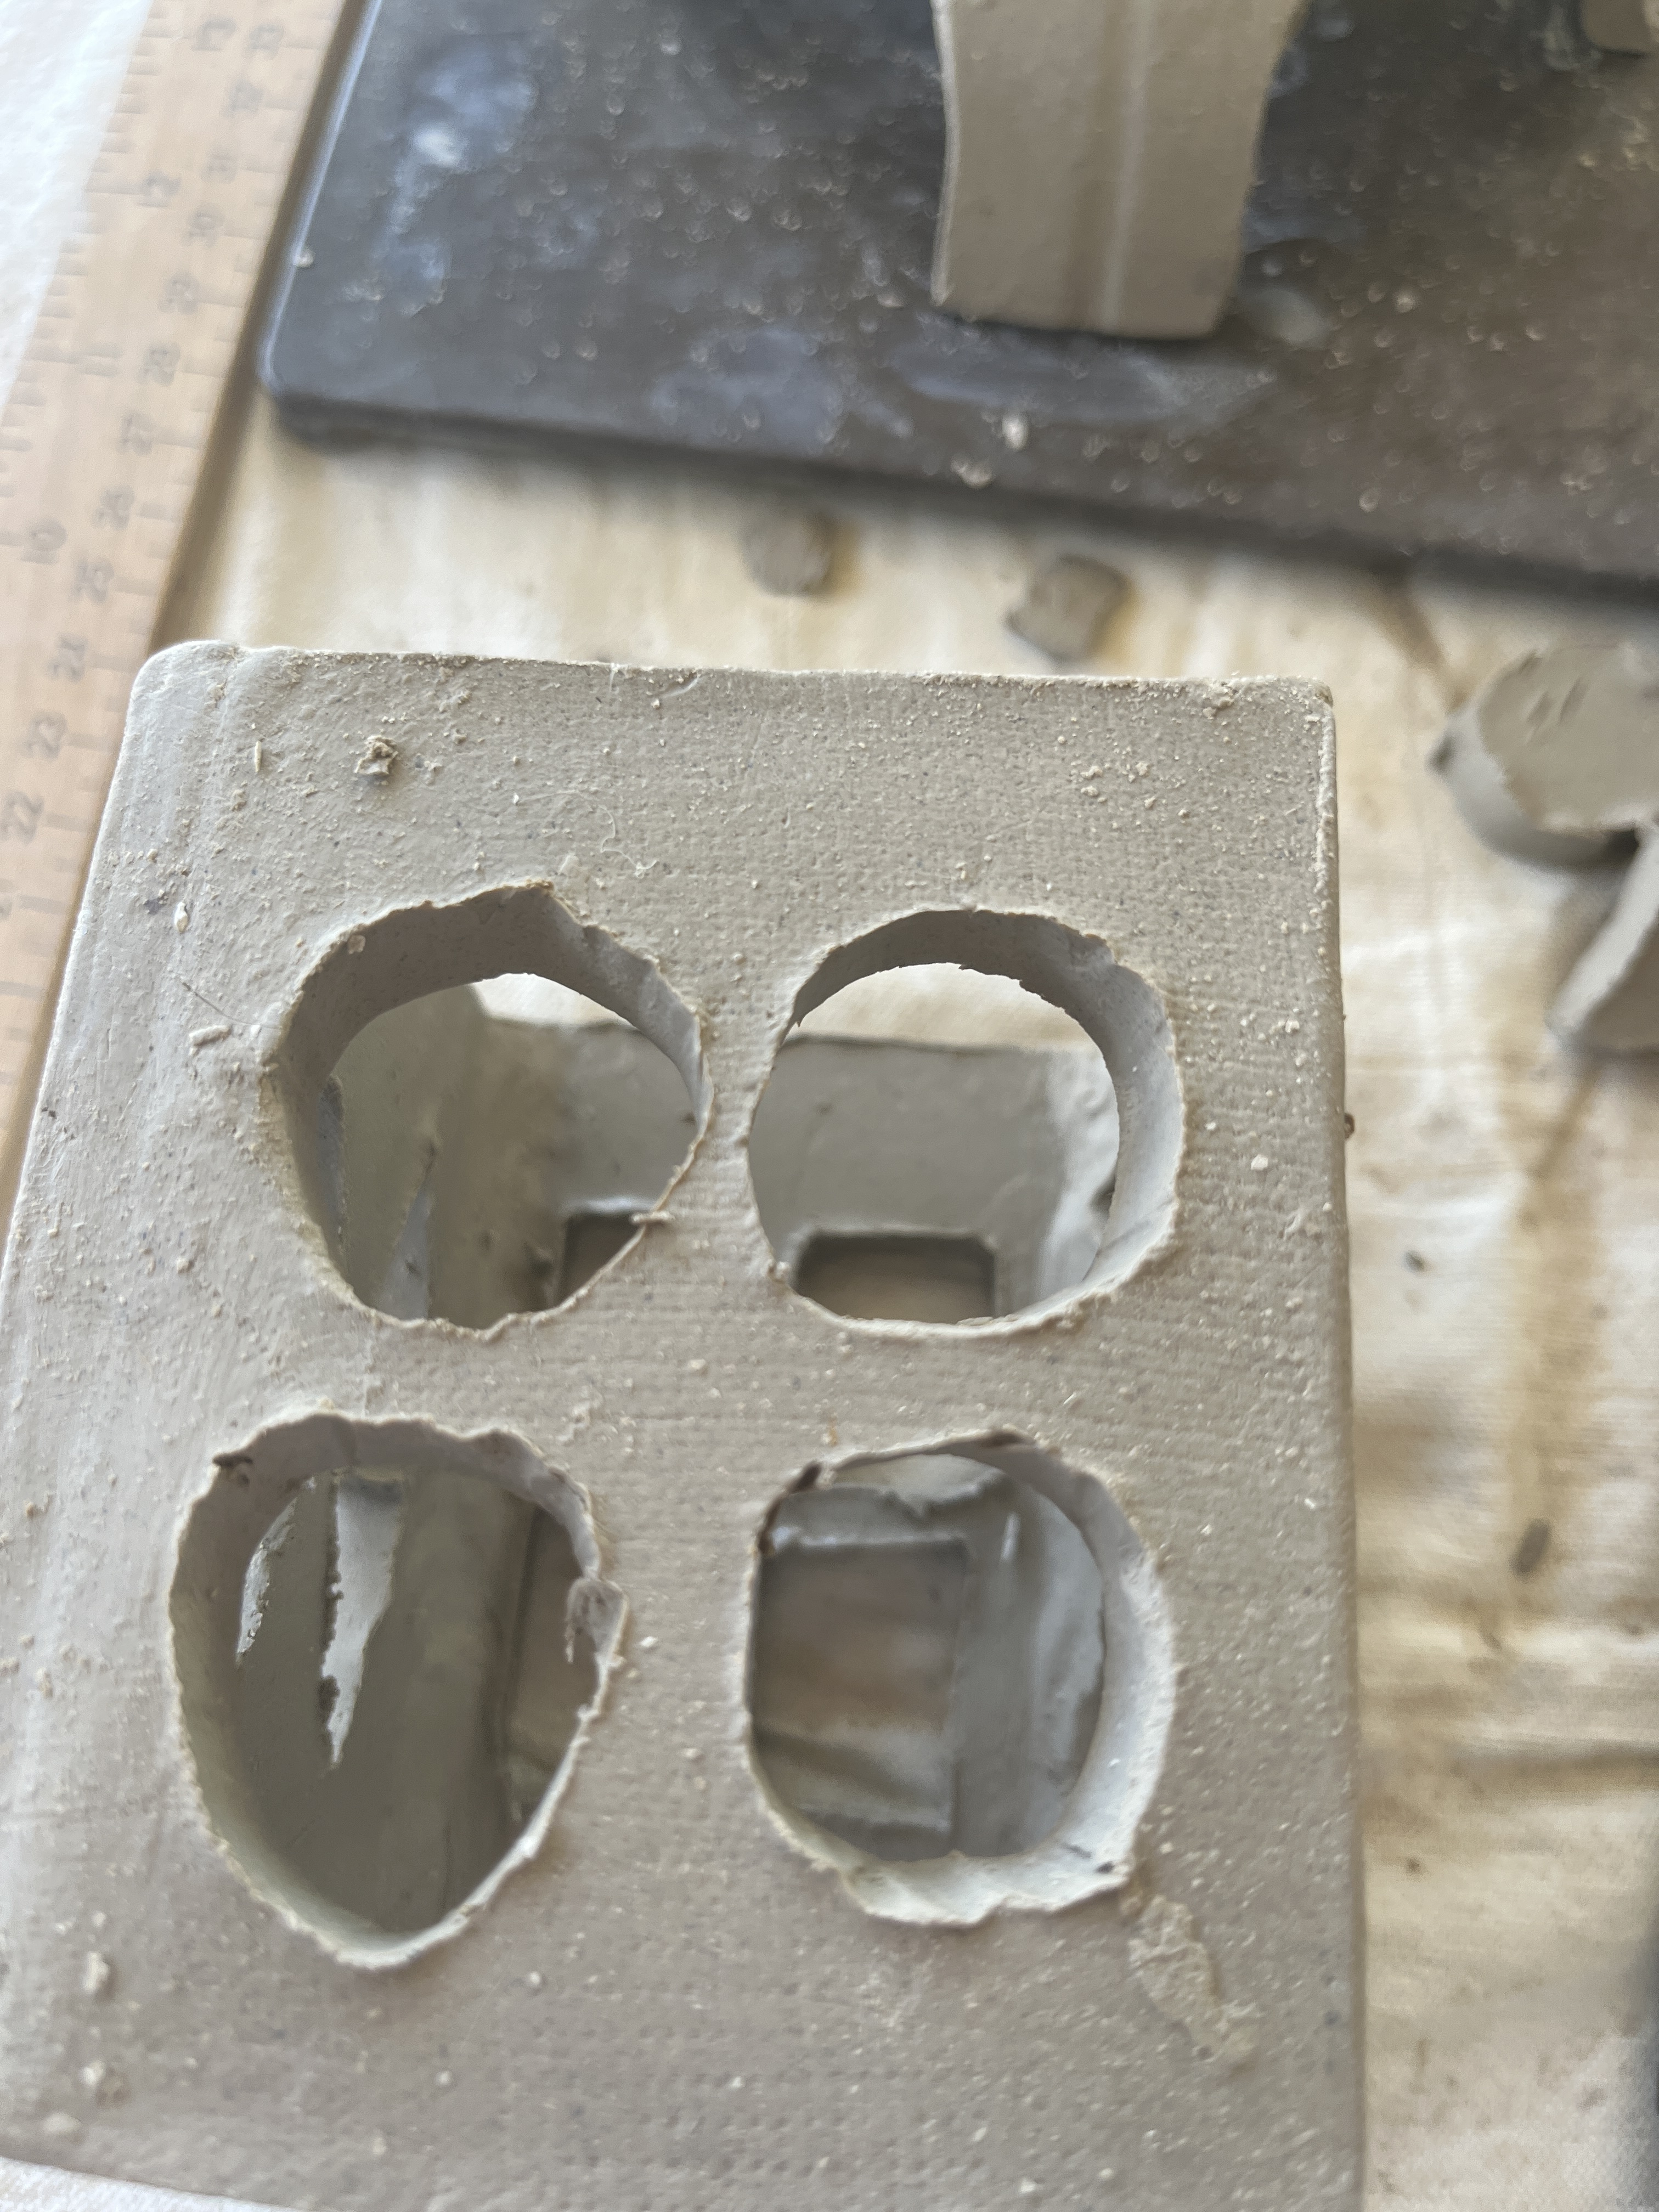
Cut windows into the first wall.
And into the second wall…and you’re allowed to be indecisive.
Round windows might be interesting.
Triangle again are easy enough, just upside-down.
Now scruff up the bottom of the main body and set it on the base to mark the base. Scruff up the base and light room and press them firmly together (with the slump mold still underneath the base for support.
Take balls of scrap clay and press them into the corners and edges to support the joints.
Smoothe it nicely with a tool.
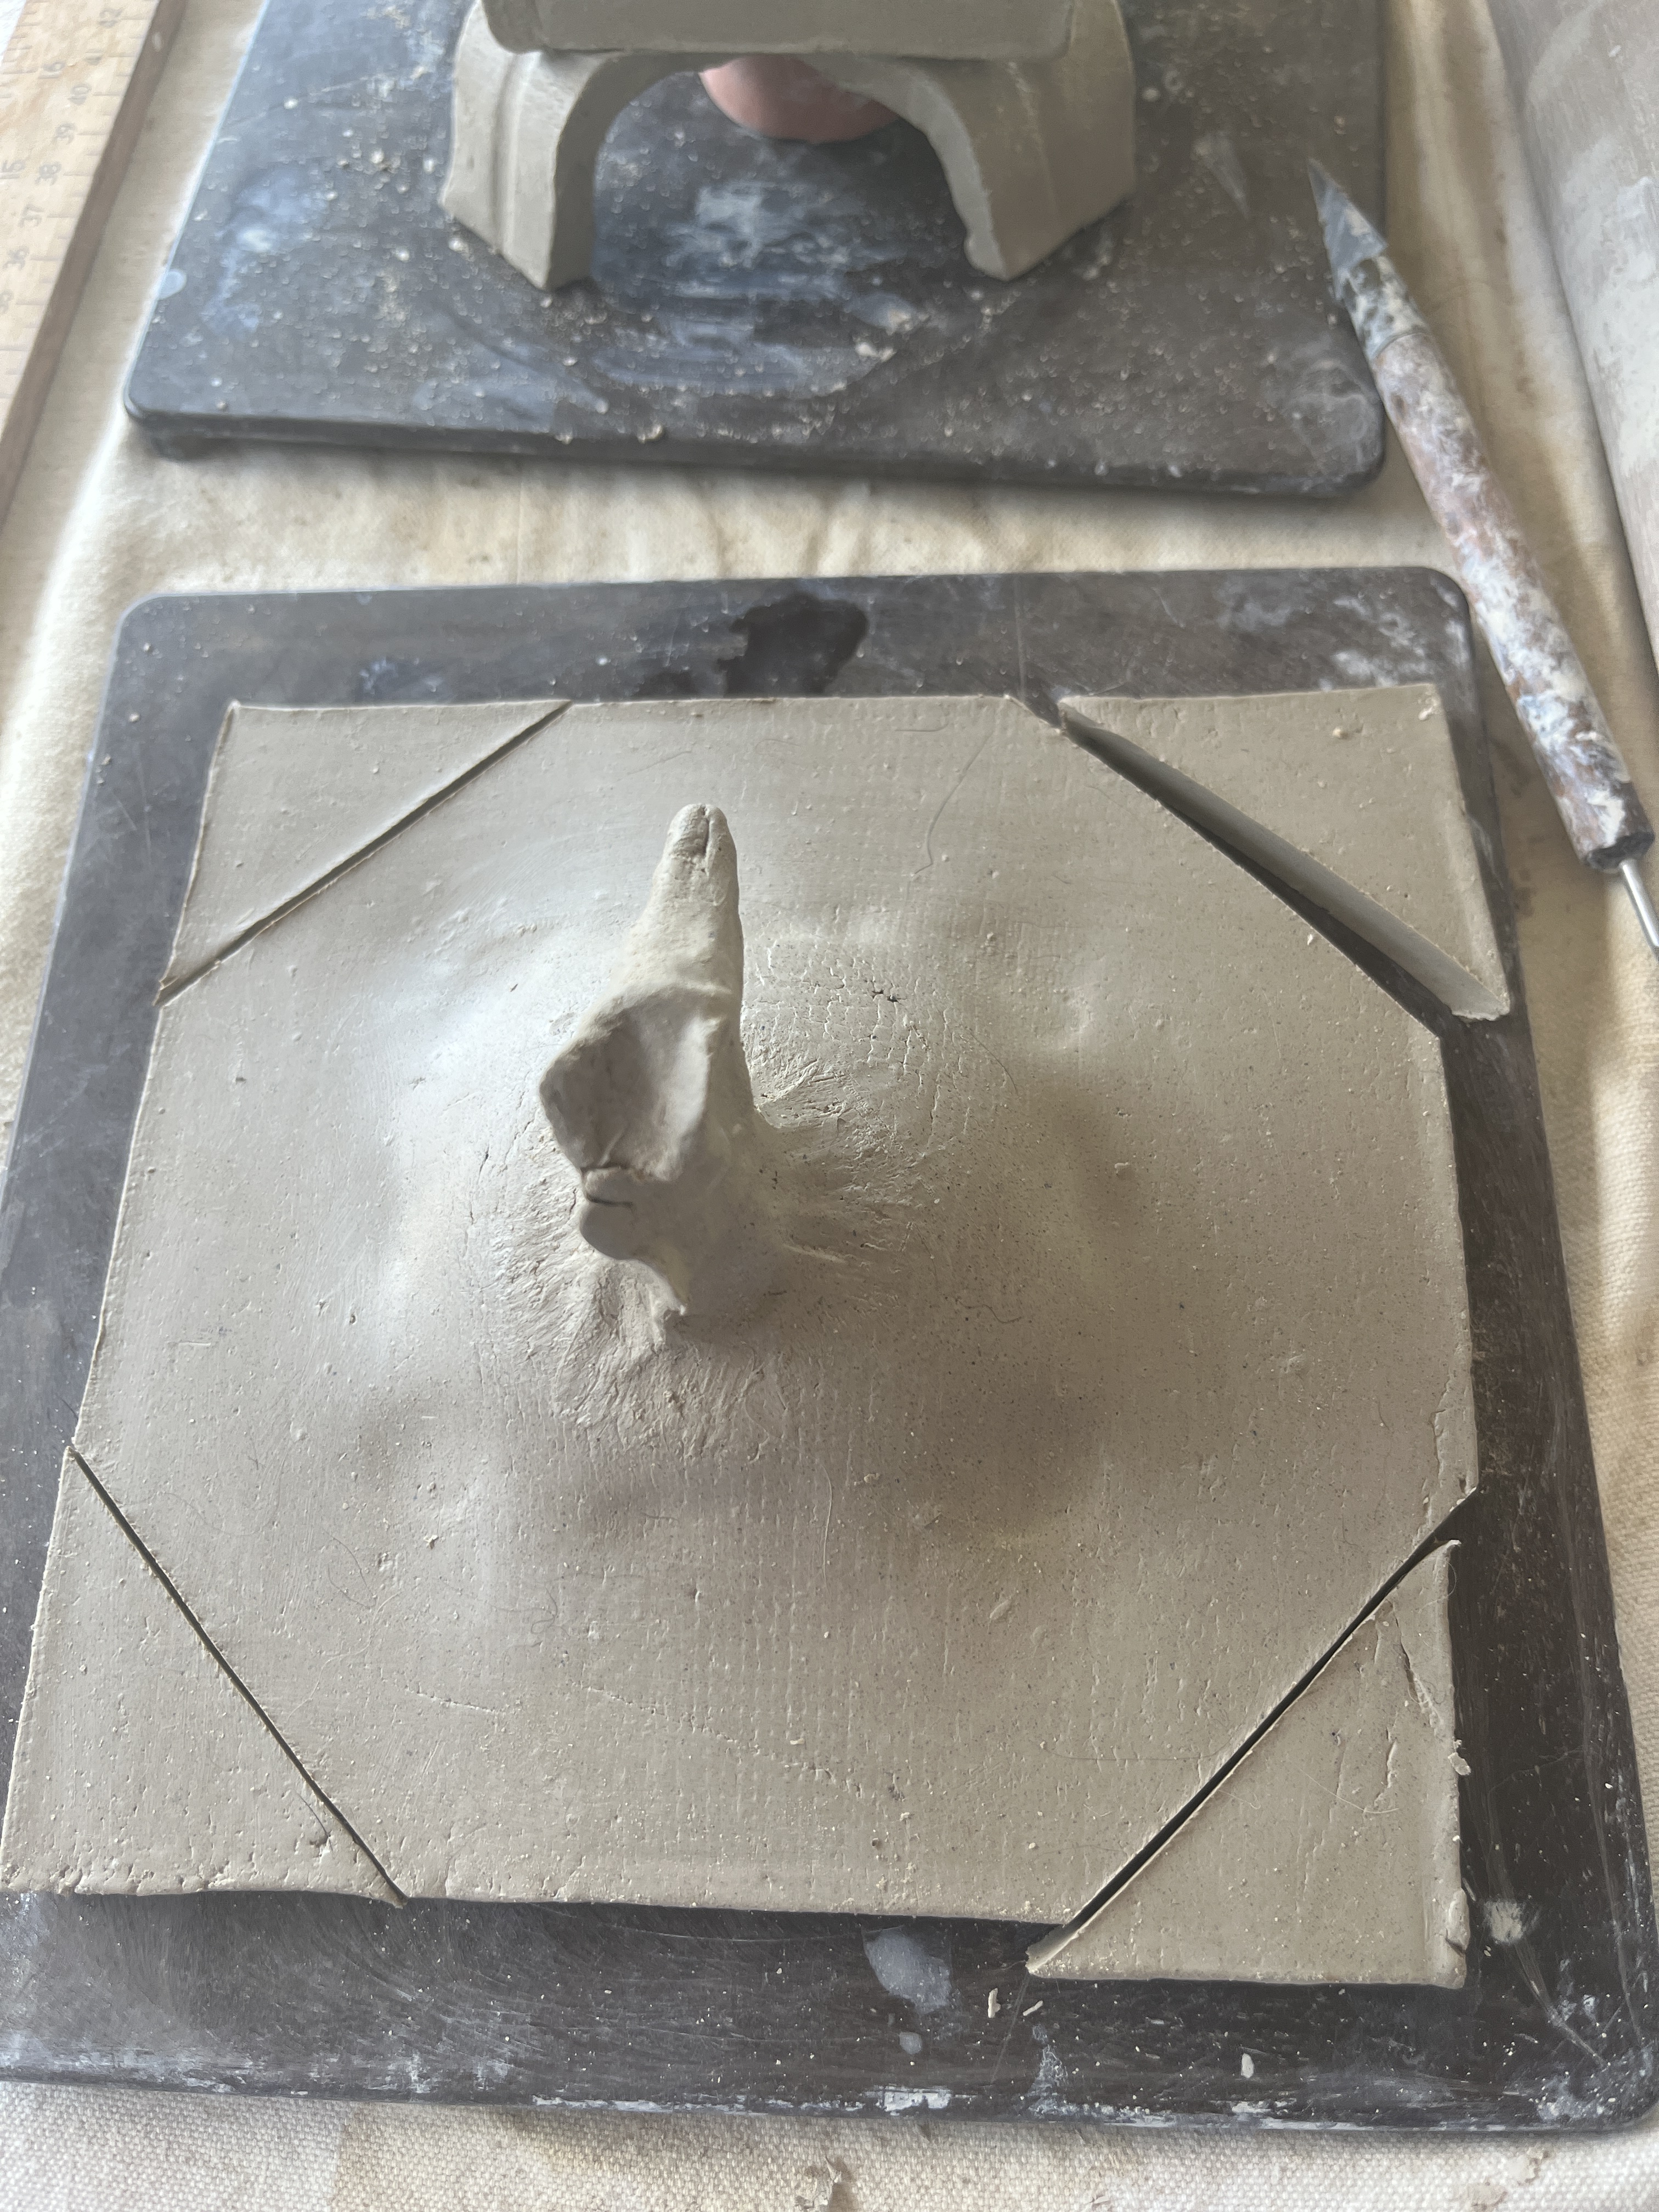
Realize the top is too big so cut the corners off to make it octagonal.
Use scruffed up knobs to mark where the corners are and add knobs to the inside of the top to slide into the corners so it won’t slip off.
Smooth off the edges and put under cover to dry slowly to avoid cracking, especially in the joints. Make sure it’s in a place safe from chickens, dogs and roommates. The pinch pots you made for scrap clay can dry without covers.
Put scraps into a plastic bag with some water so you can make something out of them later. Now get out of the heat, take a shower and make dinner. Or a few more pinch pots, dragons, beads…whatever, if it’s early enough. I’m hungry and I dug out a bunch of weeds and grass this morning so writing this blog post then dinner is my option before I become a cushion for the cats while I read myself to sleep.


You must be logged in to post a comment.