I had arbours over 2 windows for over 20 years. 2 years ago they died. The one on the west side window had to go in first so the queens bower could grow over it and shade the window. The one on the north side is mostly just to frame the window and maybe grow gourds or maybe hops. We’ll see.
I got the first one made last week, now to get this one done and I’m hoping they’ll both last another 20 years. I sketched the basic design I wanted, figured out what size they needed to be and bought the lumber. Then life happened and it took 2 years to get to make them! But now one’s up and the other’s getting done so progress on the house and garden continues.
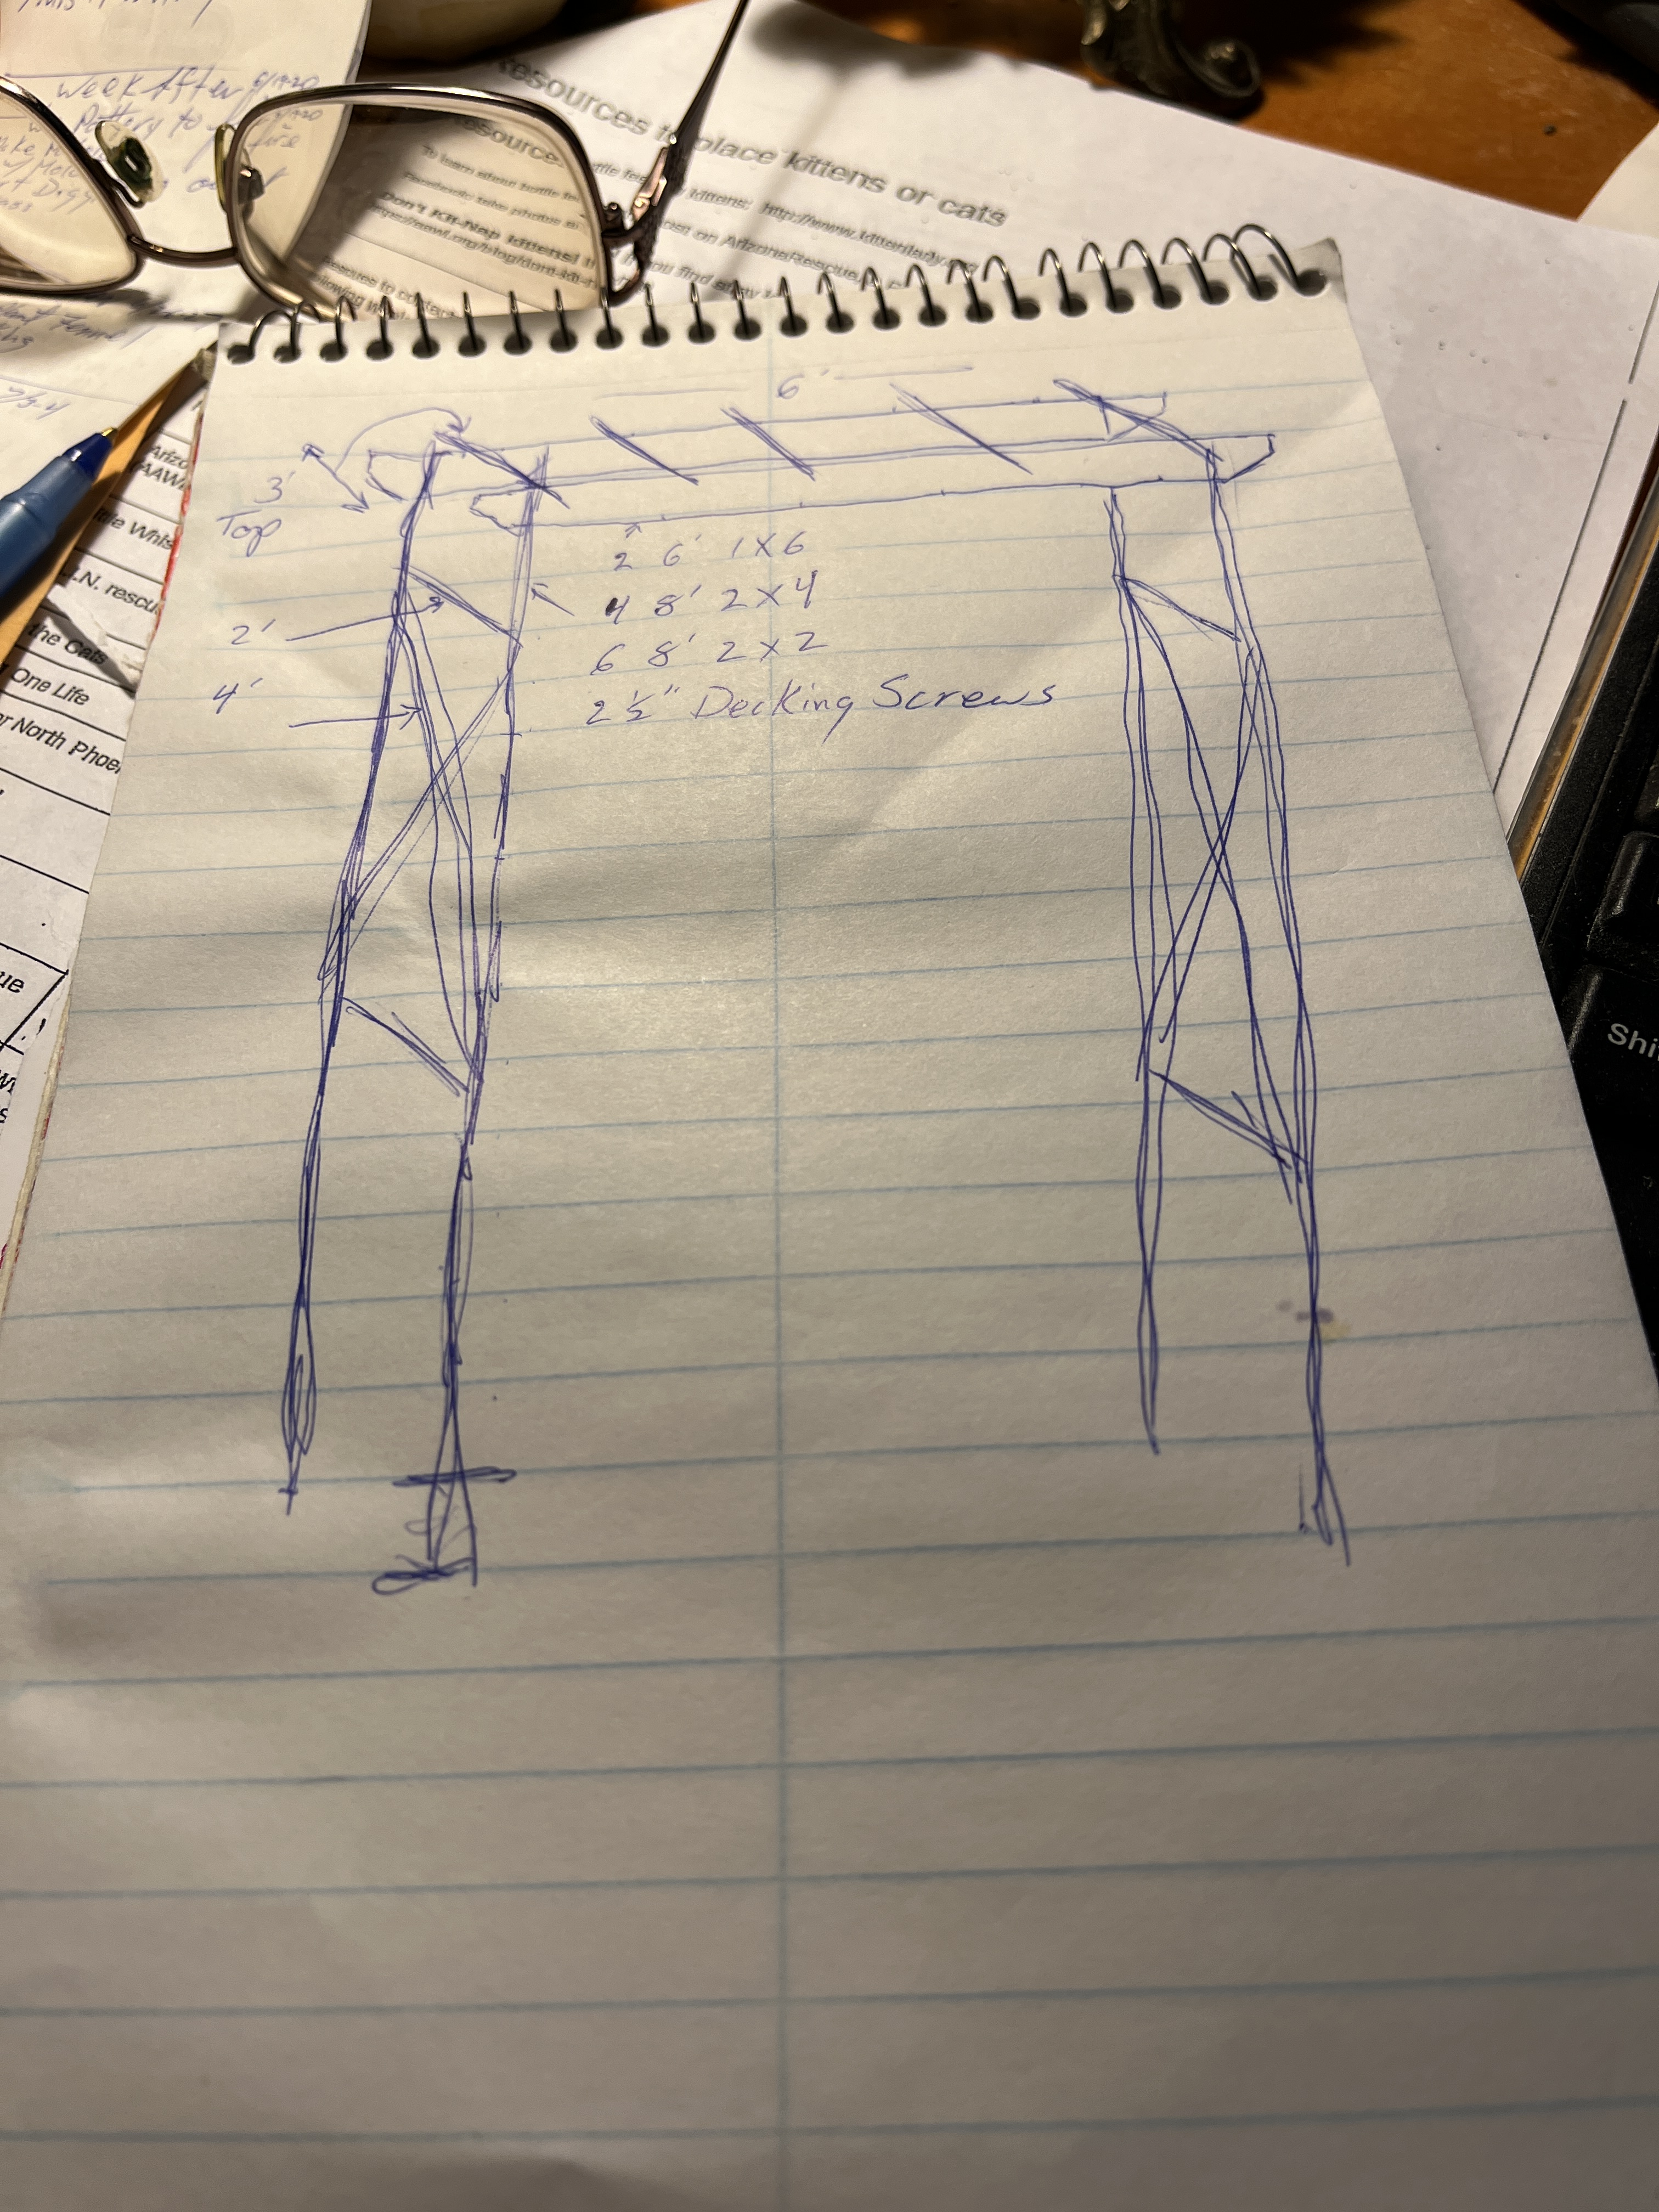
Start with a simple sketch with measurements so you know how big you need to make it and what you need to buy. It doesn’t have to be great art, this is just to get you started since you’ll probably change your mind as you go.
Measure twice, cut once.
Set everything up and you’re ready to go. I cut as I went with the first one, but then I was redesigning as I went.
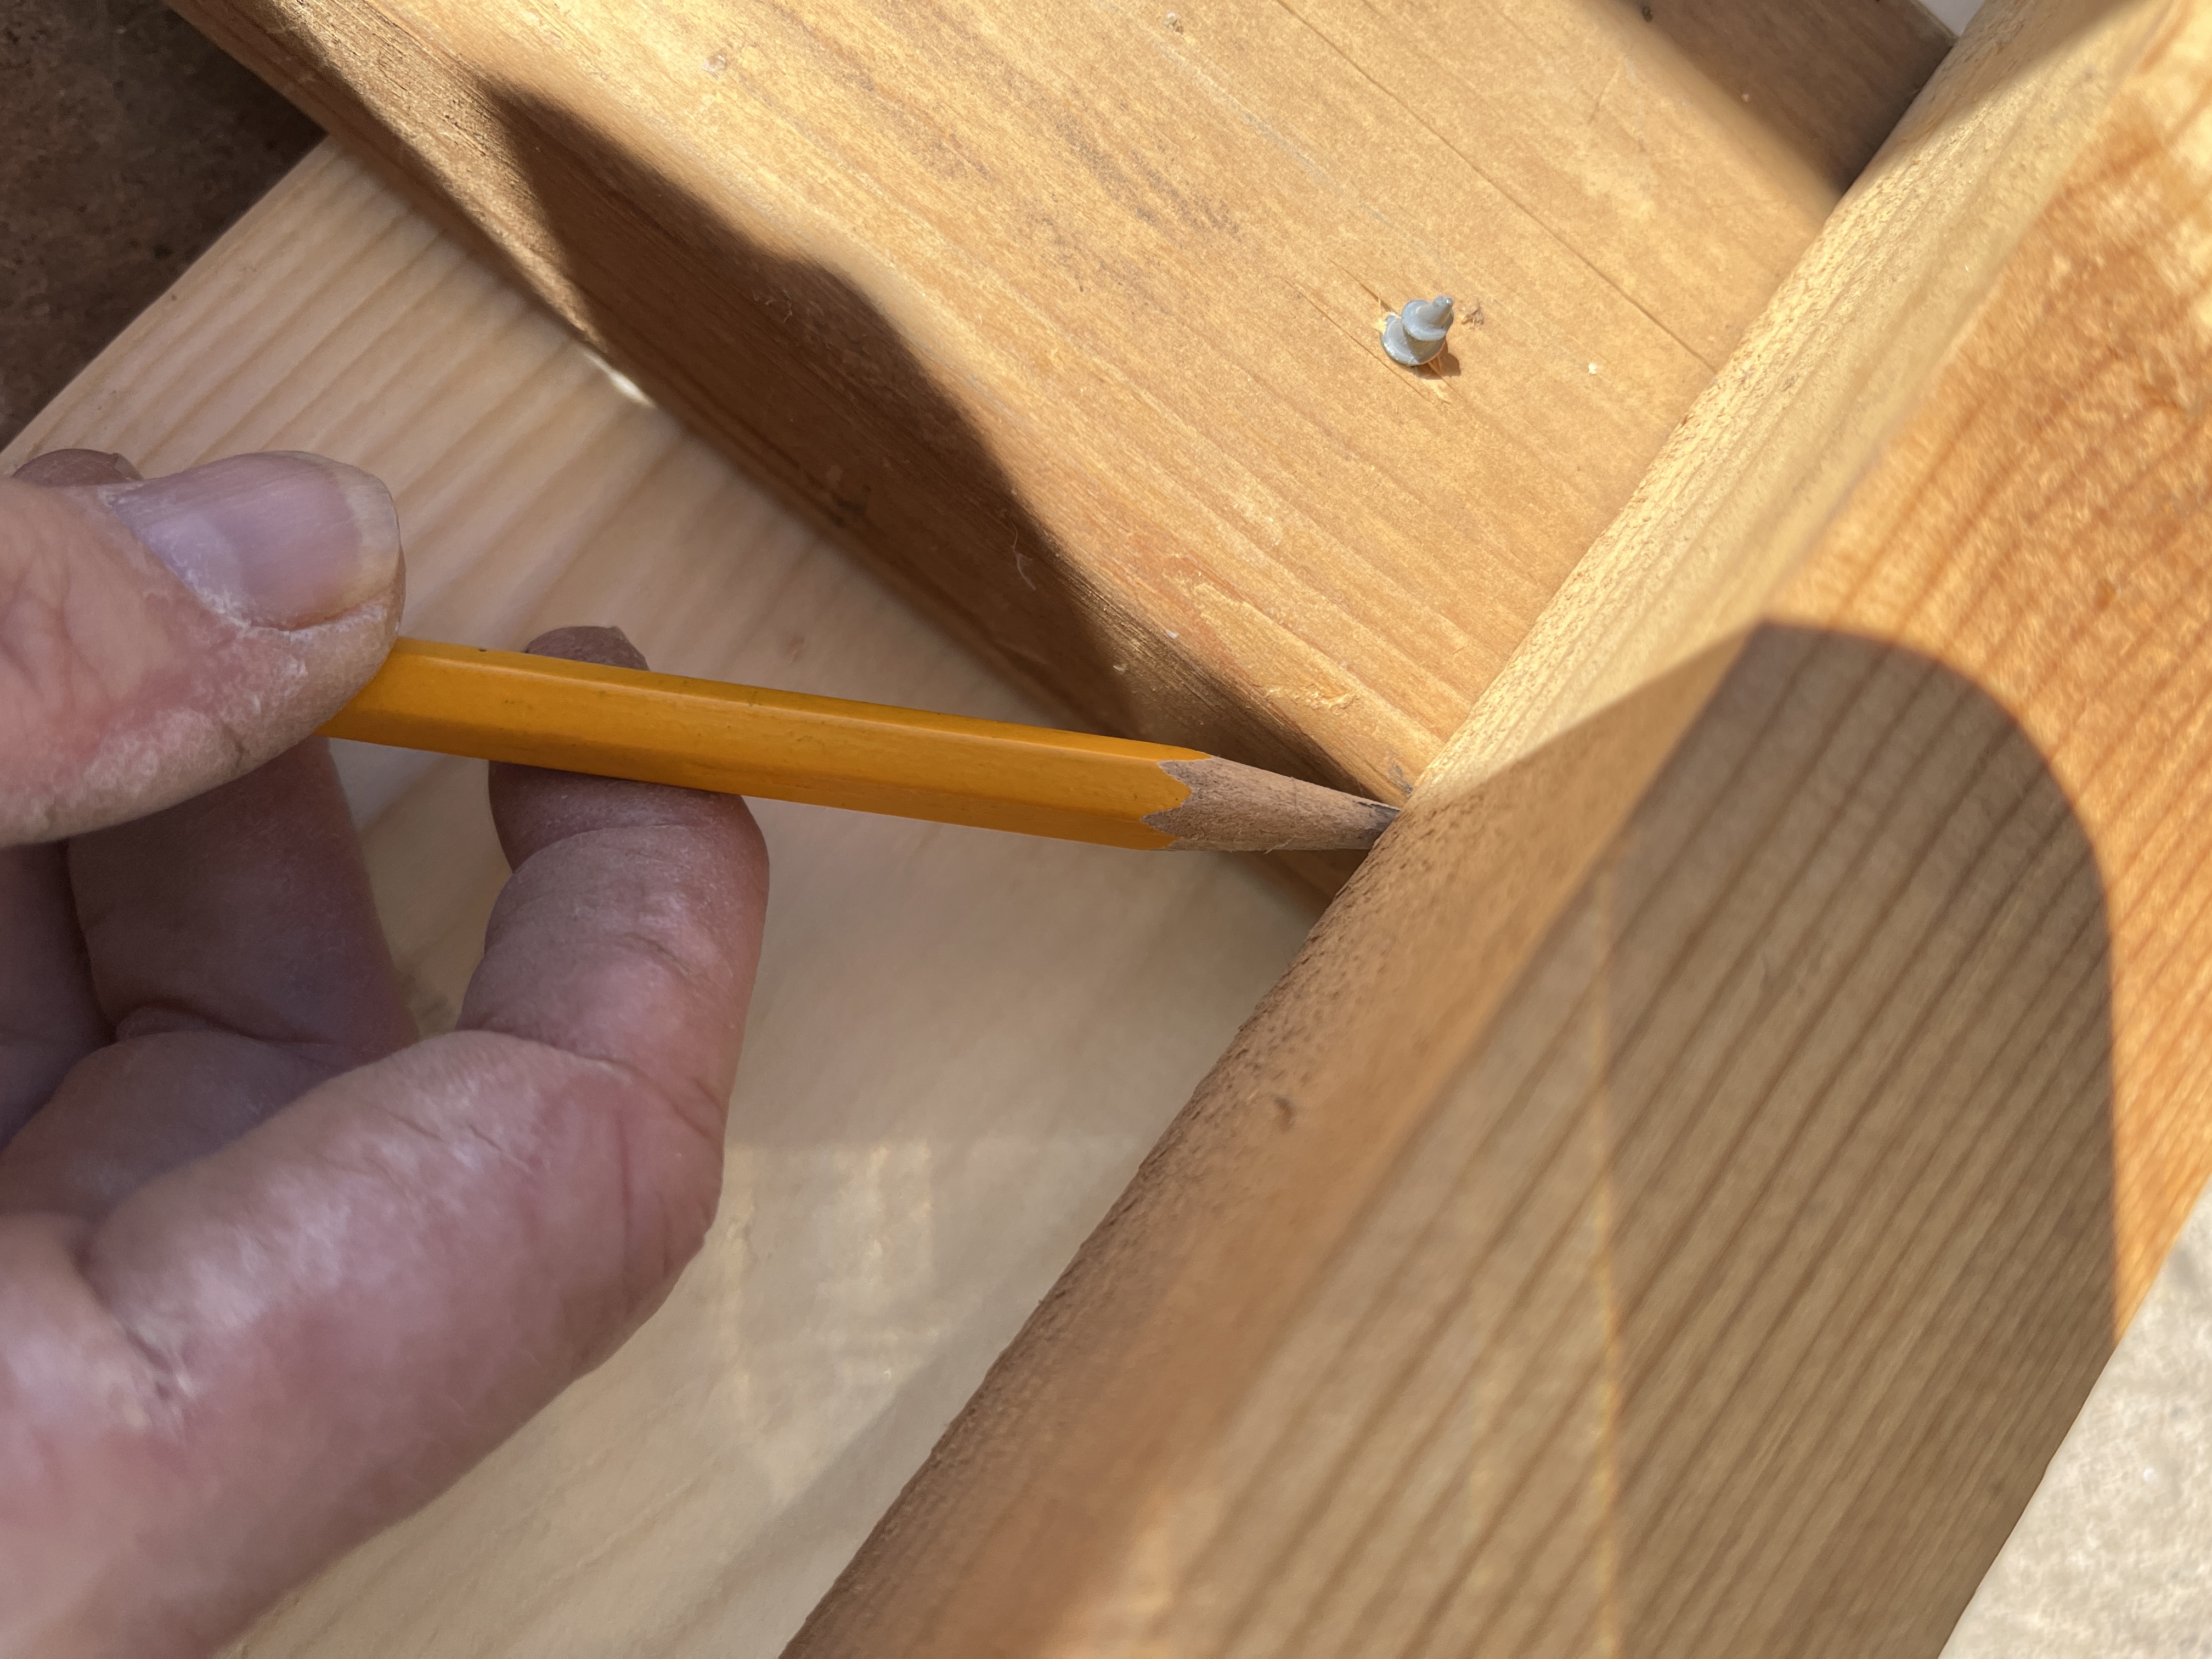
Now to screw everything together. You’ll want to drill pilot holes so you don’t split the wood. I didn’t do this when I made the 1st arbours. More bad words happened when I made them way back when. So drill, screw, drill, screw, repeat.
Yes, it’s kind of a pain to keep changing the bit from drill to driver but this way the woos moves less and the holes stay lined up, making for fewer bad words overall.
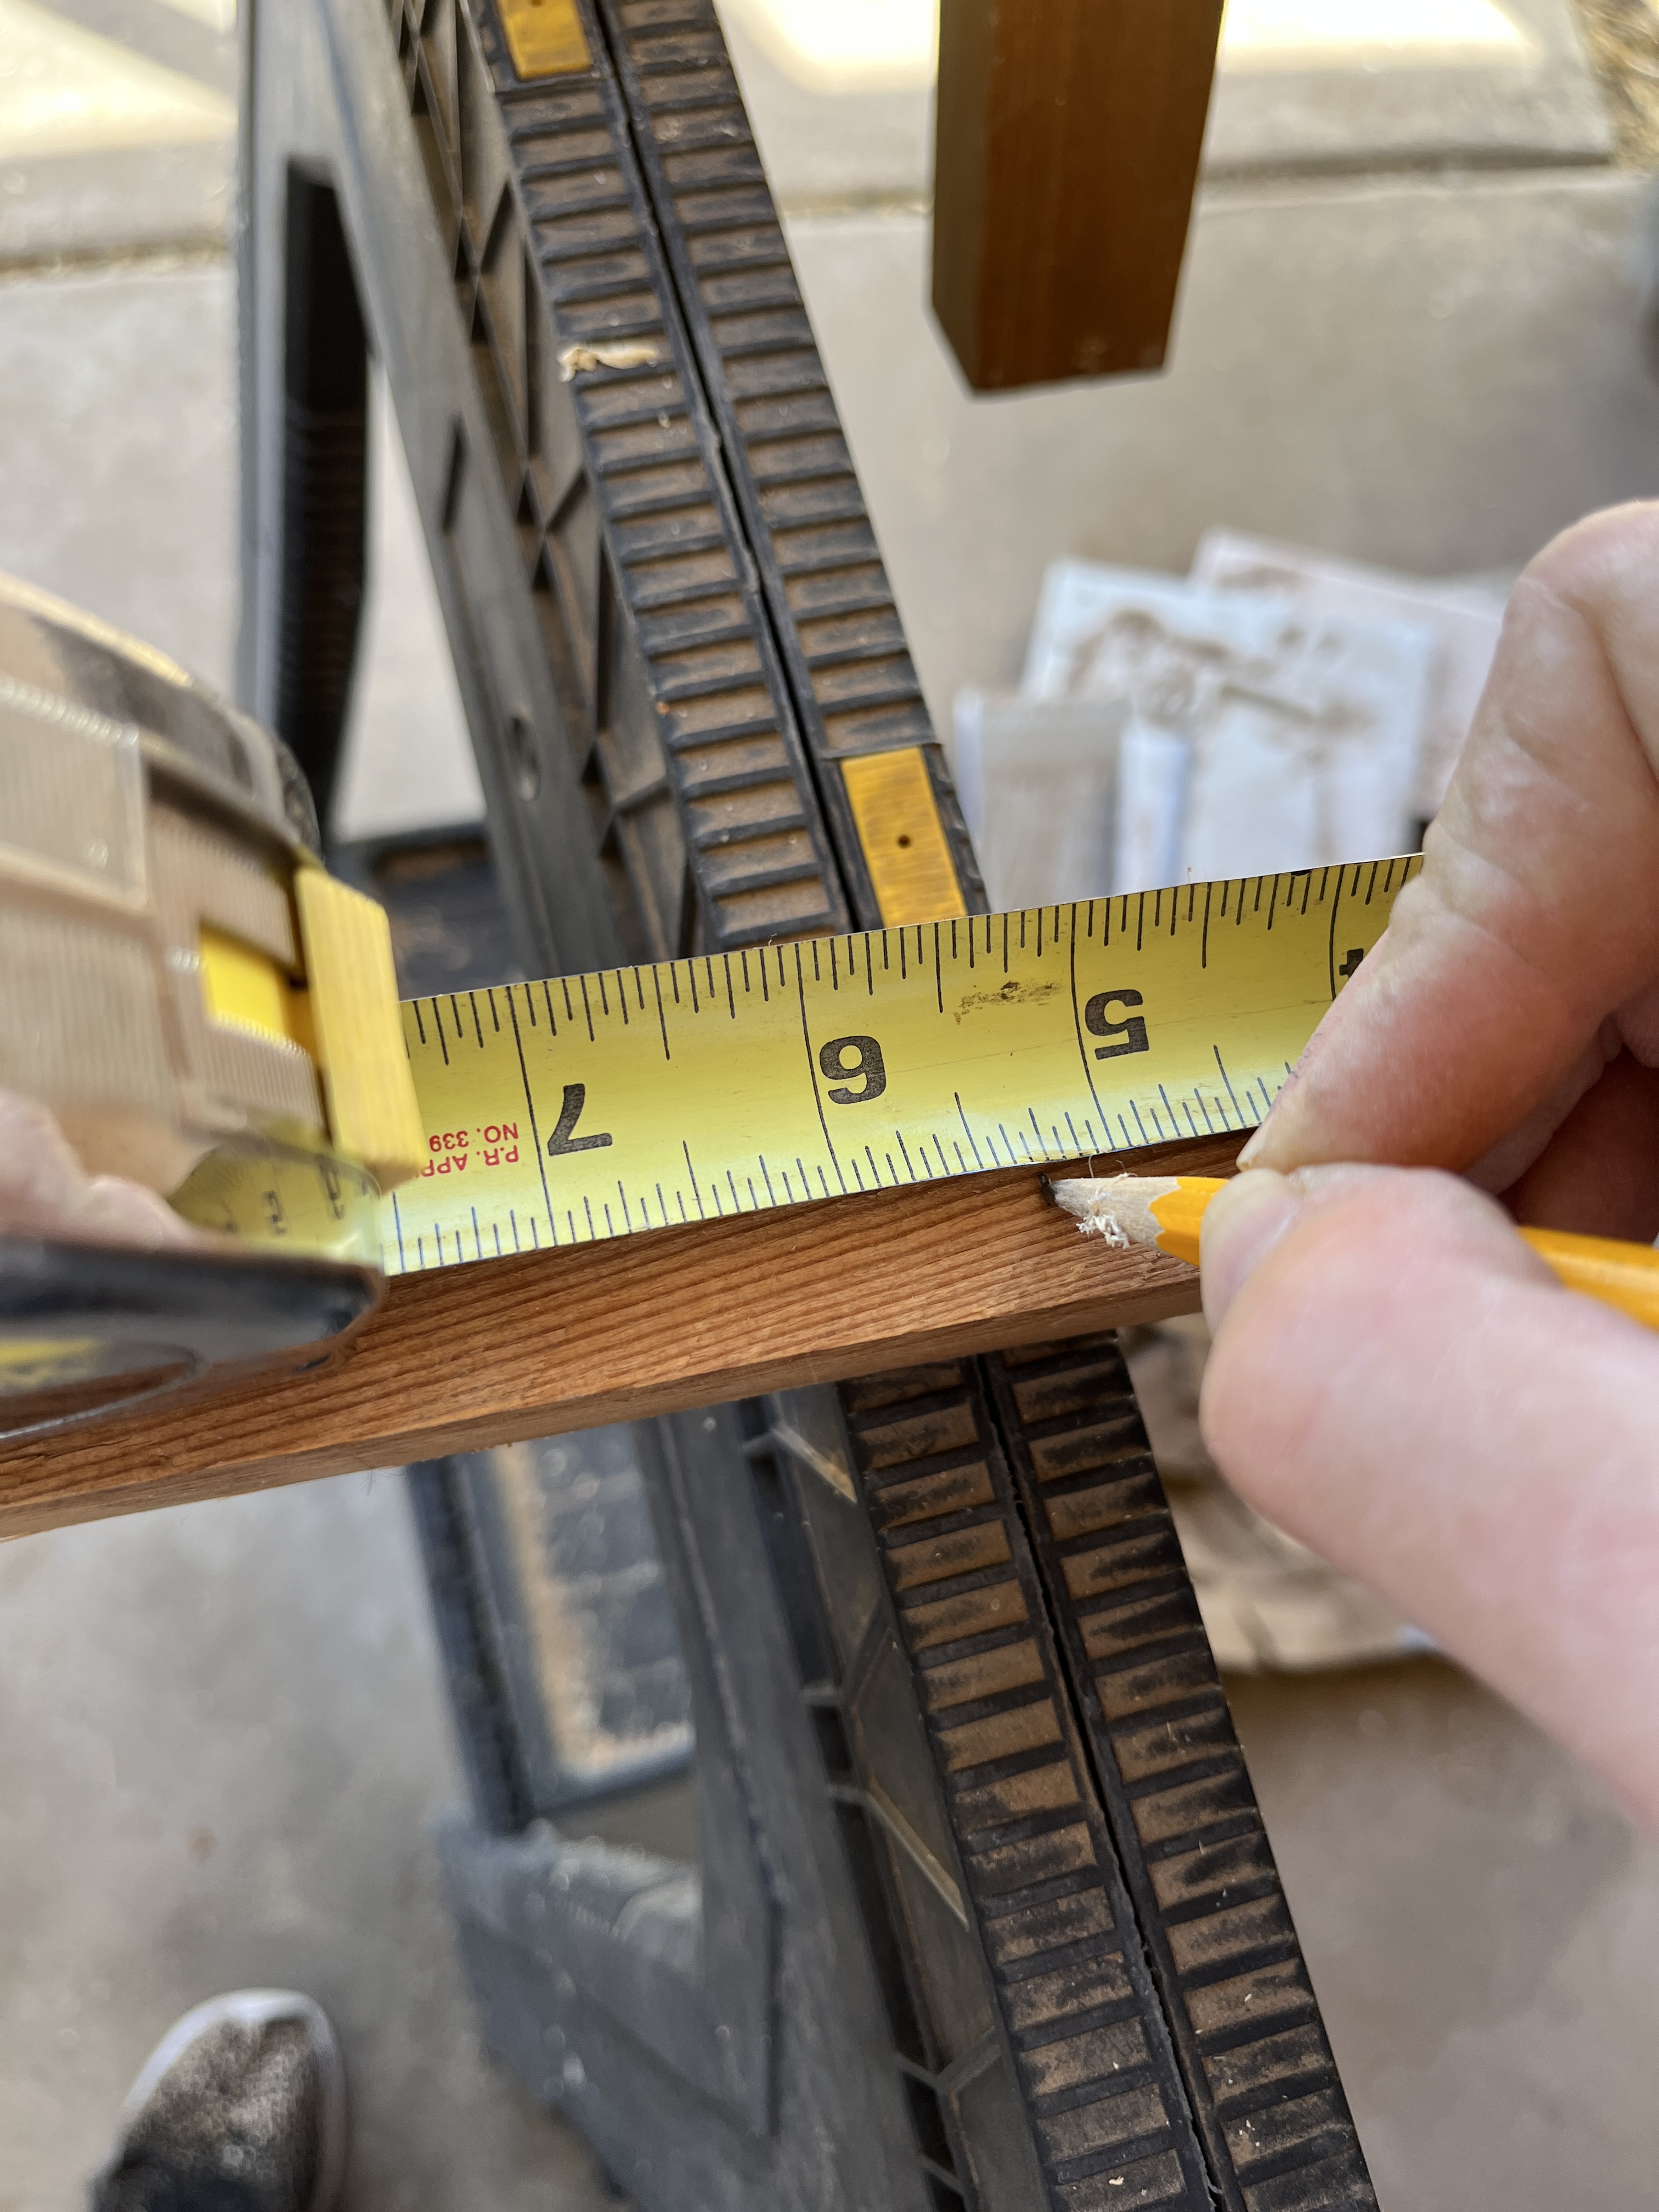
I used a tape measure to measure how far down to put the first cross-piece but used the the first side of the X to figure out where to put the second cross-piece.
One side done…now the other.
Then put the tops on. Attach the 1x6s to the top of the 2x4s. And oops, I forgot to count and cut the 5′ 2×2 supports for the tops! Oh, well, this is a bit different anyway.
Measure and mark the inside length on the 2x2s, then cut to length.
Now grab a couple clamps, drill and screw them on.
Whew! Almost done. Now for the top cross-pieces. But first, a break.
Measure the top span pieces so the over-hang is the same front and back.
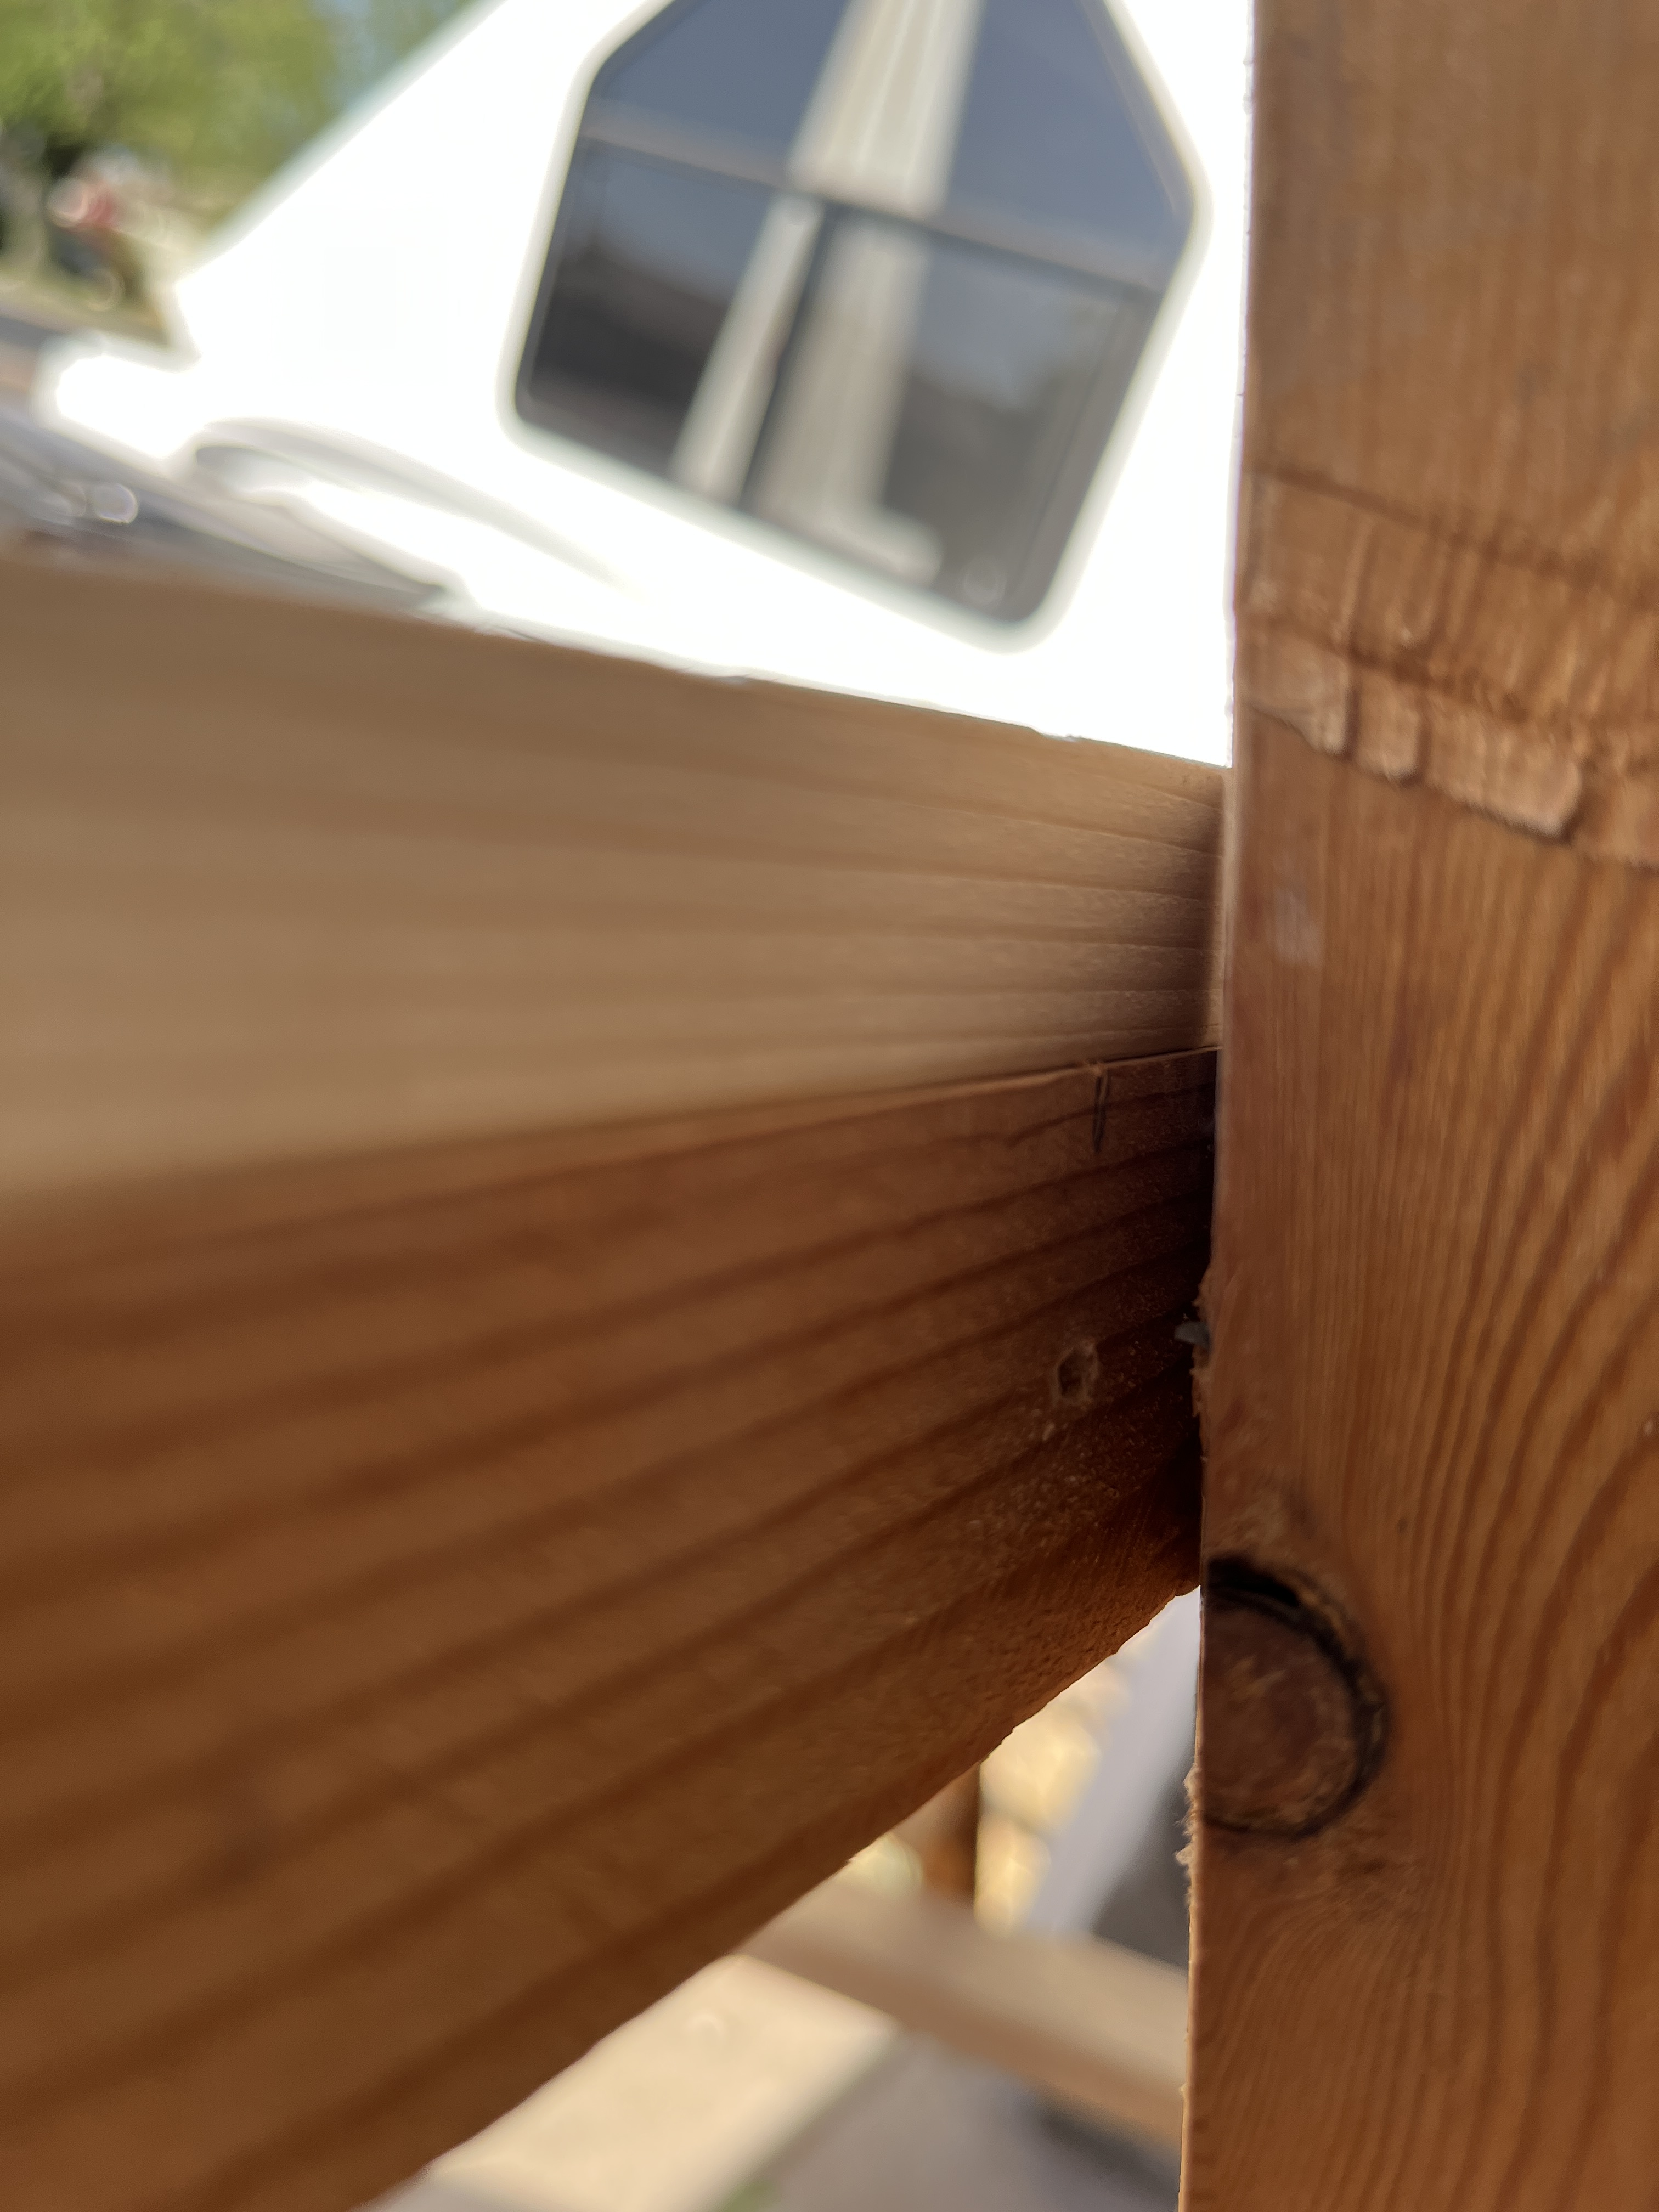
Hold the top carefully in place while you drill, then, since it won’t stay in place yet, drive the screw just barely through the crosspiece.
Line up the tip of the screw with the hole and finish driving it in.
You can measure or just eyeball getting the top spans centered. I measured. Once the tops are secure drill and finish the bottom/back of them.
Drag or carry the finished arbour into position and put it up. I still have to do some digging and grading underneath before securing this one in place. That’ll be maybe next week. It’ll look a lot better after that, honest.
A view of both arbours (I made the one over the west window last week). I’m thinking of adding a long stabilizer a couple feet up from the ground in the back of both of the arbours and maybe another 2′ piece on each side a bit up from the bottom as well. We’ll see about that later, when I have some spare time.
After the window garden gets dug out and re-graded and the arbour is secured I’ll be putting a paved walk in front of the garden. Still have lots of work to do. At least I won’t be bored any time soon.
The way I cook and plan menues I end up cleaning out the fridge fairly regularly, at least every couple of weeks, usually before my next paycheck comes. With whatever is in the pantry I can usually cobble together something nutritious, yummy and not too weird. I was just reminded of this in a Facebook Memory from 9 years ago:
“Cleaning out the fridge feast, 1st course: yummy pasta in white sauce. 2nd course: sweet & sour shrimp 3rd course: roast chicken (the carcass of which will soon be broth) 4th course: salad Beverage: generic red wine Dessert: Chocolate silk pie. I should clean the fridge more often.”
Not everything is still fit for human consumption. My fridge gets cleaned out at random intervals. Sometimes I eat, sometimes the chickens eat, sometimes I feed the compost heap and sometimes I feed the trash can if the something has become a science experiment that’s just too scary and has taken on a life of its own. Hmm…there may be an indy comedy-horror film script in that…
Anyway…it’s time to clean the fridge again. Payday is still a few days away and once again moths are flying out of my open pocketbook. Time to open the fridge. Of course, there’s always something you’ve squirreled away in the freezer. 1-person portions of lasagna, chili, casseroles, stir fry…but here we’re going to pretend that those have been et and we’re scraping the bottom of the barrel with just basic ingredients left. I’m surprised how much I have in there! There’s still 2 or 3 weeks of work lunches, so that’s no worries, now to figure out what to make with the leftovers.
2 avocados. OK, these came from the fruit bowl but they still need to be used. I also have onions, garlic, tomatoes and lemons so guacamole is happening.
Now to the fridge. Ignore the shelf of bottles, that’s rice wine I made that I need to deal with. Leftover beans, so re-fry those and make a nice burrito. I have cheese, salsa, tortillas and sour cream so even without leftover meat I’m good there. Or make a small pot of chili if you have a can of dices tomatoes in the pantry. Garlic, oregano and LOTS of chili pepper and topped with cheese makes a nice dinner with cornbread or tortillas or chips or crackers on the side.
More than 1 flour tortilla and enough cheese so there’s a cheese crisp on the side.
A jar of pickles a friend made with 1 spear left. That’s a snack.
Prickly pear jelly a friend made, just enough left in the jar for breakfast tomorrow. There’s still marble rye bread, so there’s the toast. YUM!
Bread dough waiting to be a loaf. I’ll set that to rise tomorrow after work. There’s also some Branson’s pickle so … *rummaging in freezer* … Found some ham and Swiss cheese. I can have a Ploughman’s Lunch for tea tomorrow after work when the bread’s done. Cheddar would’ve been more Plaughman-lunch-ish than Swiss but it’ll work fine. It’s still cheese. That’ll make a lovely dinner.
If I hadn’t had Branston’s pickle I could have made a flatbread with tomatoes, onion, mushrooms and cheese as a kind of pizza or just fancy flatbread.
Or I could make the bread into a regular loaf and make tepenade from the olives I found. Scooping up stuff with pieces of bread is fun, especially if you have some wine to wash it down with. Soda, Kool-ade (sometimes we must resort to this) or a good ale will do, though.
Or I could make Welsh rarebit with cheese and a bottle of beer I found, just melt some grated cheese in beer, toast the bread and pour the melted cheese over the toast. Pickles go great with this…maybe I’ll save the friend’s pickle for tomorrow.
I’ve got lunches for work frozen and ready to go so that’s no worry. If I didn’t have random weird things to cobble together in the fridge I could just dig into that but I’d rather pull something out of the pantry before shorting myself on work lunches.
In the pantry I had linguini, canned clams, olive oil and garlic so I had linguini in clam sauce last night for myself and 2 friends. Made garlic breadsticks from some of the refrigerator bread dough and salad to go with it. The 1 bottle of white wine I had was just enough to make the sauce and each have a glass.
I also have cans of tuna so I can make tuna salad in future. Or *more rummaging* cook up these egg noodles, make a white sauce with the tuna (or just mix it with cream of mushroom soup), spread that over the noodles in a casserole dish, top with cheese and buttered breadcrumbs, bake til bubbly and enjoy a nice dinner with leftovers for future nights or day-off lunches.
I always try to keep canned soups for when life gets tight or I just need a light comfort food night. Tomato and chicken noodle are always in there for when I feel pookie. Cream of mushroom is in there for quick strogonoff or random casseroles (a-la 1950s cooking…I was born then, I’m allowed!). The vegetable beef is generally for making pasty fillings for lunches but makes a good dinner, as does bean soup and clam chowder. Sometimes other things end up there, too. If soup isn’t quite enough, a sandwich or salad fills it out, depending on what’s in the fridge or garden.
Got eggs? I got chickens so I (almost) always have eggs. If I only have a few I can make an egg sandwich or use it to bind stuff together in another recipe (leftover bread into stuffing or bread pudding, lots of stuff…). Or maybe an omelette or quiche.
Got a potato? Bake it, stuff it with all the best stuff (cheese, butter, bacon or whatever leftover meat you have, sour cream, salsa…) and have a feast.
Having a few standard things in the kitchen (flour, sugar, rice, oatmeal, condiments, onions, olive oil, butter…) helps make things when there’s nothing to eat. It’s amazing how many things you can make if you know how. Leftovers suddenly take on a life of their own, changing from what they were (roast, boiled, grilled…) into some new, amazing concoction. With a little imagination and some inspiration form your favourite search engine you should be able to come up with surprisingly good stuff when the kitchen starts getting scant. I’ve been doing the make-something-from-something-else trick since I was a kid babysitting the brothers and sisters when my parents had evening meetings, classes or were just home late. Since some or most of the work is already done, making something interesting from leftovers is a great way for kids to get into cooking. Yay for mystery dinners!
When I started writing this a few months ago my cupboards were more bare. Apparently I’ve come up in the world lately and have an embarrassment of options.
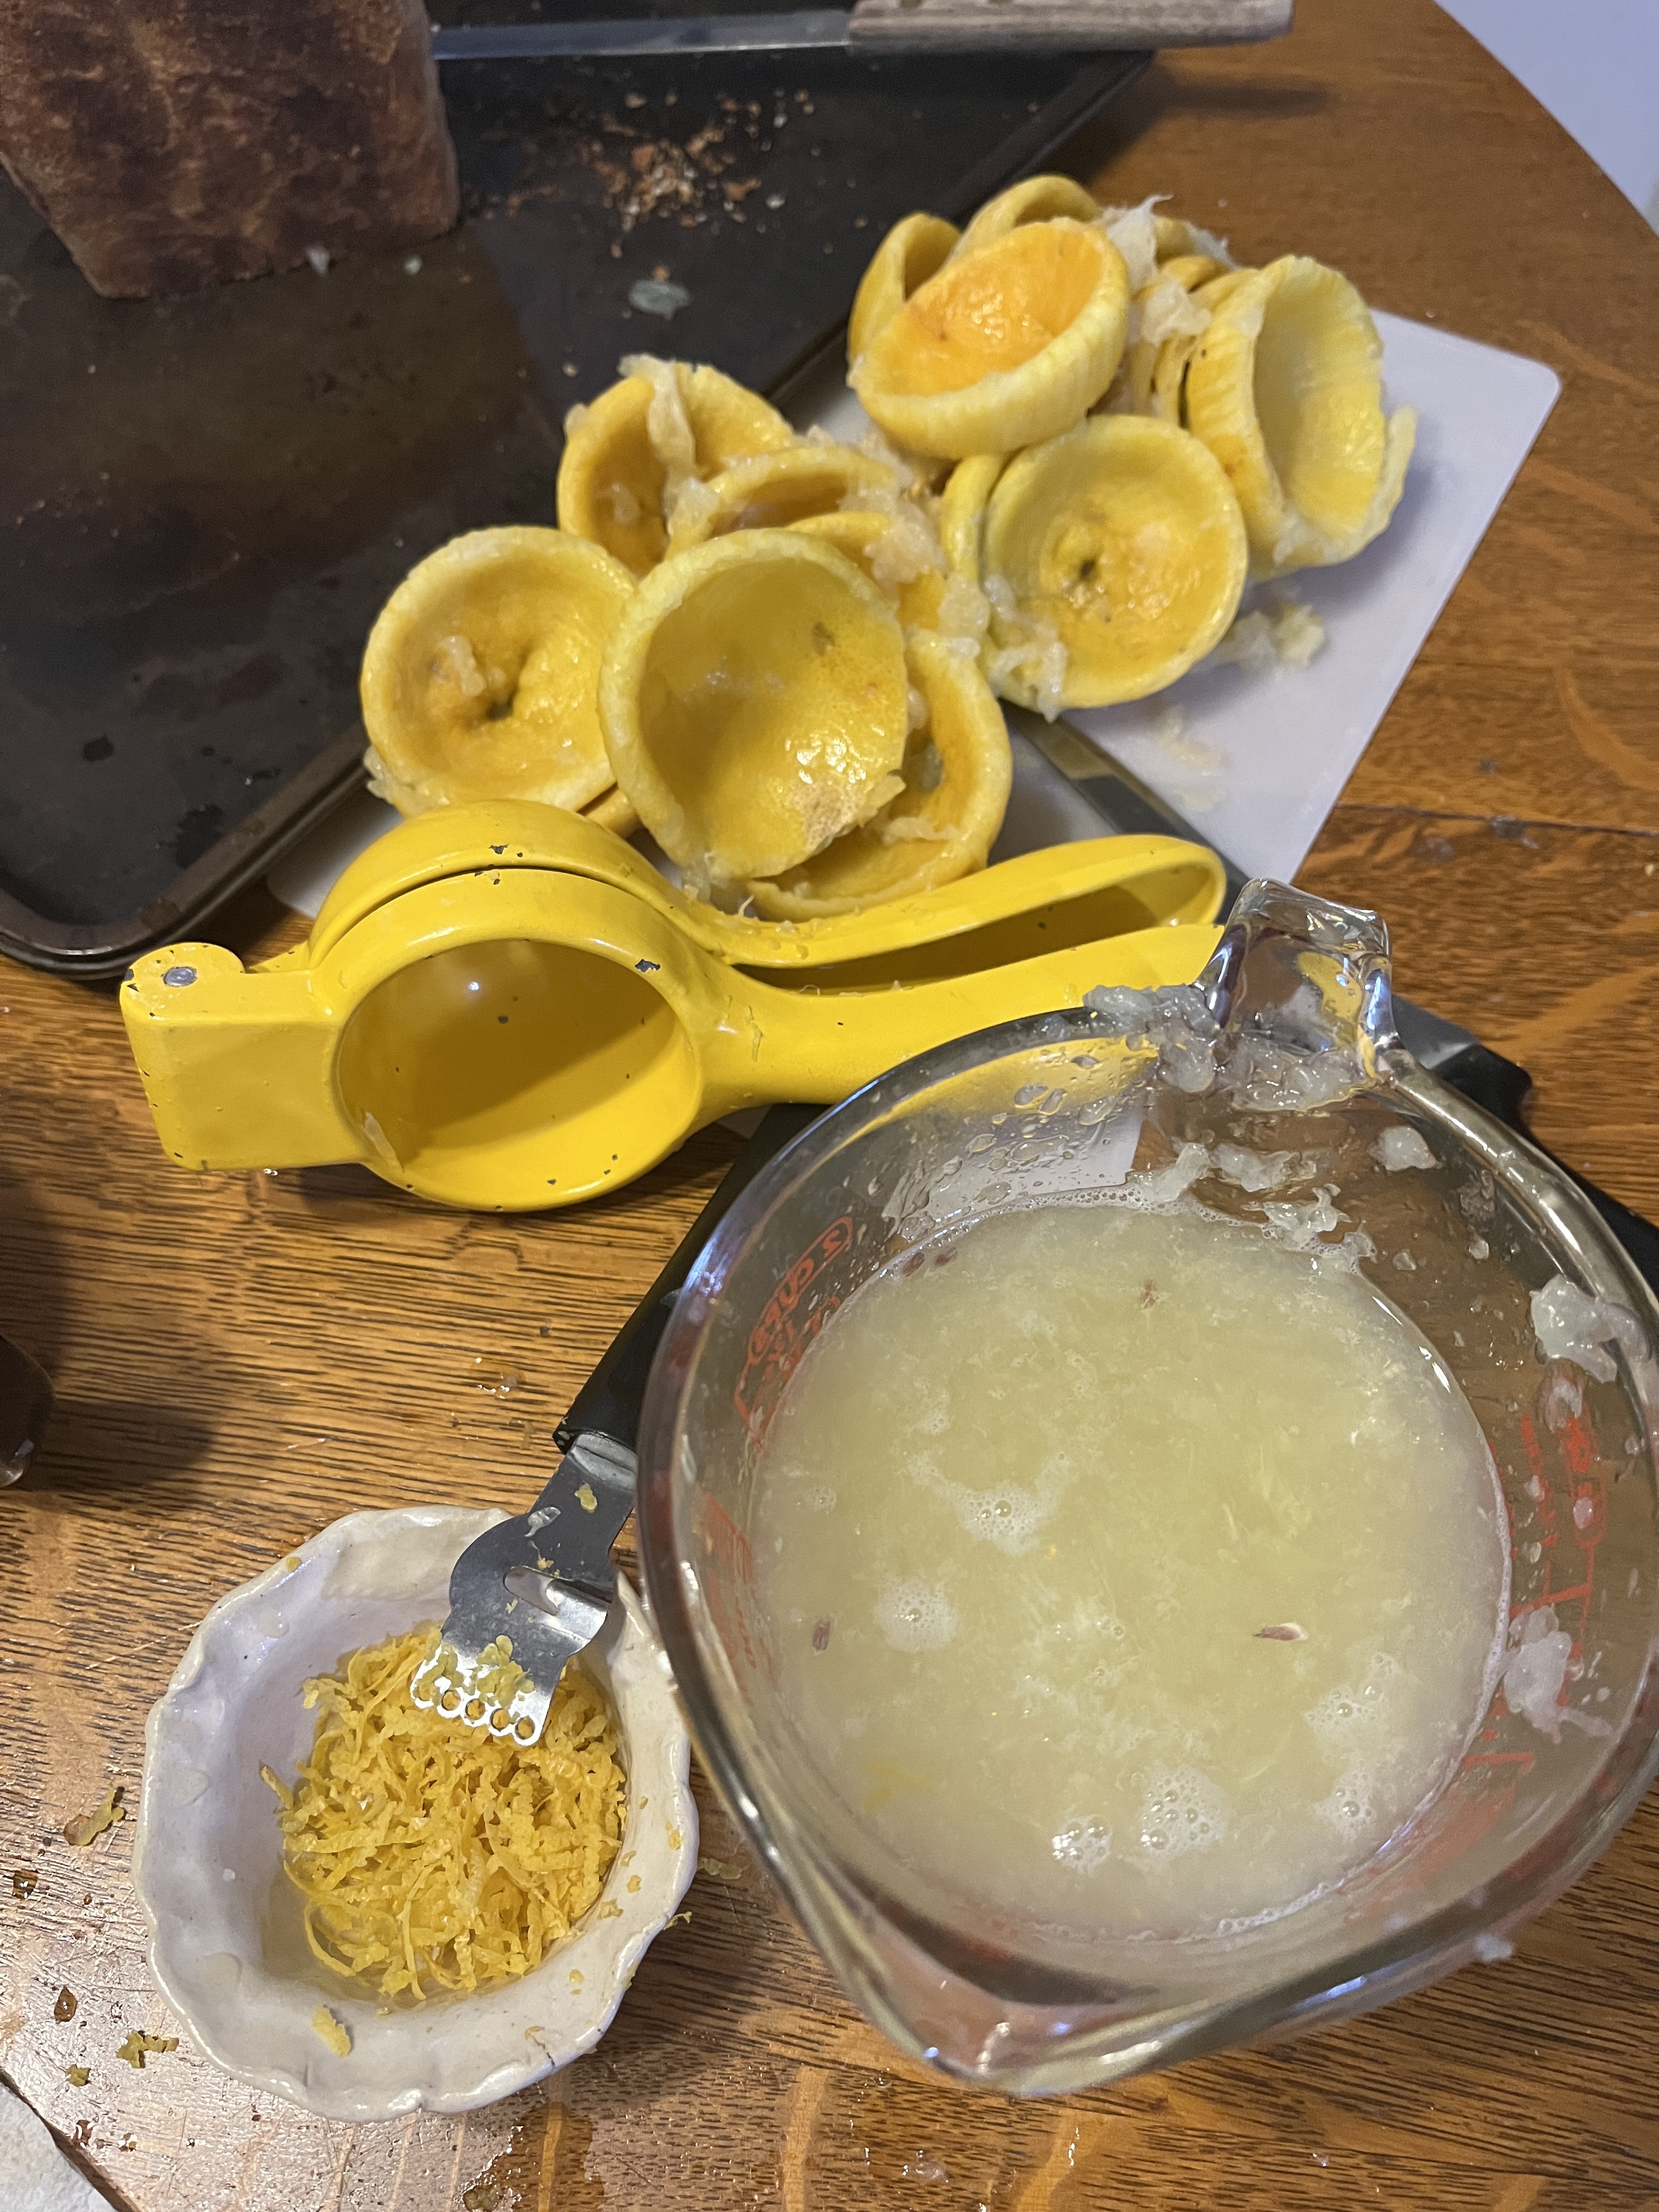
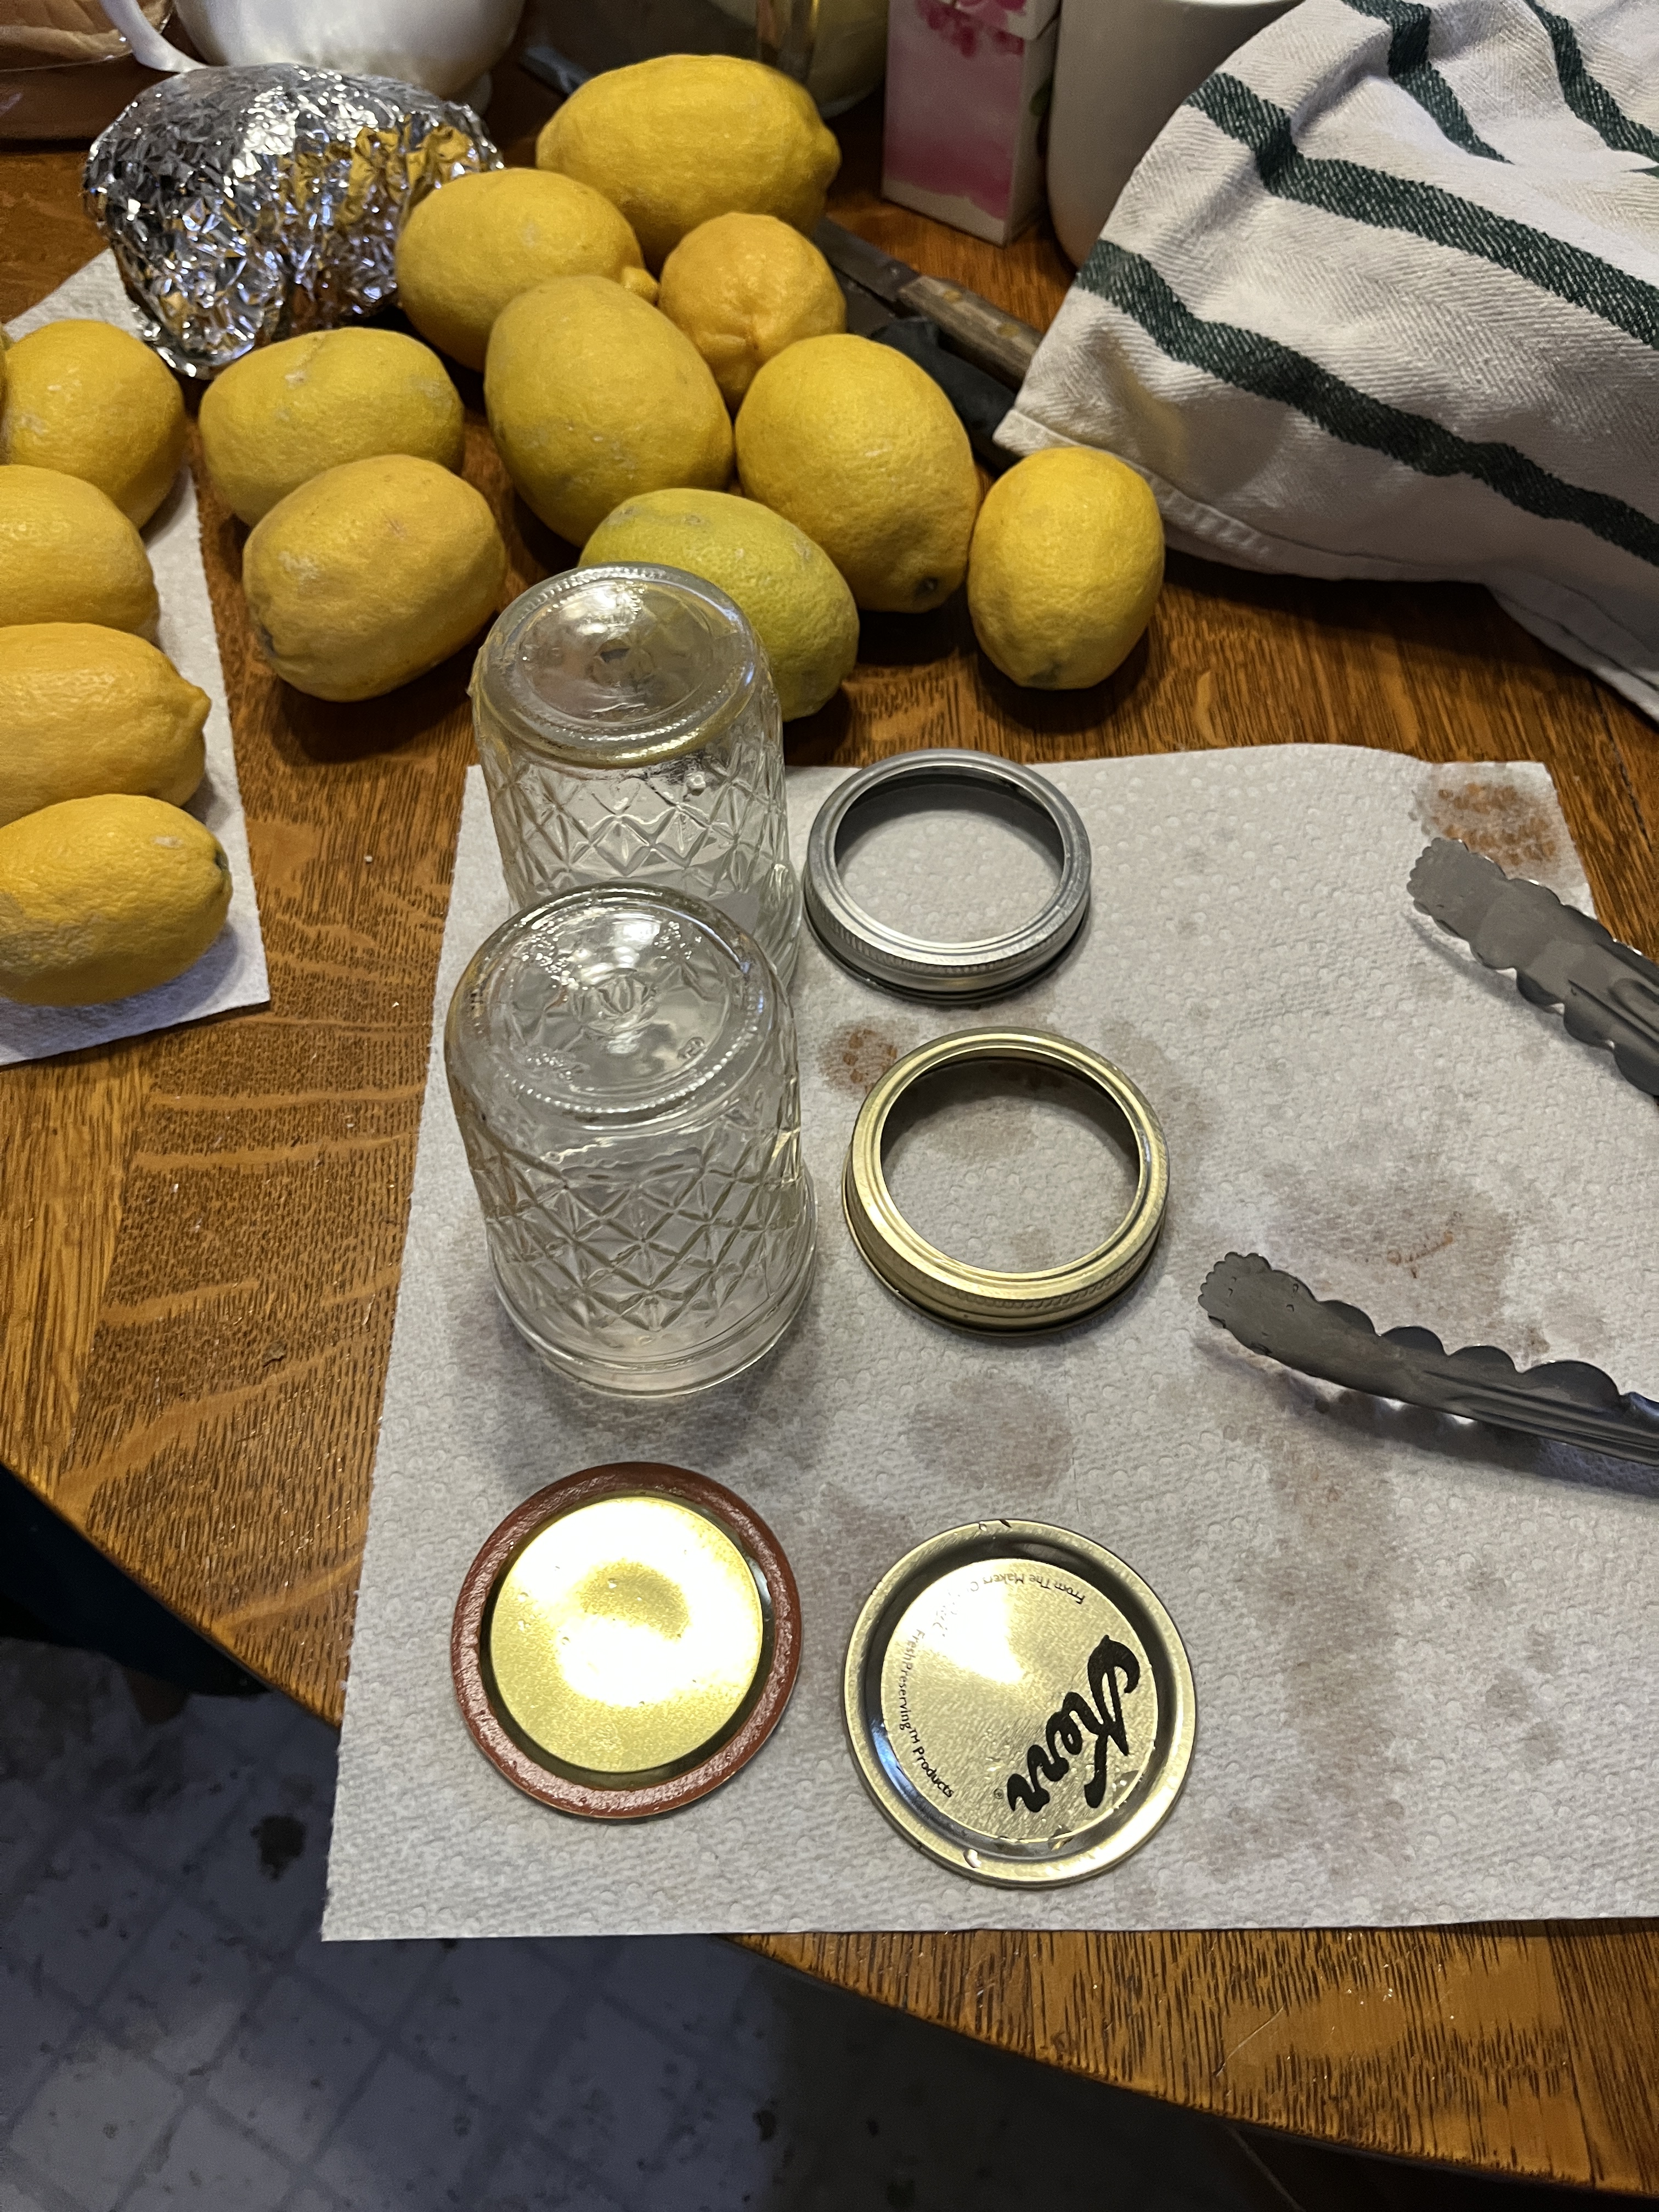
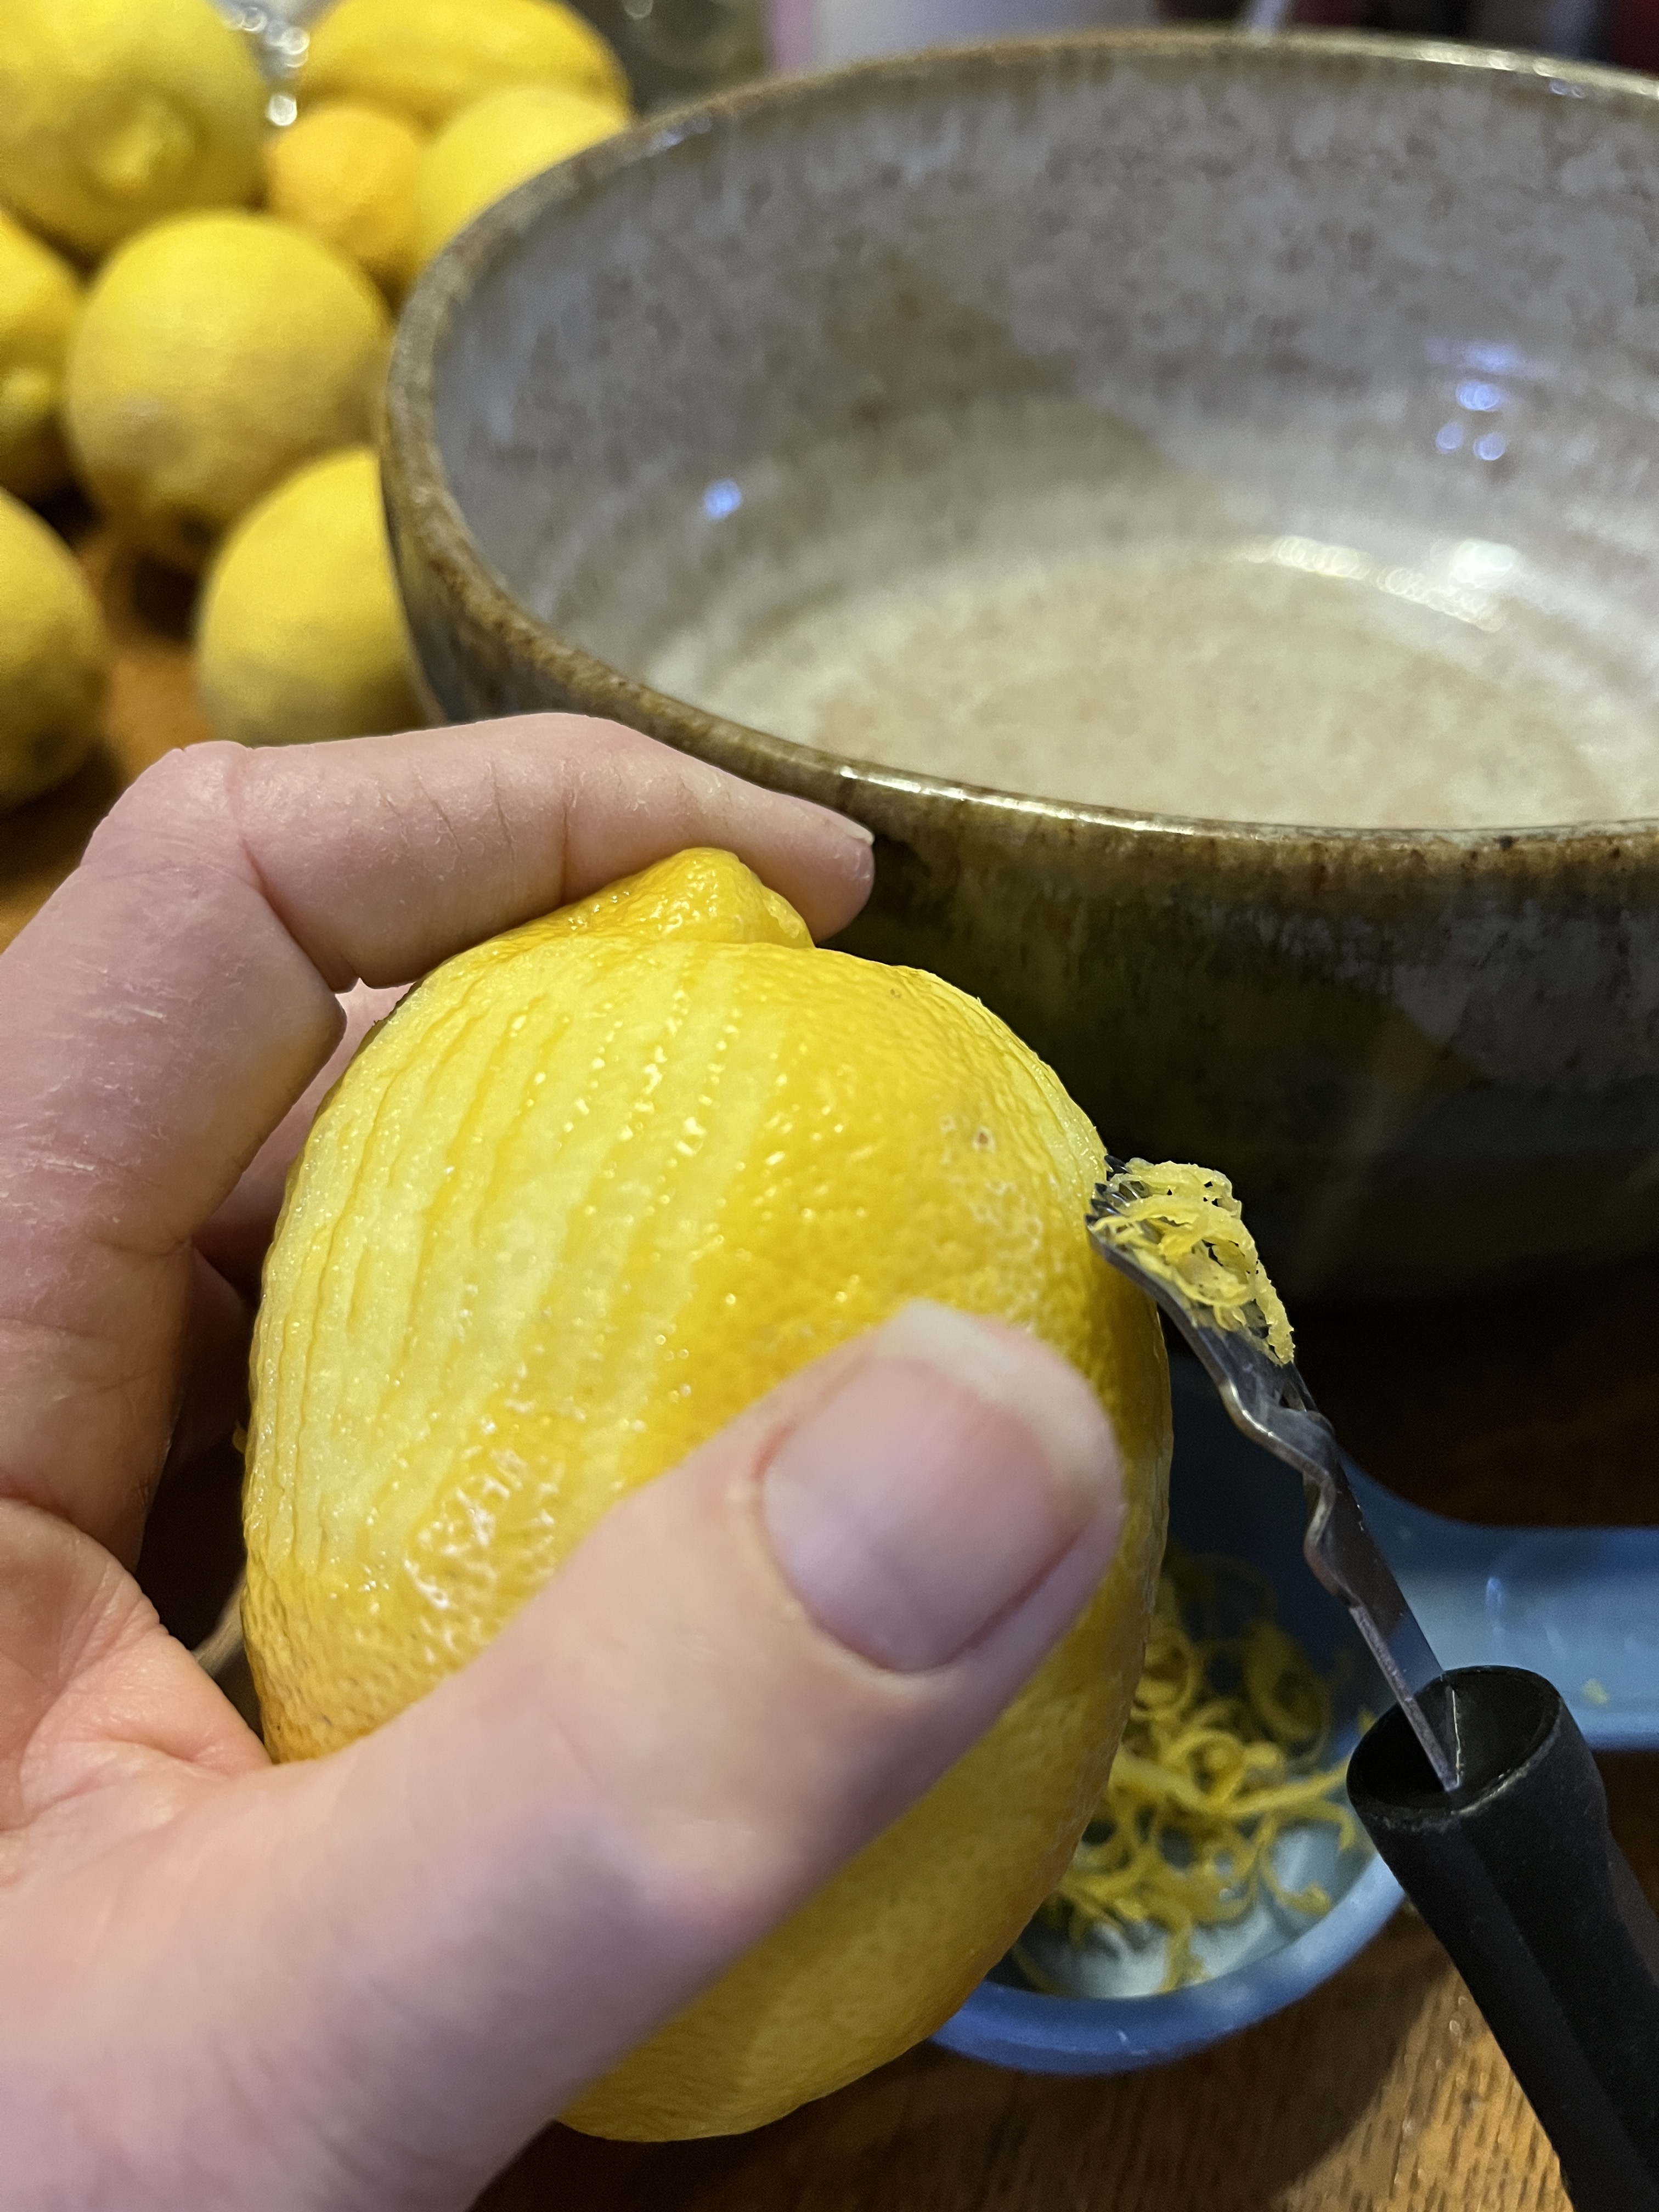
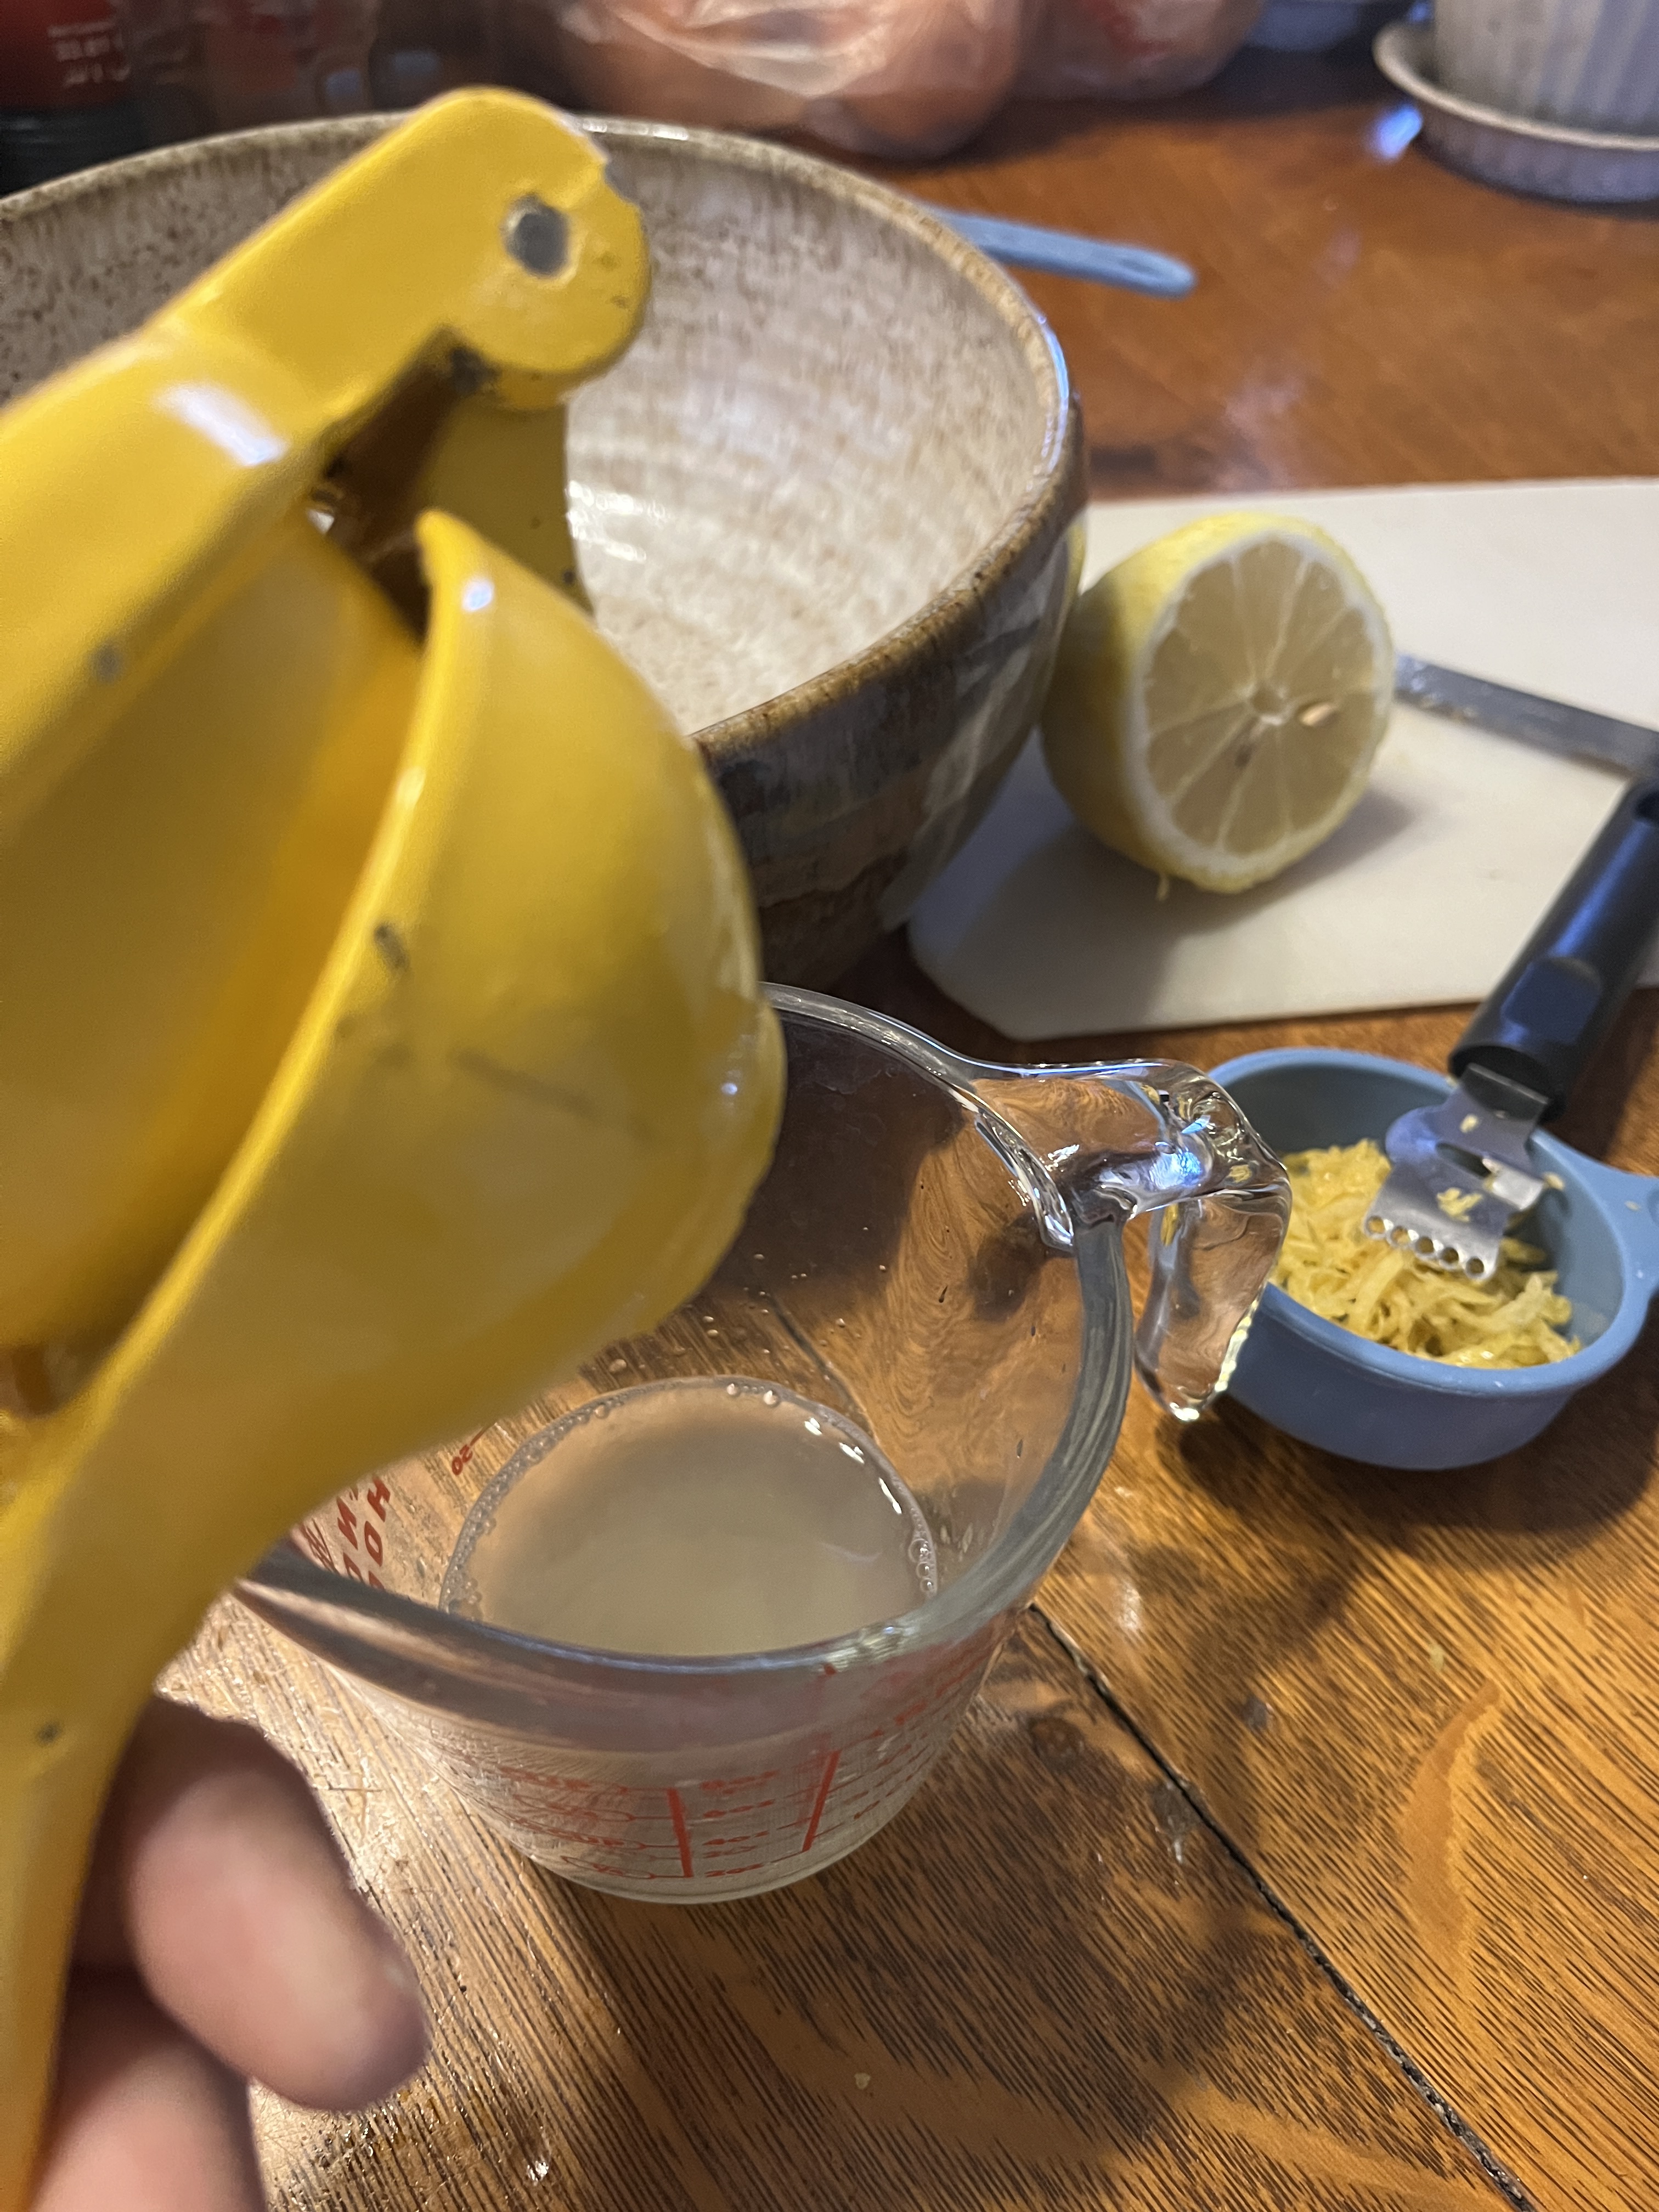
So many lemons this year! I’ve used lemons fresh off the tree for months, then after I had to harvest 2 weeks ago (late this year) made lemon curd, lemon meringue pie, lemon cookies (and cloud-light meringues from the leftover whites), lemon poppyseed cakes and now lemonade. I haven’t made lemonade in years and never used the zest but now that I have a zester I can really go to town on the flavour. It’s fairly easy, if messy.
You’ll need
8-10 lemons
1 1/2c sugar plus 1 1/2c water
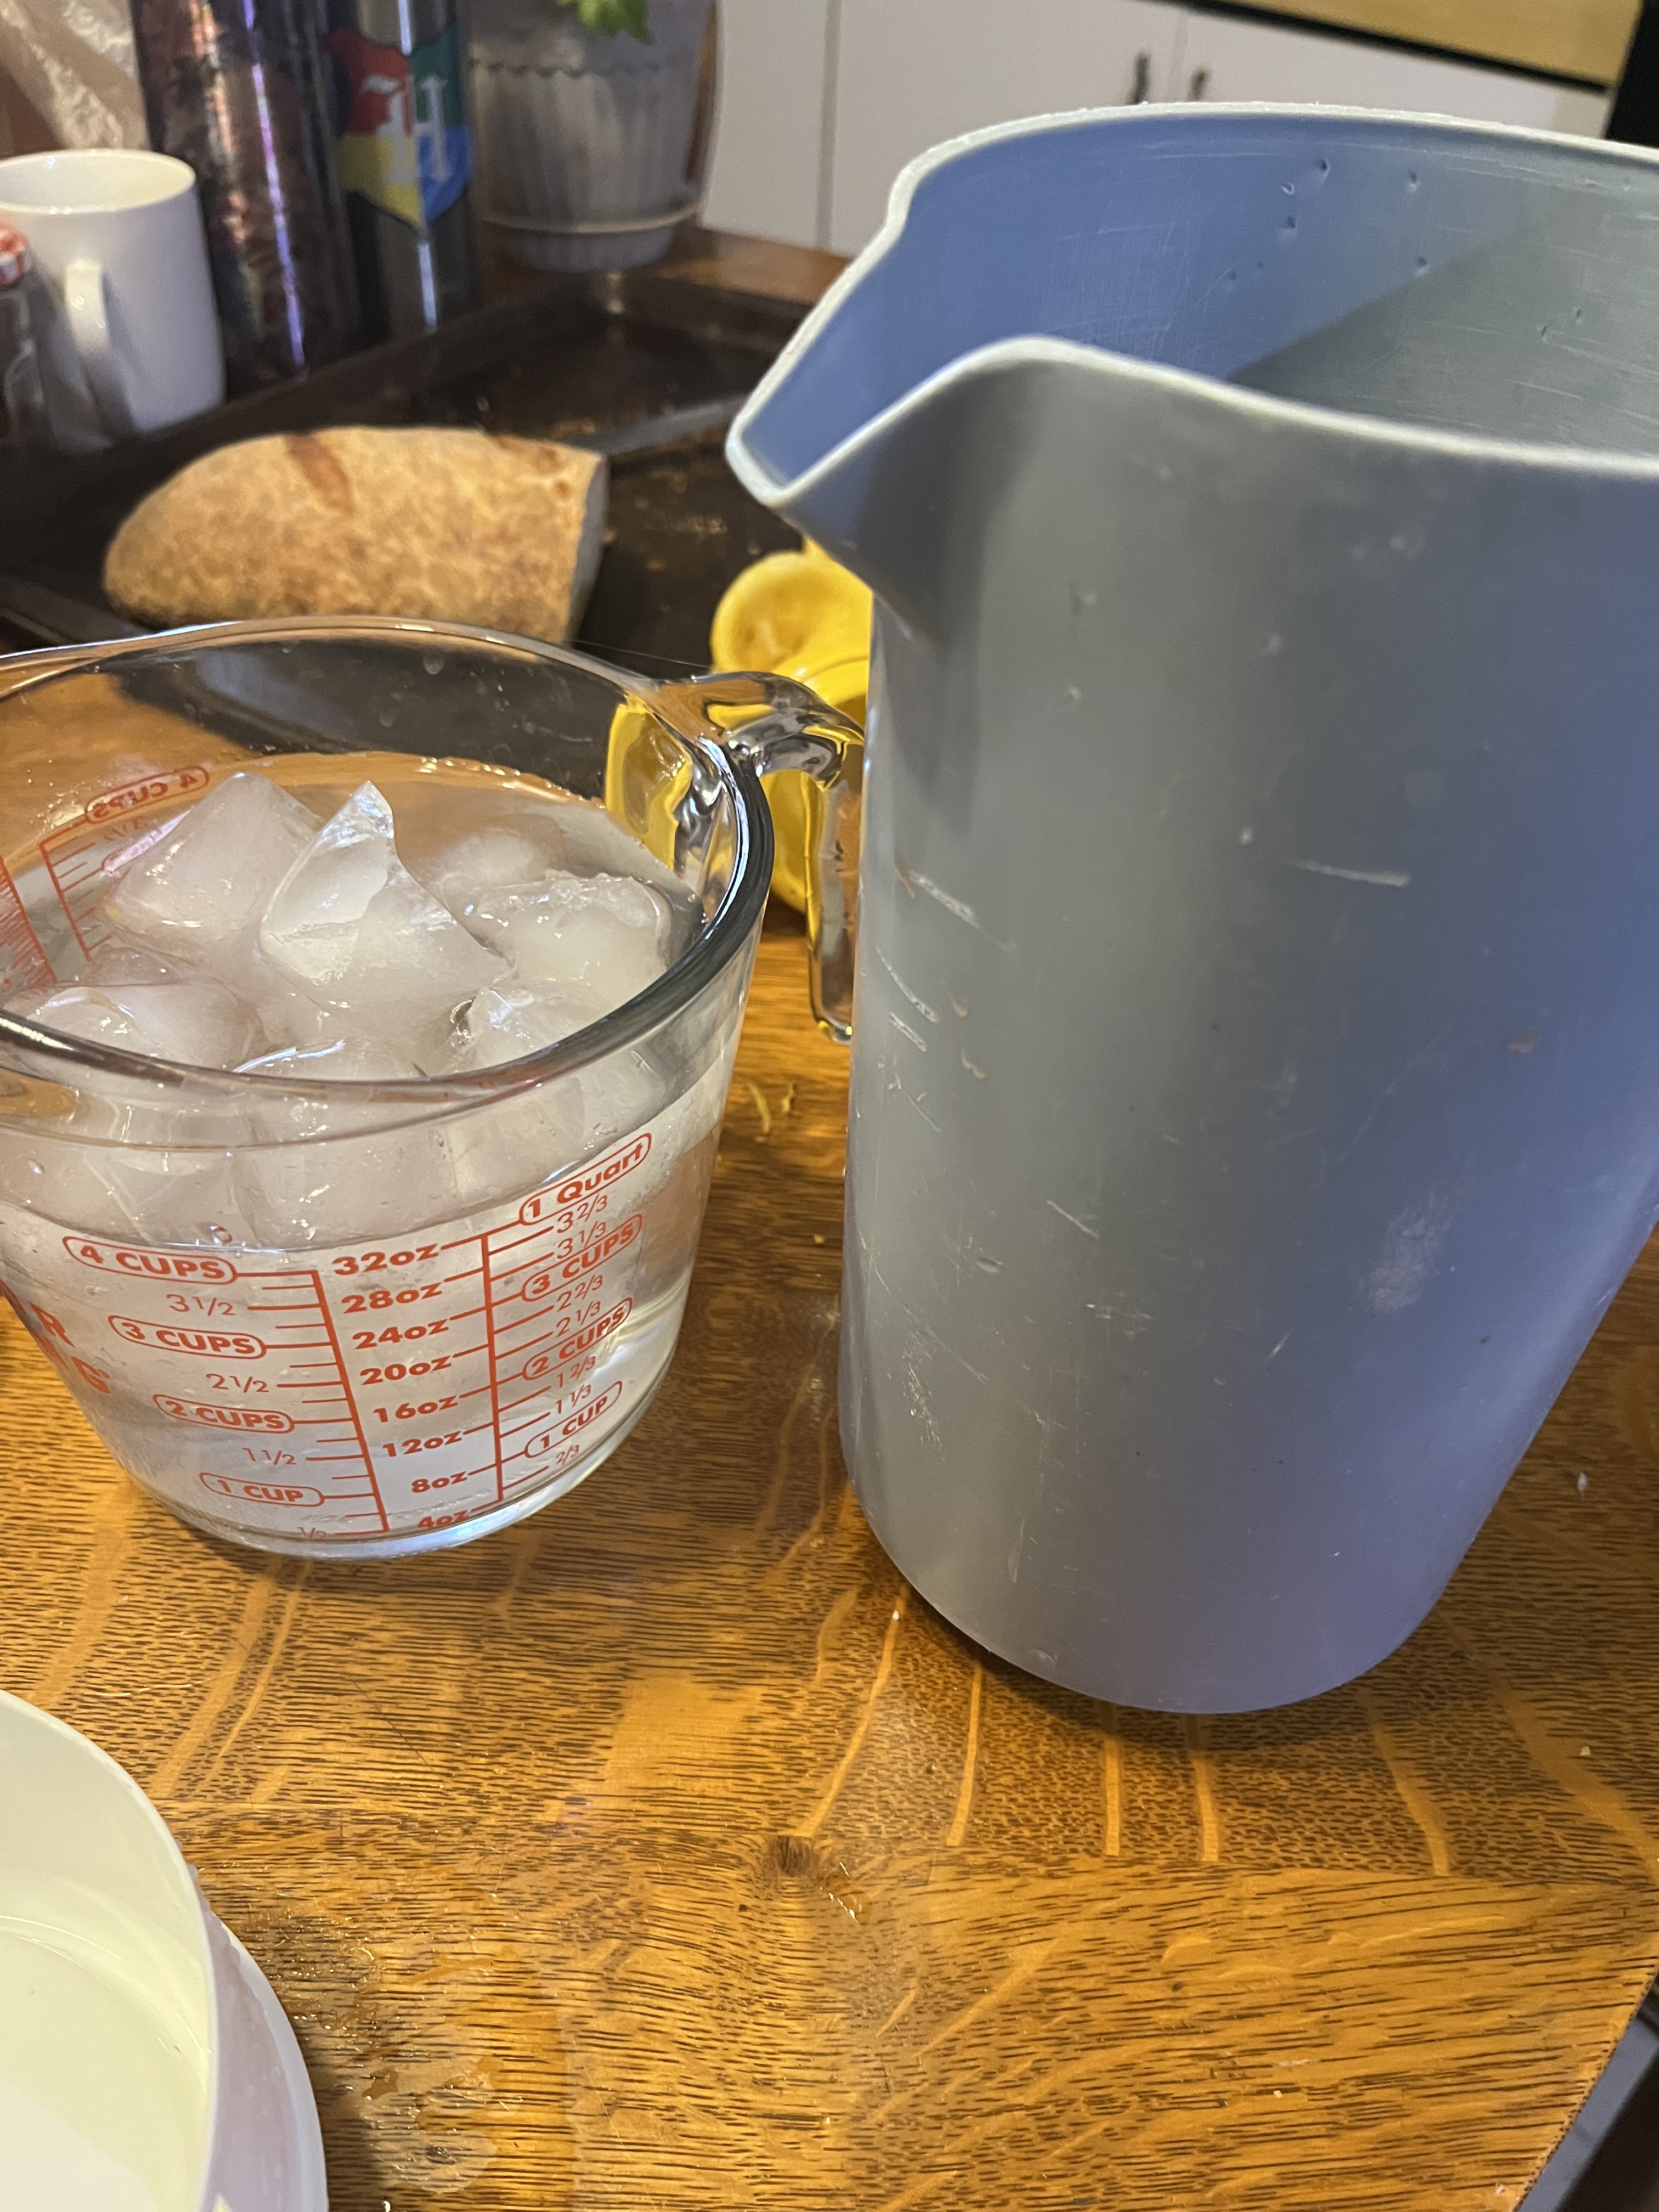
7c ice water
Optional: Berries of your choice for embellishment
Zest and juice the lemons. You might want to wear goggles or at least keep your glasses on. Squirts are real! I had to wash my face afterwards and was very glad for my glasses! Don’t have a zester? Quick! Run out and get one! I don’t use it often but when I need it it’s the best thing for the job!
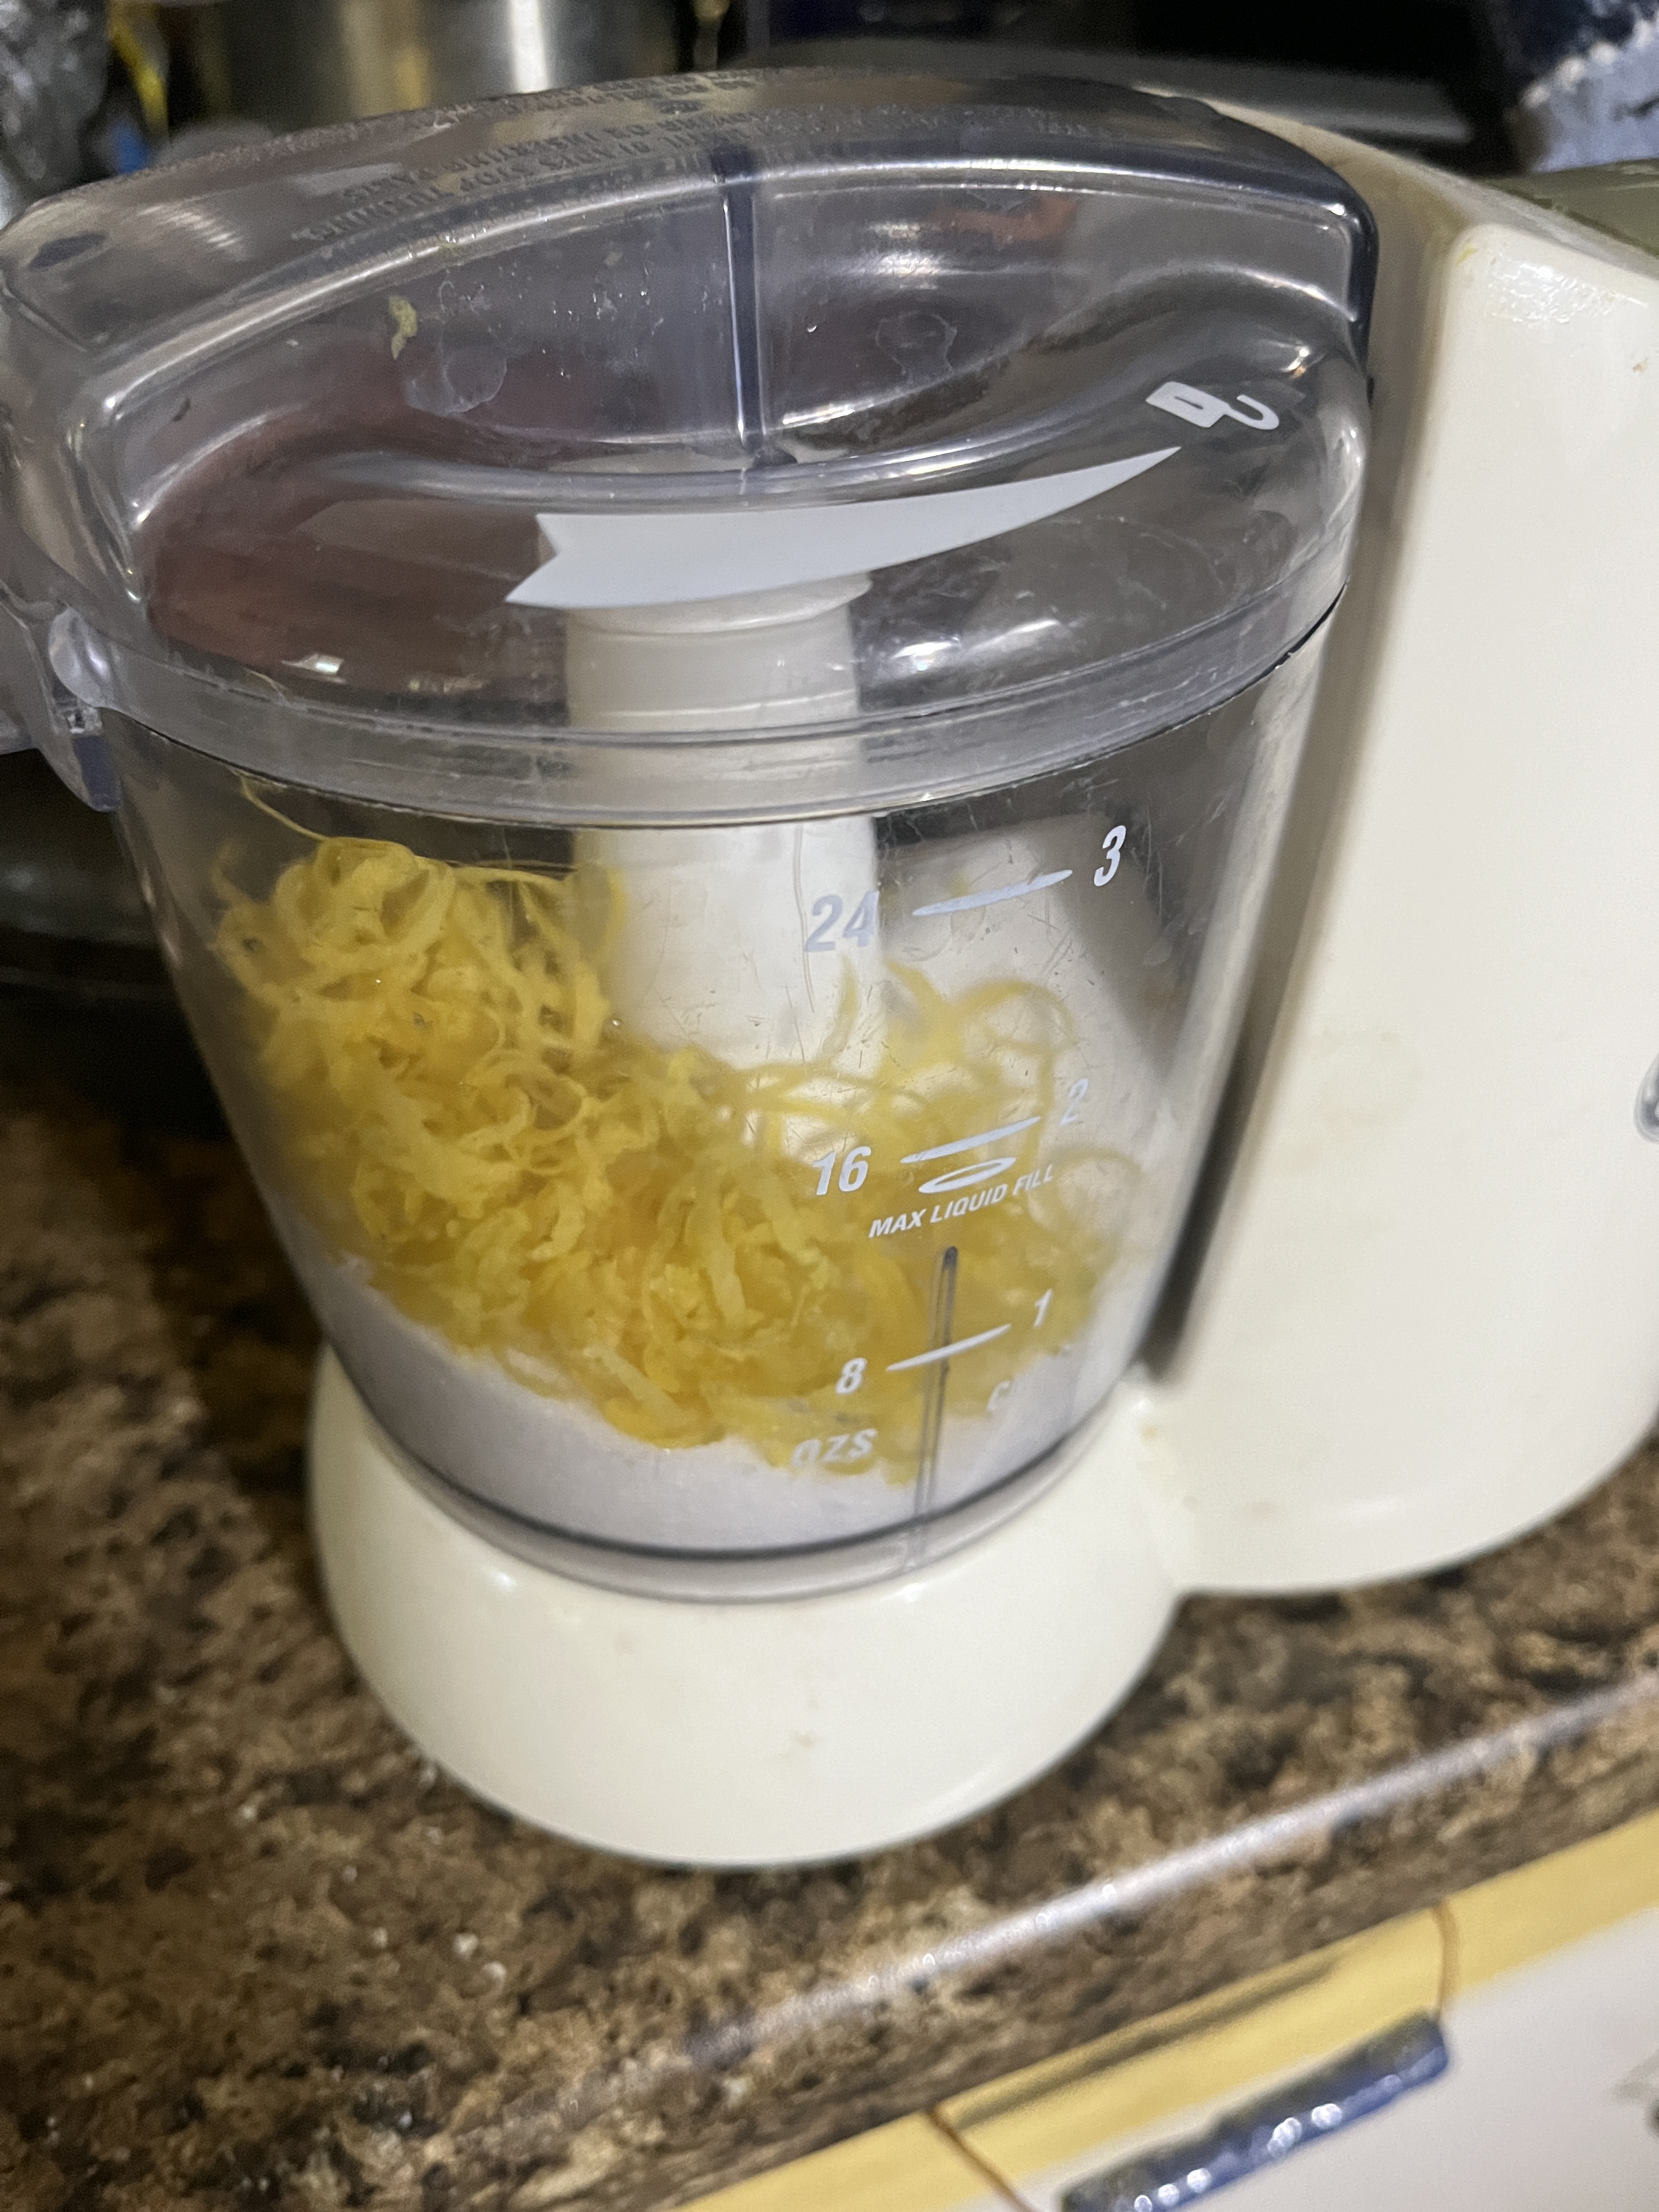
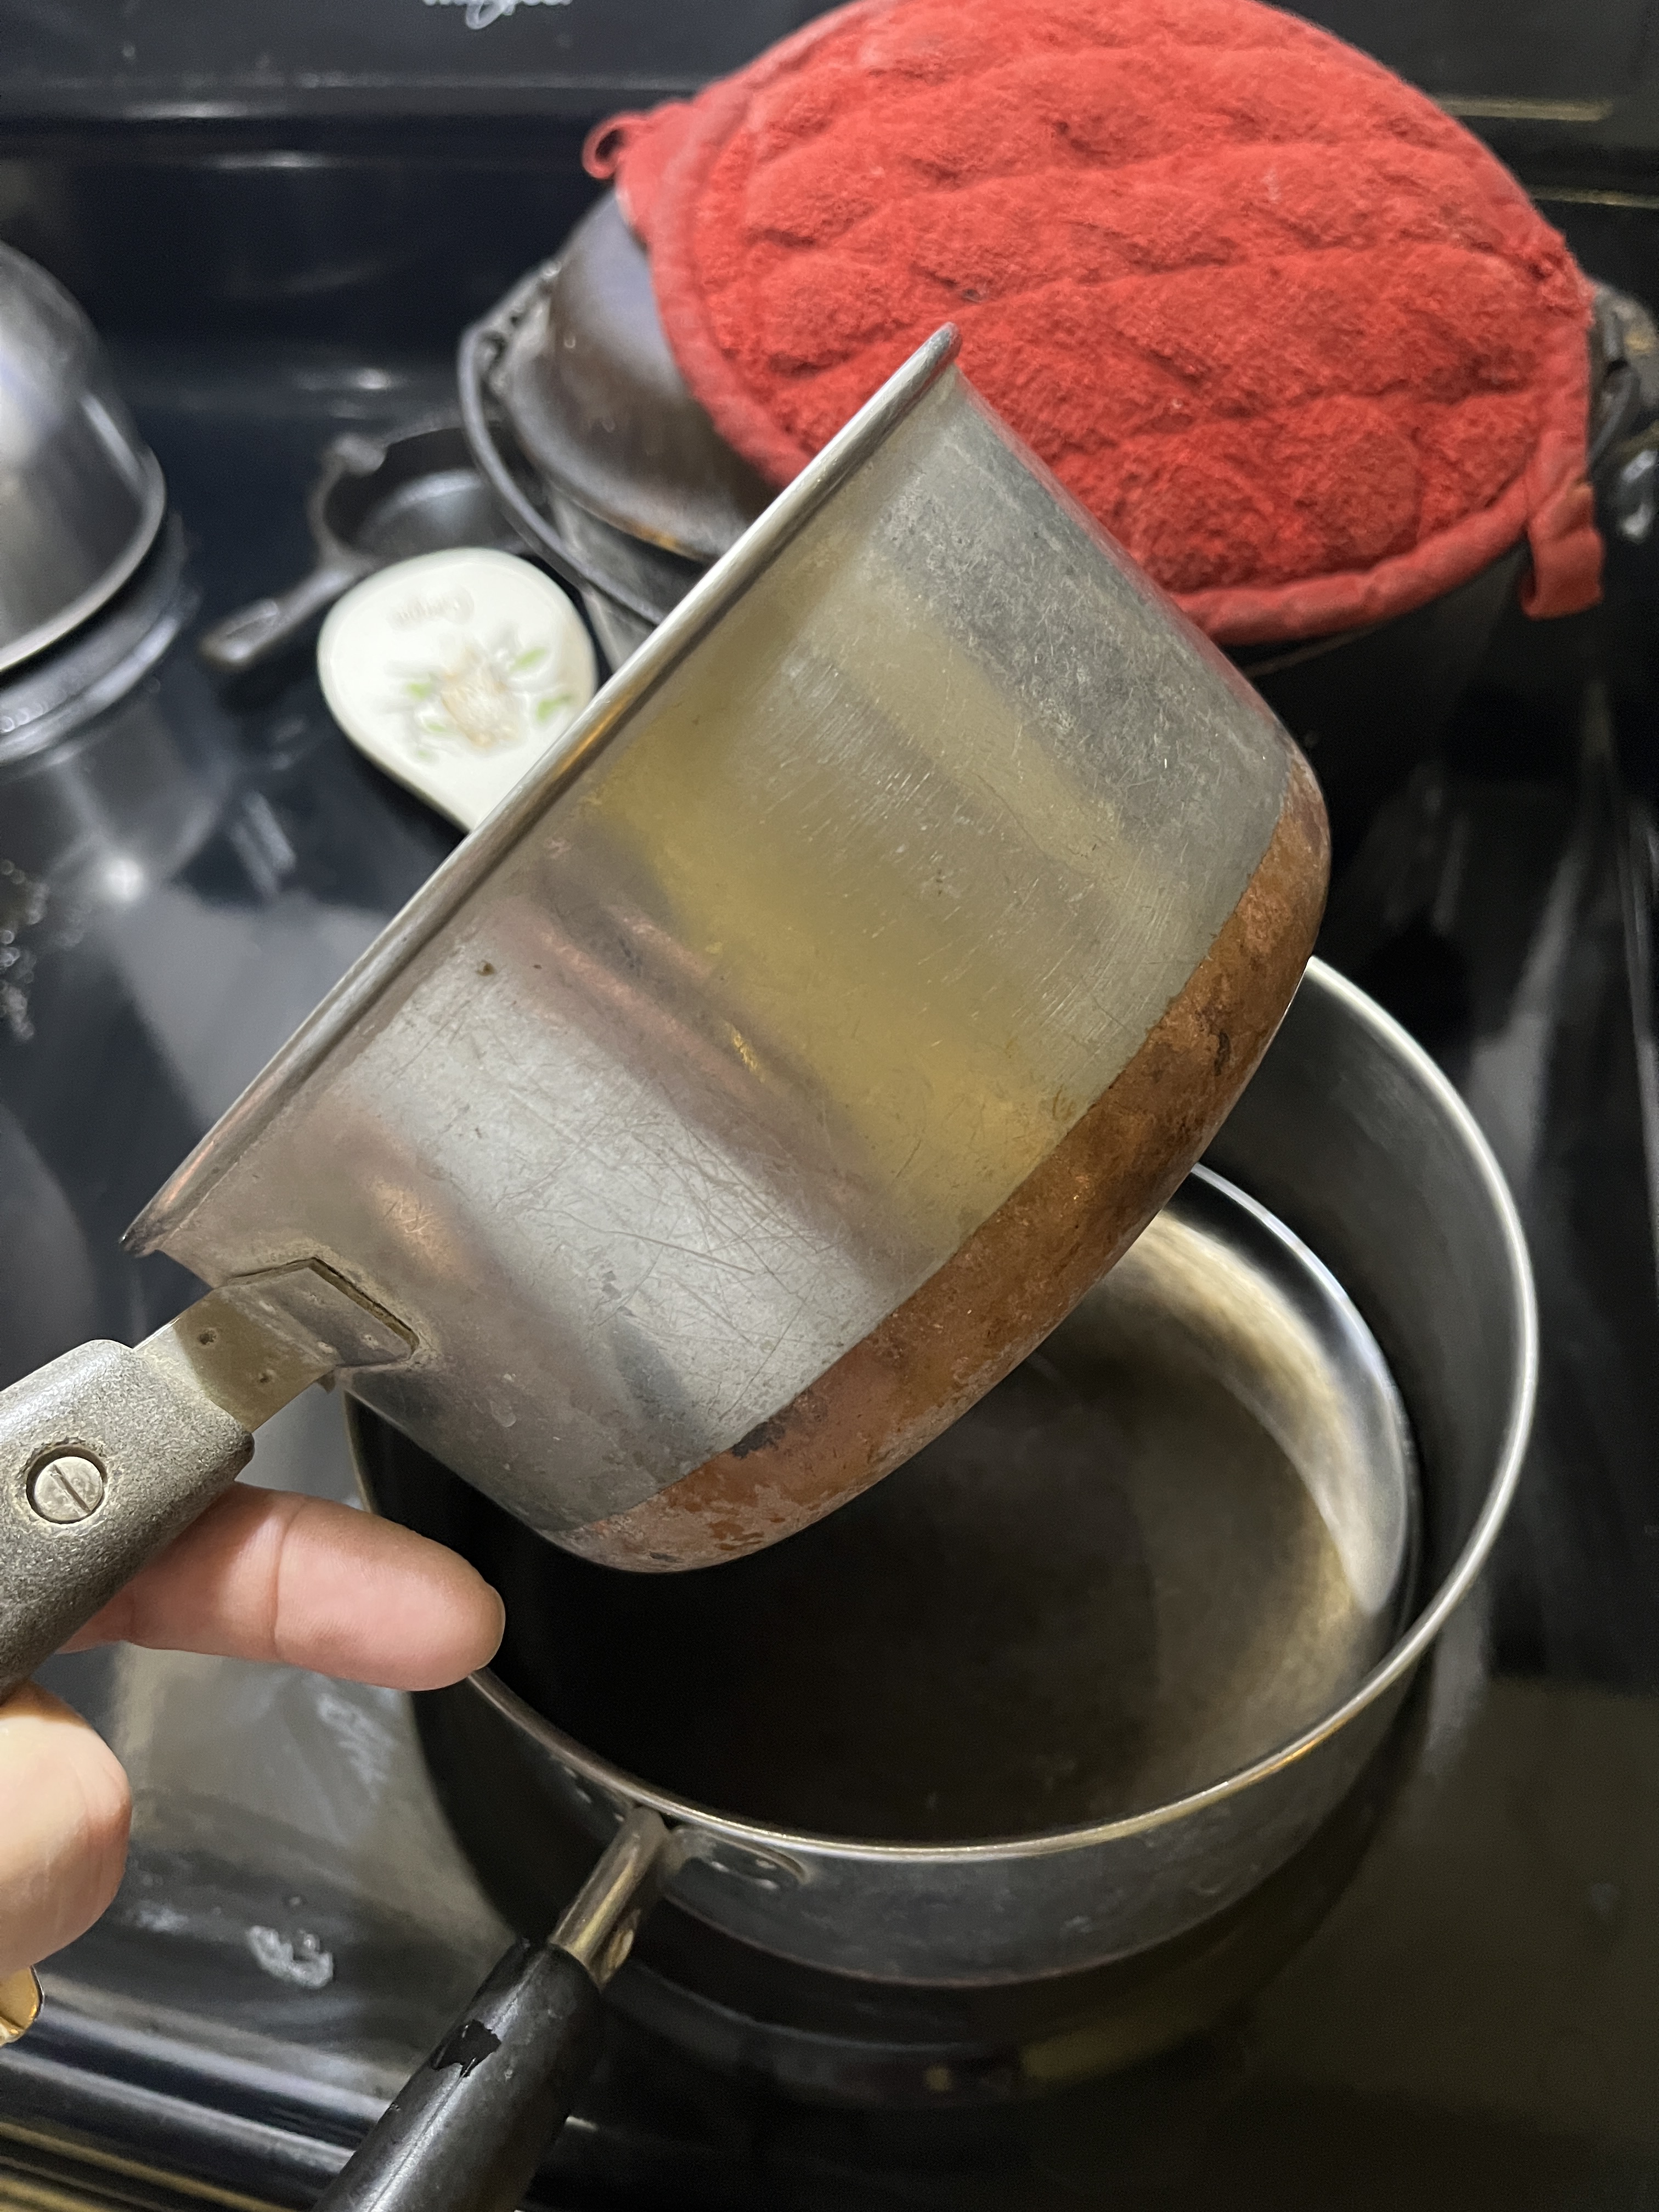
Put the sugar in a pan and add 1 1/2c water and lemon zest. I started to make the simple syrup first but changed my mind as soon as I put the sugar in the pan. If you decide to use the big burner for tonight’s chili and the small burner for the simple syrup and than zest the lemons before adding the water to make the syrup DO turn the burner off or you’ll end up making caramel, too.
Bring the sugar-water to a boil while stirring to dissolve the sugar. Once it starts to boil take it off the heat and let it cool a bit while you juice the lemons.
I realized that 7 c of water plus 1 1/2 to 2c juice and 1/2c or so of simple syrup was too much for the 2-quart pitcher and mixed it in a gallon jug. Maybe next time I’ll just double the recipe and use the pitcher for overflow.
Put 7c ice-water in a jug or pitcher.
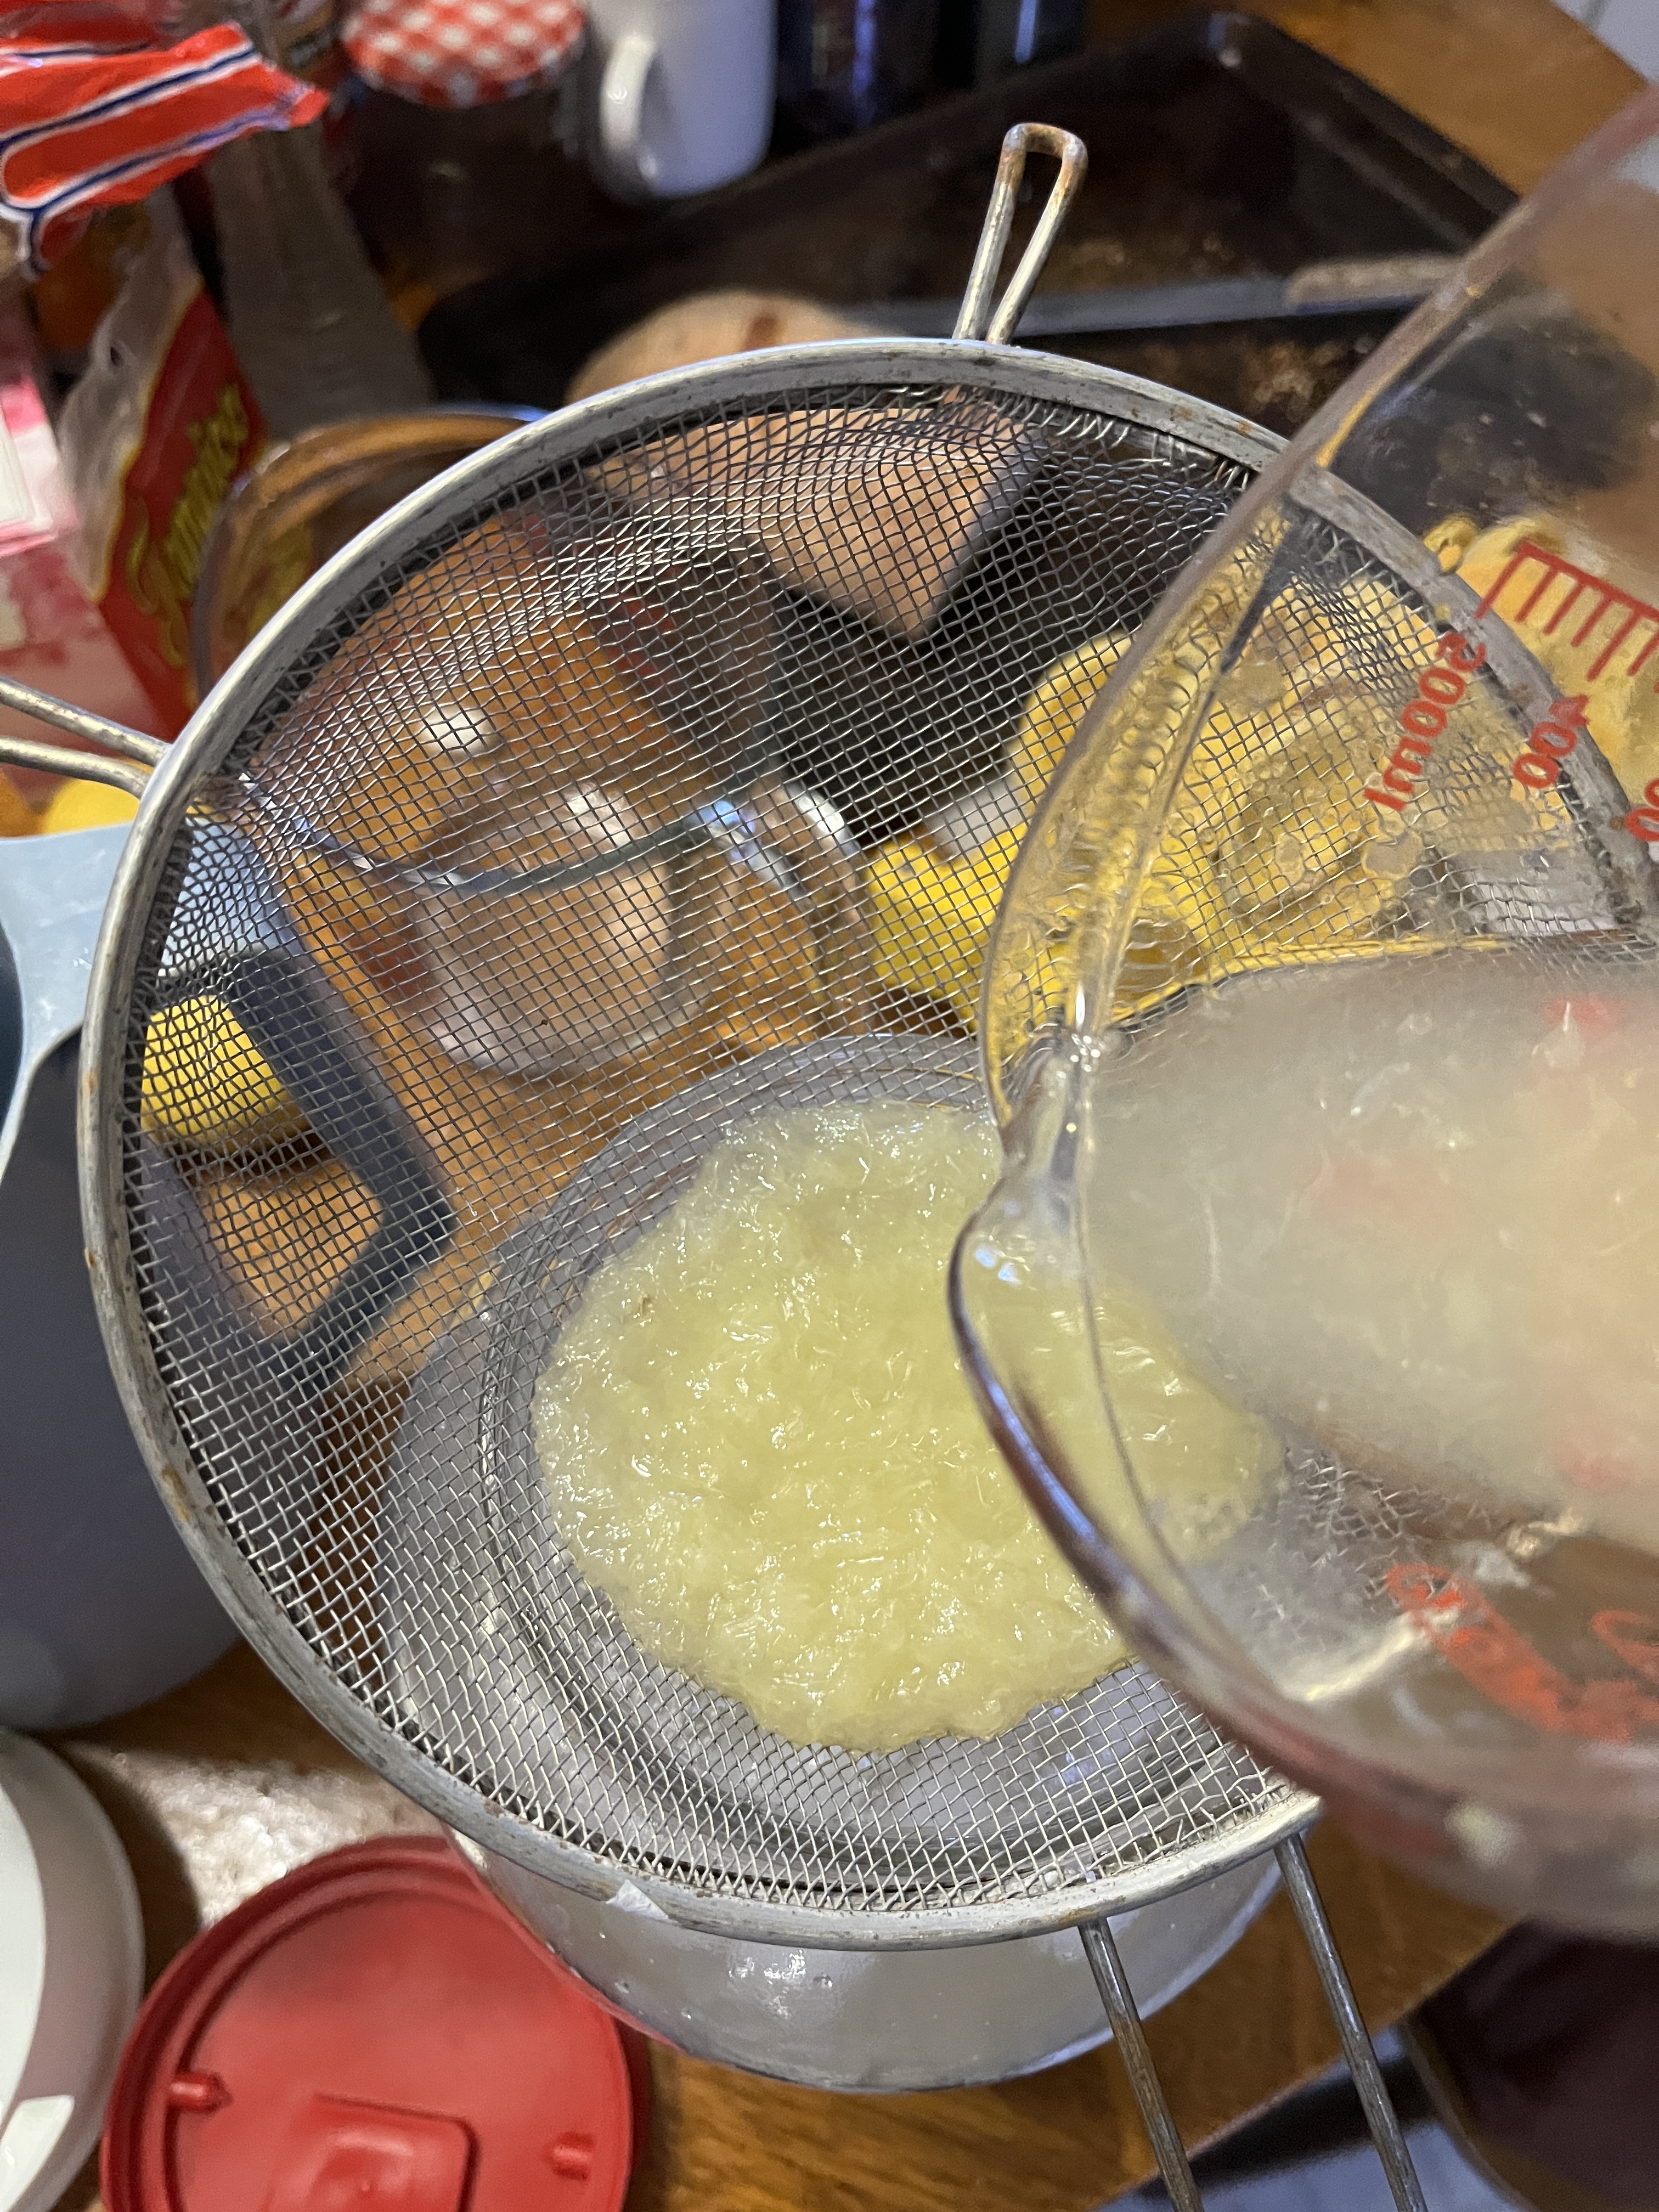
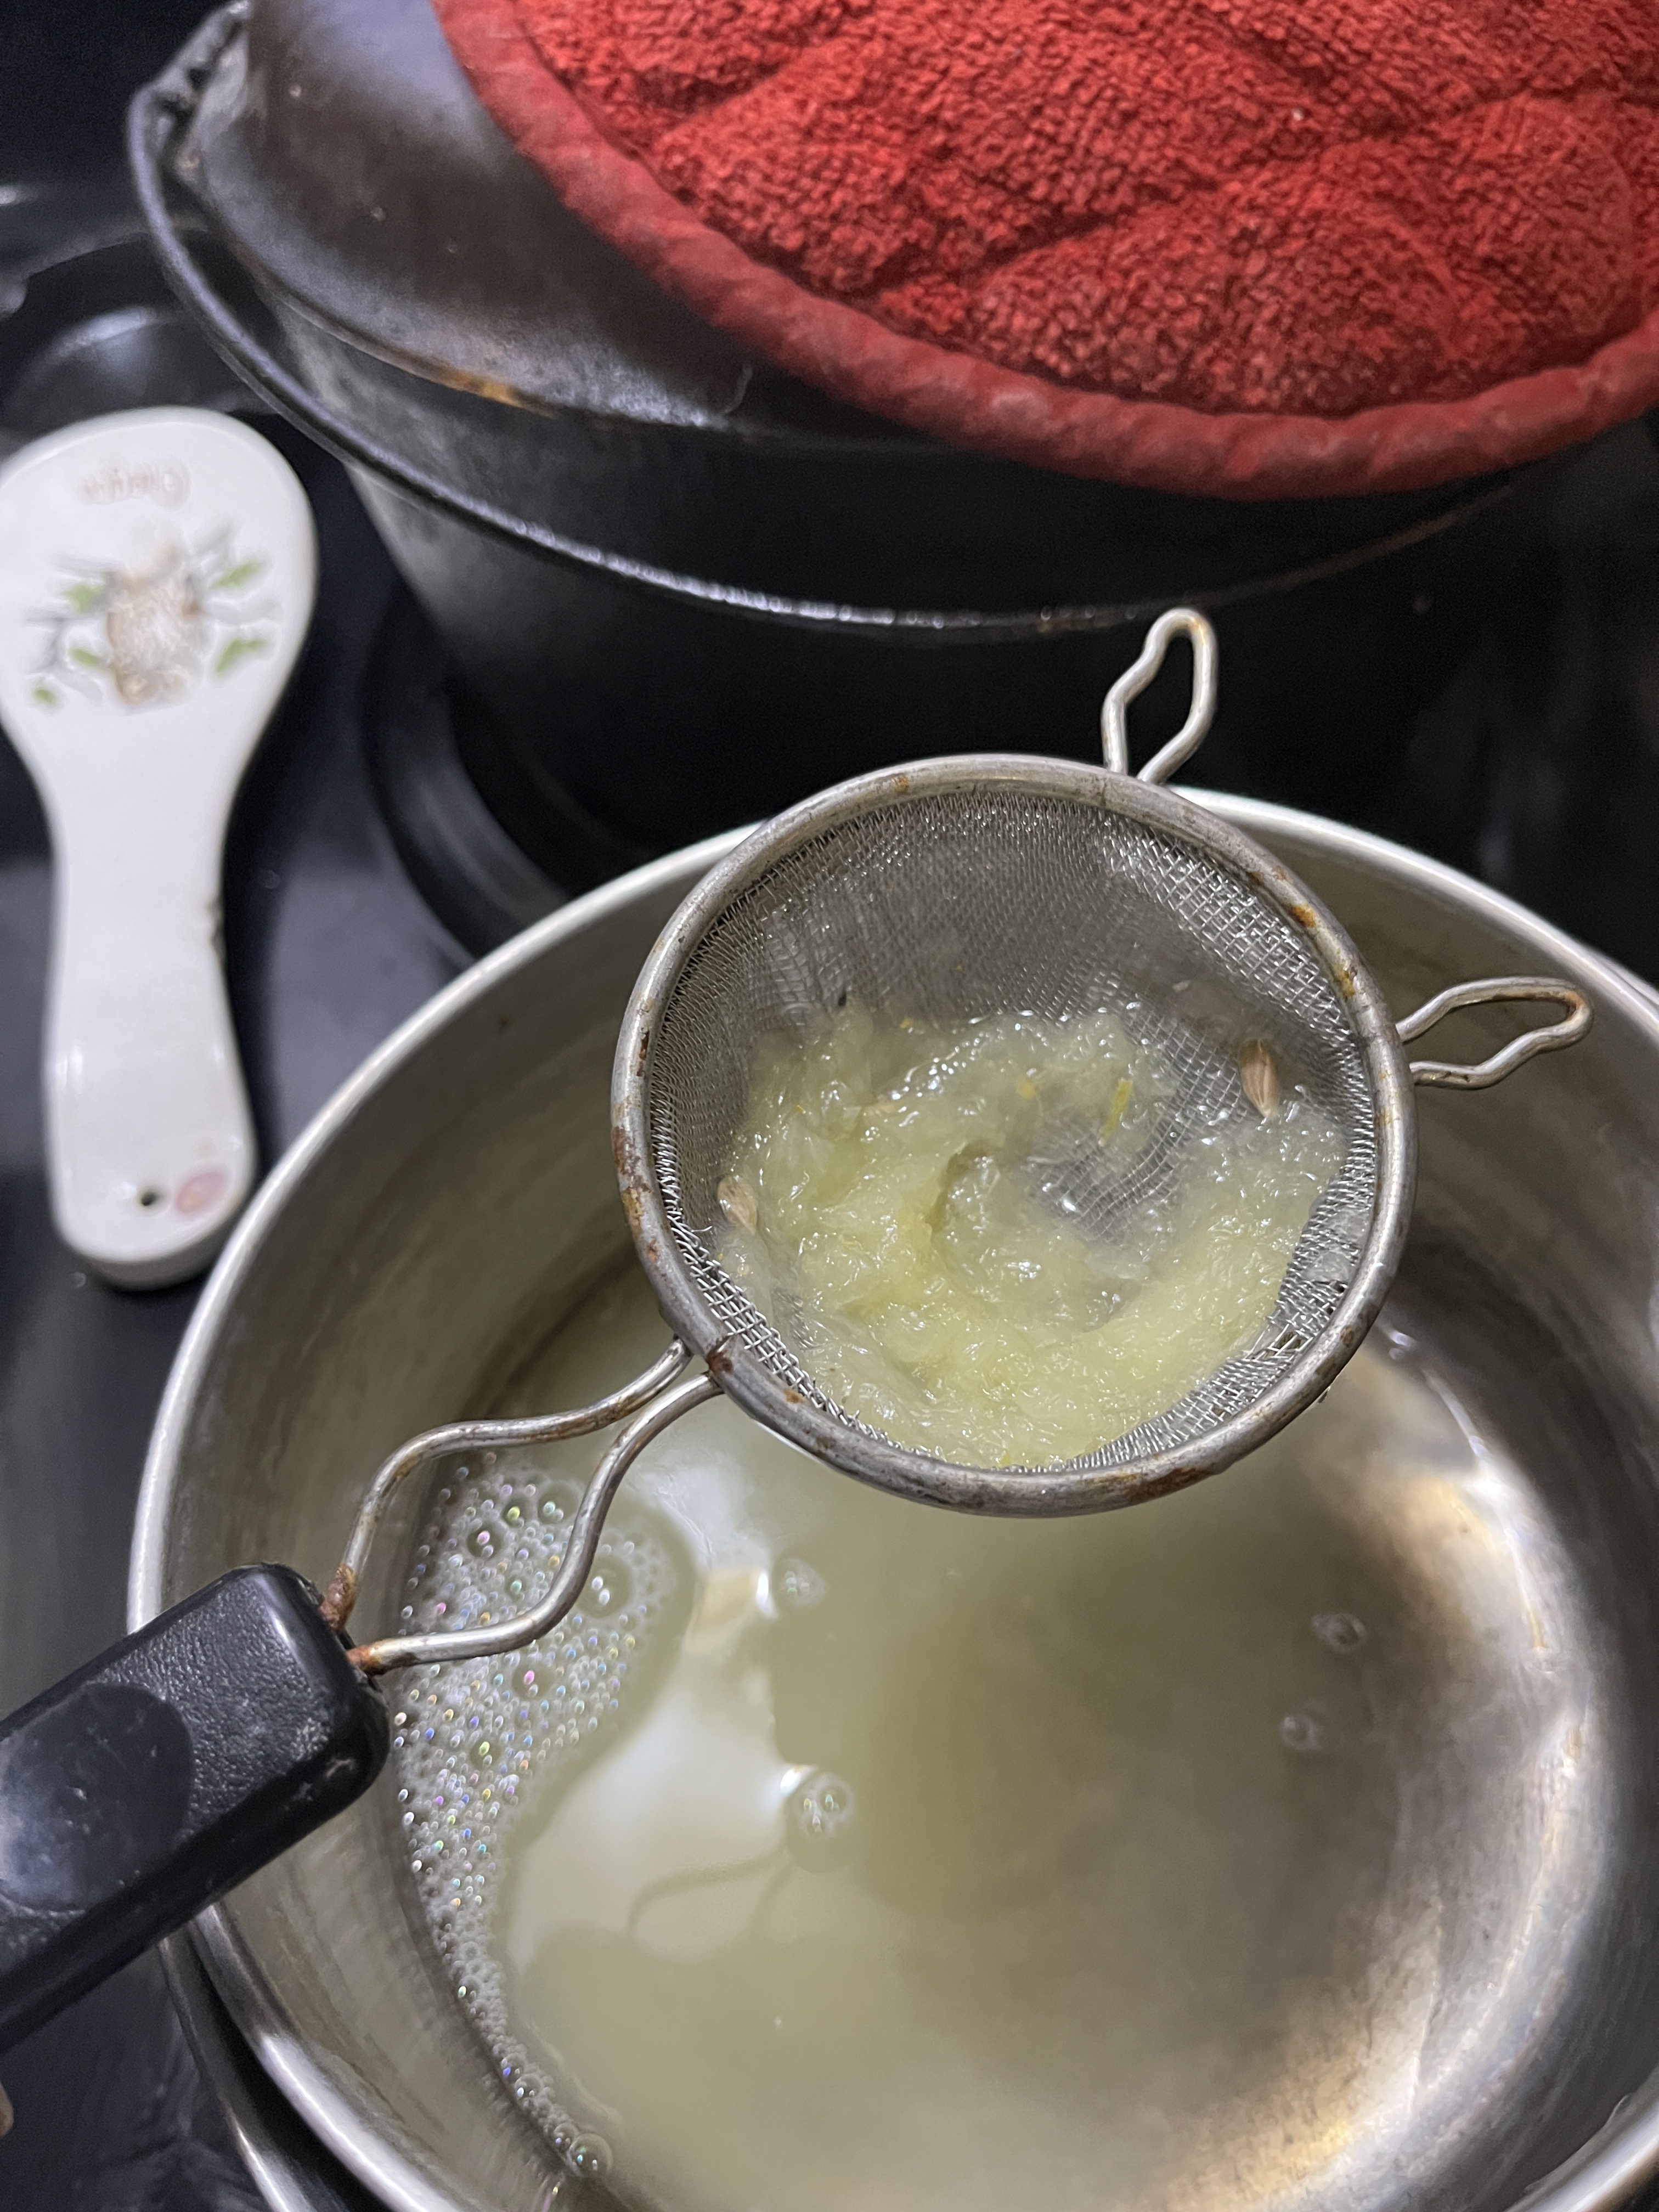
Strain the lemon juice (it’ll be about 1 1/2 to 2c) into the jug or pitcher. If you don’t mind pulp you can skip this step, just make sure you fish out any seeds with a spoon before adding the juice.
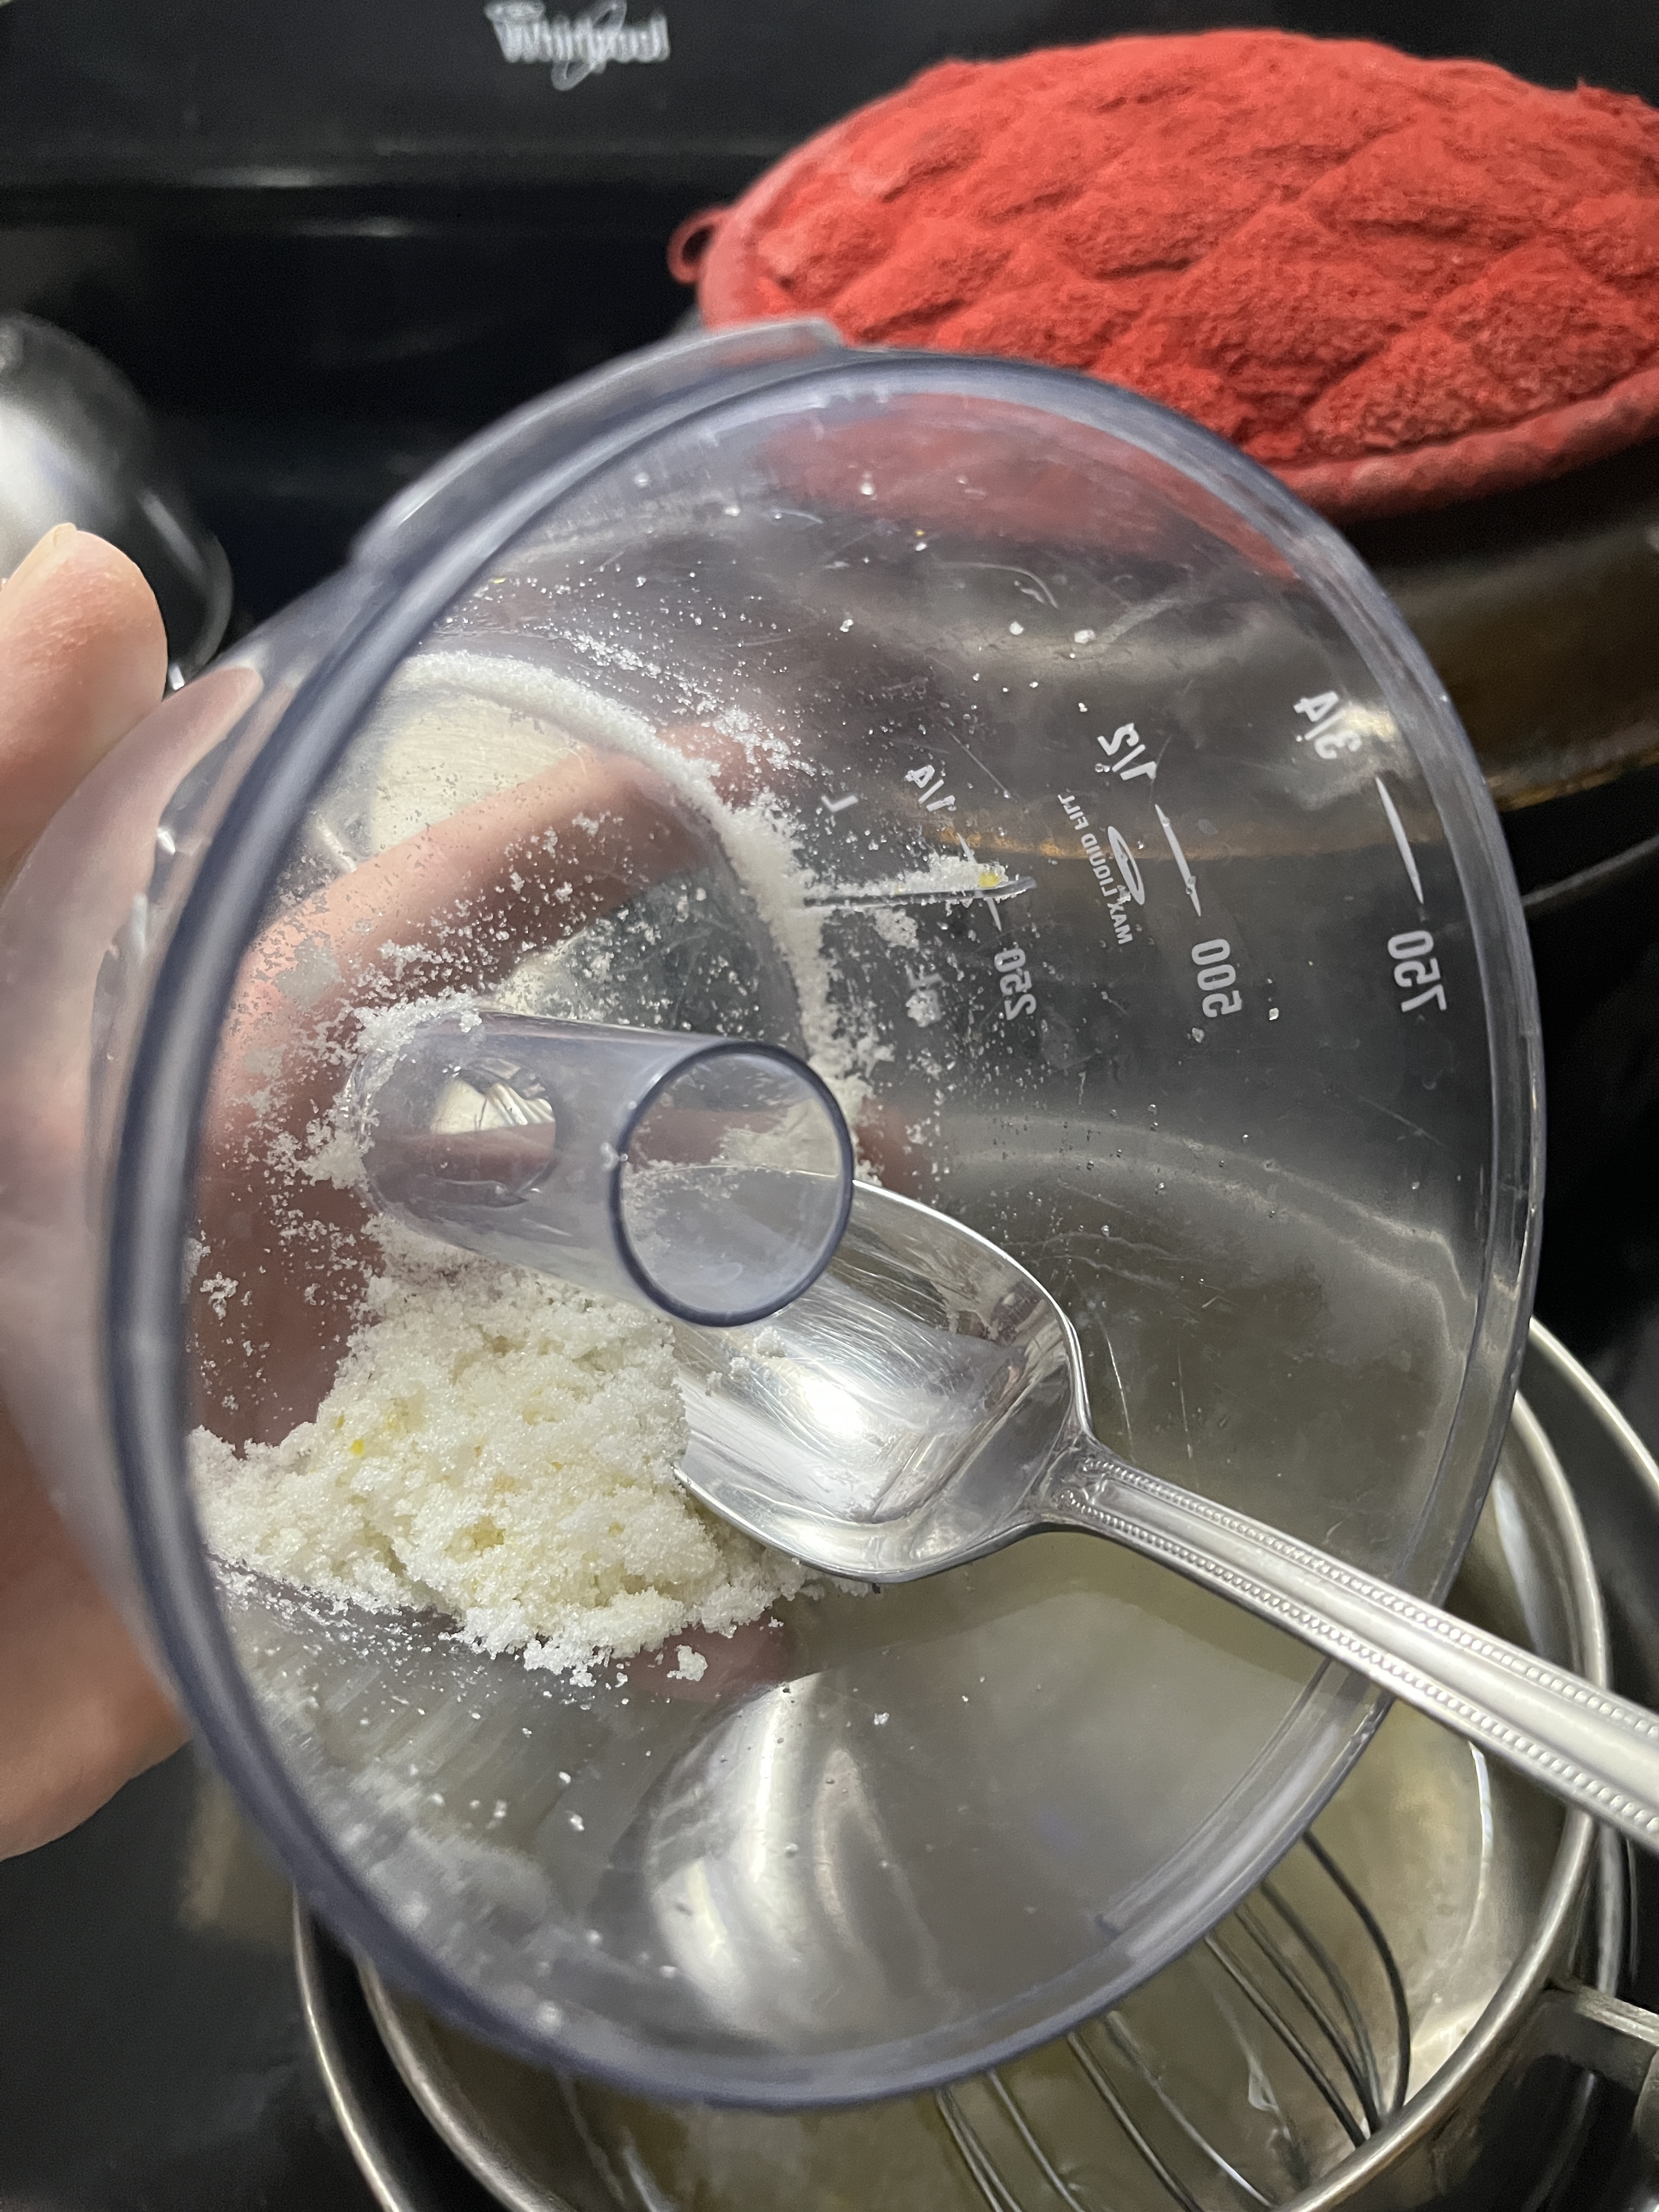
Pour 1/2 to all of the sugar syrup into the jug or pitcher, depending on how sweet you like it. Any leftover simple syrup can be used for another batch of lemonade, whiskey sours, rum drinks or pouring over sherbert or cakes for desserts. If you feel like straining out the zests that’s fine but they’re nicely candied and shouldn’t detract from the drinking experience.
If you want to embellish your lemonade with strawberries, raspberries, pomegranate bits, prickly pear fruit or whatever appeals to you, go ahead. Pink lemonade is a classic special treat. I don’t have any berries today so I tried melting some blackberry jam in the microwave and added that. It didn’t work well. I’ll have to get some berries to play with now.
Store any extra simple syrup in a clean jar in the fridge til you’re ready to use it. It’s really kind of pretty.
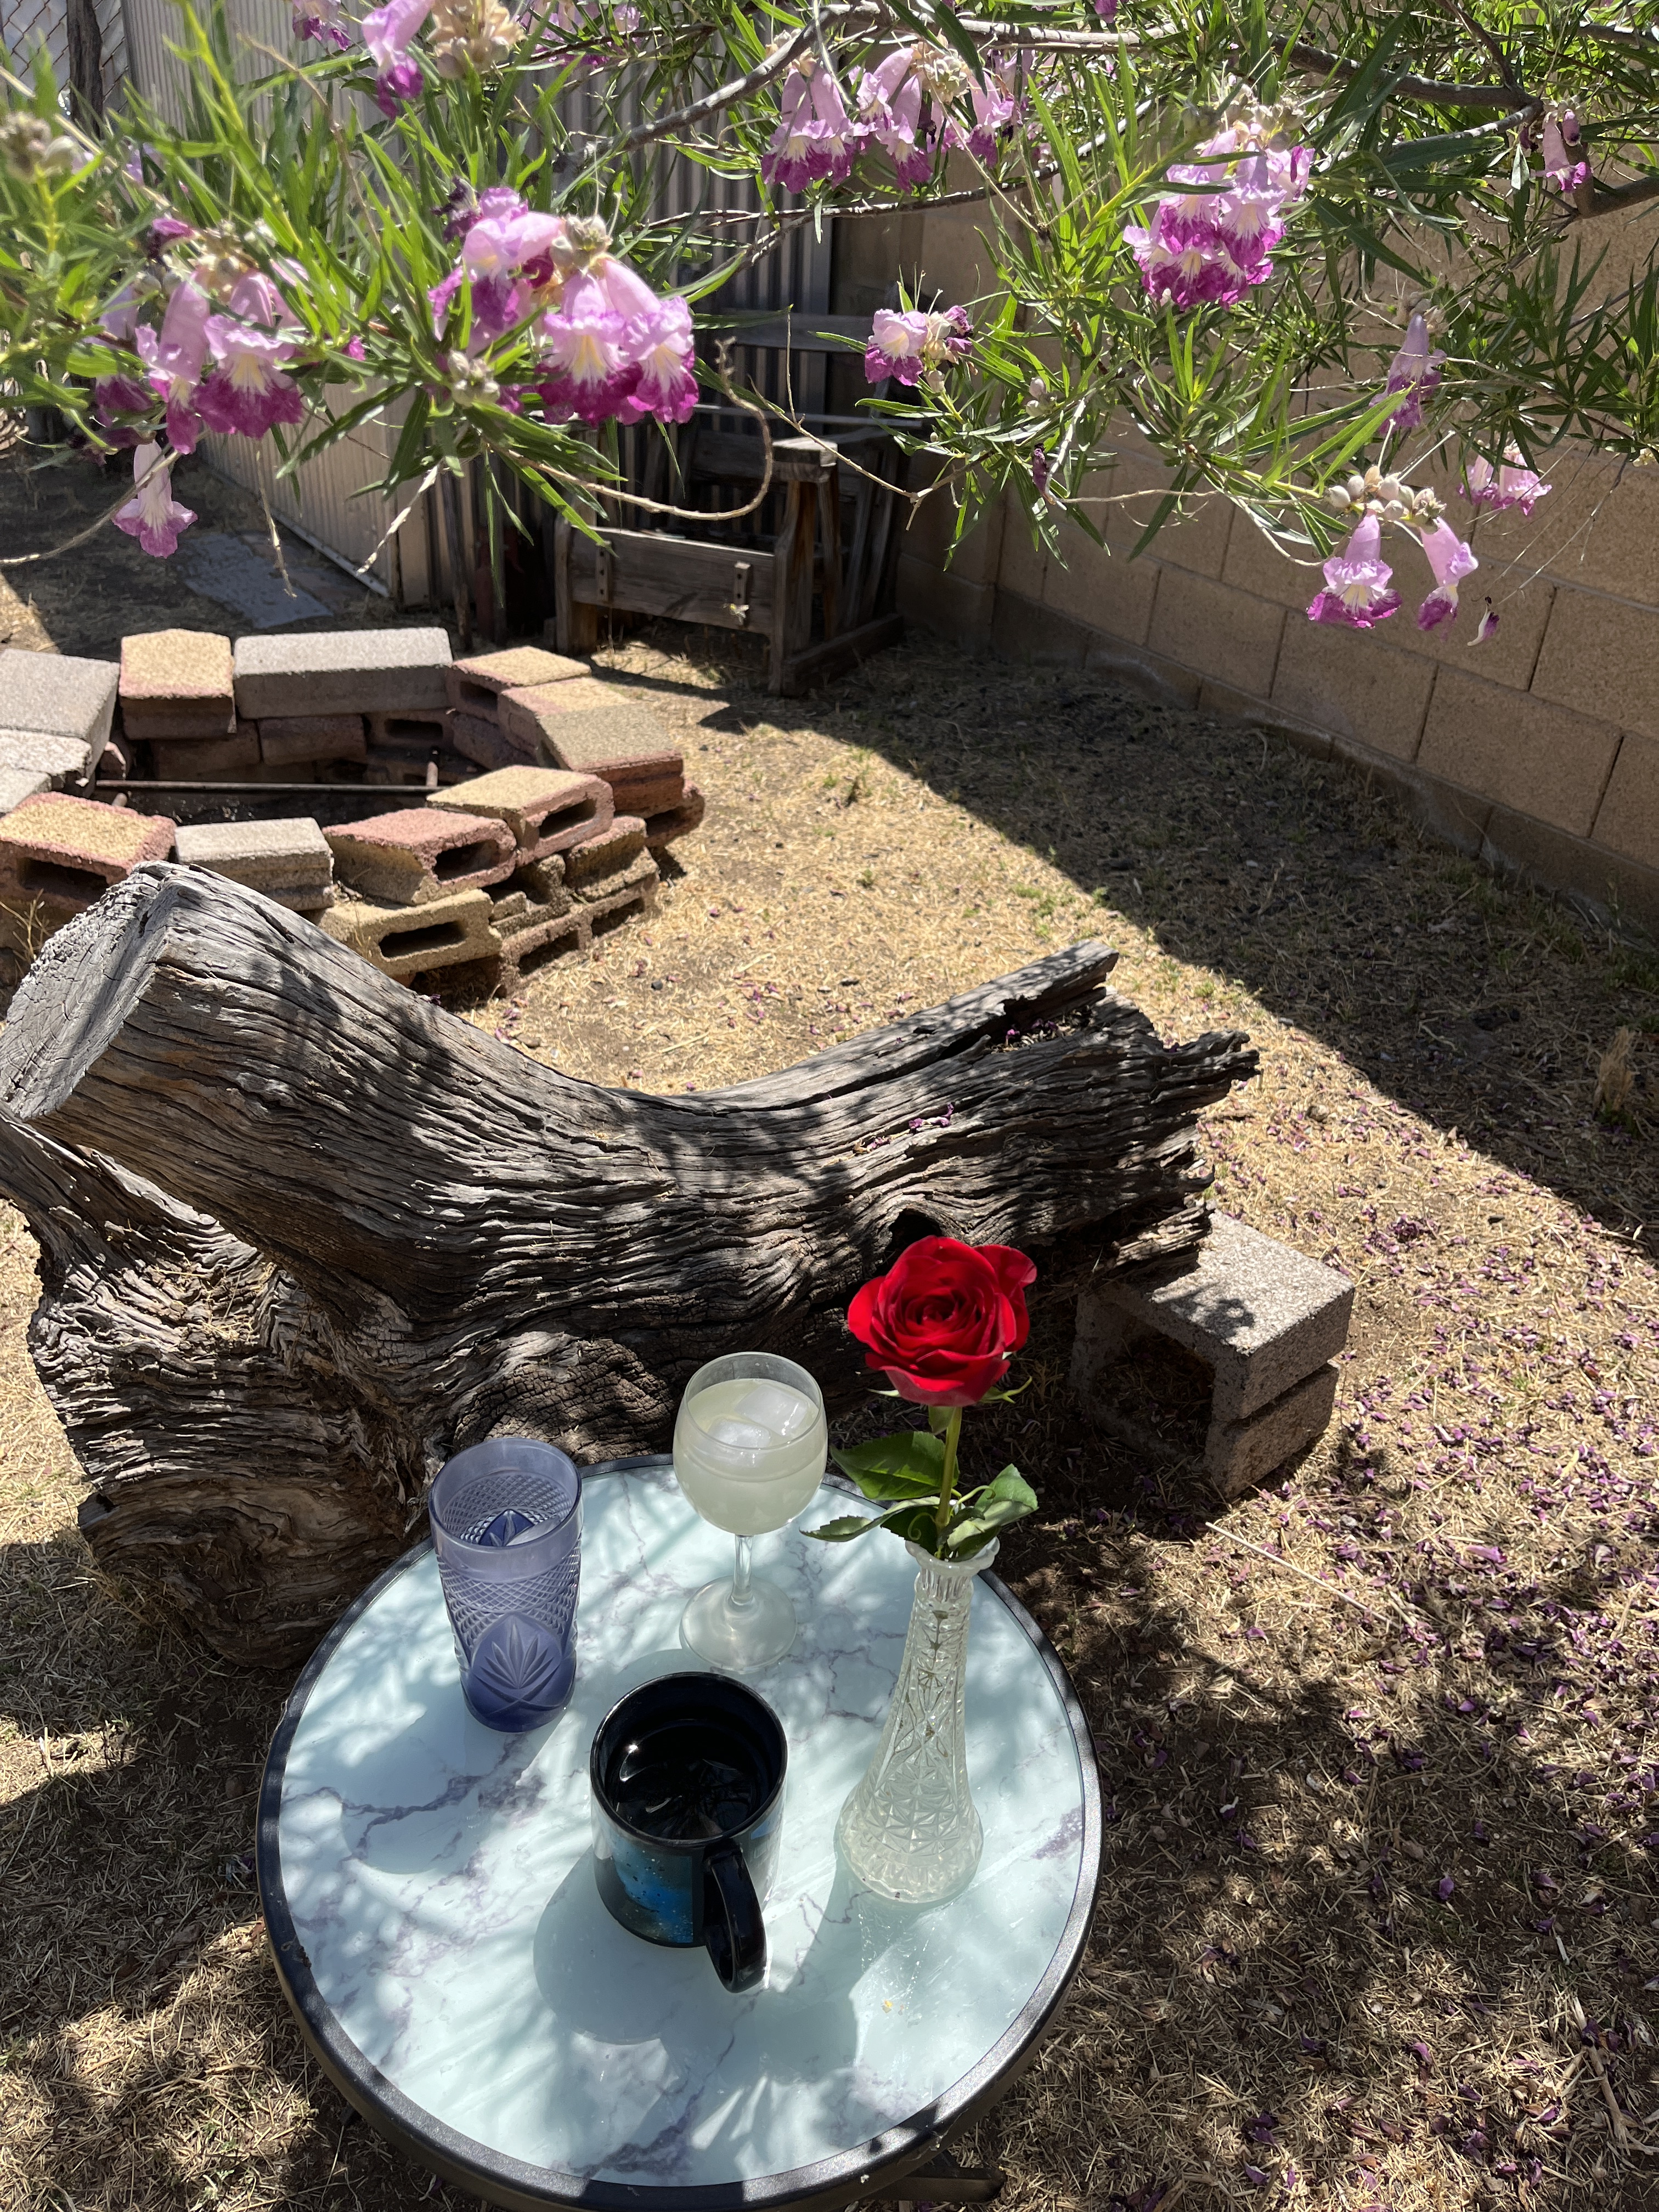
Enjoy in a tall tumbler, nice wineglass or your favourite TARDIS mug while relaxing in your favourite spot.
Bonus: I realized the caramelization in time to toss in a cup of water to keep it from burning. After finishing the lemonade I re-heated the caramel mistake to make caramel sugar syrup. Use for any bar drink-mixing, cake baking or other dessert use you can think of.
It tastes lovely so I’ll have to experiment with this…later. For now I’ll store it in the fridge and get the back yard weed whacking done.
Last night we went out to listen to our favourite local band play. We sat with other friends who I hadn’t seen in a while and my escort hadn’t met yet. In the ensuing discussion I was reminded of my way of cooking…for the future so I don’t have to cook every day. I do this with many things but meatloaf was his 1st exposure to it. One evening several years ago he dropped by for something and I was just starting dinner so he stayed to keep me company.
I set the butter and chocolate to melt, then put on a pot of rice and chopped an onion. Once the butter and chocolate had melted I finished putting together brownies and put them in the oven. Then I mixed up the meatloaf in a big bowl. Before putting the meatloaf in the loafpan to bake I pulled out 2 handfulls of meatloaf mix, tossed them in a pan to scramble, made 2 hamburger patties and THEN put the meatloaf in the pan to bake as I pulled the brownies out, setting them aside to cool. As the meat was scrambling/browning I put the rice in a casserole and once the meat was brown put 1/2 of it on top of the rice, opened a can of spaghetti sauce, put it on top of that and put a bunch of shredded cheese on top before popping that in the oven with the meatloaf. Then I put a can of vegetable beef soup in with the rest of the scrambled meat, rinsed the can with wine and added Worcestershire and other flavours to make filling for my lunch pasties. As that simmered down I fried up the hamburgers, added whatever cheese we felt like that night (cheddar, Gouda, Swiss, provolone…), made a quick wine reduction from the pan drippings to pour over the burgers and sat down to dinner. I might have tossed some frozen tater tots in the oven earlier with the brownies…they’d be nice, too, but not essential. After dinner I finished making lunches and we finished our visit as I portioned the casserole out into single-serving containers to freeze for later meals. The next day I had meatloaf for dinner with mashed potatoes and a salad from the garden. The night after that I made stroganoff from the meatloaf leftovers (cut up) with cream of mushroom soup, a little wine and Worcestershire sauce (again). Sometimes I mix in a little Kitchen Magician or other caramelized browning aid to make it darker. Instead of serving over noodles I just mix it all in with the boiled and drained noodles as a one-pot dinner. Sneaking in some peas or broccoli doesn’t hurt but isn’t necessary. The leftovers from this ate put into single-serving containers and frozen for later meals.
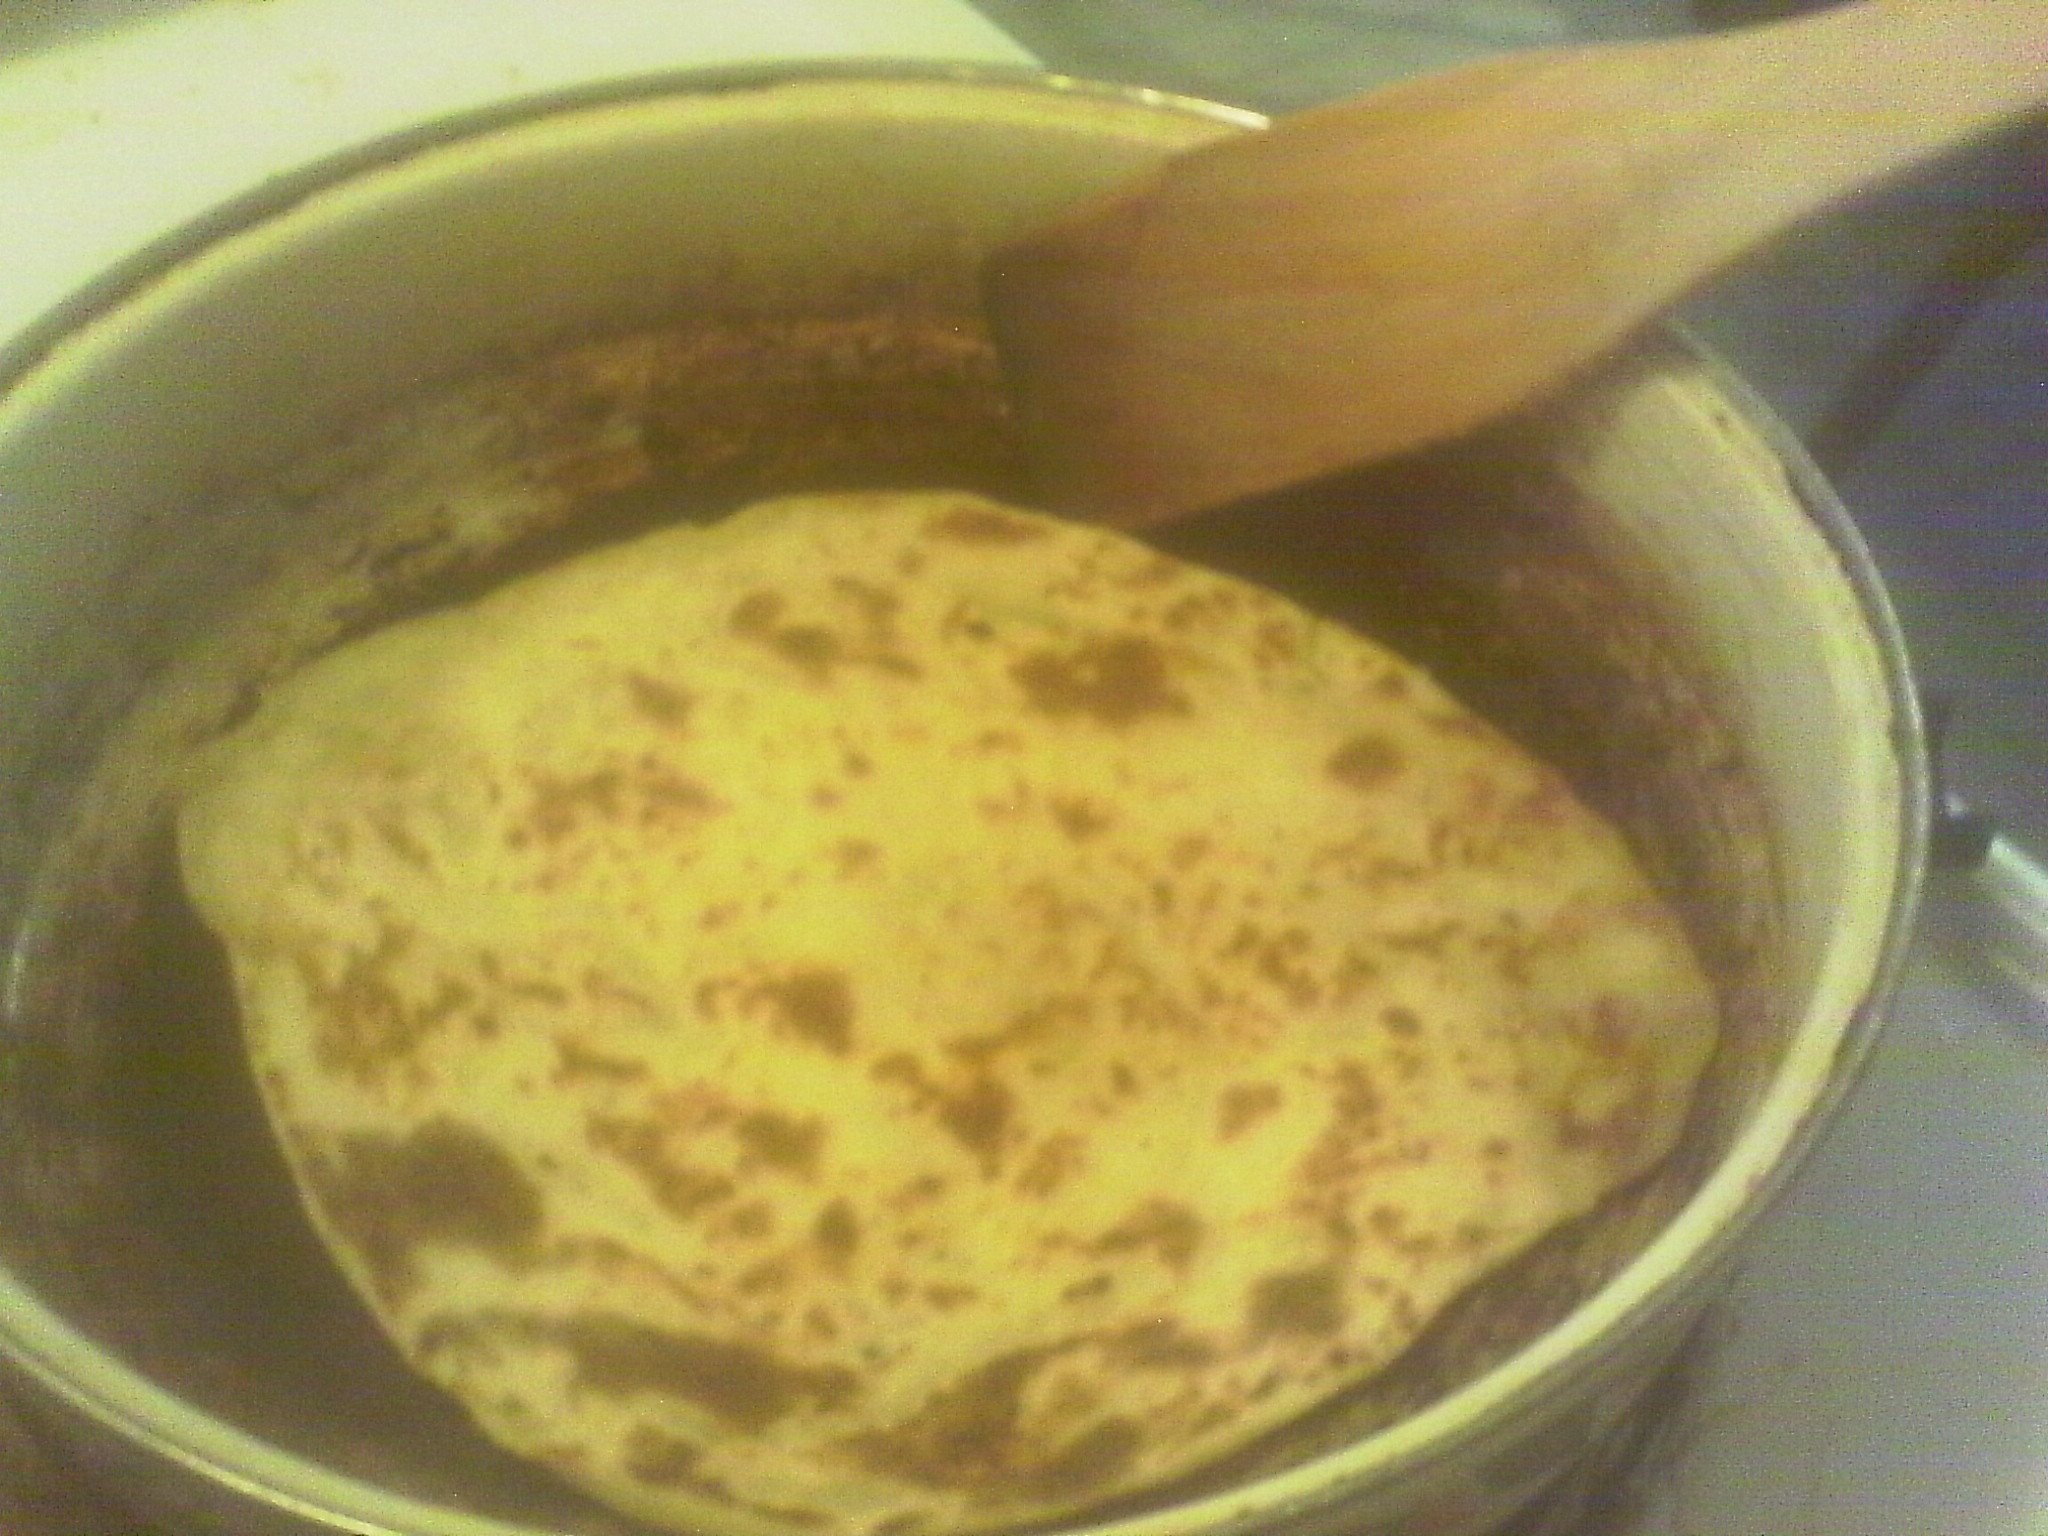
Turn with a small spatula or flat stick and finish rolling the next one
So in 2 hours on 1 evening I set up about 8 meals. Hamburgers the 1st night, meatloaf the 2nd, at least 6 meals from the rice casserole and at least 6 meals from the stroganoff. Sure, I also made mashed potatoes to go with the meatloaf but those can be easily made from packets and whether you make them from scratch or from a packet, any leftovers from those can, in turn, be made into potato pancakes or added to bread dough or made into lefse (Scandinavian flat bread), so the leftover life keeps going. If I feel really motivated I can even make the stroganoff the 1st night from part of the meatloaf and rest the 3rd night which will probably be a work night anyway but it’s not as if making it is a hard thing.
ViviLnk All done
This isn’t the only thing I make chain leftovers from. When the kids were young and I was newly divorced I’d get a 10lb bag of chicken quarters, divide them into 4 or 5 pans and season them each in different ways. Pepper, garlic and chopped onion would go on all, then the 1st pan would get wine, Worcestershire and herbs before popping into the oven. The 2nd would get ginger and teriyaki sauce then popped into the oven. The 3rd would get salsa an POP! Into the oven. The 4th gets cream of mushroom soup before entering the oven with it’s companions. If there’s a 5th (depending on the size of the chicken legs and the size of the legs) I’s maybe make honey mustard or try for Greek or middle eastern flavors, maybe sweet and sour or pour leftover spaghetti sauce on or…what’s in your fridge that needs to be cooked that can stretch dinners? While the chicken baked I’d pop some biscuits in the oven (fresh-made or from a fridge-can), put some rice on, mix up some instant mashed potatoes and throw together a packet of instant stuffing. This way everybody has whatever they feel like for dinner and I have plenty of leftovers to make into things later in the week or freeze for individual future meals. Fried rice, enchiladas, soup, stew, stir fry, anything I can dream up to use the chicken in.
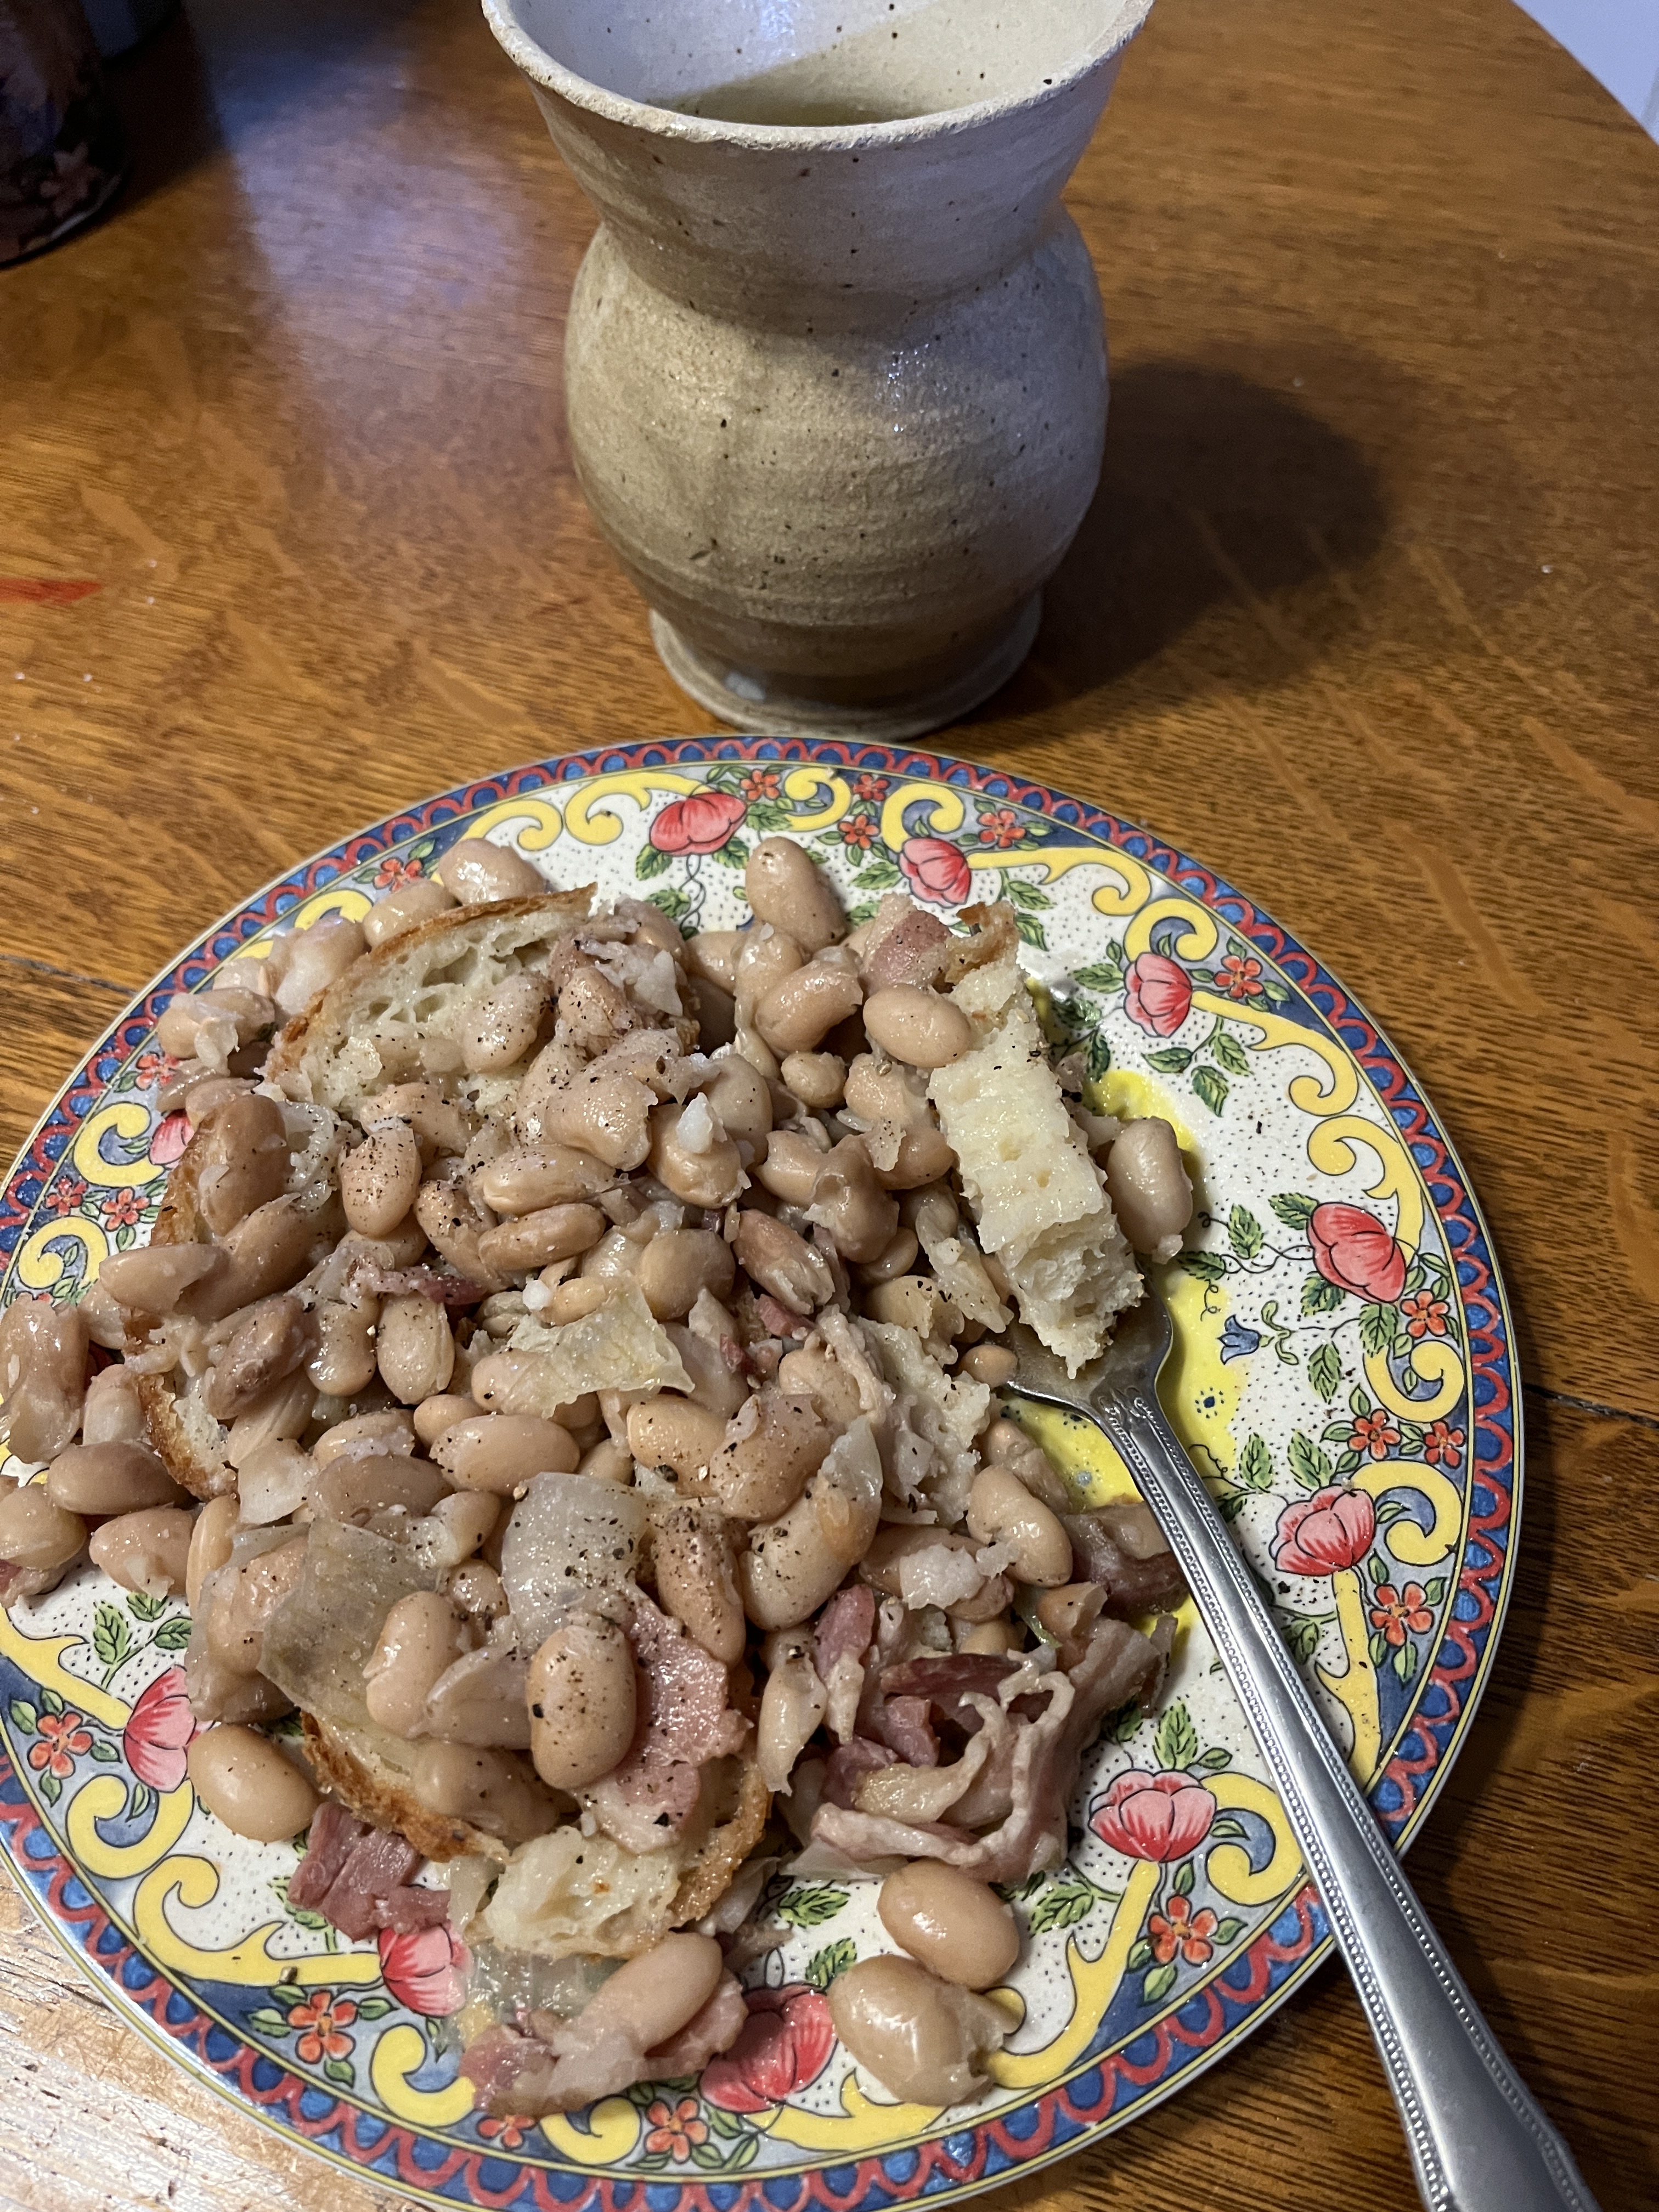
When I was a kid Dad would sometimes make a pot of beans. Let it soak overnight, turn it on to cook 1st thing in the morning and have beans on buttered bread or toast for a satisfying early lunch. YUM! Grand memories! And then there’s the leftover from THAT to use! Pull some out for chili for that night’s dinner with leftovers for lunches, more yum!. Then make baked/BBQ beans to have with another dinner, yet more yum! Then, with the last bit, make refried beans for yet another fabulous meal with tacos, enchiladas (remember the chicken leftovers?), tostadas, burritos…so many options! And if there’s still more beans left over there’s always soups and stews to add them to with other leftovers. I kind of grew up with this leftover life.
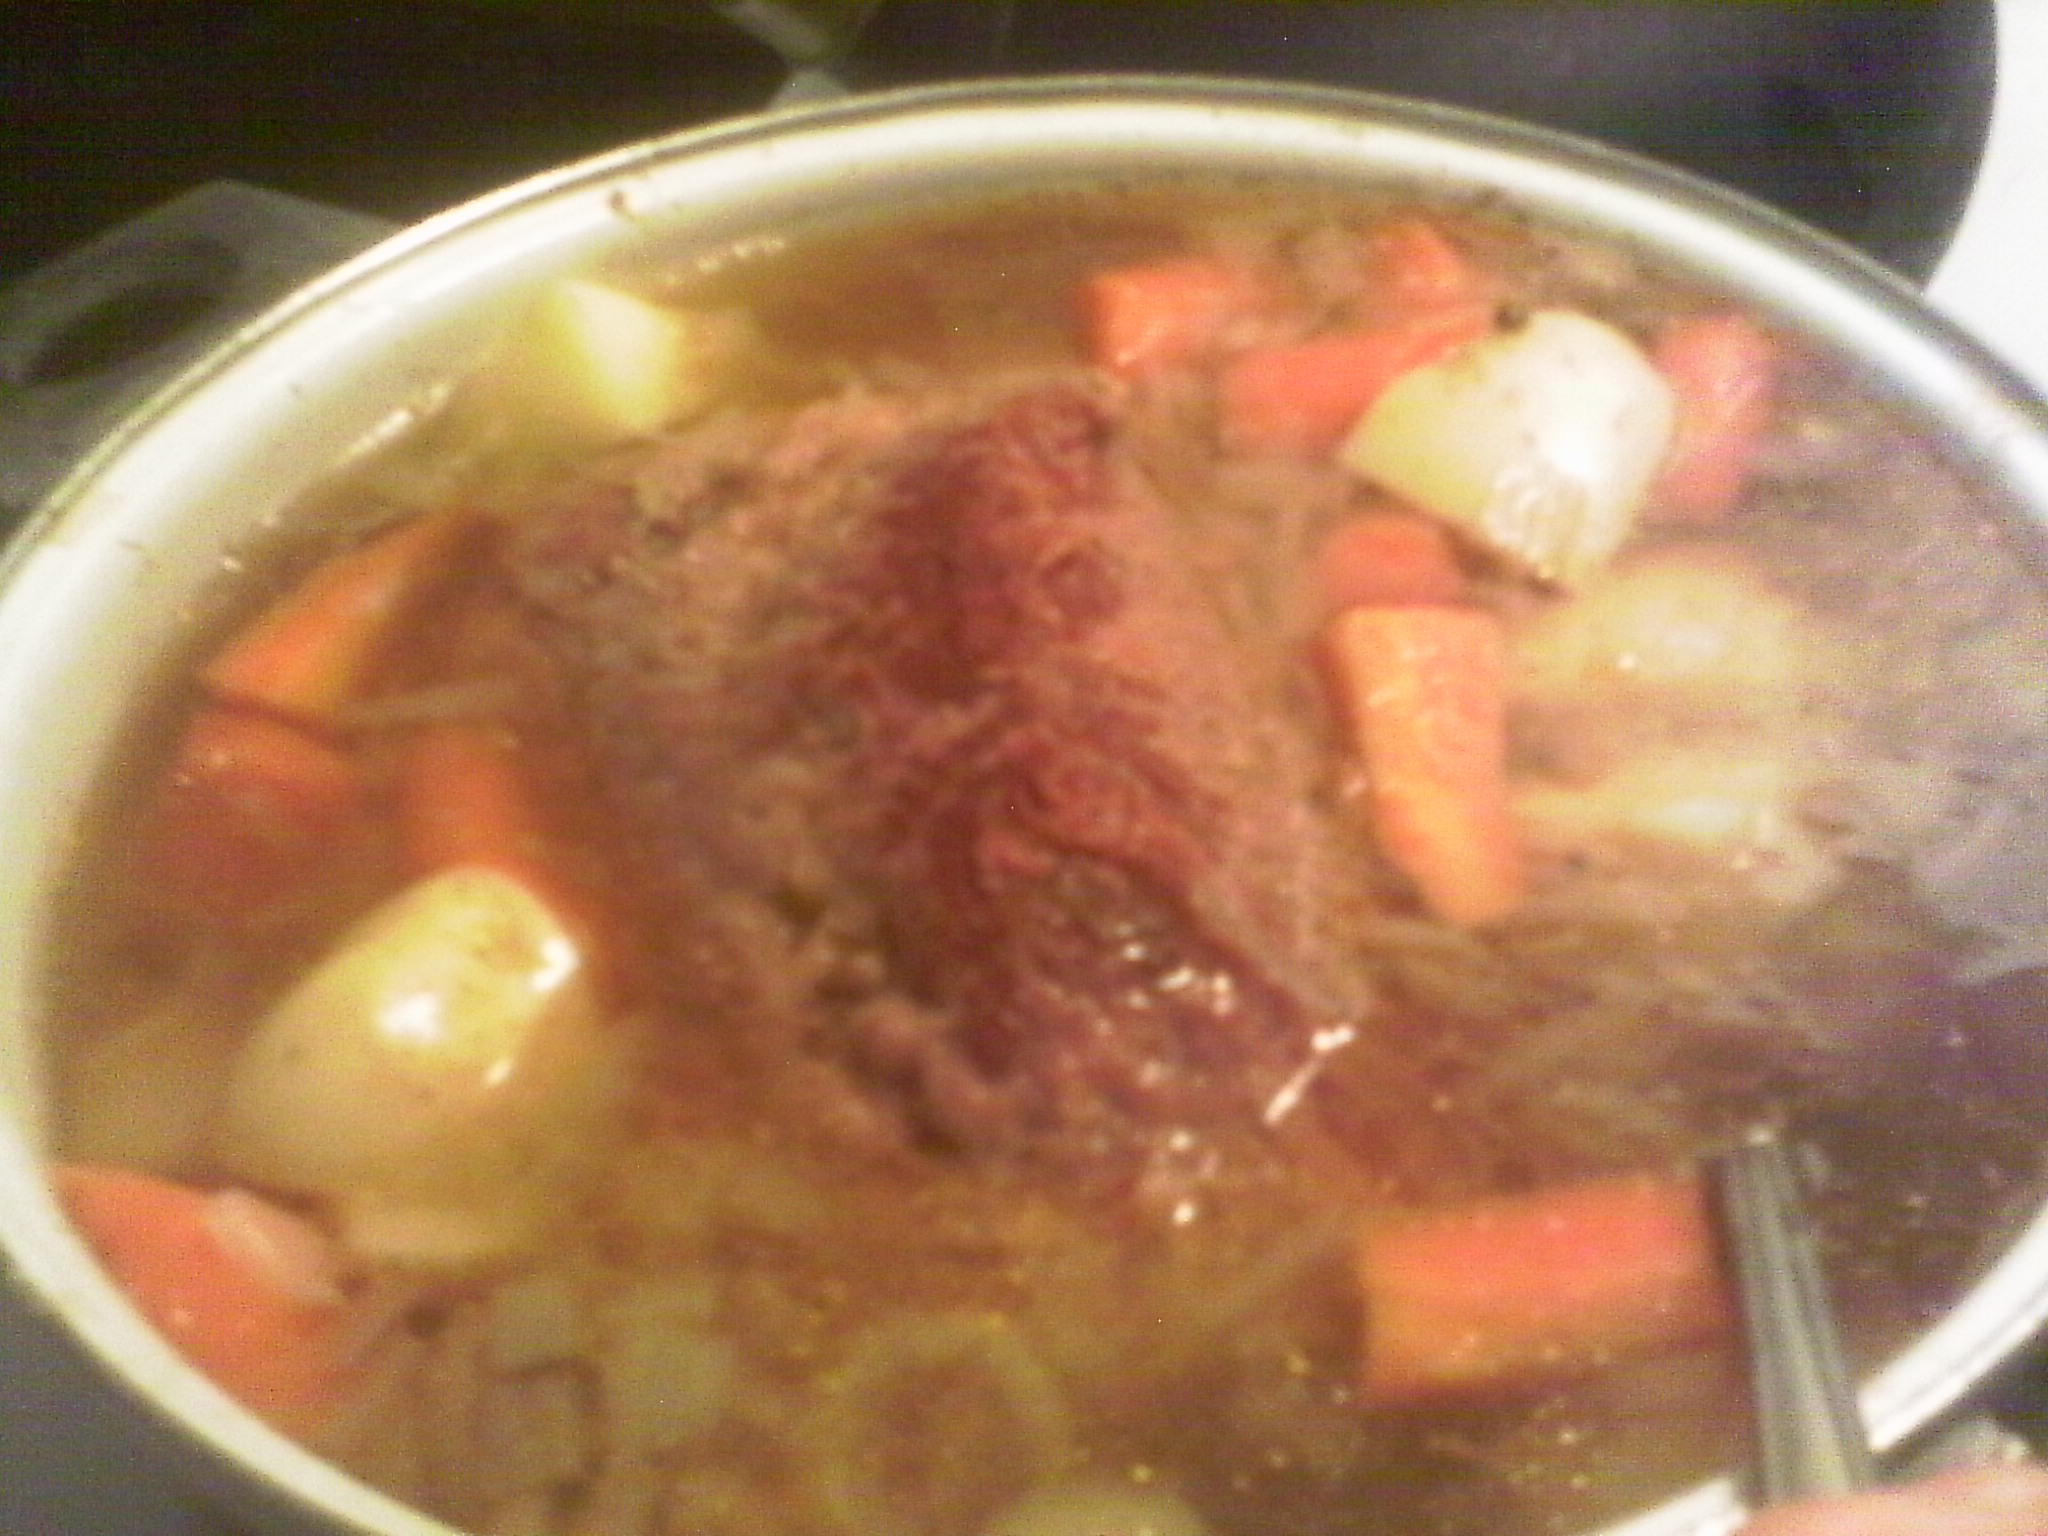
Roasts (beef, pork or even chicken, turkey or duck) provide ample leftover culinary opportunities, not the least of which is simple (or fabulous) sandwiches. Just make nice slices for later. Helpful hint: French dip is both elegant and fun. But wait! What about the parts that don’t slice so well!? Soups, stews, casseroles and even enchiladas or fillings in SO many other things! Meat pie and pasties are an amazing way to stretch the stew that won’t quite go far enough for the whole family. Make a pie crust (or pull one out of the freezer), add a few leftovers from previous dinners, bake and serve with a salad picked from the garden. With a bit of practice you don’t need to be bored with leftovers and can get away with minimal cooking while having a plethora of meal choices in the freezer for casual dining. Or dining by candle night if you like, now that there’s time to relax a bit after work. You can skip the baking and use rotisserie chicken form the grocer, which is wonderful savings in the summer when baking strains even the best A/C units.
Bubblin’ away!
St Patrick’s day was this weekend so I have leftover corned beef and cabbage. Besides the sandwiches from what little is left of the corned beef I also make bubble and squeak. You can make bubble and squeak any time you have leftover boiled potatoes, or even roasted ones from any beef or pork roast, they’ll each have their own marvelous flavour. So. Heat some fat in a pan (bacon, butter, even olive oil can work), then squish the potatoes with your hands as you put them in the pan. Then chop the leftover cabbage and add it in, unless it’s already getting squished with the potatoes. Whatever. Tossing in some corned beef or bacon doesn’t hurt, then let it all brown on the bottom before turning. No, it won’t turn like one big pancake, it’ll be a bit here and there but the brown crispy bits are the best, so give the other side a chance to get in on the fun before serving. Besides the bubble and squeak and sandwiches, don’t throw away the water they were boiled in! It’s a great base for soup! Toss in whatever other leftovers you have that won’t make a full serving an there you are. Don’t forget a couple tablespoons of pearl barley for character, this somehow makes the soup less soupy and more textural without being thick.
One last thing. Leftover boiled potatoes! Warm them up, melt raclette cheese (or another melty cheese) and have raclette. Some gherkins, pickled onions and pickled beets on the side makes a lovely fast dinner. If you don’t have leftover boiled potatoes you can boil them fresh or leave the for another time and make Welsh Rarebit and just pour the melted cheese over toast. This is great with a nice ale and a salad. Pickles on the side or picalili, relish, Branston pickle, chow chow or chutney are good with it, too.
Oh. Leftover bread, just a bit stale but still easily cut into cubes? Make fondue! There’s also croutons, biscotti, bruschetta, French toast, bread pudding, stuffing, bread crumbs for coating things and adding to meatloaf…
Leftover rice! Fried rice and rice pudding are obvious. If you don’t have breadcrumbs you can use rice as the starch filler for meatloaf. When my Dad was a kid he and my uncle would take leftover rice, sprinkle it with sugar and pour milk over it for breakfast. A little cinnamon and a few raisins won’t hurt this, either.
Leftover pie dough or biscuit dough or puff pastry…OK, these things probably won’t be “leftover” so much as extra after you’ve made the pie, tarts, biscuits or pastry things. There’s often scraps but for now we can call them leftovers. You can cut them into strips or cut them into pieces, sprinkle them with cinnamon and sugar and bake them til they’re golden and use them in dessert or for breakfast. Or you can cut them into strips, sprinkle with salt, garlic and other spices, bake them and serve as breadstick-like things to accompany lunch or dinner. Or snacks. Well, maybe not as thick as in the picture, but you get the idea.
If you have a leftover something and don’t know what to do with it, internet search engines are your friend. It can be a time thief of a rabbit hole, but the options can also be fun on days when one is singularly uninspired.
I’ve loved lemon pie forever! And lemon drops and lemon cookies and lemon chicken and lemonade and lemons (my sister and I used to quarter them and eat them straight!) and…well, anything lemon. Even whiskey sours…mmm, bourbon and lemon!
But this post is about lemon meringue pie. Because I (finally!) made lemon curd today (I’ve been threatening to for years) and my tree gave me enough lemons and I MADE the time (I really should be whacking weeds, painting the house, fixing stuff or a dozen other things but I’m sore from doing lots of that yesterday so today is an inside day cooking in the kitchen.
Pre-bake a pie crust per instructions unless you use a graham cracker crust, then just have the crust ready. Yes, you can use store-bought. That’s what pantries and freezers are for, having something ready when you need it, whether you make it ahead or buy it.
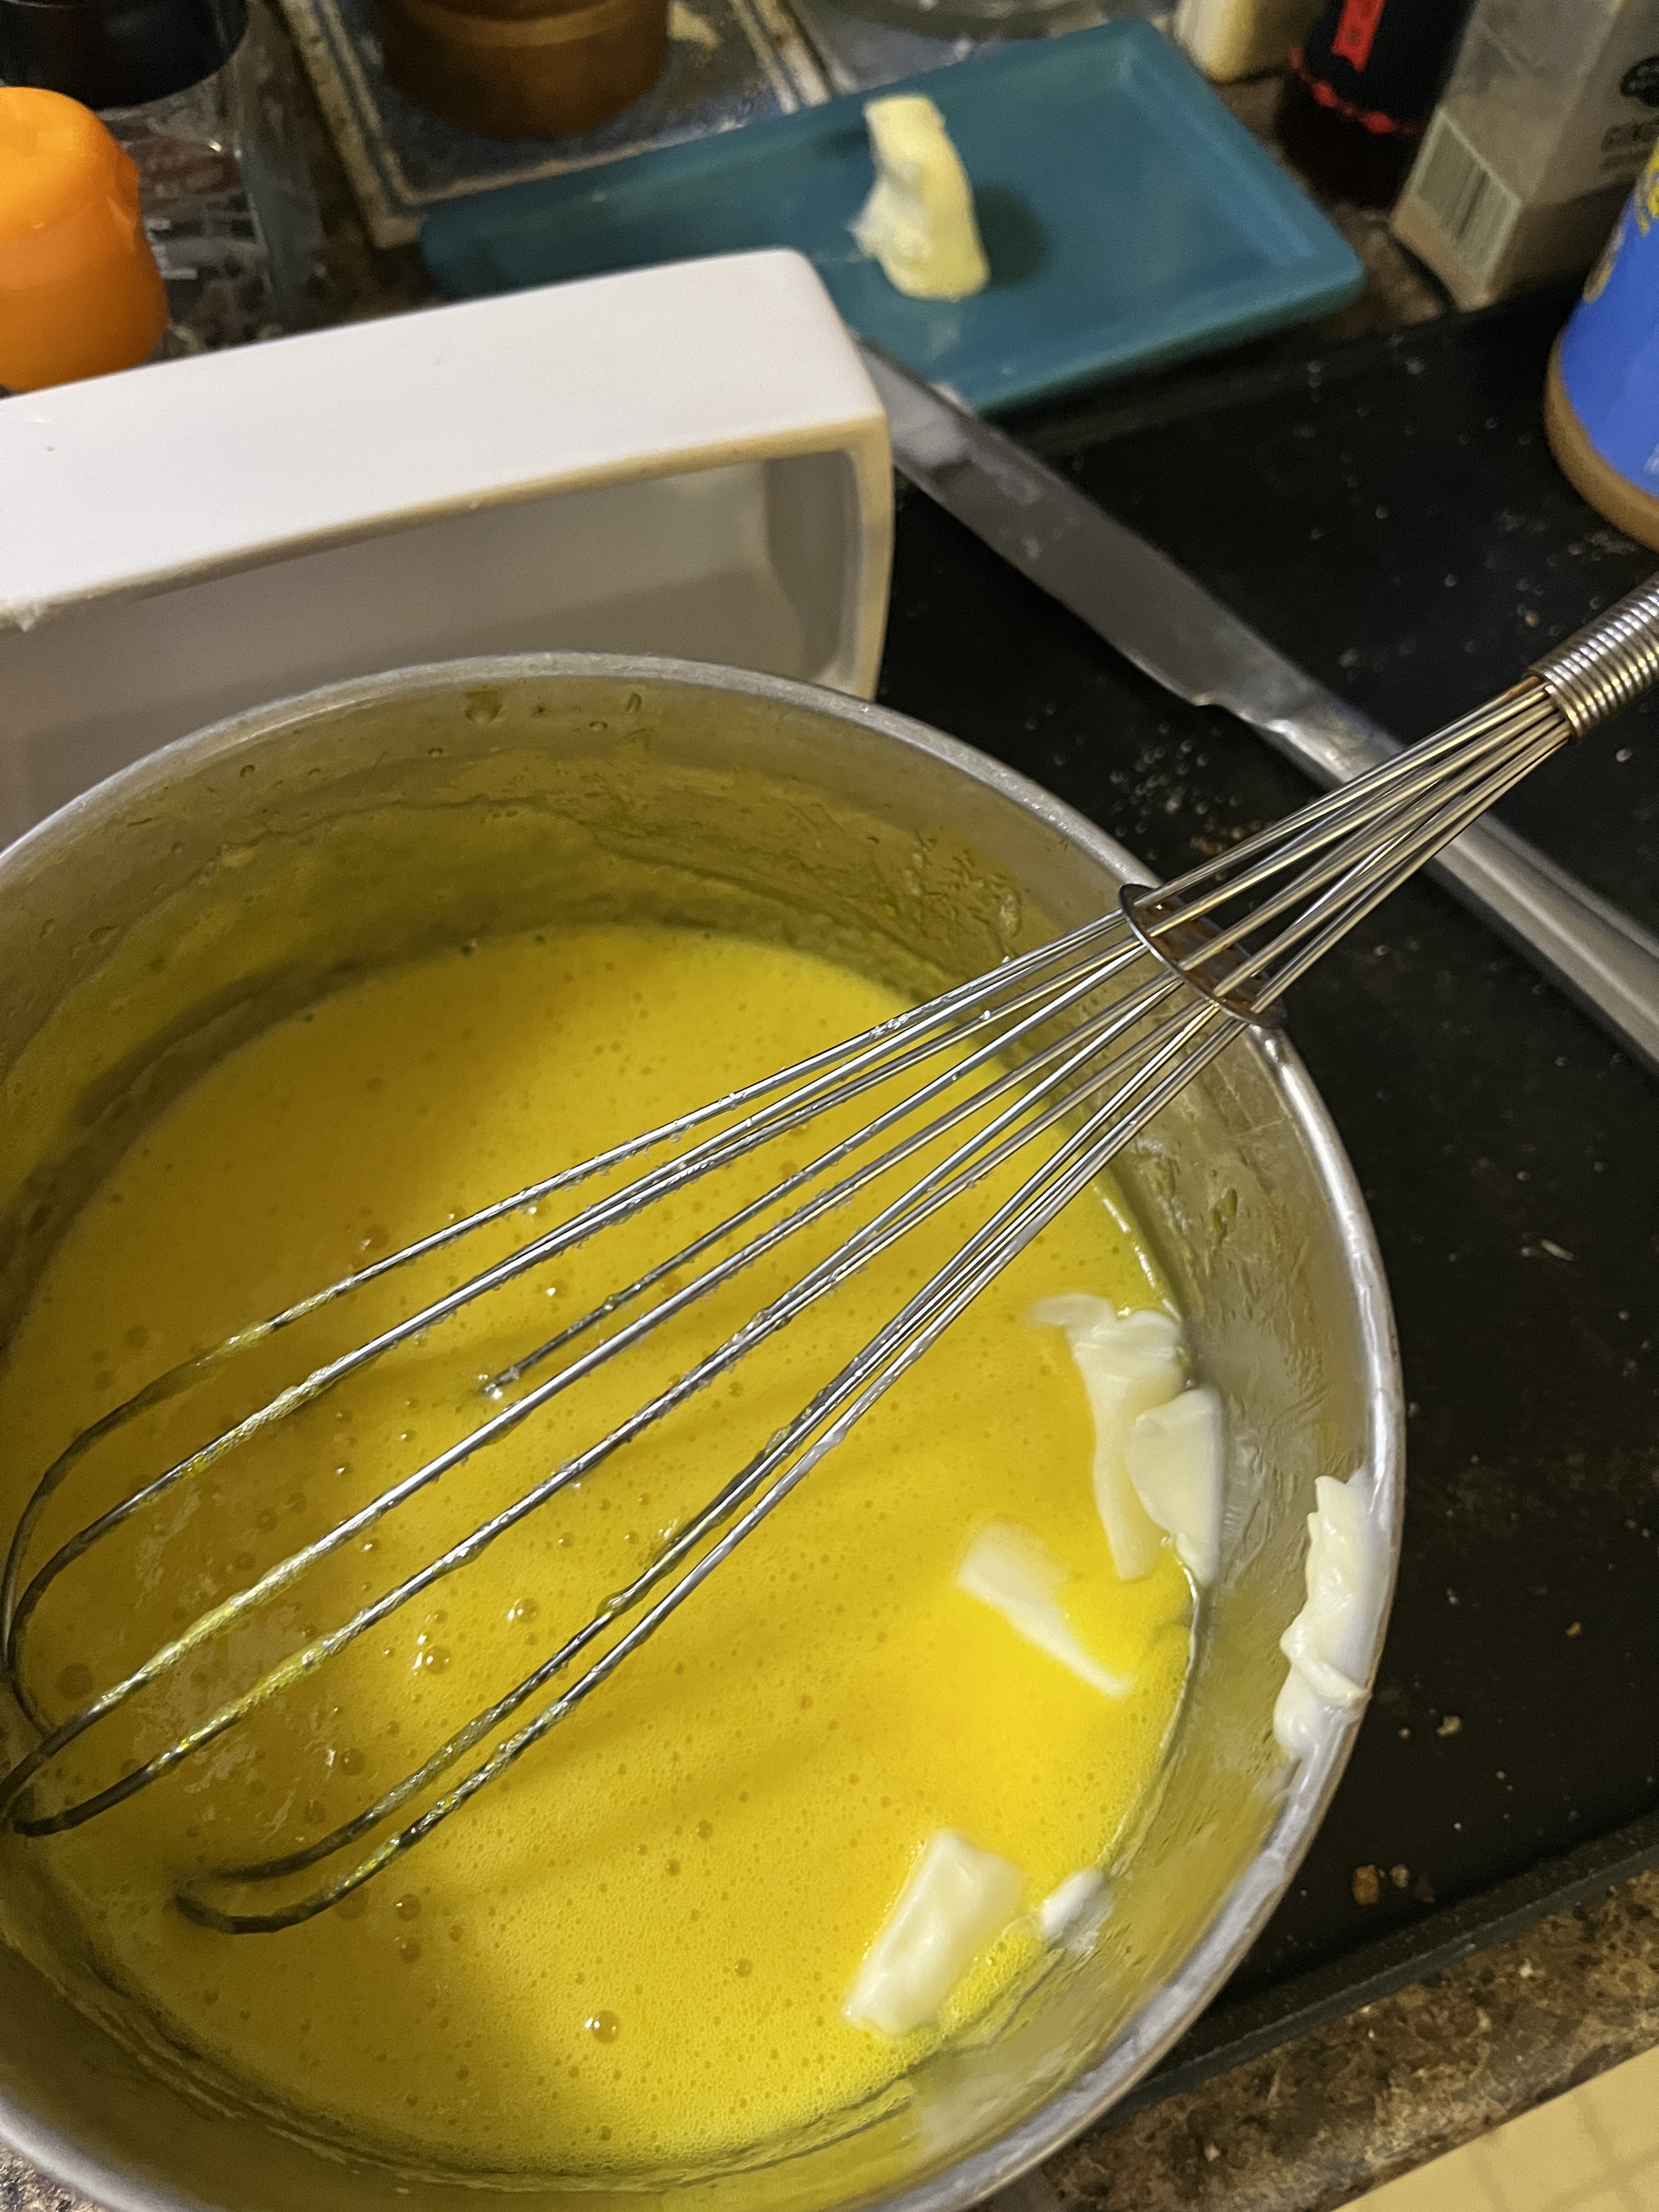
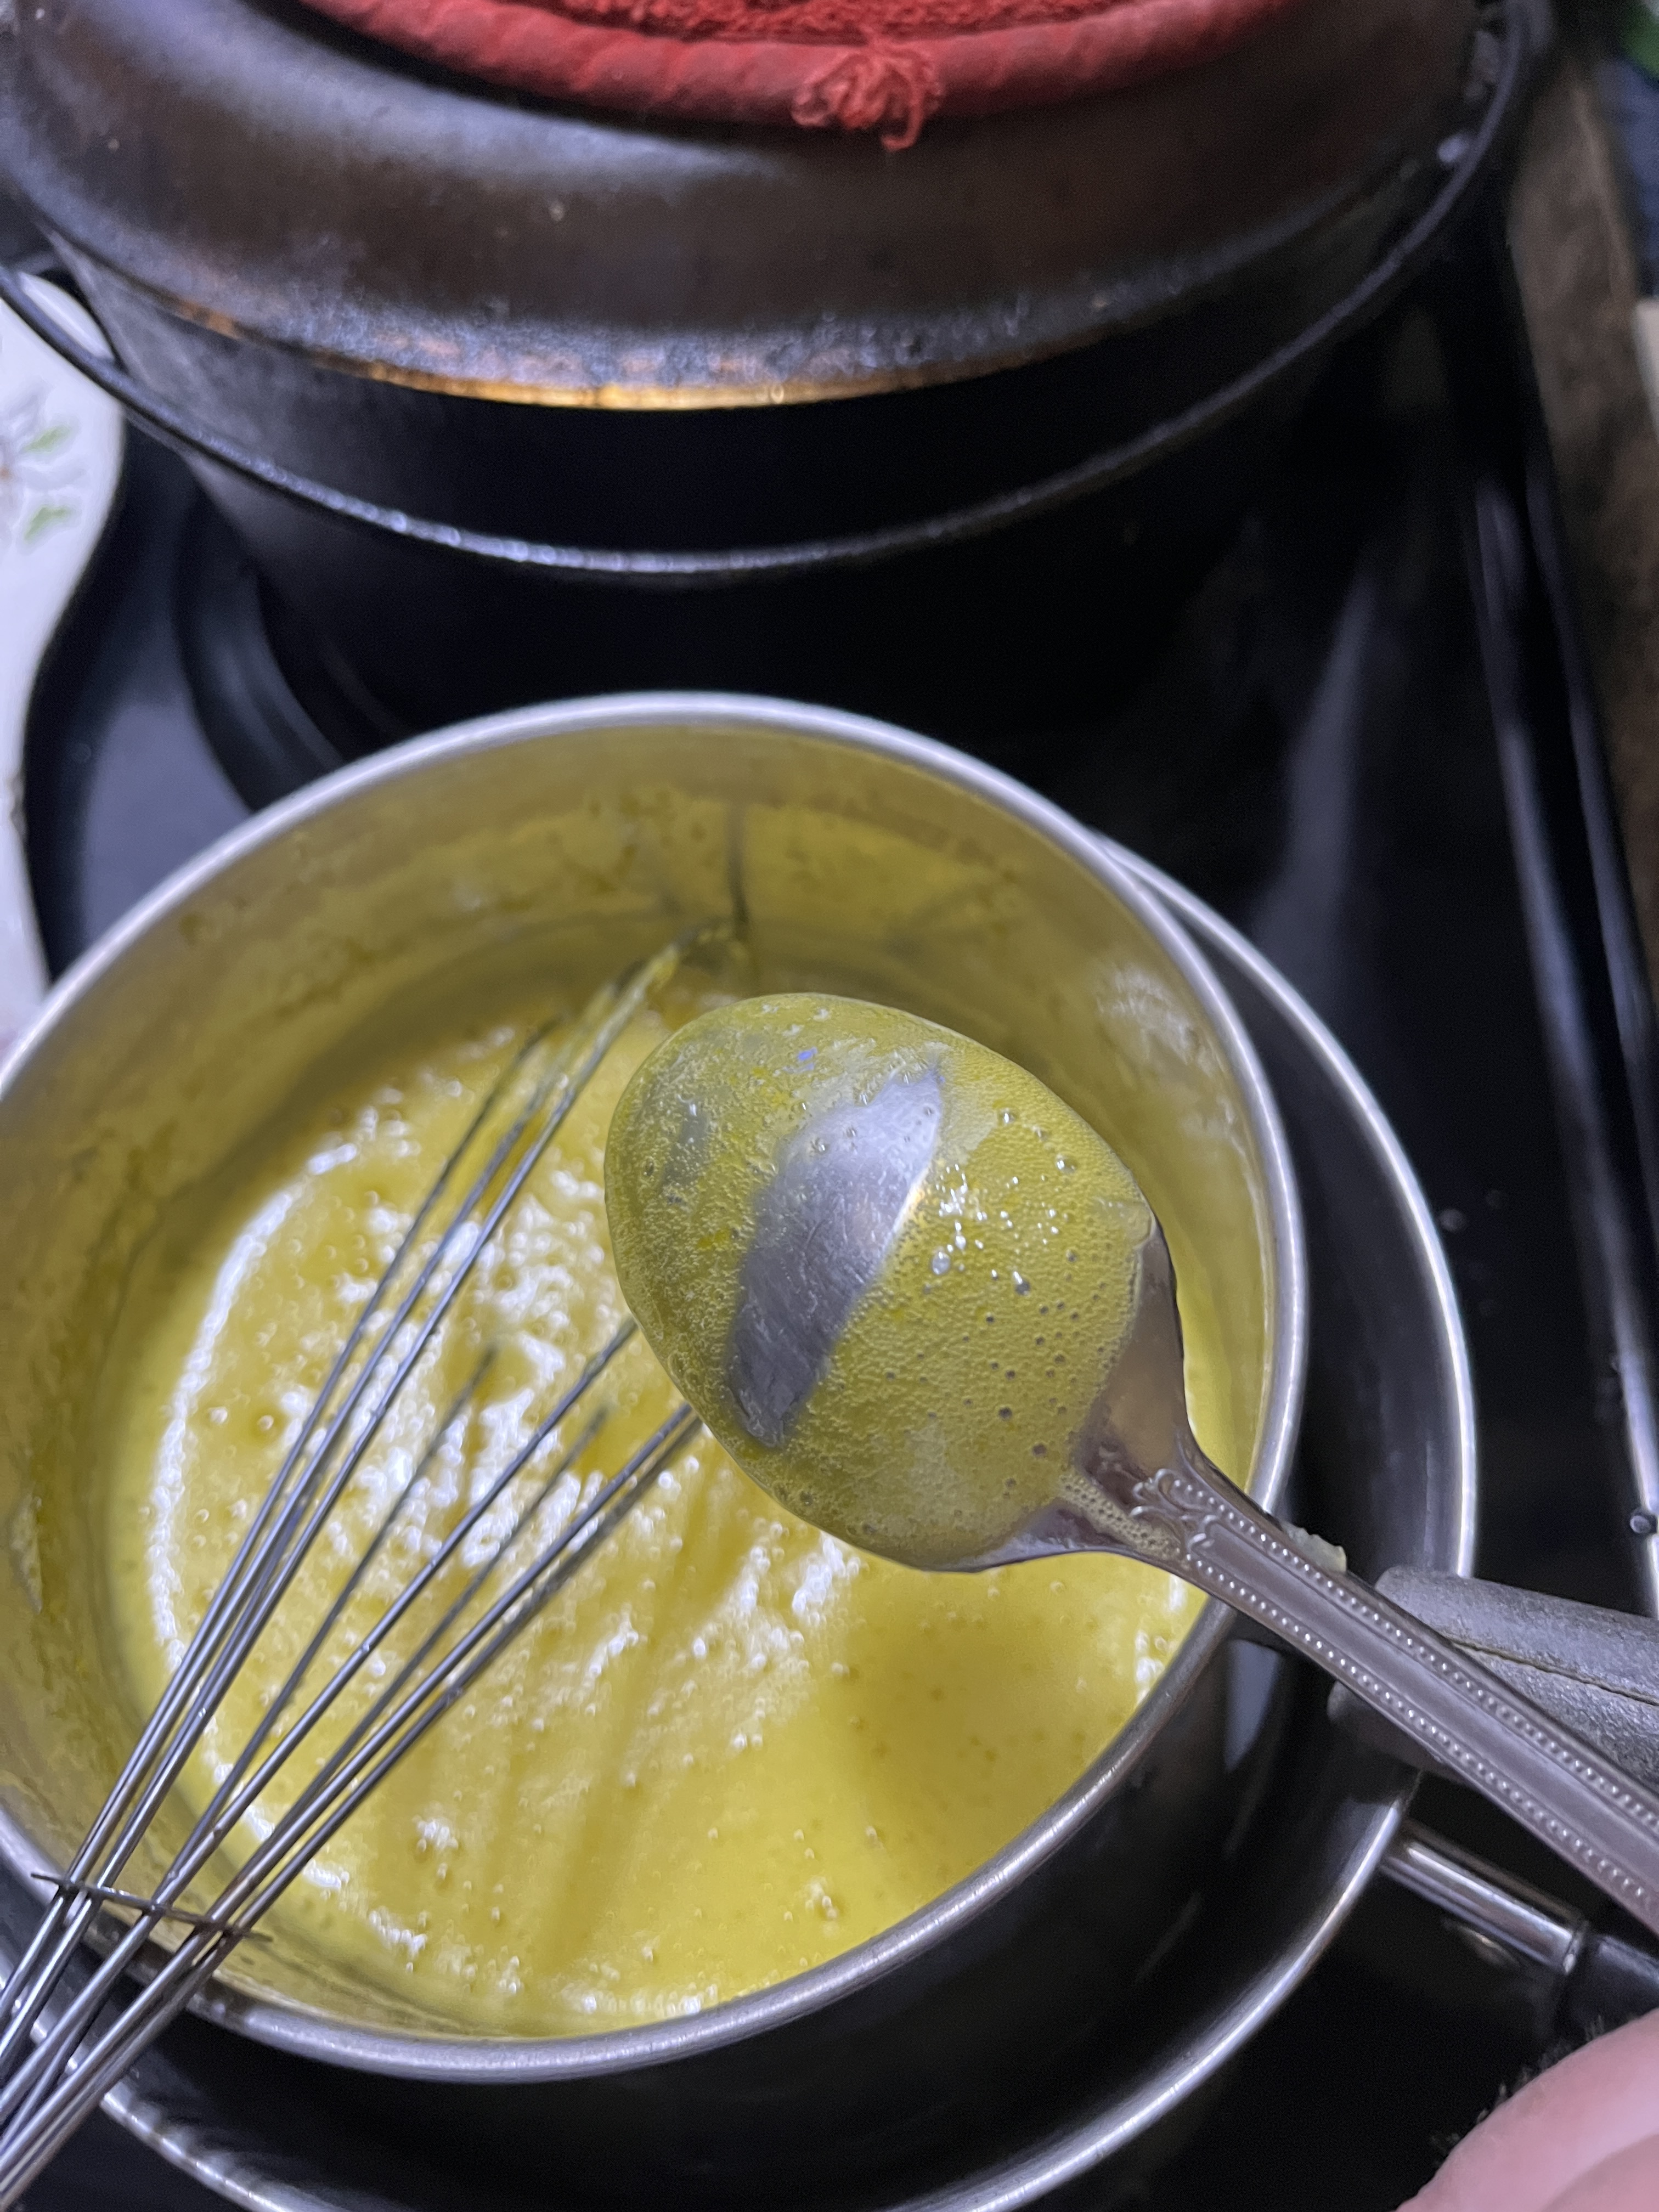
So, make a batch of lemon curd. I posted this earlier today so it should be easy to find in my archive. This is a picture of the point at which you add the butter and whip it in.
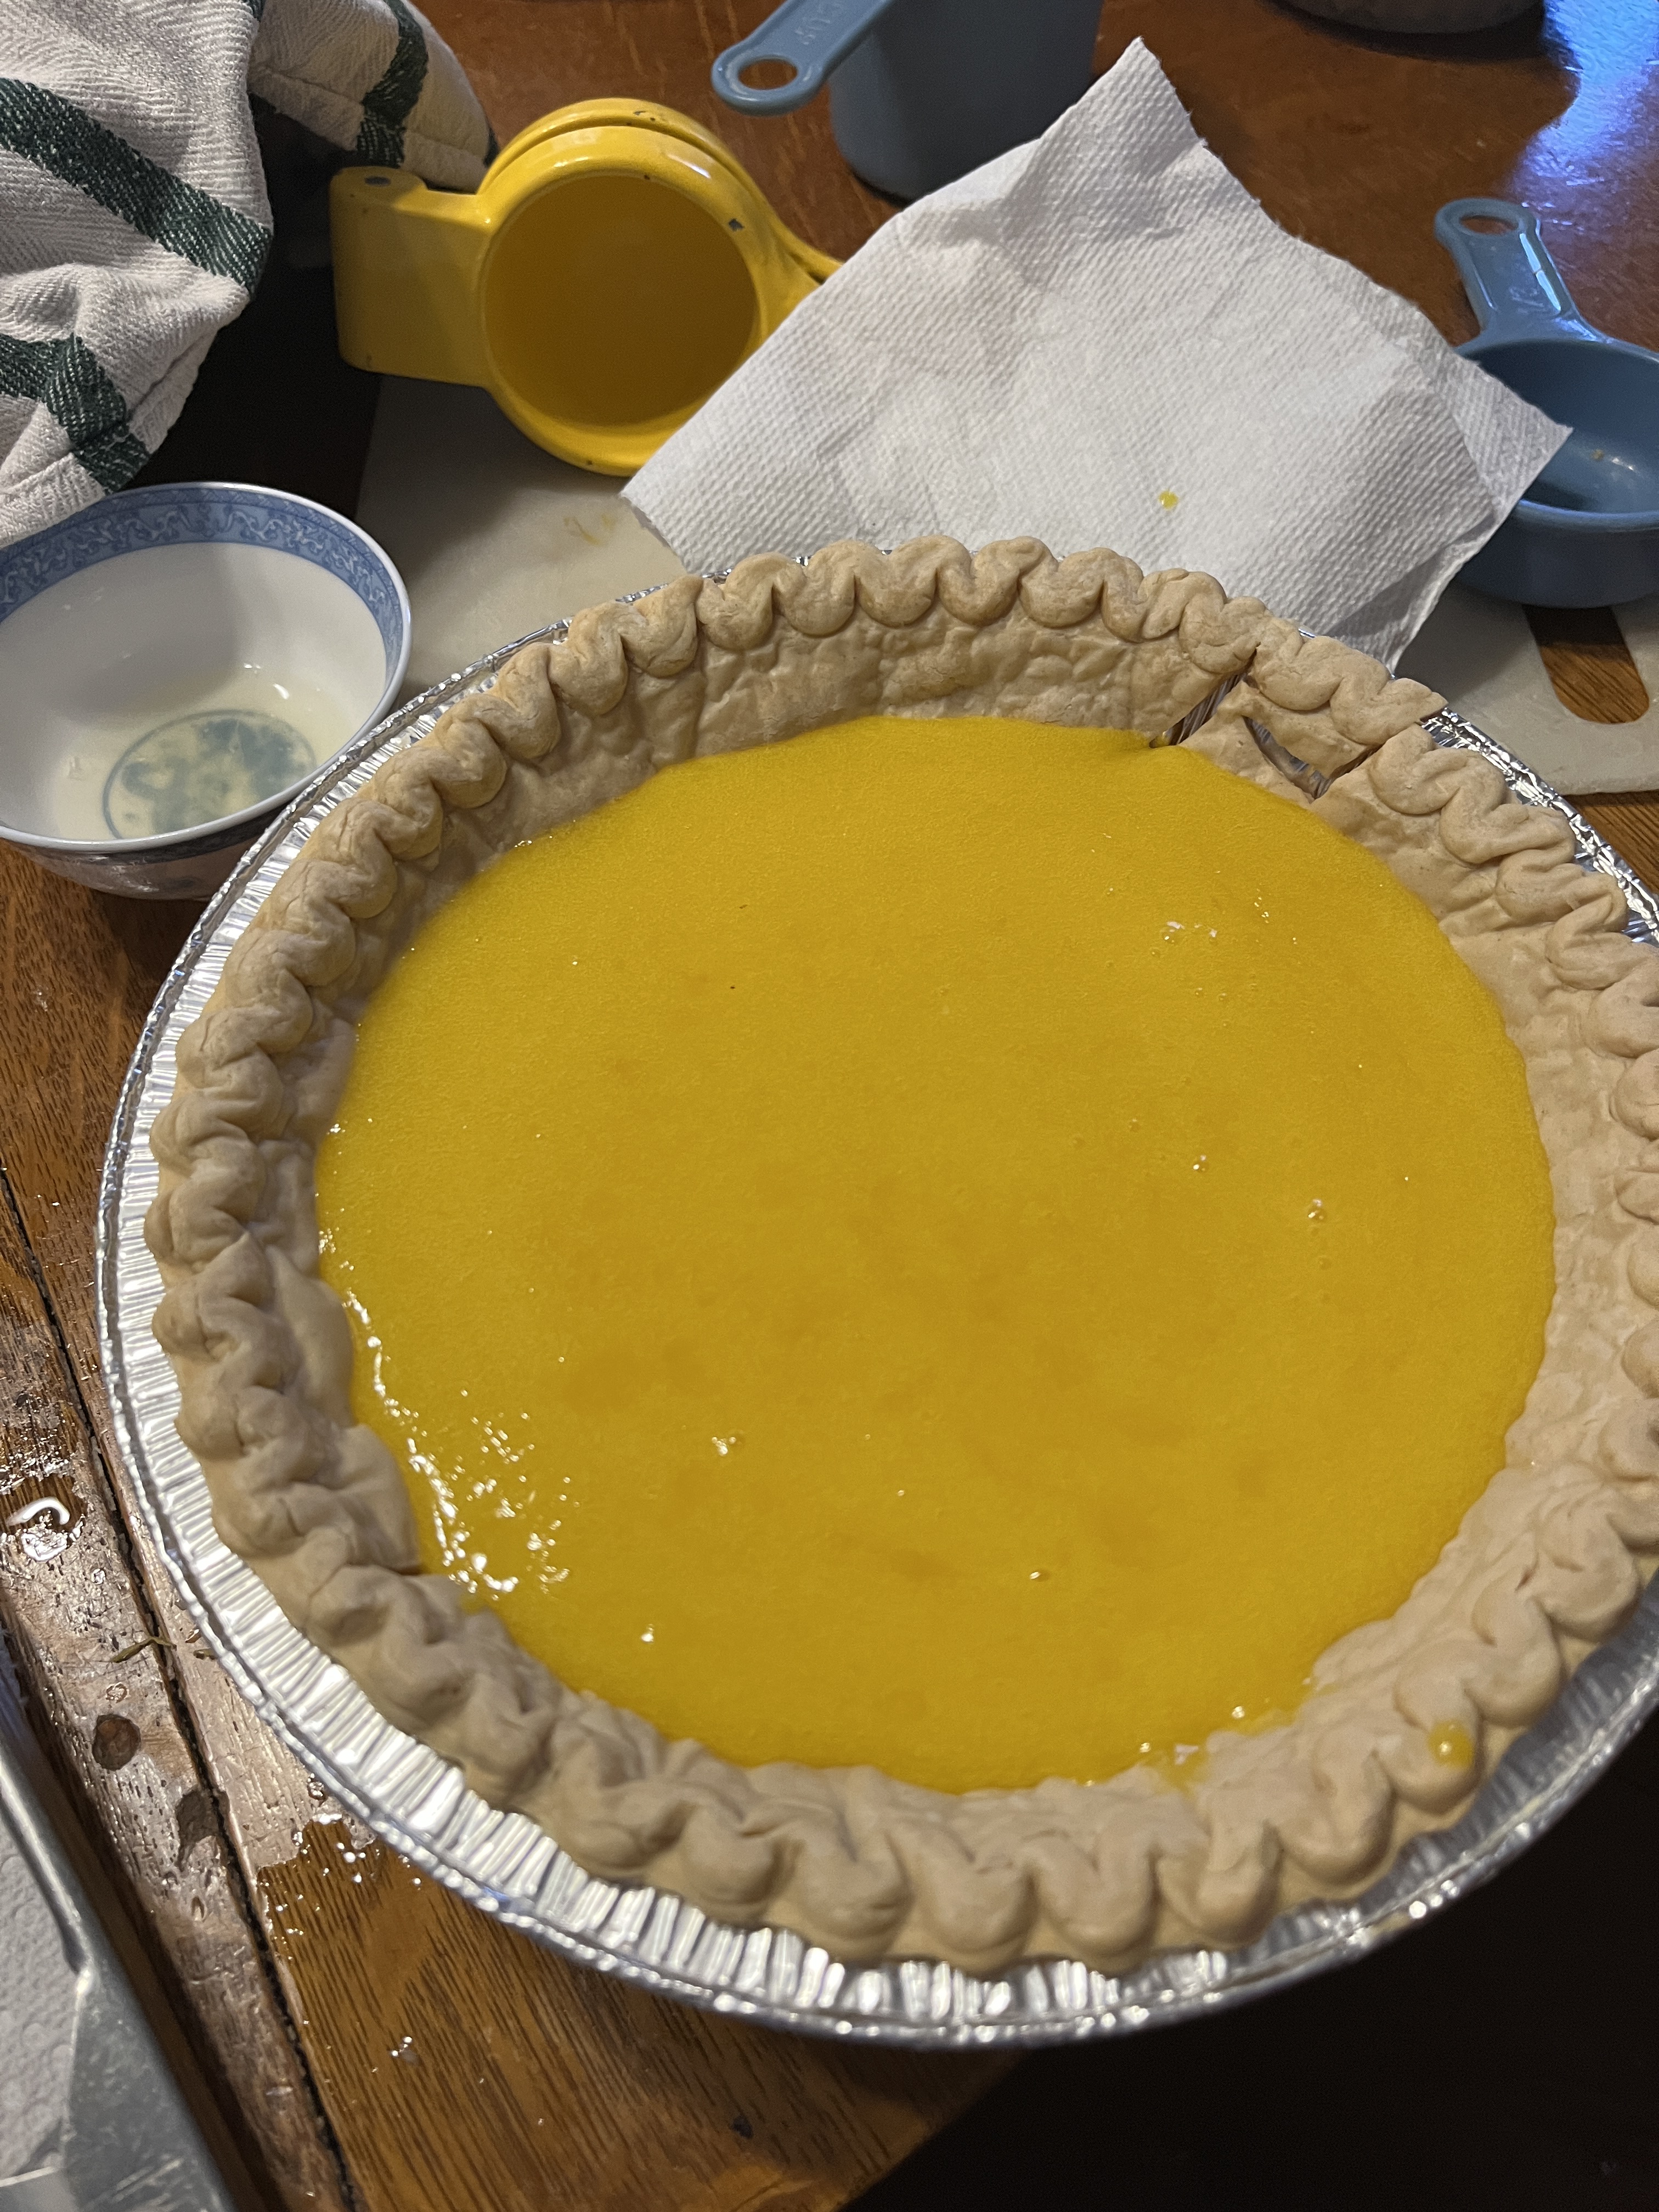
Pour it into the pie crust you baked or made earlier. If it’s a graham cracker crust it doesn’t necessarily need cooking. Regular pie crusts are more traditional, though.
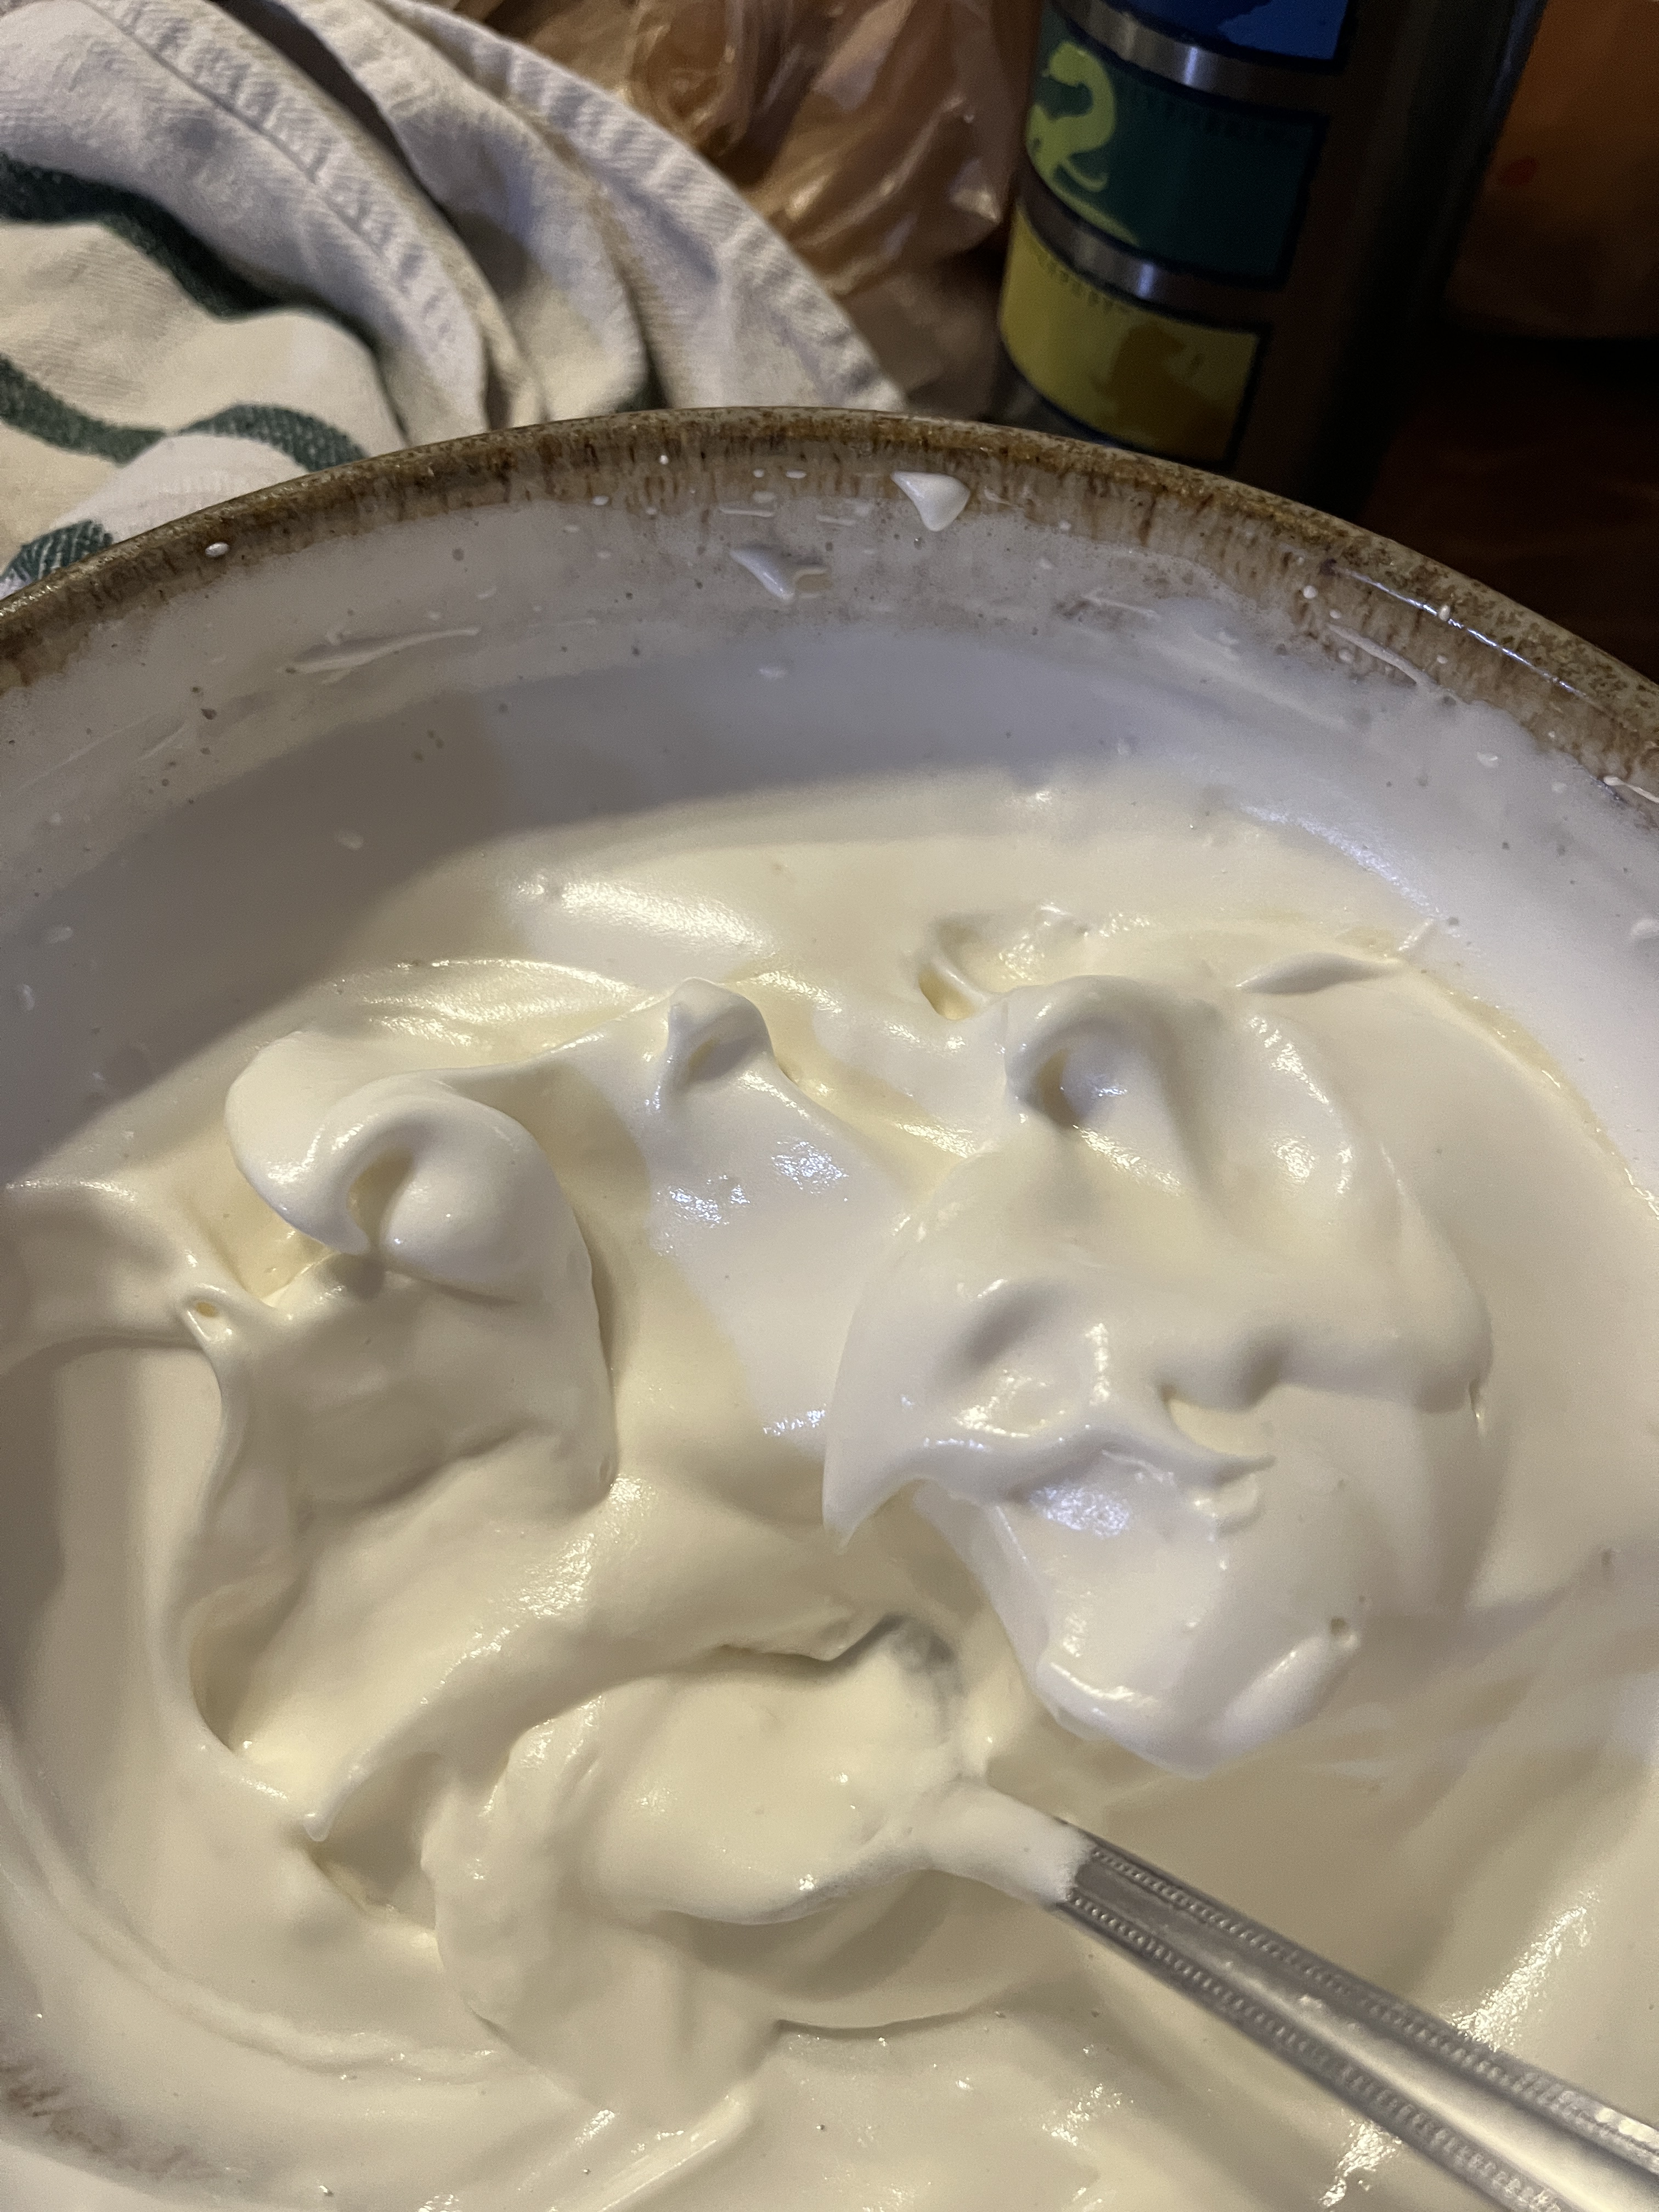
Whip up the egg whites left over from making the lemon curd. As you start to get bubbles in the eggs as you whip, add vanilla, 1 tsp cream of tartar and 1/2c to 1 cup of sugar, depending on how sweet you want it. Whip them to stiff peaks. These are soft peaks, but almost there. I’ll live with the consequences of not the perkiest peaks.
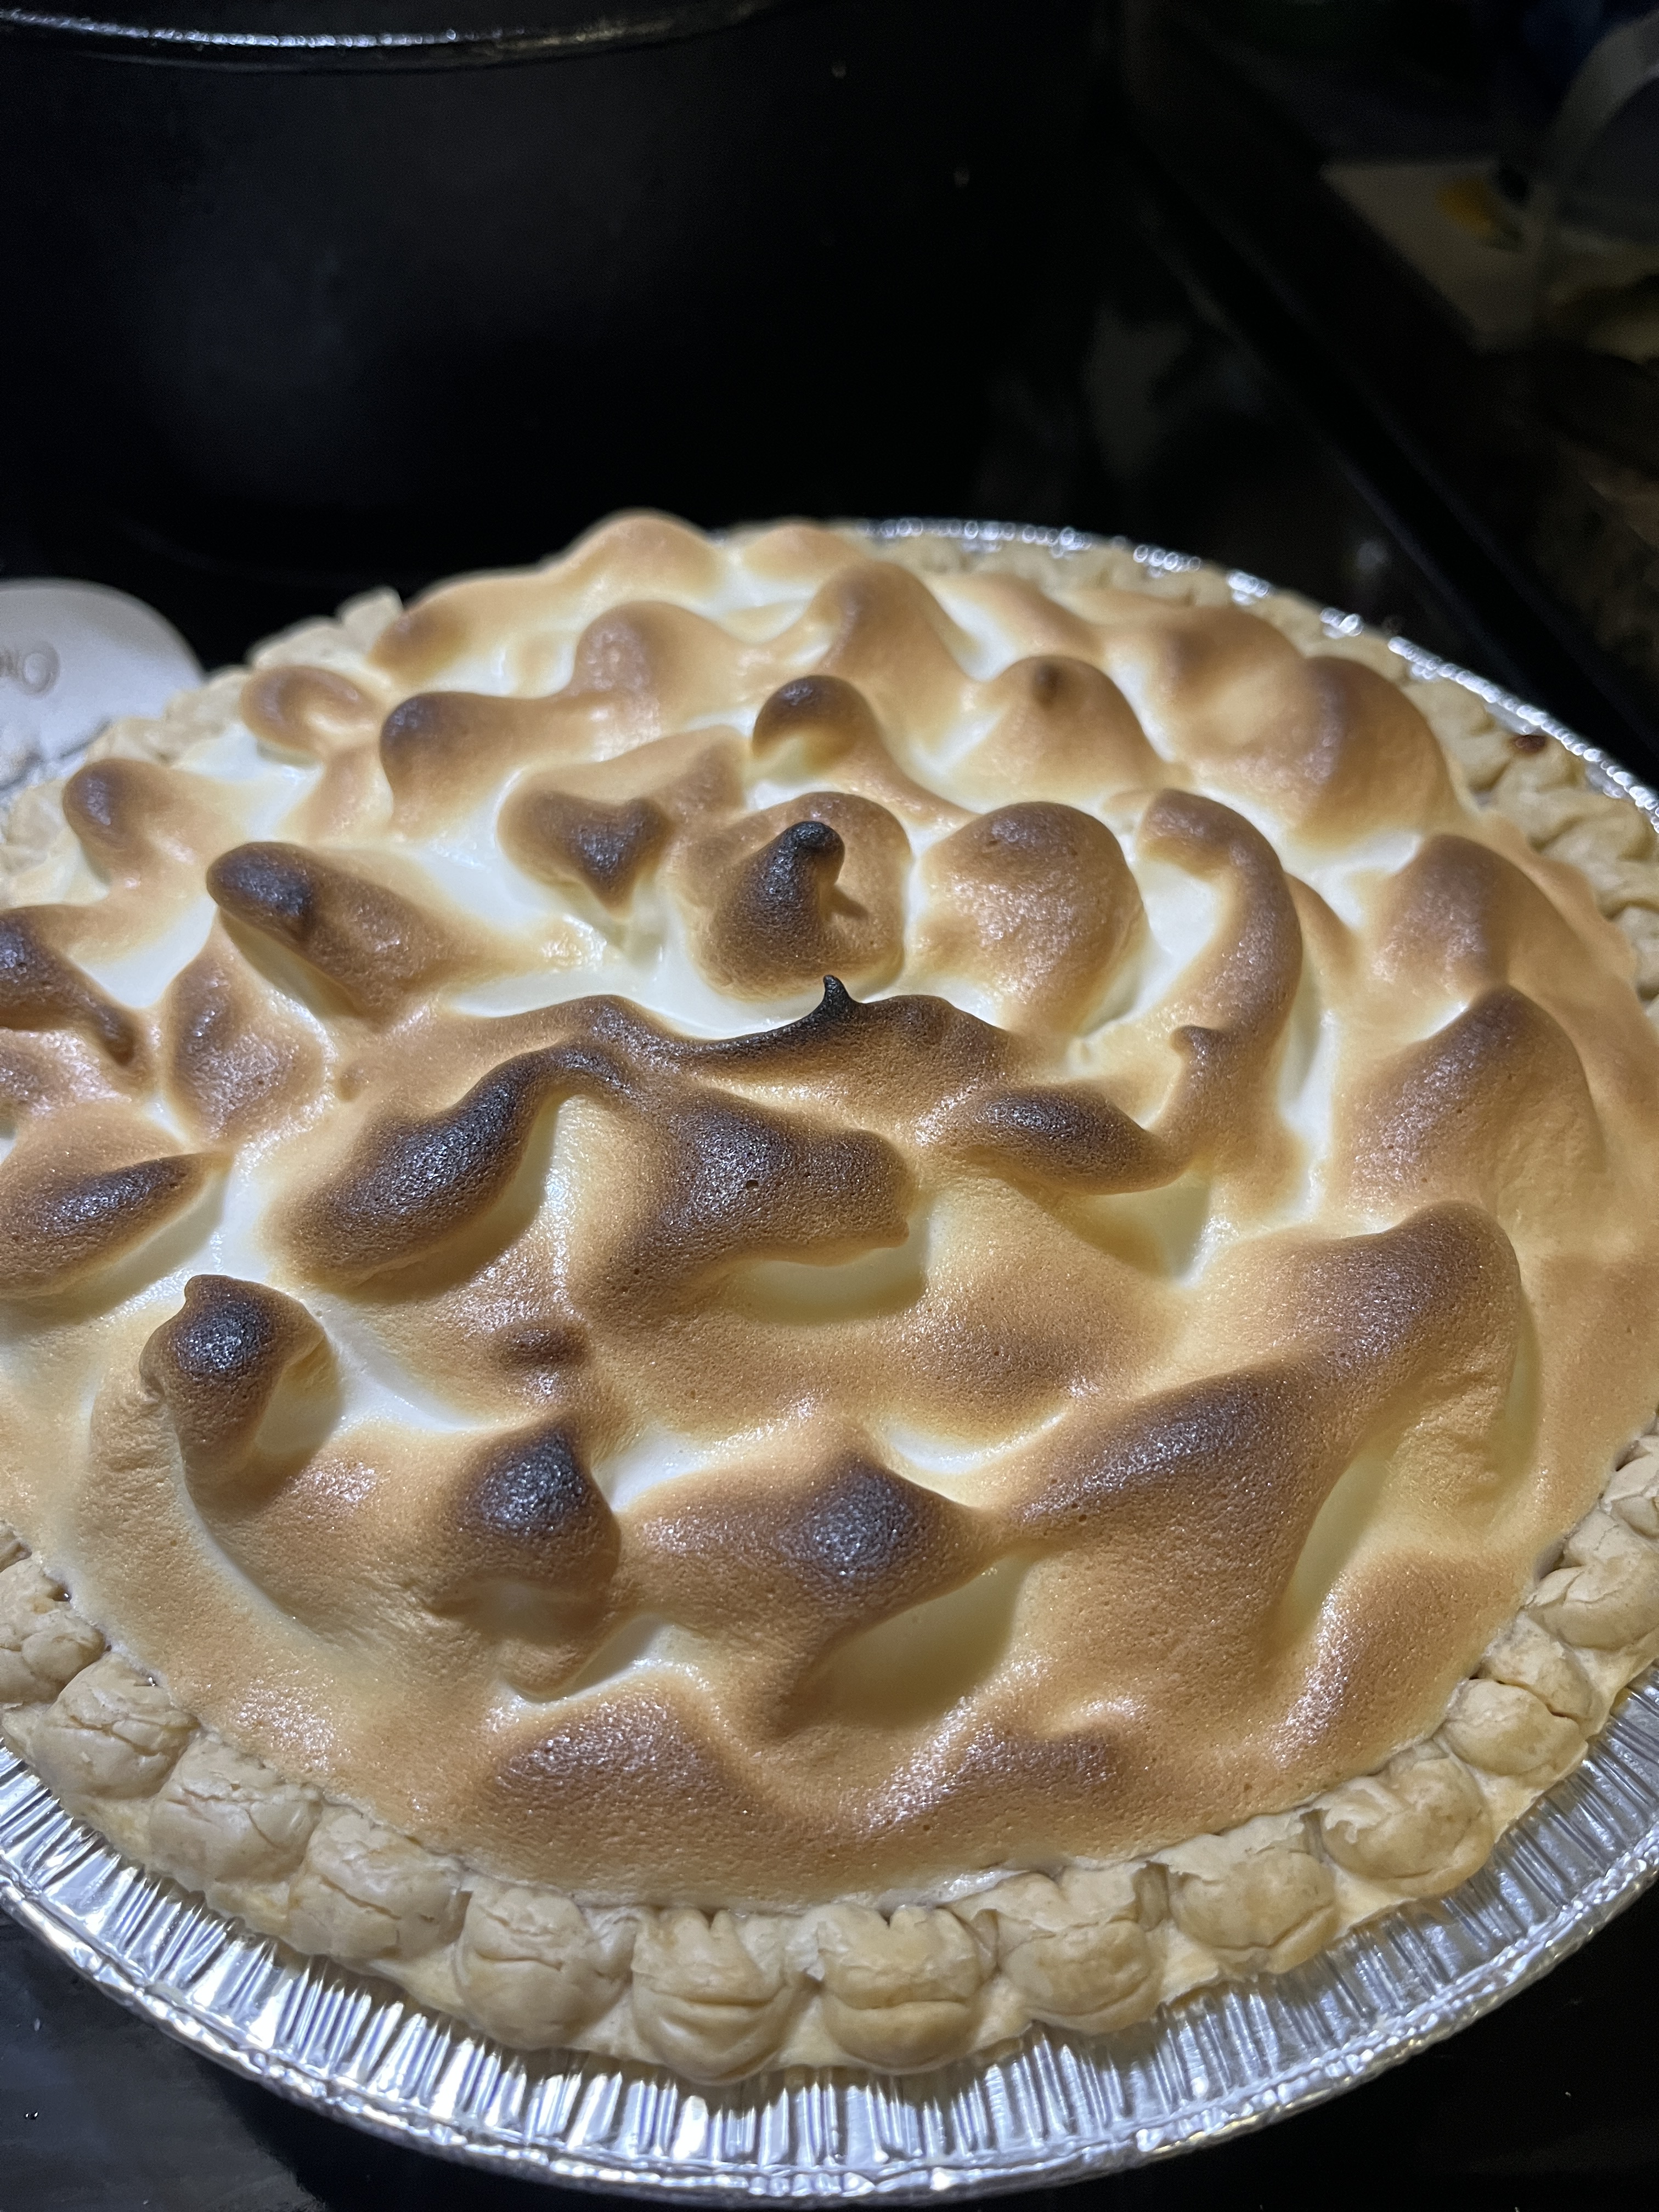
With an offset spatula, butter knife or spoon (I used a spoon), spread a good layer of meringue onto the pie, sealing the edges well to avoid weeping. Then add more to the top and make swirls and peaks or any designs you fancy. Put it under the broiler for a few minutes until it’s nicely golden. DON’T leave and pay attention to something else or your pie will get too dark or worse. In about 5 minutes or less it’ll be ready to take out and cool again.
Some people do as Julia Child did when, in her groundbreaking TV show, shocked the American public by lighting up a hand torch and browning the meringue with that. If you have one and are brave enough, go for it! Those things scare the dickens outta me so I’ll stick to my broiler.
Serve as dessert with the beverage of your choice (a tall glass of ice water is wonderful). I should have let it firm up in the fridge a little longer and the 1st piece is often the worst looking one. Oh well, it tastes wonderful! Also, next time I’ll use a regular pie crust instead of a deep dish crust.
If you want to make a bunch of smaller lemon tarts, you can do that, too.
If you have extra meringue, cover a cookie sheet with waxed paper and spoon little bite-sized drops of meringue onto it and make them at 250 for 10 minute, then turn off the oven and let them dry out in the warm oven. If they get a bit brown it’s OK, they’re still good but the aim is to bake them and dry them slowly without browning because they look better white. My Mom was very good at this. Me, not so much. I have, however, found that the new mini chocolate chips are good in these as are broken-up hard candies, especially mints. You can also add food colouring to the meringue to go with whatever flavour candy you crunch up for them.
Because my tree gave me a LOT of lemons this year, I like lemons, I like lemon curd and all the things you can do with it…like make lemon pies and tarts, fill doughnuts, top scones with it at tea, put it on ice cream or sherbet, put it on pancakes, crepes or waffles, use it as a filling between cake layers or sandwich cookies…so many yummy options!!!
enough jars or a pie crust for the lemon curd
Zest and juice of 2 or 3 lemons
2/3 c sugar
4 large egg yolks
Dash of salt (about 1/8 tsp
6 Tbsp unsalted butter. If you use salted butter (like I do) don’t add the salt.
Now to get down to business making this stuff.
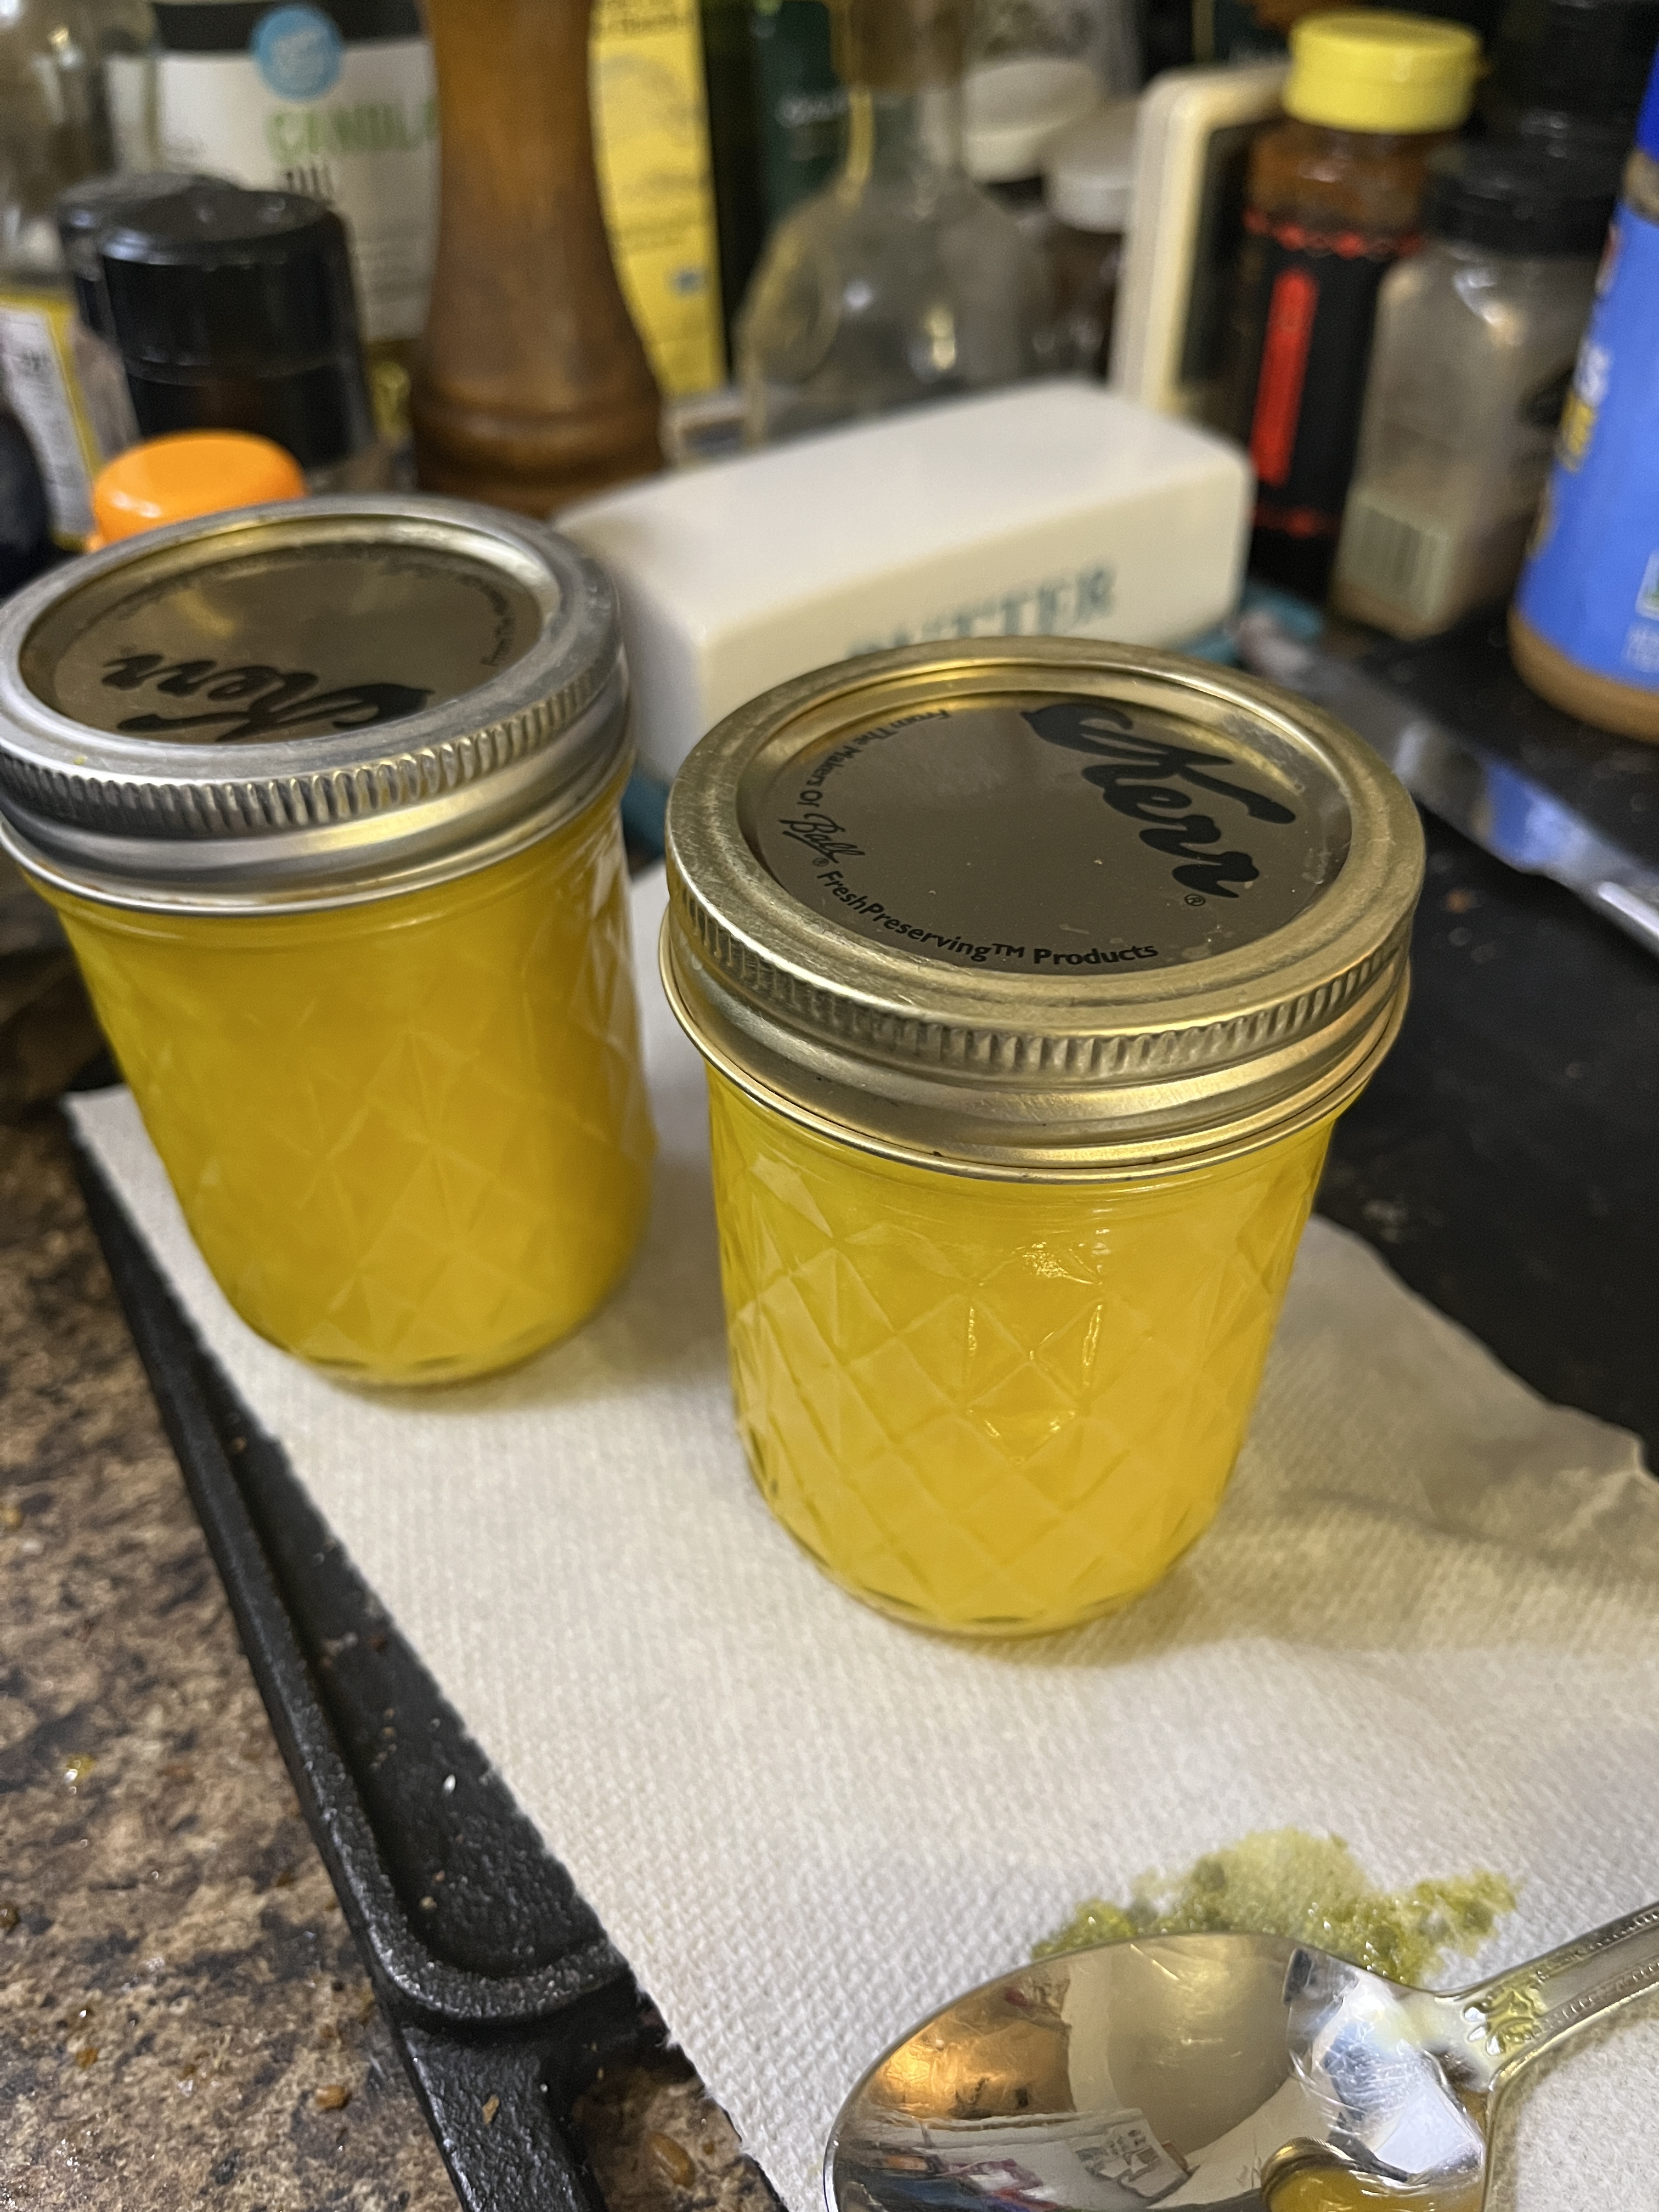
Put some jars in a pot, cover with water and bring to a boil.
Turn off the heat and take out a couple to dry upside-down on a tea towel or paper towel til you’re ready for them.You’ll need 2 8-oz or 1 15-oz jar. if you’re making a double batch use twice as many jars. If you’re making a pie skip this step.
Zest 2 or 3 lemons
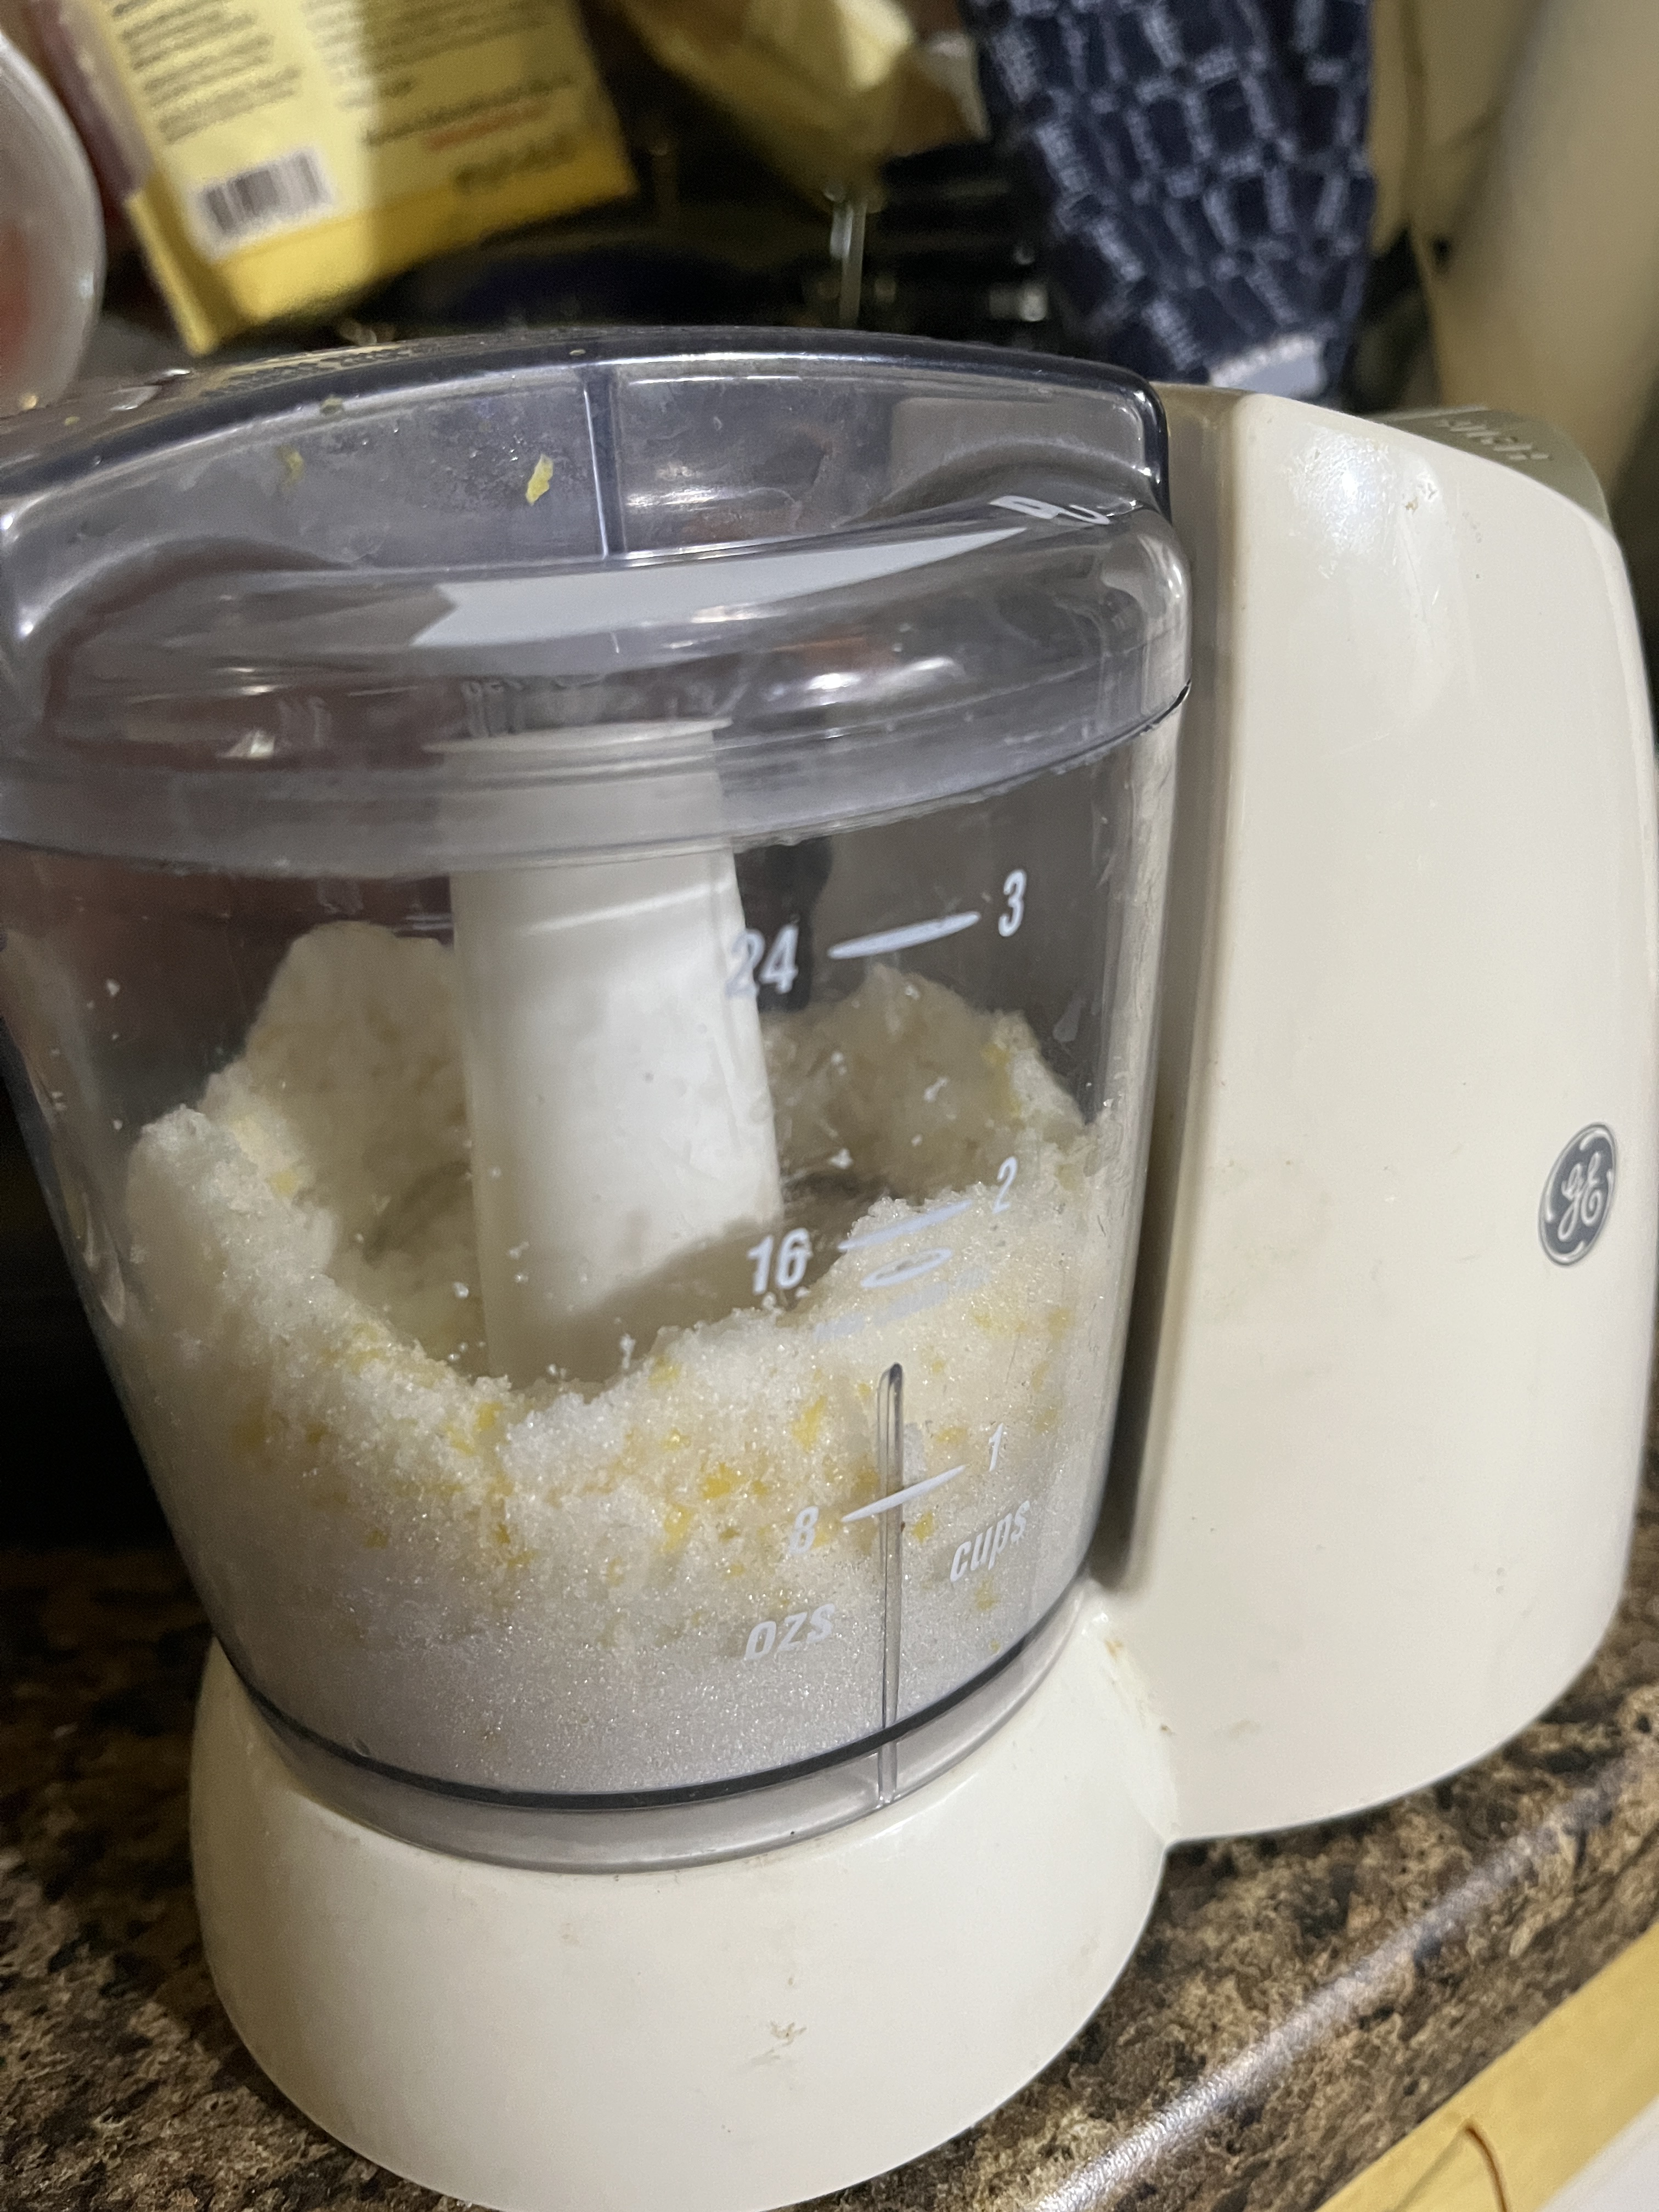
Whiz the lemon zest and sugar together in a food processor. This makes the zest smaller and less conspicuous and seems to make it more lemony and it breaks the zests into smaller pieces that cook down better.
Juice the lemons
Separate the eggs. Today I used my grandmother’s egg separator. My chickens have really dark yolks because they get to eat anything they can catch. Sometimes they’re darker than this. Chickens are not vegetarians!
Set the whites aside for later covering with a tea towel to keep curious noses out. Make an egg white omlette, meringue for cookies or pie or whatever you can think of.
Put together your double boiler. Don’t have one? (I don’t) Then use a larger pan with about 2 inches of water and a smaller pan for mixing/cooking in.
In the smaller, top pan put the lemon juice, straining out any pips and pulp,
then add the sugar and zest
and finally the yolks.
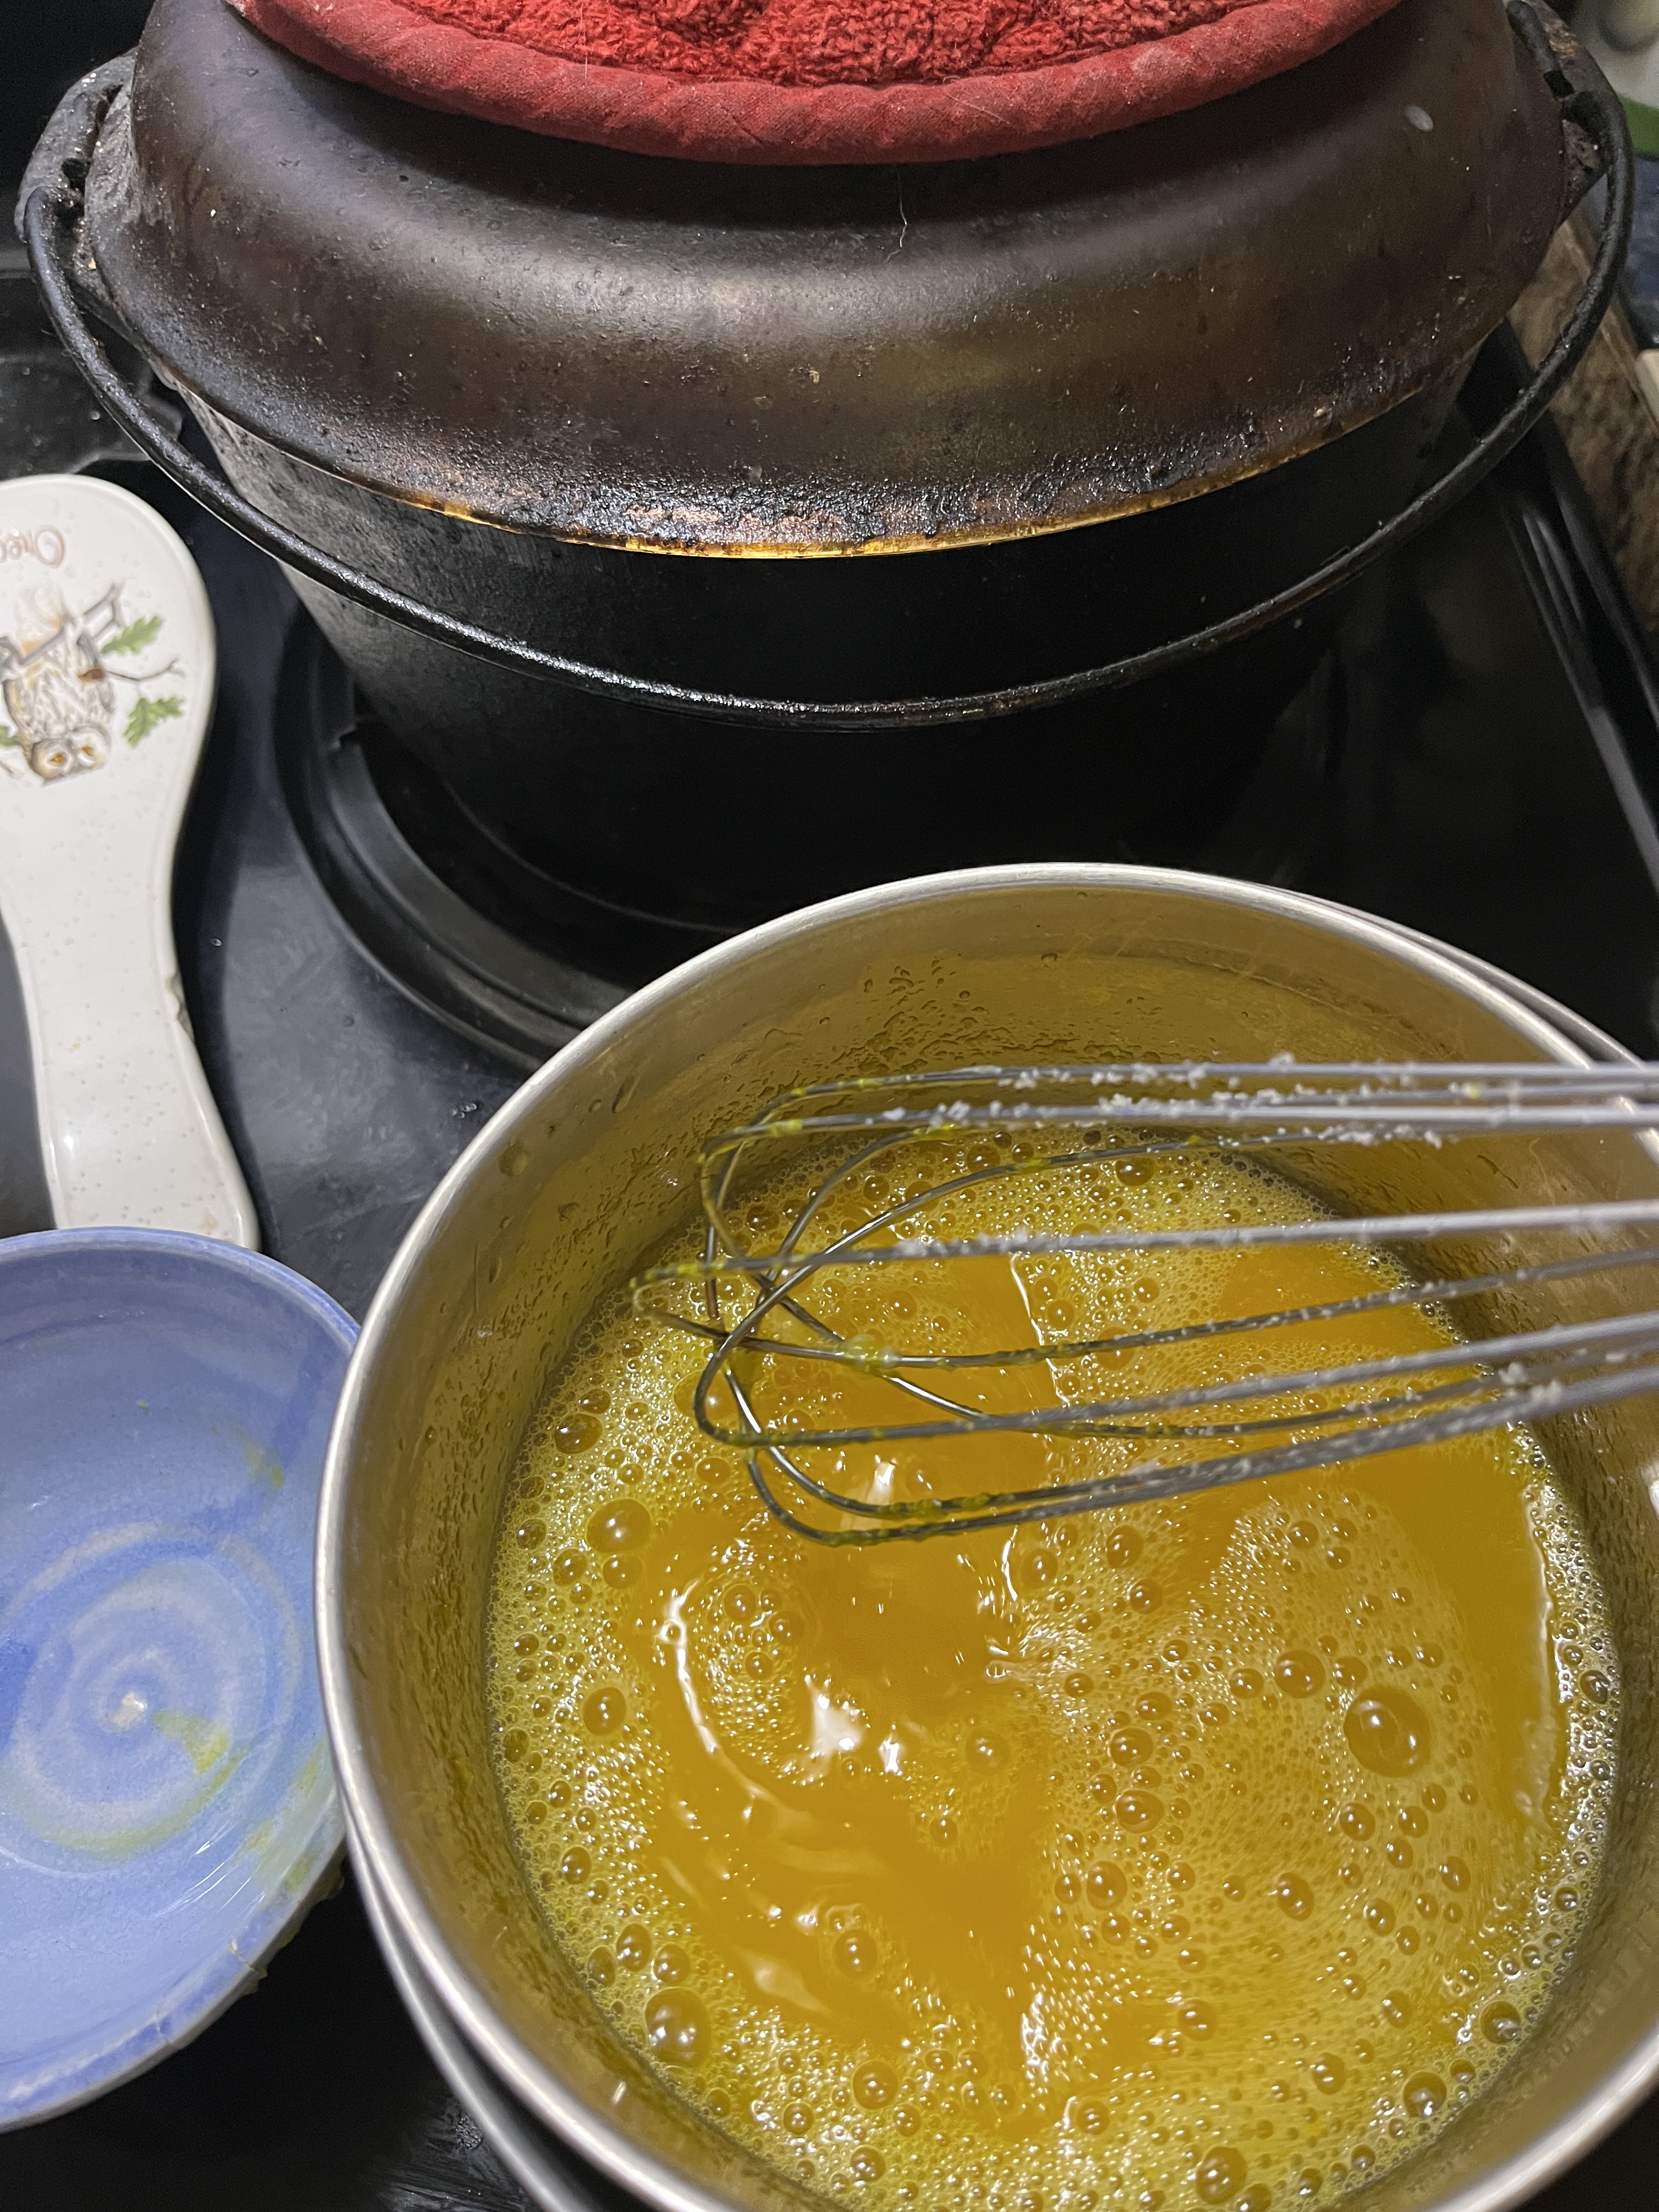
Whisk together and cook til it starts to thicken and coats the back of a spoon (you can leave a trail in it with your finger), about 10 minutes or so,
Take it off the heat and whisk in the butter
Put into the jars
or a pie crust, whichever you’re making today…or both!
Use at tea, breakfast, elevensies, brunch, dessert, midnight snacks or in any direction your imaginative taste buds take you.
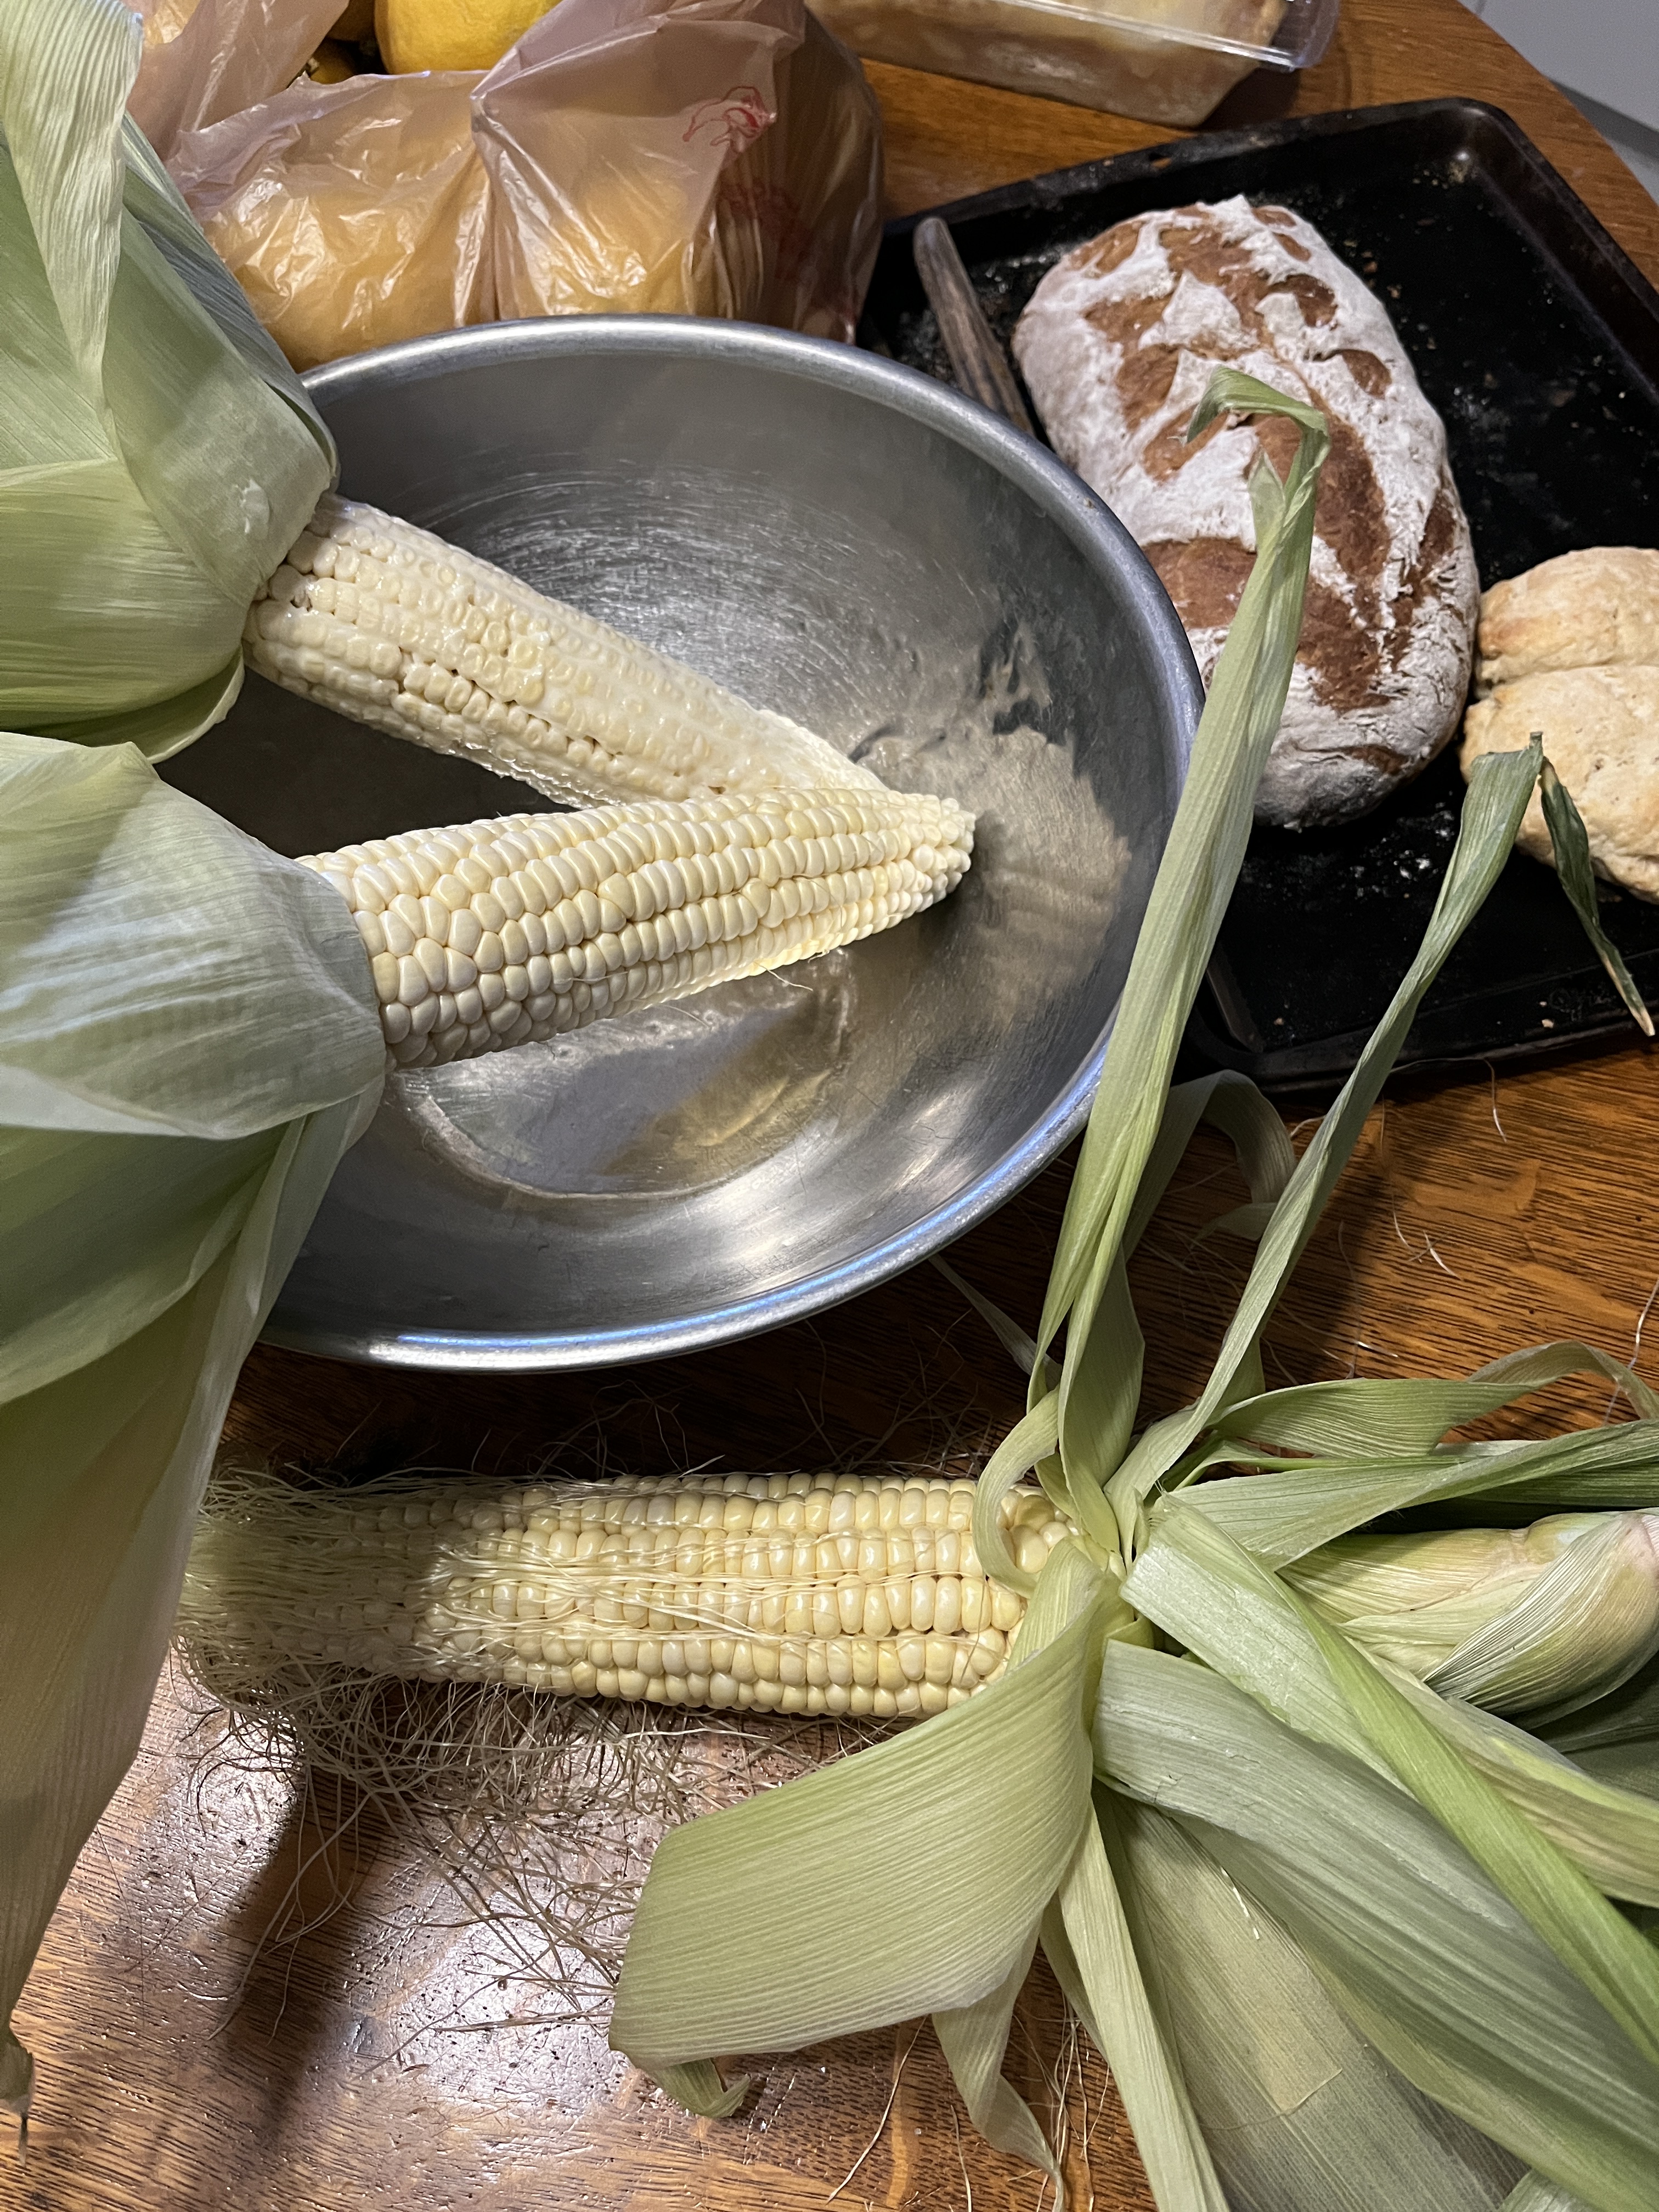
I bought some sirloin steaks on sale so I needed something to go with them. I’d dug some potatoes a few days before so potato salad was of course on the menue. Corn on the cob was on sale, too, so it also seemed like a natural choice. Since yesterday was our 1st day with temperatures over 100 degrees I didn’t want to heat up the house so grilling the corn as well as the steaks seemed like a good idea. I’d seen it done but never done it myself so just tried it. Here’s what I did:
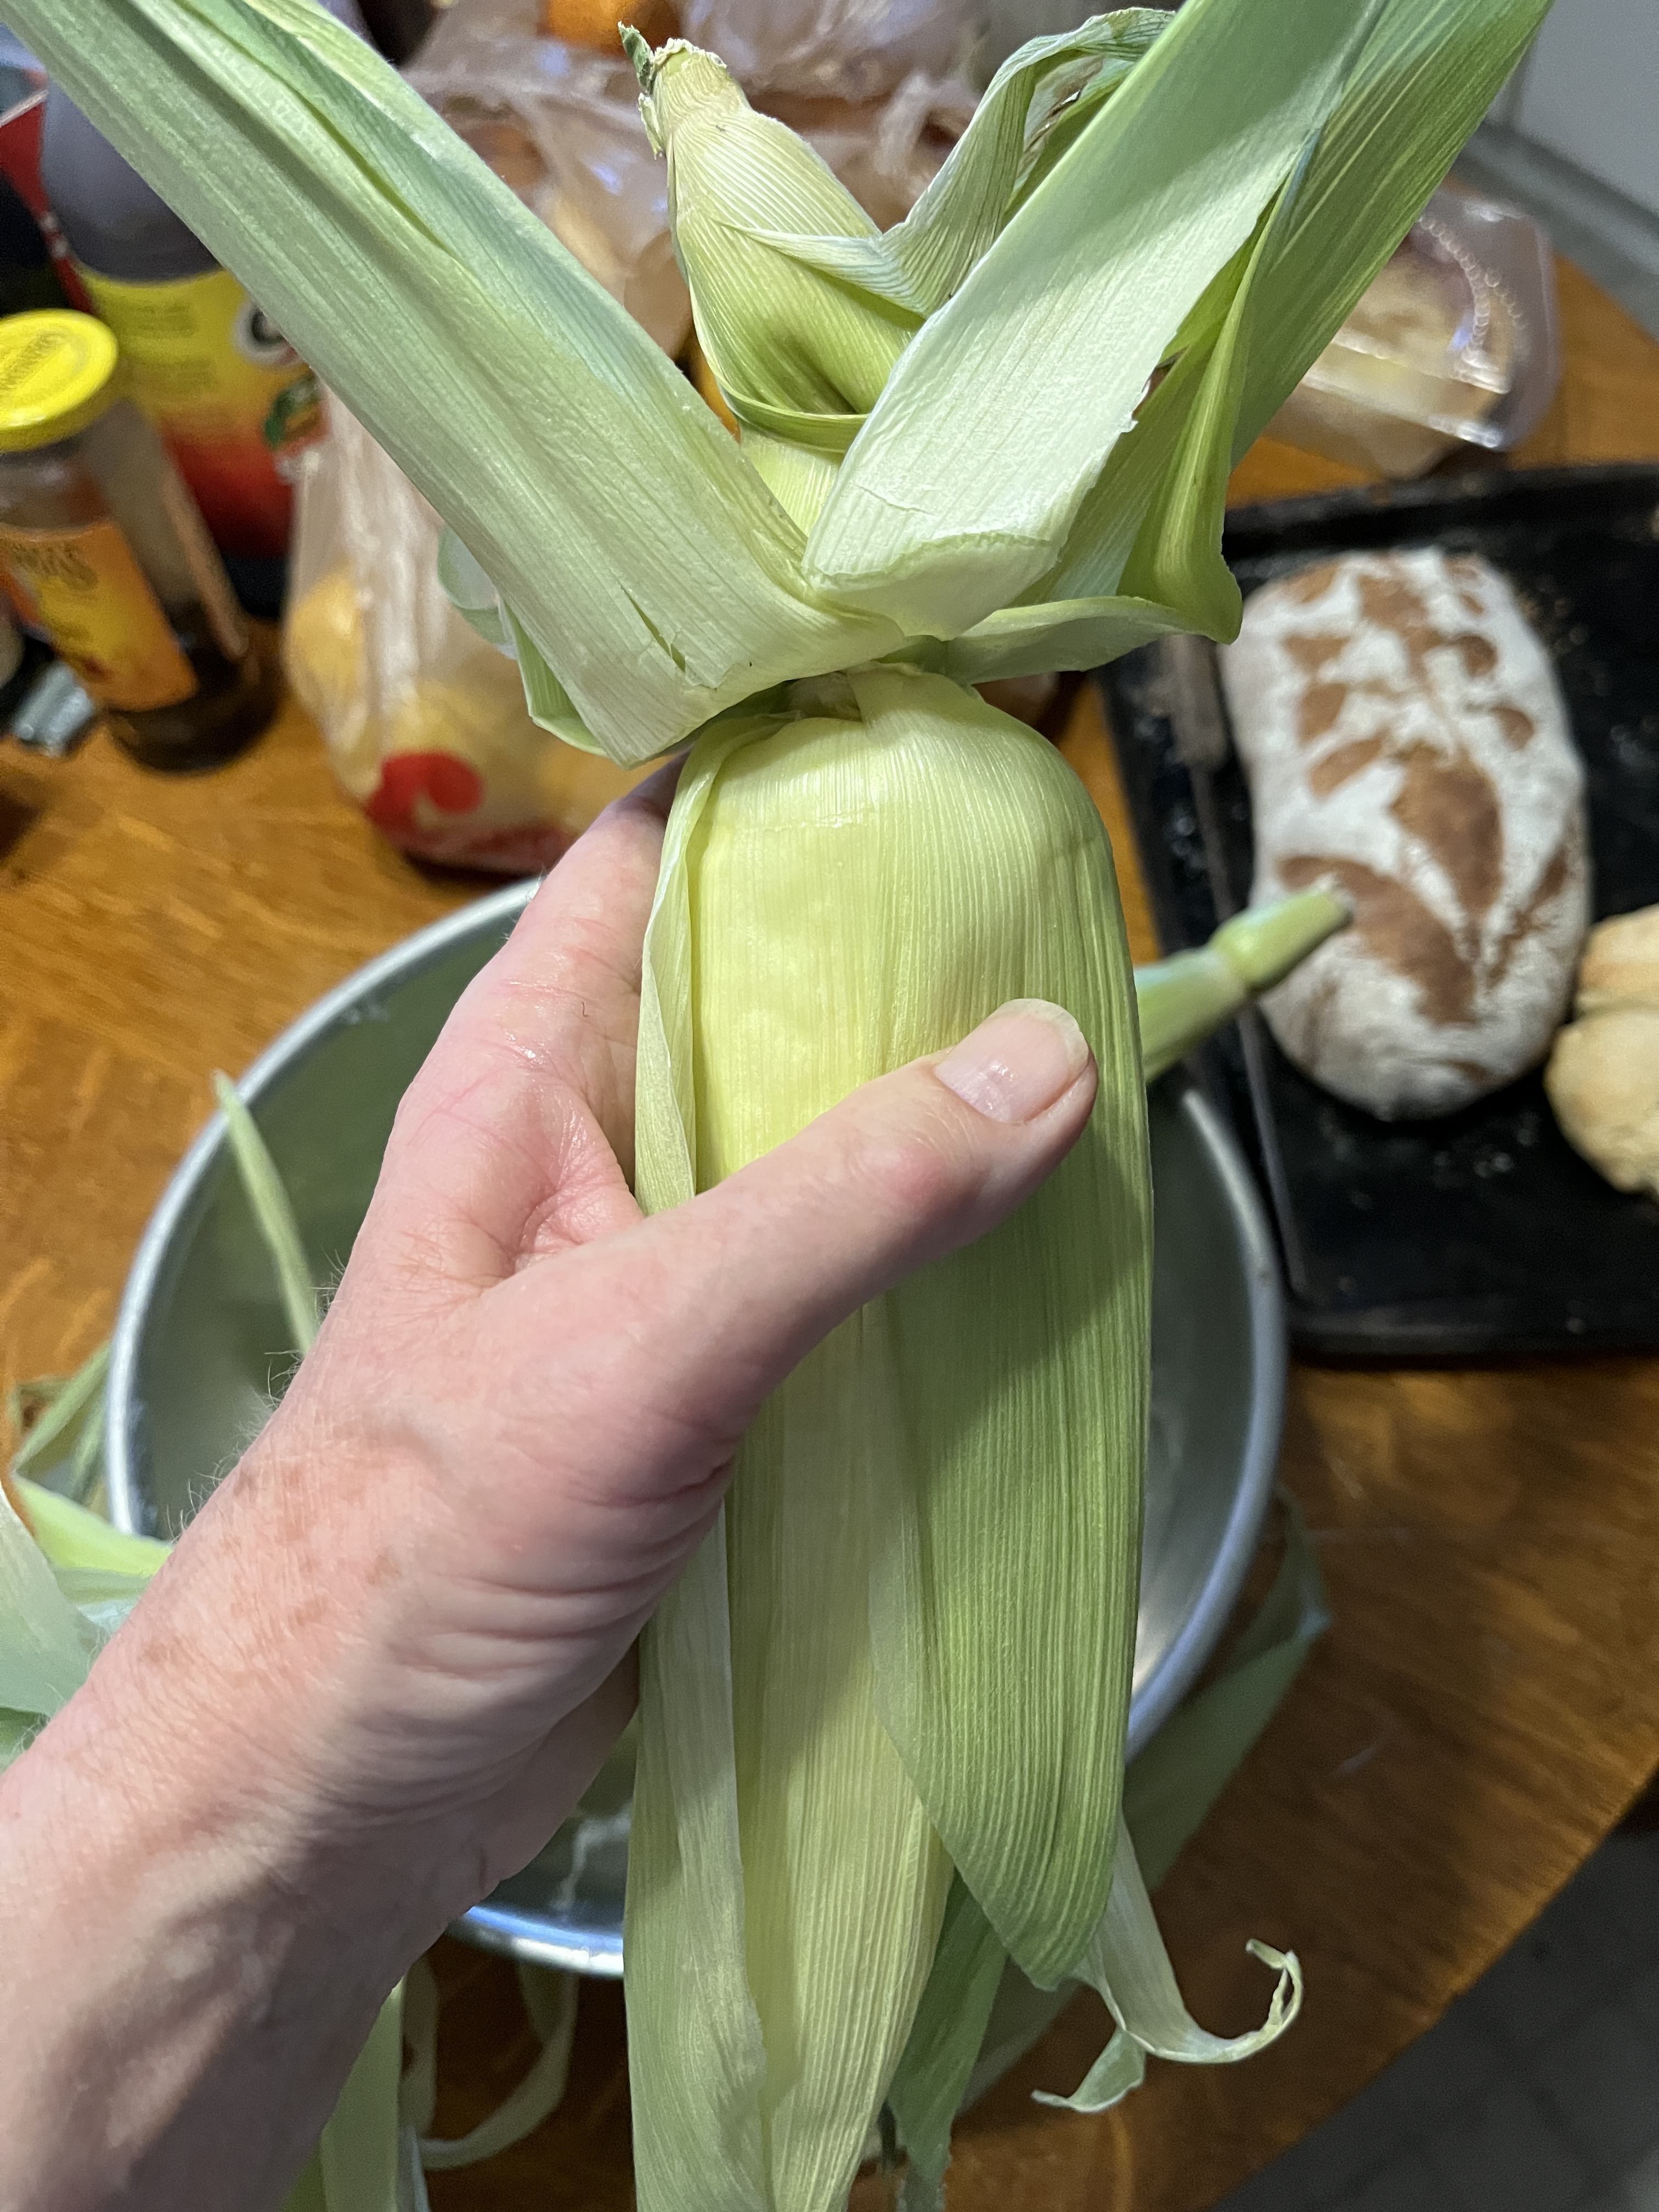
Peel back the husks. This is, by the way, something the kids can do while you’re getting other things ready for dinner like making potato salad.
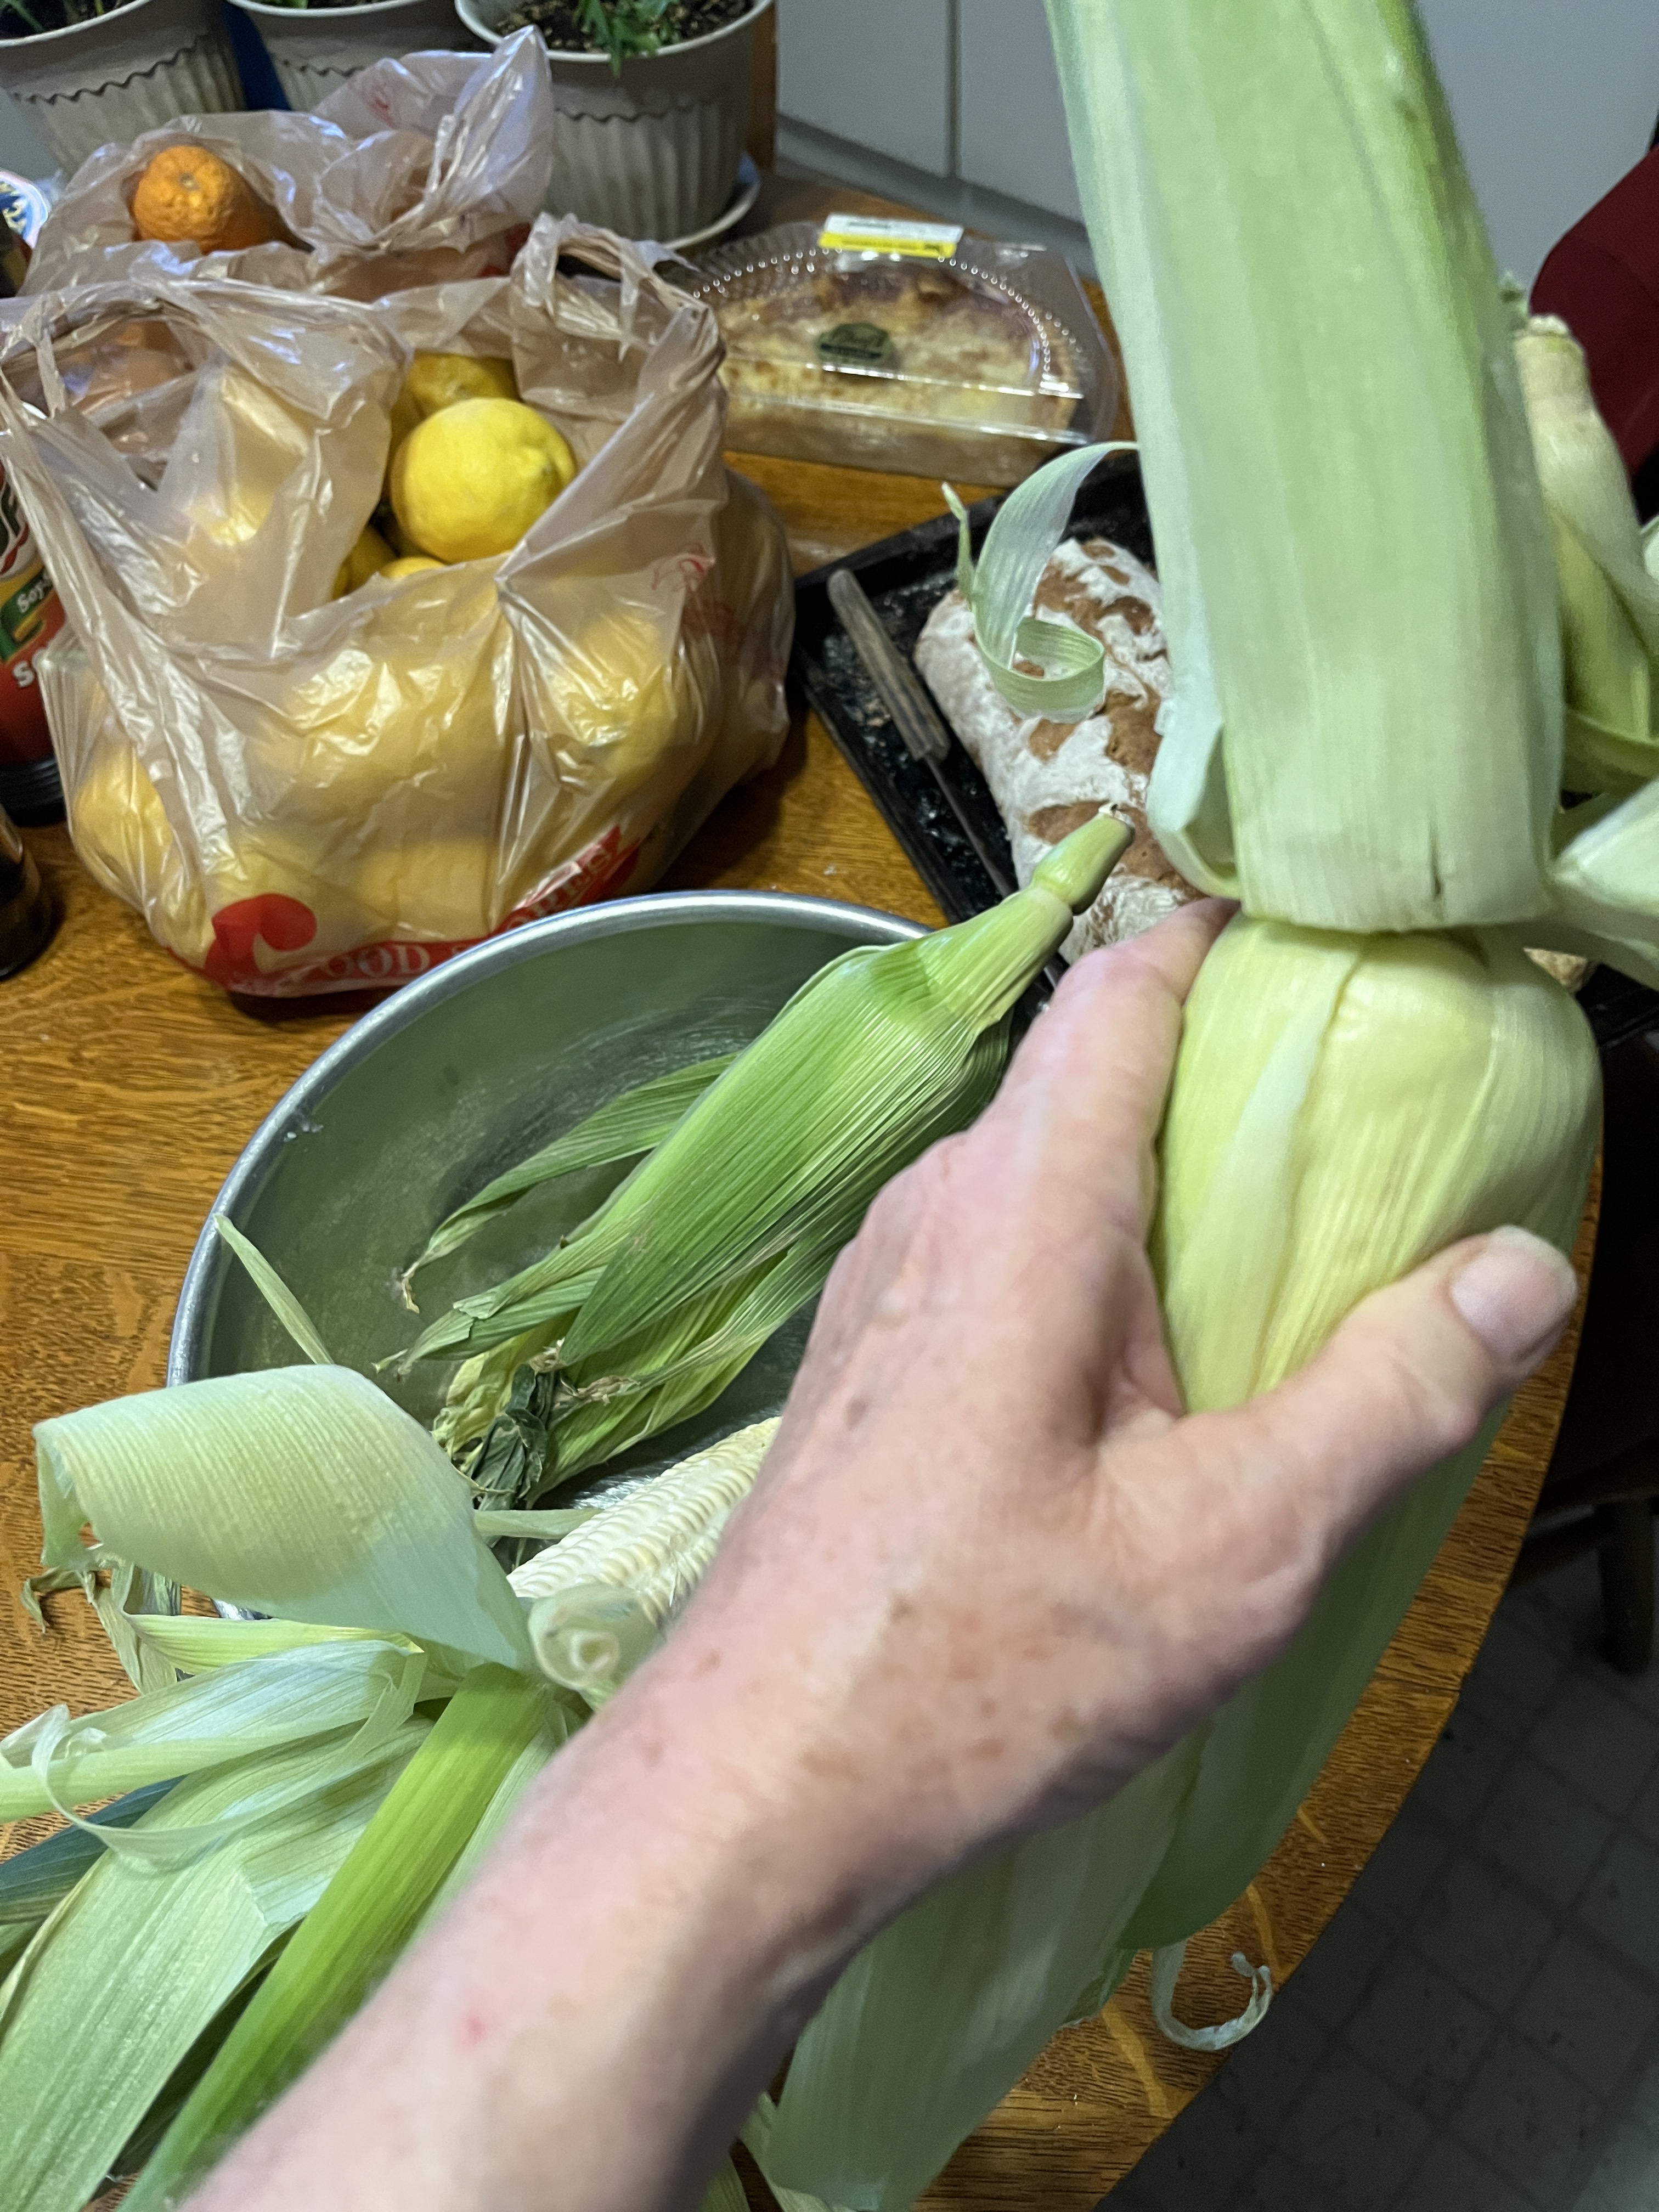
Take off the silks and slather the kernels with soft butter, salt and pepper (or even paprika or chili powder) if you like. Yup, those are home-made scones and bread in the background waiting for dinner, too. If the kids are doing this a buttery-hands play-fight might break out.
Fold the husks back over the kernels. Oh, you noticed the lemons and blood oranges in the background? Those are today’s harvest from out front and I’ll make stuff from them next week. The pie was an impulse buy to make tonight’s steak dinner easier.
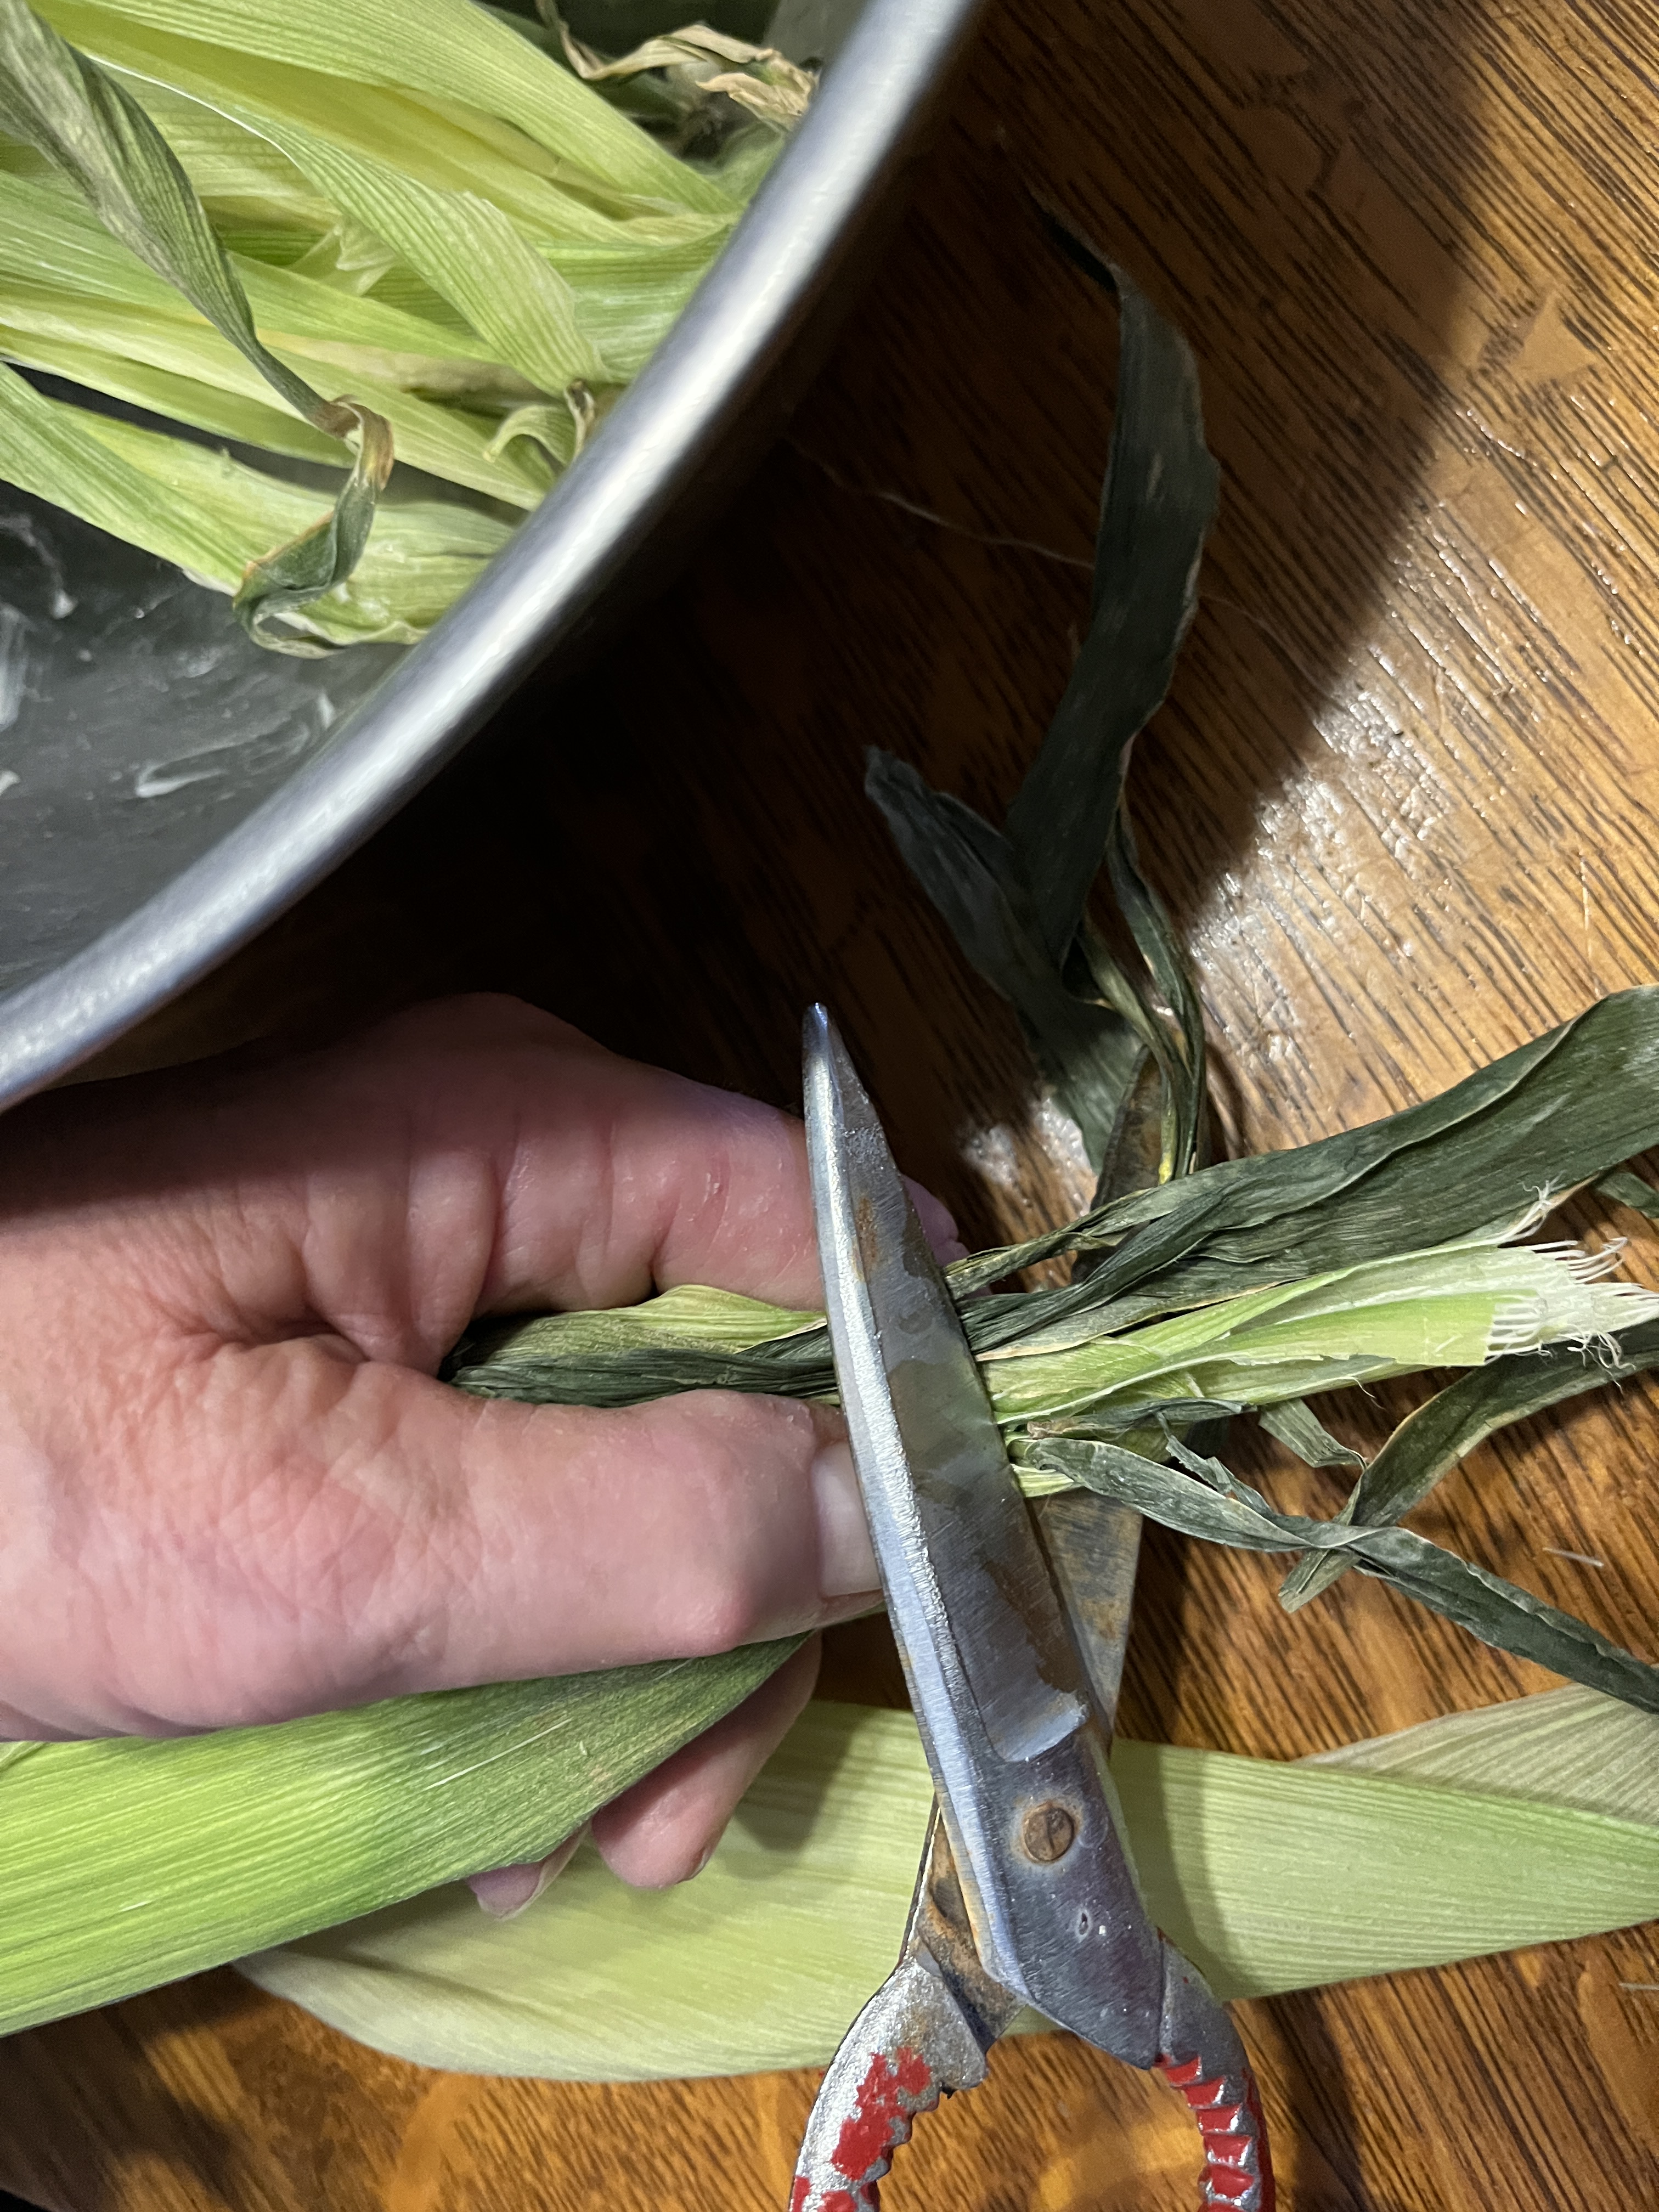
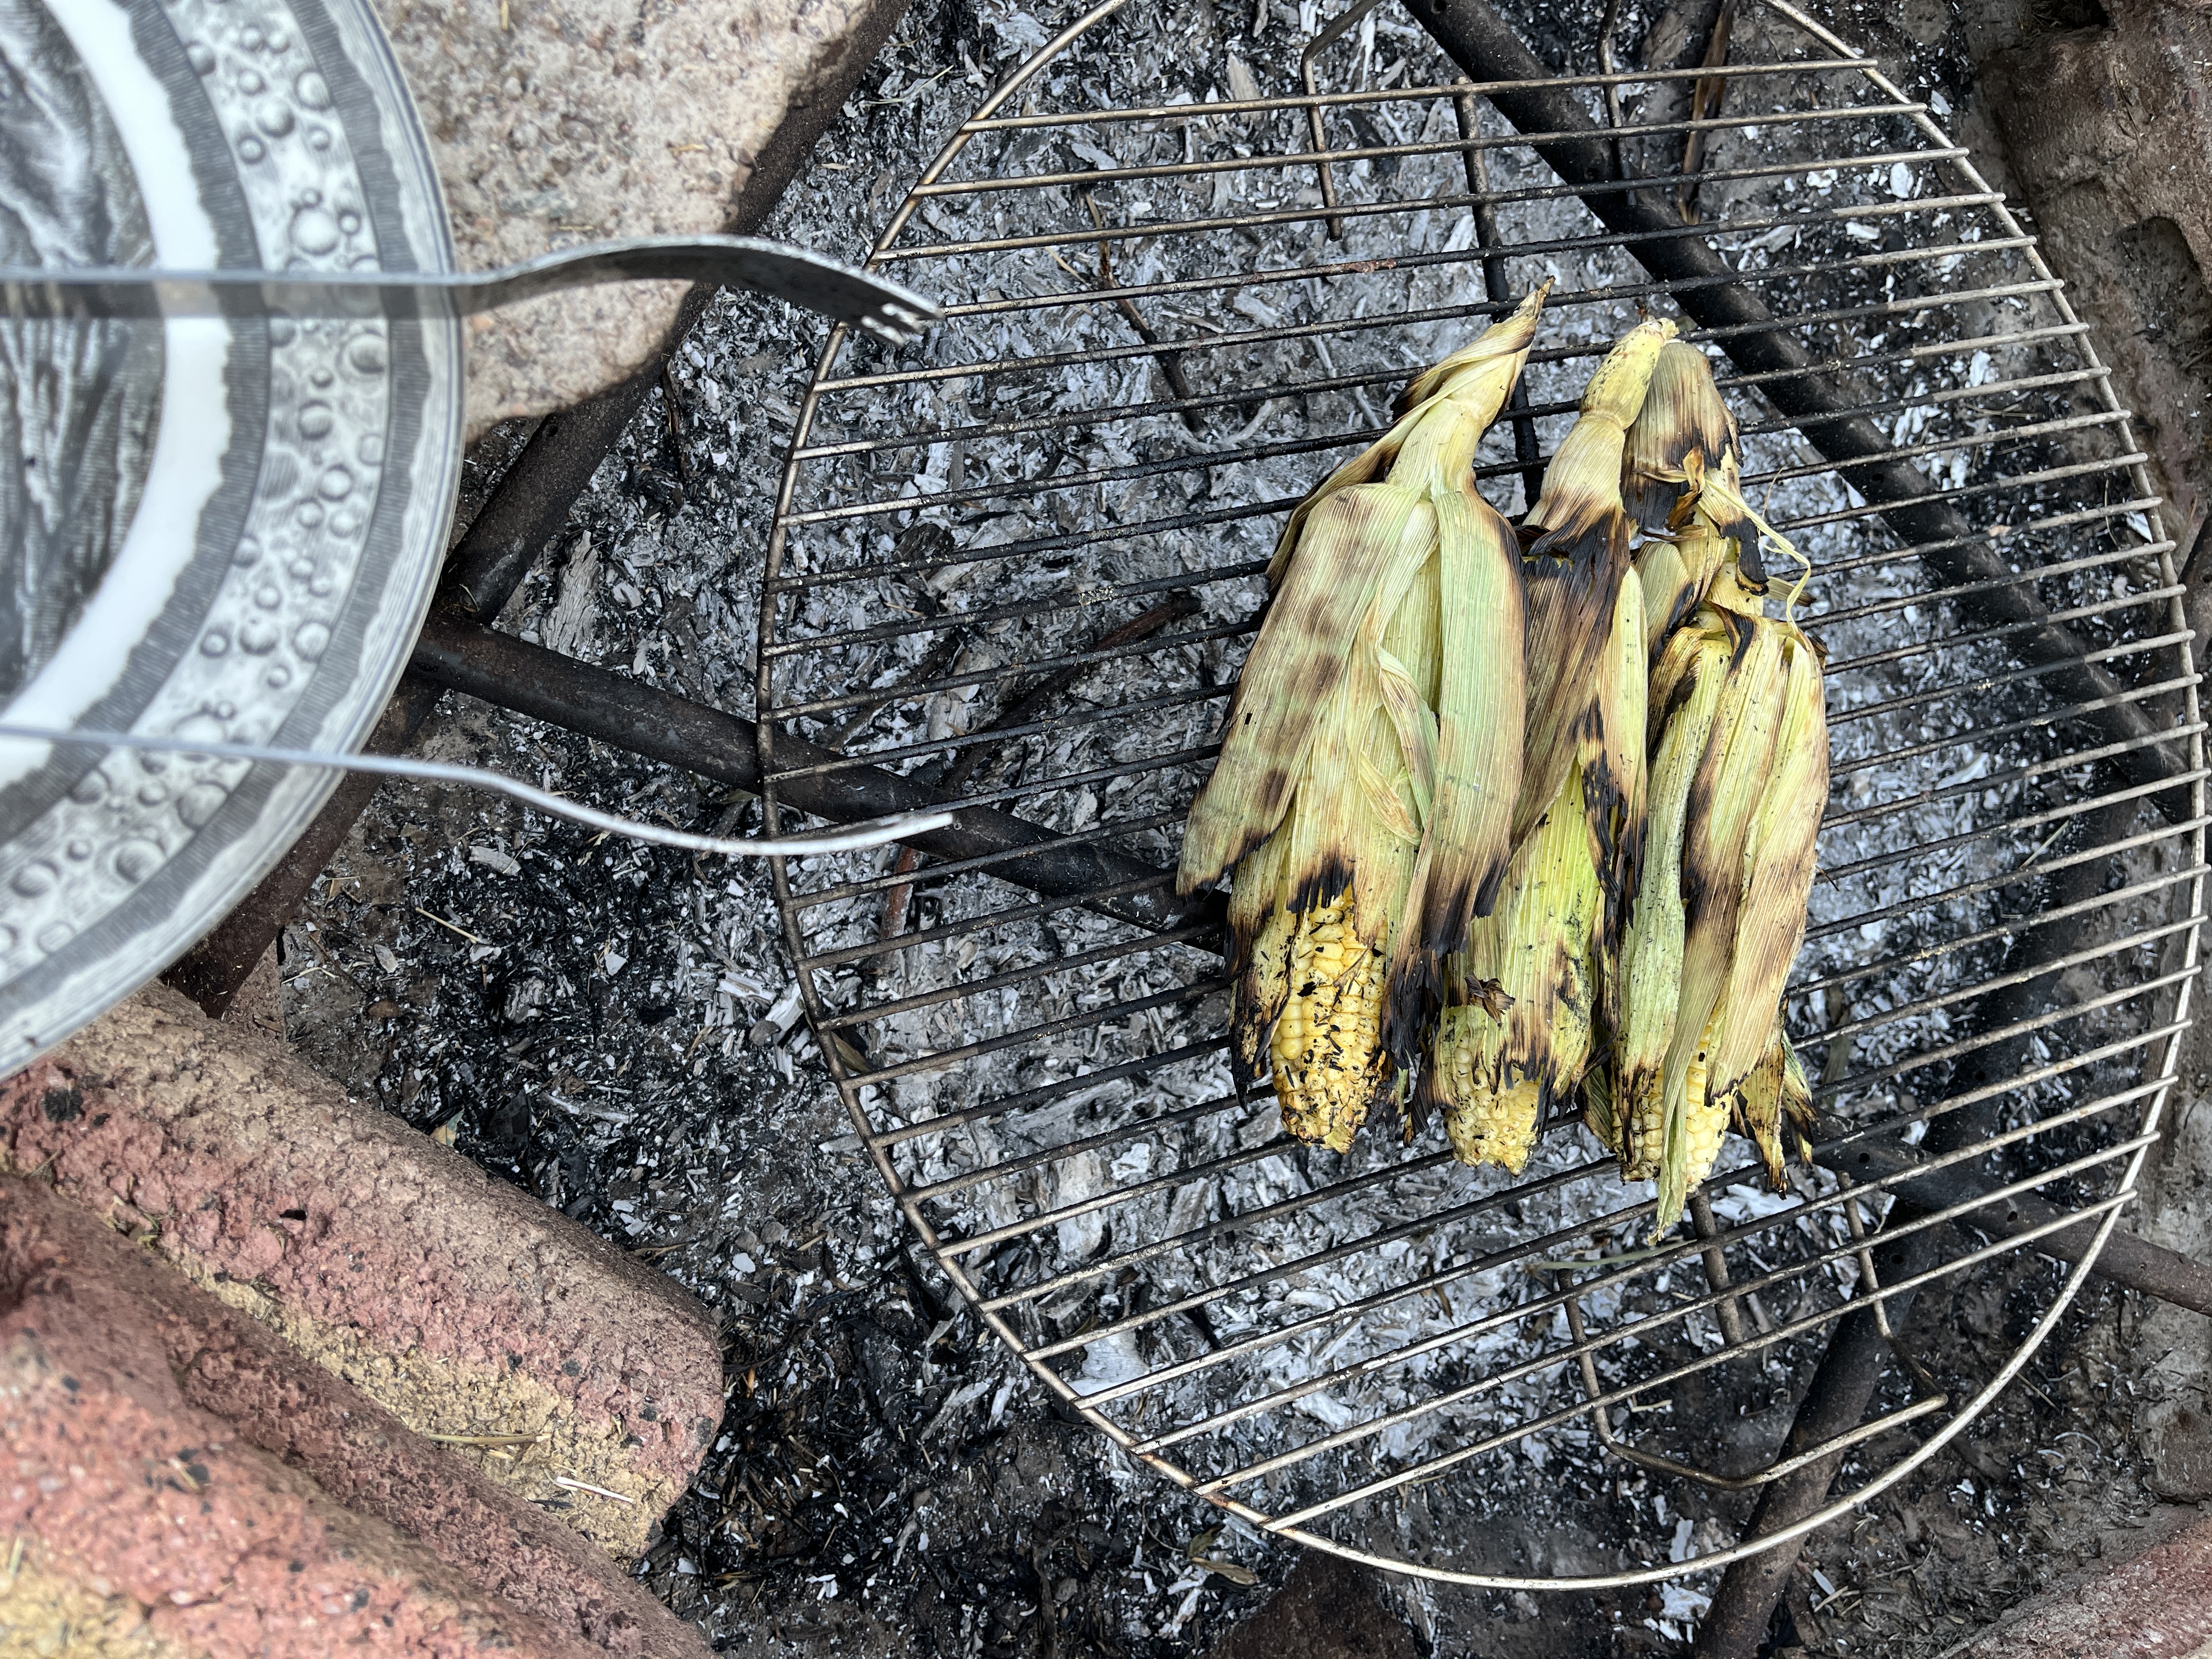
If the ends of the husks are too long trim them so they don’t catch fire. If bits do catch fore just pat them out with the tongs or aquirt them with a spray bottle of water…but I prefer patting it out instead of watering it down.
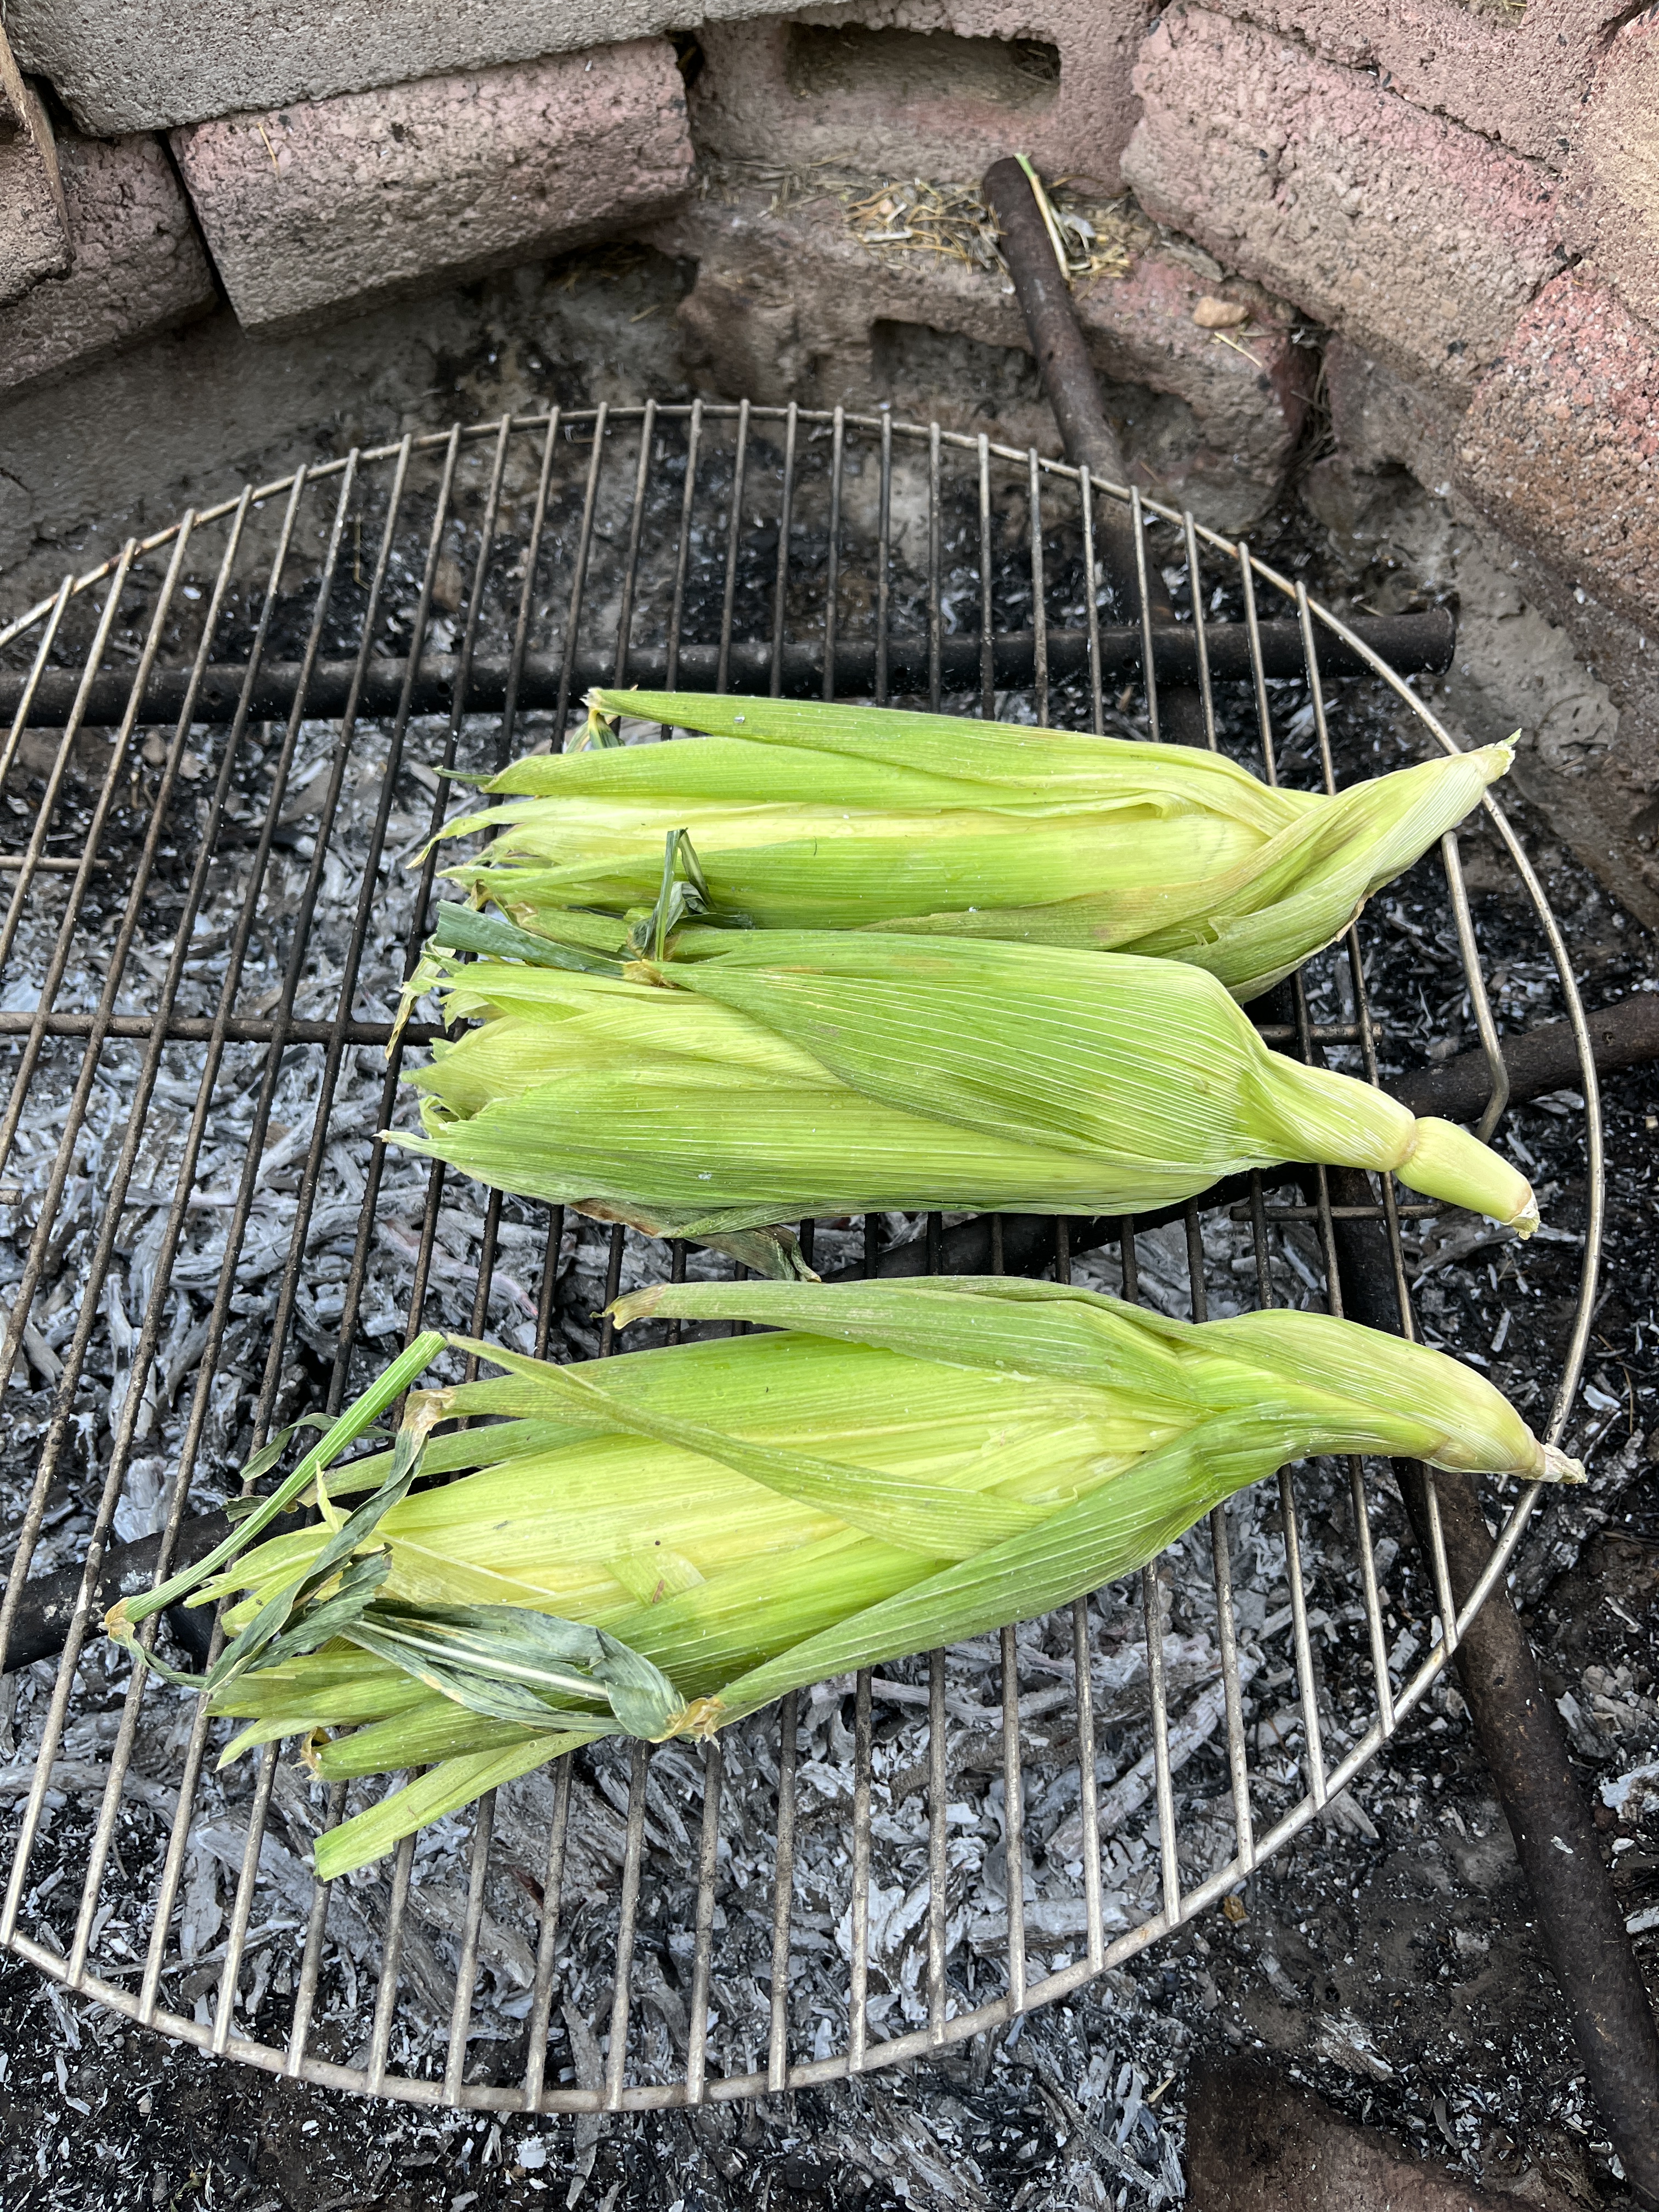
Soak for a bit, maybe an hour or so until you have the fire ready (burnt down to coals).
Lay them on the grille to start cooking.
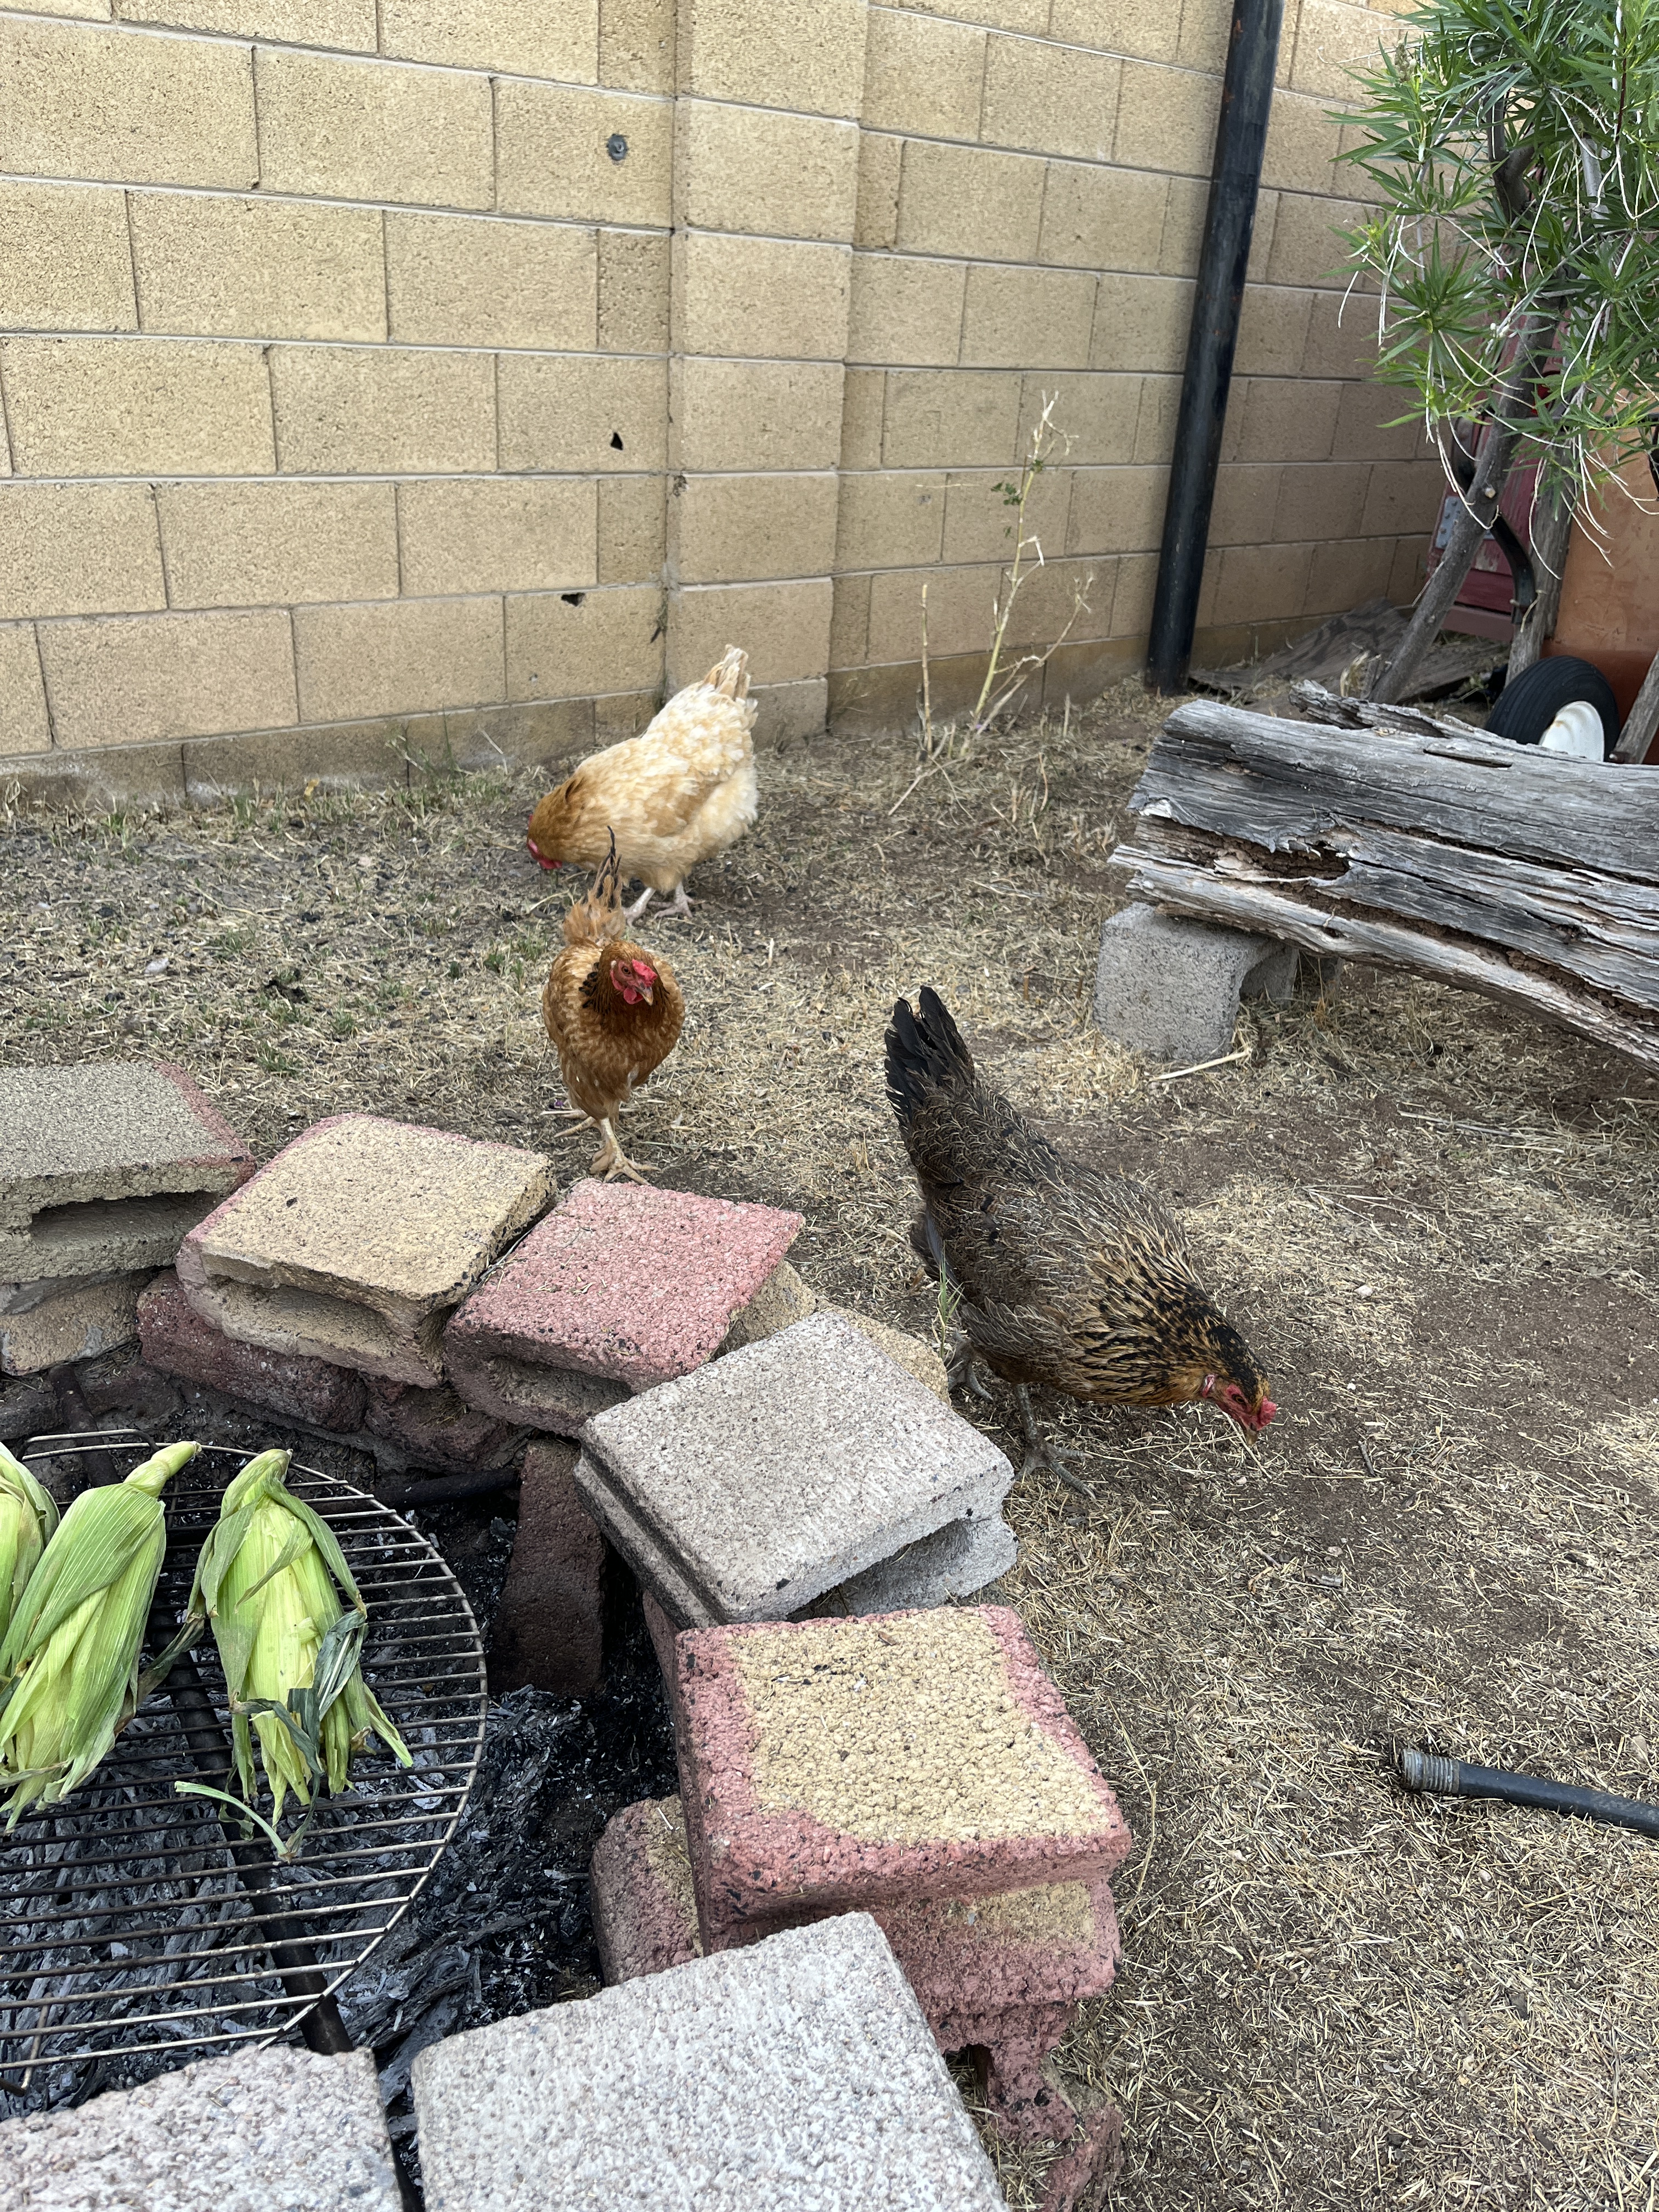
Hang out with the chickens…
And Sophie the Cat… and if you have kids or friend who aren’t doing something important like homework or working from home in the other room, they can hang out with your too. Story telling or songs ’round the fire is a long-time favourite thing for humans. Good thing I like critters and speak fluent chicken and cat.
Until the corn has been turned so all sides get cooked. When they’re done move them to the cool sides of the grille to make way for the steaks, which won’t take as long since we do ours rare. If you like yours more well-done…well, that’s up to you.
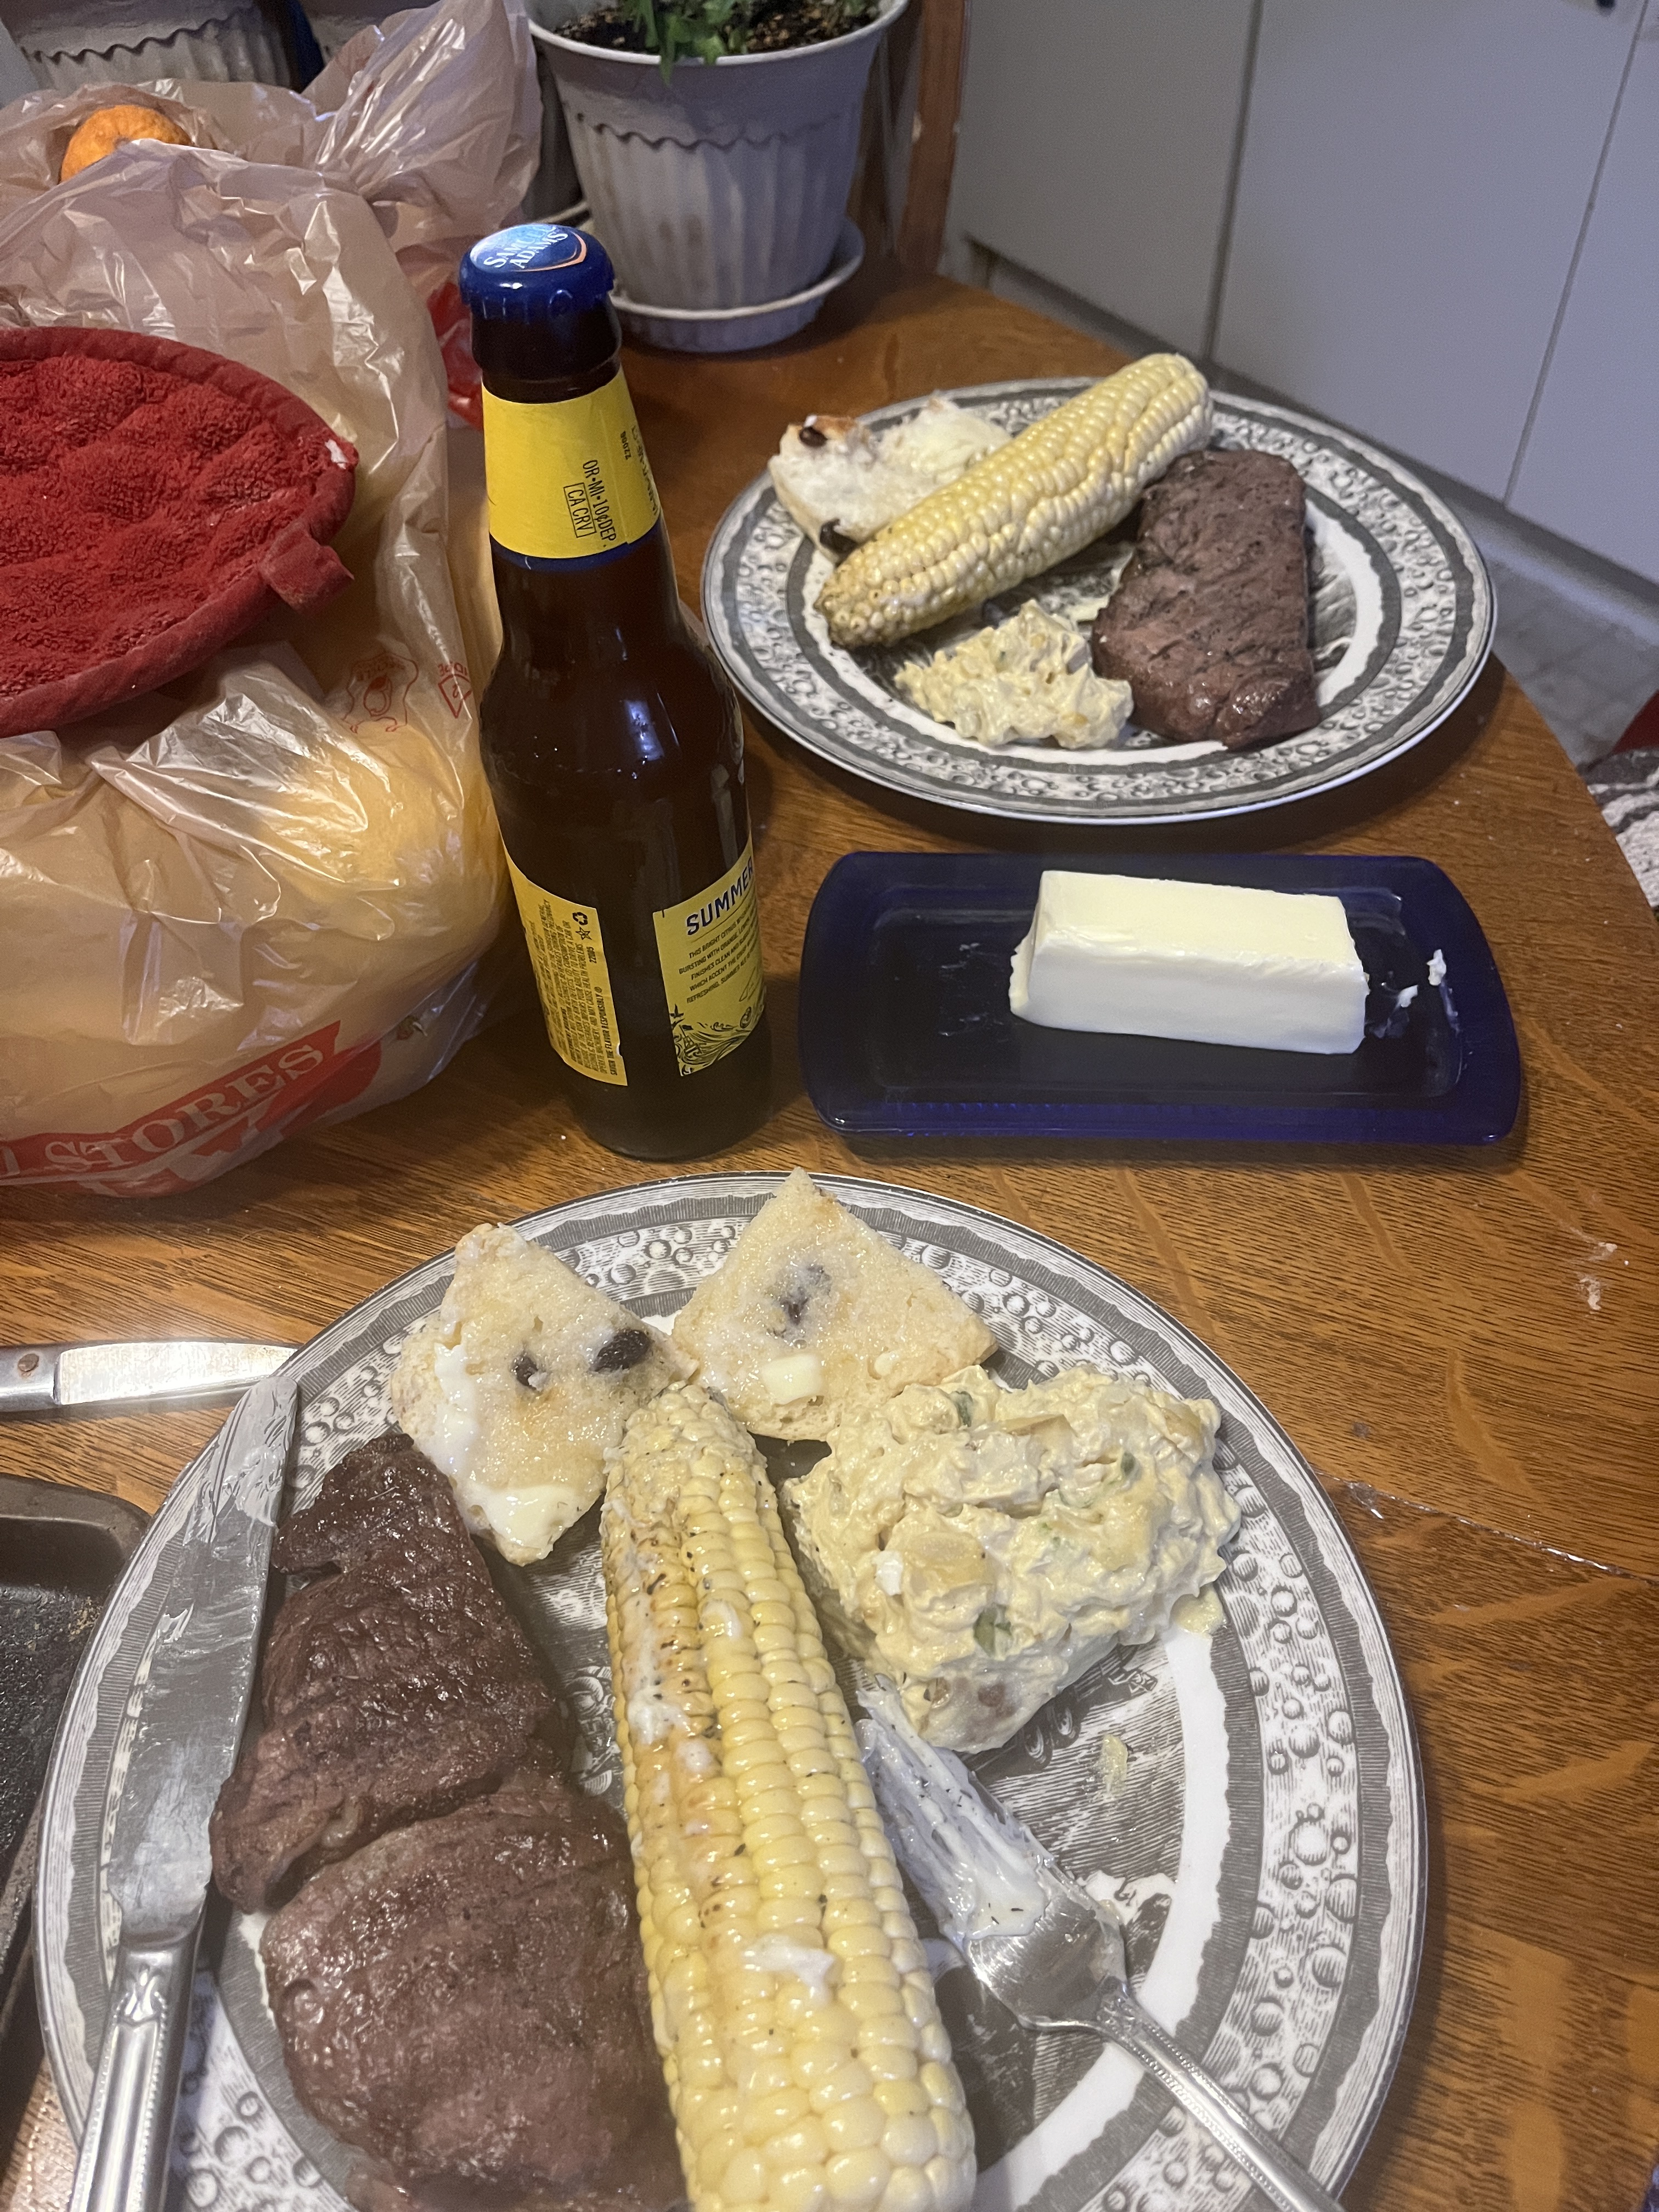
Peel off the husks, snap off the stem, add more butter and salt if you like and serve with steaks (sirloin, here), bread/biscuits/scones or rolls, a beverage of your choice, a green salad, potato salad or coleslaw, and something lovely like apple pie and/or ice cream (…OH! Home made would be AMAZING!) for dessert.
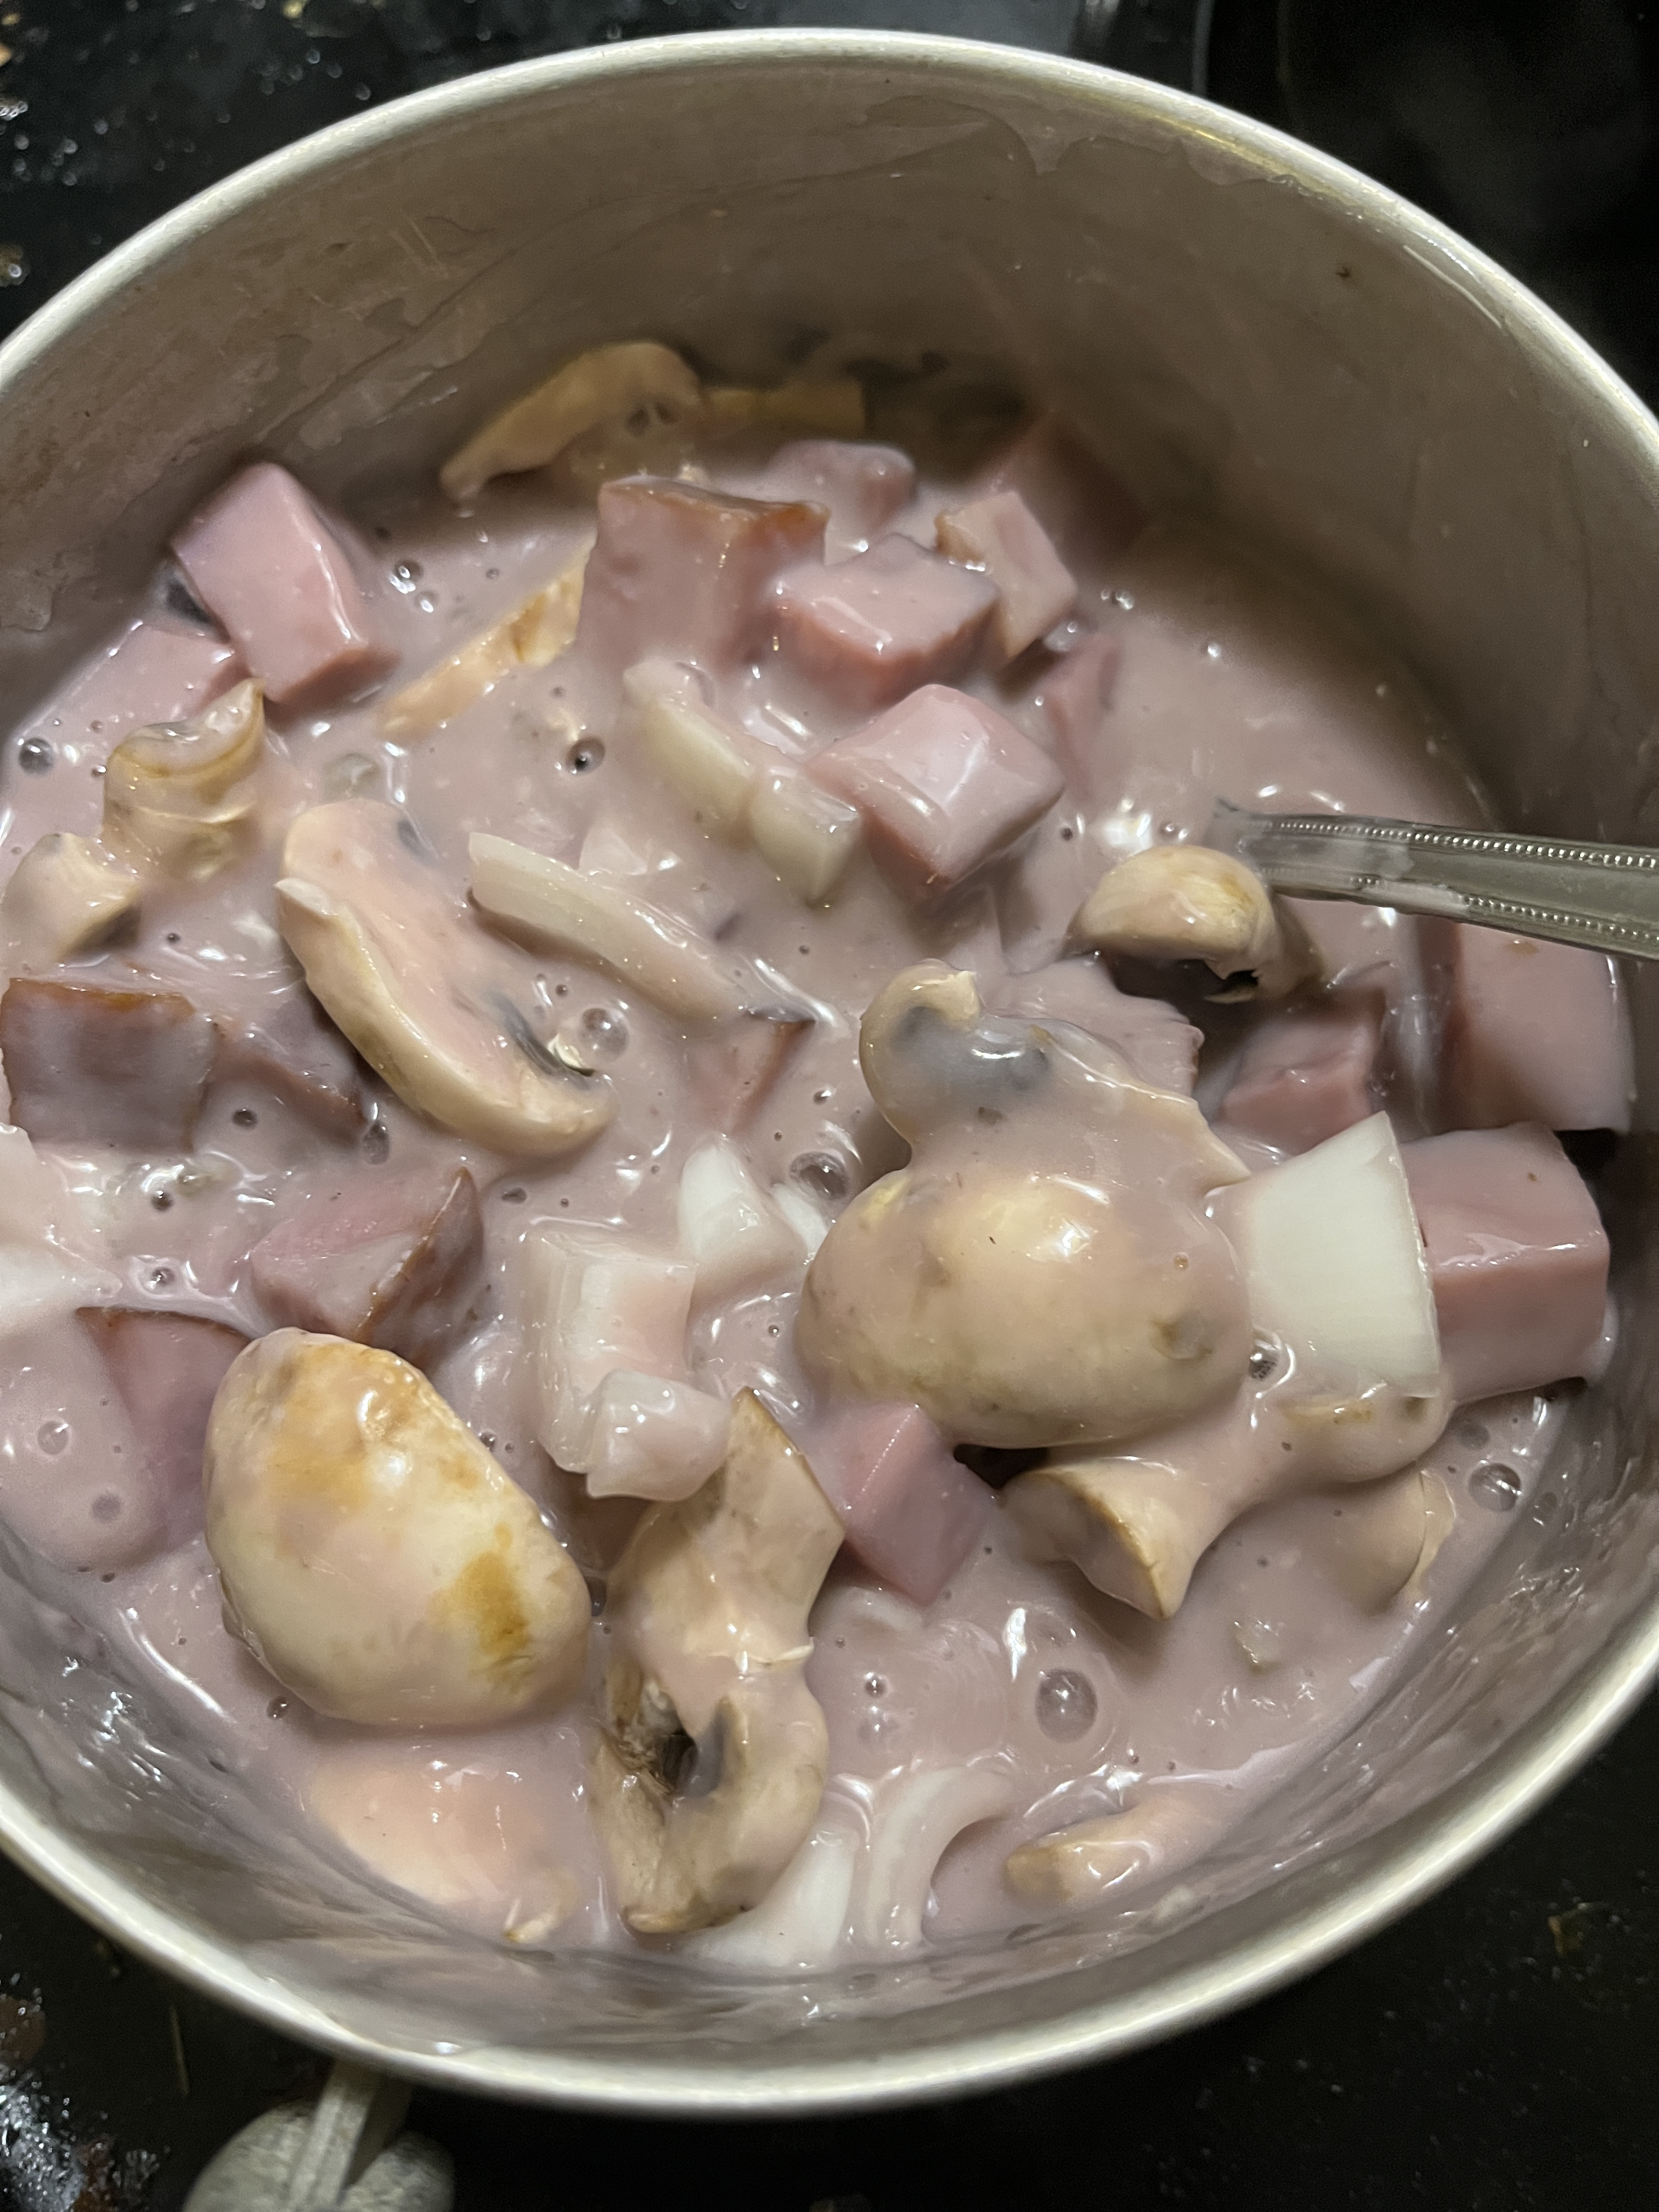
Leftover ham. What to do, what to do… Sure, you can make ham sandwiches, even grilled ham sandwiches, but how many of THOSE can you eat? Then there’s quiche, great for breakfasts, brunch or emergency fancy guest dinners…yum! Or just a quick omelette. And ham salad for lunches. Maybe time travel into the 50s and do a ham casserole, compleat with egg noodles, cream of mushroom soup and cheese on top! Yum! That’s what’s for dinner!
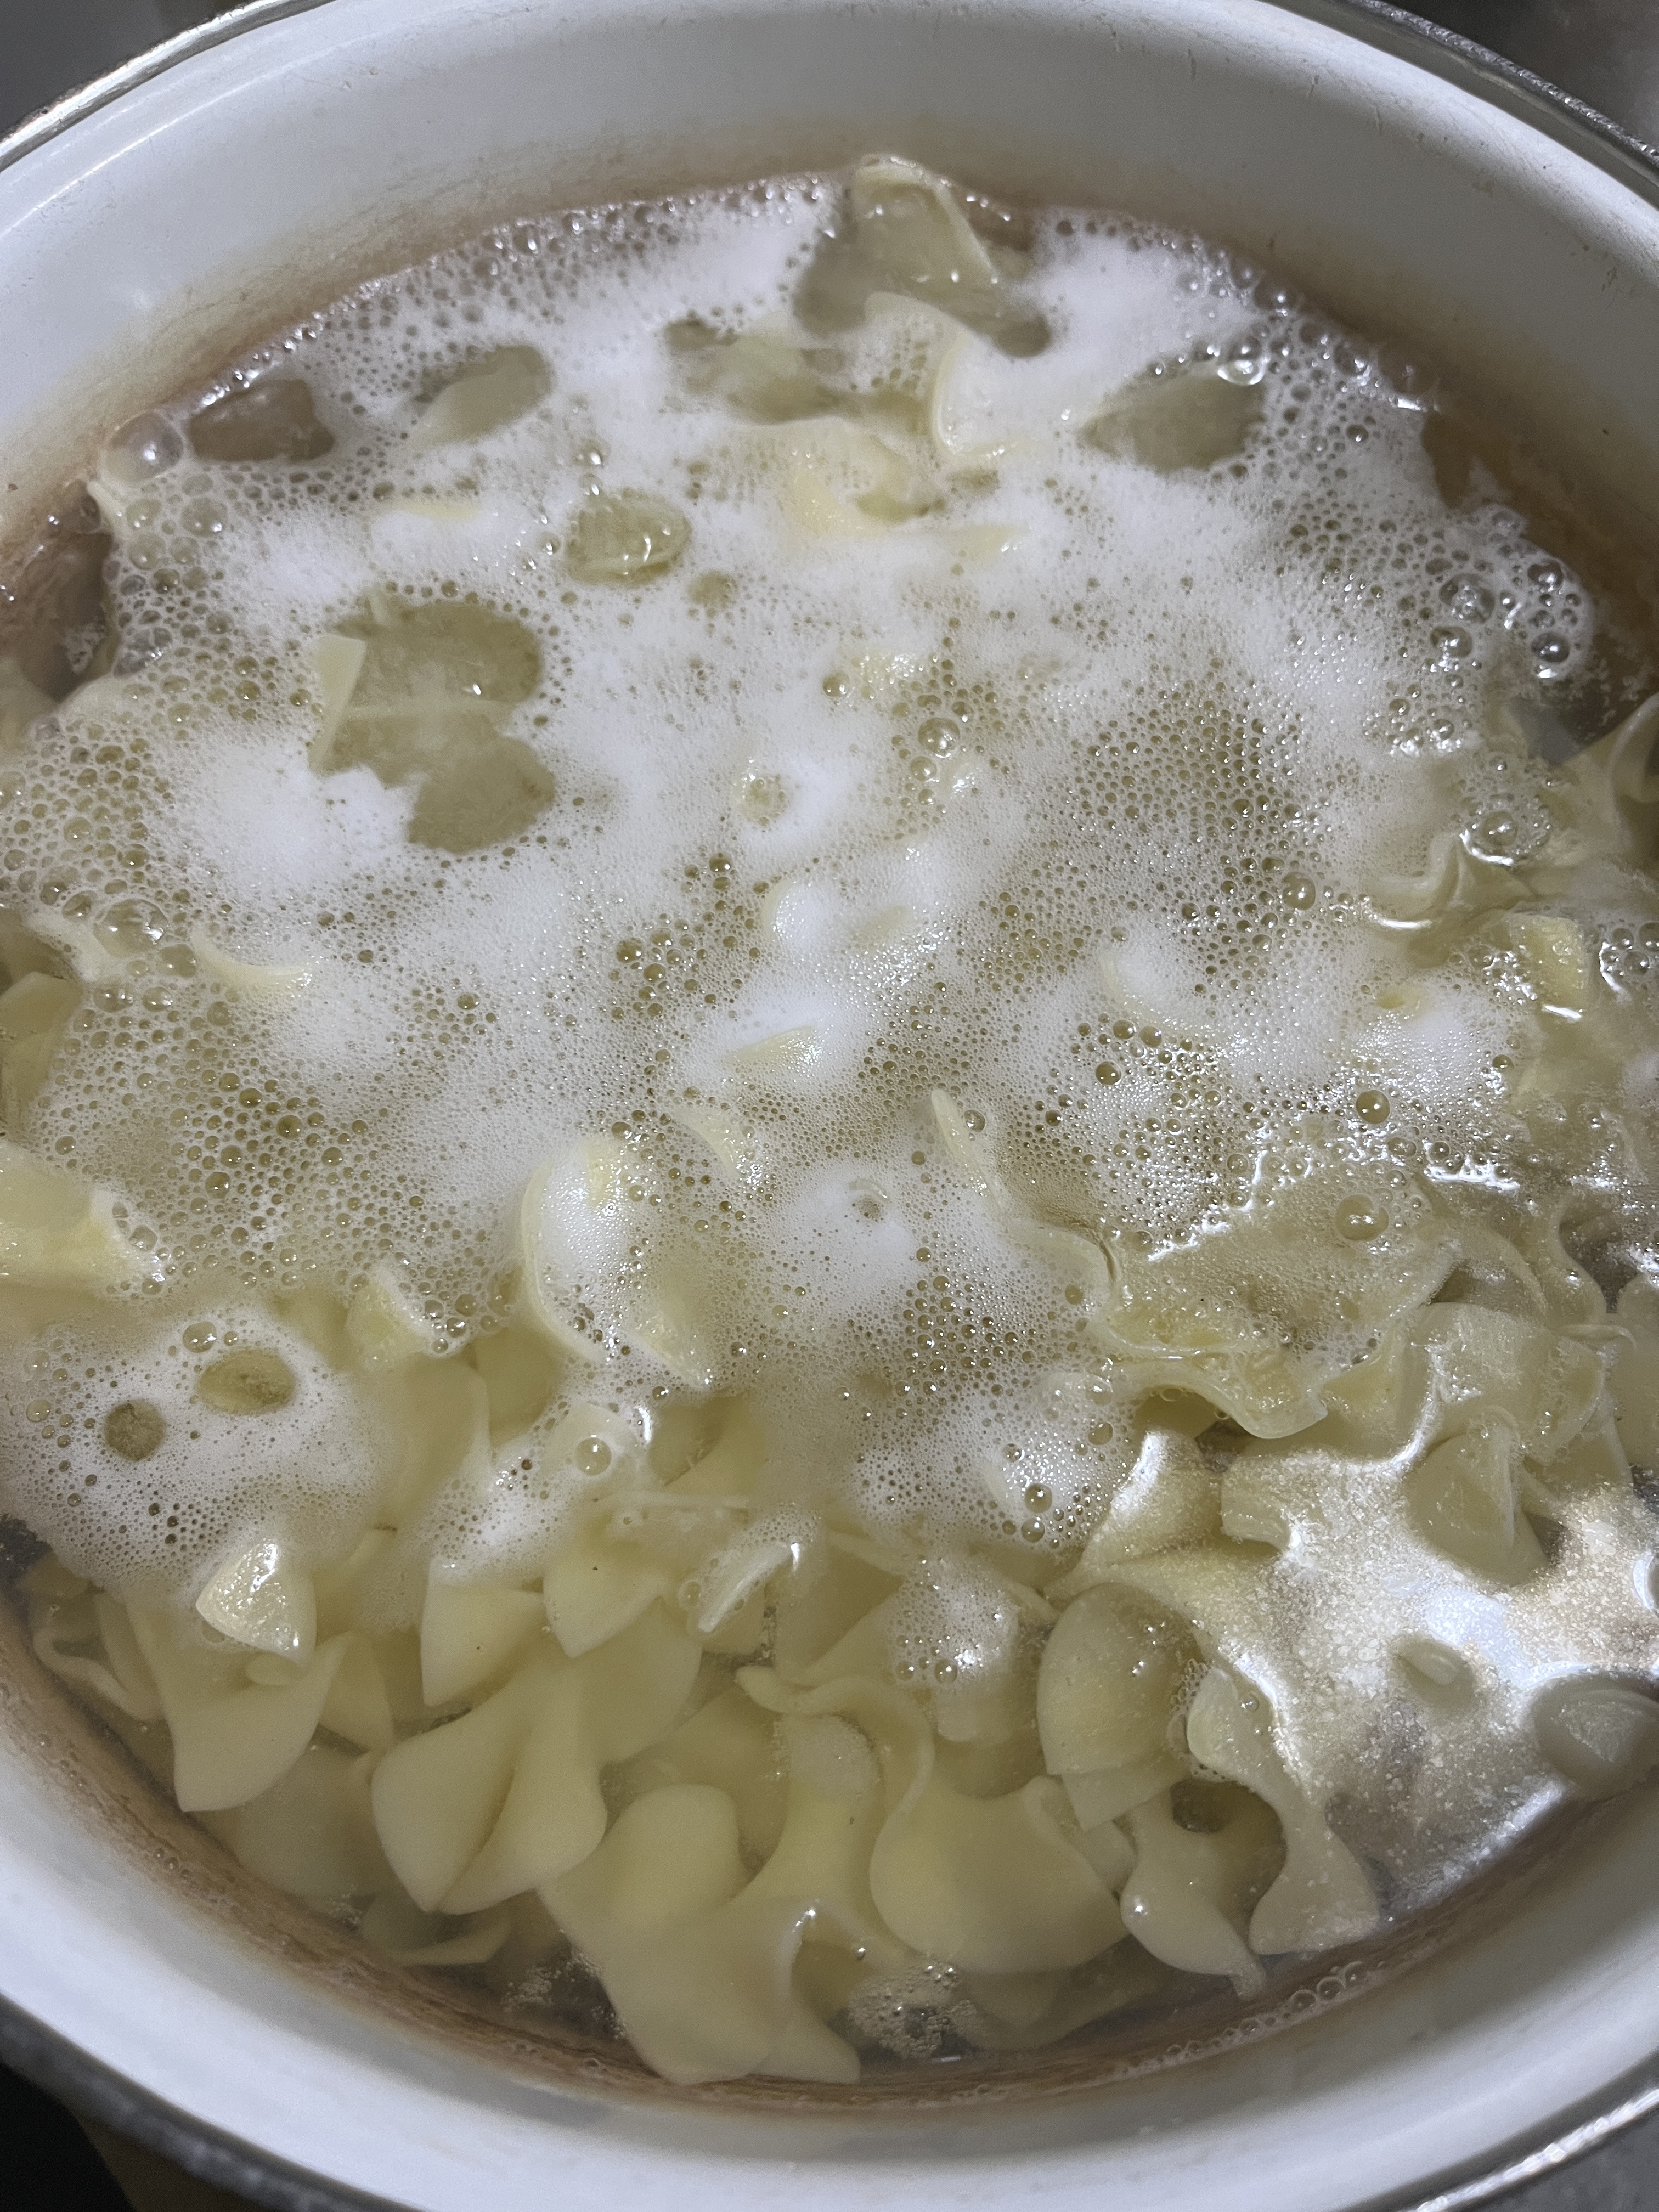
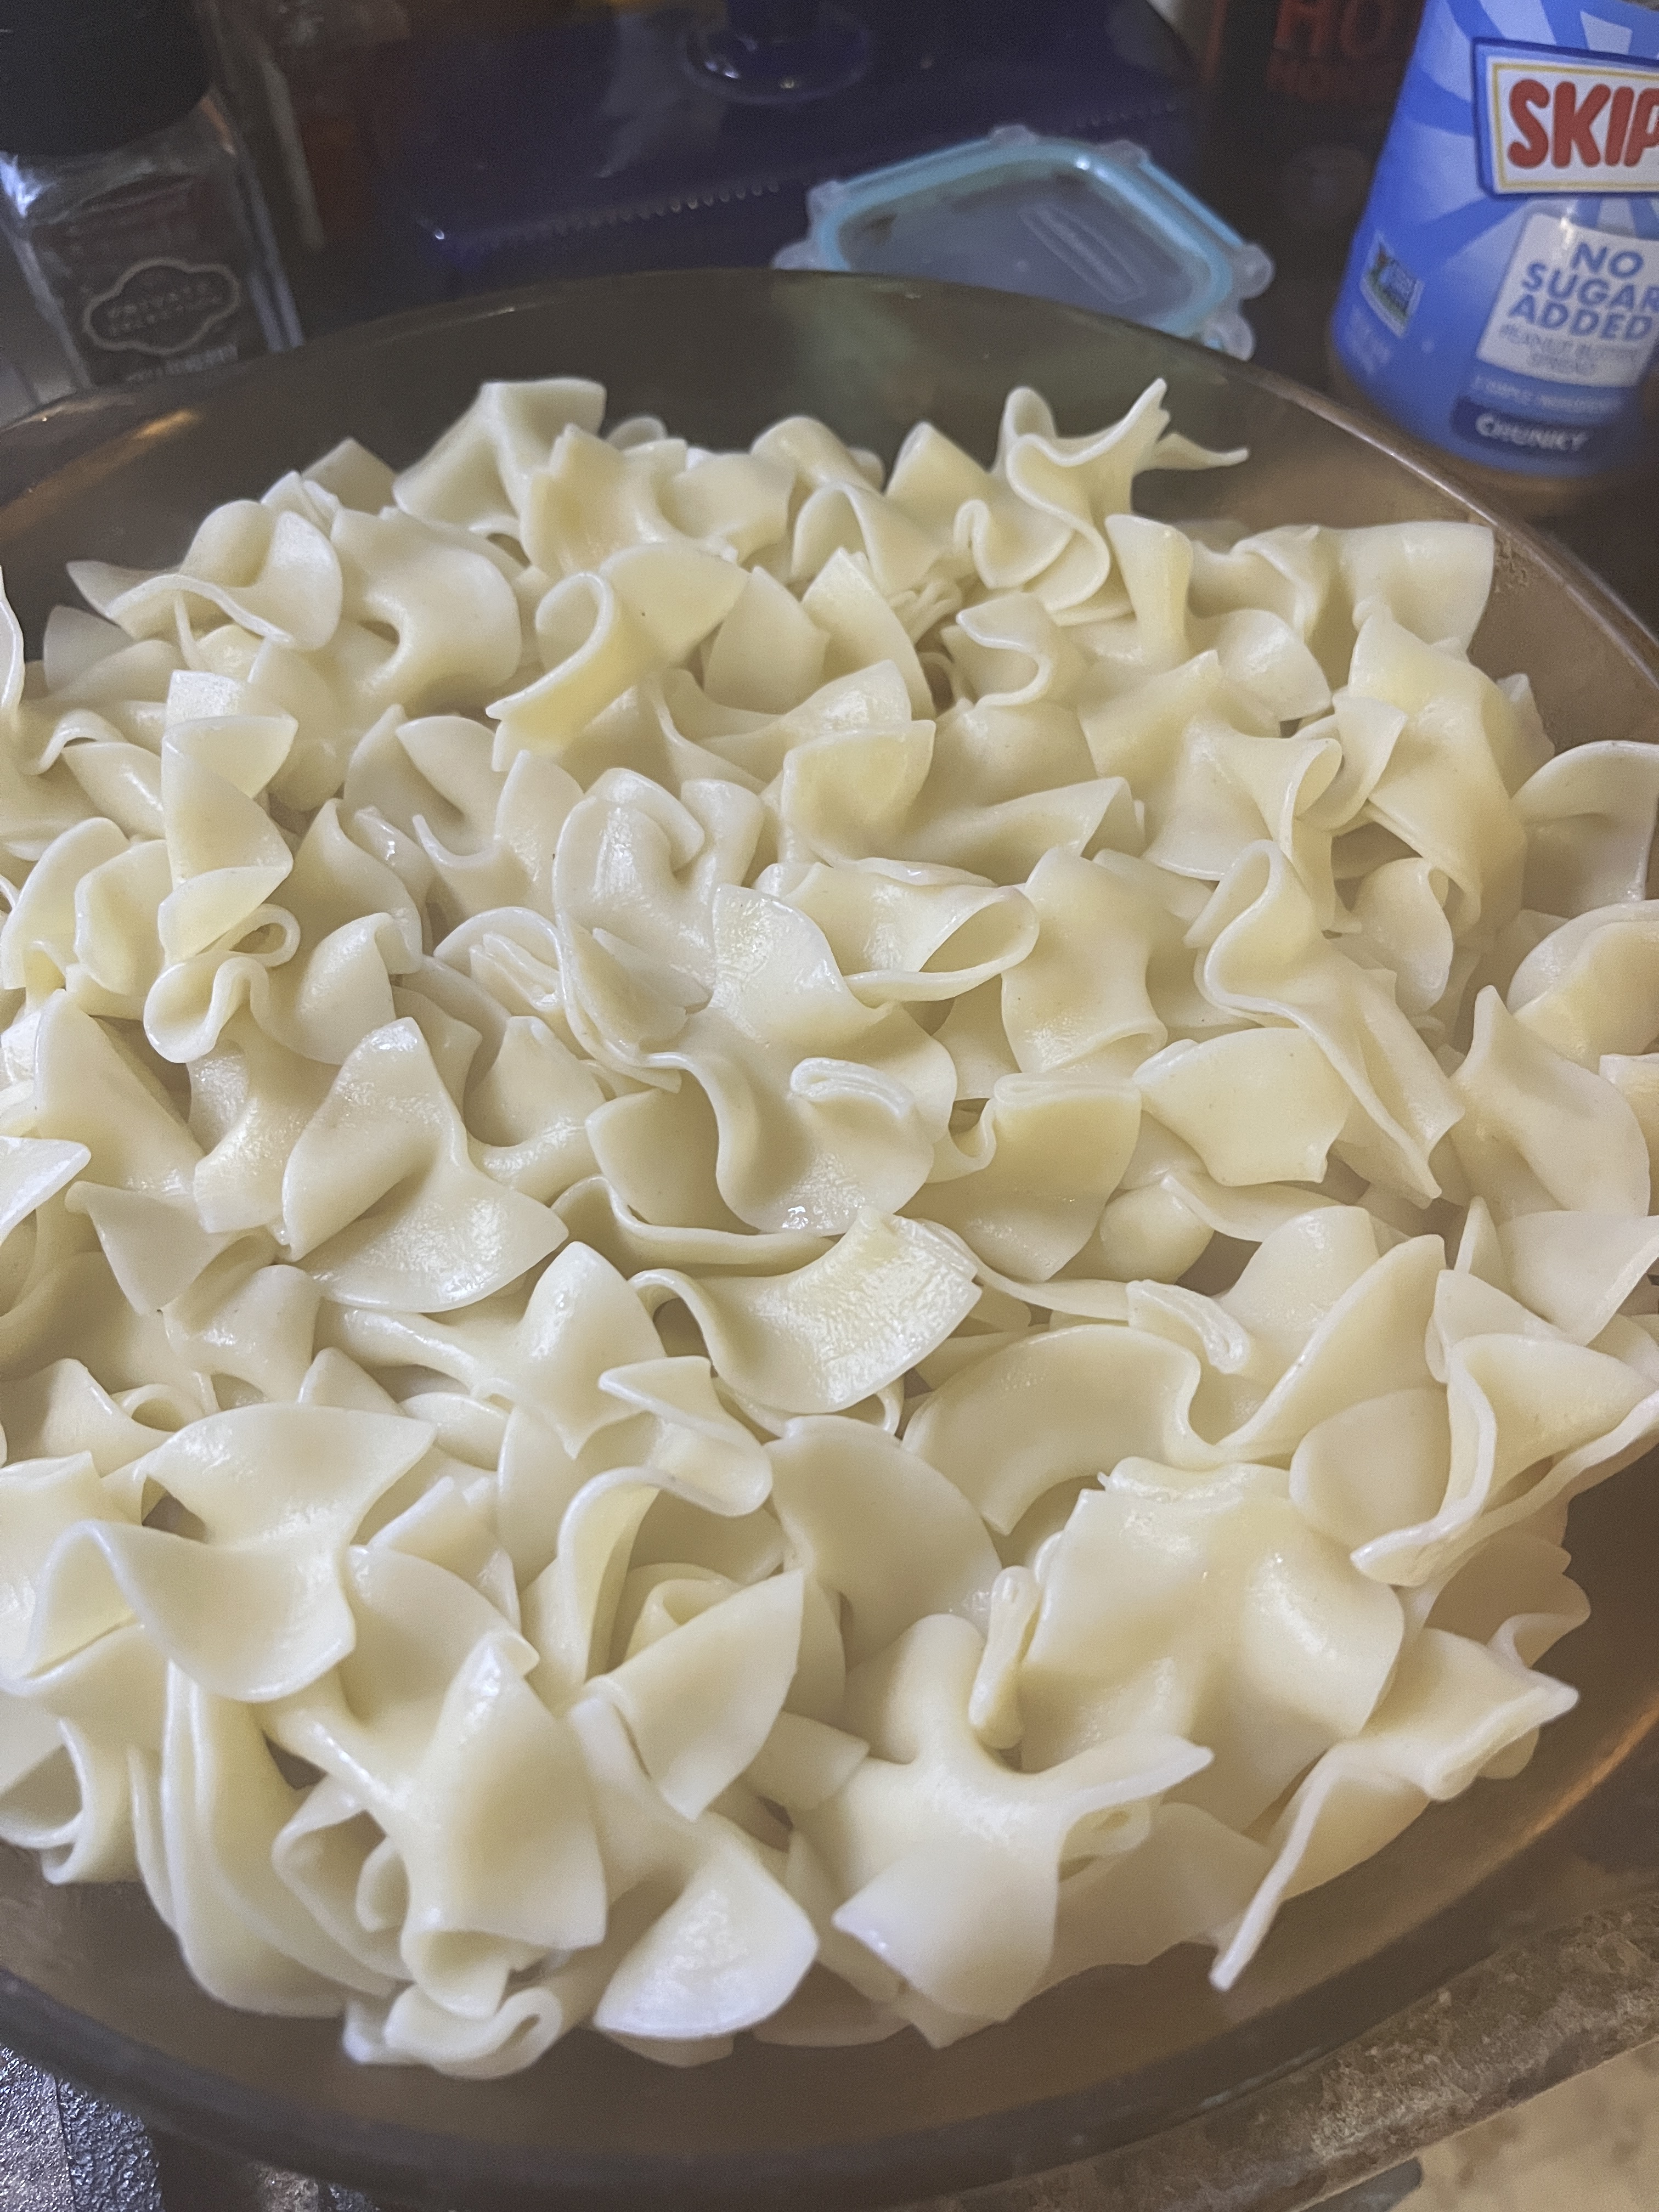
Put the noodles on to boil per package directions.
Put the cram of mushroom soup in a pan to warm up with 1/2 a can of wine. If you use red wine it’ll turn purple. This amuses me. Cut up some onion and celery and add it to the soup. Cube up a couple slices of ham and add them to the soup. If you have mushrooms needing to be used slice them up and add them, too.
Drain the noodles and put them in a casserole dish.
Put the soup and ham mixture on top. Yes, you caught me. I forgot to take the picture before I put some cheese on. I guess I’m just human and that’s OK.
Top that generously with grated cheese, I used Swiss this time.
Bake at 350 for 20-30 minutes or until the cheese is melted or even slightly browned…to your liking. You’re the cook, after all. That’s the best thing about cooking, you can make it any way you want. The brown spots on this one are Worcestershire sauce. I forgot to put it in with the soup. Turns out I rather like putting it on after the cheese, so I might just keep doing it this way.
Have a salad on the side with some nice home-made rolls or yummy bread and the beverage of your choice. Dessert can also be anything you like. A cheese plate, nuts, ice cream, fruit, cookies…whatever suits your fancy.
Another bonus is that this is easy enough for kids to manage. Everyone taking turns making dinner can take some pressure off the main cook and give kids a sense of accomplishment while developing valuable life skills. I love bragging about my kid’s cooking.
AKA Bakestones, because they were baked on a bakestone or griddle on the fire or stovetop and apparently they’re also called pics or occasionally even griddle-scones. I love finding cool things to make based on my ancestry and my ancestry is sufficiently varied to give me years of discovering and cooking/baking/gardening.
I made a 1/2 recipe this time but next time it’ll be a full recipe.
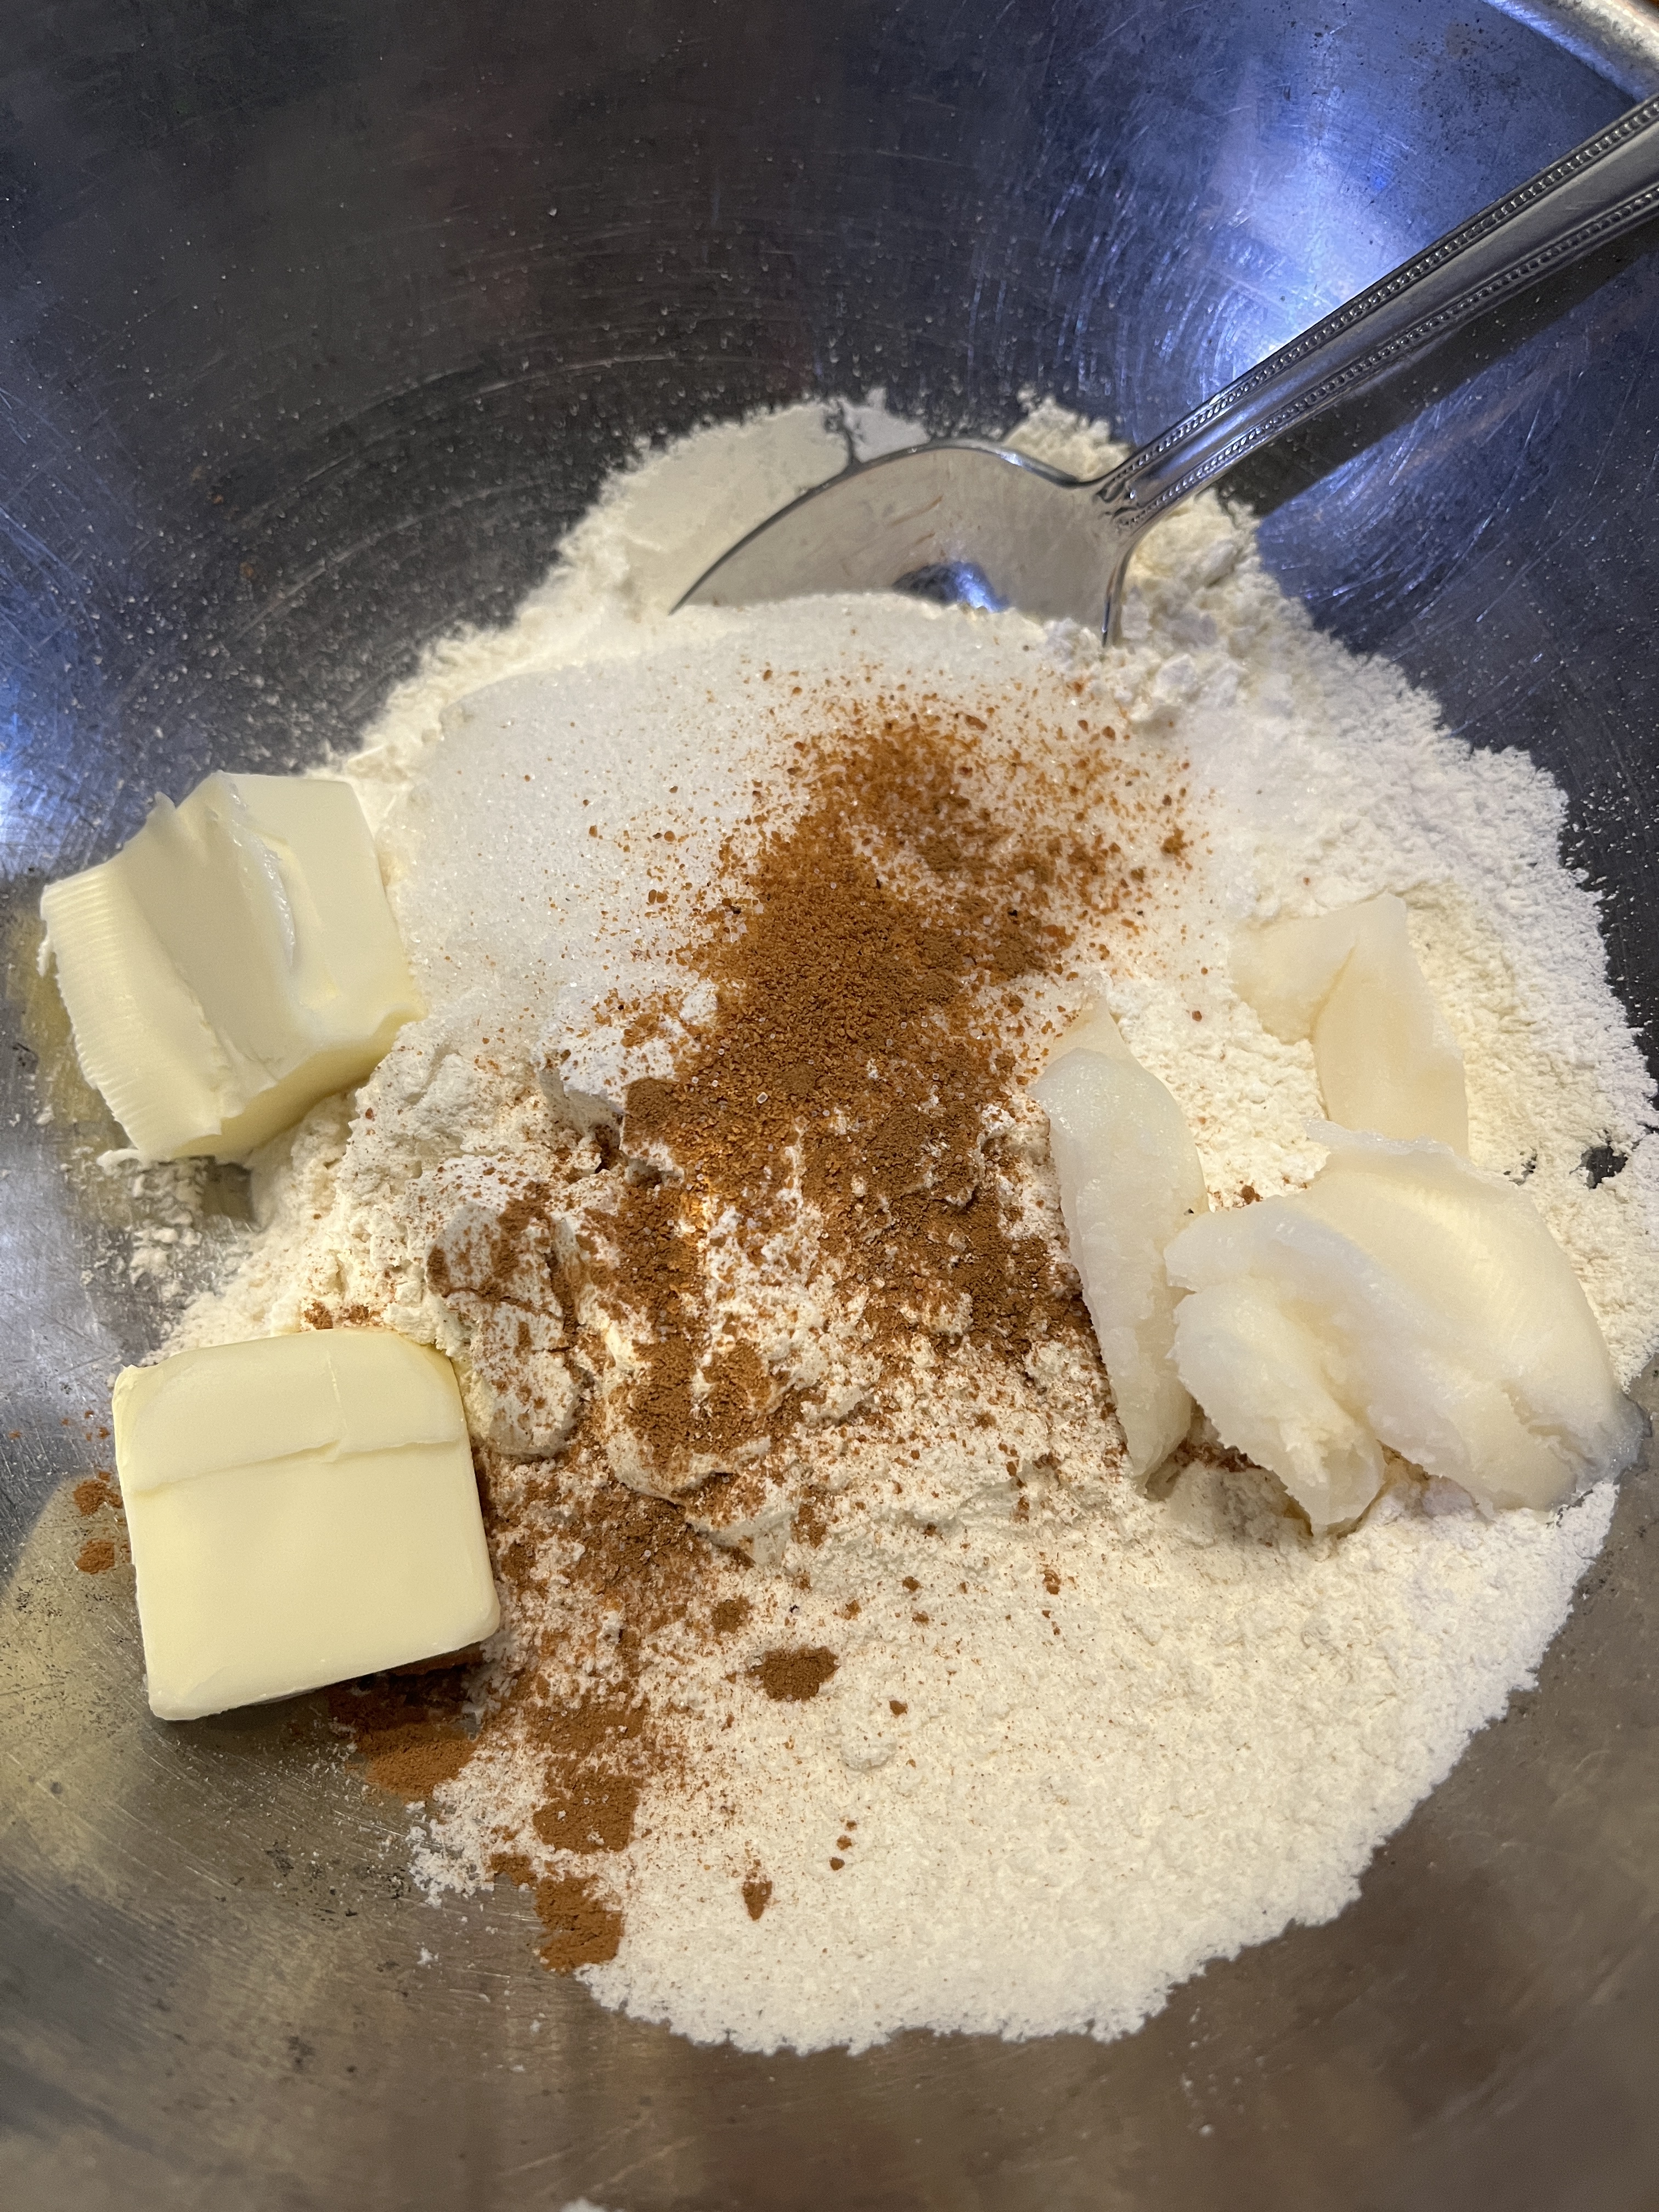
2c flour
1/3 c caster sugar (finer than granulated sugar, just zap regular granulated sugar in the blender for a bit to make the pieces smaller)
1 tsp Baking Powder
1/2 tap Mace
1/4 tsp Salt
1/8 tsp Cinnamon
2 oz lard (I used bacon fat this time)
2 oz Butter
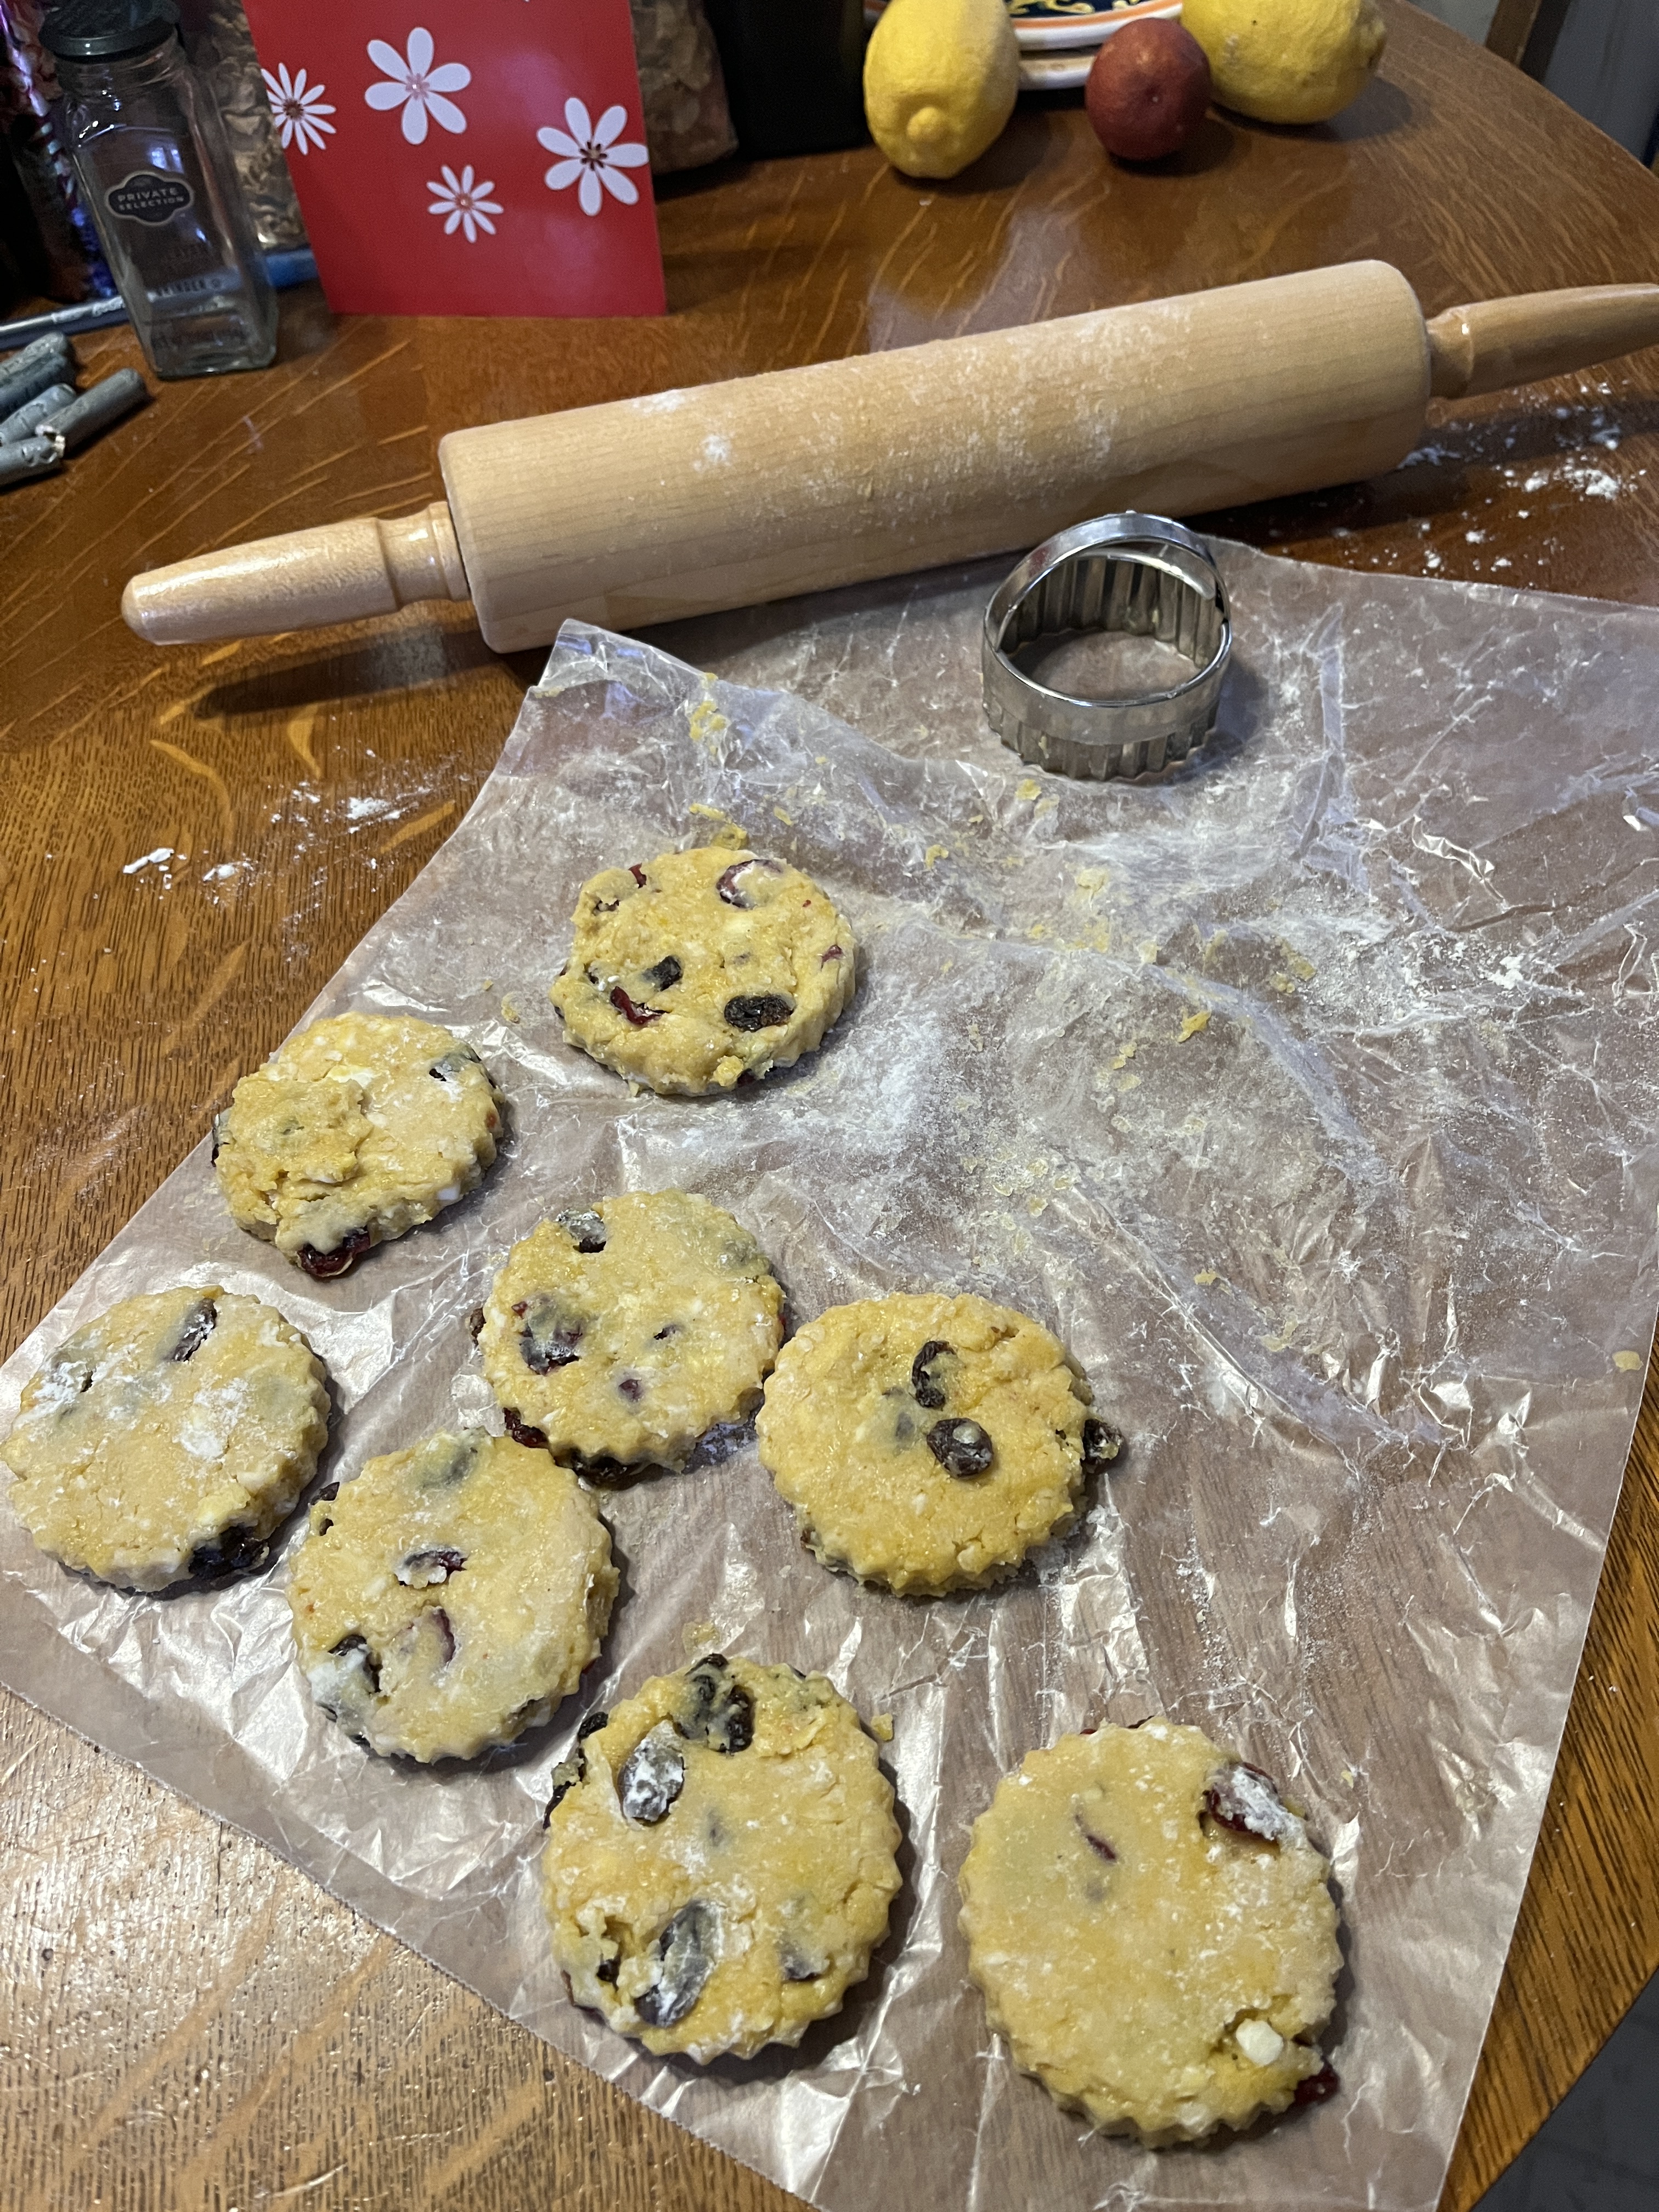
1/2 c dried currants (I used dried cranberries because I had them and some raisins)
1 lg egg
2-3 Tbsp milk
Granulated sugar to dust with after they’re cooked
Mix the dry ingredients together. OK, mix the dry ingredients THEN add the fats.
Cut the fats in until it’s like grainy meal.
Add the dried currants or dried cranberries or raisins or what-have-you.
Beat an egg and mix it in, adding a tablespoon of milk or 2 as you mix to make it all come together.
Wrap it in waxed paper and refrigerate for at least an hour…overnight or a day is fine, too.
Roll out on lightly flour-dusted waxed paper (helps with the clean-up) and cut out rounds with a cookie cutter. I couldn’t find my plain one so I used the fancy one with the crinkly edges.
While you’re rolling and cutting heat up your cast iron pan, then add a knob of butter and fry them up.
When they’re nicely browned dredge the warm cakes in granulated sugar. It’s OK if you want to skip this step and they’re probably easier to re-warm the next day without the sugar.
Then enjoy with tea or whatever.
I’ll definitely be making these for tea again, probably something I’ll mix up the night before and foll out when I’m ready for tea the next day. Using bacon fat from the fridge instead of lard didn’t hurt them at all. I haven’t used mace much but it is a delightfully different spice in baking and these go well with tea. They also go well with a nice red wine so these would make a good dessert or sweet tapas-kind-of-thing. They’d also go well after lunch ham sandwiches or a ham dinner. I love that, as with lefse, I get to use my cast iron for this.
You can leave off the sugar, add cinnamon to the sugar, use vanilla-infused sugar, eat them plain (with or without sugar), split them open and butter them or add jam or cream or…any yummy tea-time stuff you can think of.
I’ve been saying for decades that all schools should have gardens. Sure, they can be pretty with flowers and nice to stroll along the paths but that stereotypical thinking just demeans the potential of gardens in education. The lessons learned in a garden go far beyond the philosophical and poetic things that come to most peoples minds. Sure it would be lovely to have kids go to schools in beautiful surroundings but just looking isn’t enough. Kids have to get their hands dirty to learn…well, there’s a lot of stuff that doesn’t involve grovelling in dirt, too… There are activities that educators can integrate into the curriculum at all grades appropriate to all ages and abilities. No one needs to be excluded from gardening no matter their age or ability. Besides, it’s fun to learn how amazingly pretty vegetables can be! Take carrots for example, they make an amazing border edging for flower gardens (well any gardens actually), especially with alyssum in front of them to attract lacewings and other beneficial insects. And bean and pea flowers are beautiful, especially when grown on supports like tee-pees and arches over benches but on to other stuff.
The first part of curriculum that comes to mind is Science. Biology specifically. Plants grow, but being part of the how and why of it makes it real. And understanding that it’s not just the plants, it’s how they interact with bugs, birds and mammals is valuable, too. The other sciences come into play right away, too. Chemistry come into play not only in soil Ph and composition but in the plants themselves as well as why bugs are attracted to things and how to repel destructive bugs and animals while attracting beneficial bugs and critters (mammals as well as reptiles and amphibians). You build it and they will come. Physics of fluid movement in plants and soil and just getting loads around the garden (leverage and wheels come readily to mind). Even engineering fits in with how to manage an irrigation system, whether it’s just a hose, pipes and emitters, ditches or a waffle garden the options are numerous and interesting depending on the location. If you have reliable rain consider yourself fortunate.
ViviLnk
Math! Learning about Fibonacci in a garden, what could be more delightful? Besides, you need to know how deep to plant seeds, how far apart to plant and how large they are expected to grow so you can place them appropriately so not only do they not crowd each other but the tall plants don’t shade smaller plants…unless you want them protected from the sun. Graphs, measuring and timing are just the beginning of the garden things that involve math. Where to place beds, walks, sheds, trees and shrubs, expected first and last frost dates, crop yields…these are all basic math things any curriculum can use to enrich and drive home lessons as well as making math relevant to everyday life and possibly even leading to lucrative careers later in life.
ViviLnk
Language arts in the garden. A rose by any other name… So much reading is involved! Language classes such as reading are enriched when students research plants and how they’re grown and how they’re used. You need to be able to find things out so being able to navigate a library as well as the internet effectively is valuable. To do that you need to read. The reading part goes beyond just basic reference, though, as there are so many stories/novels/poems involving not only gardens but everyone and everything that visits or lives in them in both fiction and nonfiction. Once you’ve got them reading the writing happens, too. Keeping notes about the garden turns naturally into journaling and then essays, short stories, poetry, reports and longer writing projects can be integrated into classes for all ages. Foreign languages offer expansion on all of this in their classes, too.
History and geography are a natural progression from language arts. Who ate and used what plants when, where, how and how did it affect social issues not only in everyday life but also commerce, migration and war (Irish potato famine being just one extreme example). So where did tea/potatoes/bananas etc come from? When did our ancestors start using them? When did carrots start being orange instead of yellow, white and purple? When and how did they travel the world? How were they used at different times and what beliefs did people hold concerning some plants? Does the Language of Flowers belong in Social Studies or in Language Arts? It’s interesting to see how people farmed (crop rotations is not a new idea) and what did gardens look like in different times and places?
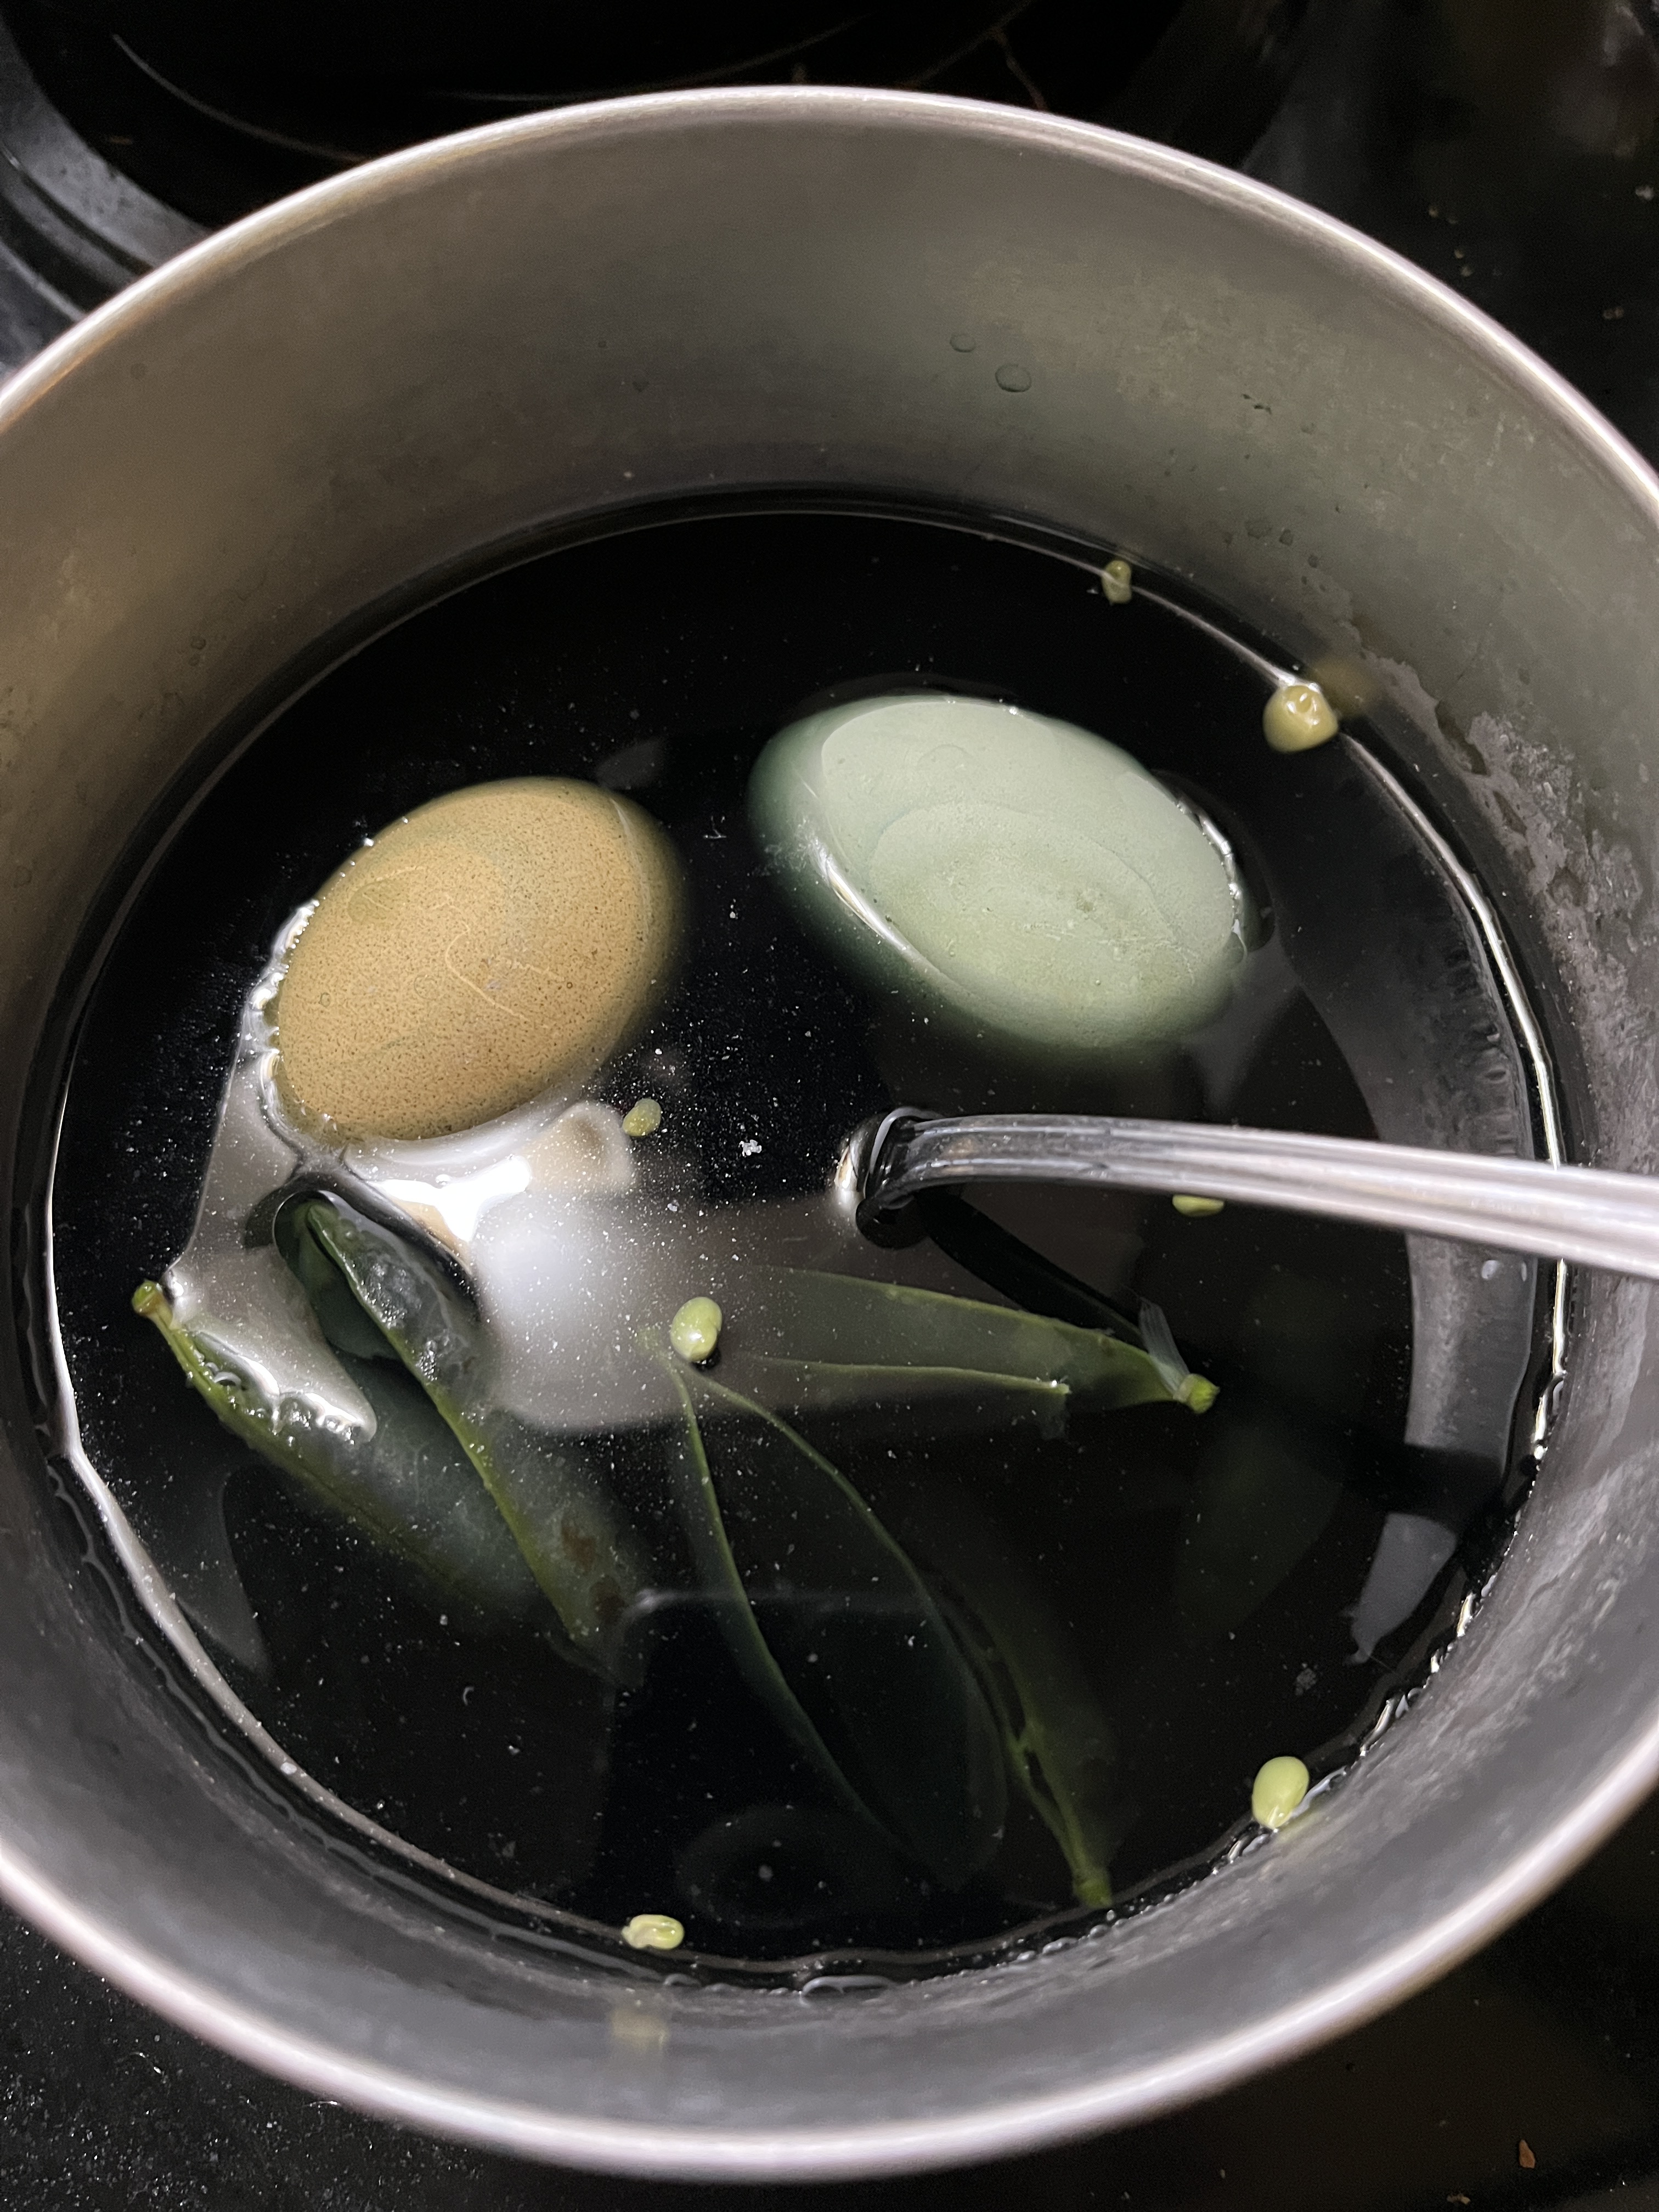
Home Economics and Shop: Cooking, cleaning, dyes, fibres, nutrition and other useful household things from plants. Building and making things for the garden, whether it’s simple raised beds, tools, sheds, benches and tables, ramadas for shade. Fishponds or more complicated aquaponics or hydroponics (where we again get into chemistry and physics) can even be incorporated into the garden so there’s so much potential here. It’s Easter season so I’ve experimented with dying eggs with purple pea pods.
Art: sketching, painting, photographing and sculpting can be used to document the gardening experiences and the garden can inspire creative exploration of these skills as well. You don’t have to be good at it, as long as you enjoy it and are exposed to different things you can find a way to be adequate enough to incorporate art into your daily life in useful ways and maybe some people will find their way into careers but being able to incorporate art skills into life is a good thing no matter what.
Music: Interesting things to listen to while gardening, how does music affect plants and how are students inspired musically (as was Beethoven) by nature are just the beginnings of how gardens can be integrated into music classes. Some people have even made instruments out of vegetables!
Phys Ed: With all the moving you do to work a garden this is the perfect place to learn how to do it without getting hurt. Not just in the immediate sense of maybe not dropping a shovel on your toe or lifting too much weight but how to make the most from your time in the garden, stretching before, during and after to prevent damage. How to move properly to avoid repetitive movement injuries. How to lift, climb and work safely for today as well as the long run. Then there’s the opportunity to do laps around the garden, Yoga or Aikido on the lawn, rock climbing if you have the room for it on a well designed structure that’s beautifully integrated into the landscape.
And that’s just the outside opportunities. While aquaponics and hydroponics are generally considered indoor or at least garage projects there are all kinds of activities to bring into the classroom with container gardening so even in urban schools and places where outside gardening is limited by climate it can be done. The health benefits of indoor plants has been established, not to mention the benefits of growing edible things inside. Tomatoes in large pots surrounded by carrots and onions is surprisingly decorative. Peas growing up teepee stakes with lettuces at their base is pretty, too.
ViviLnk
Of course the curriculum should lean heavily away from using insecticides and pesticides that could harm children. This is another area for chemistry classes. Starting with good compost for healthy soil it’s easy to avoid expensive industrially produced fertilizers and local stables or stockyards might be happy to contribute to the project. With ladybugs, lacewings and mantis eggs among the readily available organic options for pest control you can get a decent harvest. Learning which bugs are good is important. Ladybug larvae look REALLY scary but they aren’t harmful to us and will devour tons of aphids. Ants aren’t usually to be feared with the exception of fire ants. Generally ants provide a service aerating the soil. If the birds and good bugs don’t manage to control the hornworms and other crawlies there’s always Bt (a good bacteria that messes up their digestion) as well as hand-picking as a last resort. The crawlies won’t hurt kids and learning to overcome fears and grossness is part of a well-rounded education. With the kid power readily available in the student population herbicides shouldn’t be necessary. Just learn how to tell the weeds from the crops and flowers and start pulling. They’ll have a good compost pile going in no time and if they have chickens as part of the food cycle (no, they don’t eat the chickens! They eat the eggs!) the chickens can eat the weeds and save a bit on store-bought chicken feed. The stuff the chickens leave behind (poop, not eggs) is invaluable in the compost heap. Helpful hint: you don’t need roosters to make eggs, hens will make eggs no matter what. You just need roosters if you want chicks from the eggs.
Many schools have 4-H and FFA (Future Farmer of America) programs that can both help with and benefit from all of this, too. With more interest in suburban and urban gardens and farming as well as backyard and container gardening who knows what careers the students of today could make for themselves in farming and nutrition as well as all the STEM (Science, Technology, Engineering and Math) areas we need in the future. Being able to create an Eden in the yard to come home to no matter what careers we go into could be just the least of the useful and pleasant outcomes.


You must be logged in to post a comment.