Posted by: briellethefirst | January 28, 2022

A Hat From A Hankie


Or a bandana or a squarish piece of cloth about that size. So. You’re out, it’s hot, no shade and you need something on your head. This is just one reason you should always carry a cloth handkerchief…or bandana…or something of that sort. I first saw a hankie hat in a skit on Monty Python’s Flying Circus. I’ve always used them bandit-wise to keep dust out when cleaning or doing yard work.

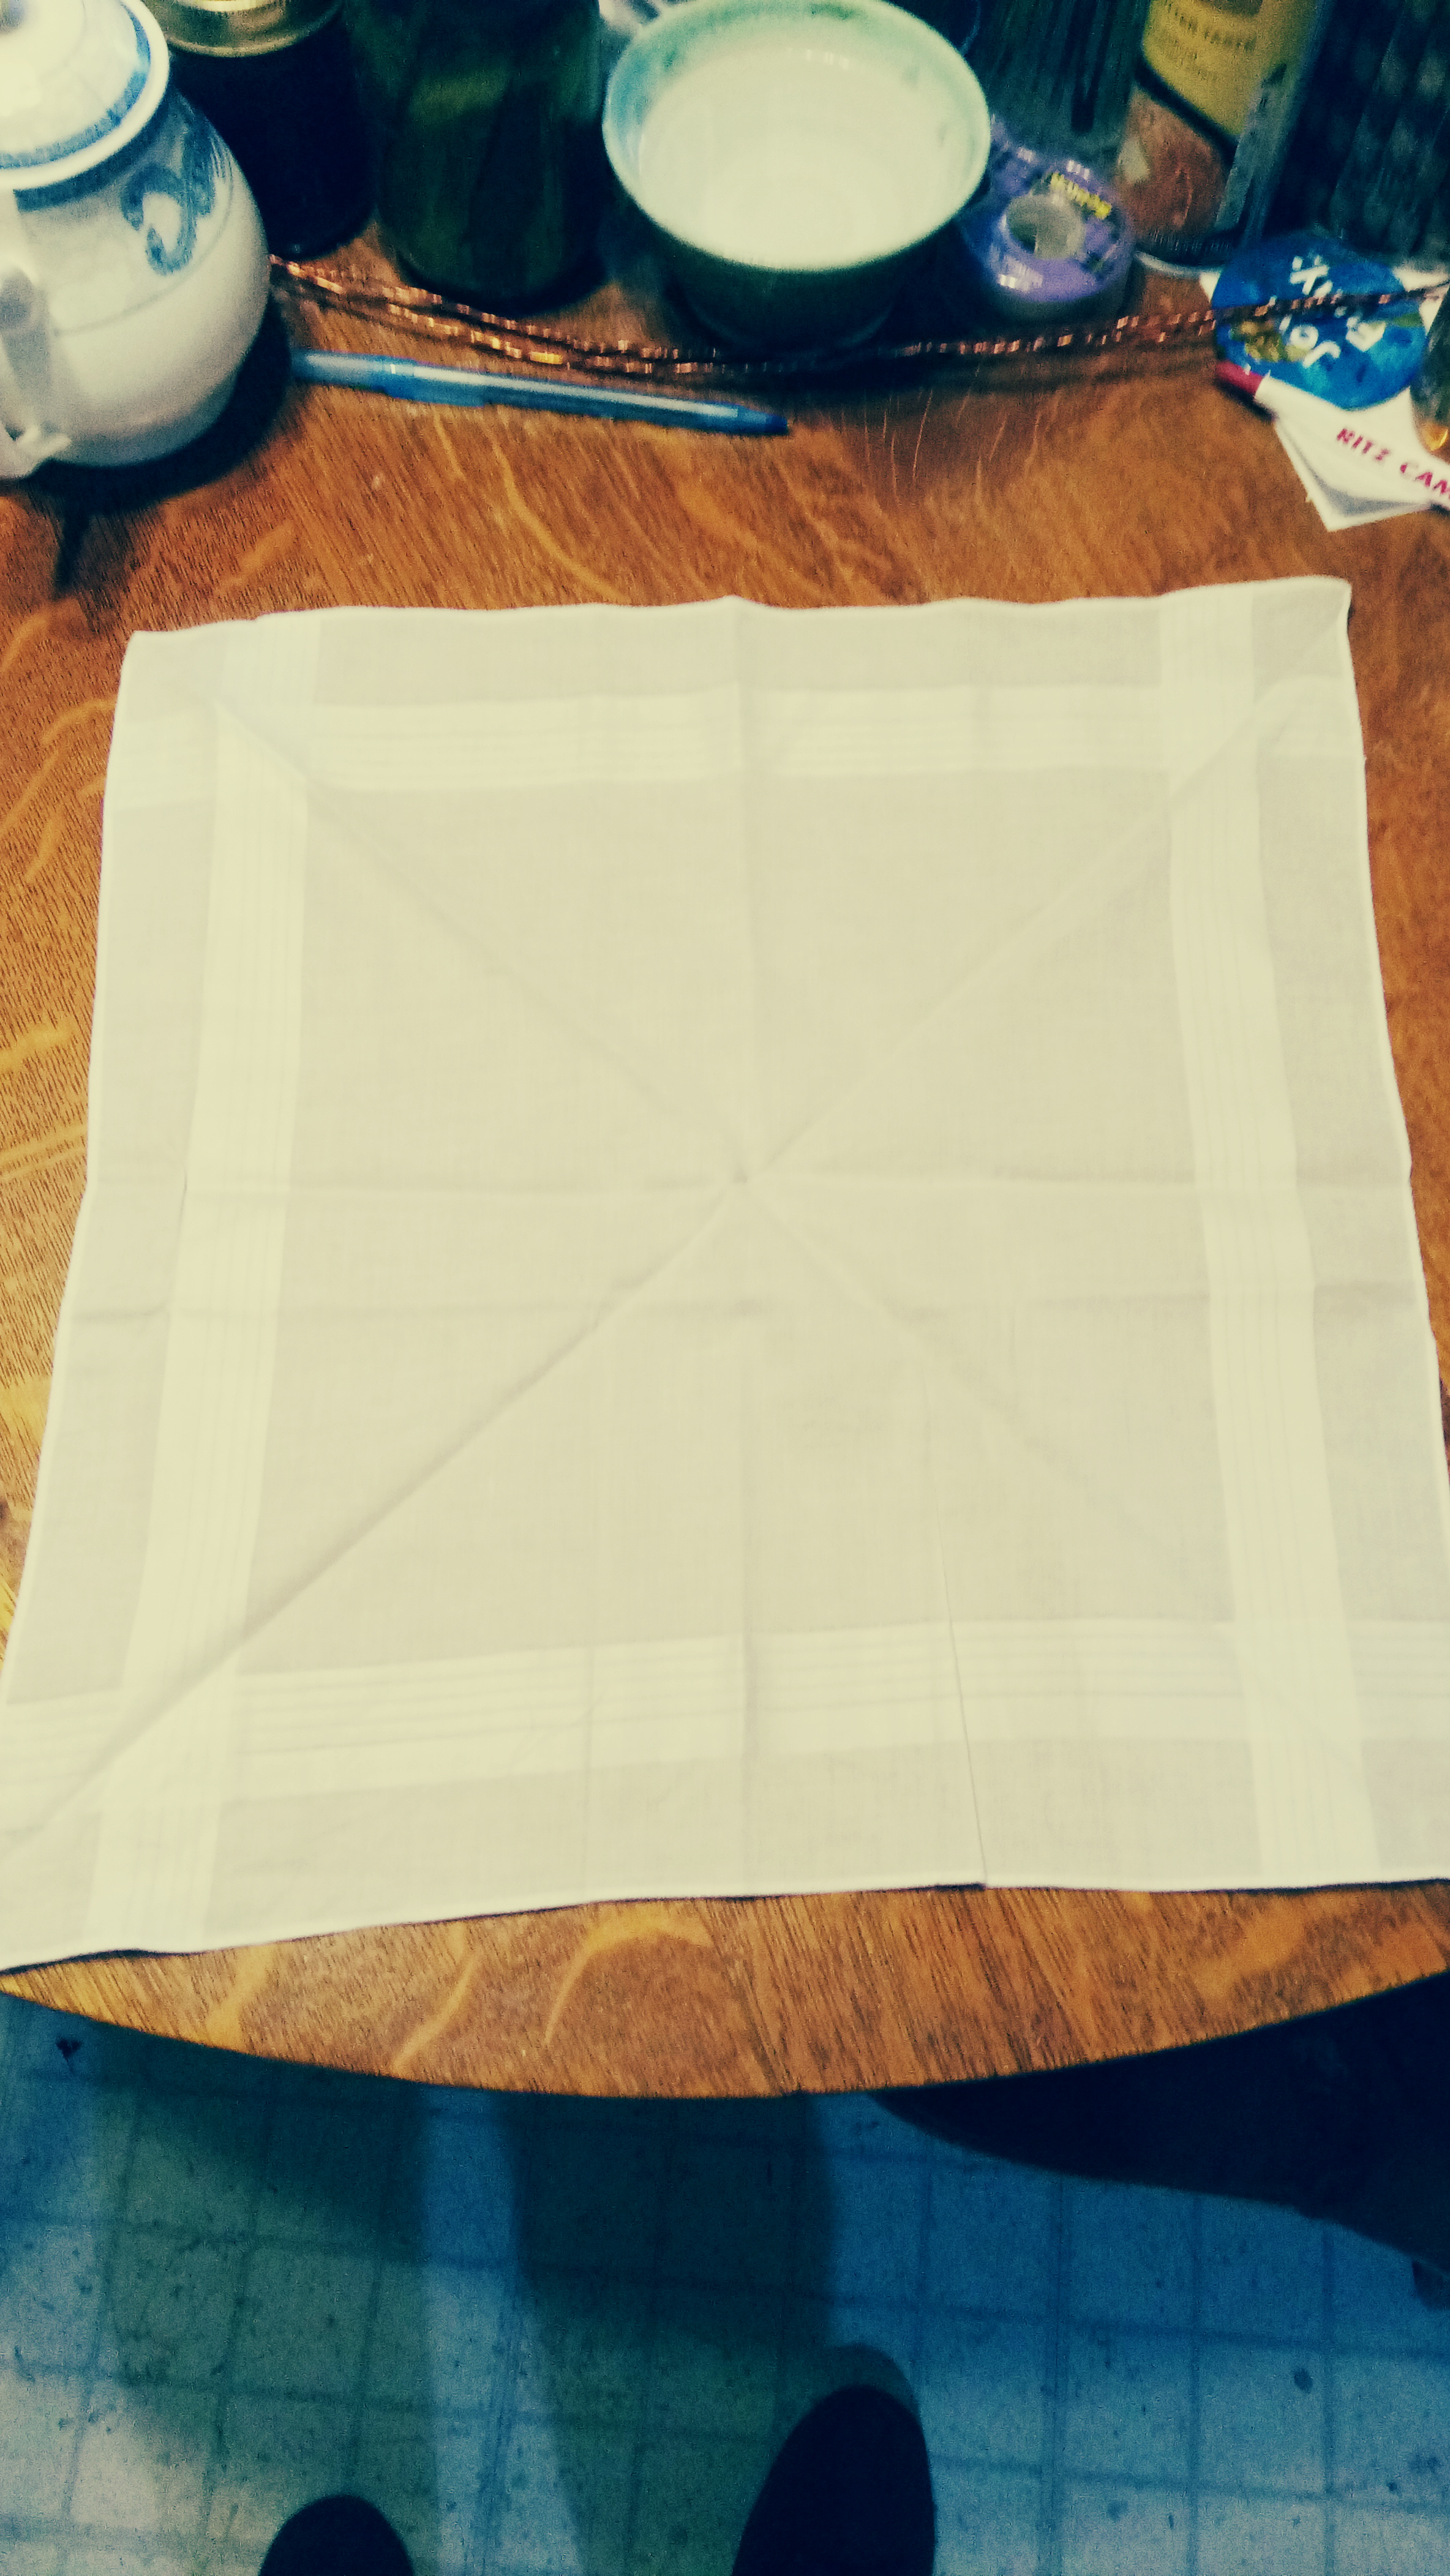
So. Take a handkerchief

or a bandana

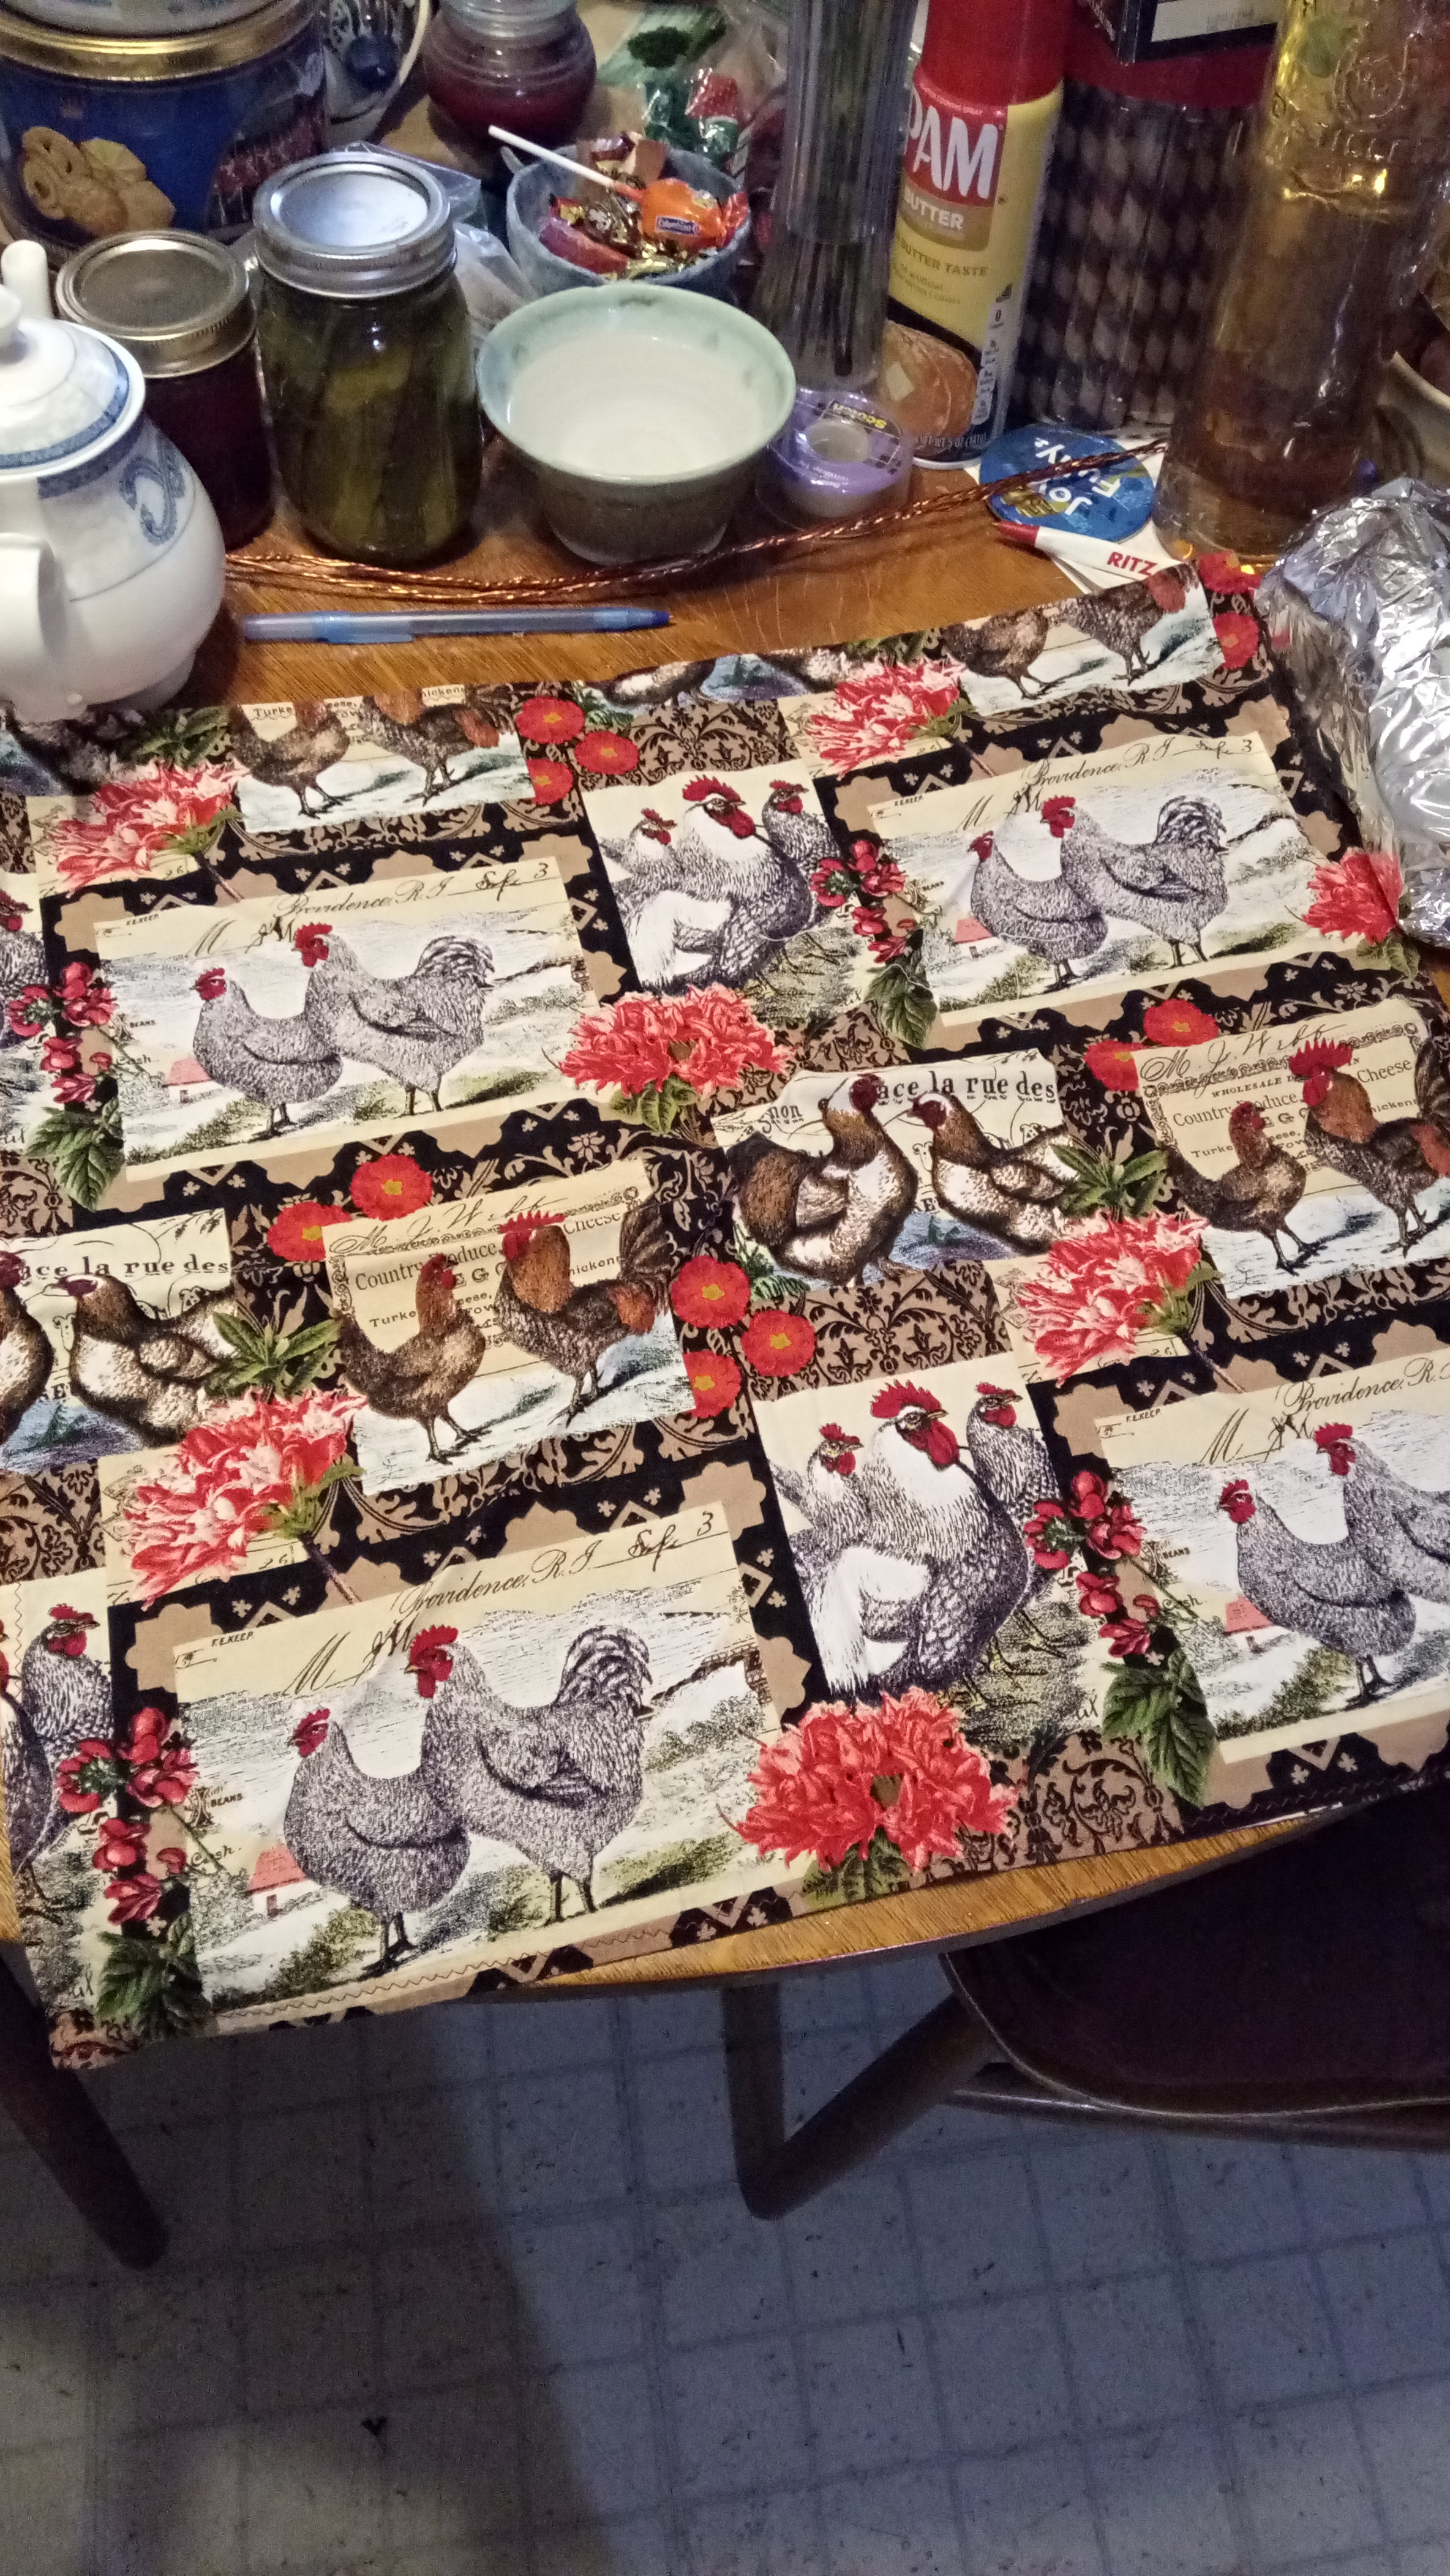
or the cloth that you hemmed up to work as a bandana when there were no masks to be had for love or money!

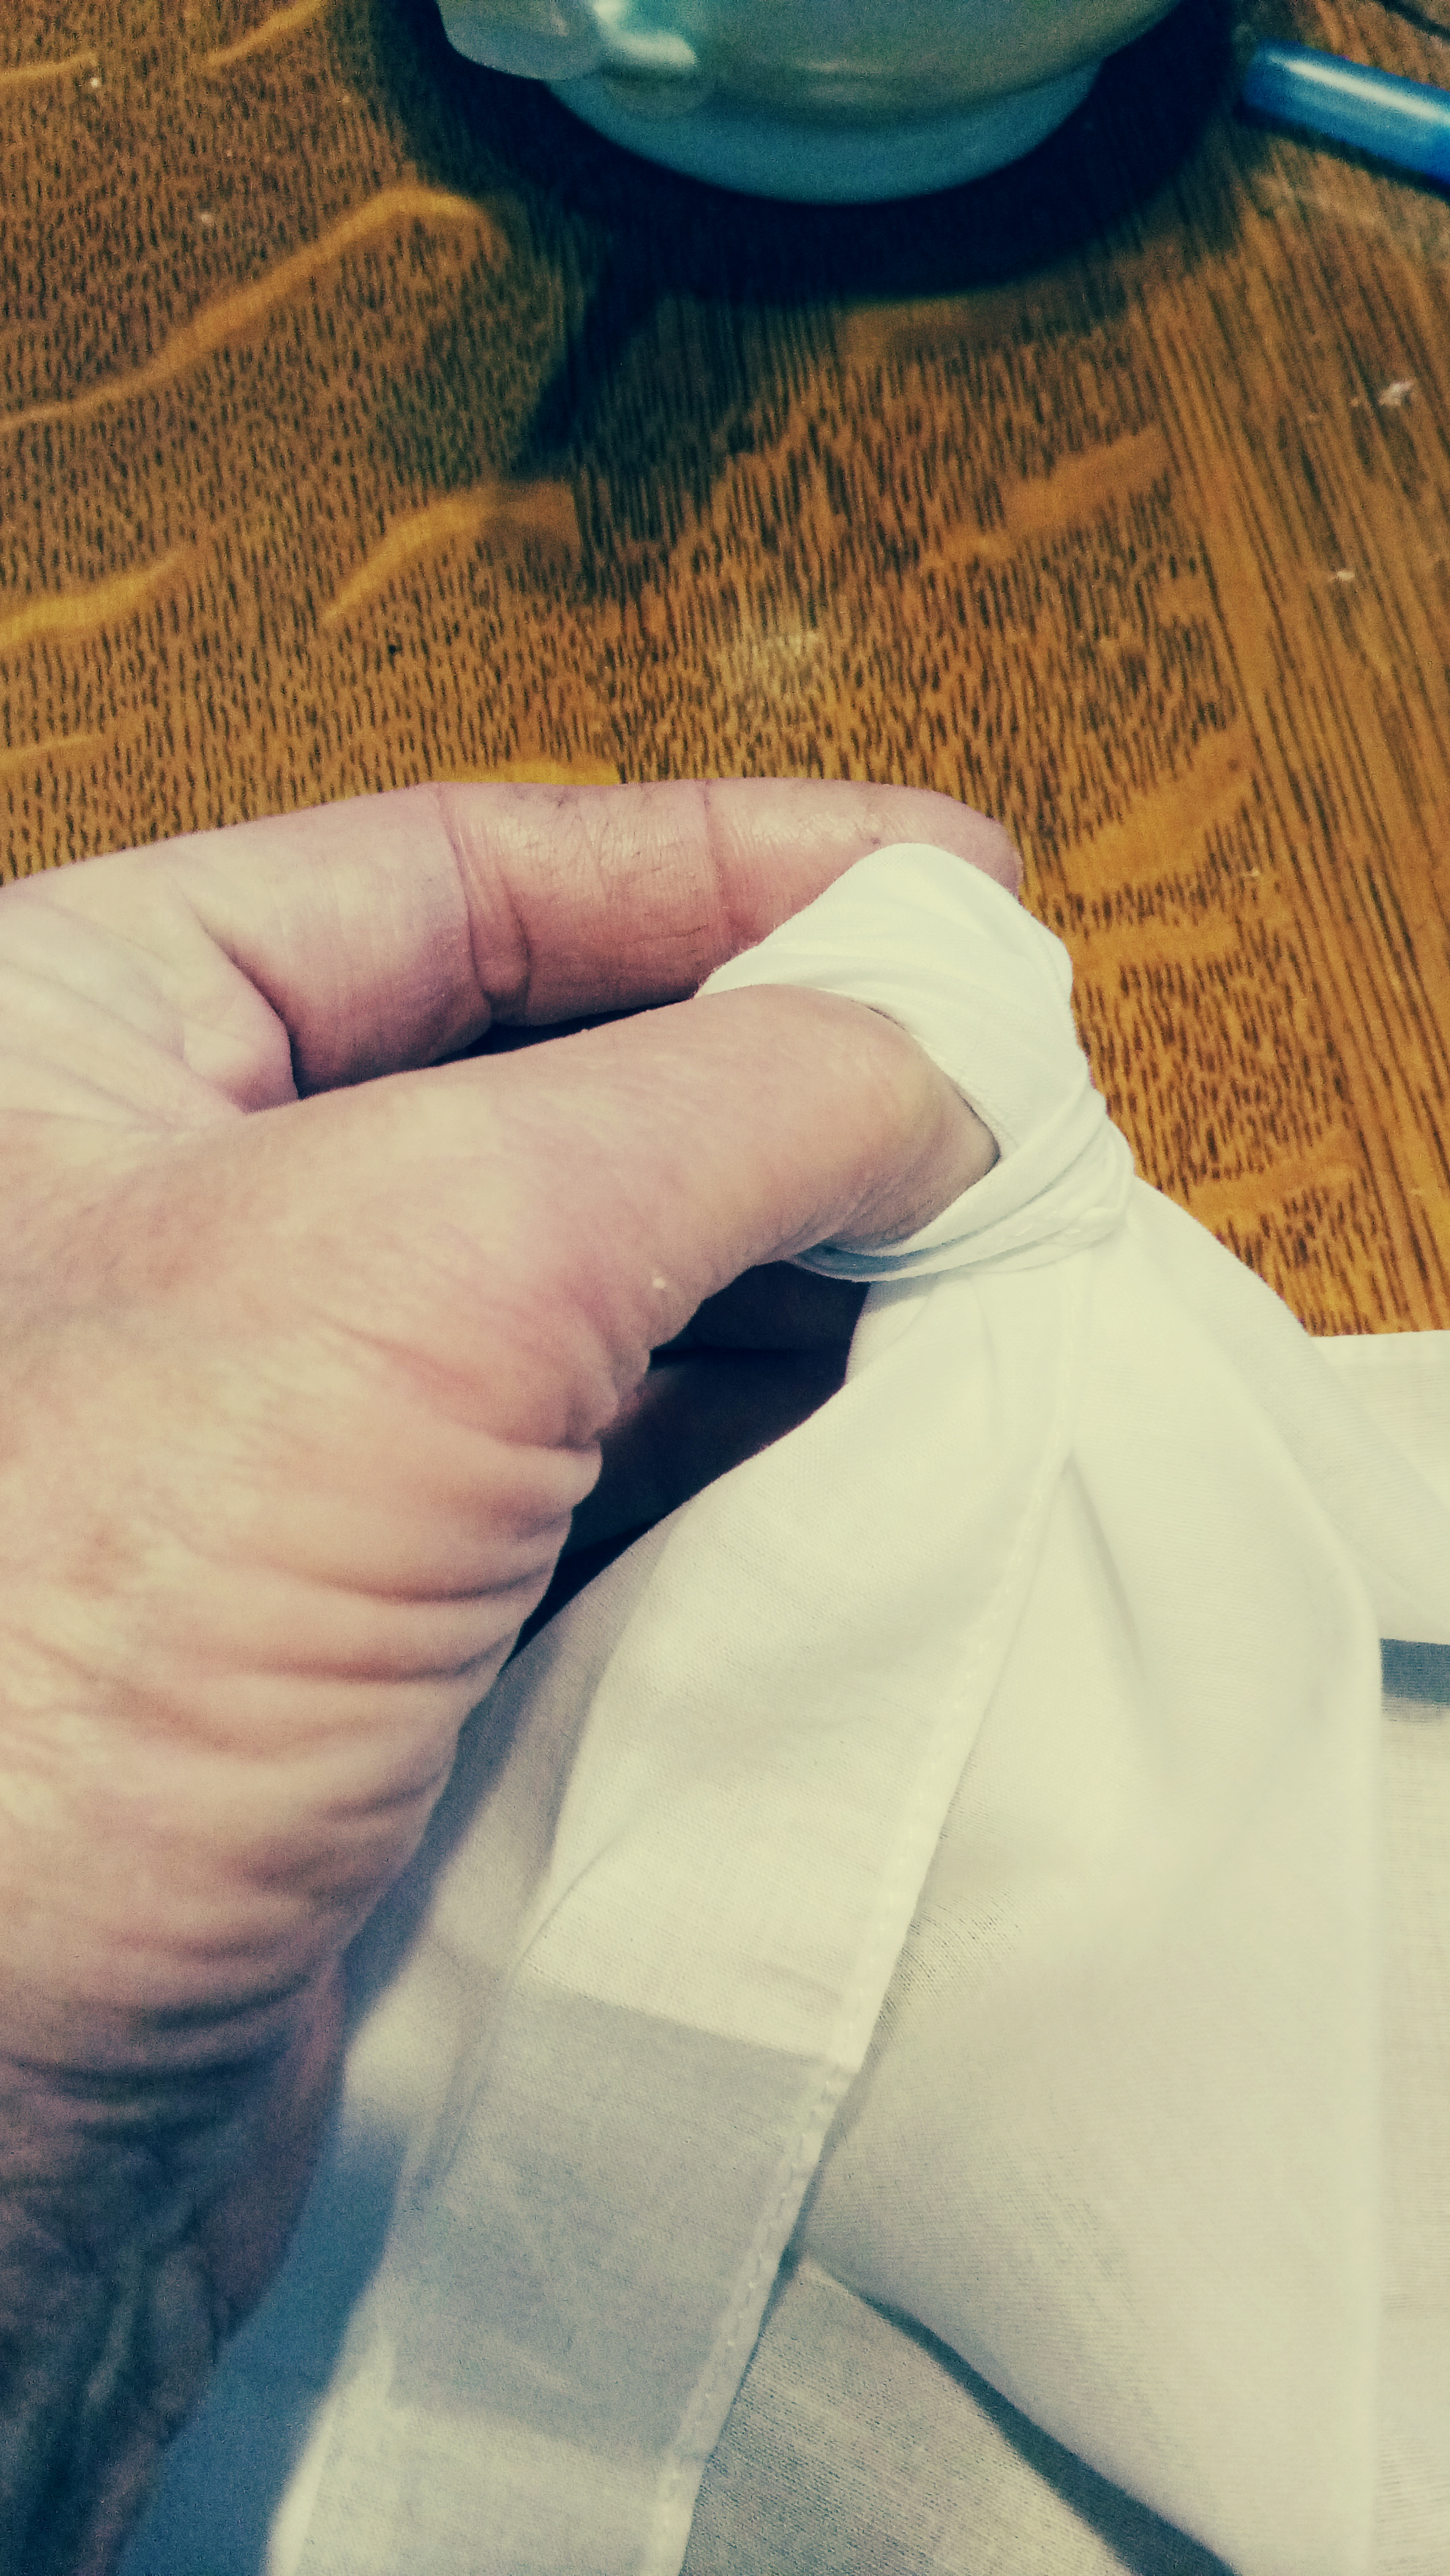
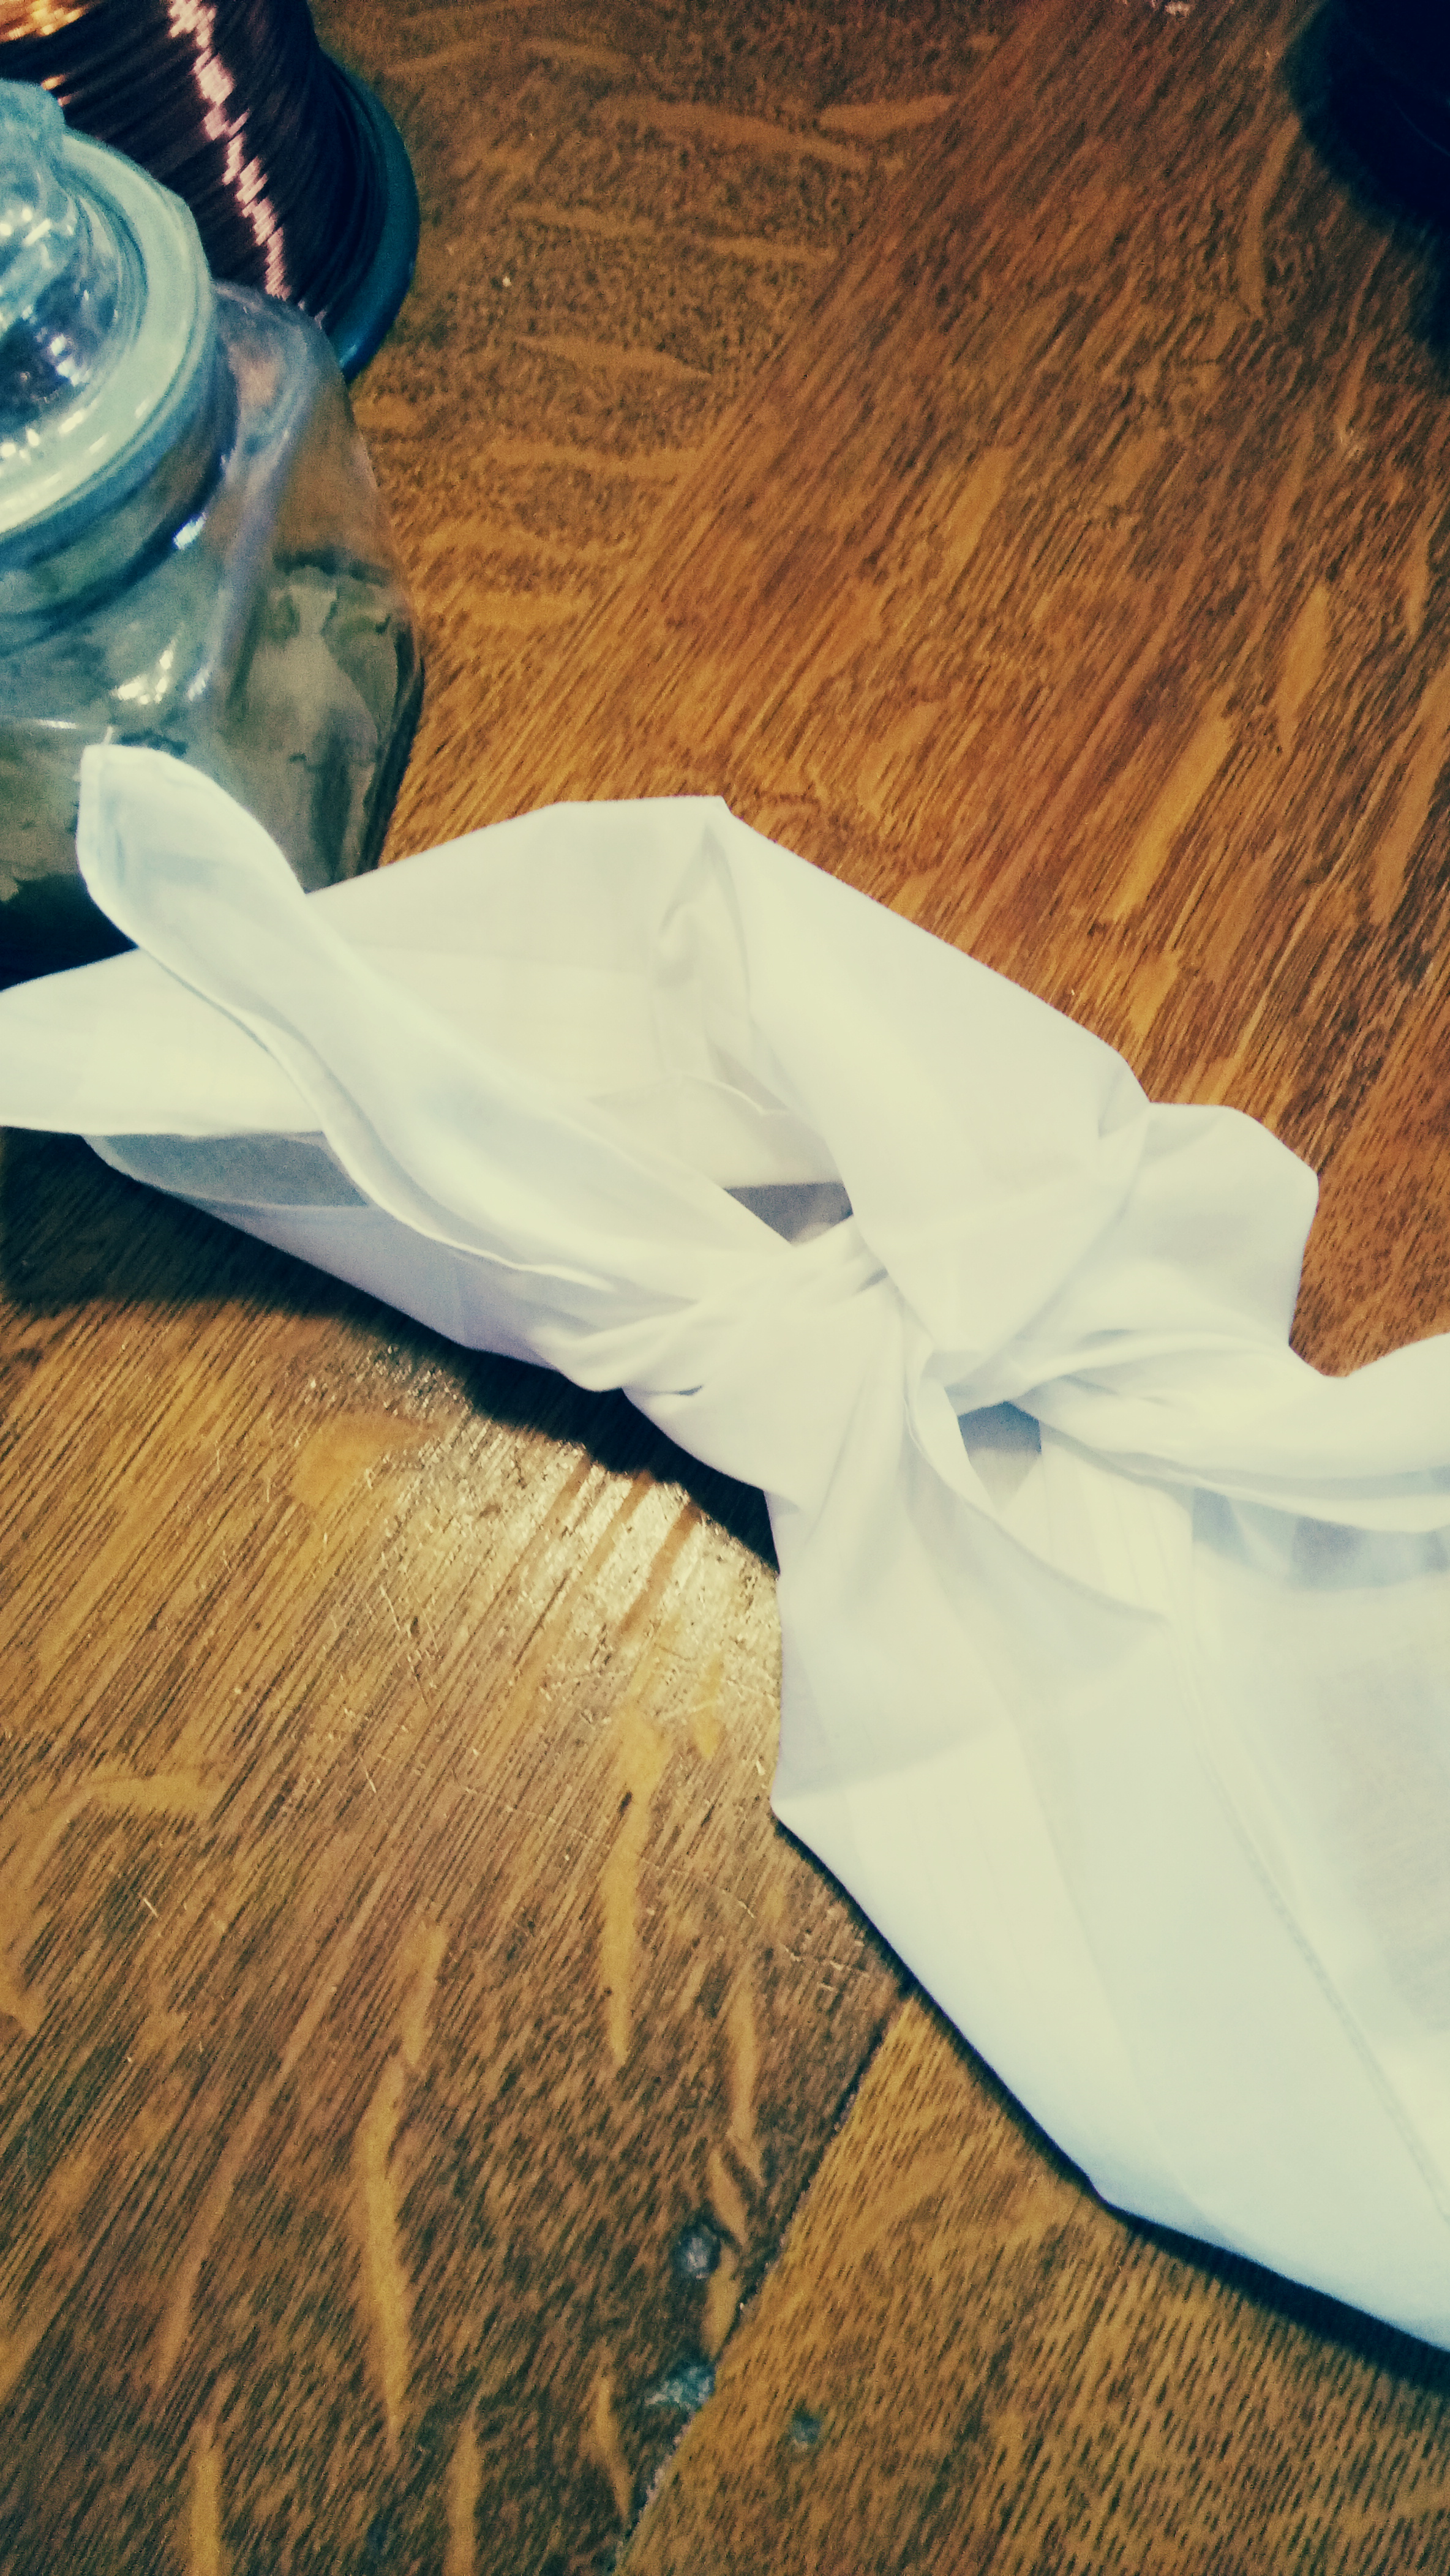
Tie an overhand knot in one corner, wrap the corner around a finger,

poke the end through and pull tight

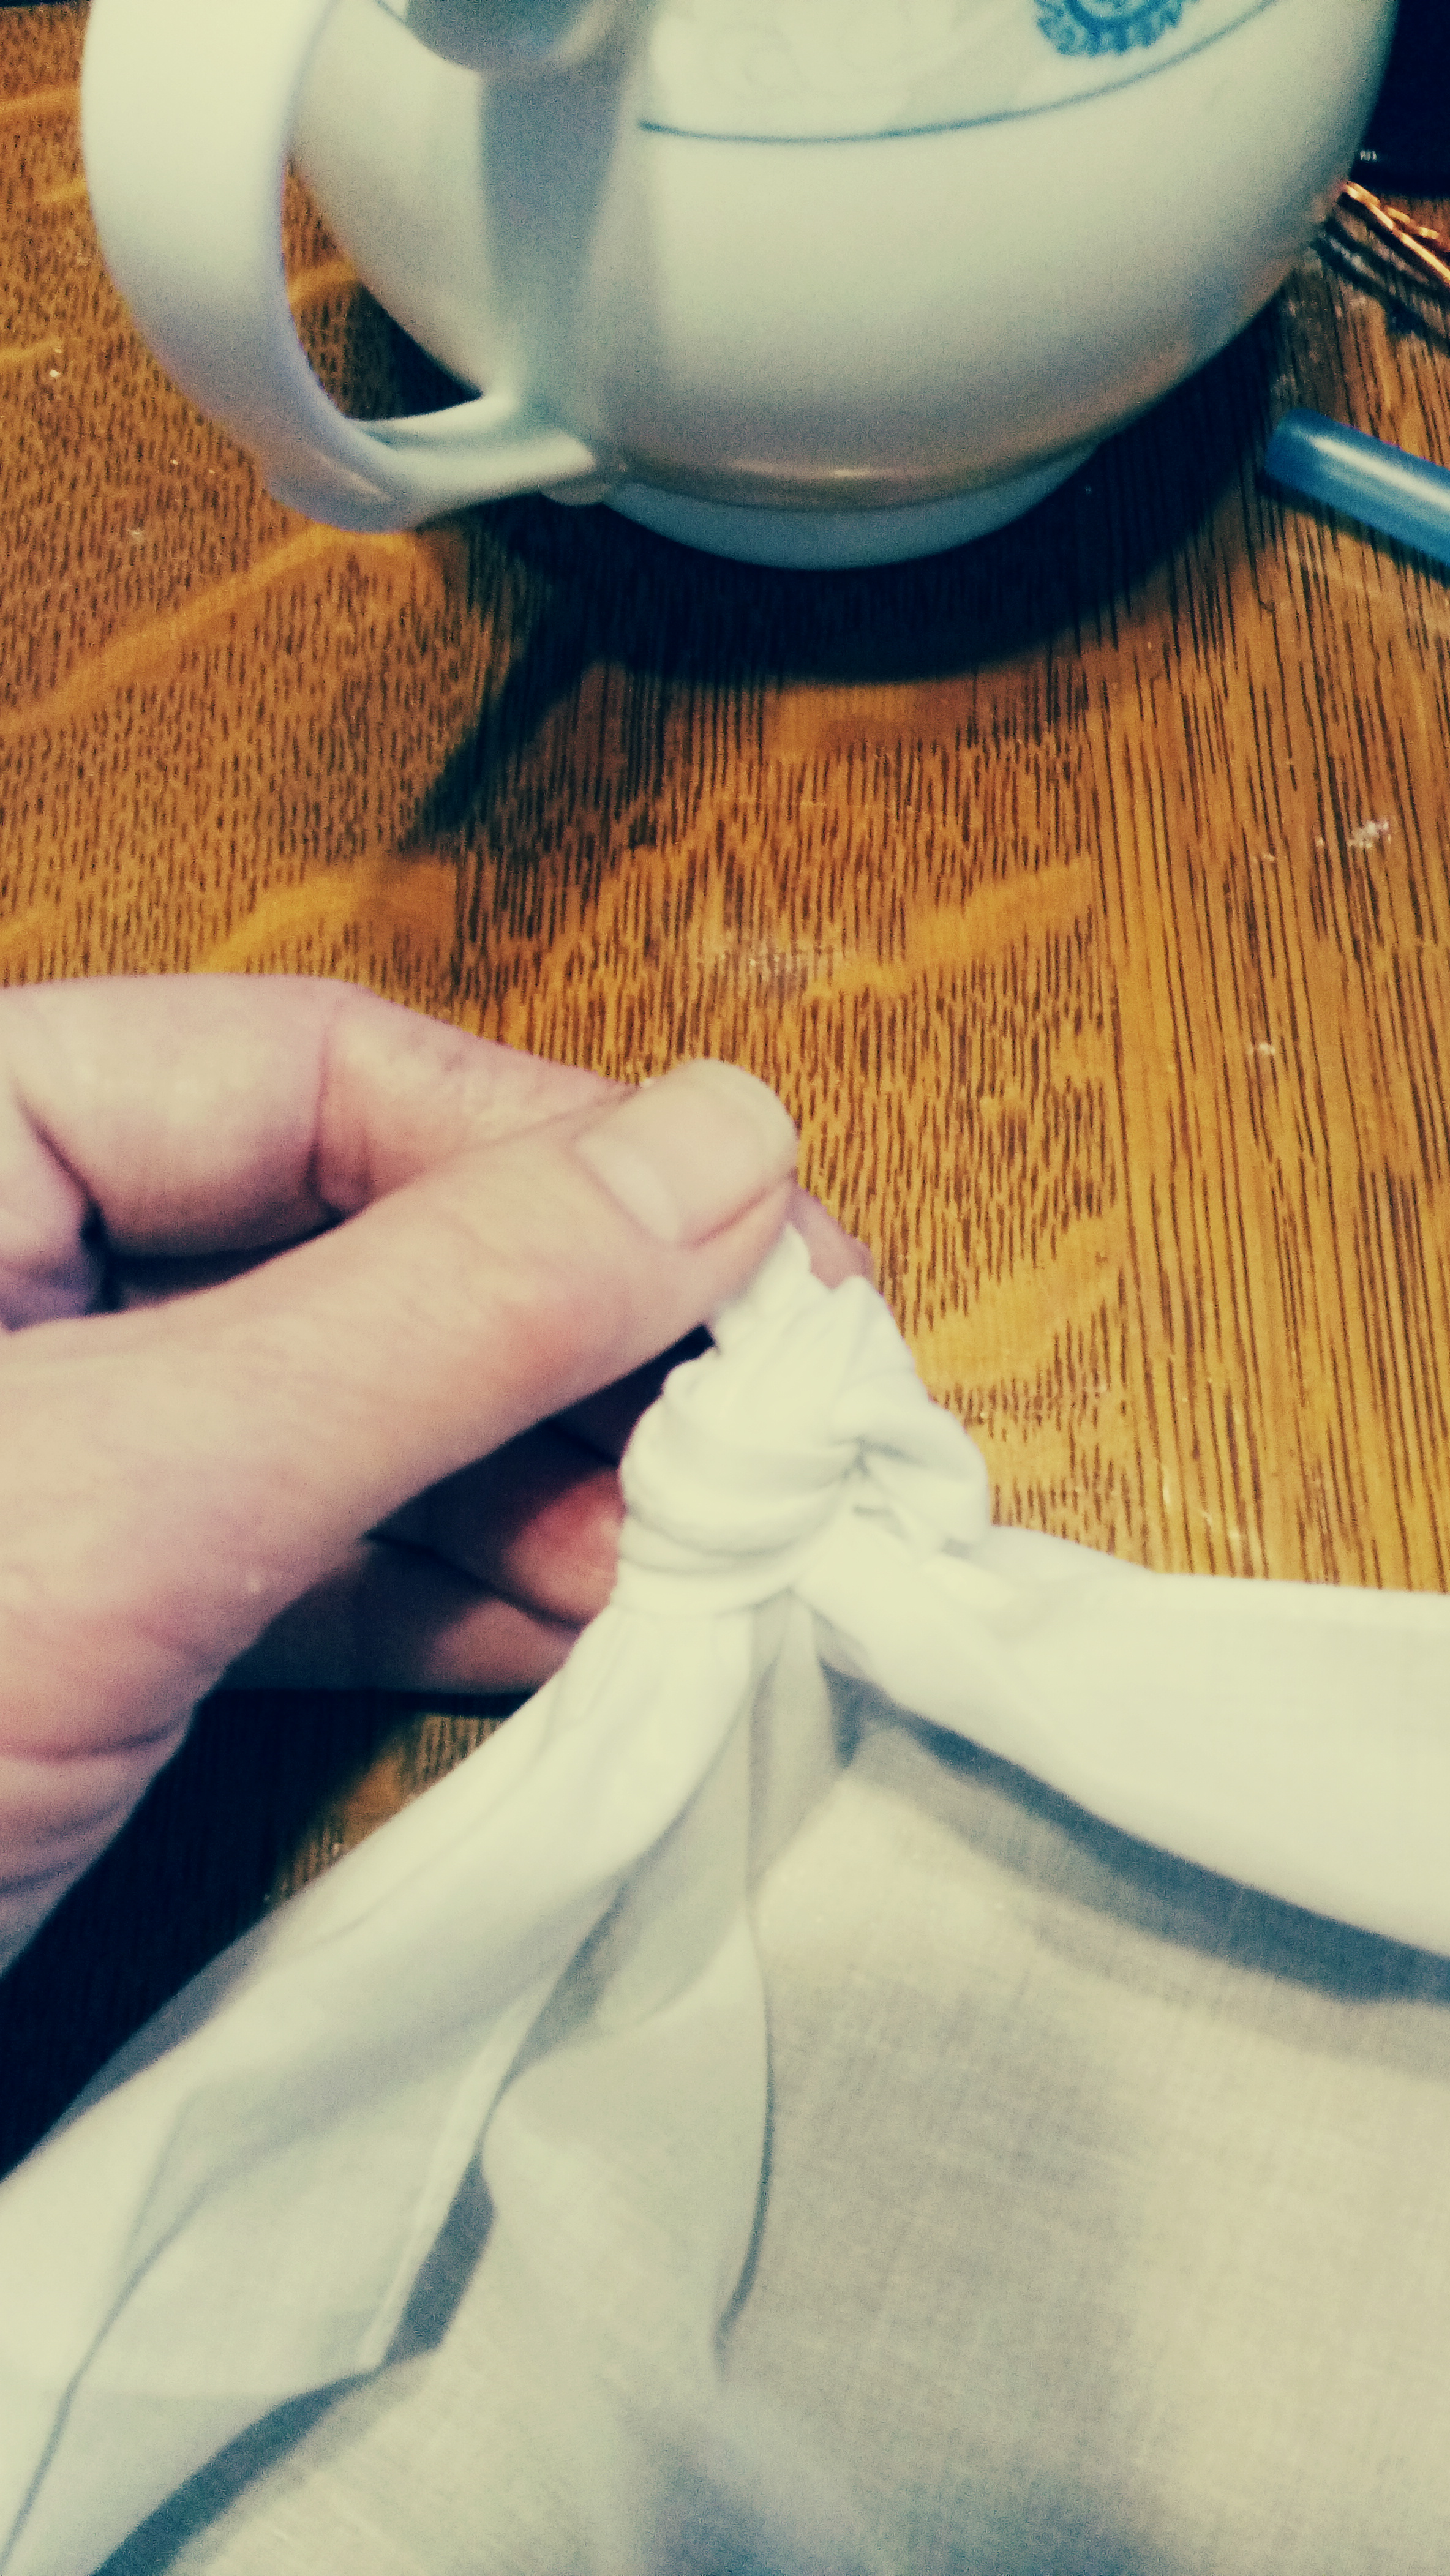
Then do it again on the next corner

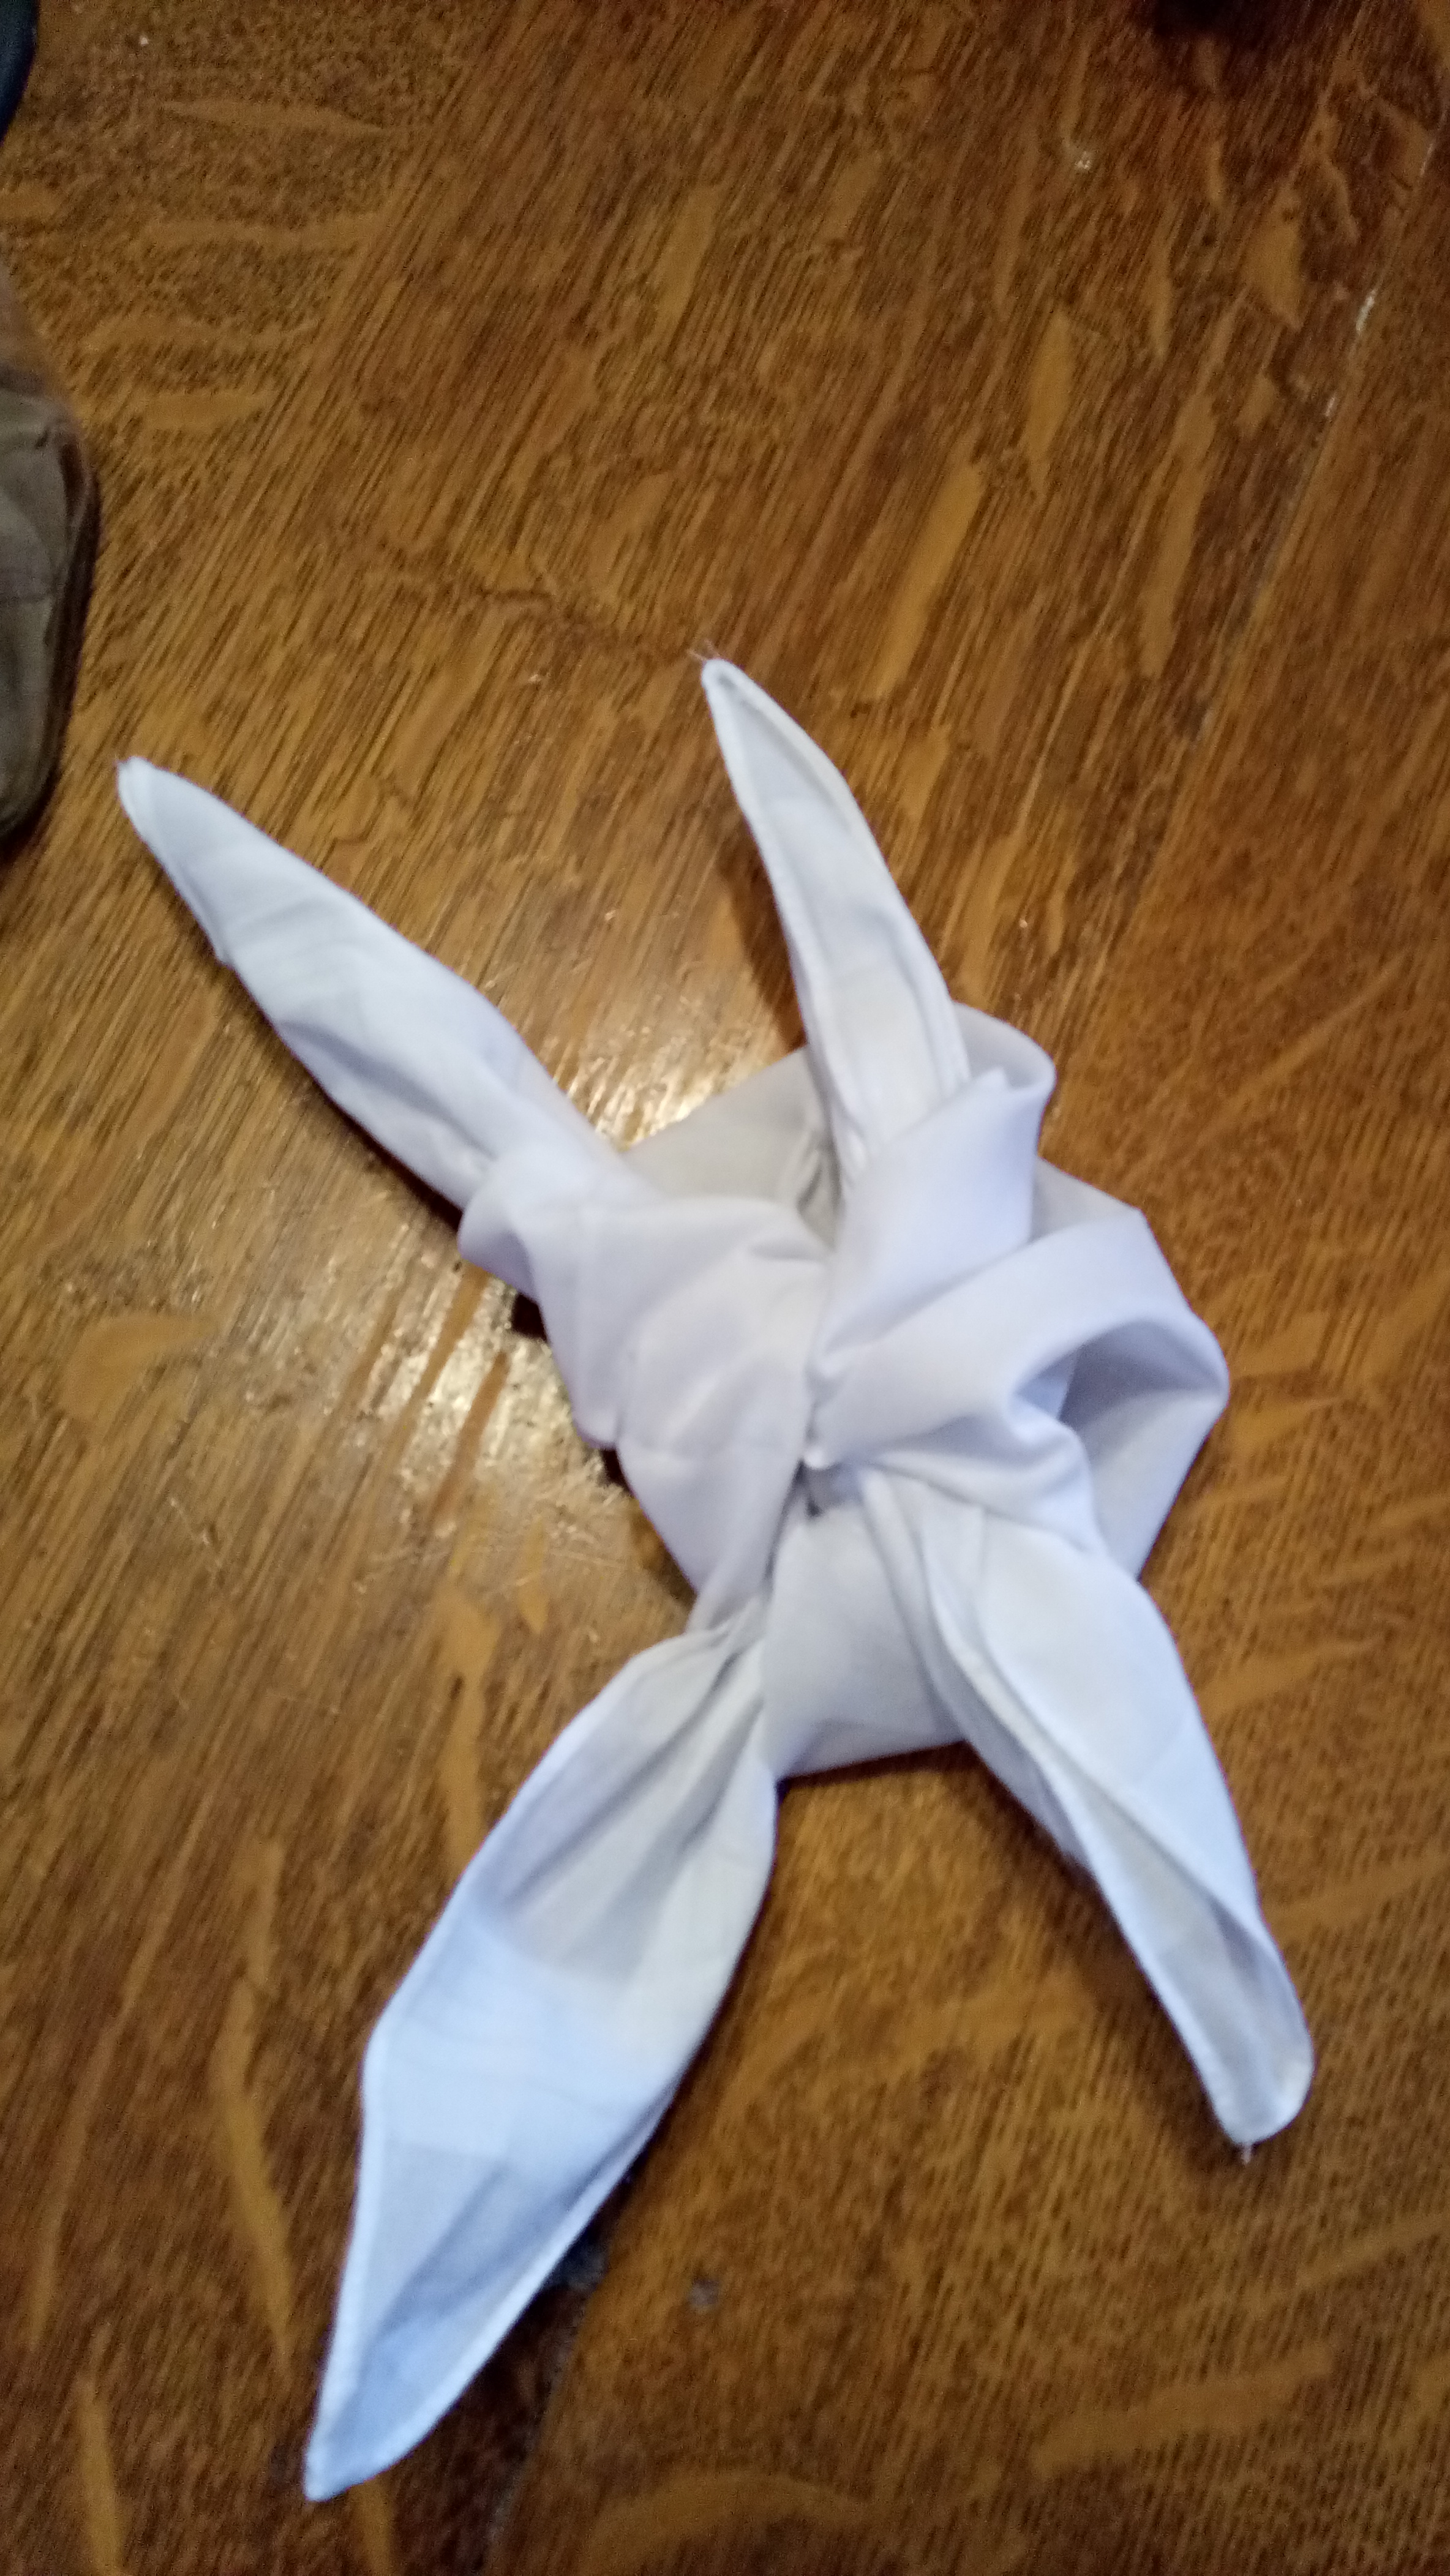
and repeat til all 4 corners are knotted. If it’s too small, make the knots smaller and closer to the corner. If it’s too big, make the knots bigger and further from the corner.

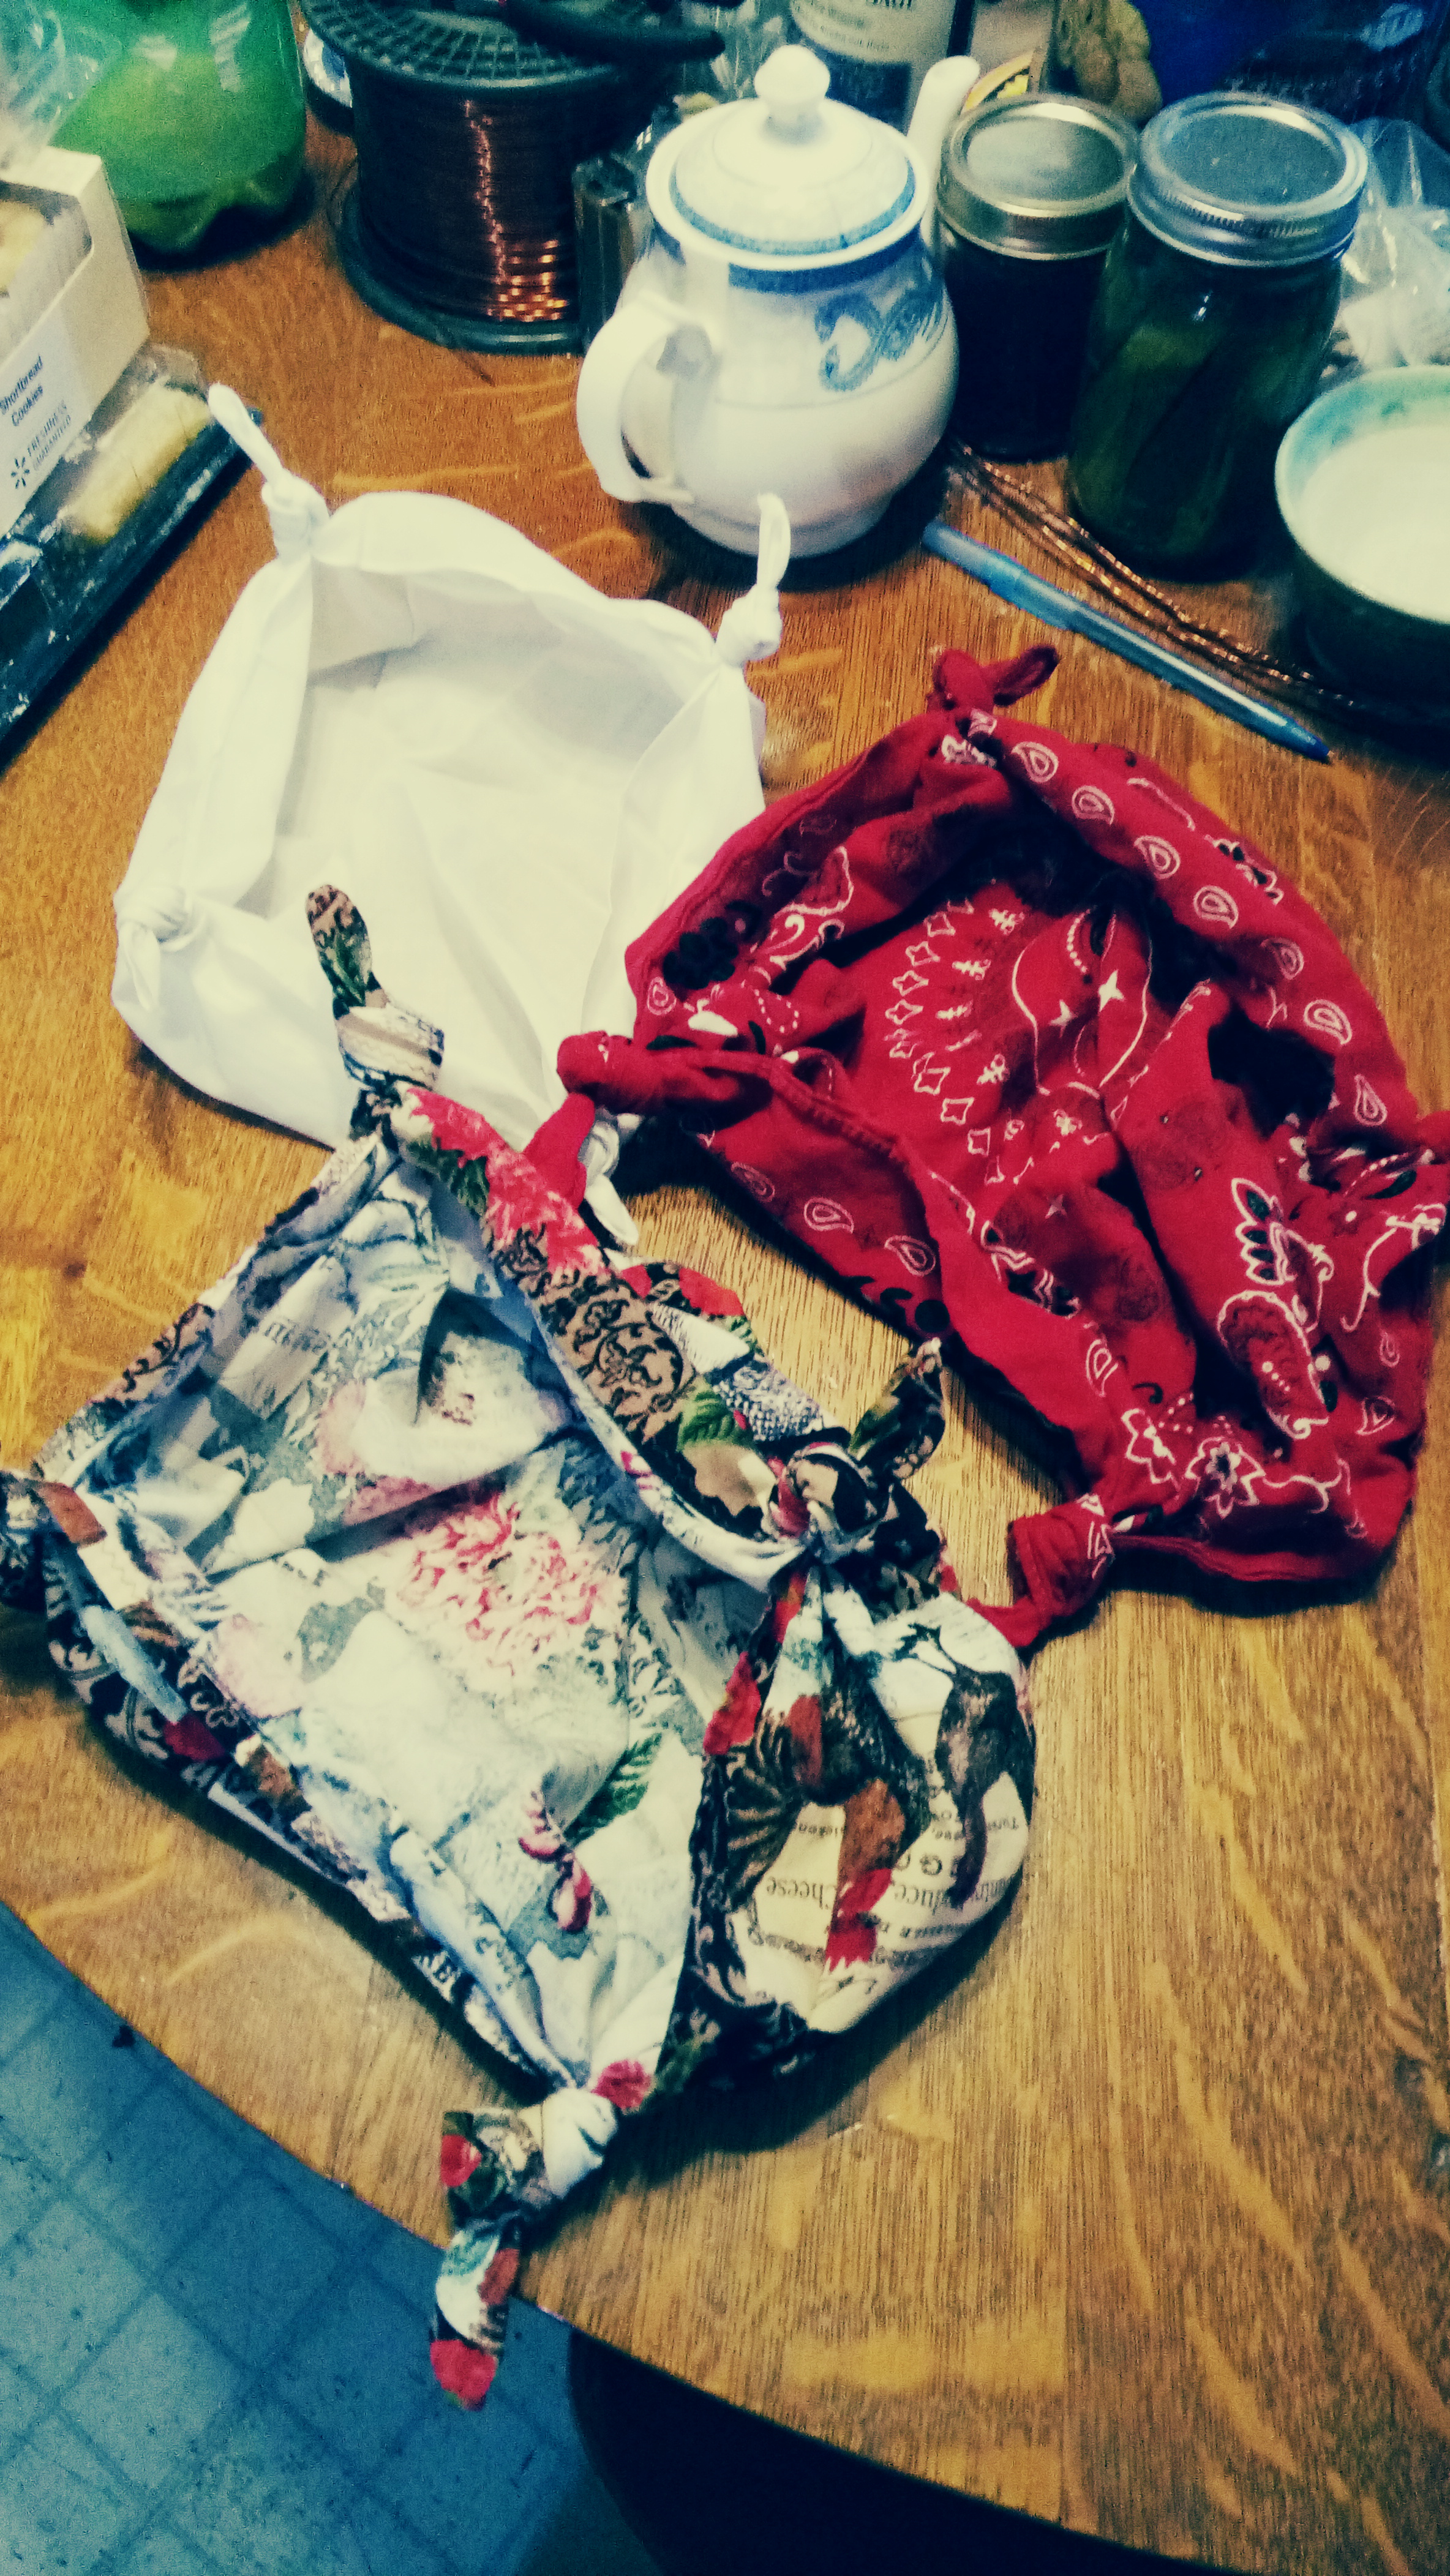
now do it again on any others you want to make today.

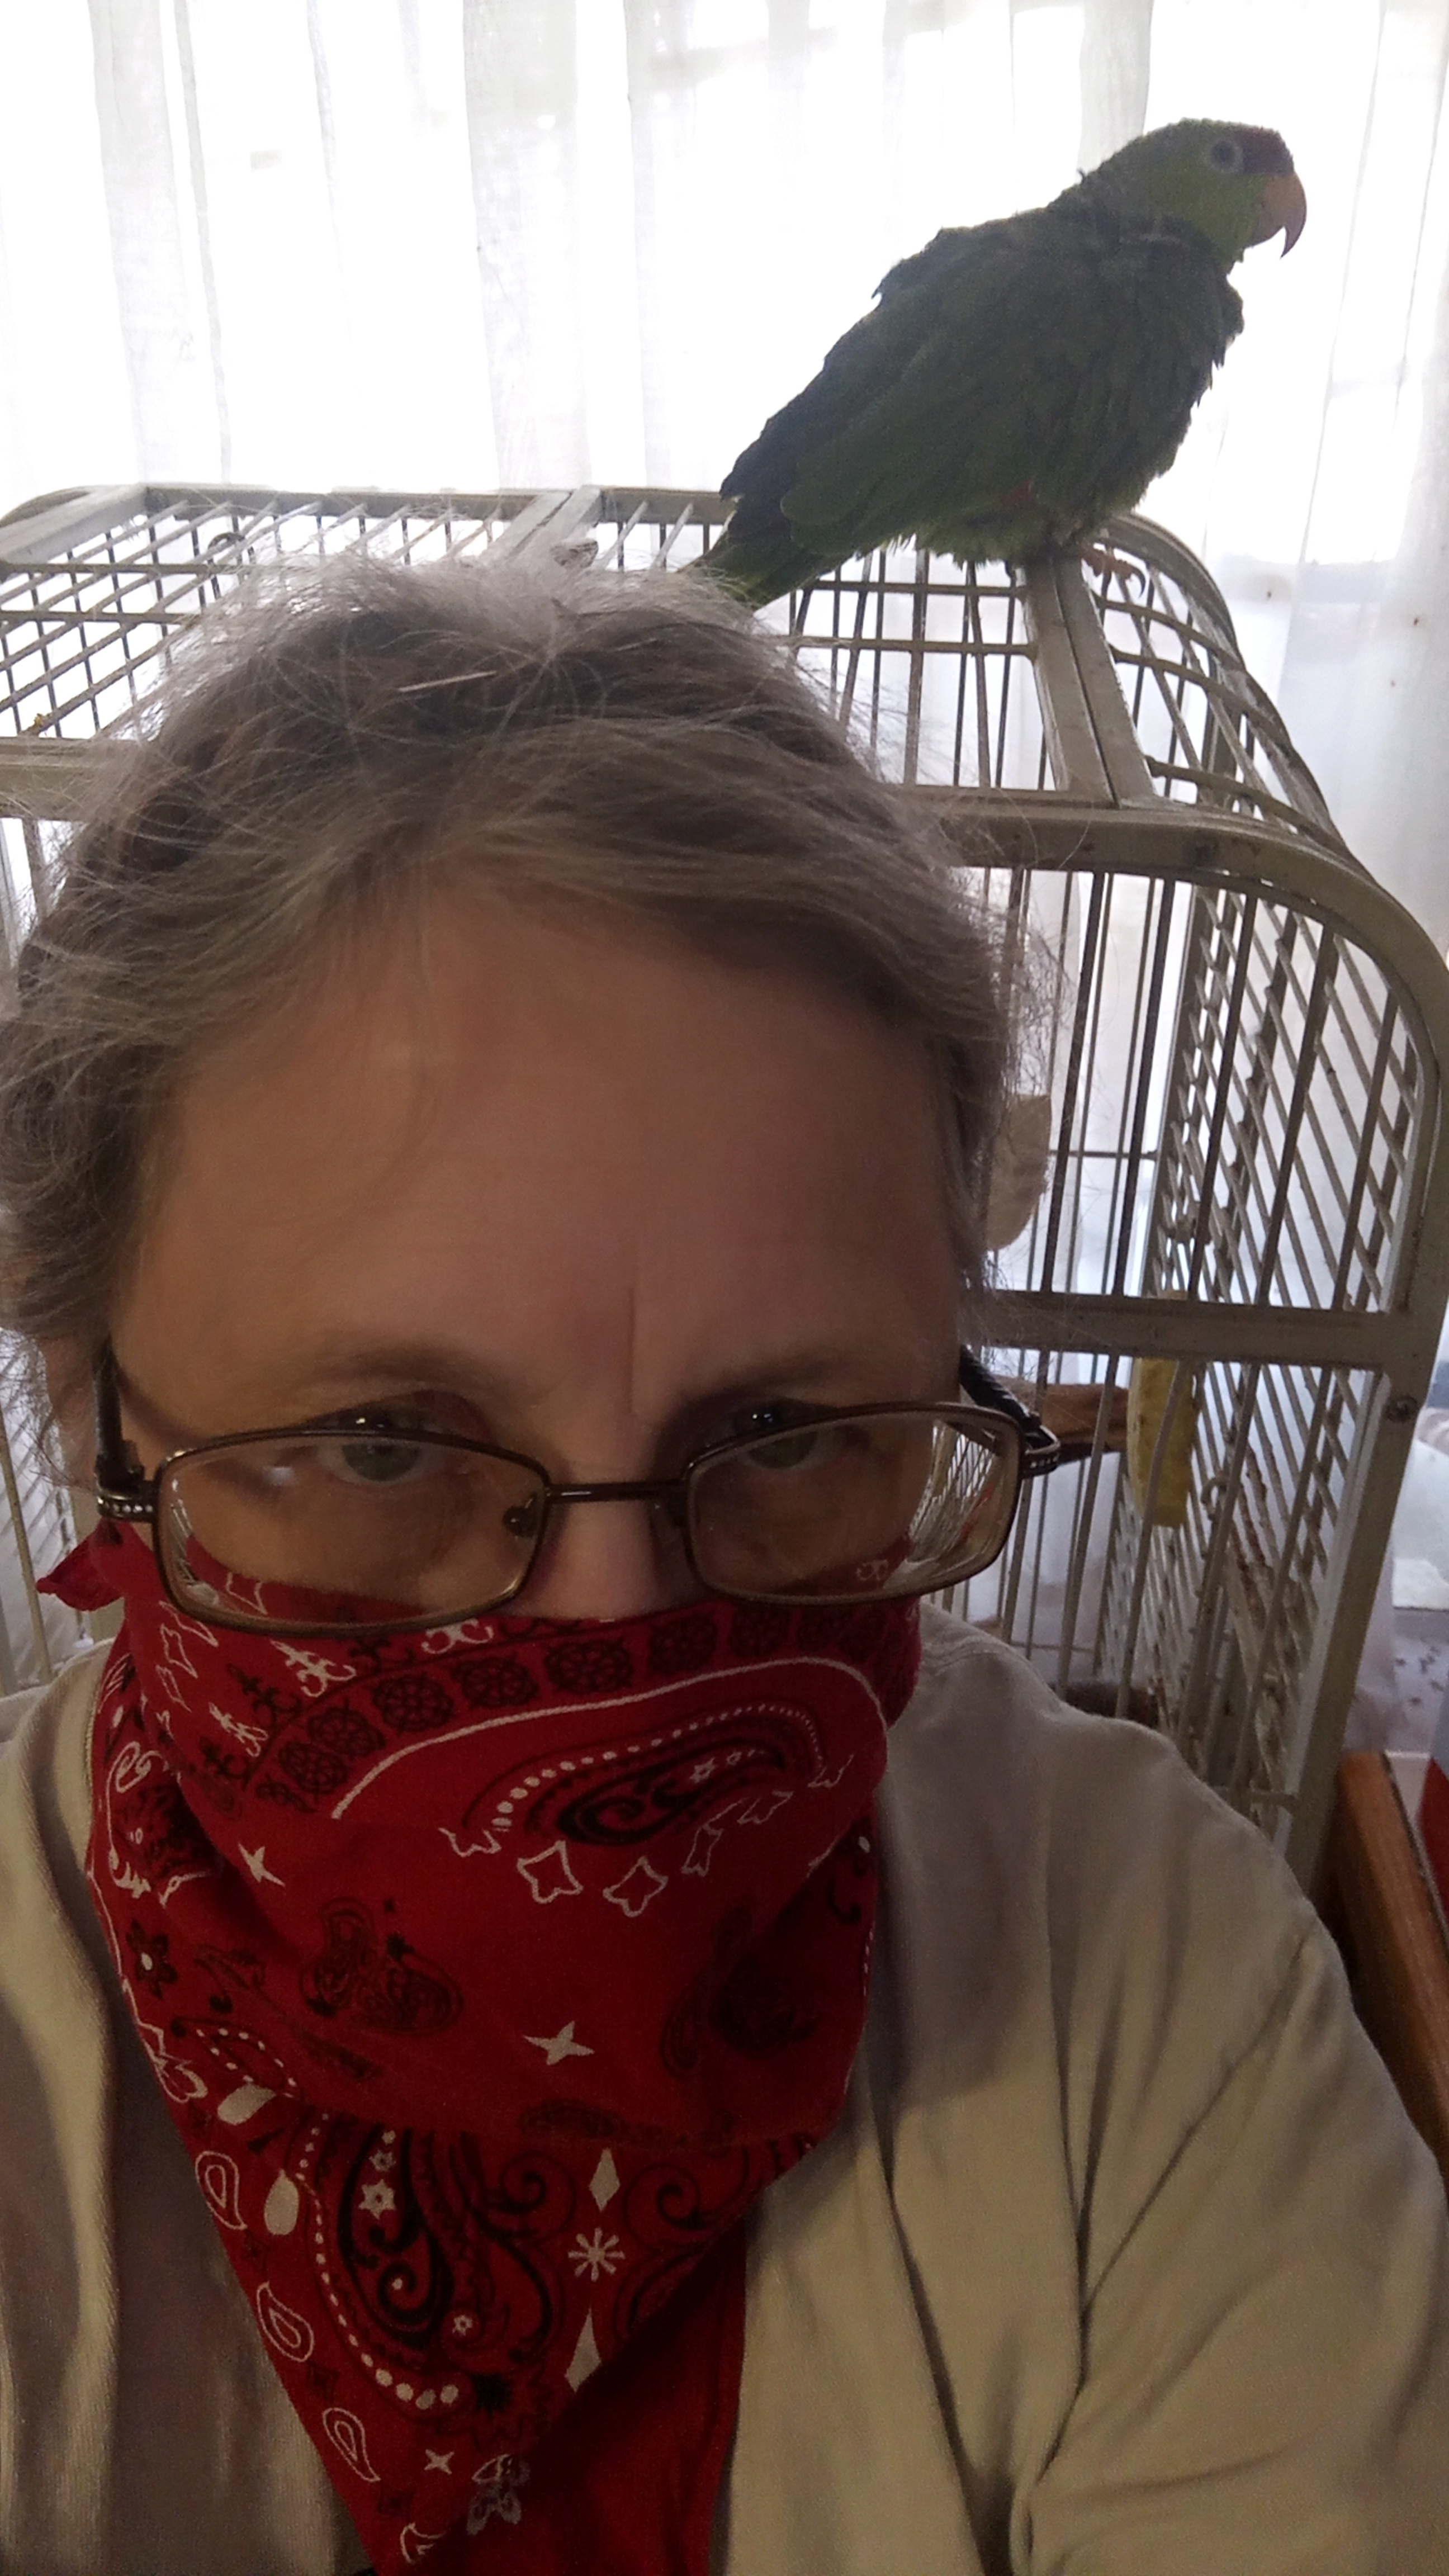
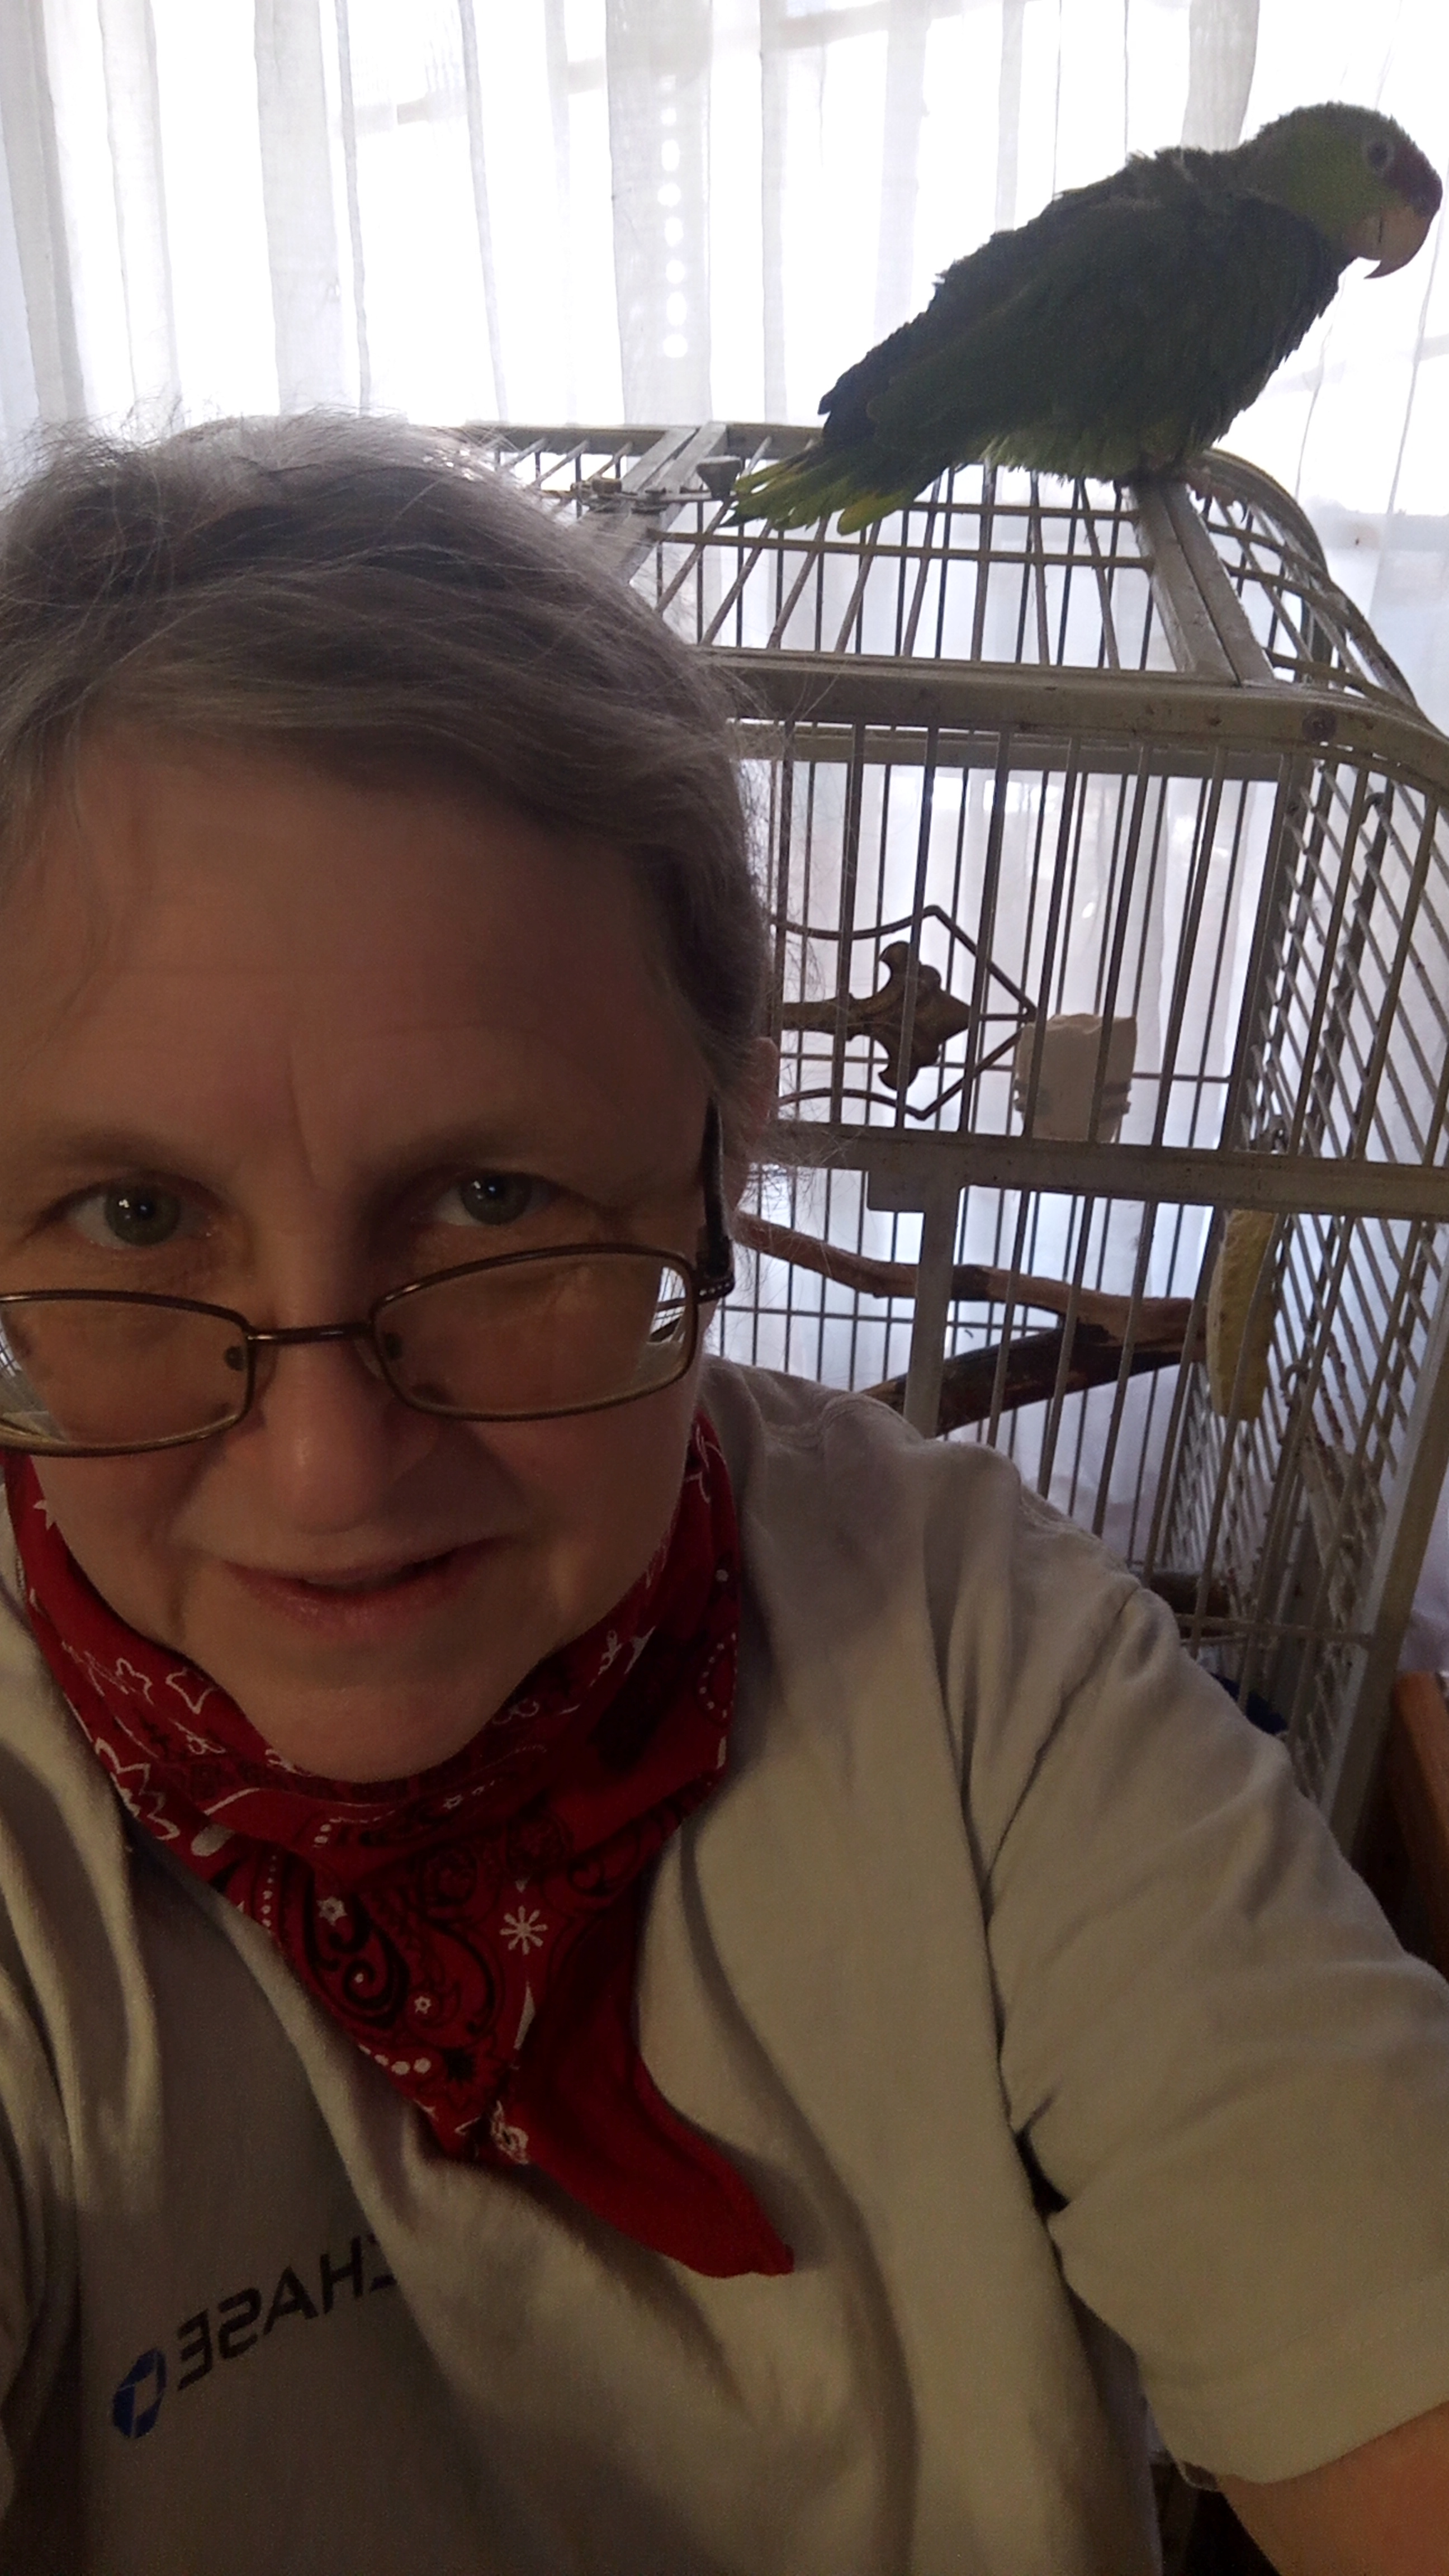
and try it on, corners at the sides, while the parrot ignores you

corner at the front while the parrot snickers

or chickens at the front. Never mind what Paco says, we all know it just looks silly no matter how you wear it.

Tie it over your head to tame your long hair. This is more traditional, at least for women and Paco seems to approve.

So what else can you do with hankies? I’ll think on it…

Need a mask for yard-work, cleaning, a dust-storm hits (yes, in Arizona haboobs happen) or you left your real mask at home. No problem, you have a hankie/bandana/cloth in your pocket/glove compartment/purse.

Or it’s just a fashion statement as a neckerchief to keep your neck warm…or cool in the summer if you wet it.

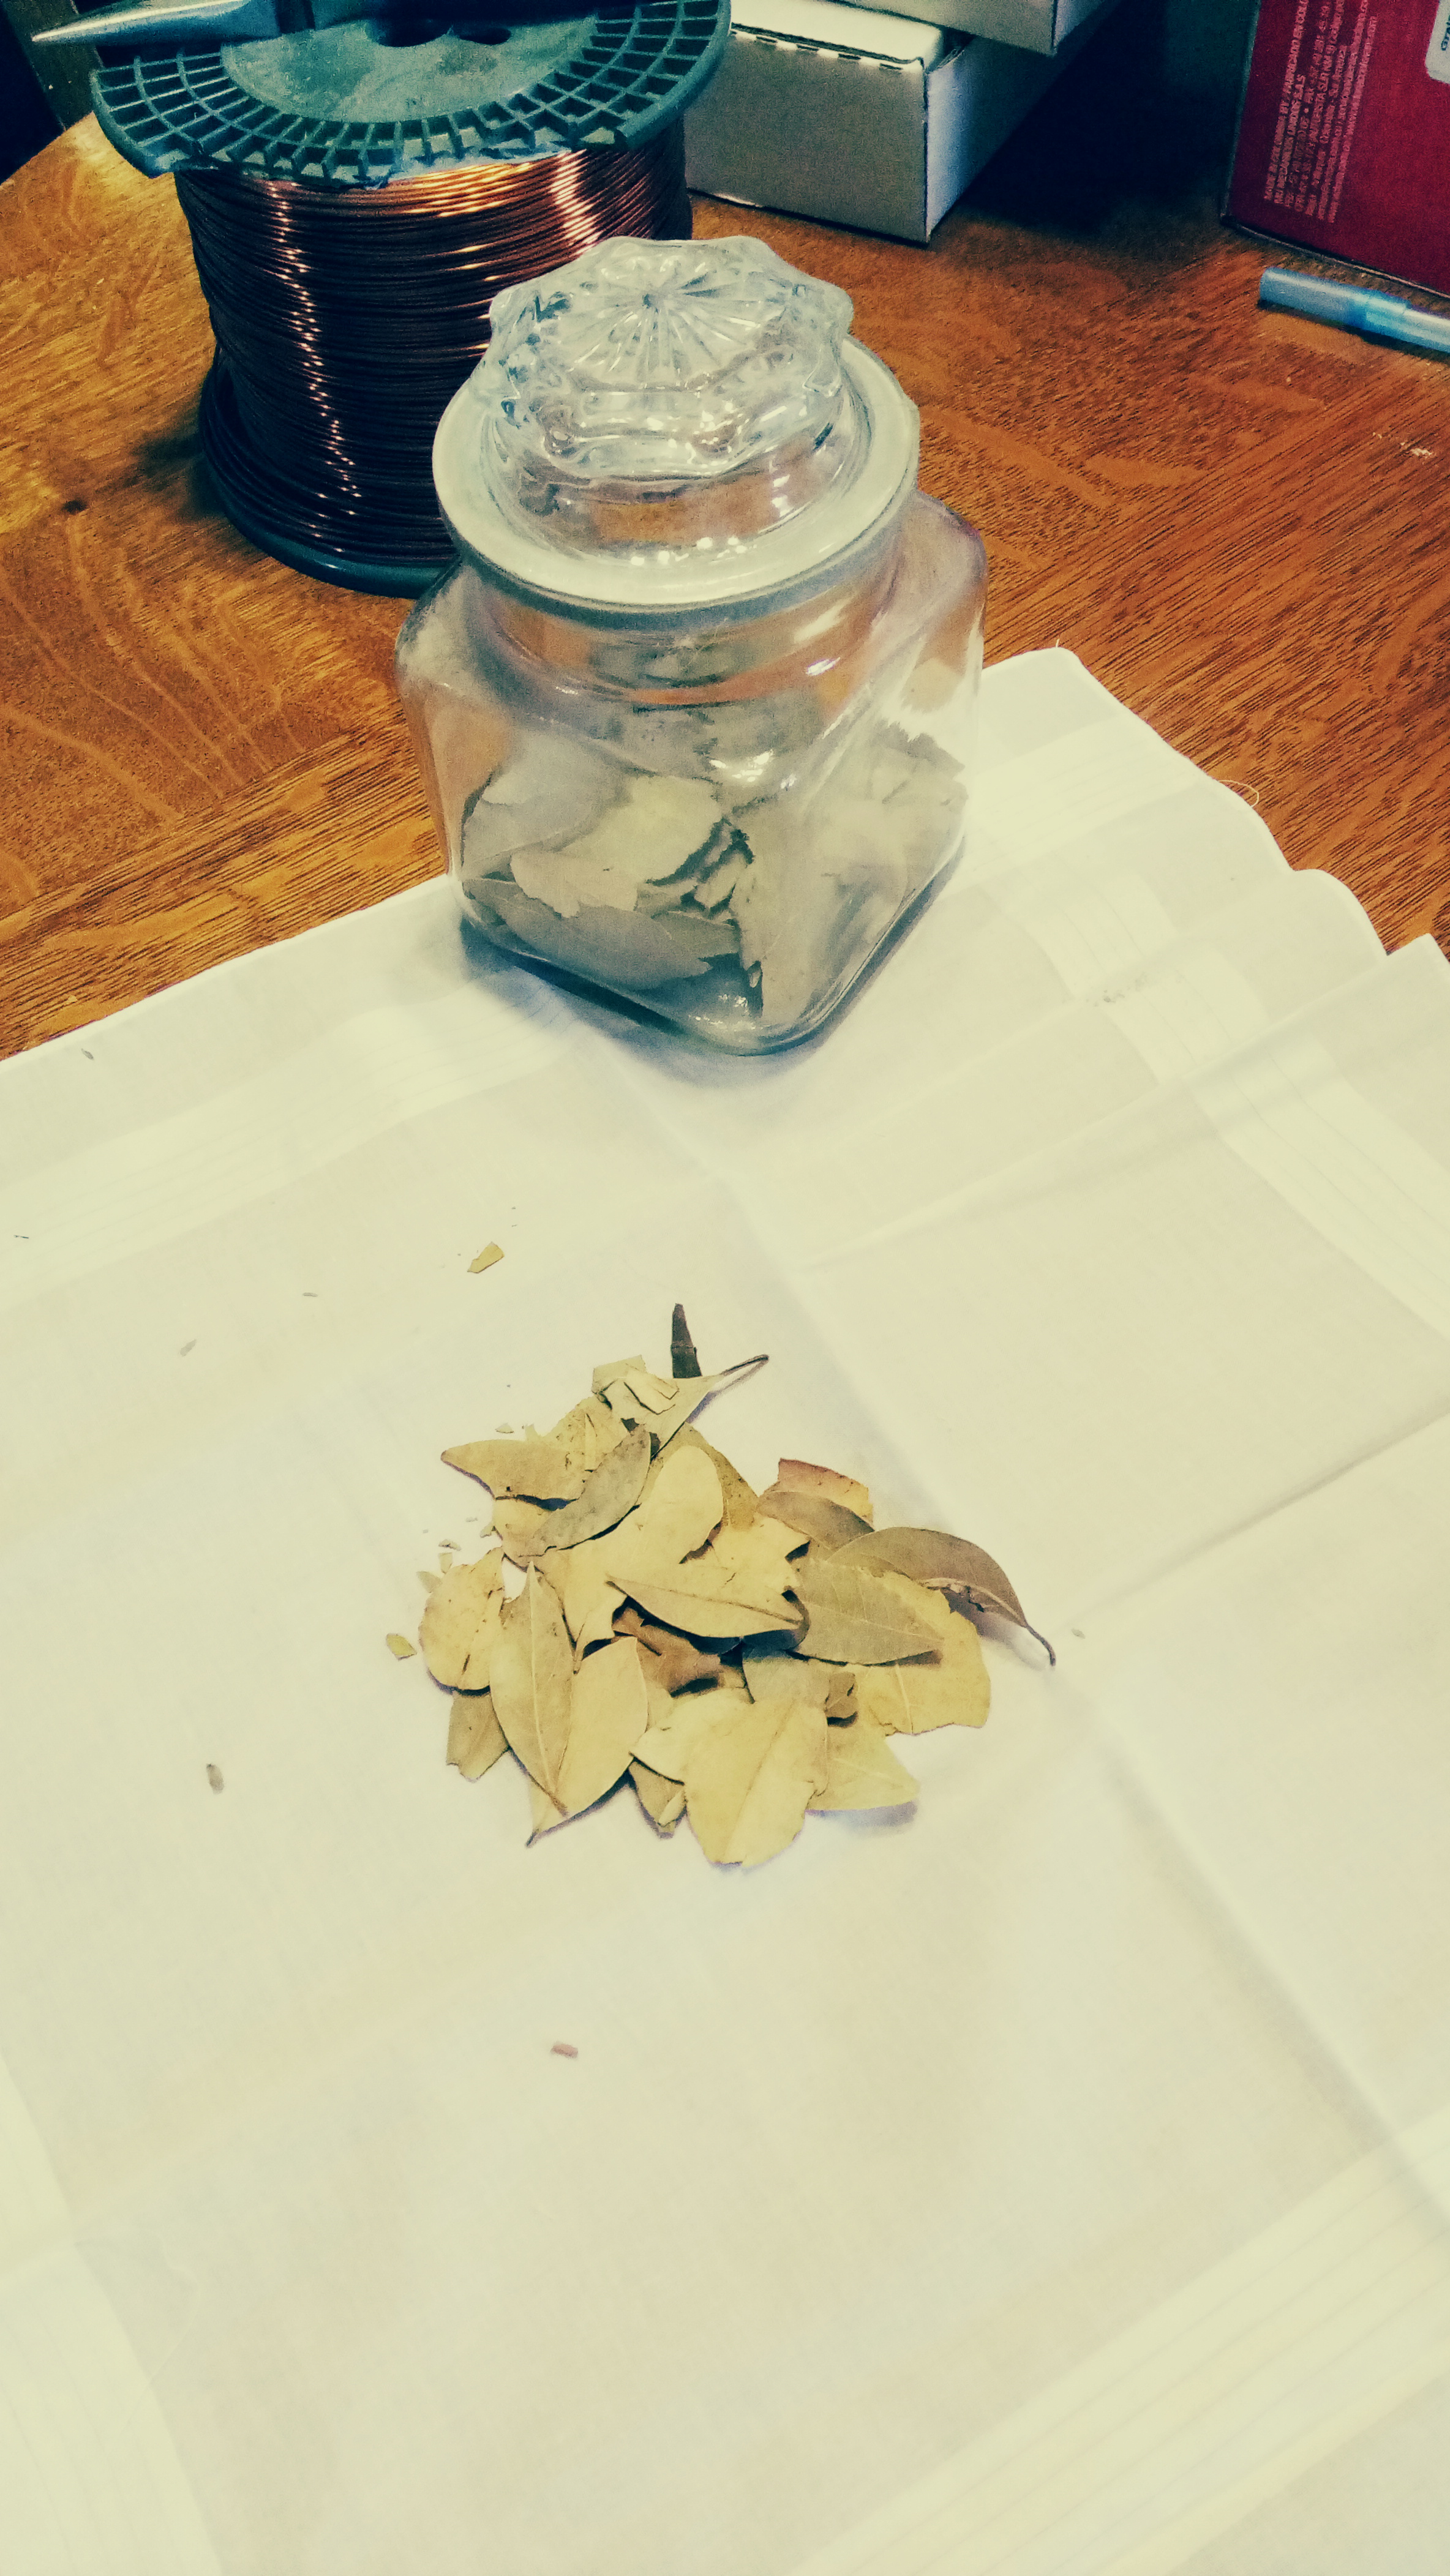
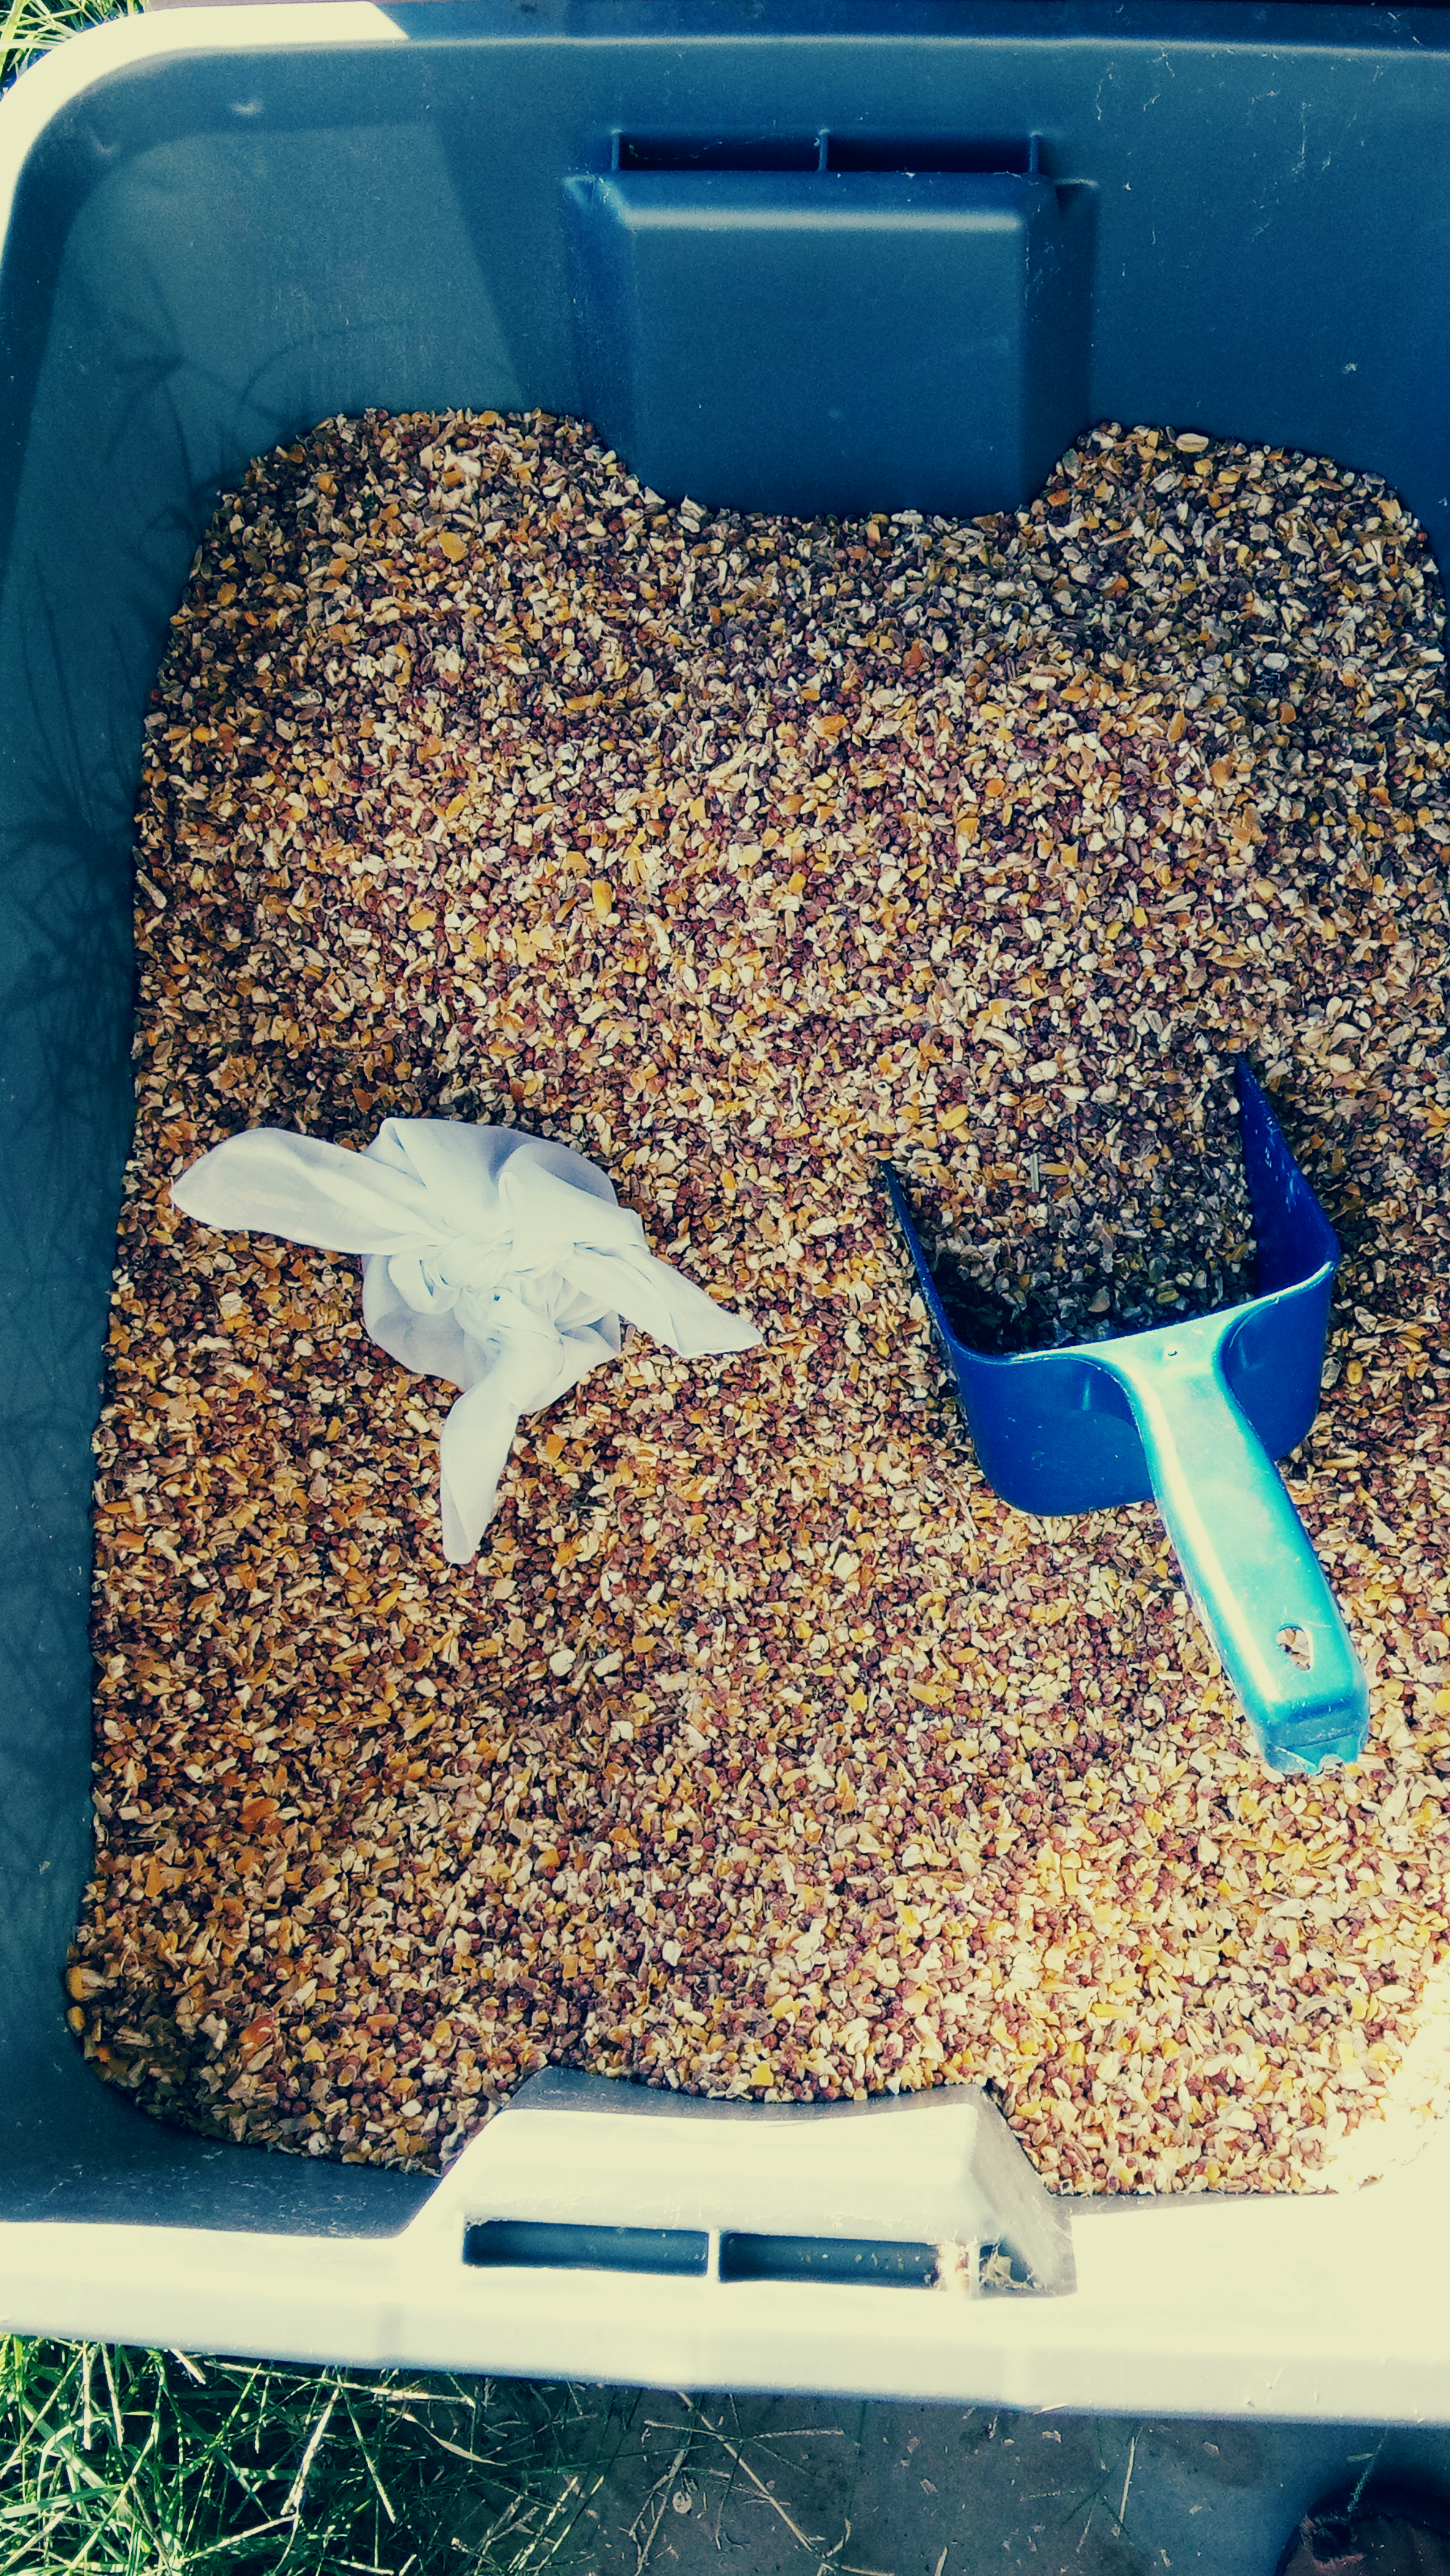
You can also tie it into a pouch to hold herbs (bay leaves) to keep bugs out of your chicken feed. You can do the same thing with sweet-smelling herbs to make a sachet for your drawers, too.

Use it as a towel, napkin, wrapping up a few cookies and a sandwich for later, flirt (drop it so one hopes the intended picks it up to return it to you as an opening for conversation), temporary bandage, tourniquet, blindfold, magic tricks, waving to attract attention (or surrender), filter and even to blow your nose.

There’s also a way to make a sweet little baby bonnet out of a lace-edged hankie, but I’ll have to find a fancy one to try that so it’ll have to wait for an update.

Posted by: briellethefirst | January 27, 2022

Japanese Milk Bread


I saw this being made on a PBS cooking show and had to look it up. The dough is amazing to work with, forgiving and versatile. I found a recipe for Chinese Pork Sung Buns and used half the recipe to make those since their bread base sounded very similar and the Japanese Milk bread recipe I was following made half the recipe into unfilled buns anyway, so why not experiment? And while I was at it (and ran out of savory filling anyway) I experimented with a brown sugar cinnamon raisin dessert/breakfast version that I can’t wait to try. Dinner will be yummy tonight since while I was waiting for the first rise I put on a pot of cawl. I had to harvest some potatoes that got nipped in a cold snap so up came some carrots and turnips as well.

Now that I’ve made this bread I’m in love with it!

1/3 c sugar

2/3 c heavy whipping cream

1 c Milk

1 large egg

1 Tbsp active dry yeast

Mix together cream, milk, egg, sugar and yeast. A whisk is fine, but you’ll want to switch to a spoon after the first cup of flour is mixed in. If you start with the sugar you can use the same 1/3c measure for the sugar, cream and milk.

Mix in 4 c flour, 1 cup at a time. Add 1 tsp salt (preferably not iodized)

Knead for 20 minutes

Put it back in the bowl

and cover with a damp towel

Let it rise for 1 hour or until it doubles in size.

While it’s rising make a pot of soup or just cut up the filling for the buns.

I used a couple of pieces of cooked bacon, some onion greens and a few leftover mushrooms.

You can also mix up some egg wash: 1 egg mixed with a spoonful of water.

You can also mix up a simple syrup with 2 tsp sugar and 2 tsp tap water, heat til dissolved. Today I needed some simple syrup to make lemonade so I used 1/2c water and 1/2 cup sugar.

Turn it out onto a surface and knead about 5 minutes to even out all the structure then cut in half.

The first half will be the loaf, so cut it into 3 equal parts,

form them into nice oblong shapes and put them into a greased loafpan

the other half is for buns so cut it into 8 pieces, roll or squash them into thin rectangles and spread with mayonnaise before spreading on the savory filling.

Then roll

and cut mostly in half, leaving a bit at the top to hold it all together before twisting the cut bits filling-side up about 3 times over, pinching the ends together

If you want to make sweet rolls you can substitute sour cream for the mayonnaise, sprinkle with brown sugar and raisins before rolling and twisting

Put your twisted buns on a greased sheet and let them rise for about an hour next to the loaf.

Brush with simple syrup (yes, even on the savoury buns) and egg wash, and sprinkle with sesame seeds if you have them then bake at 350 degrees f for 25 minutes or so on the middle rack of the oven or until they are golden brown. The buns will cook faster than the loaf.

Serve the buns with a nice soup or as an appetizer or (if you make the sweet ones) as dessert or breakfast. The loaf is lovely with soups also, plain or buttered or sliced and used as sandwiches with the chicken salad you made yesterday of as tea sandwiches with simple butter and thinly sliced cucumbers, cut into triangles, of course.

This is sturdy and tender and a delight not only to work with as you make it but a wonderful bread to enjoy with any meal. It’s lovely even simply with butter and jam.

Or you can just make a simple loaf like we did today. Let it rise, brush with butter, slit and bake.

1/9/24 I made this again today but got distracted while mixing the liquids and forgot to add the yeast! I realized my mistake about the time I finished mixing in the flour so WHOOPS! Since it needs quite a bit of kneading I pressed it out into a flat square, added 1/2 the yeast, rolled it up, smashed it into another square, added the rest of the yeast and proceeded to knead for a good 20 to 25 minutes. The initial rise took close to 2 hours but it worked! I held out enough dough for 4 buns, rolled them each out, spread them with brown sugar and raisins, folded and pinched them closed with the filling inside, rolled them into closed crescents and baked after the rise. They were good for dessert and I’m looking forward to another one for breakfast. Whipped cream guilded the lily and I’m sure a little icing wouldn’t go amiss but they were yummy plain, too.

Posted by: briellethefirst | January 4, 2022

Whatever Burgers


So, I wanted a burger today. I didn’t want to run through a fast food establishment, just wanted to go home. Didn’t want to buy hamburger, just wanted to go home and it’s not in the budget til next paycheck. I have plenty of stuff at home, just have to work it. I have leftover chicken, eggs, breadcrumbs…that’ll work. This is more a how-to than an actual recipe, since it’s more use what you have and go by feel, so here’s how:

I pulled chopped onion out of the fridge and tossed some in a bowl with some chopped mushrooms, egg, pepper, garlic and any other spices you like. Worcestershire sauce is nice, as is a dash of wine. If you want to make enough for 4, use 2 eggs and more stuff. If you end up with too much for the number of burgers you need either make a spare for tomorrow’s lunch or fry it up and give it to the dog or chickens.

Throw in chopped chicken (or pork or beef or turkey or what-have-you) and mix it all well up.

Add enough bread crumbs to make a pasty mess that you can form into a burger or two…or more, depending on how much stuff you threw into the bowl in the first place.

Form into a burger or two and fry up. Butter, bacon fat, olive oil, regular cooking oil…whatever you happen to have and like. Don’t go checking social media, it could get too brown. The next picture isn’t too brown, it’s almost too brown. If you need something to keep you by the stove now would be a good time to brown the bun(s) under the broiler if you like them toasted, if you haven’t already done that. If not, just prep them with condiments.

Carefully turn them when they’re brown, after a couple minutes on medium heat. Careful, they’re a bit more delicate than regular burgers, but they should be fine. If you want a cheeseburger now is the time to put a slice of cheese on. Cheddar, provolone, Gouda, Havarti, Swiss (especially if you’re using leftover ham!) are all nice.

Some people like their condiments on the bun, some like them on the burger. Add the condiments you like in the order you prefer. Fun crockery is always a plus.

If you like lettuce and tomato on, add that and enjoy with the beverage of your choice from your favourite mug.

This is a meal you don’t need a salad with, you put the salad right on. Nice things to have on the side are chips (tortilla or potato), french fries, potato tot-things, onion rings, potato salad, macaroni salad, whatever your heart (and appetite) desires or nothing at all.

Posted by: briellethefirst | December 17, 2021

Stuffed Pork Chops


I popped by the store for a quick something and cauliflower was on sale so I bought some and fresh potatoes and updated that post (cauliflower pie). As I passed the meat counter I noticed pork chops for sale. Thick pork shops. Thick enough for stuffing. I had 1/2 a loaf of bread to get rid of so now I had plans for dinner. So here’s another blog post.

Throw the stuffing together. Cut up a stalk of celery, half an onion and half a loaf of yummy bread. Break in an egg, grind on some fresh pepper and melt 4 oz (1/2 a stick) of butter in a cup of broth with a good dash of Worcestershire sauce. A few raisins add a nice sweetness that goes well with pork, but you can leave them out. The egg is optional.

Realize that it’s Friday and run out for lottery tickets. Buy flowers on impulse, sort them into 4 arrangements then get back to cooking. What’s one more impulse buy at this point?

Pull the pork chops out of the fridge and cut them open.

Brown them briefly in bacon fat. Yes, you can use olive oil or any other fat you have, but bacon’s yummy. Use medium high heat to do this fast since the rest of the cooking happens in the oven. This is for looks and to get the flavour started.

Put the chops in an oven-proof pan and stuff with the stuffing, tucking the rest of the stuffing around the edges. Bake at 350 for an hour.

Make some gravy. I used milk because I forgot to save some broth before I froze it. A couple dashes of Worcestershire sauce makes it not taste like what you put on biscuits in the morning and goes great with the pork as well as the stuffing.

Serve with cauliflower pie, a salad or any vegetable you happen to have handy and the beverage of your choice.

Posted by: briellethefirst | December 7, 2021

Pudding Pie And Parfait


I had milk I needed to use up. I had enough to make 2 batches of pudding. So tapioca and chocolate got made. Since that seemed a lot of pudding for one person I made a parfait as well as a marbled pie. That’ll be dessert for me for the next week!

You can make a single pie crust or pull one out of the freezer. You do have an emergency supply of frozen pie crusts, don’t you? Good. Bake one according to the directions. Don’t forget to dock the bottom so it doesn’t dome up. What’s docking? You poke the bottom in a few places to let the air out so it doesn’t push the bottom up. Or you can line the crust with waxed paper and fill it with beans and rice to weight it down. Pull it out and let it cool. If you have a store-bought graham cracker crust in the pantry you can use that and it doesn’t need baking. YAY!

While the crust is in the oven cook the pudding according to the recipe or box directions if you aren’t cooking from scratch. Of course you have cook and serve pudding for emergencies in the pantry! Just don’t try to cook instant and don’t expect cook and serve to firm up without cooking. Yes, cook and serve takes more time but I like it better and think it’s smoother. That said, there’s nothing like pudding or custard made from scratch. Well, whatever you have and whatever you have time for, do that.

Pour the pudding into the crust and chill. If you have 2 flavours lay them in as stripes. The flavours can be whatever you like and one hopes they taste good together.

Then marble them. I feathered them pretty nicely but then tried to smoothe it out and made it less pretty marbley and just messy marbleous.

If you use 2 flavours you’ll probably have some of each left over. Make a parfait. Try to layer the different puddings so they show up better in yours. If you don’t have a parfait glass, just use a cool mug, but do keep an eye out for parfait glasses because they’re fun to layer desserts in. Or breakfasts, just use yogurt, granola and berries. They can be inexpensive in thrift stores. Fruit, sprinkles, syrup or chocolate curls are nice on top. Yes, you can be extravagant and use as many different cool extravagant things as you like. Even edible flowers. Especially if the edible flowers are sugared, but that’s another post.

A bit of whipped cream fixes everything. Whipping it up from scratch uses up some of the calories from eating, but if you don’t have time there’s always the option of the canned spray stuff, which is fun and also works to hide flaws in the pie. If you want to dress it up with fruit or edible flowers, have fun and make it pretty.

You can add more to your slice if you like, sprinkles or chocolate curls are fun, too. Serve with tea, coffee, or the beverage of your choice. Yes, I set the parfait as the featured image because it was prettier than the pie.

Posted by: briellethefirst | December 6, 2021

Bugs In My Chicken Feed!


I got to the last of the scratch in the feed bin and noticed weevils. AAAACCKK!!! I’m sure the chickens don’t mind a bit of extra protein but overall this is not a good thing. Fixed it! I realized the feed bin is just a larger version of my countertop canisters. Inspiration hit. BAY LEAF!!! I have some. And a handkerchief.

Lay out the handkerchief. Put a bunch of bay in it. Use the scruffy, broken and little ones so you have the big nice ones left for cooking and using in kitchen canisters. Pay no attention to the copper wire in the background. That’s for another Zen Garden project.

Tie 2 opposite ends in a half knot.

Tie the other 2 opposite corners in a half knot. Now the bay is contained in the hankie pouch.

To secure the pouch tie it again.

And again if you like

Toss on top of the scratch in the bin. Just don’t scoop it up when you feed the chickens. It’s been about a week and it seems to be working fine.

Posted by: briellethefirst | November 26, 2021

Cranberry Sauce


A standard with turkey at Thanksgiving and Christmas. It’s easy to open a can and slice what comes out, and some people even prefer that. Made from scratch, though, is it’s own yumminess, so give it a try. The nice thing is that you can adjust the flavour to your own taste. Yesterday was Thanksgiving and I forgot to make the cranberry sauce! So I’m making a 1/2 batch tonight. I’ll use the rest to string a holiday garland with popcorn, so I guess that’s a bonus for the end of the post.

Pour 1/2 bag of cranberries in a saucepan and rinse well.

Pull out any with soft or shriveled spots and set them aside with the used teabag for the compost.

Add enough juice to almost make the berries float. Orange is fairly standard but apples juice is good too and you can experiment depending on what juices you happen to like.

Add 1/4 c sugar. More if you like it sweeter, less if you like it more tart.

Turn the heat on to medium high. You’ll soon hear the berries popping.

In no time it’ll come to a rolling boil.

That’s when you want to turn it to medium heat and let it simmer down until it’s thick and red.

You can serve it hot, room temperature or cold. If you want to serve it cold you might want to make it the day before the feast and that’s just one less thing to worry about on the day of much cooking. If you forget til the last minute, don’t worry, it takes only a few minutes to whip this together and it tasted great hot. Serve with the usual holiday sides and the beverage of your choice.

Yes, that was a 1/2 Cornish Game Hen on the plate. This year I was tired and just wanted to spend the day with the critters in the garden so I made the proper proportion of bird to stuffing.

Now for the bonus: Garland time!

Get a needle and thread, put a knot in one end of the thread and thread the needle on the other. Pop some popcorn, Microwave or stove-top, whatever you have handy. Pour a glass of your favourite beverage (cocoa or eggnog are lovely this time of year) and start threading. I started with a cranberry.

Pull it to the end of the thread.

Skewer a piece of popcorn.

Pull it to the end next to the cranberry. Repeat in any pattern you like or just randomly. Yes, you can snack as you go. Stories happen naturally when doing this with friends and family. You might have to pop more popcorn.

As you go along don’t use any that are mushy or have soft spots. Put them in the pan for the compost.

When you want to end your garland the cranberries are sturdier. Take another stitch through the end.

Pull that stitch tight and take a stitch through that.

Pull that tight into a knot. Do it again if you like and snip off the extra thread.

Try not to spill too much blood making the garland. This can be a hazard if you’re not used to working with needles or if you use too much rum in the eggnog or schnapps in the cocoa.

Make it as long as you like, but an arm’s length, 2 to 3 feet long, is probably the maximum you want to tackle. Longer threads can get unwieldy. All ready for the tree or whatever you want to decorate. I have enough left to make a few more of these, but that’ll wait for another day. If there’s popcorn leftover the chickens will be glad to take care of that for you. When you’re done with the garlands after the holidays, set it out on a tree or bush for the wild birds to enjoy. Yet another bonus.

If you don’t have cranberries you can just use popcorn and if you don’t have popcorn you can just use cranberries. Or get creative and dry some fruit (apples are fun and dried slices of citrus have an interesting window-pane effect.

Posted by: briellethefirst | November 17, 2021

I Grew A Loaf Of Bread!


I had a spare bit of garden left when I finished planting what I had, There was a space of about I had about 4′ x 8′ to fill. I also had a bunch of barley I’d grown a couple years earlier to do some wheat weaving. Never got around to the wheat weaving but had more than enough so I grabbed a few bunches, broadcast the seeds, raked them in and mulched with the straw and more straw. This was late September or early October 2020.

As they grew across from the chicken coop the cats liked laying in it. It became their personal bird stalking jungle.

Eventually it grew to full gold wonder and I harvested it. This may have been late February.

Sheaves on the old bench I still need to fix (the slats need replacing).

I covered it with a sheet so it wouldn’t go to the birds and let it dry a bit more.

Before the rains came I took it out to the driveway and, between 2 sheets, managed to thresh it. Next time I’ll break off all the heads first and leave the straw behind. This was in March.

Then I just had to wait for windy enough days to winnow it. I was surprised that I had to wait for May to do this.

Winnowing was more a challenge than I expected. I ended up pouring from a bowl to a pie tin as the win d blew the majority of the chaff away. That was a LOT of chaff.

Then I set it aside in an old butter tub with a bay leaf to keep weevils at bay. It sat, contented, on my card table as I worked on other things until October, when I finally bought a hand-cranked mill to make the grain ready for the next part of the project.

In November I finally had time to do a final sort to get the last bits of this and that out of the grain. The nasty bits are on the lid with the bay leaf.

Then a few more days before the grinding. I put it through 4 times before giving up for the night. The next day I put it through twice again but didn’t take any more pictures.

I got about 3 and a half cups out of it and decided to try just using about half the medium meal in the first loaf. I put a teaspoon of bread yeast in, a sprinkle of salt and a Tablespoon of brown sugar.

Then I added a cup of milk and mixed well before covering with a towel and setting aside to see what it would do.

2 hours later… it hasn’t really caught the exuberance of the yeast so I added 1c flour

and 1/2 c milk

Now that looks more bread-doughy and we’ll see how it does overnight, and knead it a bit before work

After work knead it again and form into a boule, rub with soft butter, cover with tea towel and go to birthday dinner

Come back from dinner. It’s bigger.

Slash a pattern so it can expand as it bakes

Bake for about 30 minutes or so until it’s a nice golden brown and sounds hollow when thumped on the bottom. Don’t forget to put a pan of water in the oven to add humidity for a nice crust, but if you forget it’s not the end of the world.

Let it cool about 15 minutes before cutting off a piece. Yes, I tried it plain then slathered the warm piece with butter and enjoyed it more. Excellent with stews or roasts or just plain with cheeses, chutneys and cold cuts or just jams for dessert. No, I don’t have pictures of that, sorry, I was too busy nomming. I took most of it to work to share, actually. They loved it.

Posted by: briellethefirst | October 12, 2021

Impromptu Cauliflower Pie


I bought cauliflower but ended up not needing it for what I bought it for. I found leftover ham in the fridge. I had acquired black garlic at an import store on a whim. My herb garden is growing again and my chickens are laying. No potatoes. *sigh* How can I make a potato crust without shredded/grated potatoes mixed with eggs? Never mind, there’s tater thingies in the freezer! The dinner I didn’t know I was making until this afternoon is saved!

Ingredients: Tater thingies (to avoid using brand names), onion, cheese, cauliflower, garlic (black or normal), herbs, ham, tomato. These are just what I happened to have, you can substitute what you have to make your own impromptu dinner pie.

So. Grease (or spray with oil) a pie tin and lay in a bunch of tater thingies and wait until they thaw.

Once thawed, smash them into submission as a crust. It’s easy, really, because they’re made with something that binds them together anyway. Just make sure to schmoosh together any holes.

Add a layer of chopped onion.

Add a layer of cheese.

Add the cauliflower.

Add garlic. You can use normal garlic or even leave it out if you want to.

Add salt, pepper and herbs from your garden (or spice shelf). I used thyme, basil and tarragon this time.

Add ham. Ideally I should have added the ham before the cauliflower, but I forgot to pull it out of the fridge and have it in line on the counter. So much for planning! Oh, right, this wasn’t really planned anyway so that’s OK.

Another layer of cheese and the bit of tomato leftover from the sandwich you made the other day. or bell pepper. Or slices of fennel. Or whatever…or nothing. But more cheese is good.

Now whisk up an egg and some milk, pour it over the whole batch and bake at 350 for about 30 minutes or until the cauliflower is done, fork-tender.

Drizzle with truffle oil if you have it (another impulse buy at an import store).

Serve with a hunk of good bread, a roll or a croissant made from the leftovers of your dessert tart and brie baked in puff pastry. A nice green salad would be nice, too. Wine, tea, soda or the beverage of your choice is up to you. Have fun making yummy cuisine from your leftovers and extras.

UPDATE! :

If you don’t have frozen tater puffy-things or just prefer to use fresh potatoes, do this:

Grate a couple potatoes, 2 or 3 depending on their size.

Drain the excess liquid, pressing a bit. You can add this to soups, stews or meat loafs if you don’t want top waste it.

Mix with onion, celery, egg and spices and press into a pie tin or casserole.

add a layer of cauliflower with onions on top

add pepper, garlic and basil or whatever spices you like. Thyme and tarragon are nice, but whatever you have on hand. If you have some bacon in the freezer you can break some on for flavour unless you don’t do bacon.

Add a layer of cheese and pour on a mixture of 3 or 4 eggs with milk and maybe some cream whisked in.

Bake at 350 for about 30 to 45 minutes or until the cheese is melted, the egg mixture has firmed up and, if you like, the cheese has started to brown.

Serve with whatever you’re having as a main course or use it as the main course. Good with a salad (picked fresh from the garden, of course). fresh-baked bread and the beverage of your choice.

As you can see, a basic recipe can take quite a few turns to end up in slightly different ways, using what you happen to have at the time.

Posted by: briellethefirst | October 8, 2021

Enchiladas


When I was a kid my sisters and I would make an assembly line when it was enchilada night. I’d prep the tortillas, one sister would dip them in enchilada sauce and the other would fill them. Sometimes we made stacked and sometimes we made rolled. When we all grew up and moved out we weren’t in the same place to do assembly lines so my middle sister decided to use the stacked method and instead of making individual enchiladas just built it up in a casserole. So here’s how.

This is one way I have of using up leftover meat from roasts or whatever.

I use store bought, canned sauce. This time I used green sauce instead of red. It seems to be milder. They both come in mild or hot, so you can get whichever you’re more comfortable with. I find that if I go with mild anyone can add heat if they want to but it’s harder to take heat out than put it in.

Heat up the cast iron skillet, out in a bit of oil and heat each tortilla just enough to soften it.

Dip it in enchilada sauce, put it in the pan and fill it with meat, cheese, onions, green chilis, olives…whatever sounds good.

Roll it up. Put a little enchilada sauce in the bottom of a pan. Repeat until the pan’s full, pour the rest of the enchilada sauce over them, top with cheese and bake until cheese is melty and the whole thing is bubbly.

OR

Dip a soft tortilla in enchilada sauce, put it on the pan, sprinkle fillings on

Top with another tortilla dipped in sauce, sprinkle with cheese. Repeat til pan is full, pour the rest of the sauce over the enchiladas, sprinkle liberally with cheese and bake till all are bubbly.

OR

Put a little sauce in the bottom of a casserole, put 3 dipped tortillas in the bottom, sprinkle fillings on.

Repeat

Repeat

Put 3 more dipped tortillas on top, sprinkle with the rest of the chopped onions, olives, cheese and pour the rest of the sauce over all. Put on a tray (in case the casserole overflows) and bake at 350 f for about an hour til the cheese is melted and it’s all bubbly.

Lightly tent with foil and let it sit at least 15 minutes so it can firm up. Or make it one night, have tostadas or tacos for dinner and re-heat the enchilada casserole tomorrow when everything’s had a chance to fully combine and let the flavours develop. This time I let it cool, put it in the fridge and re-heated it another evening. I think I’ll do this more, since it wasn’t too gloopy at all, just a bit loose. Pro tip: To help the center heat up put a spoon ibn the center. Heat transference is your friend. Also pro tip: When you take the casserole out of the oven, take the spoon out of the center BEFORE you put down the oven mitt. That spoon is HOT! If you try to pick it up without protection you will yell bad words and drop it on the floor. You can stop laughing now. Whatever makes you think I know this from experience? Ahem…

Serve with refried beans and guacamole and Spanish rice or tacos or tamales or a cheese crisp whatever other Mexican dishes you happen to make. Sour cream is, of course, optional. Beer is nice, to, as is a lovely Mexican wine. Or you can go with your favourite soda. Drinking soda from stemware is just as appropriate as drinking wine from tumblers. Stemware makes everything taste better, though.

« Newer Posts - Older Posts »

Categories